

Page 1

JioPhone Guide
Reach us at
Page 2

Safety guidelines
Please read these simple safety guidelines.
Restricted area limitation
Switch off your phone in restricted areas.
Road safety
Do not message/text or talk on your phone
while driving. Use a hands free device.
Battery use
Use batteries, chargers, and other
accessories provided by the manufacturer in
the box pack.
Authorised service personnel
Only authorised service personnel should
handle your phone.
Avoid moisture
Keep your phone dry.
Hearing damage
Do not listen at high volume levels for long
period of time.
SAR
THIS DEVICE MEETS INTERNATIONAL
GUIDELINES FOR EXPOSURE TO RADIO
WAVES.
The JioPhone is designed not to exceed the
limits for exposure to radio waves
recommended by international guidelines.
Page 3
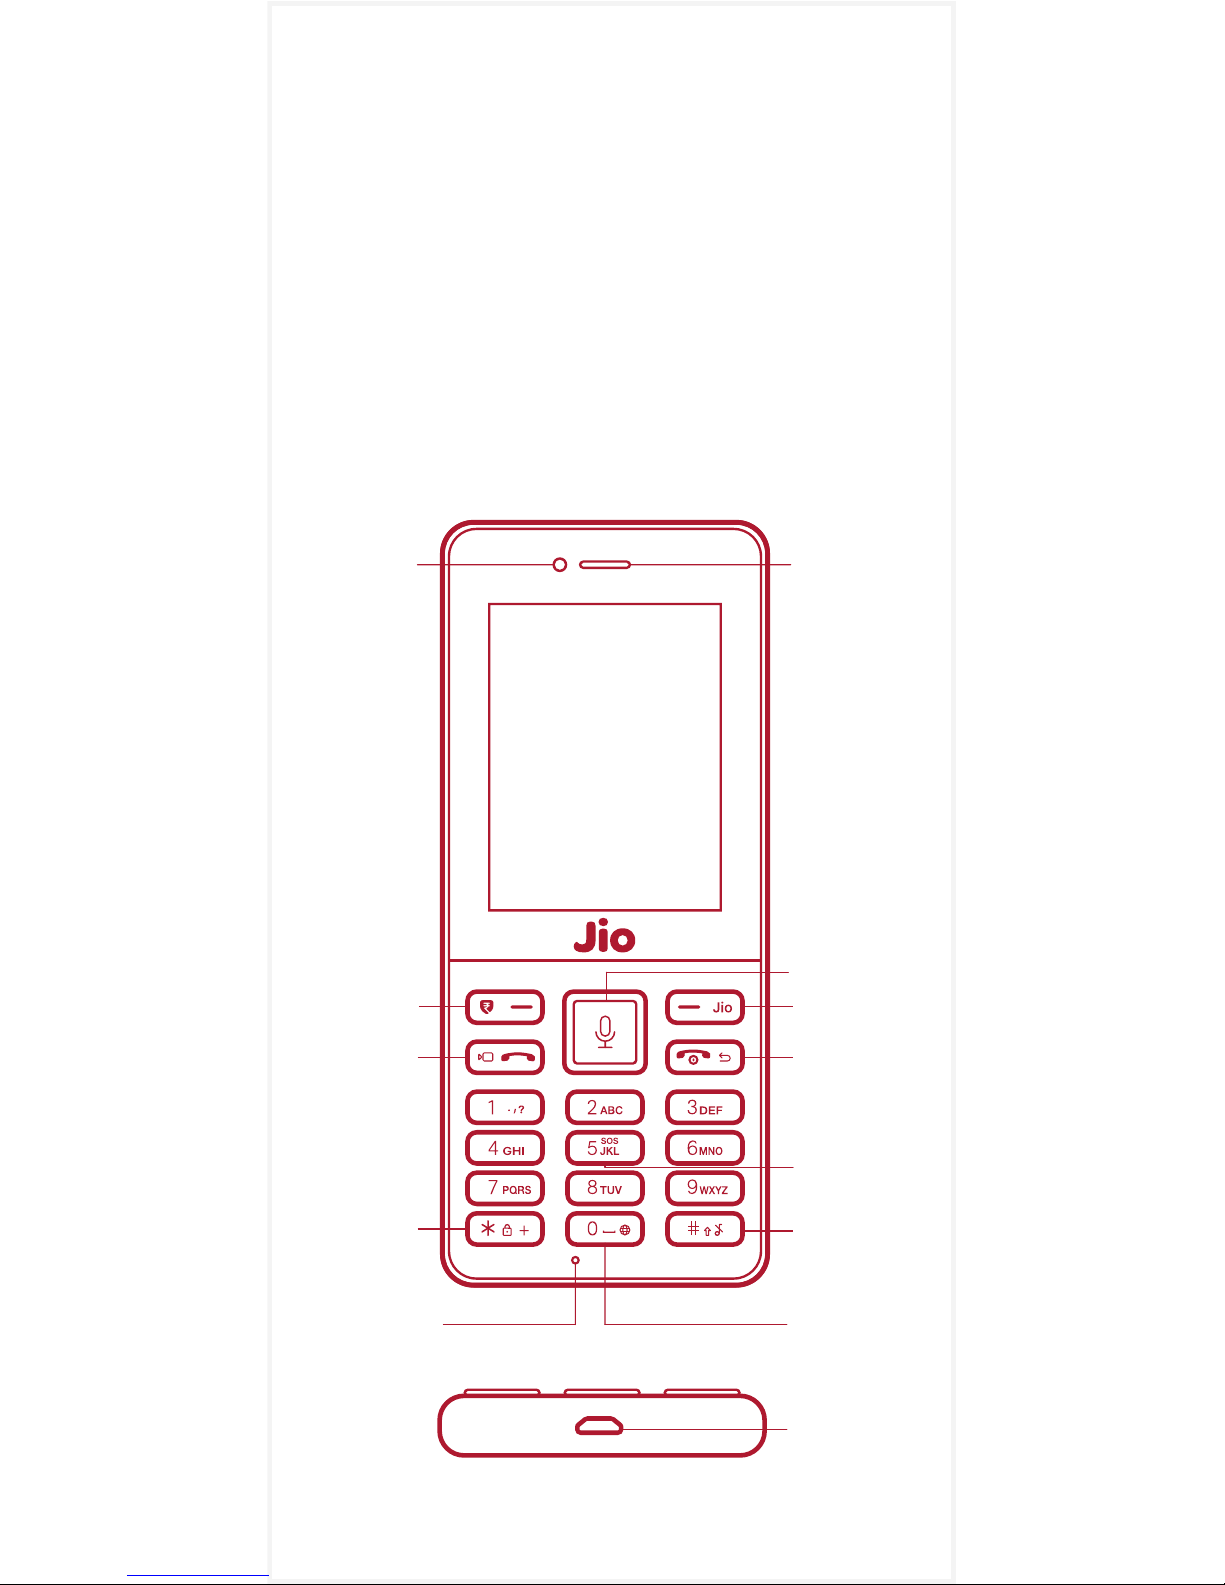
Getting started.
1 JioPhone.
Earpiece
DPAD keys /
Voice search
Torch
RSK /
Jio key
Browser
Key
LSK key /
Payments
Voice/
Video
Call key
End call /
Power/
Back key
Front
Camera
Audio Profile
(Normal/
Silent)
Keypad
Lock /
Unlock
Microphone
SOS / Panic
Button Call
Charging
Connector
Illustration for reference only.
Page 4
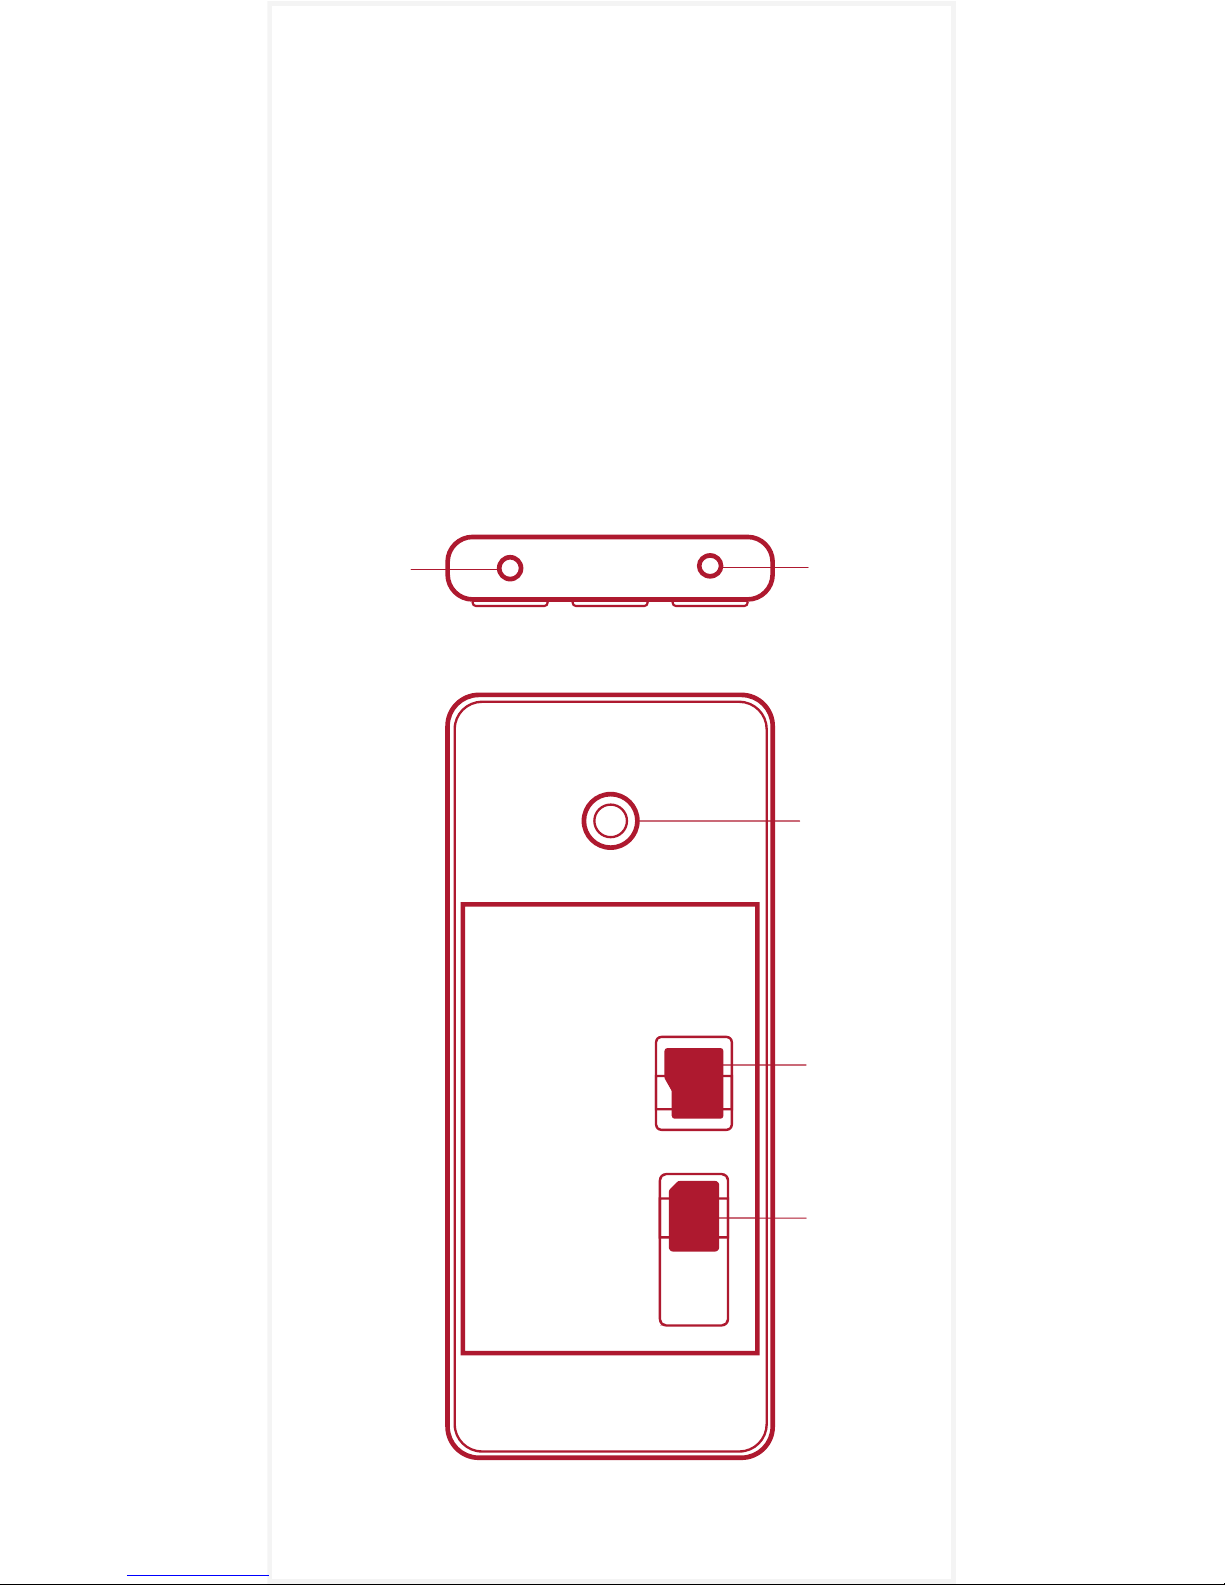
Let us get started with the specifics and have
the JioPhone up and running. The image on
the left illustrates keys and parts of the
JioPhone.
The image below illustrates the placements of
SD card and SIM card.
Placement of phone parts can vary.
Rear
Camera
Headset
Connector
Torch
SIM
Card
SD
Card
Page 5
2 Know your keys
Directional Keypad (DPAD) keys
The navigation keys on DPAD (Left/Right/Top/
Down) are used to move around the screen
and the center key to select a particular item.
DPAD Shortcuts from home screen
Left key Short press it to launch Messages app.
Right key Short press it to launch Camera app.
Up key Short press it to open Quick settings
which gives you easy access to frequently
used features like Torch, Bluetooth, Wi-Fi,
Calculator, Airplane Mode, Camera, Volume,
Brightness, etc.
Down key Short press it to launch Music app
OR to reopen any other music app running in
the background.
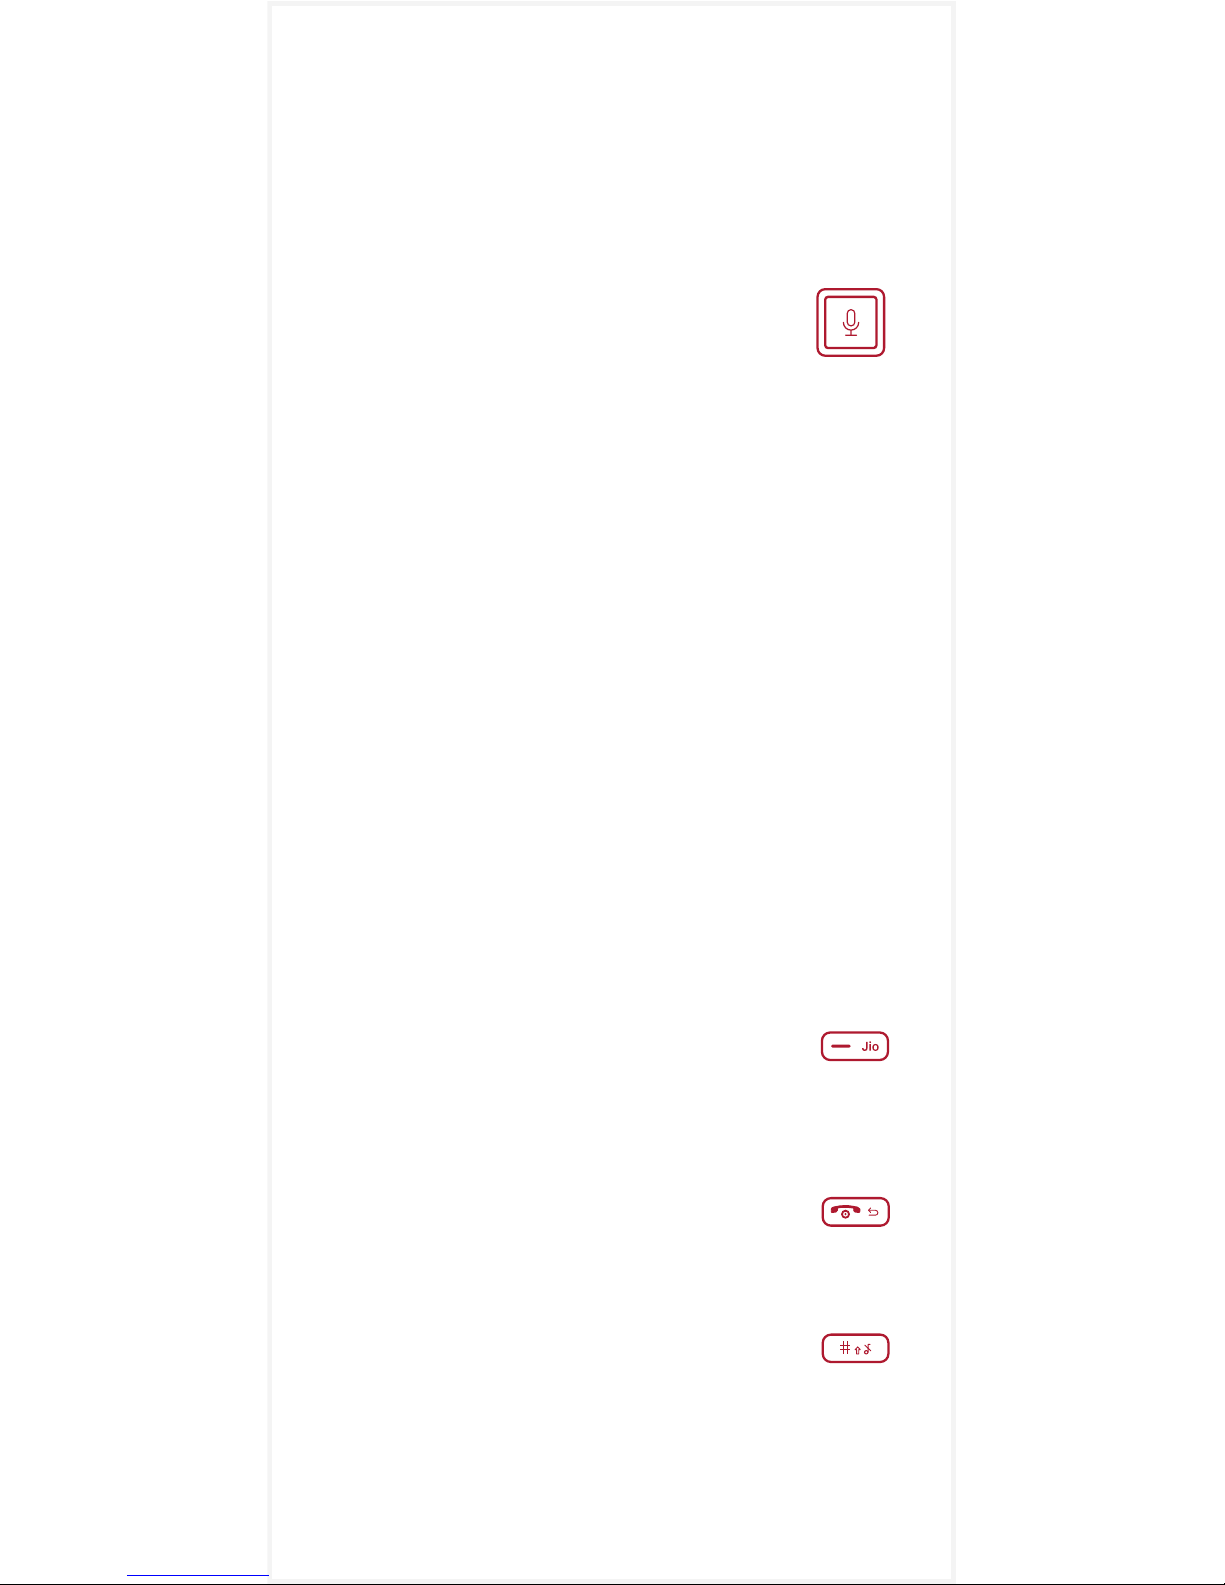
HelloJio Long press the center key to launch
Voice search using HelloJio.
Torch Long press the top key to turn Torch
ON/OFF.
Right Side Key (RSK) / Jio key
To show respective app related features &
options / save; long press from home screen
to launch My Jio app.
End call key / Back key / Power key
To end calls; single press takes one step back;
long press to power ON/OFF the phone.
Audio profile key / Hash /
Input method
Long press from home screen to toggle
between normal/vibrate audio profile mode.
Page 6
a) Insert Jio SIM card, battery and
memory card
Important: This Phone is designed to be
used with Jio SIM card only and comes
with a pre-installed Jio SIM card.
Follow the next steps to replace it.
3 About the JioPhone
While in input field in apps - single press to
toggle between numbers, upper case and
lower case characters; long press to toggle
between languages.
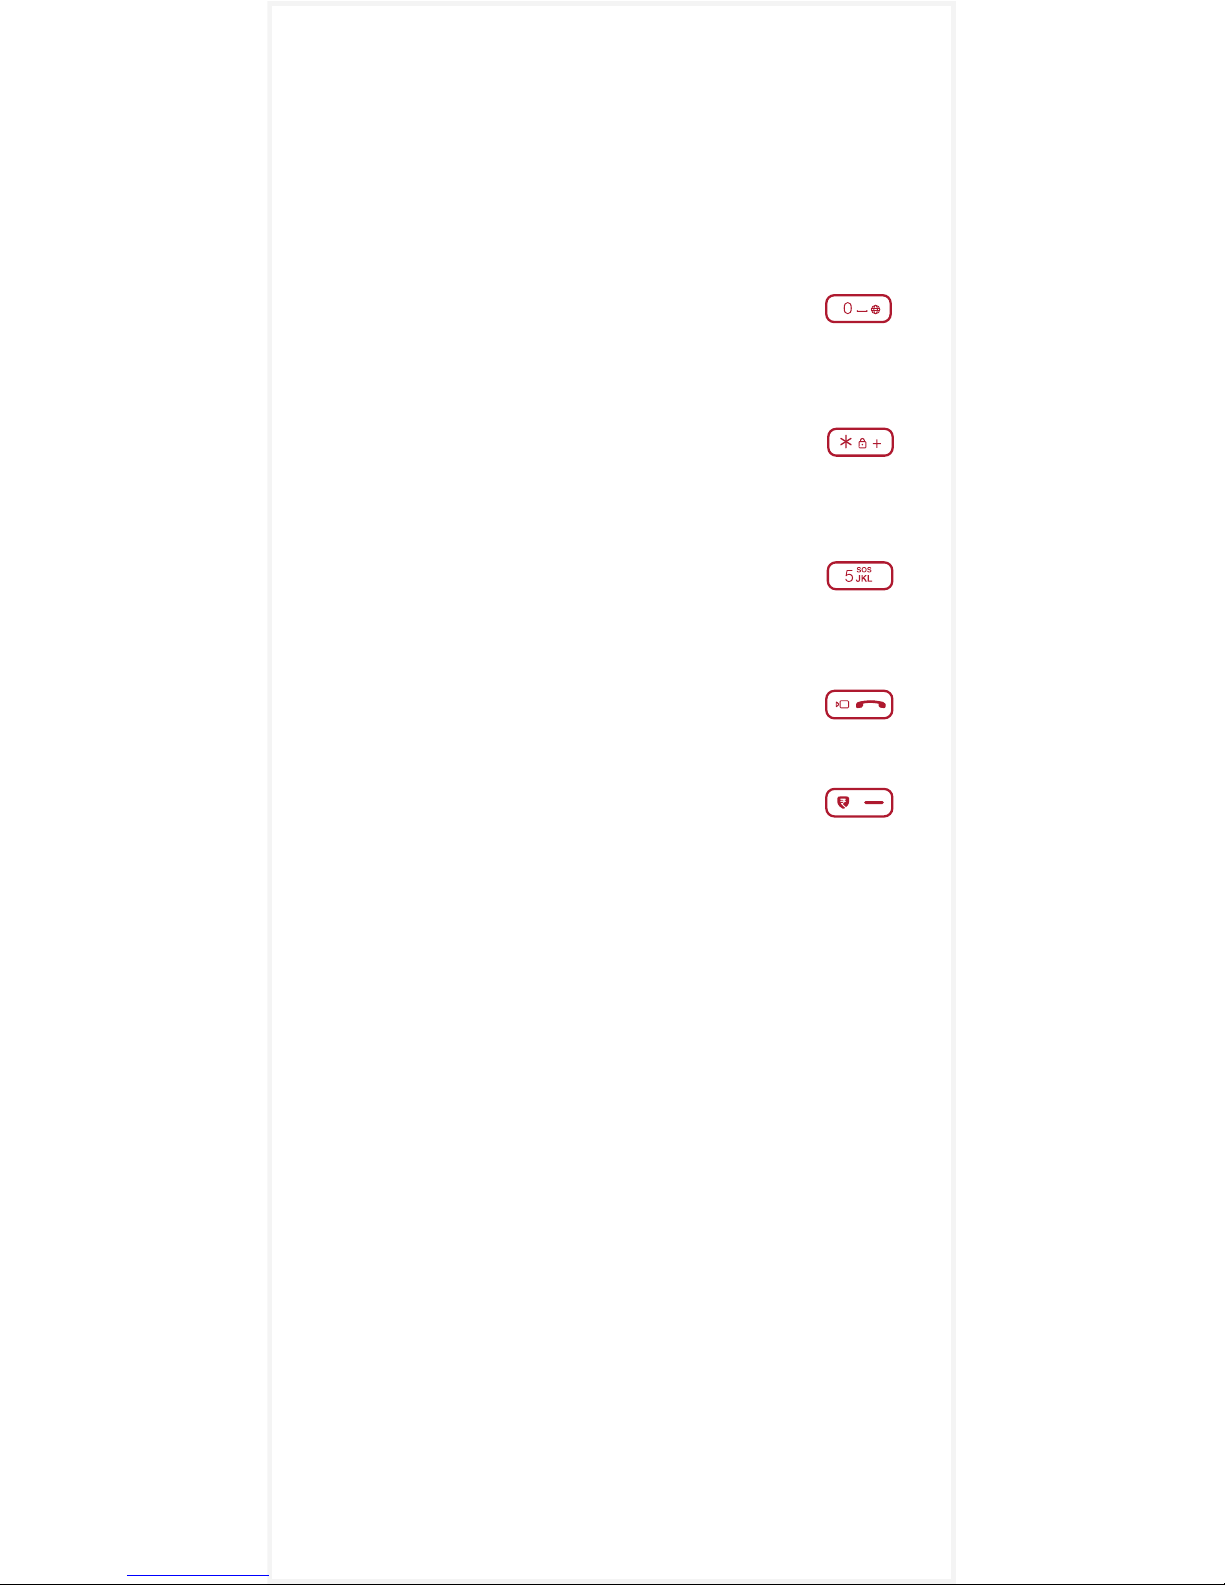
Zero / Space / Browser key
Long press to launch browser from home
screen.
Lock / Plus / Star Key
Long press to Lock/Unlock the phone. In
unlocked state, press twice to insert plus(+).
SOS / Panic button call
Long press to initiate Emergency service
number “112”.
Call key Short press to make voice
call and long press to make video call.
Left Side Key (LSK) / Payments key
In unlocked state, long press to launch/close
payment option; short press to launch alerts/
notifications.
Page 7

Note Switch OFF your phone and disconnect
the charger.
1 To remove back cover, gently pull it using the
indentation at the back side of your phone.
2 Take the battery out.
3 Insert your Jio SIM card into SIM card slot.
SIM Slot It is for Nano SIM card.
4 Insert a memory card into the SD card slot.
SD Slot It is for External memory card
5 To insert the battery, slide it into the
compartment ensuring that the three
terminals match the three contact points on
your phone.
6 Reattach the back cover.
b) Remove Jio SIM card, battery and
memory card
Note Switch OFF your phone and disconnect
the charger.
1 To remove back cover, gently pull it using the
indentation at the back side of your phone.
2 Take the battery out.
3 Take your Jio SIM card out.
4 Take your memory card out.
c) Charge the battery
For the first time, fully charge the battery
before switching ON the JioPhone.
1 Insert the battery into the JioPhone.
Note DO NOT switch on the JioPhone.
2 Plug in one end of the charger to the power
outlet and the other end to the JioPhone.
Note When the battery gets fully charged, it
will get displayed on your screen. Unplug the
charger and switch on the JioPhone.
Page 8

Your Jio SIM empowers you with True 4G
experience everywhere you go. You can make
voice calls in HD, enjoy high speed Internet
and get access to a secure mobile wallet, TV
channels, movies, songs, news, and
magazines and secure cloud storage, all on
the JioPhone.
1 Subscribe to Jio services
To subscribe to Jio services, visit the nearest
Jio Store to purchase the JioPhone.
Remember to carry the following documents
with you: Aadhar Card or Proofs of identity &
address, Passport size colour photograph
4 About your Jio SIM
Extending Battery life
Turn off radio services, i.e. Wi-Fi, Bluetooth,
GPS, if not required.
Due to non-usage of the phone for prolonged
duration, battery may be drained out. Allow
battery to be charged for at least 30-40
minutes. If the battery still does not reflect any
charge, then please visit the nearest Device
Care Center.
d) Lock or unlock your phone
Use keypad lock to avoid pressing the keys by
mistake. When the JioPhone keypad is
unlocked, long press * button to lock the
keypad. When the JioPhone keypad is locked,
long press * button to unlock the keypad.
Page 9

After subscribing, insert Jio SIM in the SIM slot
of the JioPhone.
2 Activate your Jio SIM
After inserting the Jio SIM, switch on the
JioPhone. Ensure the JioPhone is fully charged.
Follow the steps to activate Jio SIM. To know
more about Jio services, visit www.jio.com.
3 JioCare
Customer Care Number 198
General Information Number 199
From other networks 1800 889 9999
Visit us www.jio.com
Email us [email protected]
SMS keywords to 199 to receive information
about the following:
Tariff Plan (Postpaid) <MY PLAN>
Bill (Postpaid) <BILL>
Balance (Prepaid) <BAL>
If you have registered for a complaint, we will
provide you a unique docket number. Your
complaint will be resolved within the timelines as
prescribed by TRAI. In case, you are unsatisfied
with the response from JioCare, you can make a
further appeal to the Appellate Authority in your
region with your complaint docket number. The
unique appeal number of your appeal will be
communicated to you within 3 days of filing your
appeal. The appeal will be decided within 39
days from the date of filing your appeal.
Appellate Authority
Reliance Jio Infocomm Ltd.
Phone Number 1800-889-3999
Fax Number 1800-889-1211
For email and address details, please visit our
website www.jio.com.
Page 10

4 Terms and conditions
Your usage will be rounded up to the next
higher pulse for voice & data usage. As per
TRAI regulations, the tariff is charged
depending upon the duration of the call which
is recorded to be within +/-1 second,
traceable to an appropriate time reference. In
case of non-usage (no voice or video calls,
data, outgoing SMS, usage of Value Added
Services or payment of rental for postpaid) for
a continuous period of 90 days or more, the
services to the mobile number will be
deactivated at the discretion of Reliance Jio
Infocomm Limited. Jio mobile number can be
reactivated by making payment of ₹20 within
15 days of deactivation due to non-usage.
Postpaid
Postpaid customers can opt for the safe
custody scheme in case of continued
non-usage of a mobile number by paying
₹150 for every three months or part thereof.
Prepaid
In case, the available balance in your account
is more than ₹20 at the expiry of 90 days of
non-usage period, ₹20 will be deducted from
your account and the non-usage period will
be extended by 30 days. This process will
continue till the balance in your account is less
than ₹20 post which your number will be
deactivated.
As per DOT directions, national roaming is
not permitted for J&K prepaid customers.
Also, prepaid customers from other circles
cannot roam in J&K.
As per DOT directions, International roaming
is not permitted for prepaid customers of
Assam, North East and J&K.
Page 11

Let us learn about the amazing features
of the JioPhone.
Call supports True 4G VOLTE calls including
popular options such as Speed dial, Recent,
Contacts and Emergency call key.
Network supports True 4G VoLTE (HD Voice
and Video Call).
Messaging supports SMS and popular
options.
Internet supports 4G Data, supports
browsing.
Languages supports English and multiple
Indian languages.
SPECIAL FEATURES AND APPS
Connect to TV Watch your favourite movies
and television shows on your TV from the
JioPhone with the help of a JioMediaCable.
This feature works on any TV set, be it CRT,
LCD, or a Smart TV with JioMediaCable.
HelloJio Give voice commands in English,
Hindi or any other supported language to call,
message, search, open the native phone
functions like alarm, camera etc.
JioPhone Features
Page 12
Long press voice search key to start
your personal Voice Assistant.
Speak your command and get redirected to
your chosen service. Try commands like Call
‘Name’, Message ‘Name’, Open Camera.
JioPay Use JioPay App to make payments,
book travel tickets and get exclusive offers
anytime, anywhere. Use JioPay for all your
everyday payments, recharges, bookings and
avail exclusive offers. Long press LSK key to
launch JioPay from home screen.
MyJio Provides easy access to MyJio.
Manage your Jio account - balance, recharge,
usage etc.
JioStore Download and enjoy many more
Apps on the JioPhone.
Page 13

1 CALL & MESSAGING
Make / End a call
1 Type in the desired phone number with the
help of the keypad.
2 Press the dial key .
3 To end your call, press the end call key.
Save a contact
1 Type in a phone number. Contact option will
appear on the LSK key
2 Press the LSK key. New contact option will
appear on the left bottom corner of your
screen.
3 Press the LSK key to create a New contact.
4 Type in name, mobile number, email,
company name, add picture, add phone, add
another email, add address, add date, add
ringtone, add note with the help of the DPAD
keys.
5 Press the RSK key to select Options.
6 Press the DPAD center key to Save the
contact.
Write, send and receive messages
1 From Home screen, press the DPAD left key
to open Messages OR press the DPAD center
key to launch the App menu; navigate to
Messages and press DPAD center key to
open it.
2 Press the LSK key to create new message.
Basic Functions
Page 14

3 Type in the number or add from Contacts
(bottom left on it).
Note To shift to only numeric or alphanumeric
option, press # key. To delete, press back key.
4 Move down to SMS writing field.
5 Press the LSK key to send your message.
Receive Messages
There are two ways in which you can view
incoming messages.
Option 1 Your unread message will appear on
the status bar.
1 Press the LSK key to access recent Notices.
2 Navigate to the unread message and press
the DPAD center key to read it.
Option 2 Your unread message is directly
stored in your Messages inbox.
1 Press the DPAD center key and navigate to
Messages in the App menu.
2 Press the DPAD center key to open
Messages and read your unread message.
2 CAMERA
Access Camera
1 From Home screen, press the DPAD right
key to launch Camera OR press the DPAD
center key to launch the App menu; navigate
to Camera and press DPAD center key to
open it.
2 You can open the Camera with the help of
voice assistant also. Long press the DPAD
center key and give the command “Open
Camera”.
Page 15

Take a photo
1 Press the DPAD center key to take a photo.
Note: Press the RSK Key to access Options.
The options are: Switch between Front and
Rear camera, Access Self Timer, Switch On or
Off Grid, go to gallery and select Photo or
Video Mode. Move up and down to zoom in or
zoom out.
View Photos
1 From Home screen, press the DPAD center
key to launch the App menu; navigate to
Gallery and press DPAD center key to view the
photos.
Record a video
1 In the Camera app, press DPAD right key to
select Video mode.
2 Press the DPAD center key to start
recording a video.
Note Press the RSK Key to access Options.
The options are: Switch between Front and
Rear camera, go to video application and
select Photo or Video.
3 ENTERTAINMENT
Listen to music
1 From Home screen, press the DPAD down
key to open Music app OR press the DPAD
center key to launch the App menu; navigate
to Music and press DPAD center key to
access your music collection.
2 Use DPAD up and down keys to select the
music you wish to play.
Page 16

Play FM radio
1 From Home screen, press the DPAD center
key to launch the App menu; navigate to FM
Radio and press DPAD center key to open it.
2 Use DPAD left and right keys to select the
radio station you wish to listen to.
Note You can play or pause the radio by
pressing the LSK key.
Play a video
1 From Home screen, press the DPAD center
key to launch the App menu; navigate to
Video and press DPAD center key to open it.
2 Use DPAD up and down keys to select the
music you wish to play.
4 CLOCK & CALENDAR
Set an alarm
1 From Home screen, press the DPAD center
key to launch the App menu; navigate to
Clock and press DPAD center key to open it.
2 Press the LSK key to select New Alarm
option on the bottom left corner of the screen.
3 Press the DPAD center key to select the time.
4 Press the RSK key to save the alarm.
Note You can repeat this alarm, set a ringtone,
opt for vibrate option, and assign this alarm a
name for reference.
Add a calendar event
1 From Home screen, press the DPAD center
key to launch the App menu; navigate to
Calendar and press DPAD center key to
open it.
Page 17

2 Use DPAD up/down/left/right keys to select
the date of event.
3 Press the LSK key to add an event.
4 Enter a title, location, start date, end date,
start time, end time, event reminder and notes.
5 Press the RSK key to Save the event on your
phone’s calendar.
5 PHONE SETTINGS
Access Settings
1 From Home screen, press the DPAD center
key to launch the App menu; navigate to
Settings and press DPAD center key to open it.
Change the time and date
1 Use DPAD right key to navigate to
Personalization tab.
2 Use DPAD down key to navigate to Date &
Time and select OK.
3 Press the DPAD center key to change date.
4 Use DPAD down key to navigate to Time and
press DPAD center key to change the time.
Note You can opt for automatic time and date
selection. Enable Auto option and select
Kolkata (UTC+05:30) under Time zone.
Change the wallpaper
1 Use DPAD right key to navigate to
Personalization tab.
2 Use DPAD down key to navigate to Display
and select OK.
3 Press the DPAD center key to select
Wallpaper.
4 Select the image you wish to display on your
Page 18

screen from Camera or Wallpaper or Galley.
5 Use DPAD up/down/left/right keys to select
the image.
6 Press the RSK key to Save your selection.
Set Language
1 Use DPAD right key to navigate to
Personalization tab.
2 Use DPAD down key to navigate to
Language and select OK.
3 Use DPAD up and down keys to select the
language of your choice and press OK.
Change the volume
1 Use DPAD right key to navigate to
Personalization tab.
2 Use DPAD down key to navigate to Sound
and select OK.
3 Press the DPAD center key to open Volume.
4 Use DPAD up and down key to navigate
between media, ringtones & notice and alarm.
5 Use DPAD right key to increase the volume
and left key to decrease the volume.
Set the ringtone
1 Use DPAD right key to navigate to
Personalization tab.
2 Use DPAD down key to navigate to Sound
and select OK.
3 Press the DPAD center key to open Tones.
4 Press the DPAD center key to open
Ringtones.
5 Use DPAD up and down keys to select the
ringtone of your choice and press OK.
Update your device software
1 Use DPAD right key to go to Device tab.
2 Press the DPAD center key to open
Page 19

Device Information.
3 Use DPAD down key to navigate to LYF
software update, select OK and follow
instructions.
Factory reset
1 Use DPAD right key to go to Device tab.
2 Press the DPAD center key to open Device
Information.
3 Use DPAD down key to navigate to Reset
Phone and select OK.
4 Press the RSK key to reset your phone to
factory settings.
Model number and serial number (IMEI)
1 Use DPAD right key to go to Device tab.
2 Press the DPAD center key to open Device
Information.
Model
You can view the model number and software.
IMEI
3 Use DPAD down key to navigate to More
Information and select OK.
You can view the IMEI number.
6 BROWSER
Browse the web
1 From Home screen, long press the 0 key to
launch Browser OR press the DPAD center
key to launch the App menu; navigate to
Browser and press DPAD center key to
open it.
2 Press the LSK key to search for your
website of choice.
3 Type in the URL and press the DPAD
center key.
Page 20

Phone care
Read all safety information before using the
device to ensure safe and proper use.
Following are the warning information
provided below to prevent incidents such as
fire or explosion.
Do not expose the device to physical
impact or damage.
Do not carry your device in your back
pockets or on your waist.
Use manufacturer-approved batteries,
chargers, accessories, and supplies.
Prevent the multipurpose jack and battery
terminals from contacting conductive
elements, such as metal or liquids.
Do not touch the device with wet hands.
Also, do not use the device in humid
environments, such as rest rooms, or
during water-based activities, such as
swimming.
If any part of the device is cracked or
broken, or if the device becomes very hot,
stop using the device immediately and
take it to a Device Care Centre.
Do not turn on or use the device when the
battery compartment is exposed.
Following are the warnings below to
prevent injury to people or damage to the
device
a) Do not store your device in very hot or
very cold areas. It is recommended to use
your device at temperature between 5 to
35 degree Celsius.
Device Care and
Maintenance
1
2
3
4
5
6
7
8
Page 21

Hearing Safety
To prevent potential hearing damage, avoid
listening at high volume levels for long period
of time. We recommend that music and call
volume to be set at an optimal level.
Return & Recycle
b) Do not use your device outdoor
during a thunderstorm.
c) Do not store your device near or in
heaters, microwaves, cooking
equipment, or high pressure containers.
d) Keep your device dry.
e) Comply with all safety warnings and
regulations regarding mobile device
usage while operating a vehicle.
Do not allow children or animals to chew
or suck the device.
Do not poke eyes, ears, or other body
parts with the device or insert the device
into the mouth.
If the device has a camera flash or light,
do not use it close to the eyes of people or
animals.
The user is obligated to return the
JioPhone to RRL in terms as specified by
RRL. Please contact JioPhone Customer
Care or visit www.jiophone.com
1
2
3
1
Children
Page 22

This marking on the product
accessories or literature indicates that
the product and its electronic
accessories (such as charger) should
not be disposed with other household
waste.
This product is ROHS compliant.
Certification
information (SAR)
This mobile phone has been designed to
conform to applicable safety requirements for
exposure to radio waves.
Precautions
THIS DEVICE MEETS INTERNATIONAL
GUIDELINES FOR EXPOSURE TO RADIO
WAVES.
Your mobile is designed not to exceed the
limits for exposure to radio waves
recommended by international guidelines.
Use a wireless hands-free system
(headphone, headset) with a low power
Bluetooth emitter. Make sure the cell
phone has a low SAR.
Keep your calls short or send a text
message (SMS) instead. This advice
applies especially to children, adolescents
and pregnant women.
Use cell-phone when signal quality is
good. People having active medical
implants should preferably keep the cell
phone at least 15cm from the implant.
1
2
3
Page 23

The guidelines were developed by an
Independent scientific organization (ICNIRP)
and include a substantial safety margin
designed to assure the safety of all persons,
regardless of age and health. The radio wave
exposure guidelines use a unit of measure-
ment known as the Specific
Absorption Rate, or SAR, The SAR limit
for mobile devices is 1.6W/Kg.
The highest SAR values under the ICNIRP
guidelines for this device model are:
Maximum SAR for this model and
Conditions under which it was recorded
Head SAR (refer to MRP Label)
Body-worn SAR (refer to MRP Label)
Body-worn SAR testing has been carried
out at a separation distance of 1.5 cm. To
meet RF exposure guidelines during
body-worn operation, the device should
be positioned at least this distance away
from the body.
1
2
3
4
5
6
Copyright and other
notices
This Document published in electronic or
hardcopy form is property of Reliance Retail
Limited (RRL). No part of this document may
be copied, reproduced, stored in any
retrieval system, or transmitted in any form or
by any means, either electronically, mechanically, or otherwise without prior written
permission. RRL shall at all times remain the
sole owner of the copyright in the Technical
Documents.
© Reliance Retail Limited, 2017 ALL RIGHTS
RESERVED
Page 24

TRADEMARKS
All the brand names and other products or
services mentioned in this Technical
document are identified by the trademarks or
service marks of RRL and wherever
applicable, other right holders. You are not
permitted to use or reproduce these marks
except as part of the unaltered Technical
Documents without the prior written consent
of the RRL or where applicable the right
holders.
TARIFF
For Postpaid customers, Tariff is as per the
Tariff Enrolment Form (TEF) that you have filled
and signed at the time of subscription.
Base Tariff for prepaid customers:
Your Jio Prepaid Plan ₹ 153
Voice Free Local, STD, Roaming Calls
to any operator in India
Data Unlimited (0.5GB/day high
speed, thereafter at 128 Kbps)
SMS 300
Jio Apps Complimentary subscription
to Jio Apps
Validity 28 days
You can choose from a wide variety of plans
that provide “All Unlimited”. For more details,
visit www.jio.com.
 Loading...