

Jiffy J-2000, J-2000 User Manual

Jiffy®
J-2000 Model Steamer
FEATURES
• Polymer
outer
housing unit for
durability
• Lightweight, flexible hose
•
Shatterproof
• Safety wiring feature
accidentally
water
run
caddy
temporarily
dry
turns
• Comfortable, easy-to-grip handle
• Removes wrinkles
up
to five times faster
ironing
• Easy-roll casters for mobility
• Numerous steam
• Backed
by
Jiffy®
steamer need repair, send it to
head
attachments
's
renowned
available
Customer
us
and
we will repair and ship
Service--should
the unit within 24 hours from its arrival to our
INCLUDES:
the unit off should
than
conventional
your
plant
it
Check
Rod Set
(not included with
J-1
series)
Owner's
Manual
J-2000
Base Unit
Jiffy®
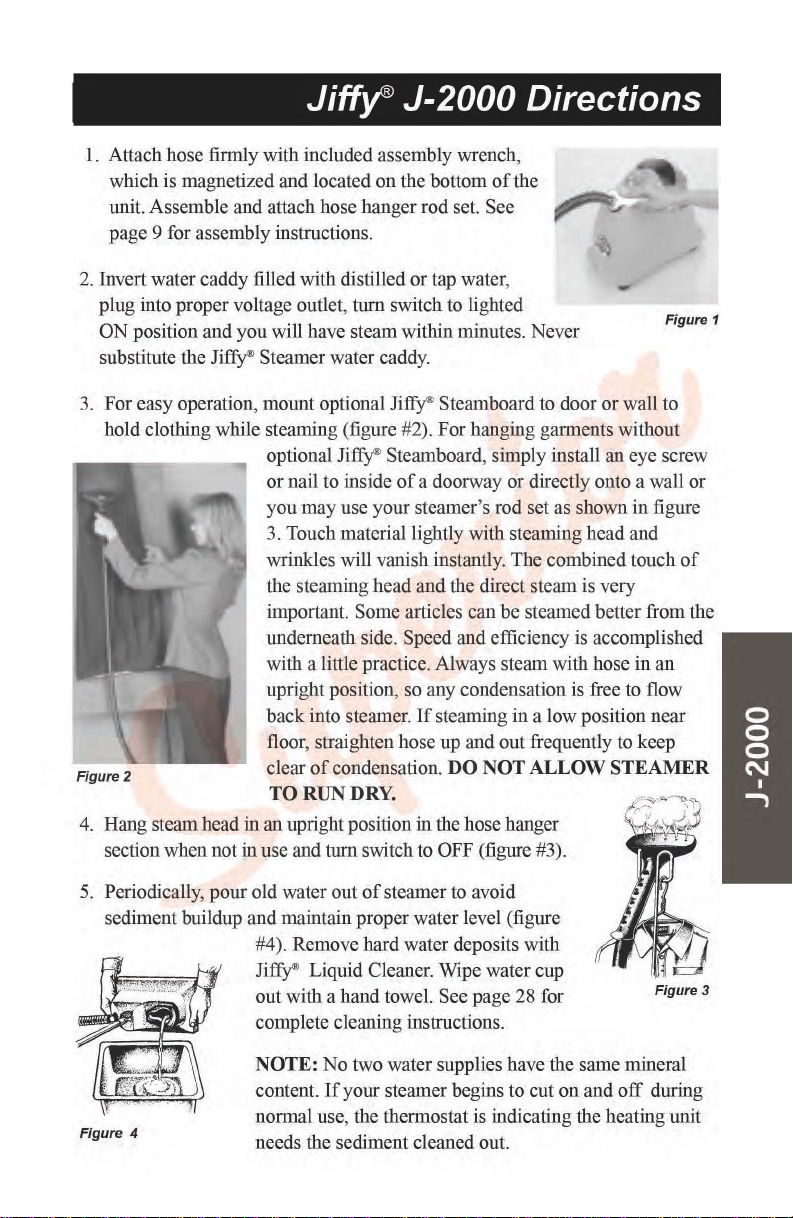
1.
Attach hose firmly with included assembly wrench,
which is magnetized and located
J-2000 Directions
on
the bottom
unit. Assemble and attach hose hanger rod set. See
page 9 for assembly instructions.
2.
Invert water caddy filled with distilled or tap water,
plug into proper voltage outlet,
ON
position and you will have steam within minutes. Never
turn
switch to lighted
substitute the Jiffy® Steamer water caddy.
of
the
Figure 1
3. For easy operation, mount optional
Ji~
Steamboard to door or wall to
hold clothing while steaming (figure #2). For hanging garments without
optional
or nail to inside
you
Ji~
Steamboard, simply install an eye screw
of
a doorway or directly onto a wall or
may
use your steamer's rod set as shown in figure
3. Touch material lightly with steaming head and
wrinkles will vanish instantly. The combined touch
the steaming head and the direct steam is very
important. Some articles can be steamed better from the
underneath side. Speed and efficiency is accomplished
with a little practice. Always steam with hose in
upright position, so any condensation is free to flow
If
back into steamer.
steaming in a low position near
floor, straighten hose up and out frequently to keep
Figure 2
condensation.
DO
NOT ALLOW STEAMER
clear
of
TO RUN DRY.
4.
Hang steam head in an upright position in the hose hanger
section when not in use and tum switch to
5.
Periodically, pour old water out
of
OFF (figure #3).
steamer to avoid
sediment buildup and maintain proper water level (figure
#4). Remove hard water deposits with
Ji~
Liquid Cleaner. Wipe water cup
out
with a hand towel. See page 28 for
complete cleaning instructions.
of
an
Figure3
Figure 4
NOTE:
content.
normal use, the thermostat is indicating the heating unit
needs the sediment cleaned out.
No
two water supplies have the same mineral
If
your steamer begins to cut
on
and
off
during
 Loading...