

Page 1
PIPER
Page 2
PIPER INSTALLATION
Connecting your new PIPER
ELECTRICAL SUPPLY
• A 115 Volt -15 Amp circuit breaker is required for this washer (please make sure that this outlet is grounded). A standard
power-cord with plug is provided for your convenience for the 115 Volt version.
• NOTE: If you have purchased the optional 208 Volt version, the rear access panel must be removed prior to making
connections. The circuit used for this unit should be independent from any other equipment. (Make sure that the power stays
within the prescribed voltages).
WATERSUPPLY
• A 3/4" garden hose coupling is required with 30 p.s.i. dynamic pressure. A water pressure regulator is required. The water
pressure cannot exceed 50 p.s.i. If the water pressure exceeds the prescribed amount, you will get inconsistent washing
temperature and thus may void the warranty.
• Incoming water temperature must be 140° F (60° C). An easily accessible shut-off valve is recommended — making
installation, service and repairs easier.
• The diameter of the fitting required is 3/4" ID. This size hose is standard for most warewashing machines. Fittings should be
available from your local hardware or plumbing supply house.
• Flexible hoses are highly recommended to make installation, servicing and maintenance easier.
• Make sure that the water is free from calcium and hard water deposits. For these situations, an on-line water cartridge system
is highly recommended. Build -up of calcium and lime deposits in the washer may occur and servicing will be required on a
more frequent basis which will not be covered by the warranty.
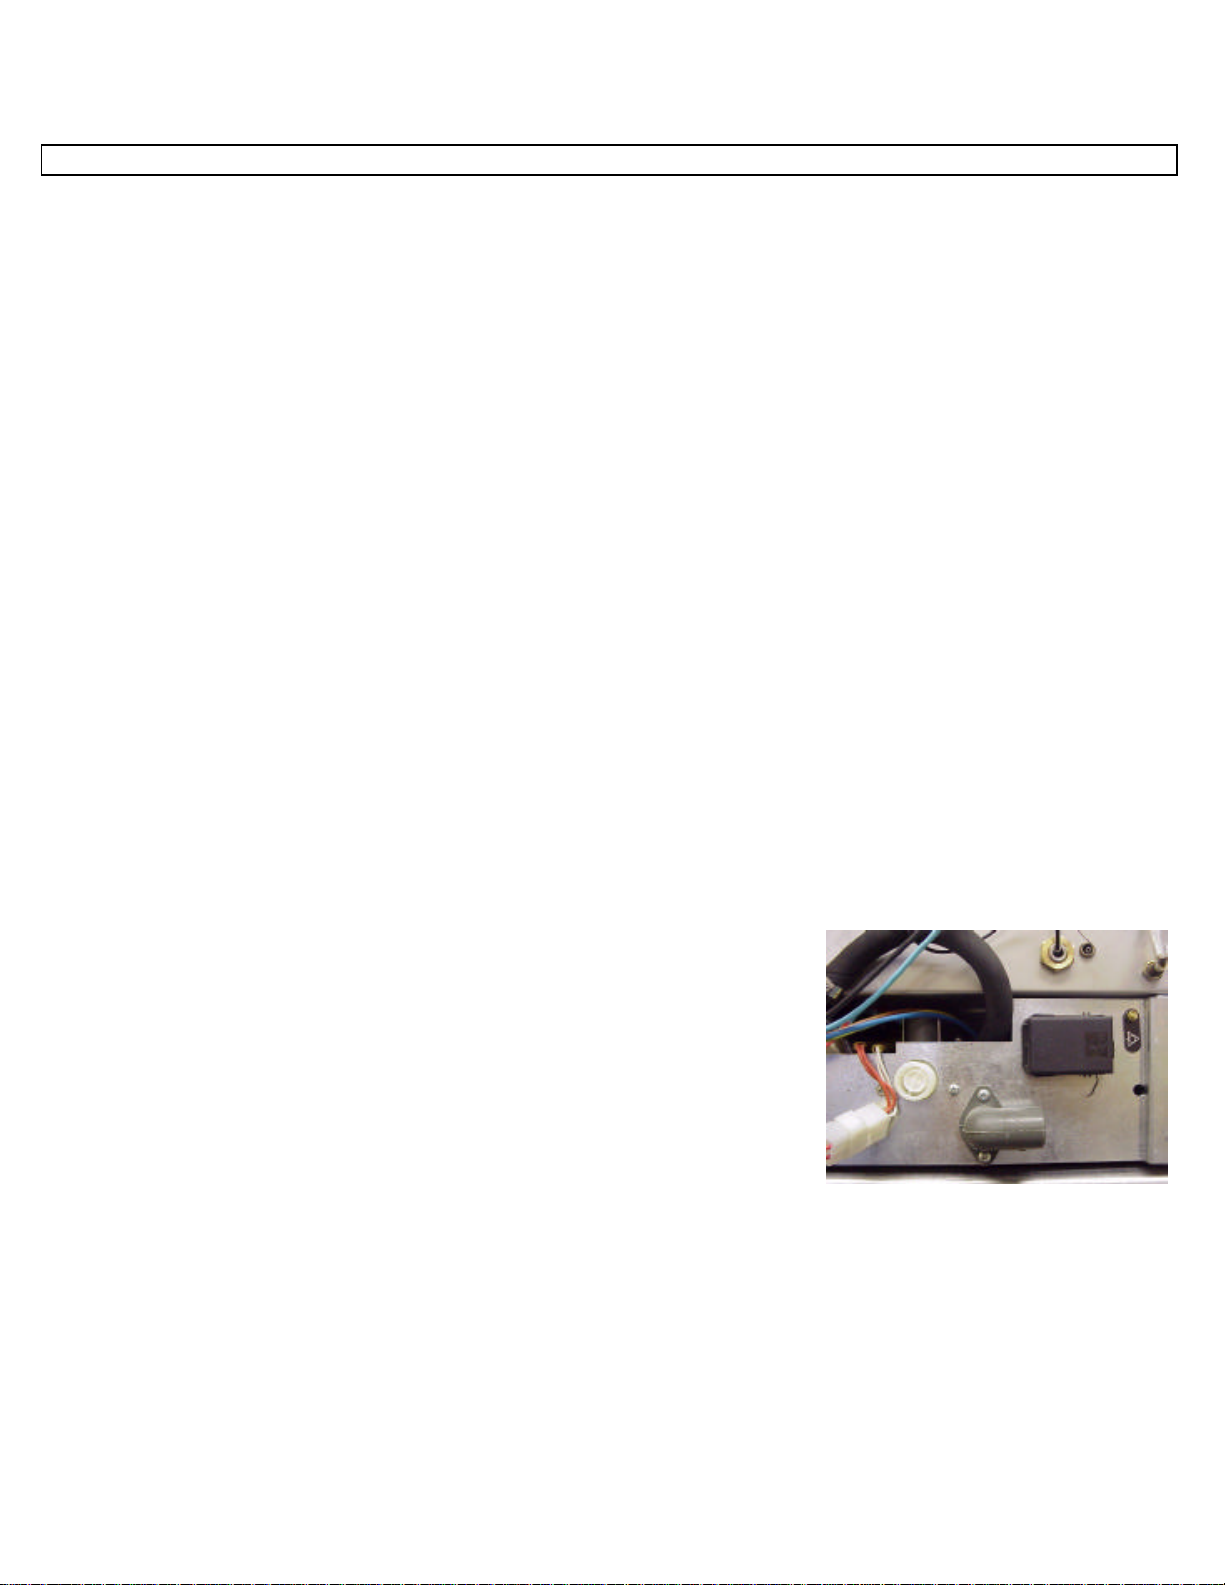
DRAIN CONNECTION
• This washer has a gravity type drain. Since this unit is a 'counter-type' installa tion,
your flexible drain hose, should be connected to the drain outlet elbow at the rear of the
unit behind the rear access panel; and extended through the side opening directly into a
floor drain or sink (see Figure)
Page 3

Before operating the machine, ensure that power is supplied to the machine (verify the breaker) and that the
water supply is correctly fixed on the machine. Also verify that the overflow pipe is correctly set in its place
(inside the wash tank). The overflow pipe should never be forced into its position.
• The main power switch (square green button on the right side) must be activated.
When the wash tank is empty and the overflow pipe is in its place, the machine will fill up to its requir ed
water-level. Always keep the door closed during this time. When the machine is done filling up, the elements
will then raise the wash and rinse water temperatures automatically. It will take approximately 10-12
minutes in order to get optimum washing te mperature (140°F in the wash tank and 18 5 °F in the booster). A
pilot light will turn ON to indicate that the machine is ready for its first load.
• Fill the basket with glasses and cups then push the basket into the machine. If you are using dry soap
detergent or crystals, put the required amount (usually about one full tablespoon) inside the door and close.
If you are using liquid soap detergent, a chemical pump system will take care of adding the right amount of
soap for each batch. DO NOT use domestic liquid dish soap, only commercial grade.
• NOTE: Whenever you start with the initial fresh water after fill-up, it is recommended to place one
tablespoonful of detergent (if you are using powder soap) on the filters in addition to the regular amount per
batch. Use soap as recommended by your supplier. Using too much may cause damage to the pump seals.
• It is more economical to wash when the basket is fully loaded. It is also important not to overload the basket.
Water should always be able to spray freely around the cups and glasses.
• Press the cycle start switch (round black button on the right). This switch will power the timer and a pilot
light beside it. It may be necessary to press and hold the switch for one full second to begin the cycle.
A. The cycle starts and consists of a 165 second wash and a 15 second rinse time.
B. Another basket can be filled while the first one is being washed. After 180 seconds, the pilot light
turns OFF to signal the end of the cycle.
C. NOTE: It is recommended to change the wash water at least twice per day (after each peak
period). To do this, turn the green power switch to the off position. Pull up the overflow pipe and
allow the machine to drain fully.
D. Clean the tank filter. Flush the tank out with clean water. Put back the filter and overflow pipe in
their proper location. Close the door and turn the power back ON. Turn off machine and drain the
washer at the end of the day or if the machine will not be in use for more than a few hours.
Page 4

Page 5

Page 6

Page 7

PIPER PARTS LIST
10275 DRAIN PLUG 12171 LEFT RINSE ARM
10295 TANK FILTER 12174 WASH ARM
10342 CONNECTOR DIAMETER 6,5 12391 PIPER JET-TECH DECAL
10344 CONNECTOR 15006 PIVOT
10346 CONNECTOR 15007 PIVOT SUPPORT
10349 CONNECTOR 15018 KIT SUPPORT + EXTENSION
10415 BUSH 15519 TUBE FOR PRESSURE SWITCH
10425 NUT 15547 SPACER FOR PIVOT
10430 NUT 15562 SMALL SPRING
10431 NUT 15705 SQUARE MICROSWITCH
10435 NUT 15772 TANK
10438 SPACER 15773 RIGHT BASE
10446 RINSE AID FILTER 15774 LEFT BASE
10458 NUT 15775 DOOR
10470 SPRING 15776 EXTERNAL LID
10471 SPRING 15778 RIGHT RACK GUIDE
10472 SPRING 15779 LEFT RACK GUIDE
10475 SPRING 15781 PANEL
10479 BUFFER 15782 HANDLE
10489 PIVOT 15783 CROSS MEMBER SOL. VALVE
10493 PIVOT 15784 SQUARE FOR PUMP
10502 ADJUSTABLE FOOT 15785 CROSS MEMBER
10528 AIR TRAP 15788 PANEL 1 BUTTON THERMO.
10552 PLATE 15790 TUBE
10569 DISK 15791 TUBE
10576 NUT + RUBBER -- CARRIER SOLENOID V. 15792 TUBE
10609 SPACER 15795 BOOSTER
11351 BUSHING 15986 PANEL PIPER JET-TECH
11404 FILTER 20010 LIGHT
11409 ROD FILTER 20018 FILTER
11998 NUT 20035 DOOR MICROSWITCH
12007 SUPPORT 20042 LIGHT
12009 HUB 20045 TERMINAL BLOCK
12010 PLUG 20053 PRESSURE SWITCH
12012 SUPERIOR RINSE ARM 20108 THERMOMETER DOUBLE SCALE
12013 PLUG 20110 WASH THERMOSTAT
12014 RINSE JET 20119 RINSE THERMOSTAT
12015 RINSE JET INSERT 20130 TERMINAL
12017 PIVOT 20131 TERMINAL PART
12019 PLATE 20190 FIXING CABLE
12020 NUT 20199 RINSE AID PUMP
12021 CONNECTOR 20355 CABLE
12040 MANIFOLD 20356 CABLE + PLUG UL
12049 DOOR HOOK 20519 CYCLE START BUTTON
12050 DOOR CATCH 20528 GREEN BIPOLAR SWITCH
12051 BUSH 20575 BOOSTER ELEMENT 110V 1400W
12052 SPRING 20576 WASH TANK ELEMENT 110V 1400W
12053 PLATE 20577 SOLENOID VALVE 1A 110V UL
12054 DOOR CATCH BODY 20578 RELAY 12A 110V 60HZ
12055 SCREW 20579 TIMER 3'18"
12131 RUBBER-CARRIER 20580 CAPACITOR 20MF 110V UL
12168 RUBBER-CARRIER 21428 WIRING HARNESS
12169 WASH/RINSE ARM 30026 CUTLERY HOLDER 2 COMP.
12170 RIGHT RINSE ARM 30087 GLASS RACK 14X14X5
Page 8

PIPER PARTS LIST
40248 MOT PUMP 110V 0.1HP 2212 60HZ 60565 HOSE
60003 GASKET
60004 GASKET 15x10x2
60008 GASKET
60009 GASKET
60012 GASKET
60050 O RING
60055 O RING
60060 O RING
60061 O RING
60063 O RING
60071 O RING
60072 O RING
60073 O RING
60074 O RING
60076 O RING
60078 CLAMP
60079 CLAMP
60081 CLIP
60082 CLIP
60083 CLIP
60102 SCREW
60103 SCREW
60109 SCREW
60130 SCREW
60131 SCREW
60135 SCREW
60136 SCREW
60137 SCREW
60146 SCREW 6X10
60147 SCREW 6x25
60160 SCREW
60161 SCREW
60162 SCREW
60164 SCREW
60200 NUT
60201 NUT
60202 NUT
60203 NUT
60204 NUT
60208 NUT
60210 NUT
60212 NUT
60215 NUT
60231 WASHER
60233 WASHER
60234 WASHER
60235 WASHER
60242 WASHER
60244 WASHER
60245 WASHER
60258 BALL
60555 HOSE
60563 HOSE
 Loading...