

Page 1

USER GUIDE MANUAL
MODEL#: JMY3000-BLK | VERSION: 042016
Page 2
• Scooter • Charger
• Tool kit • Pump
IN THE BOX
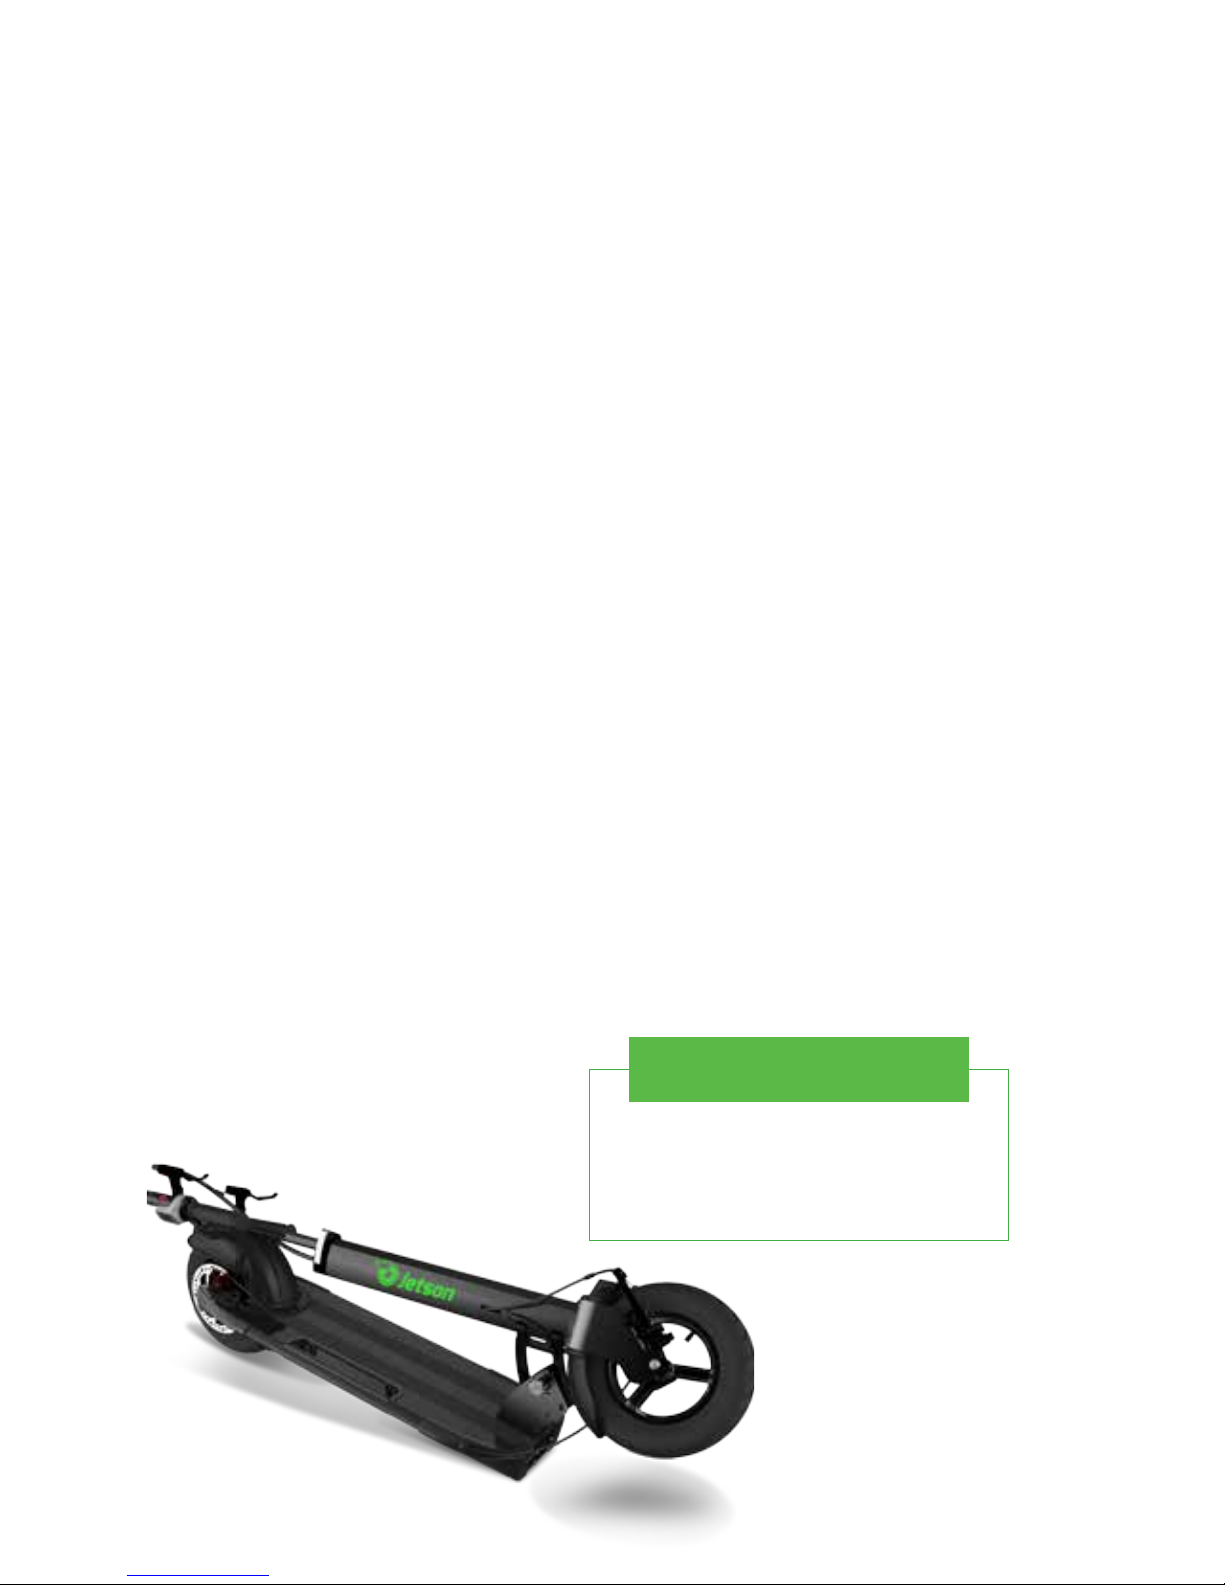
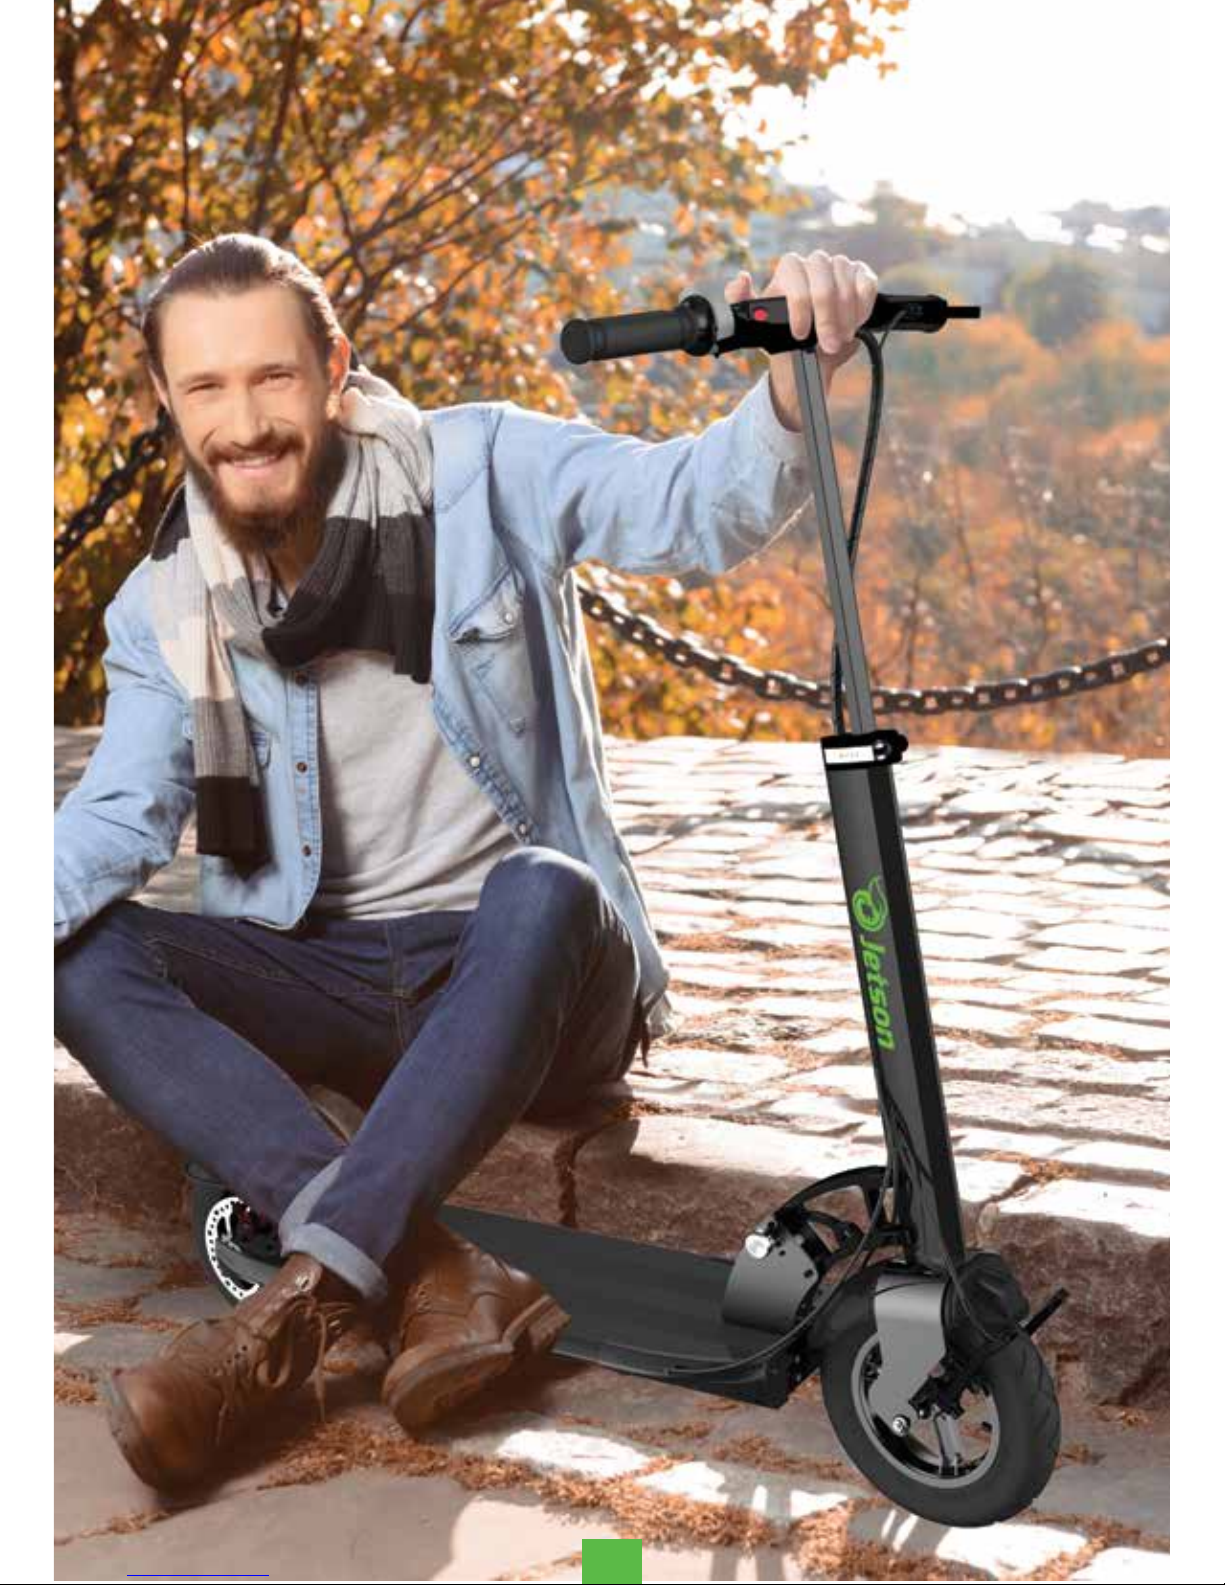
Congratulations on purchasing your brand new Jetson® Breeze
Electric Scooter. The Jetson® Breeze is a stylish and reliable folding electric
scooter. With a long range of 15-20 miles per charge, the breeze can take
you anywhere you want to go. Use it for your daily commute and still have
enough juice for those fun leisure strolls. Charging takes up to 5 hours to fully
recharge those 15-20 miles. With a backlight LCD display, and front and
back brakes, you know you’ll be safe riding at all times of the day. Please
ride safe, follow your local laws, and take it for a breeze!
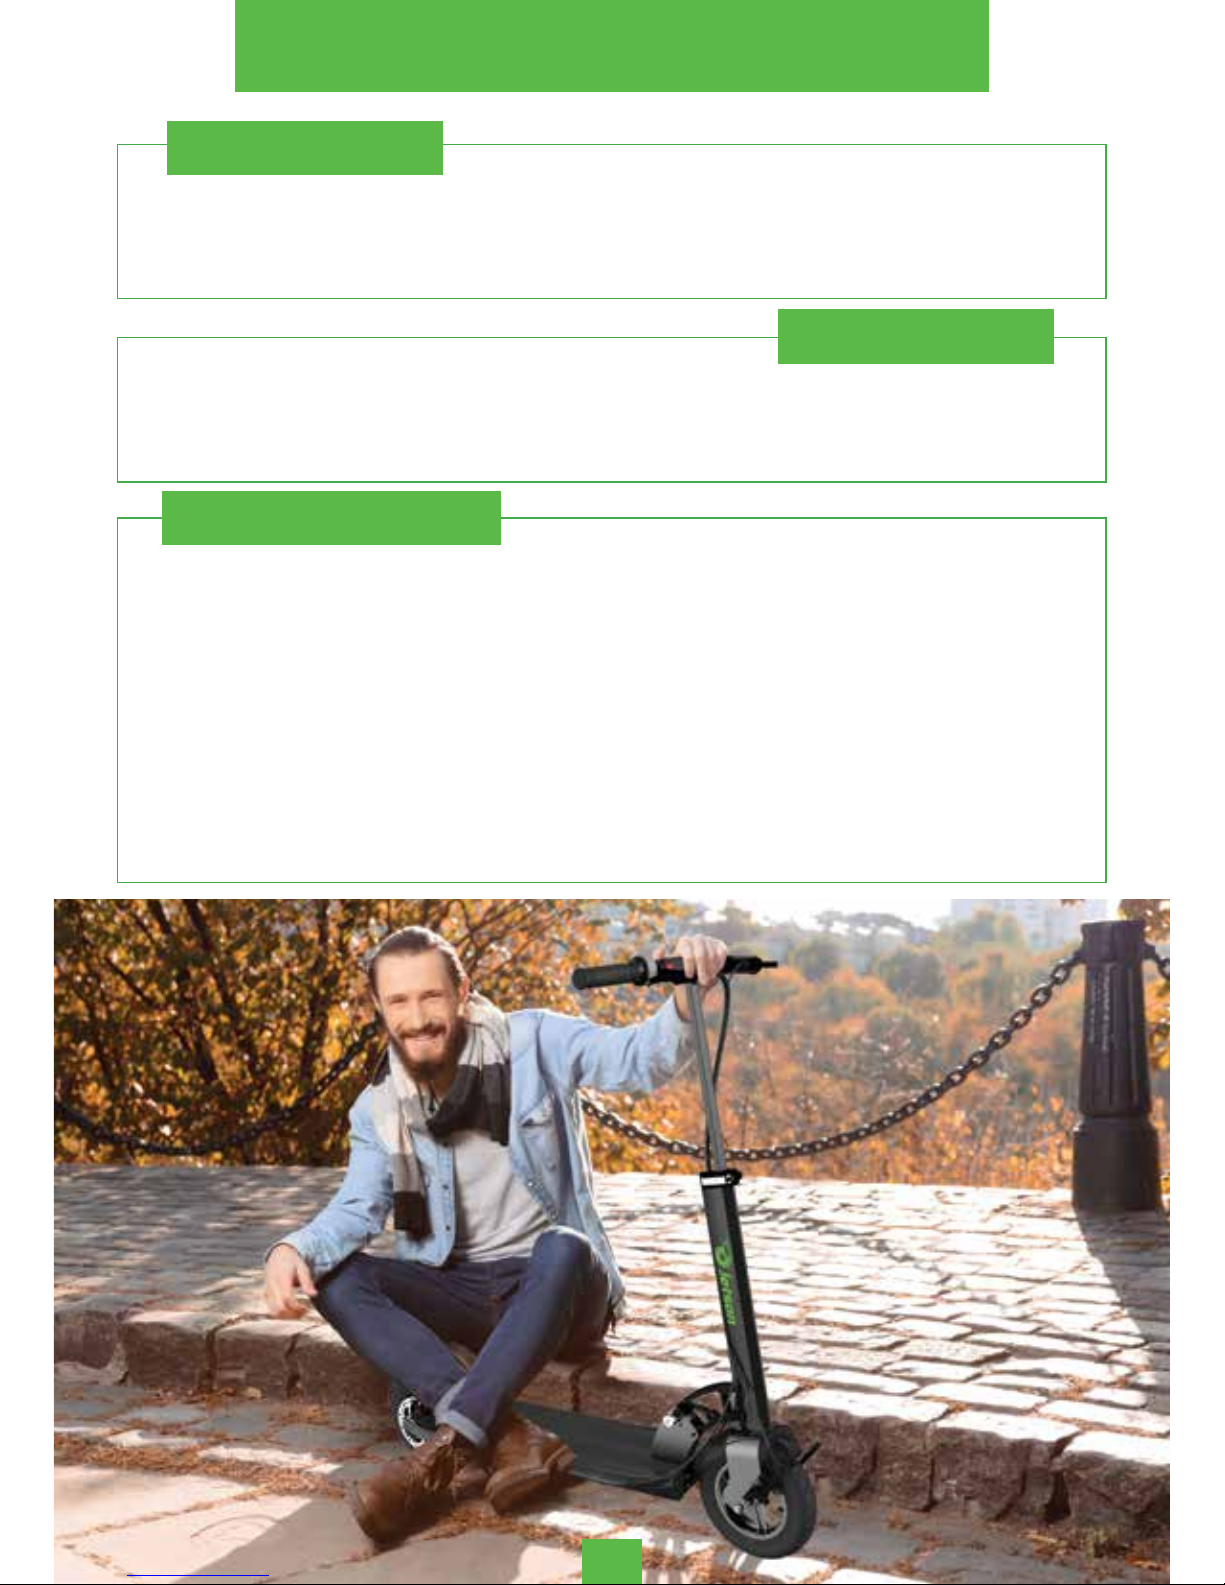
Before taking the Breeze for a ride, please get adjusted to its speed and
turning radius and sensitivity to avoid any injury.
SPECIFICATIONS
• Range: Up To 20 Miles Per Charge
• Speed: Up To 18 Mph
• Weight Limit: 325 Lbs
• Braking System: Front + Rear Disc Brake
(Brake For Each)
• Motor: 250 Watt Brushless Electric Motor
• Charge Time: 4 Hour Fully Charged
• Battery: Lithium-Ion 36V 8.8Ah
• Tire: 10 Inches
• Weight: 32 Lbs
SAFETY FEATURES
• 3 Rear Reectors + Brake Lights
• Anti-slid Grips For Foot Control
• Easy Grip Handlebars
• Energy-saving Auto-shutdown
FEATURES
• No Assembly Required
• Backlit LCD Display With Speed,
Odometer and Battery Guage
• Thumb Throttle Speed Contol
• 3 Speed Options
• Integrated Quick-Alert Bell
• Aluminum Alloy Frame With
Concealed Battery
• Protective Mudguard
• Built-in Kickstand
• Quick Release Lock + Fold
Technology
• Compact And Portable For
Travel
• Collapsible Handlebars
• Height Adjustable
• Water-Resistant
Page 3

Jetson Breeze Features .....…..…........….………………….....…………….………3
Jetson Breeze Main Parts ................................................................................4-5
Warnings & General information ..………........………..……..........………...…6-7
Serial Number ……………………….……..………………….......…………………...8
Opening & Folding the Jetson Breeze ...……………....……...…..………….9-15
Operation ..………………………………………………………………………....…16
Charging & Battery .....……………………………………………….….…..………17
Throttle ............................................................................................................18-21
Safety / Tires air pressure …....……………...….…………………………......….....22
Driving Technique .......……………………..…………...……..…...................23-24
Jetson Breeze Quick Maintenance .................................................................25
Flat Tire Repair Instruction ..…………………….....…………..……….........…27-35
Removing Rear Plastic Covers ..........................................................................28
Disconnecting Motor Connectors ...................................................................29
Removing Rear Motorized Wheel ...............................................................30-31
Replacing Flat Tire Tube ...............................................................................32-33
Reassembling Rear Wheel ...............................................................................34
Plastic Covers Assembly ....................................................................................35
1
Table of Contents:
Page 4
2
Page 5
THUMB THROTTLE
LCD DISPLAY WITH SPEED,
BATTERY METER & ODOMETER
FOLDING TBAR
SELF LOCKING /
RELEASE BUTTON
LITHIUM ION
BATTERY 36V-8.8Ah
ALUMINIUM DECK
ANTI SKID GRIPS
2 REFLECTORS
REAR DISC
BRAKE
EFFICIENT INTEGRAL
BRUSHLESS HUB MOTOR
BATTERY CHARGER
CONNECTOR
KICKSTAND
QUICK FOLDING
MECHANISM
BELL
EASY GRIP
HANDLEBARS
FRONT BRAKE LEVER
REAR DISC BRAKE LEVER
QUICK RELEASE
FRONT V-BRAKES
ALLOY WHEEL
10 INCH
PNEUMATIC TIRES
REMOVABLE
BRACKETS ON
EACH CORNER
FOR MAINTENANCE
ACCESSIBILITY
HEIGHT ADJUSTABLE
HANDLEBARS
MUDGUARD
CARRY HANDLE
FRONT & BACK
BRAKES LIGHTS
3
JETSON® BREEZE FEATURES
Page 6
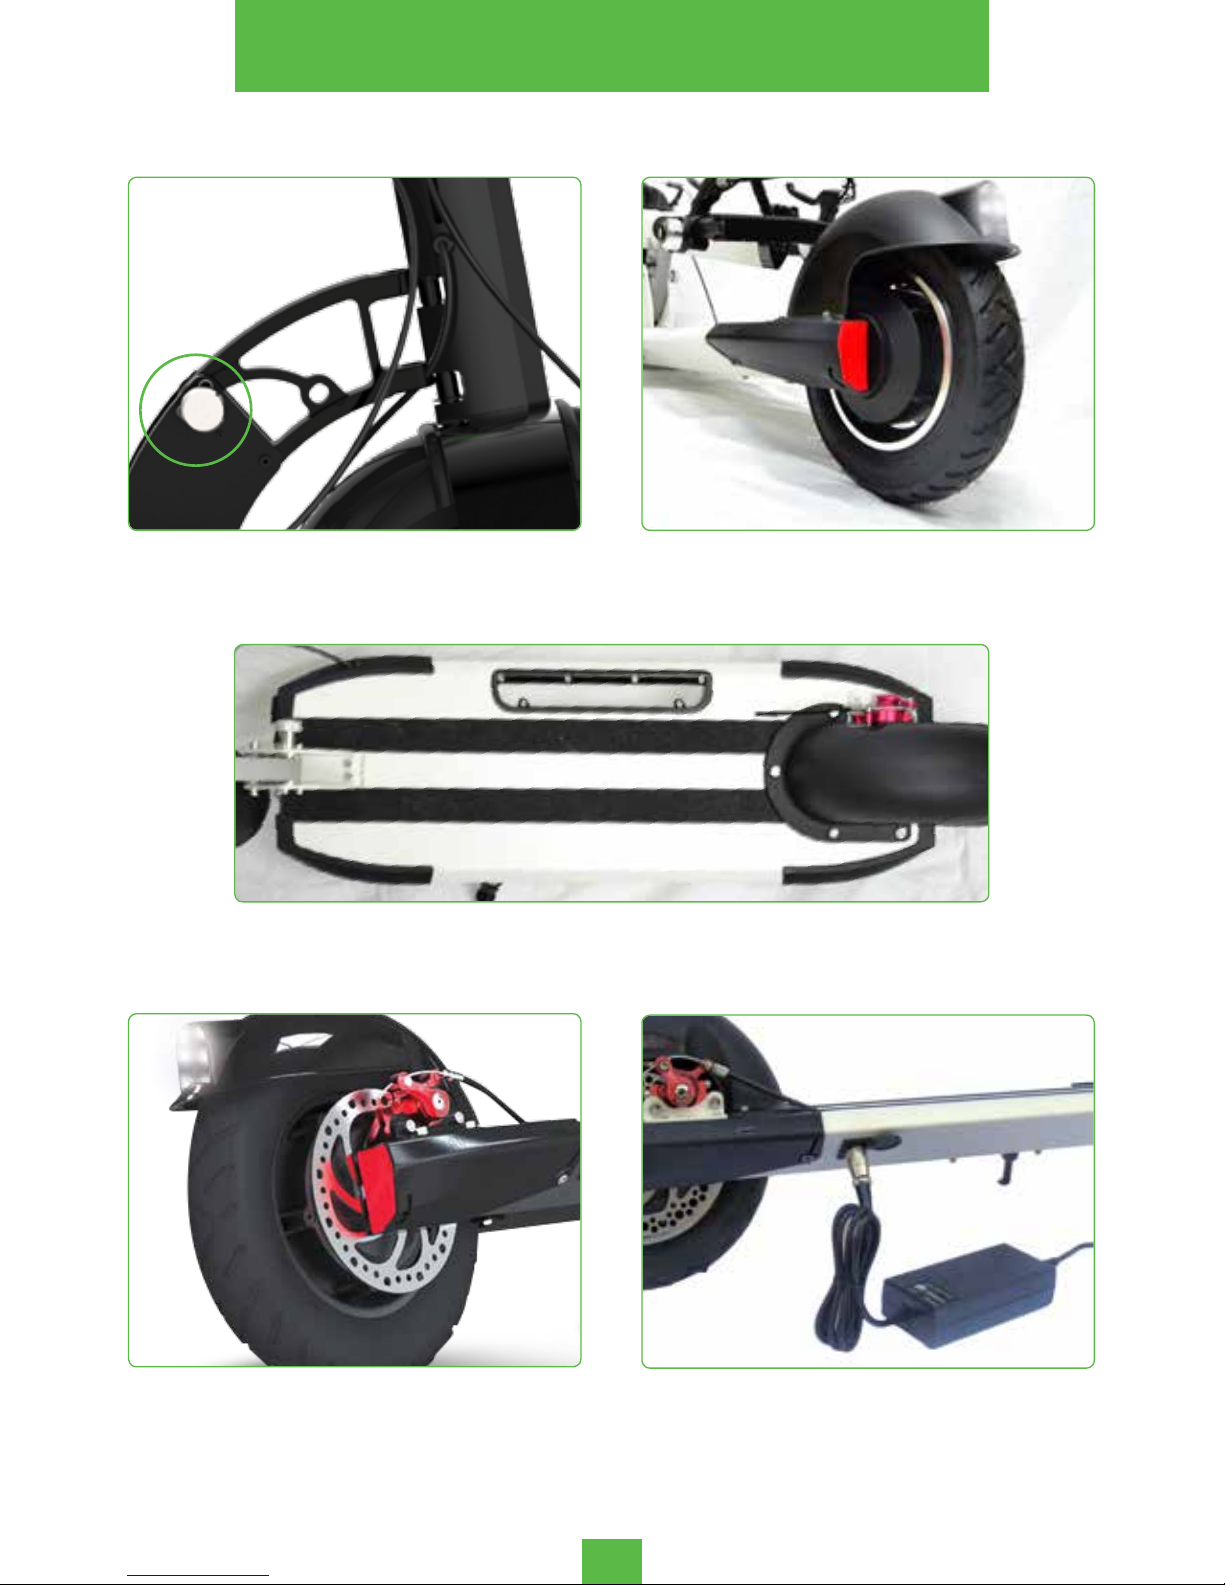
REAR DISC BRAKE
QUICK FOLDING MECHANISM
WHEEL MOTOR
ALUMINIUM DECK WITH CARRY HANDLE + ANTI SKID GRIPS
BATTERY CHARGER CONNECTOR
4
WARNINGS & GENERAL INFORMATION
Page 7
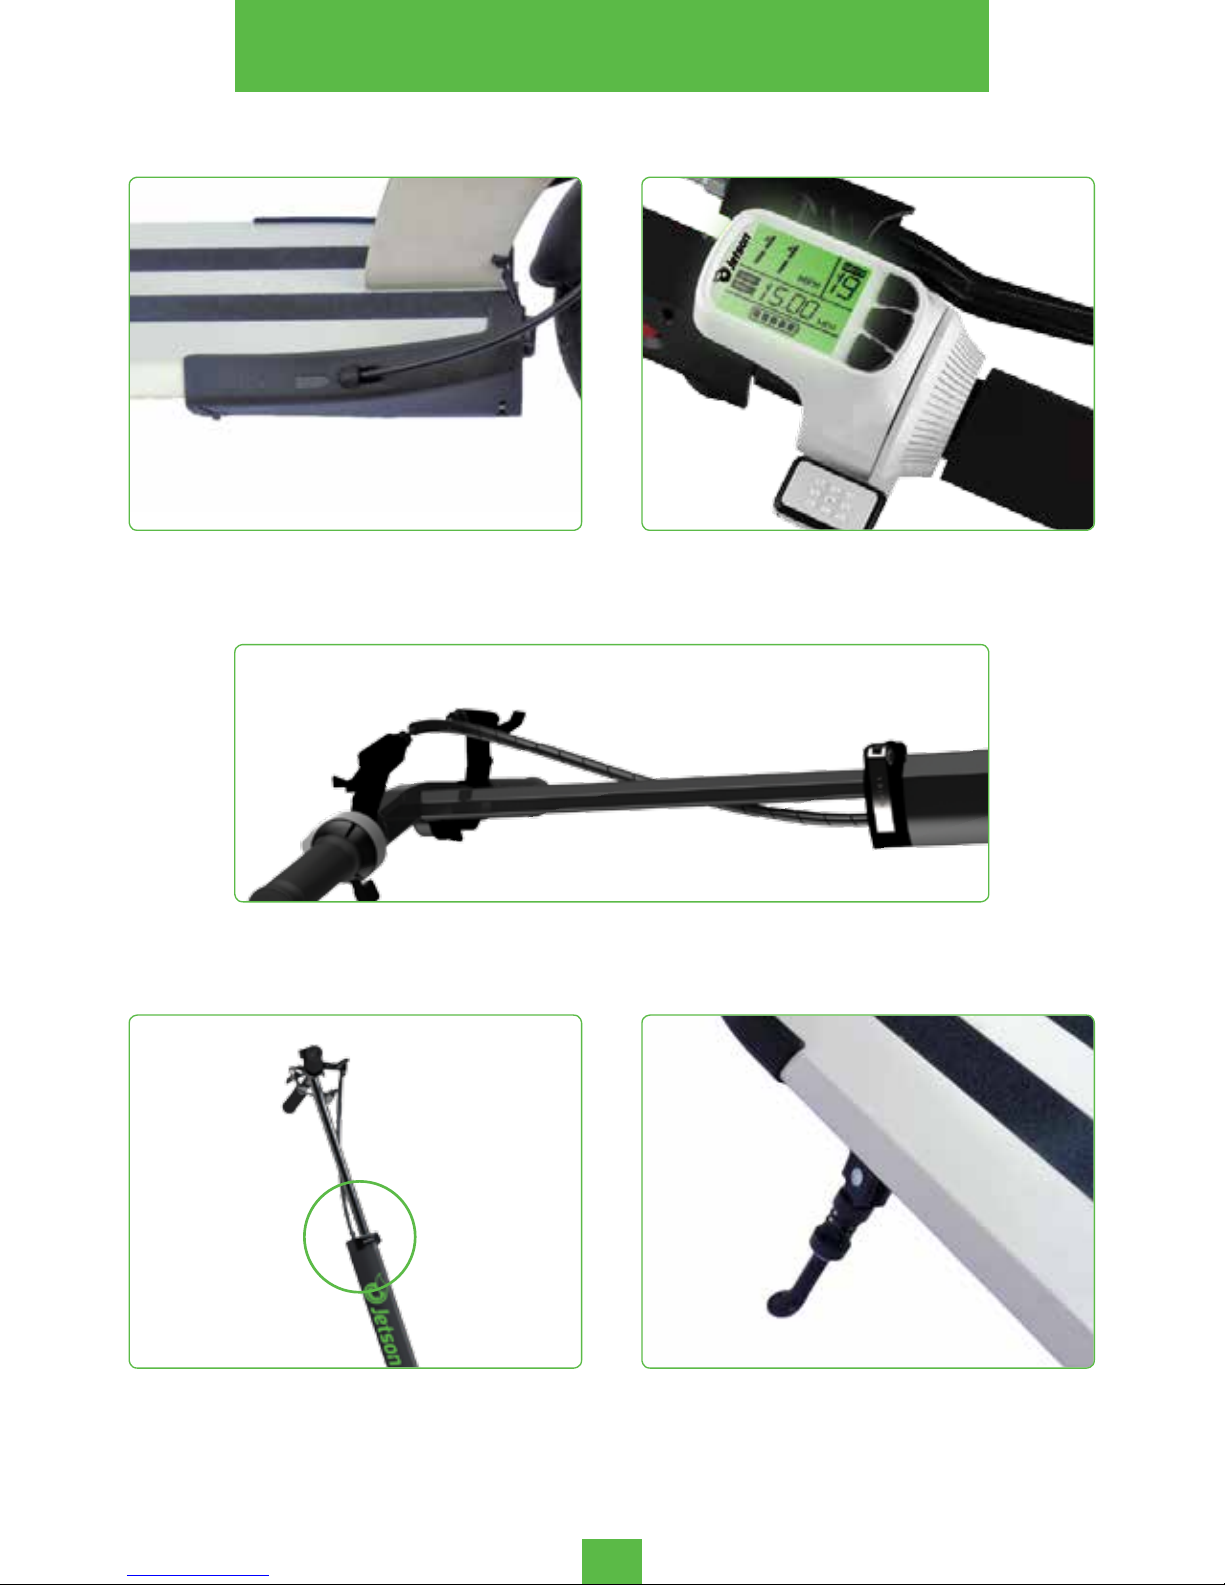
QUICK RELEASE
FRONT BRAKE LEVER / REAR DISC BRAKE LEVER
SPEED CONTROL THROTTLE
WITH LCD DISPLAY
MAINTENANCE PLASTIC COVER
KICKSTAND
5
WARNINGS & GENERAL INFORMATION
Page 8

WARNING !
WHY IS IT NECESSARY TO READ THIS USER MANUAL ?
This Manual was written to help you understand the proper use and
maintenance of the Jetson
®
Breeze.
It is important for you to understand the Jetson® Breeze; its features
and performance, so that you enjoy every ride.
Also, it is important that your rst ride with the Jetson® Breeze is in an
open area.
The Jetson
®
Breeze needs a short period for all moving parts such as
hinges and brakes to adjust themselves into their correct position.
IMPORTANT INFORMATION
READ THIS MANUAL
The responsibility for the Jetson® Breeze maintenance is
yours, and will help reduce risks of injuries.
Before riding, please ensure that the brake levers, and
thumb throttle LCD display are all tightly secure before
using the device.
6
WARNINGS & GENERAL INFORMATION
Page 9
Always follow the local laws and regulations.
Never ride your scooter in conditions of poor visibility.
Do not do stunts, wheelies or jumps. They will increase your
chances of injury and damage your Jetson
®
Breeze.
Never carry passengers.
GENERAL WARNING
JETSON
®
is not liable for incidental damages or consequential
damages due directly or indirectly to the use of this product.
PLEASE NOTICE
Ensure that the Self locking/release button is inserted all the way in
to the middle folding mechanism/bridge.
BEFORE RIDING:
7
WARNINGS & GENERAL INFORMATION
Page 10

RECORD SERIAL NUMBERS:
Write down the serial number of your Jetson® Breeze. Keep this
information separately and in a safe place.
Each Jetson® Breeze has a unique serial number. These numbers can
provide information that may be useful later on for insurance claims and
in case of loss or theft.
Jetson® Breeze serial number location:
1. The number is on the top of the board, on the side of the front wheel.
2. Note the serial number and keep it in a safe place.
8
SERIAL NUMBER
Page 11
OPENING AND FOLDING
THE JETSON BREEZE
9
Page 12
10
To release the button (self locking/release button), hold the Steering
rod in one hand in a far point from the folding mechanism to create
a momentum, and nd a point in which there is no pressure on the
opening mechanism, meanwhile creating a gentle pull on the
M button in the other hand.
At the right point of no pressure the mechanism will be released and
the button will come out easily. That will enable the folding of the
handlebar.
Abuse in this act will harm and cause wear to the folding system.
IMPORTANT NOTE !
STEP 1
A. Slightly lift steering bar to
release weight
B. Pull Out self locking/
release button
OPENING THE JETSON® BREEZE
Page 13

STEP 3
Before driving you must ensure that the self locking/release button is
inserted all the way in to the central folding mechanism. Otherwise
you risk injuring yourself and damaging the folding system!
NOTICE:
STEP 2
B. Visually check that
self locking/release
button is inserted all
the way in
C. When the stem is
upright, you will hear
a click sound and it is
now secure.
A. Unfold rmly for locking
the folding mechanism
CLICK
A. Unfold T-Bar
11
OPENING THE JETSON® BREEZE
Page 14

12
STEP 4
Use your thumbs to help red
buttons to get in and out their
place in the foldable T-bar
Please make sure this is secure
before moving onto the next
step.
OPENING THE JETSON® BREEZE
Page 15

STEP 5
A. Open Quick Release
B. Pull Handle bar up to
adjust height
C. Lock Quick Release
You are now ready to ride.
Please make sure this is secure
before riding.
13
OPENING THE JETSON® BREEZE
Page 16

STEP 1
The telescopic steering rod: Start by opening the quick release, slide
the top steering rod into the main steering rod (where the JETSON®
logo is written) and lock the Quick Release.
The Jetson® Breeze has a unique folding mechanism, which enables
a quick and easy fold for carrying, transportation and storage.
NOTICE:
A. Open Quick Release
B. Slide Handle Bar down
C. Lock Quick Release
14
FOLDING THE JETSON® BREEZE
Page 17

STEP 2
Folding of the steering system is achieved by pulling out the self
locking/release button and folding the steering rod towards the
rear wheel until you hear a "click". That conrms the locking of the
mechanism. Make sure the self locking/release button is inserted all
the way in, both positions.
A. Push Steering pole Forward
B. Pull Out M Button
C. Fold back the Steering Part
until it's locked in it's place
You can fold the Jetson® Breeze more compact by folding T-bar as
well at any stage of the folding process. (Please refer to page 12,
step 4 for more detail.)
15
FOLDING THE JETSON® BREEZE
Page 18

BATTERY:
•
Do not operate motor while charging!
• Indicator lights in the throttle are intended only for general
knowledge (full /empty) and does not give a precise indication to
the battery status.
• Do not store the Jetson
®
Breeze for long terms (more than two
months) with a fully charged battery.
• From time to time, discharge the battery by riding the Jetson
®
Breeze
DO NOT USE THE BATTERY IF THE BOARD:
• Is Broken
• Emits an unusual odor or excessive heat
• Presents any leakage.
Avoid contact with substance oozing from the battery.
Keep the battery away from children and pets. Exposure to the
battery voltage can cause death or serious injury.
The use, storage or charging of the Jetson
®
Breeze battery outside
specied limits may result in the annulment of the warranty, battery
damage, and an ineffective battery charging.
16
OPERATION
Page 19

17
CHARGING AND BATTERY:
Your Jetson® Breeze has an external charger. The charging slot
opens by turning the cover and not trying to pull it off. Connect
the charger’s electric cable to an electrical outlet. Then connect
the charging cable to the scooter’s charging socket under the
footboard, on the right side at the rear. Always plug the charger into
the wall rst before the device. The charger offers a charging status
on the top of the charger:
Charging Light Red - Battery is charging.
Charging Light Green - Charging is complete.
(Please note: Always plug the charger into the wall rst before the
device. If the wall outlet doesn’t have power and you plug the
charger into the unit, it will light green, even if the battery is not full. So
always plug into the wall rst to make sure there is power.)
Average charge time is 4-5 hours. Charge the battery only using tools
approved by Jetson® Breeze.
To maximize your scooter's battery performance, fully charge it for 9
hours, once a month, or after each use of twelve hours.
Unplug the Jetson® Breeze from the outlet before installing, removing
the battery or performing any maintenance. It is dangerous to use
the Jetson® Breeze when plugged into an AC outlet. Electrical shock
can cause serious injury and damage the scooter.
Do not attempt to open the battery. Do not insert anything in the
battery and do not attempt to open its case with any tool. Inserting
an object into openings or in the battery can cause electrical
shock, injury, burns or re. Any attempt to open the battery case will
damage it and cause release of dangerous toxic substances.
Remove the battery and carry the Jetson
®
Breeze according to all
applicable local and national requirements.
OPERATION
Page 20

LCD DISPLAY THROTTLE FUNCTIONS
THROTTLE BUTTONS INTRODUCTION
• Travel speed
• Cruise control
• Distance
• Battery status
• 3 speed mode options
• Total trip distance
• Background light
• Automatic power-off
ON/OFF button
button
button
ACCELERATE thumb button
The display is set for units in
MPH and Miles by default.
18
THROTTLE OPERATION
Page 21

THROTTLE POWER ON
THROTTLE POWER OFF
AUTO OFF
Pressing to power the scooter on.
Press for three seconds to shut down the system.
DRIVE / SPEED CONTROL
Start twisting the thumb throttle with your thumb for accelerating.
Max twisting angle 60 ° for full speed.
After ve minutes of non using any function, the scooter will
automatically shut down.
19
THROTTLE OPERATION
Page 22

SPEED MODE
When power on
the default display is mode (appear at top right).
You may change it using the buttons.
Speed mode: this device is set with 3 speed modes,
for different skill modes and ages:
•Speed mode 3 - using full throttle will gain
maximum speed of the scooter, 18MPH at default.
•Speed mode 2 - using full throttle, the maximum speed is12MPH.
•Speed mode 1 - using full throttle, the maximum speed is 7MPH.
LCD BACKLIGHT (rst mode)
When power is on, you can turn on or off the LCD backlight by long press
There are 3 levels for different LCD brightness.
Press to change level from 1 to 3 (low/middle/high).
Long touch to save settings.
Short touch to enter second mode.
SPEED LIMIT MODE (second mode)
Default and highest speed 18MPH at full throttle.
You can dene other speed limits (from 7MPH to 18MPH).
Press or buttons to change speed limit number.
Long touch to save setting.
Short touch to enter third mode.
DISPLAY MODES
To enter the display modes settings :
Touch buttons for 2 seconds will enter in the rst mode.
Press to switch between modes
Long press will back to normal function menu.
SPEED
20
THROTTLE OPERATION
Page 23

DISPLAY MODES
• CRUISE CONTROL (third mode)
The default setting is Cruise Control off (letter "n" to indicate).
Press or to choose enable Cruise Control
(Letter "Y" to indicate).
Long touch to save setting.
Short touch to enter rst mode.
• TRIP RESET
Reset TRIP by long press
OTHER DISPLAY MODES ARE:
• TRIP- your trip distance since your last trip reset. Press to swap.
• ODO - your scooter total distance since its factory assembled,
or new / repaired battery was placed.
• Battery voltage - Your battery state.
• Error - your system has encountered an error. If you need further
assistance please call us at 1-888-976-9904 or email us at
customerservice@jetsonbike.com.
Please be aware that when using Cruise Control system,
releasing your thumb from the throttle will not slow you down,
you may ne yourself in danger or in danger of others.
WARNING!
CRUISE CONTROL
While riding at full speed for more then Ten (10) seconds, the Cruise Control will
turn on, (If this option is dened in "SETTINGS", it does not come as a default for
safety reasons).
When Cruise Control is operated, you can release your thumb from the throttle
and the scooter will continue to ride at full speed.
To slow down, simply apply pressure on one of the brake levers or press the
throttle again, the Cruise Control will be turned off.
When riding with cruise control and braking, Cruise Control system powers off.
21
THROTTLE OPERATION
Page 24

TIRES AIR PRESSURE:
Recommended tire pressure in tires: 40psi to 50psi.
SAFETY GEAR:
Helmet: most serious injuries that occur while riding are head. This could
be prevented by wearing a helmet.
MECHANICAL SAFETY TESTS:
Before using the Jetson® Breeze: Perform a visual inspection that all
screws and nuts are tight and in place.
Tires and wheels: check the tires for signs of wear. To do this- spin them
to make sure that they are not yet in the need of replacing. Make sure
that the wheels are freely rotating from the brakes. If not, take
the Jetson® Breeze to the authorized distributor.
Before each ride, always check your brakes and mechanical function.
As you accelerate, lean forwards.
As you brake, tilt your weight backwards!
TIP
WARNING !
Certain countries or regions require safety devices or gear. It is
your responsibility to know the state laws, and follow them.
22
SAFETY
Page 25

SAFE DRIVING:
1. Get to know the Jetson® Breeze before driving it. Test your control
over it. Make your turns slowly and cautiously, and give yourself
stopping distance.
2. Your driving capability - to gain control over your scooter, practice
your rst ride on the Jetson® Breeze in an open space with no
obstacles to disturb you.
DRIVING TECHNIQUE:
Foot Position - before riding put your foot as close as possible to the
front section of the scooter, and your other foot on the ground. Make
sure that your driving route is clear.
To start riding, boost yourself forwards (as on non-motorized
scooters) with your foot that is on the ground. Please do not push
the thumb throttle all the way down, please get accustomed to the
acceleration of the throttle.
Immediately after, slowly press the thumb throttle downwards, tilt your
body forwards so you shouldn’t fall backwards during acceleration.
The Jetson
®
Breeze will be in motion.
Avoid putting your body pressure on the handle bars in acceleration
and deceleration!
Keep one foot behind the other, (it's more comfortable to place one
foot forward and the other one turned backwards at 70-90°, like on
skate/surfboard). It will help you gain more stability.
Riding, like most sports, involves risks of injury and damage. By
choosing to ride the Jetson
®
Breeze the responsibility and all
inherent risk is on you. It is crucial that you know, understand and
act according to safety rules.
NOTICE
23
DRIVING TECHNIQUE
Page 26

DRIVING TECHNIQUE:
Turns - The turns on the Jetson® Breeze are done as on surf/ski/
snowboard. The handlebar should be in parallel to the body. Before
turning look at the approaching direction and make sure turning is
safe.
Braking - Tilt your weight backwards so that the brake action will come
through the feet and not trough the handlebar and steering system.
It is best to learn how to adjust your center of gravity when braking,
otherwise, you could fall forward.
24
DRIVING TECHNIQUE
Page 27

JETSON BREEZE
QUICK MAINTENANCE
25
Page 28

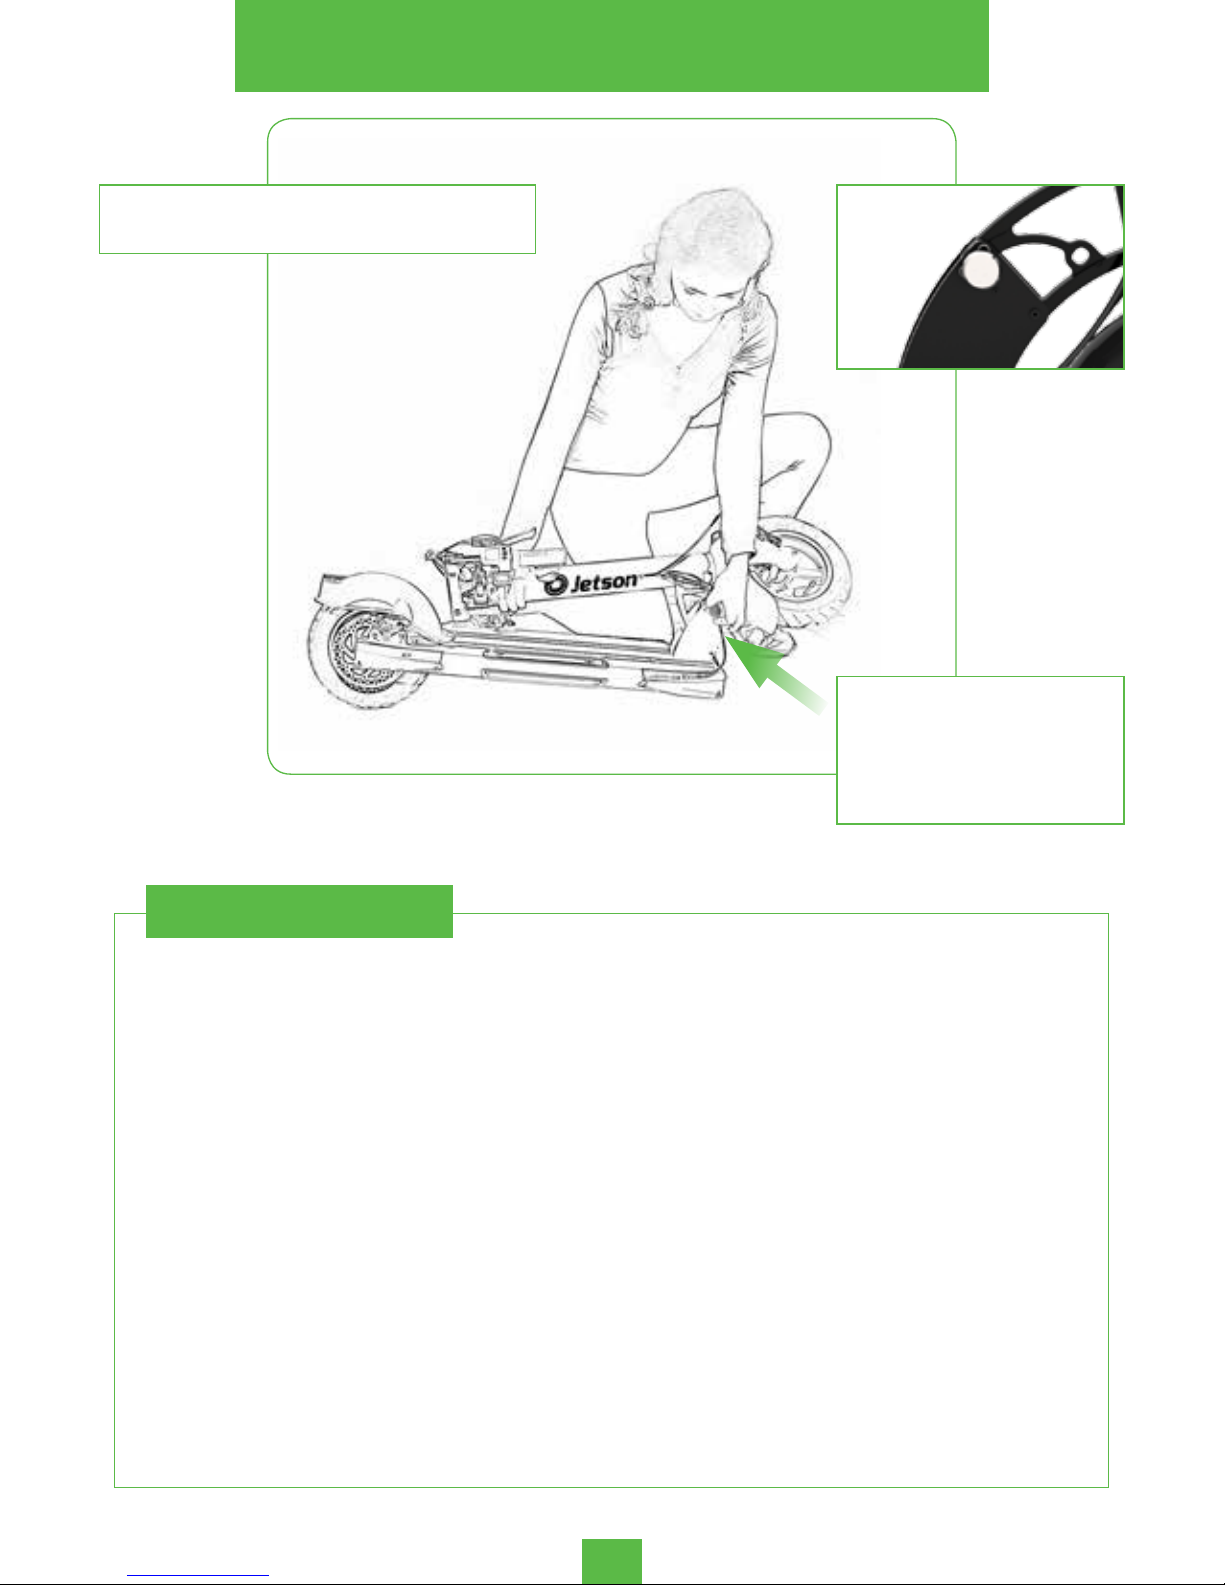
REQUIRED TOOLS
The Jetson® Breeze comes with a toolset and pump with all of these
accessories, however, if it is lost, this is what is needed:
3 mm Allen key
Professional spoons Tire Pump
19 mm ring key
The Jetson® Breeze was assembled by professional technicians. Any
attempt to independently x or change the Jetson
®
Breeze or parts
of it in any way, can cause damage to the Jetson
®
Breeze folding
electric scoooter, and can cancel the manufacturer warranty given
upon delivery.
26
JETSON® BREEZE QUICK MAINTENANCE
Page 29

1. Make sure the Jetson® Breeze is unplugged and powered off.
2. Place the Jetson
®
Breeze on a high stable surface where it's placed
only on its body, so that rear and front wheels will be in the air.
3. Use 3 mm Allen key to open both rear plastic covers. (See Page 28)
4. From the scooter’s right side gently disconnect all motor connectors
attached to wires. (See Page 29)
5. Use the 19 mm ring key to disassemble motor nuts and motors.
(See page 30)
6. Remember the exact order and place of washers on each side of
the motor. (See page 30)
7. Use professional spoons (not plastic or small ones) to dismount tire
from motor, be careful not to damage the motor, rim, tire and tube,
use liquid soap around the rim to help tire slide out of the rim.
(See Page 32)
8. Fix or replace tube.
9. Put the tire back in place. Use liquid soap around the rim to put the
tire back in place. Do not use any tools for placing back tire on the
rim, use hands only! (See Page 33).
10. Check that your repair is completely done by pumping air to 45 psi.
Into the wheel.
11. In order to put the Jetson
®
breeze back together do all the steps in
reverse order. (See Page 34)
MAKE SURE THE JETSON
®
BREEZE IS UNPLUGGED AND POWERED OFF!
NOTICE !
27
JETSON® BREEZE REAR FLAT TIRE REPAIR
Page 30

WITH THE JETSON® BREEZE FLIPPED UPSIDE DOWN OPEN
BOTH REAR PLASTIC COVERS
Use 3 mm Allen key
1
Always slide plastic cover aligned with the scooter’s
body lines as shown with green arrow.
Do not pull the covers as shown with the red arrow.
2
28
JETSON® BREEZE REAR FLAT TIRE REPAIR
Page 31

1
2
Gently, unplug the motor connector
When assembling the motor back, note the arrows on both plugs, make
sure they are aligned or you may damage the connector
IMPORTANT NOTE
29
JETSON® BREEZE REAR FLAT TIRE REPAIR
Page 32

DISASSEMBLE MOTOR WHEEL
Use 19mm ring key
to open nuts
1
Remove the washer
2
Disassemble nuts
and washers from
both sides
3
30
JETSON® BREEZE REAR FLAT TIRE REPAIR
Page 33

Carefully slide out
the Motor wheel
DON'T PLACE MOTOR
ON THE FLOOR WITH
ROTOR (DISC BRAKE)
TOUCHING THE
GROUND, TO PREVENT
IT FROM BENDING!
DISASSEMBLE MOTOR WHEEL
31
JETSON® BREEZE REAR FLAT TIRE REPAIR
Page 34

REPLACING A TUBE
Start next to the air
valve.
Use professional
levers to dismount
at tire from Wheel
Motor Rim
1
Be careful not to
damage the motor!
Slowly open about
1/4 of the Tire using
the levers
2
Use hand to help
tire slide out of the
rest of the tire out of
the rim
3
32
JETSON® BREEZE REAR FLAT TIRE REPAIR
Page 35

Remove inner tube to x or
replace it if needed
4
Place tire back on rim using your hands only
(You can use lubricant such as soap
to ease this operation)
DO NOT USE ANY TOOLS FOR PLACING BACK
TIRE ON THE RIM, USE HANDS ONLY !
REPLACING A TUBE
5
33
JETSON® BREEZE REAR FLAT TIRE REPAIR
Page 36

PLACING THE MOTOR WHEEL BACK
Slide back Motor.
Check right order
of washers at both
sides!
1
Note inner washers
are in place.
2
Safety extension lock
of the washer must
enter this slot on both
sides of motor hinge
Note external
washer with lug is in
correct slot!
Plug in the motor
connector all the
way in.
3
4
34
JETSON® BREEZE REAR FLAT TIRE REPAIR
Page 37

Align plastic
cover lines to the
scooter’s body
lines.
1
The body
construction rail is
showing through the
slot of the plastic.
Slide in plastic
cover
Both corners of
Aluminium and
plastic should be
aligned.
Align plastic
cover hole with
4mm hole on the
scooter’s body
and screw it.
PLASTIC COVER ASSEMBLY
2
3
Note that aluminium
prole seen through
the hole!
35
JETSON® BREEZE REAR FLAT TIRE REPAIR
Page 38

TO QUALIFY FOR WARRANTY SERVICE:
1. You must present a copy of the sales receipt from an approved retail partner
within 90 days of purchase.
2. This product can not be used for rental or commercial use.
3. This product can not be used for competition.
LIMITATIONS OF LIABILITY
• This Limited 1 Year Warranty is non-transferable after the Product’s initial sale.
• No unapproved modications can be made to the Product, its performance
or otherwise, in orderfor this Limited 1 Year Warranty to remain in effect.
• No reimbursement is provided for towing, loss of time, loss of use, inconvenience,
incidental or consequential damages.
• Warranty is void if weather related water damage is determined. Owner is
responsible for storage and protection from weather.
• Jetson® makes no warranty with respect to products or trade accessories
not made by Jetson®, including, but not limited to, motors, tires, wheels and
batteries, such products or trade accessories, such items being subject to the
original manufacturer’s warranty, if any.
• This Limited 1 Year Warranty does not cover minor surface blemishes, rips,
tears, or other cosmetic damages due to normal use, or other intentional or
unintentional damage to the Product.
• This Limited 1 Year Warranty will not cover any damage which results from the
application of improper cleaners, solvents or chemicals to the Product, water
damage, smoke or soot, or from exposure to saltwater, sea breeze or salt.
• This Limited 1 Year Warranty will not cover any damage which results from
aging, such as fading of paint, deterioration of plated surfaces, deterioration of
rubber or plastics, or rusting.
• This Limited 1 Year Warranty does not cover improper repair or misdiagnosis of
problem.
• This Limited 1 Year Warranty covers only parts and labor due to manufacturer
defect.
Damage due to misuse or neglect, use other than as specied in the Owner’s
Manual, or use under abnormal conditions are not covered by this Limited 1
Year Warranty.
OWNER’S WARRANTY RESPONSIBILITIES
As the vehicle owner, you are responsible for the performance of the required
maintenance. You should maintain a record of all maintenance performed
your vehicle and retain all receipts covering maintenance on your vehicle. You
may be denied a warranty claim solely because of your failure to ensure the
performance of all scheduled maintenance or lack of maintenance records or
receipts. As the vehicle owner, you should be aware that you may be denied
your warranty coverage if your vehicle or a part has failed due to abuse, neglect,
improper maintenance, or unapproved modications. For any issue regarding
your Jetson® product, call toll free 1-(888) 976-9904.
36
LIMITED 1 YEAR WARRANTY
Page 39

Please complete and mail this card within 10 days of purchase.
Name: _____________________________________________________________________
Age: _______________________________________________________________________
Address: ___________________________________________________________________
City, State, Zip: ______________________________________________________________
Email: ______________________________________________________________________
Home Phone: __________________Work Phone: ________________________________
Purchase Date: ___________ Purchased from:__________________________________
Serial Number: ______________________________________________________________
Product: ____________________________________________________________________
Gender: _______________ Occupation: ________________________________________
Is this your rst Jetson product? ______________________________________________
Other similar product owned before: _________________________________________
How did you hear about the Jetson
®
Breeze? __________________________________
____________________________________________________________________________
Complete this form and mail it to:
Attention: Product Registration
Jetson Electric Bikes
1 Rewe Street
Brooklyn, NY 11211
37
PRODUCT REGISTRATION
Page 40

A LEADER
IN ELECTRIC MOBILITY
888-976-9904
WWW.JETSONBIKE.COM
 Loading...