

Page 1
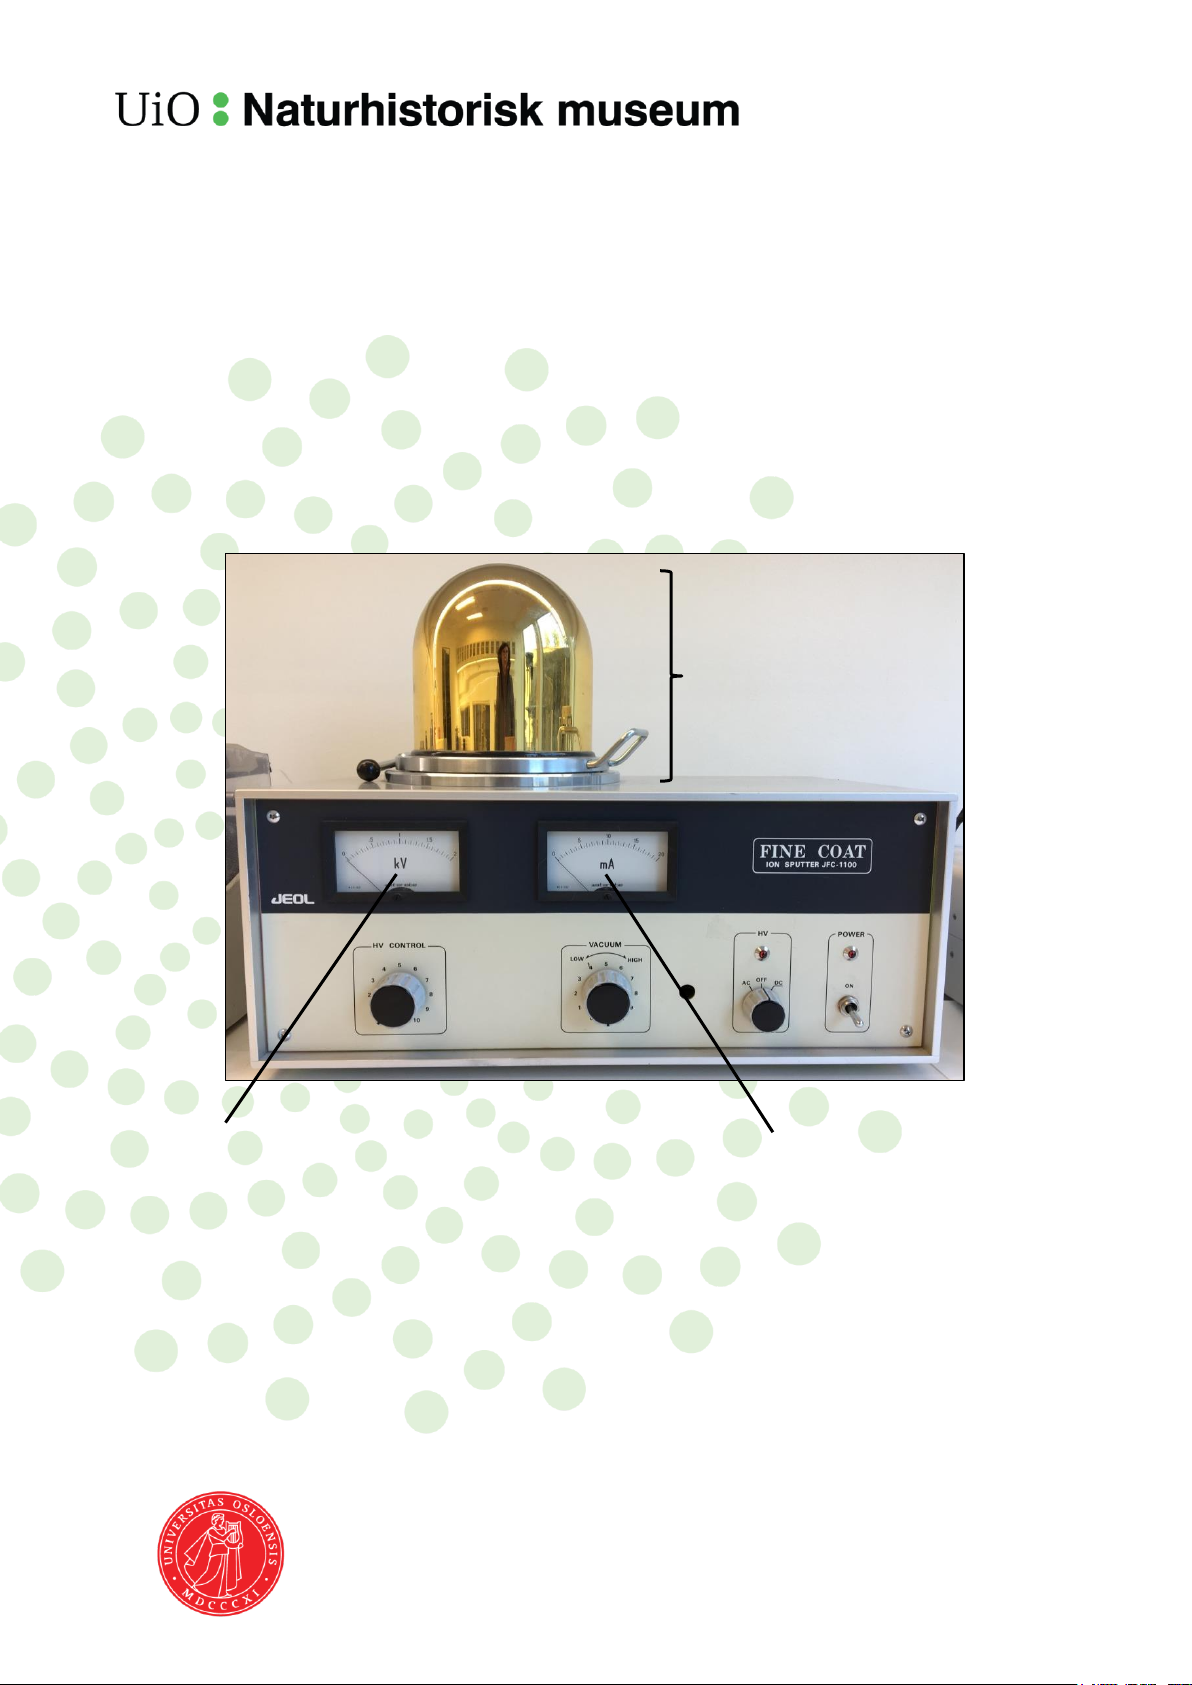
Chamber
Voltmeter
Ammeter
Jeol Fine Coat Ion Sputter JFC-1100
User instructions
Operation of this equipment is restricted to trained personnel familiar with the user
instructions, general safety precautions, and laboratory rules. Contact the laboratory
manager or your supervisor/group leader to get permission to use this equipment.
Updated | Oppdatert 10.07.2018
Page 2
Routine sample coating
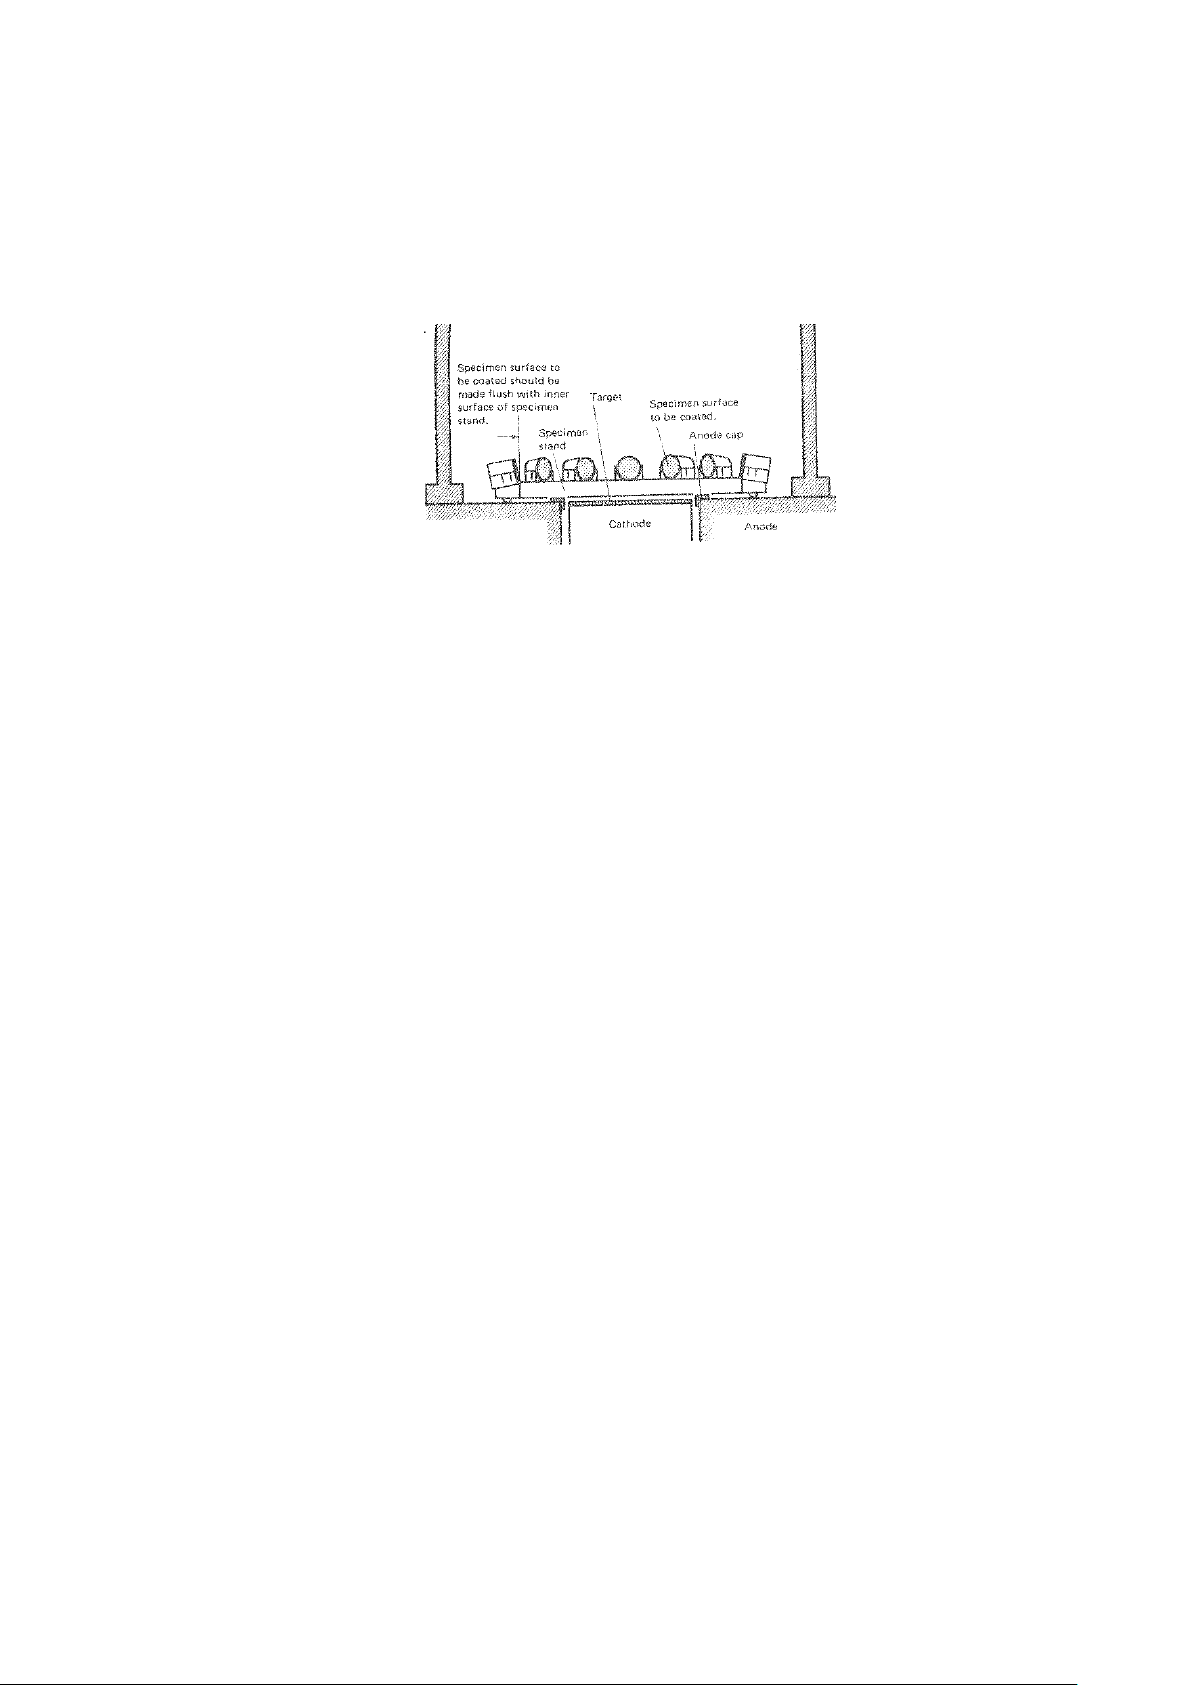
Fig. 1: How to mount specimens for coating.
Use gloves to handle the samples in order to avoid contamination of your sample and of the chamber.
1. Connect the power cord to the electricity plug.
2. Open the chamber and place the sample(s) on the sample holder (Fig.1).
3. Set the knobs and controls on the panel as follows:
POWER OFF
HV SWITCH OFF
HV CONTROL 0
VACUUM CONTROL 10
IMPORTANT: rotate the knobs slowly.
4. Set the POWER switch to ON (the lamp lights up).
5. After about 3 minutes, set the HV switch to DC (the lamp lights up).
6. Gradually turn the HV CONTROL knob clockwise until the voltmeter indicates 400–500 V (the
knob is positioned at 2/3 and the ammeter indicates less than 2 mA).
NOTE: If the ammeter reading is over 2 mA, it indicates a lack of vacuum degree. In this case,
turn off the HV switch and continue evacuation for a while.
7. Rotate the VACUUM knob counterclockwise until the ammeter indicated 5–10 mA at a voltage
reading from 1200 V (the knob is positioned at 7.5/8). The interior of the bell jar turns light red,
indicating that coating is under way (not easy to see in our instrument due to the layers of
coating in the glass and illumination in the room).
8. Continue coating for 5–7 minutes. This gives sufficient coating for microscopy.
9. Set the HV CONTROL knob to 0.
10. Set the HV switch OFF (the lamp goes off).
11. Turn the VACUUM knob fully clockwise.
12. Set the POWER switch to OFF (the lamp goes off). Air leaks into the bell jar with a hissing
sound (which lasts for about 40 seconds).
13. Open the chamber and remove your sample(s).
14. Close the chamber and disconnect the power cord from the electricity plug.
Page 3

Page 4

Experimental Conditions
For the preparation/coating of conodont specimens, the coating conditions are as follows:
Voltage: 1200 V (5–10 mA) and coating time of 4 min
Process is stopped and stubs are rotated by ~90°
Continue coating for 4 min
In case of severe charging of conodont specimens, the following coating conditions have been followed:
Coating time set to 10 min
Process is stopped and stubs are rotated by ~120°
10 min coating time
Process is stopped and stubs are rotated by 120° more (total: 240°)
10 min coating time
Coating Time: 10 min x 3 times
1
 Loading...