

Page 1
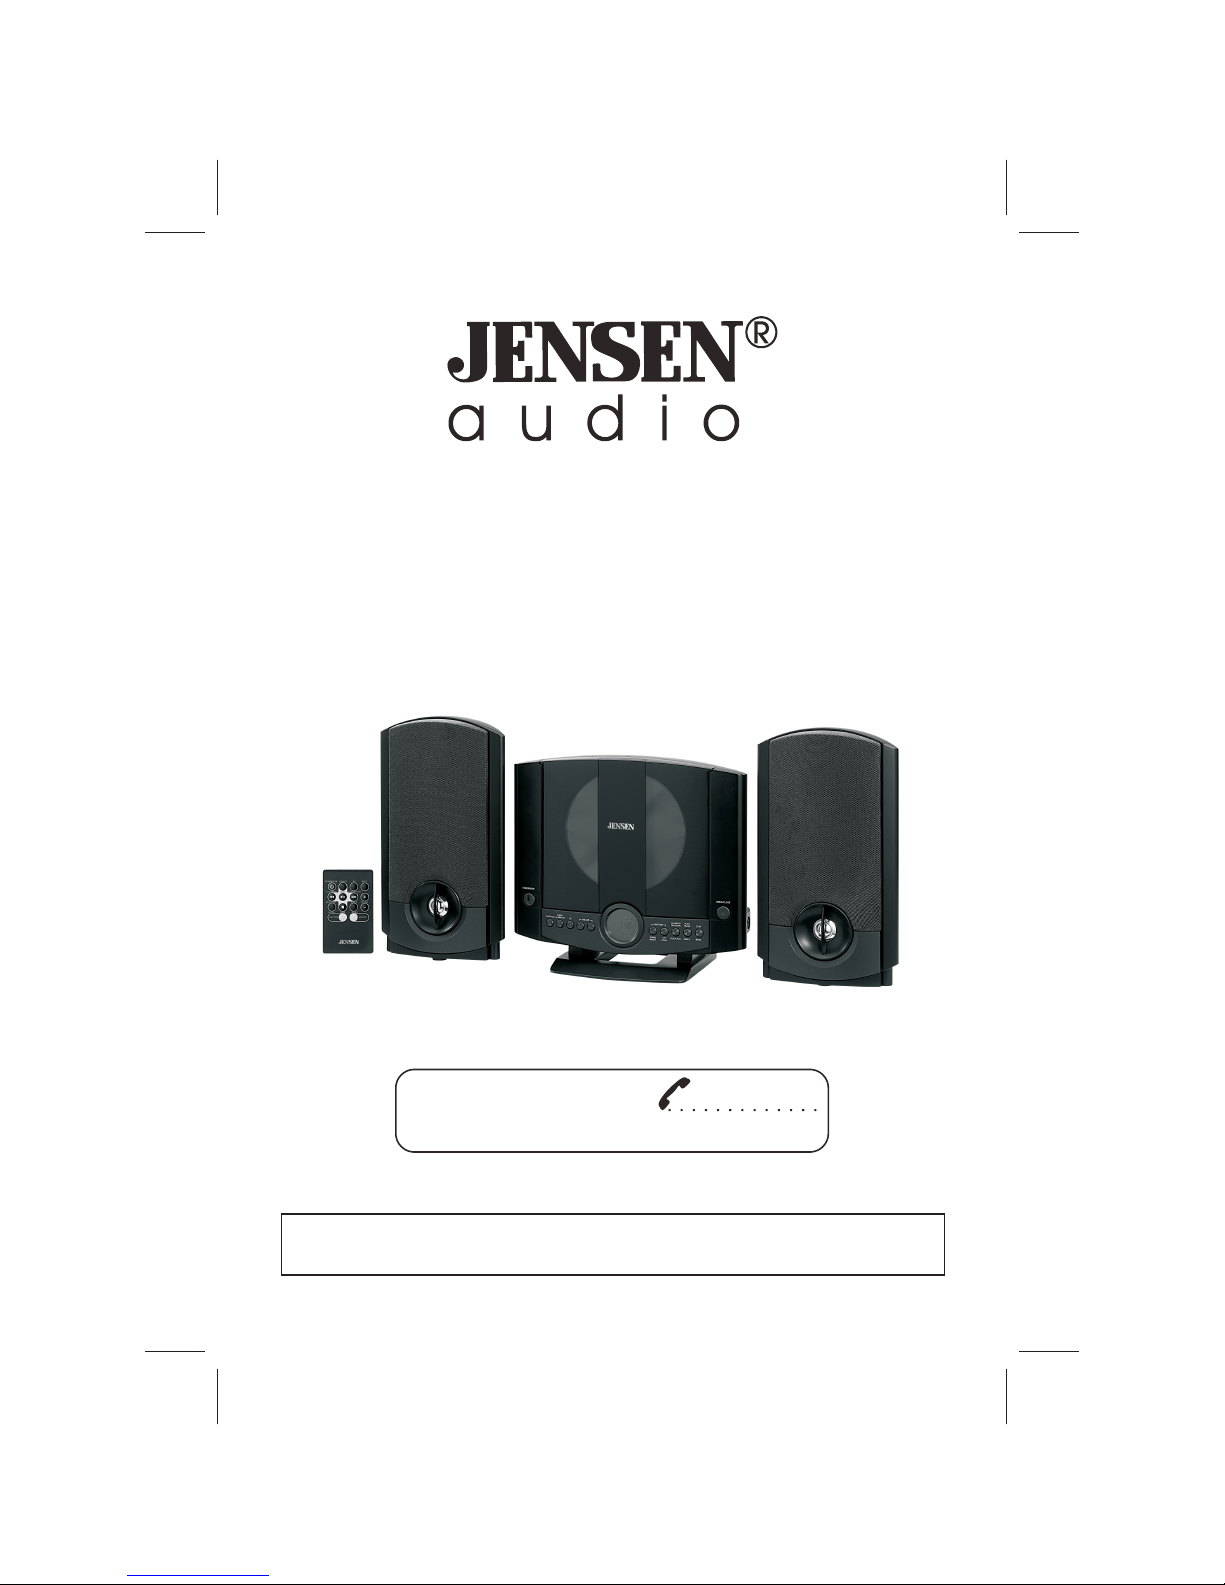
MODEL JMC-200
Wall Mountable Micro System
USER MANUAL
Need technical help. Call
Mon - Fri, 9 am to 5 pm
1300 366 144
PLEASE READ THIS USER MANUAL COMPLETELY BEFORE OPERATING THIS
UNIT AND RETAIN THIS MANUAL FOR FUTURE REFERENCE.
Page 2

1
DEAR JENSEN® CUSTOMER
Selecting fine audio equipment such as the unit you've just purchased is only the start of
your musical enjoyment. Now it's time to consider how you can maximize the fun and
excitement your equipment offers. This manufacturer and the Electronic Industries
Association's Consumer Electronics Group want you to get the most out of your
equipment by playing it at a safe level. One that lets the sound come through loud and
clear without annoying blaring or distortion and, most importantly, without affecting your
sensitive hearing.
Sound can be deceiving. Over time your hearing "comfort level" adapts to higher
volumes of sound. So what sounds "normal" can actually be loud and harmful to your
hearing. Guard against this by setting your equipment at a safe level BEFORE your
hearing adapts.
To establish a safe level:
• Start your volume control at a low setting.
• Slowly increase the sound until you can hear it comfortably and clearly, and without
distortion.
Once you have established a comfortable sound level:
• Set the dial and leave it there.
Taking a minute to do this now will help to prevent hearing damage or loss in the future.
After all, we want you listening for a lifetime.
We Want You Listening For a Lifetime
Used wisely, your new sound equipment will provide a lifetime of fun and enjoyment.
Since hearing damage from loud noise is often undetectable until it is too late, this
manufacturer and the Electronic Industries Association's Consumer Electronics Group
recommend you avoid prolonged exposure to excessive noise.
Customer's Record:
The serial number of this product is found on its back cover. You should note the serial
number of this unit in the space provided as a permanent record of your purchase to aid
in identification in the event of theft of loss.
Model Number: JMC-200
Serial Number: ____________________
Page 3
2
WARNING
TO REDUCE THE RISK OF FIRE OR SHOCK HAZARD, DO NOT EXPOSE THIS
APPLIANCE TO RAIN OR MOISTURE.
IMPORTANT SAFETY INSTRUCTIONS
1. Read these instructions
2. Keep these instructions
3. Heed all warnings.
4. Follow all instructions.
5. Do not use this apparatus near water.
6. Clean only with dry cloth.
7. Do not block any ventilation openings. Install in accordance with these instructions.
8. Do not install near any heat sources such as radiators, heat registers, stoves, or
other apparatus (including amplifiers) that produce heat.
9. Protect the power cord from being walked on or pinched particularly at plugs,
convenience receptacles, and the point where they exit from the apparatus.
10. Unplug this apparatus during lightning storms or when unused for long periods of
time.
11. Refer all servicing to qualified service personnel. Servicing is required when the
apparatus has been damaged in any way, such as power-supply cord or plug is
damaged, liquid has been spilled or objects have fallen into the apparatus, the
apparatus has been exposed to rain or moisture, does not operate normally, or has
been dropped.
12. This appliance shall not be exposed to dripping or splashing water and that no
object filled with liquids such as vases shall be placed on the apparatus.
13. Main plug is used as disconnect device and it should remain readily operable during
intended use. In order to disconnect the apparatus from the mains completely, the
mains plug should be disconnected form the mains socket outlet completely.
14. Do not attempt to dismantle, open or repair this product yourself. If a fault occurs,
seek advice from your local qualified service technician or contact the distributor via
the telephone number at the back of this instruction manual.
CAUTION
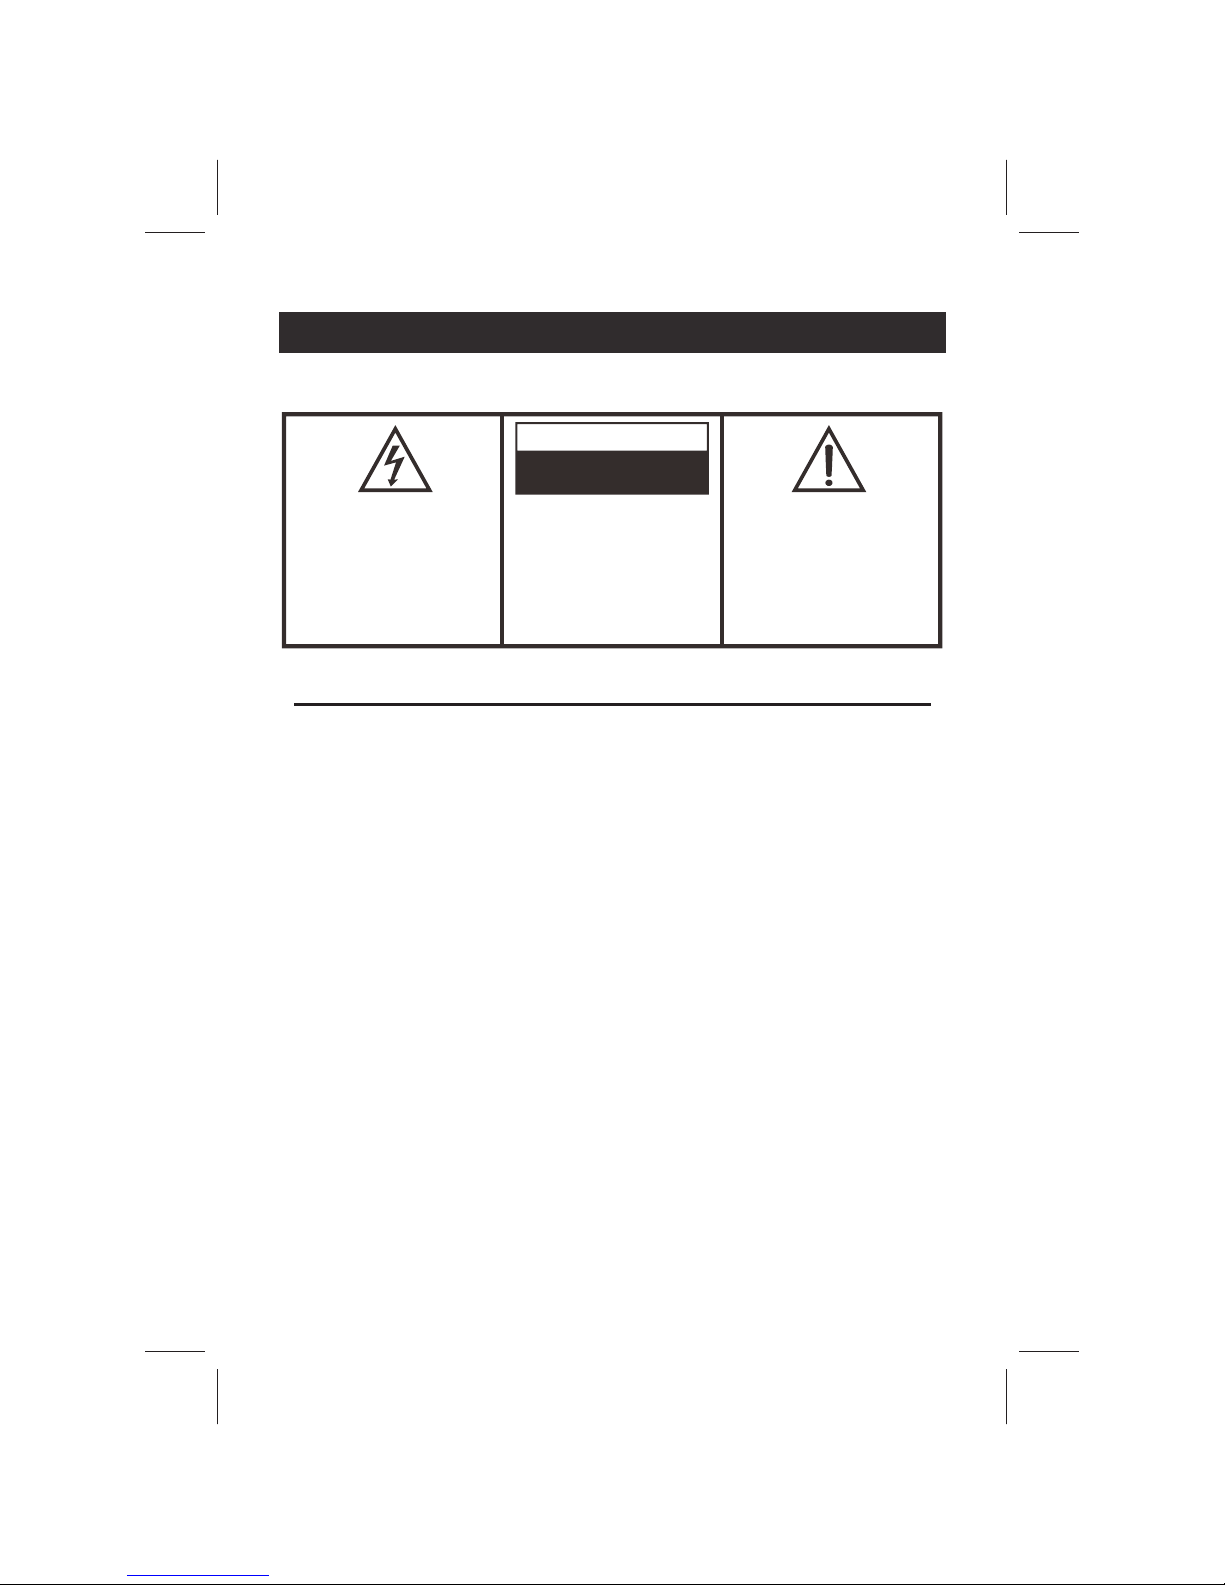
RISK OF ELECTRIC SHOCK
DO NOT OPEN
WARNING: TO REDUCE THE
RISK OF ELECTRIC SHOCK,
DO NOT REMOVE COVER
(OR BACK). NO USER
SERVICEABLE PARTS
INSIDE. REFER SERVICING
TO QUALIFIED SERVICE
PERSONNEL.
The lightning flash with arrowhead
symbol, within an equilateral
triangle is intended to alert the
user to the presence of
uninsulated dangerous voltage
within the product's enclosure that
may be of sufficient magnitude to
constitute a risk of electric shock to
persons.
The exclamation point within an
equilateral triangle is intended to
alert the user to the presence of
important operating and
maintenance (servicing)
instructions in the literature
accompanying the appliance.
Page 4
3
CAUTION
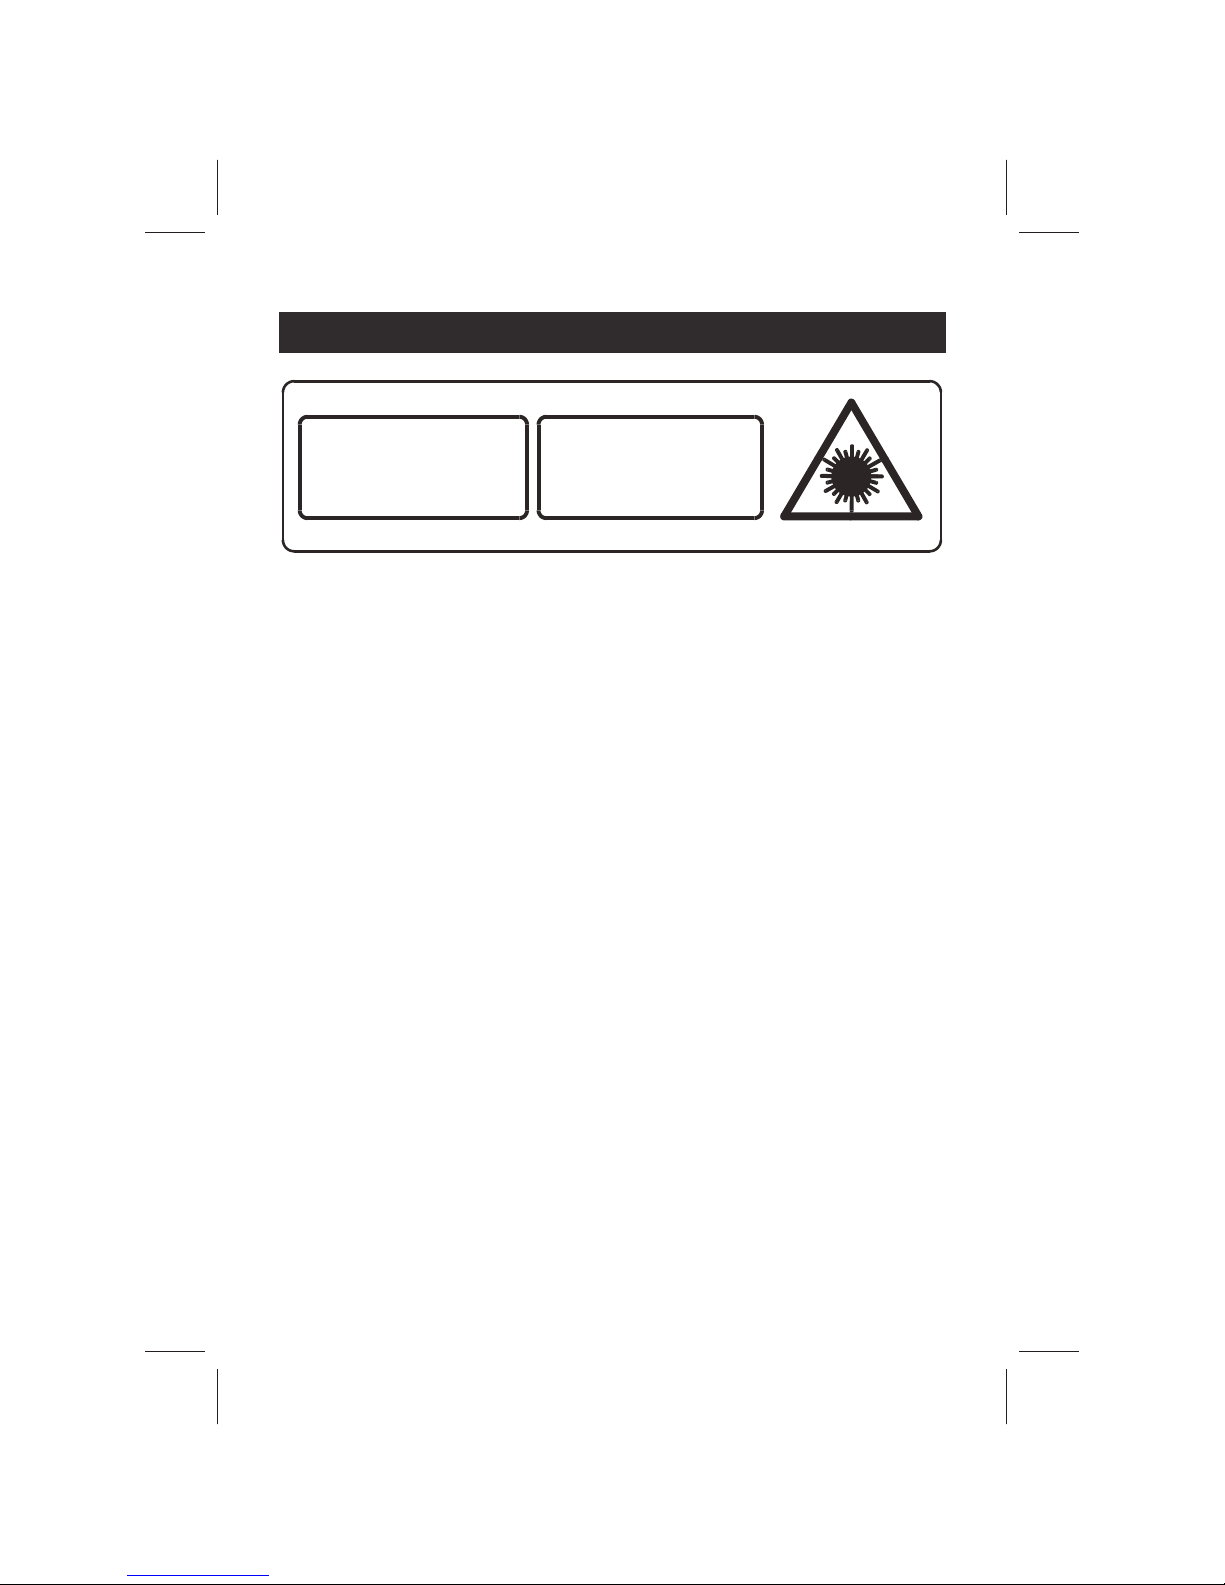
CLASS 1 LASER PRODUCT
CLASS 1 LASER PRODUCT
APPAREIL LASER DE CLASSE 1
PRODUCTO LASER DE CLASE 1
CAUTION
INVISIBLE LASER RADIATION
WHEN OPEN AND INTERLOCKS
DEFEATED.
AVOID EXPOSURE TO BEAM
This product contains a low power laser device.
Follow the advice below for safe operations.
ON PROTECTION AGAINST LASER ENERGY EXPOSURE
• As the laser beam used in this compact disc player is harmful to the eyes, do not
attempt to disassemble the casing.
• Stop operation immediately if any liquid or solid object should fall into the cabinet.
• Do not touch the lens or poke at it. If you do, you may damage the lens and the player
may not operate properly.
• Do not put anything in the safety slot. If you do, the laser diode will be ON when the CD
door is still open.
• If the unit is not to be used for a long period of time, make sure that all power sources
are disconnected from the unit. Remove all batteries from the battery compartment,
and unplug the AC cord from the wall outlet. Make it a practice to remove the AC cord
by grasping the main body and not by pulling the cord.
• This unit employs a laser. The use of controls or adjustment or performance of
procedures other than those specified here may result in exposure to hazardous
radiation.
ON PLACEMENT
• Do not use the unit in places which are extremely hot
,
cold, dusty or humid.
• Place the unit on a flat and even surface.
• Do not restrict the air-flow of the unit by placing it in a place with poor ventilation, by
covering it with a cloth or by placing it on a carpet.
ON CONDENSATION
• When left in a heated room where it is warm and damp, water droplets or
condensation may form inside the unit.
• When there is condensation inside the unit, the unit may not function normally.
• Let it stand for 1 to 2 hours before turning the power on, or gradually heat the room up
and dry the unit before use.
Page 5

4
CAUTION:
USAGE OF CONTROLS OR ADJUSTMENTS OR PERFORMANCE OF PROCEDURES
OTHER THAN THOSE SPECIFIED HEREIN MAY RESULT IN HAZARDOUS
RADIATION EXPOSURE.
THIS UNIT SHOULD NOT BE ADJUSTED OR REPAIRED BY ANYONE EXCEPT
QUALIFIED SERVICE PERSONNEL.
SHOULD ANY TROUBLE OCCUR, REMOVE THE POWER SOURCE AND REFER
SERVICING TO QUALIFIED PERSONNEL.
IMPORTANT:
SINCE MOVEMENT OF THE CD MECHANISM AND THE SENSITIVE CIRCUITY MAY
CAUSE INTERFERENCE TO THE RADIO TUNER NEARBY, SWITCH THIS UNIT OFF
WHILE OPERATING OTHER RADIO DEVICES.
PRECAUTION FORE USE
DO NOT CONNECT THE UNIT TO THE MAINS BEFORE CHECKING THE MAINS
VOLTAGE AND ALL OTHER CONNECTIONS HAVE BEEN MADE.
DO NOT COVER ANY VENTS AND MAKE SURE THAT THERE IS A SPACE OF
SEVERAL CENTIMETERS AROUND THE UNIT FOR VENTILATION.
IMPORTANT NOTES
Avoid installing the unit in locations described below:
Places exposed to direct sunlight or close to heat radiating appliances such as
electric heaters.
Places subject to constant vibration.
Dusty, humid or moist places.
PROTECT YOUR FURNITURE!!
This model is equipped with non-skid rubber 'feet' to prevent the product from moving
when you operate the controls. These 'feet' are made from non-migrating rubber material
specially formulated to avoid leaving any marks or stains on your furniture. However
certain types of oil based furniture polishes, wood preservatives, or cleaning sprays may
cause the rubber 'feet' to soften, and leave marks or a rubber residue on the furniture. To
prevent any damage to your furniture we strongly recommend that you purchase small
self-adhesive felt pads, available at hardware stores and home improvement centers
everywhere, and apply these pads to the bottom of the rubber 'feet' before you place the
product on fine wooden furniture.
Page 6
5
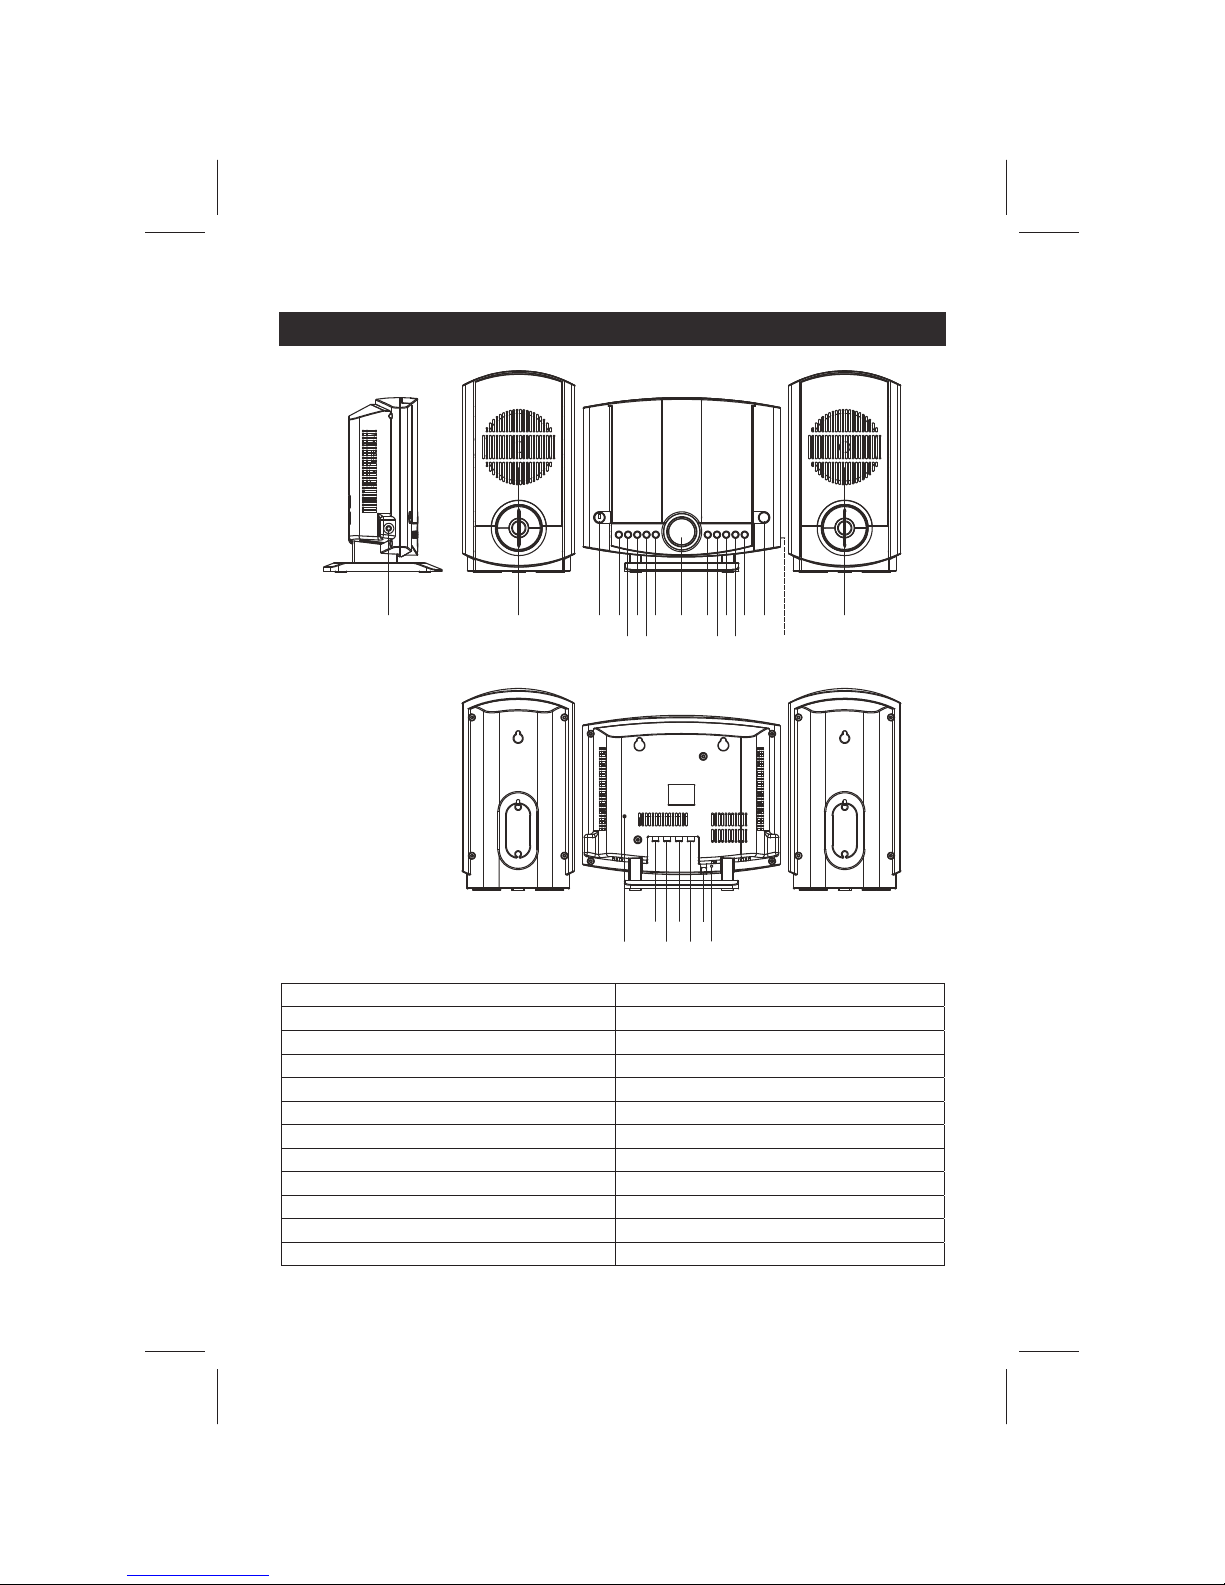
LOCATION OF CONTROLS
12 3
4
5
6 7 8 9 10
11
12
13
14
15
2
16
17
18
19
20 22
21
23
1. LINE-IN Jack 13. Play/Pause/ Mem +
2. Speakers 14. Stop/Band
3. Standby/On 15. CD door Open/Close
4. Function (CD/RADIO/AUX) 16. Right Speaker Out Jack
5. Sleep/Alarm Set 17. Left Speaker Out Jack
6. EQ (Rock/Pop/Jazz/Classic) 18. Right AUX-IN Jack
7. Volume - 19. Left AUX-IN Jack
8. Volume + 20. Reset
9. LCD Display 21. Power Cord
10. Skip/Search/Tune down/Minute 22. FM Wire Antenna
11. Skip/Search/Tune Up/Hour 23. Headphones Jack
12. CD Mode/Program/Clock Adj.
Page 7
6
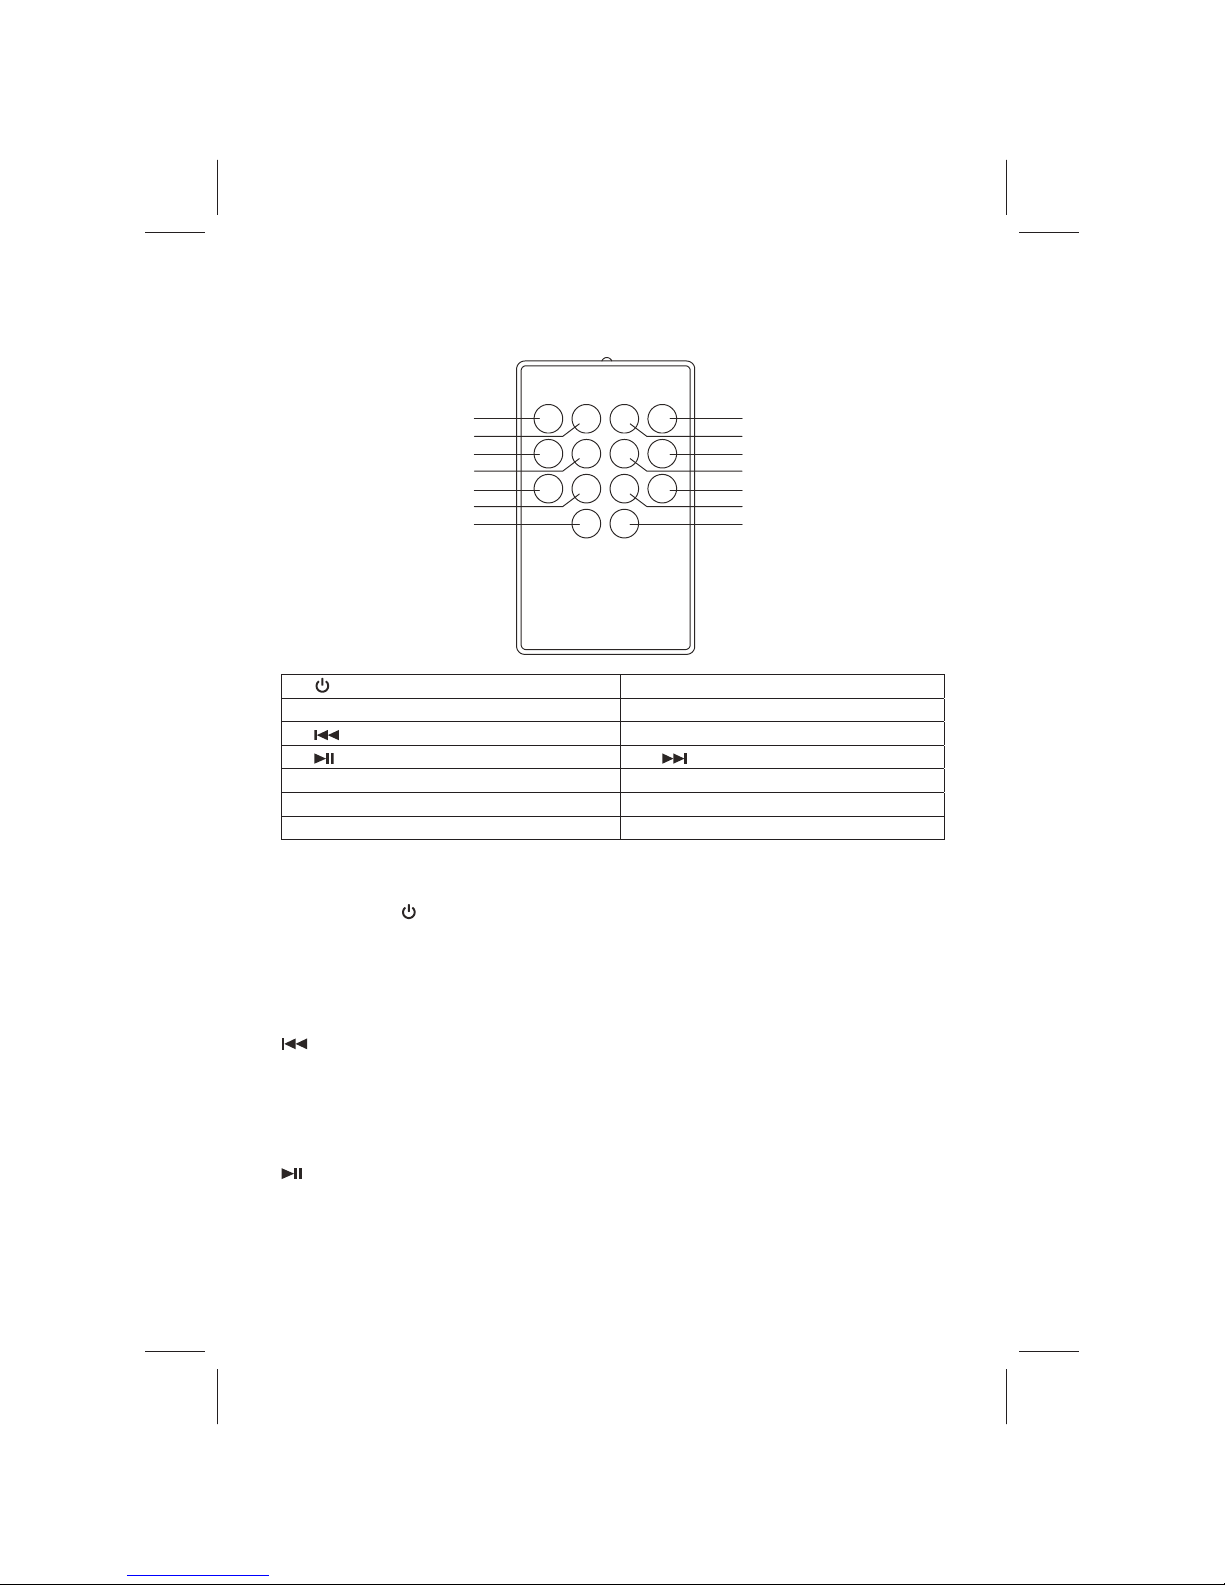
REMOTE CONTROL TRANSMITTER
1
2
3
4
5
6
7
8
9
10
11
12
13
14
1.
Standby/On 8. Mute
2. Display 9. EQ (Rock/Pop/Jazz/Classic)
3. /Tune DN/Minute 10. Volume +
4. /Memory + 11. /Tune Up/Hour
5. CD Mode/PGM/Clock Adjust 12. Volume -
6. ■/Band 13. Sleep/Alarm Set
7. Function (CD/RADIO/AUX) 14. Snooze
BUTTON DESCRIPTIONS
STANDBY/ON
PRESS TO SWITCH THE SYSTEM BETWEEN
STANDBY AND POWER ON MODE
DISPLAY PRESS TO DISPLAY TIME AND AGAIN TO RESUME TO
CURRENT FUNCTION MODE
/ TUNE DN / MIN IN CD MODE: TO SELECT PREVIOUS OR BACK
SEARCH CD TRACK.
IN TUNER MODE: PRESS TO STEP DOWN OF
FREQUENCY
IN CLOCK SETTING MODE: PRESS TO SET MINUTE
/ MEM + IN CD MODE: PRESS ONCE TO START PLAYBACK.
PRESS ONCE AGAIN TO STOP THE DISC PLAY
TEMPORARILY AND AGAIN TO RESUME PLAY
IN TUNER MODE: PRESS TO CALL OUT THE PRESET
MEMORY IN ORDER
Page 8

7
MODE /PGM /CLK-ADJ IN STANDBY MODE, FOR CLOCK SETTING
IN TUNER MODE, FOR PRE-SETTING OF RADIO
STATION INTO MEMORY
IN CD STOP MODE, FOR PROGRAM FUNCTION AND
IN PLAY MODE FOR SELECTING REPEAT 1, REPEAT
ALL OR RANDOM FUNCTION
■
/BAND IN CD MODE: PRESS TO TERMINATE CD PLAYBACK
IN TUNER MODE: PRESS TO SELECT AM OR FM
BAND
FUNCTION IN POWER ON MODE: PRESS REPEATEDLY TO
SELECT CD, TUNER OR AUX FUNCTION.
IN ALARM MODE: PRESS REPEATEDLY TO SELECT
WAKE TO CD, TUNER OR AUX.
MUTE PRESS TO TURN THE MUTE FUNCTION AND OFF
EQ PRESS TO SELECT THE PRESET EQ FOR
ENJOYMENT
VOLUME + PRESS TO INCREASE OR DECREASE VOLUME
/ TUNE UP / HOUR N CD MODE: TO SELECT NEXT OR FORWARD
SEARCH CD TRACK.
IN TUNER MODE: PRESS TO STEP UP OF
FREQUENCY
IN CLOCK SETTING MODE: PRESS TO SET HOUR
VOLUME - PRESS TO DECREASE VOLUME
SLEEP/ALARM SET IN POWER ON MODE: PRESS TO ACTIVATE AND SET
SLEEP TIME
IN STANDBY MODE: PRESS TO SET ALARM TIME
SNOOZE PRESS TO DEACTIVATE THE WAKE UP MODE
TEMPORARILY (9 MINUTES)
Page 9

8
POWER SOURCE
This Micro System is designed to operate on AC 240V ~ 50Hz line power. The Remote
Control unit operates from 1 “CR2025” Lithium battery (Included).
GETTING STARTED
ATTACHING THE SPEAKERS
NOTE: The right and left speakers are NOT interchangeable. The speaker with RED plug
fits only on the right side. The speaker with WHITE plug fits only on the left side.
1. Place the right speaker on the right side and the left speaker on the left side of the
main unit and unwind the speaker wires from behind the speaker boxes.
2. Insert the right speaker plug into Right Speaker Out Jack (16)
3. Insert the left speaker plug into Left Speaker Out Jack (17).
4. Wrap the remaining wire behind each speaker box.
NOTE:
Please be sure both speaker plugs are plugged into the jacks before the unit is
powered.
AC POWER CONNECTION
Connect the power cord to an AC 240V~ 50Hz power source.
NOTE: Please check and be sure your local Voltage is match to the voltage
requirements on the back plate of player. The mains plug is used as disconnect device,
the disconnect device shall remain readily operable.
Remarks:
In case of malfunction due to electrostatic discharge (ESD), reset the unit by unplugging
and reconnecting to the AC outlet again to resume to normal operation or by pressing the
Reset Switch (20) with a pointed object.
ACTIVATING THE REMOTE CONTROL TRANSMITTER
Remove the plastic insulator tag sticking out of the Battery Compartment of the Remote
Control by pulling on it. Once the tag is removed, the Remote Control will be ready for
use.
BATTERY CARE
i. If the unit is not to be used for an extended period of time, remove the battery. Old or
leaking batteries can cause damage to the Remote Control.
ii. Do not dispose of batteries in fire, batteries may explode or leak.
Page 10
9
BATTERY REPLACEMENT
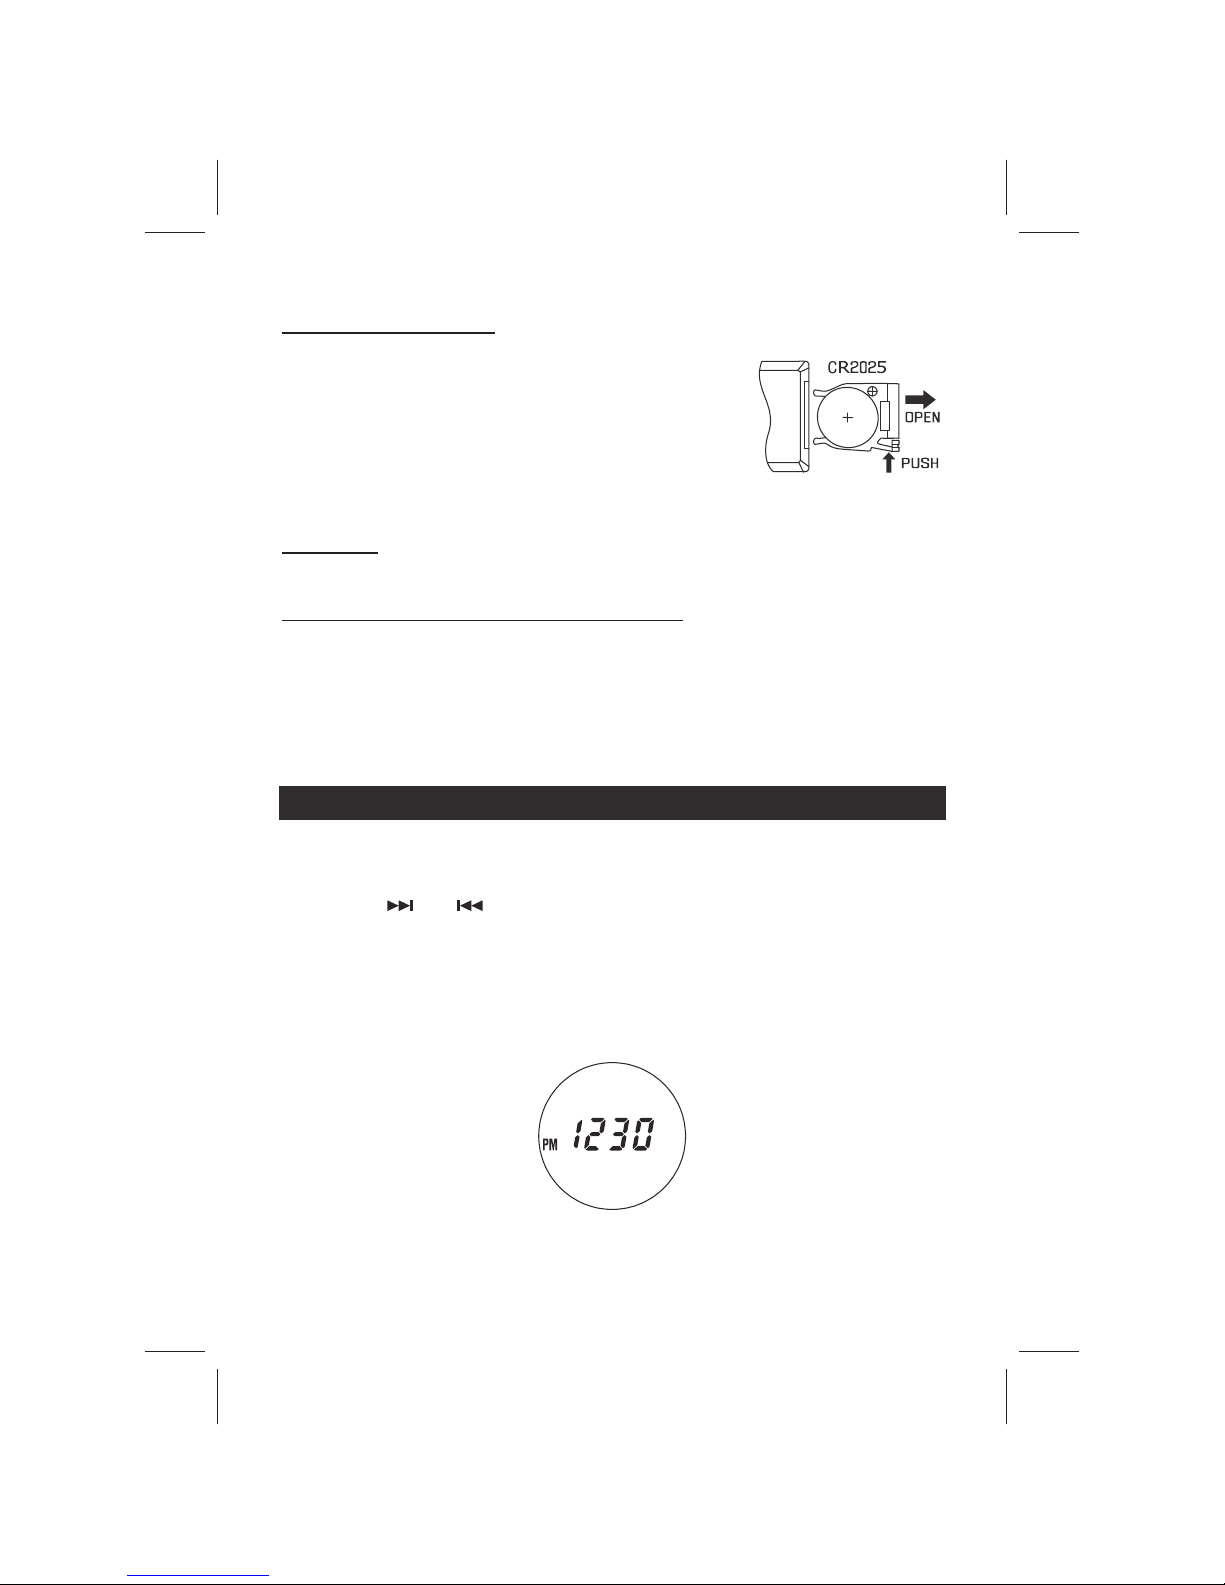
When the battery becomes weak, the operating distance of
the Remote Control is greatly reduced and you will need to
replace the Lithium battery.
1. Remove the battery compartment from bottom of the
Remote Control.
2. Install 1 “CR2025” Lithium battery with the positive side
facing up.
3. Replace the battery compartment.
IMPORTANT: Be sure that the battery is installed correctly. Wrong polarity may damage the
Remote Control and void the warranty.
USING THE REMOTE CONTROLLER CORRECTLY
Point the Remote Control at the SENSOR located on the front of the System.
The function of the remote buttons are the same as the corresponding controls on the
main unit.
The performance of the infrared SENSOR may be degraded causing unreliable
operation if there is a strong ambient light source in the same room.
The recommended effective distance for remote operation is about 10-15 feet.
CLOCK SETTING
The following steps can be accomplished by using either the remote or controls with the
same function on JMC-200. For example the current time is set at 12:30 PM.
1. Press the CLK.ADJ Button when the player is in Standby mode.
2. Press the
and button repeatedly to adjust the hour and minute
until the
desired time is displayed.
NOTE:
Be sure to observe the PM indicator to make sure that the time is set correctly for AM or
PM. If the PM indicator is 'On', the time displayed is "PM". If the PM indicator does not
light, the time displayed is "AM ".
3. Press the CLK.ADJ button to confirm your setting.
NOTE: The Player will exit the Clock Setting mode automatically if no button is being
pressed in a period of about 10 seconds.
Page 11
10
RADIO OPERATION
The following procedures can be accomplished by using the remote or controls on the
JMC-200.
RADIO TUNING
1. Press the Standby/On Button to turn on the unit.
2. Press the FUNCTION Button to operate the unit in the radio mode.
TO: PRESS:
Switch between AM/FM band
■
repeatedly
Scan radio station automatically or for 1 second
Stop auto-tuning or again
Scan radio station manually or repeatedly
Control the volume VOLUME + / VOLUME Switch between the preset EQ EQ repeatedly
Switch between Clock and Radio display DISPLAY
Stop output from speakers MUTE Button
Note:
1. When listening to the FM radio, fully extend the Wire Antenna to insure maximum
tuner sensitivity.
2. As automatic tuning depends on the signal strength of the broadcasting station,
week stations are sometimes skipped. Tune manually to find the week stations.
On the other hand, with a strong signal, the tuner may stop before it reaches
optimum setting. Tune manually for the best reception. The Stereo Indicator, “ST”,
will light when a strong FM Stereo program is received.
3. For AM Reception: The receiver has a built-in bar antenna. If reception is week,
slightly rotate or re-position the unit will usually improve the reception.
TO PRESET STATIONS
This unit is equipped with 10 preset memories for the AM band and 20 preset memories
for the FM band. Once they are preset, they can be instantly accessed by pressing the
/MEM+ Button.
1. Press the Standby/On
Button to turn on the unit.
2. Press the FUNCTION Button to operate the unit in the radio mode.
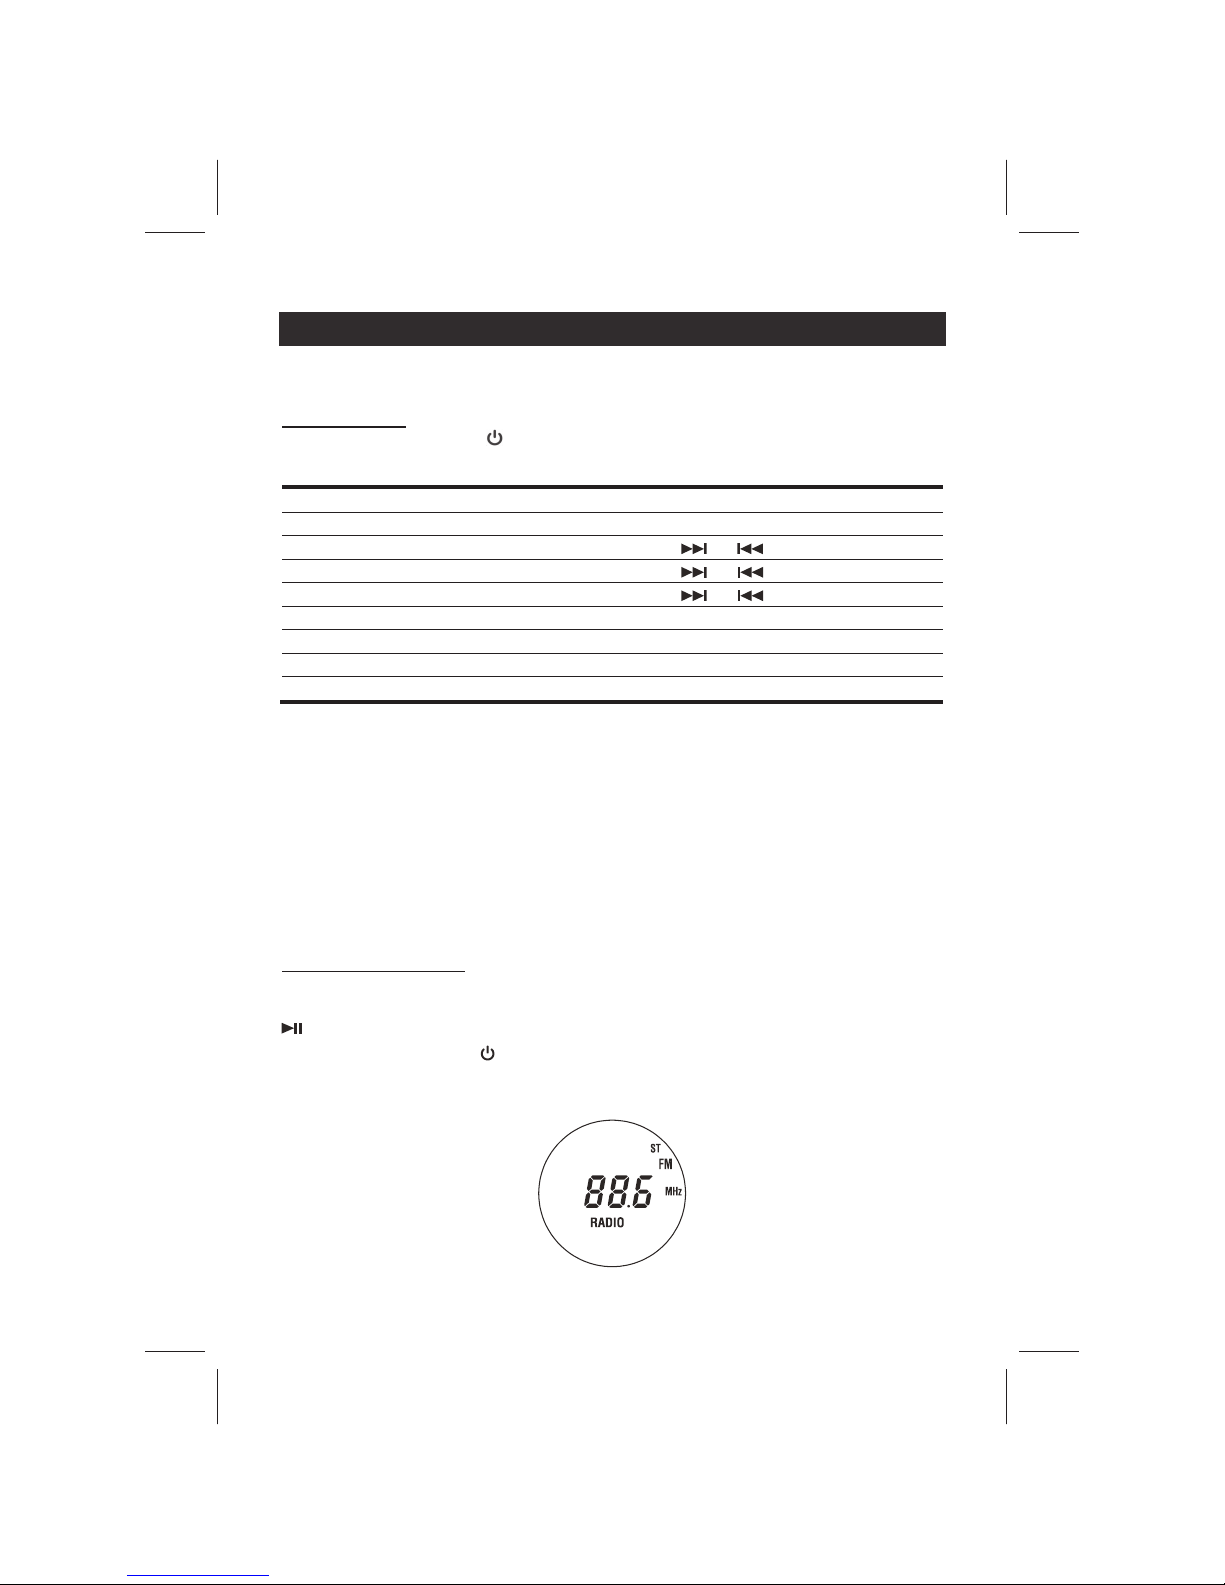
3. Tune to a desired station. For example a stereo station of 88.6 MHz is tuned.
Page 12
11
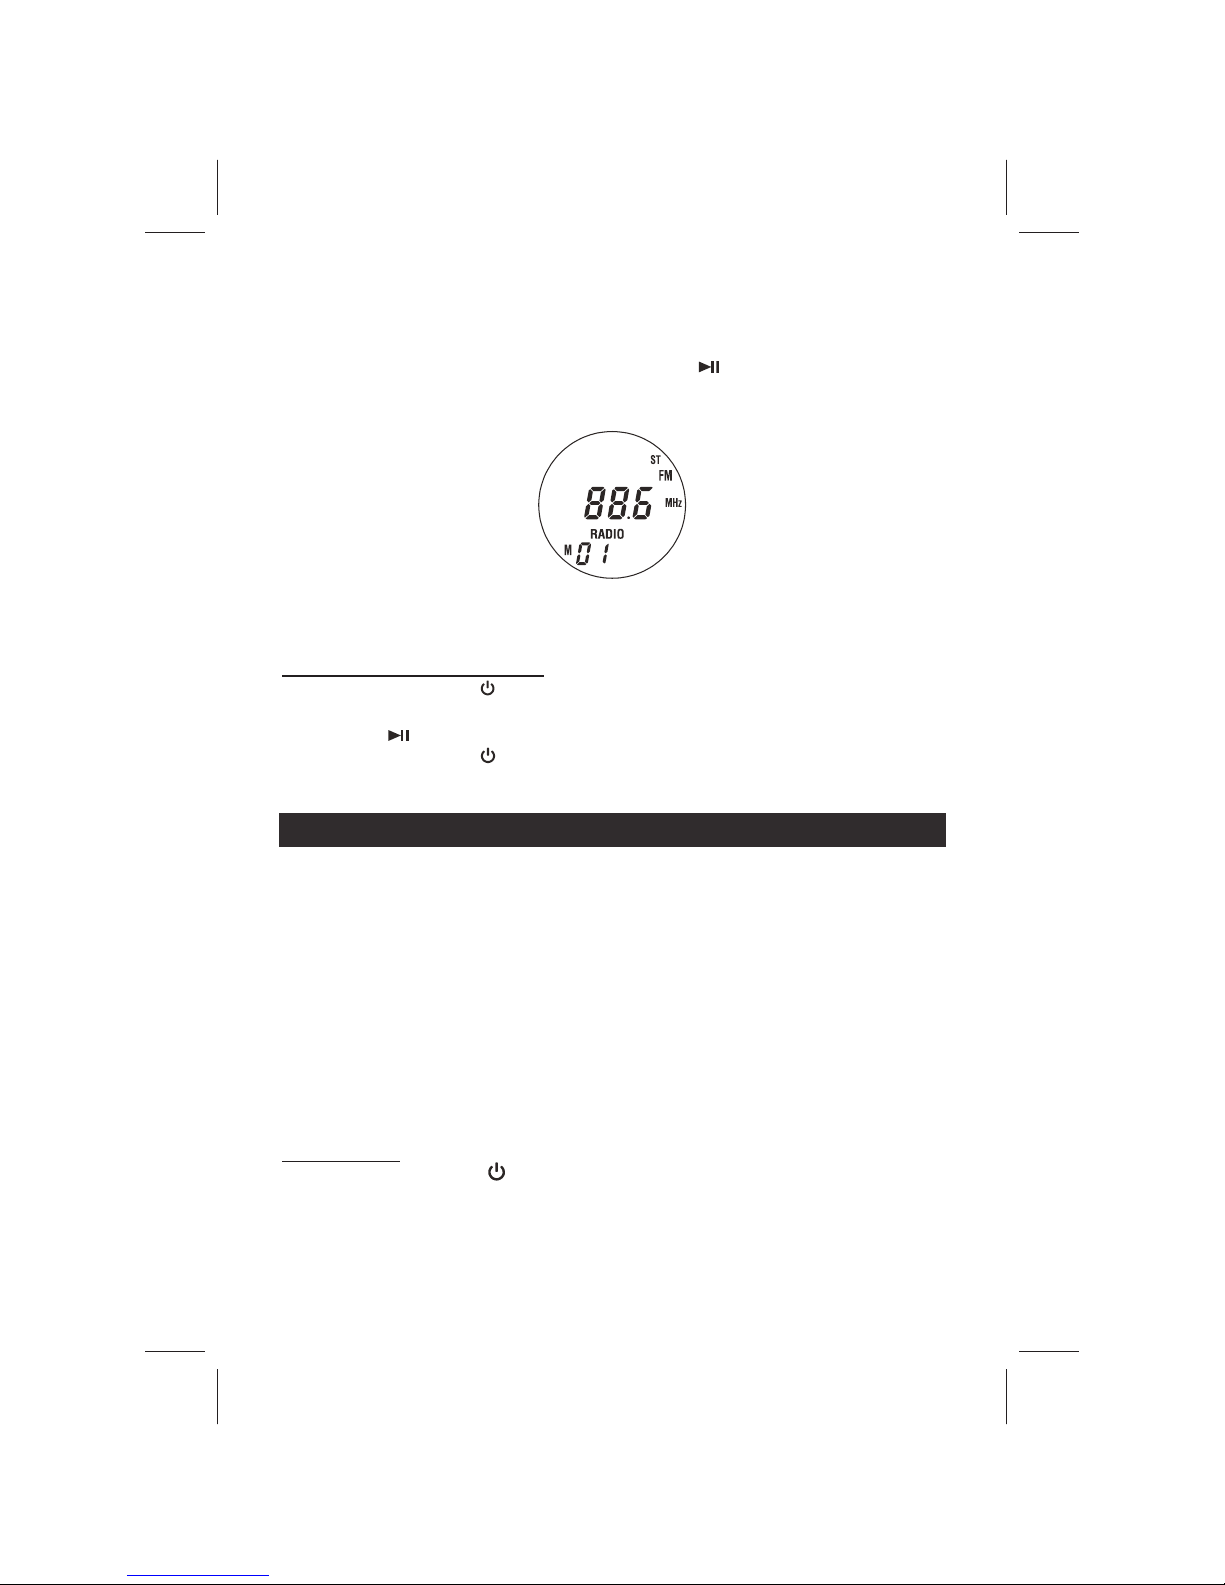
4. Press the MODE/PGM/CLK ADJ Button once. The Preset Channel Number “01” with
the flashing Preset Indicator, “M”, will appear in the left bottom of the Display.
5. While the Preset Indicator “M” is blinking, press the
/MEM+ Button to select the
desired preset channel.
6. Press the MODE/PGM/CLK ADJ Button again to confirm.
7. Tune to another station and repeat steps 4 to 6 to store the station in another preset
channel.
TO RECEIVE PRESET STATIONS
1. Press the Standby/On Button to turn on the unit.
2. Press the FUNCTION Button to operate the unit in the radio mode.
3. Press the
/MEM+ button to select the desired preset channels.
4. Press the Standby/On
Button again to turn off the unit.
CD OPERATIONS
The following procedures can be accomplished by using the remote or controls on the unit.
The icon indicates the task can only be done on the unit.
NOTE: This player plays not only commercial CDs but self-complied CD-D/RW discs.
Do not attempt to play CD-ROM, CDI, VCD, DVD or computer CDs.
Notes on CD-R/RW Discs
• Because of non-standardized format definition/production of CD-R/RW, playback
quality & performance are not guaranteed.
• Manufacturer is not responsible for the playability of CD-R/RW due to recording
conditions such as PC performance, writing software, media ability, etc.
• Do not attach a label or seal to either side of the CD-R/RW disc. It may cause a
malfunction.
PLAYING A CD
1. Press the Standby/On Button to turn on the unit.
2. Press the FUNCTION Button to enter CD mode if required. “disc” will appear in the
Display if no disc is loaded.
Page 13
12
3. Press the OPEN/CLOSE Button (15) to open the CD door. Place a CD, with label
side frontward, inside the CD compartment and then press the OPEN/CLOSE
Button (15) again to close the CD door.
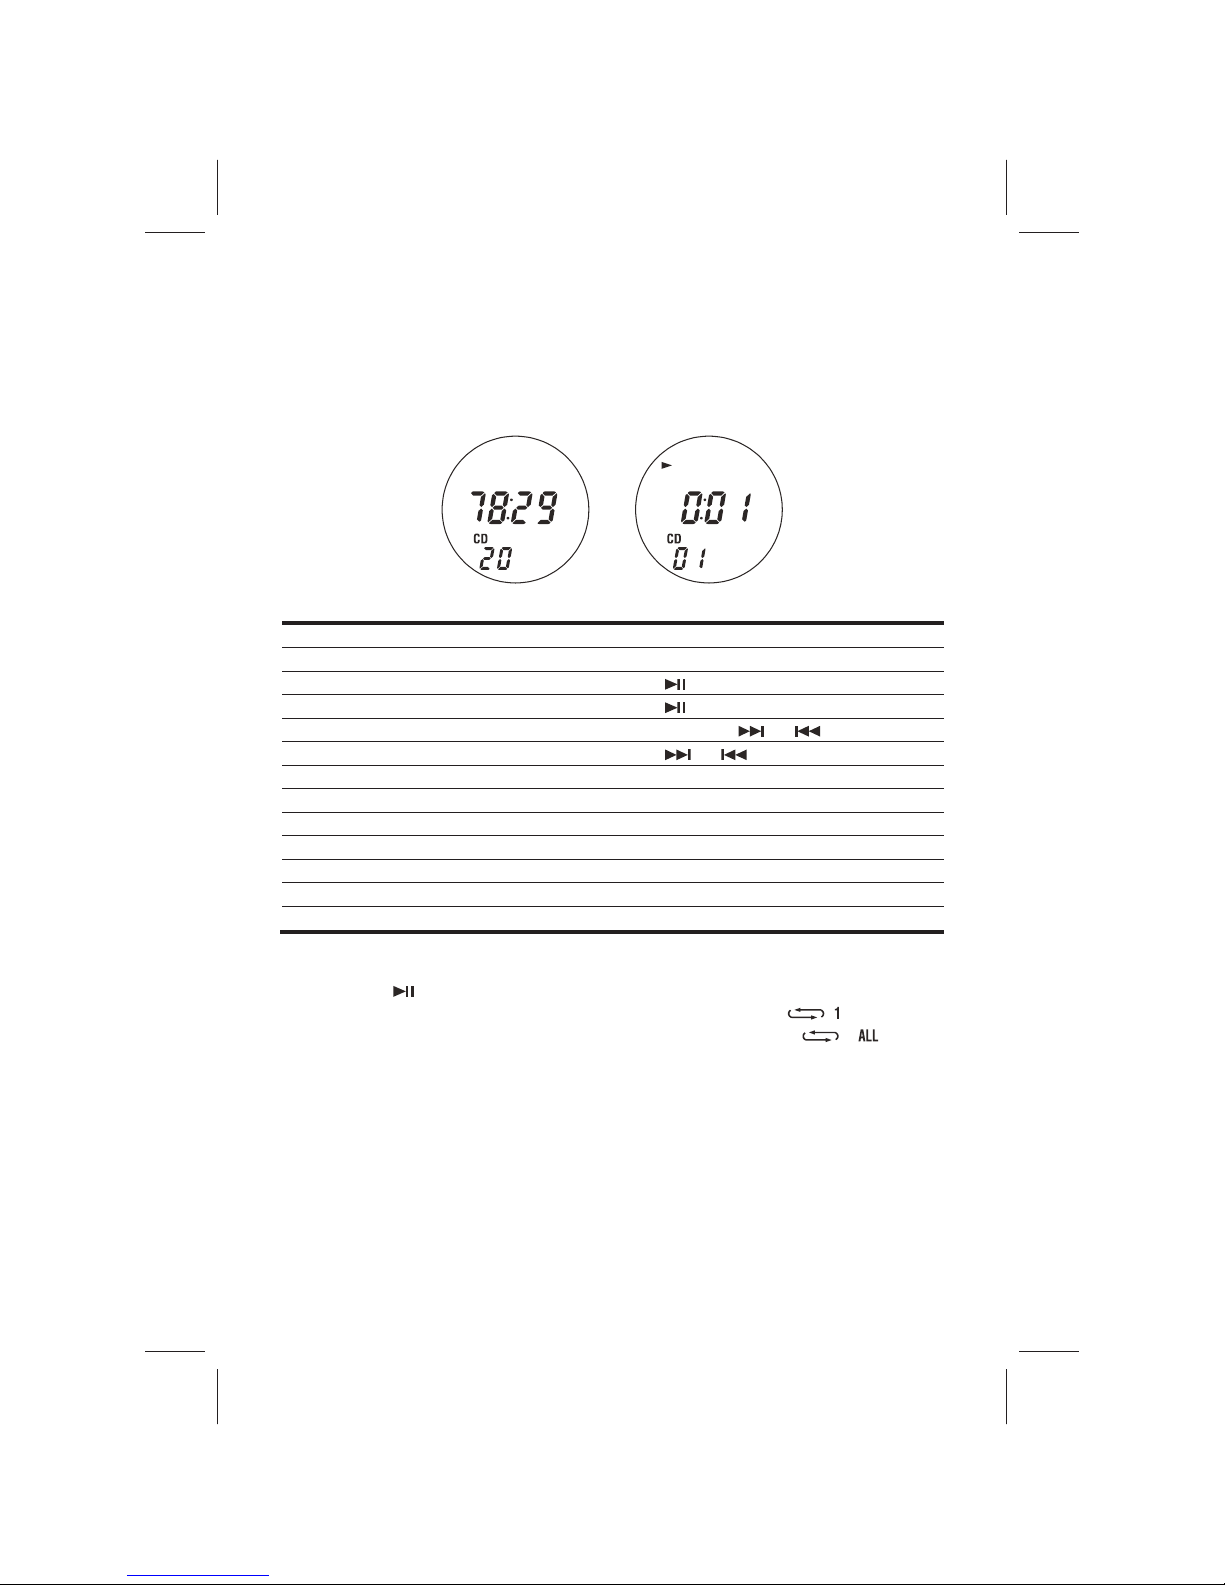
4. After a few seconds, the total number of tracks on the disc and total playing time will
appear in the Display and playback of the first track begins.
TO: PRESS:
Stop play
■
Pause play
Resume play after pause
Skip forward or backward And hold or
Skip tracks or briefly
Repeat current track MODE/PGM/CLK ADJ
Repeat all tracks MODE/PGM/CLK ADJ twice
Random play MODE/PGM/CLK ADJ three times
Control the volume VOLUME+ / VOLUMESwitch between the Preset EQ EQ repeatedly
Switch between Clock and CD display DISPLAY
Stop output from speakers MUTE
Note:
- Press the
button, the elapsed time blinks to indicate the CD is in the pause mode.
- Press the MODE/PGM/CLK ADJ Button once, repeat indicator “
” lights.
- Press the MODE/PGM/CLK ADJ Button twice, repeat all indicator “
” lights.
- Press the MODE/PGM/CLK ADJ button three times, random indicator “RDM” blinks
and press MODE/PGM/CLK ADJ button again to resume to normal play.
- “DISC” will be displayed when a CD is loaded up side down, or there is no CD inside.
Page 14
13
PROGRAMMED PLAY
With this function you can program up to 20 titles in the order you desire.
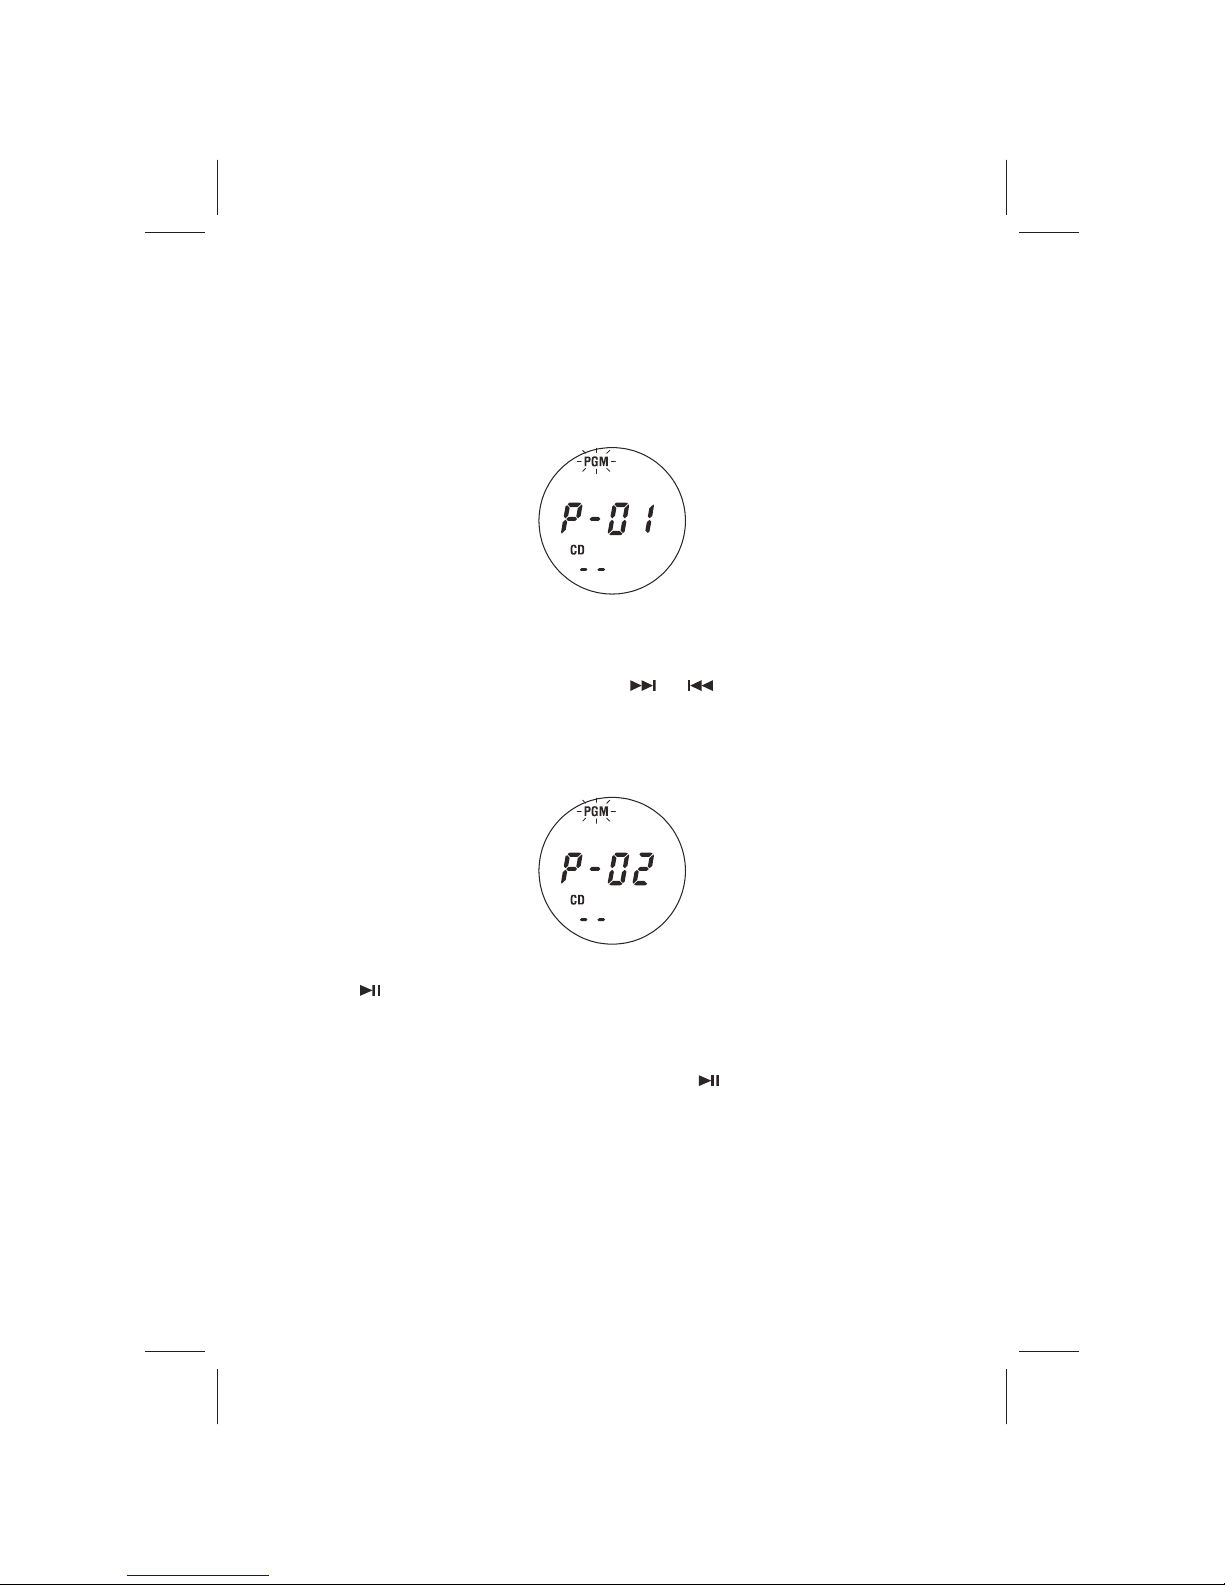
1. In CD Stop mode, press the MODE/PGM/CLK ADJ Button to start programming the
tracks. The blinking Program Indicator “PGM”, the Program Channel Indicator “P-01”
and the blank Track No. “- -” will appear in the LCD Display.
NOTE: The Player will exit the programming mode automatically if no button is
pressed within a period of about 10 seconds after pressing the MODE/PGM/CLK ADJ
button.
2. Search for a desired track by pressing the
or Buttons.
3. When the desired track appears in the LCD, press the MODE/PGM/CLK ADJ Button
again to enter the track to the memory. The Program Channel Indicator will advance
to “P-02” and the Track No. will return to “--” with the Program Indicator “PGM”
blinking in the LCD Display.
4. Repeat step 2 and 3 to program another tracks.
5. Press
Button to start playing the tracks in your programmed sequence
Note:
After all the programmed tracks have been played the player stops but the program
remains in the memory.
Press MODE/PGM/CLK ADJ the Button then the Button to begin programmed
playback again.
To cancel programmed play, simply open the CD Door.
During program mode, press MODE/PGM/CLK ADJ button repeatedly to review the
tracks currently programmed one by one.
Page 15

14
AUXILIARY (AUX) OPERATION
You can play other music sources (iPod, MP3 player or other digital audio player) through
the speakers of this System by connecting the AUX-IN Jack or LINE-IN (RCA) Jack to your
external player’s LINE-OUT Jack or Headphone jack.
1. Plug one end of an audio cable (Not included) into the AUX-IN Jack and the other end
of the cable to the line out or headphone jack of your digital audio player.
2. Set the FUNCTION SELECTOR to the “AUX” position.
3. Press the Standby/On
Button to turn on the System.
4. Play your digital audio player.
5. Adjust the VOLUME on the external audio player and the System until you reach a
comfortable listening level.
6. Turn the System and your audio player off when you have finished listening and then
unplug the audio cable.
PRESET EQ (PRESET EQUALIZATION SYSTEM)
The sound equalization can be adjusted for optimum sound reproduction depending on
the style of music you are playing. By pressing the EQ Button, you can switch between
ROCK, POP, JAZZ or CLASSIC,
ROCK POP JAZZ CLASSIC NORNAL
USING HEADPHONES (NOT INCLUDED)
Inserting the plug of your headphones into the System’s PHONES JACK will enable you to
listen to the CD, radio or other music sources in private. When using headphones, the
speakers will be automatically disconnected.
READ THIS IMPORTANT INFORMATION BEFORE USING YOUR HEADPHONES
1. Avoid extended play at very high volume as it may impair your hearing.
2. If you experience ringing in your ears, reduce the volume or shut off your unit.
3. Keep the volume at a reasonable level even if your headset is an open-air type
designed to allow you to hear outside sounds. Please note that excessively high
volume may still block outside sounds.
Page 16
15
ALARM OPERATION
The following steps can be accomplished by using either the remote or controls with the
same function on JMC-200. For example the Alarm Time is set at 7:00 AM.
SETTING ALARM TIME
1. Press the SLEEP/AL SET button when the player is in standby mode. The Alarm
Indicator, “
” appears. The Alarm time will flash to prompt for input.
2. Press the
and button repeatedly to adjust the hour and minute
until the
desired wake time is displayed.
NOTE:
Be sure to observe the PM indicator to make sure that the time is set correctly for AM or
PM. If the PM indicator is 'On', the time displayed is "PM". If the PM indicator does not
light, the time displayed is "AM ".
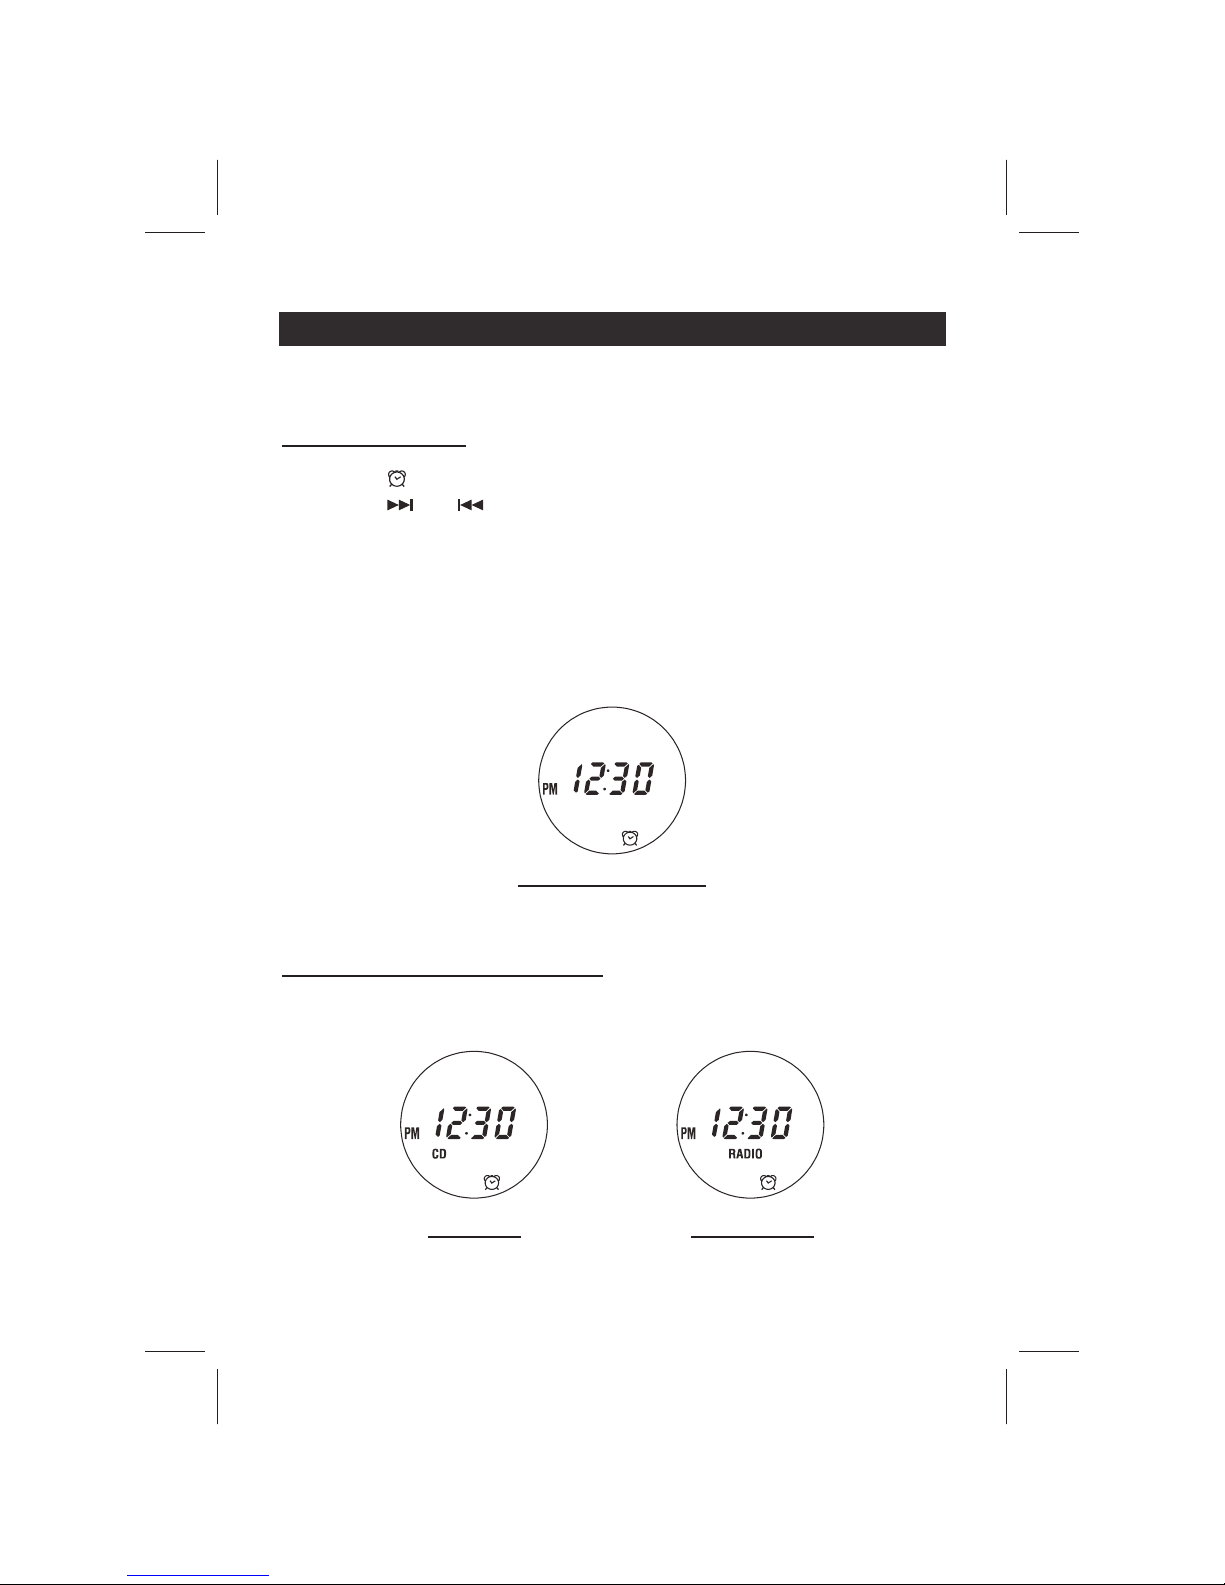
3. Press the SLEEP/AL SET button to complete. The Display will revert to current time
(12:30 PM).The Alarm will beep and last for one hour when the alarm time (7:00) is
reached.
Wake to Beeping Alarm
NOTE: The Player will exit Alarm Time Setting mode automatically if no button is pressed
within a period of about 10 seconds.
SETTING CD OR RADIO ALARM MODE
Other than the Beeping Alarm mode, you can choose wake to CD or wake to RADIO
mode by pressing the FUNCTION Button to select CD or Radio wakeup mode. Icon “CD”
or “RADIO” will be displayed depending on what wakeup mode is chosen.
Wake to CD Wake to RADIO
The CD or Radio will play continuously when the alarm time is reached.
Page 17

16
Note:
i. If you have chosen “Wake to CD” alarm mode, make sure a CD is inserted. If no CD
is inserted, the alarm will beep when the alarm time (7:00 AM) is reached.
ii. If you have chosen “Wake to RADIO” alarm mode, please make sure that a station is
tuned.
iii. After waking up, press the Standby/On
Button once to turn off JMC-200 before it
turns off automatically. The alarm sound stops but the Alarm remained set and will turn
JMC-200 on the following day.
iv. The volume level, except the beeping alarm, can be re-adjusted after waking up.
SNOOZE FUNCTION
When the alarm sound is on, press the SNOOZE Button once. The alarm sound will stop
and resume after 9 minutes.
TURNING ALARM ON/OFF
In Standby mode, press the SLEEP/AL SET Button twice. The Alarm Indicator “
”
disappears from the Display.
SLEEP TIMER OPERATION
You can use the SLEEP Timer to fall asleep listening to the Radio or CD for 10 to 90
minutes.
ACTIVATING SLEEP FUNCTION
1. In Power On mode, operate the Radio or CD as usual. Adjust the volume to the
desired level.
2. Press the SLEEP/AL SET button once. Sleep time “00” and the Sleep Icon “SLEEP”
will light.
3. Press the SLEP/AL SET Button again. The Display will show 90 minutes of playing
time and then return to show the current function mode in 5 seconds.
The Music System will automatically turn off after 90 minutes has elapsed.
4. To cancel the SLEEP function, press the SLEEP/AL SET Button repeatedly until “00”
Sleep time is shown and the SLEEP Indicator, “SLEEP” will disappear from the LCD
Display.
ADJUSTING THE SLEEP TIME
1. With the unit In POWER ON mode, press the SLEEP/AL SET Button repeatedly to
select the desired amount of sleep time from 10 to 90 minutes. With each press of the
Button the sleep time decreases by 10 minutes.
2. The unit will automatically turn off after the preset sleep time has elapsed. However, if
you want to turn JMC-200 off before the preset sleep time has elapsed, press the
Standby/On
Button once to switch off the power. The LCD Display will revert to
show the current time.
Note: If 90 or 60 minutes sleep time is selected and you are playing a CD that is only 48
minutes long, for example, playback will stop at the end of the disc.
Page 18
17
CARE AND MAINTENANCE
1. Avoid operating your unit under direct sunlight or in hot, humid or dusty places.
2. Keep your unit away from heating appliances and sources of electrical noise such as
fluorescent lamps or motors.
3. For better Clock Display clarity, avoid operating the unit under direct sunlight or in strong
room illumination.
4. Unplug the unit from the electrical power outlet immediately in case of malfunction.
COMPACT DISC CARE
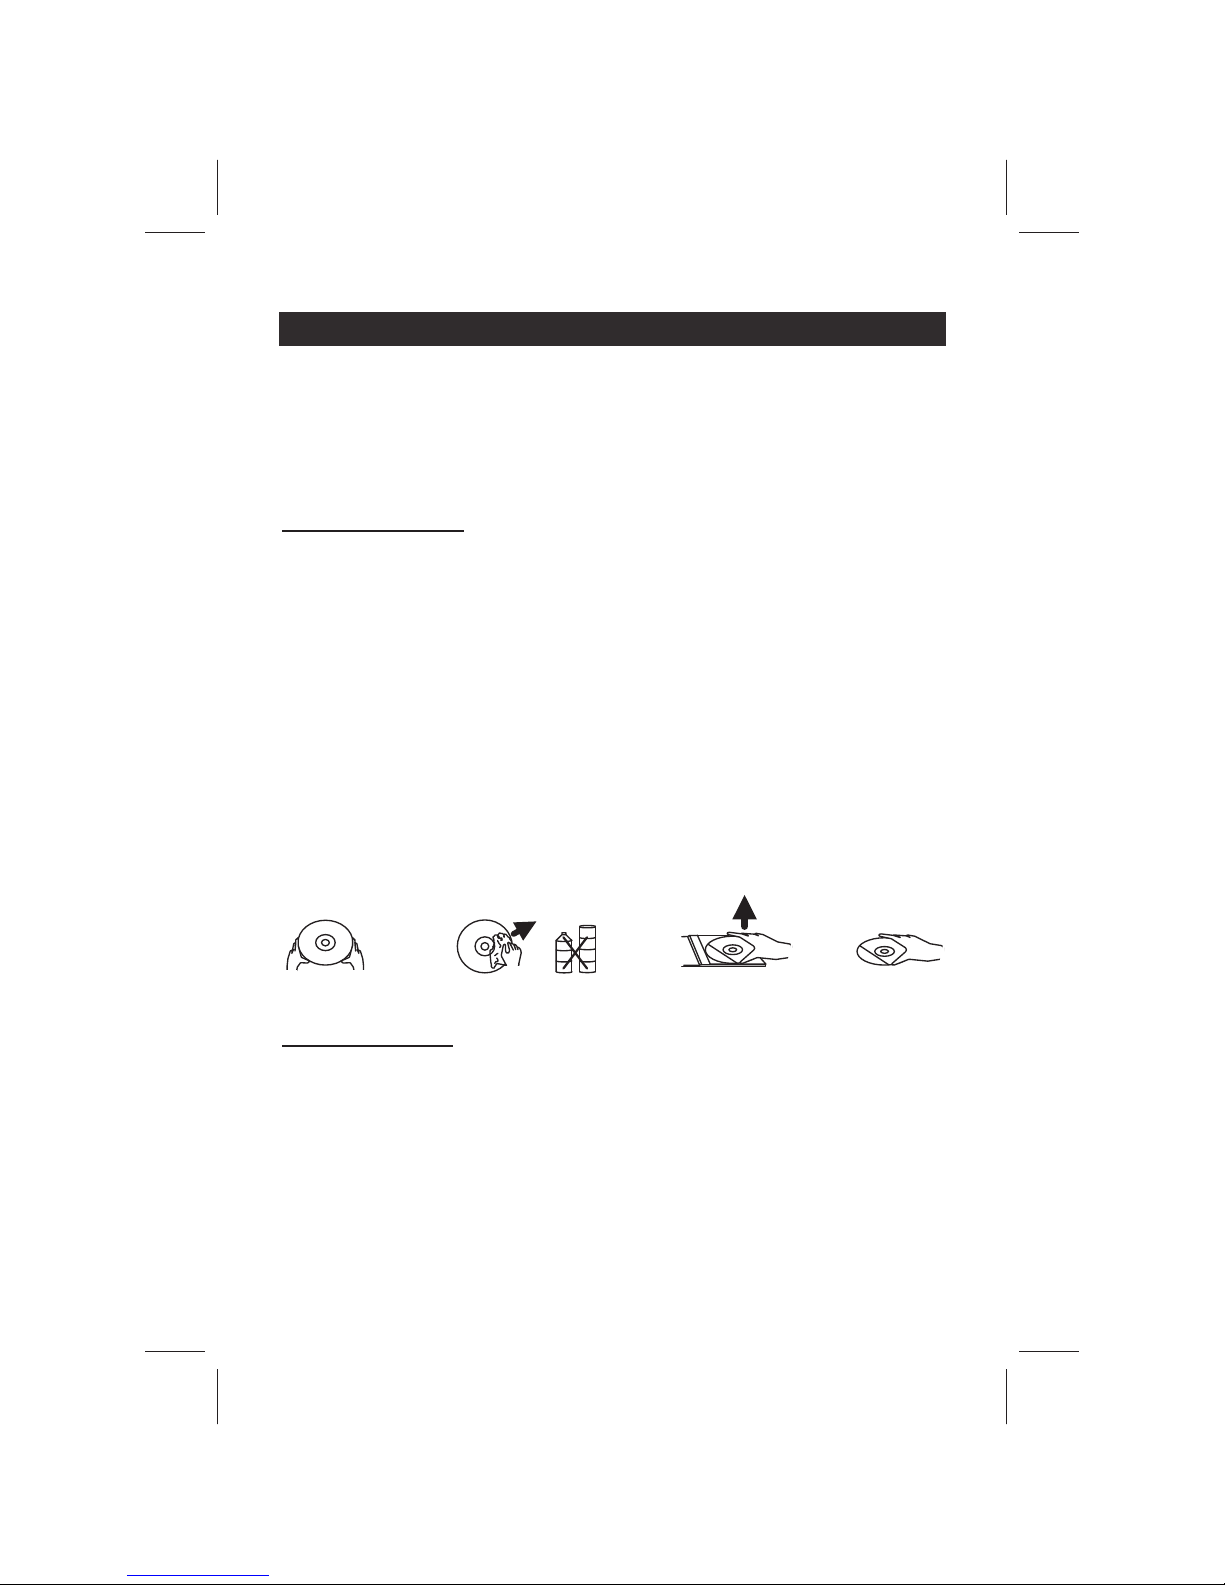
Handle the disc only by its edges. Never allow your fingers to come in contact with
the shiny, unprinted side of the disc.
Do not attach adhesive tape, stickers etc., to the disc label.
Clean the disc periodically with soft, lint-free, dry cloth. Never use detergents or
adhesive cleaners to clean the disc. If necessary, use a CD cleaning kit.
If disc skips or gets stuck on a section of the disc, it is probably dirty or damaged
(scratched).
When cleaning the disc, wipe in straight lines from the center of the disc to the edge
of the disc. Never wipe in circular motions.
To remove a disc from its storage case, press down on the center of the case and lift
the disc outs, holding it carefully by the edges.
Fingerprints and dust should be carefully wiped off the disc's recorded surface with a
soft cloth. Unlike conventional records. compact discs have no grooves to collect dust
and microscopic debris so gently wiping with a soft cloth should remove most
particles.
CLEANING THE UNIT
To prevent fire or shock hazard, disconnect your unit from the AC power source when
cleaning.
The finish on the unit may be cleaned with a dust cloth and cared for as other
furniture, Use caution when cleaning and wiping the plastic parts.
If the cabinet becomes dusty wipe it with a soft dry dust cloth. Do not use any wax or
polish sprays on the cabinet.
If the front panel becomes dirty or smudged with fingerprints it may be cleaned with a
soft cloth slightly dampened with a mild soap and water solution. Never use abrasive
cloths or polishes as these will damage the finish of your unit.
CAUTION: Never allow any water or other liquids to get inside the unit while cleaning.
Page 19

18
TROUBLESHOOTING GUIDE
Should you experience difficulties in the use of this player please refer to the following
chart or call 1300 366 144 for Product Service and Support.
PROBLEM POSSIBLE CAUSE REMEDY
The unit will not
play
The unit is disconnected from
the AC outlet
Reconnect to the AC outlet.
The AC outlet has no power Try the unit on another outlet
Unit is ON but
there is low or
no volume
The volume Control has been
turned all the way down
Turn the Volume control to a
higher output
Noise or sound
distorted on AM
or FM broadcast
Station not tuned properly for AM
or FM.
FM: The FM wire antenna is not
fully extended.
AM: The bar antenna is not
positioned correctly
Retune the AM or FM
broadcast station.
FM: Fully extend the FM wire
antenna.
AM: Reposition the unit until the
best reception is obtained.
FM ST does not
appear in the
display
You have tuned to a mono
station or the station is too weak
FM MONO MODE is set
Select another FM station or
extend or rotate the wire
antenna for best reception.
Set the FM MODE Switch to
STEREO
AM or FM no
sound
Unit not at TUNER mode.
Volume at minimum
Press Function selector to
operate in TUNER mode.
Increase Volume
CD player will
not play
Unit not in CD function mode.
CD is installed incorrectly.
It the CD is self-compiled, the
media used may not be
compatible with the player.
Select CD function mode.
Insert CD with label side up.
Use better quality blank media
and retest.
CD skips while
playing
Disc is dirty or scratched.
Wipe CD with clean cloth or use
another disc.
Intermittent
sound from CD
Player
Dirty or defective disc
Dirty pick up lens
Player is subject to excessive
shock or vibration
Clean or replace the defective
disc
Use a CD-lens cleaning disc to
clean the lens
Relocate the player away from
shock or vibration
Page 20

19
SERVICE
All necessary care is taken at the point of manufacture to ensure this unit will perform to
Jensen’s high quality standards. However if this unit becomes faulty within the warranty
period please return it to the point of purchase with your proof of purchase for a
replacement.
For further information on these products please contact:
K2 Sales Pty Ltd
PO Box 21
Balaclava, Victoria 3183
Telephone 1300 366 144
Email: [email protected]
Printed in China
 Loading...