

Jenoptik JD 2100m, JD Jendigital 2100m User Manual

1

SYSTEM REQUIREMENTS
IBM PC/AT compatible computer
•MS Windows 98 / 98 SE / 2000 / ME / XP
• 32MB RAM or higher
•120MB free hard disk space
• VGA colour monitor
• CD ROM driver
• 3.5" floppy disk drive
• USB connection
SYSTEM REQUIREMENTS
Imac, iBook, G3 blue&white series, G4 series
• Mac OS 9 / 9.0.2 / 9.0.4 / 9.1
• 32MB RAM or higher
• 120MB free hard disk space
• VGA colour monitor
• CD ROM drive
• USB connection
3
Thank you for purchasing the JENOPTIK 2100M.
Please read through this instruction manual so you can enjoy all its features.
This mark on your camera certifies that this camera meets the requirements of the
EU (European Union) concerning interference causing equipment regulations.
CE stands for Conformité Européenne (European Conformity).
This device complies with Part 15 of the FCC Rules. Operation is subject to the following two conditions: (1) This device may not cause harmful interference, and (2)
this device must accept any interference received, including interference that may
cause undesired operation.
Do not remove the ferrite cores from the cables.
FOR HOME OR OFFICE USE
Digital Camera
JD 2100M
Tested To Comply
With FCC
Standards

4
Read and understand all warnings and cautions before using this product.
Batteries may become hot or explode due to improper use.
• Use only the batteries specified in this instruction manual.
• Do not install the batteries with the polarity (+/-) reversed.
• Do not subject batteries to fire or high temperatures.
• Do not attempt to recharge, short, or disassemble.
• Do not mix batteries of different types, brands, or ages.
• Follow local regulations for battery disposal.
Use caution, accidents may occur when using this product near young children.
Keep batteries or things that could be swallowed away from young children.
Contact a doctor immediately if an object is swallowed.
Immediately remove the batteries and discontinue use if...
• the camera is dropped or subjected to an impact in which the interior is exposed.
• the product emits a strange smell, heat, or smoke.
Do not walk while looking at the monitor.
Do not disassemble. Electric shock may occur if a high voltage circuit inside the camera is touched.
WARNING
CAUTION
The heat of the camera rises with extended periods of use. Use caution when handling the camera or
removing the batteries and compact flash card.
FOR PROPER AND SAFE USE

5
BEFORE YOU BEGIN
Check the packing list before you begin. If some parts are missing, contact your
camera dealer or a JENOPTIK Service Facility.
• JENOPTIK 2100M camera (x 1)
• AA-size Alkaline Batteries (x 4)
• Video Cable (x 1)
• Hand Strap (x 1)
• Camera Case (x 1)
• USB Cable (x 1)
• Software and Documentation on CD-ROM:
USB Driver Software for :
Windows ® 98/Windows ® 98 SE / Windows ® 2000 / Windows ® ME / Windows ® XP
Instruction Manual (PDF) Windows ® /Macintosh
Adobe PhotoDeluxe 4.0 Family Edition CD-ROM for Windows ®
Adobe PhotoDeluxe 2.0 CD-ROM for Macintosh
QuickTime 5 for Windows and Macintosh
• Documentation (Printed)
User's manual (x 1)
Warranty Card (x 1)

TABLE OF CONTENTS
6
FOR PROPER AND SAFE USE........................4
BEFORE YOU BEGIN.......................................5
TABLE OF CONTENTS.....................................6
NAMES OF PARTS.........................................10
CAMERA BODY...........................................10
INSIDE THE TERMINAL COVER................12
BOTTOM OF BODY.....................................12
VIEWFINDER..............................................13
DESCRIPTION FOR LED LAMP....................14
QUICK REFERENCES....................................15
GETTING STARTED.......................................15
TAKING PICTURES........................................16
MONITERING THE CAPTURED IMAGES......17
DELETING IMAGES........................................18
PREPARATION...............................................20
ATTACHING THE HAND STRAP.....................21
INSERTING THE BATTERIES........................22
CHECKING THE BATTERY POWER ........24
POWER SAVE..............................................25
USING THE AC ADAPTER
(Sold Separately).........................25
INSERTING/REMOVING THE COMPACT
FLASH (CF) CARD............................................26
INSERTING THE CF CARD.........................26
REMOVING THE CF CARD.........................28
TAKING PICTURES..........................................29
BASIC RECORDING PROCEDURE.................30
THE RECORDING MODE DISPLAY ON THE
LCD MONITOR..................................................32
THE DISPLAY OF THE CAMERA SETTINGS
...........................................................................33
FLASH...............................................................35
Flash Range..................................................35
SELECTING THE FLASH MODE.................36
ADVANCED OPERATIONS............................38

7
THE IMAGE INFORMATION DISPLAY
IN THE PLAYBACK MODE........................65
SINGLE-FRAME PLAY...............................66
ZOOM PLAY...............................................67
INDEX PLAY....................................................68
DELETING AN IMAGE....................................71
DELETING ALL IMAGES................................74
SETTING AND REMOVING SINGLE FRAME
PROTECTION.................................................77
ROTATE..........................................................80
SLIDE SHOW..................................................81
TO START THE SLIDE SHOW..................81
TO STOP THE SLIDE SHOW....................82
THE SETTING IN THE SLIDE SHOW MODE-
MENU..................................................83
SPECIFYING THE PLAYBACK MODE..........86
THE PLAYBACK MODE MENU......................87
THE PLAYBACK MODE MENU
(LCD Monitor).................................................87
TABLE OF CONTENTS
MOVIE MODE SHOOT....................................39
BURST IMAGE
CAPTURE.......................................................41
SELF-TIMER...................................................44
DIGITAL ZOOM...............................................47
EXPOSURE COMPENSATION......................48
SPECIFYING THE RECORDING MODE.......50
THE RECORDING MODE MENU DISPLAY
(LCD Monitor).............................................51
THE RECORDING MODE MENU ITEMS
........................................................................51
SPECIFYING THE IMAGE QUALITY MODE
........................................................................54
SPECIFYING THE IMAGE SIZE MODE .......57
SPECIFYING THE WHITE BALANCE MODE
........................................................................59
SPECIFYING THE SHARPNESS MODE
........................................................................61
PLAYBACK MODE.........................................63
THE PLAYBACK MODE DISPLAY
ON THE LCD MONITOR................................64

TABLE OF CONTENTS - CONT'D
8
MONITOR......................................................103
SETTING THE BEEP SOUND......................104
SWITCHING THE VIDEO SIGNALFROM THE
VIDEO OUTPUT TERMINAL.........................105
SPECIFYING THE TIME FOR THE POWER
SAVE FUNCTION..........................................107
FORMATTING THE CF CARD......................109
RESETTING TO THE DEFAULT SETTINGS
.......................................................................110
ADJUST THE TV POSITION.........................112
SELECT DIFFERENT LANGUAGE...............114
SETTING THE DATE AND TIME...................115
CONNECTING TO THE PERSONAL
COMPUTER..................................................117
INSTALLING THE USB DRIVER...................118
CAUTIONS WHEN CONNECTING TO THE
PERSONAL COMPUTER..............................122
INSTALLING Adobe PhotoDeluxe.................124
INSTALLING QUICKTIME 5..........................126
THE PLAYBACK MODE MENU ITEMS AND
EACH SETTINGS..........................................87
FOLDER NAME.............................................89
On DCF (Design rule for Camera File system)
FORMAT........................................................91
SPECIFYING THE PRINT SETTINGS WITH
THE DPOF......................................................92
SPECIFYING THE IMAGE AND THE
NUMBER TO BE PRINED.............................92
SPECIFYING THE INDEX PRINTSETINGS
......................................................................95
RESETTING THE PRINT SETTINGS WITH
THE DPOF......................................................97
SETUP...........................................................99
THE SETUP MODE MENU DISPLAY..........100
THE SETUP MODE MENU DISPLAY ON THE
LCD MONITOR............................................100
THE SETUP MODE MENU ITEMS AND
EACH SETTINGS........................................101
ADJUSTING THE BRIGHTNESS OF THE LCD

9
TABLE OF CONTENTS - CONT'D
APPENDIX ......................................................128
WATCHING THE CAPTURED
IMAGES ON TV.......................................129
TROUBLESHOOTING..................................130
NOTES ON THE HANDLING .....................134
CARE AND STORAGE.................................138
TECHNICAL DETAILS.....................................139

NAMES OF PARTS
10
CAMERA BODY
Flash
Shutter-release
Self-timer lamp
Viewfinder window
Flash sensor
Strap eyelet
Power switch
Lens
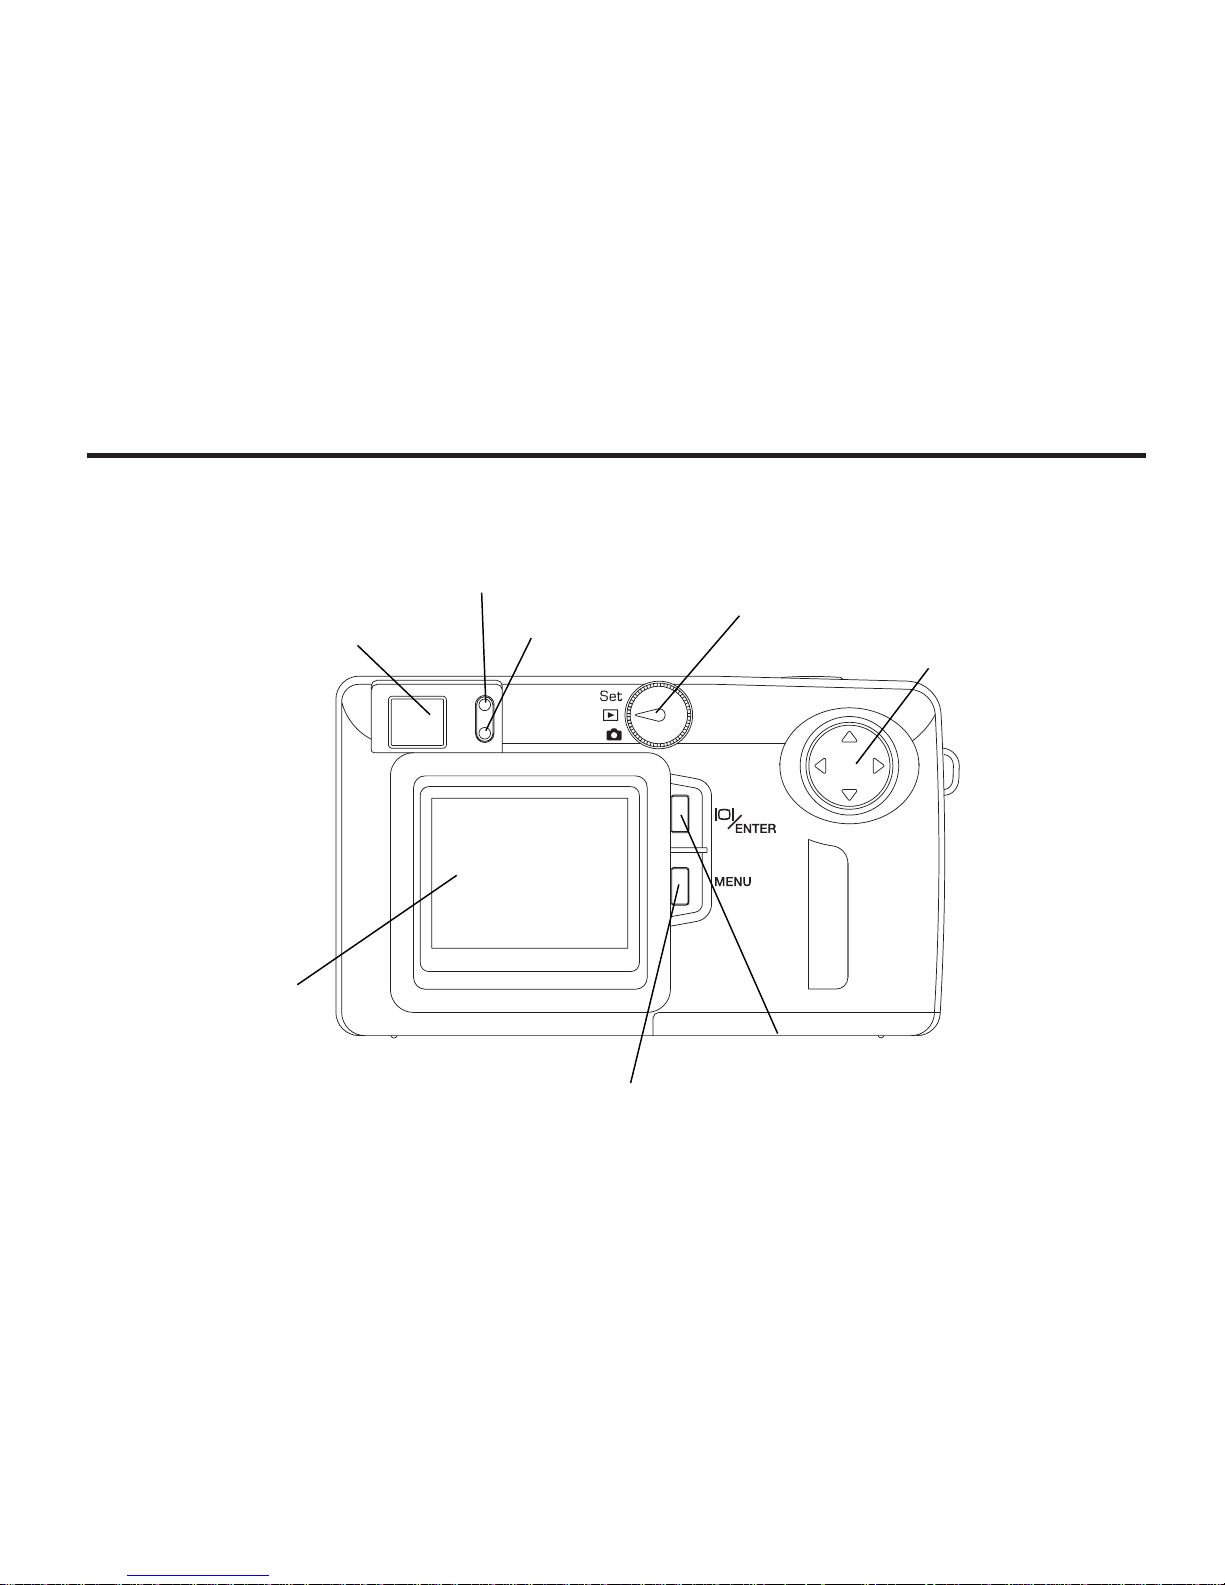
11
NAMES OF PARTS
Viewfinder window
Red LED
Green LED
Function dial
Four-way key
Display/Enter button
MENU button
LCD monitor
CAMERA BODY
Battery-chamber door
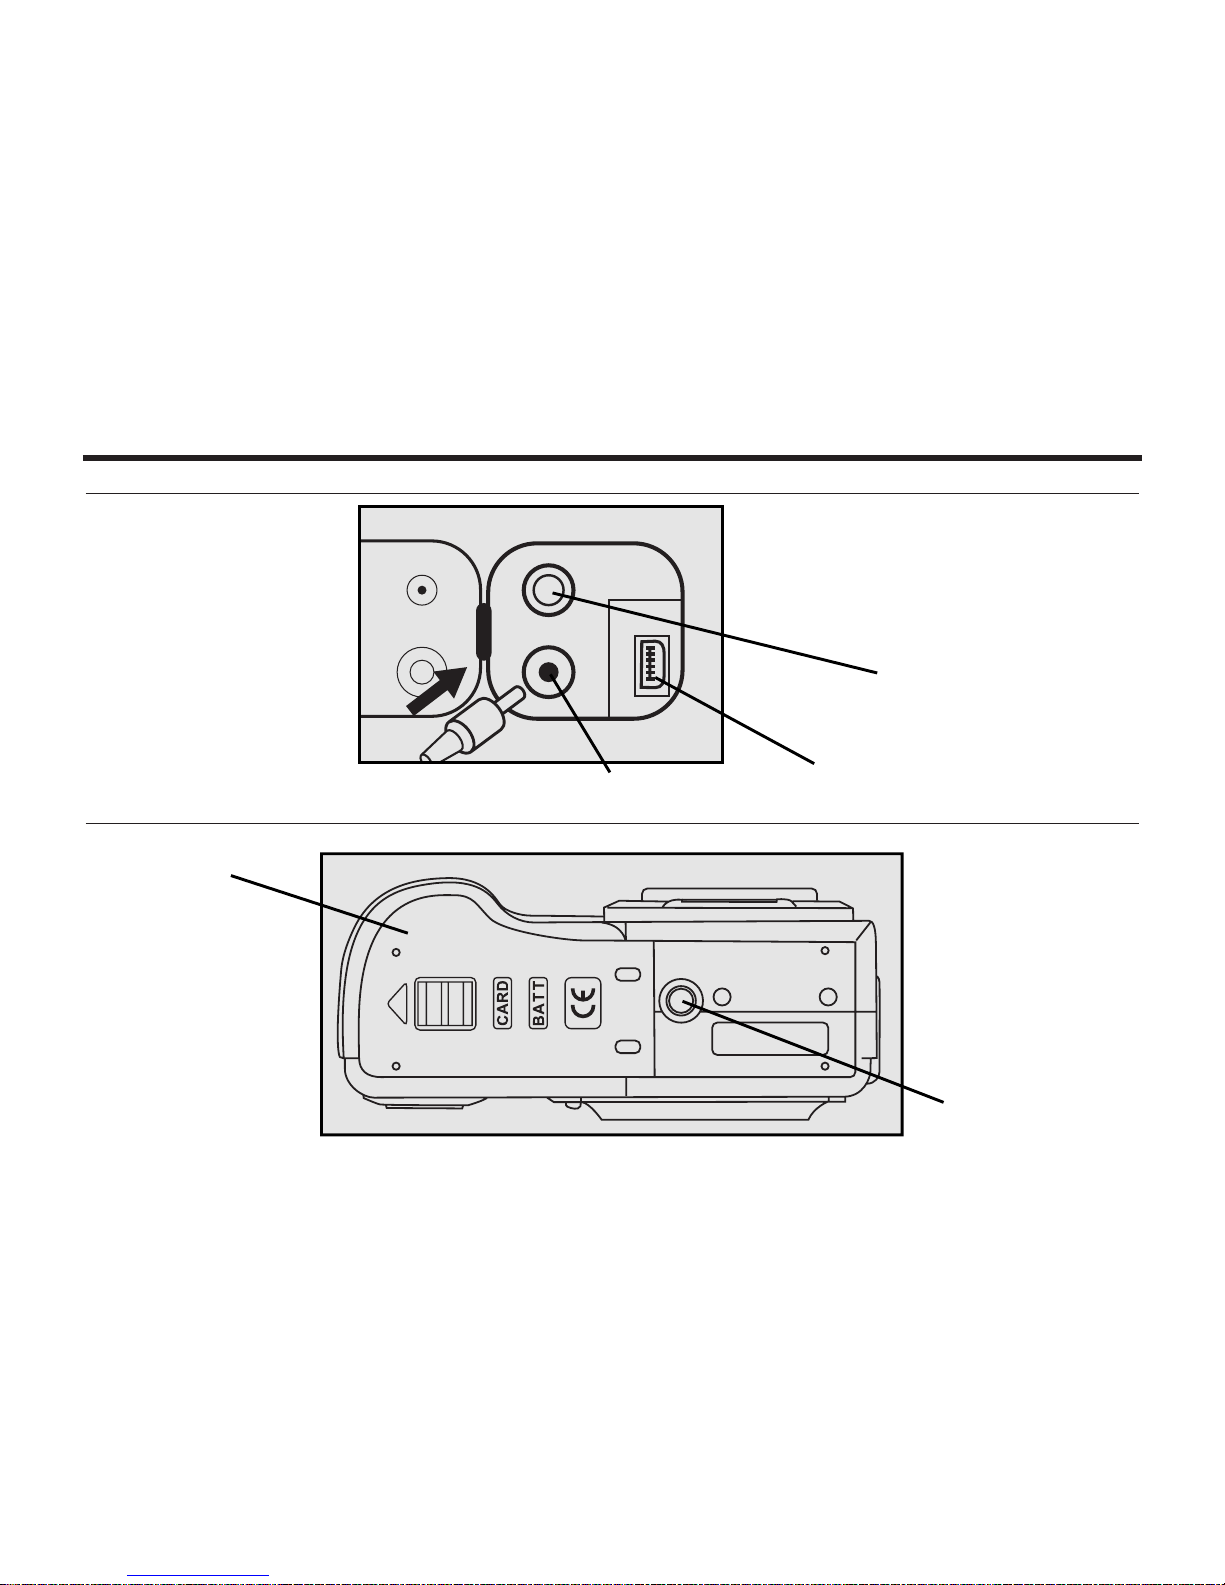
NAMES OF PARTS - CONT'D
12
INSIDE THE TERMINAL COVER
BOTTOM OF BODY
USB connector
Video-out terminal
DC terminal
Tripod socket
13
NAMES OF PARTS - CONT'D
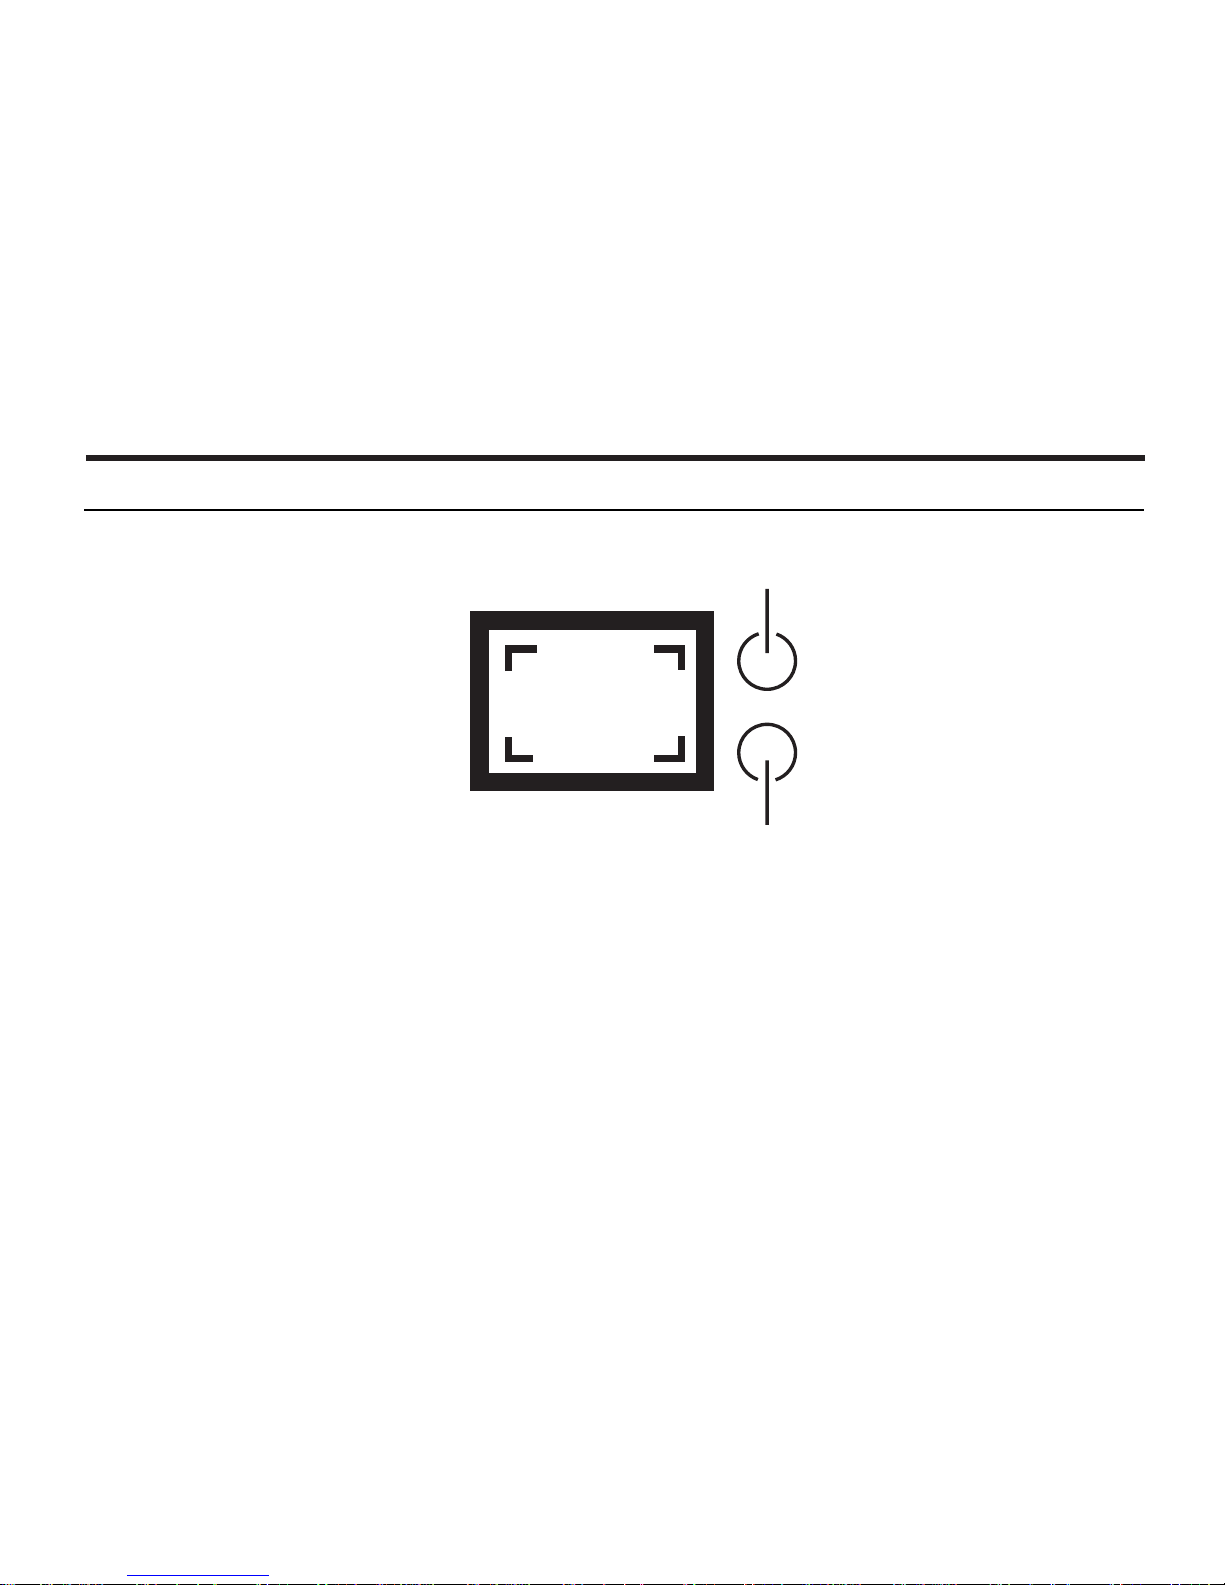
Close-framing guide
When you shoot a subject which is closer than 1m through the viewfinder, only the part under the
close-framing guide is recorded. So, use the LCD monitor to check the image composition when you
shoot a subject which is closer than 1m.
VIEWFINDER
Red lamp
Green lamp

14
Status
Ready
Busy
Warning
Error
Self-Timer
Shooting
Power On
Green LED
ON
4HZ blinking
---
--8sec 2sec release
1HZ 4HZ ON
ON
ON
Red LED
---
---
1HZ blinking
4HZ blinking
---
ON
ON
Description
Normal Status
System is in busy status, so it connot be
operated by users. E.g. Flash charging
for capture, process recording.
E.g. battery low, no CF card, CF card full.
E.g. Capture failure.
Self-timer LED blinking:
8sec 2sec release
1HZ 4HZ On
At the moment of capturing.
At the moment of power on.
DESCRIPTION FOR LED LAMP
NAMES OF PARTS - CONT'D
15
QUICK REFERENCES
GETTING STARTED
1 Insert the batteries (see page 22).
2 Insert the CF card (see page 26).
16
QUICK REFERENCES - CONT'D
3 Determine the image composition while looking into LCD monitor or
viewfinder.
• The default of LCD monitor is switched off, press to turn on LCD
monitor.
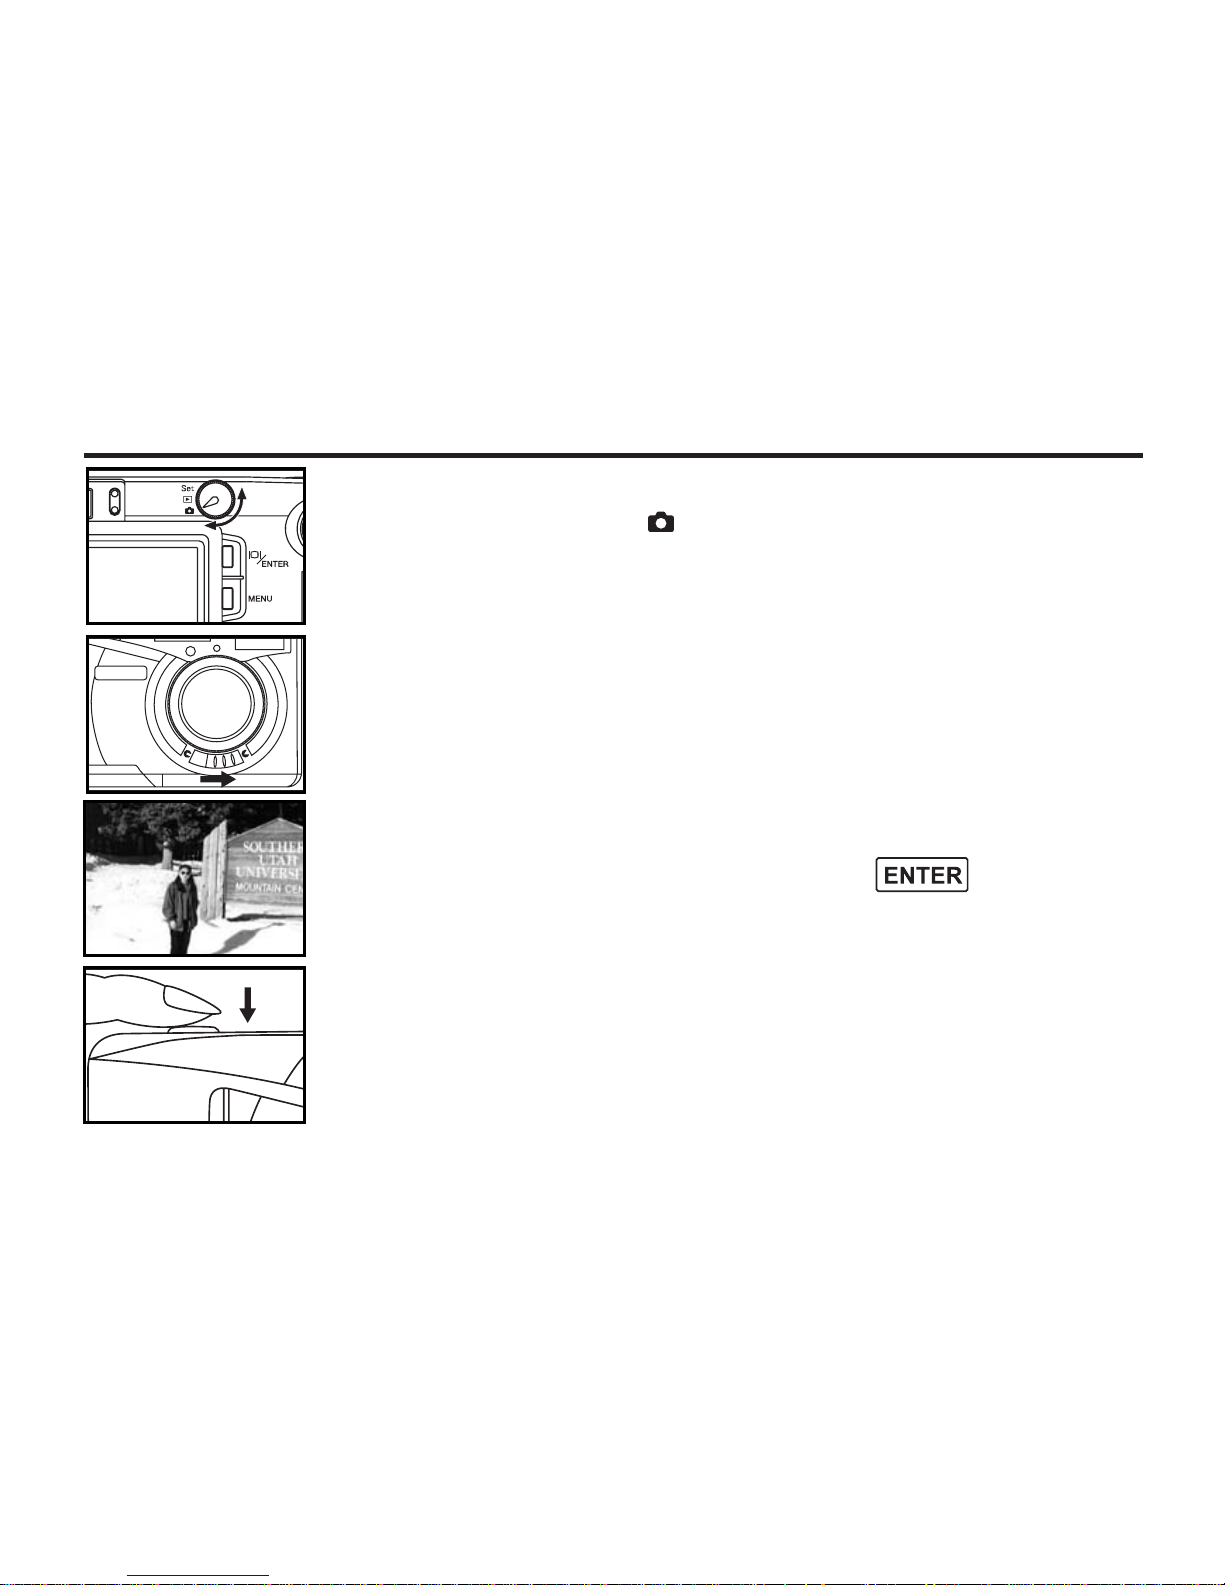
4 Press the shutter-release button to take the picture.
• When the image is in lock, the red and green lamps light up.
• While the captured image is been recording into the CF card, the green lamp
blinks (about 4 times in a second).
TAKING PICTURES – See page 29 for details.
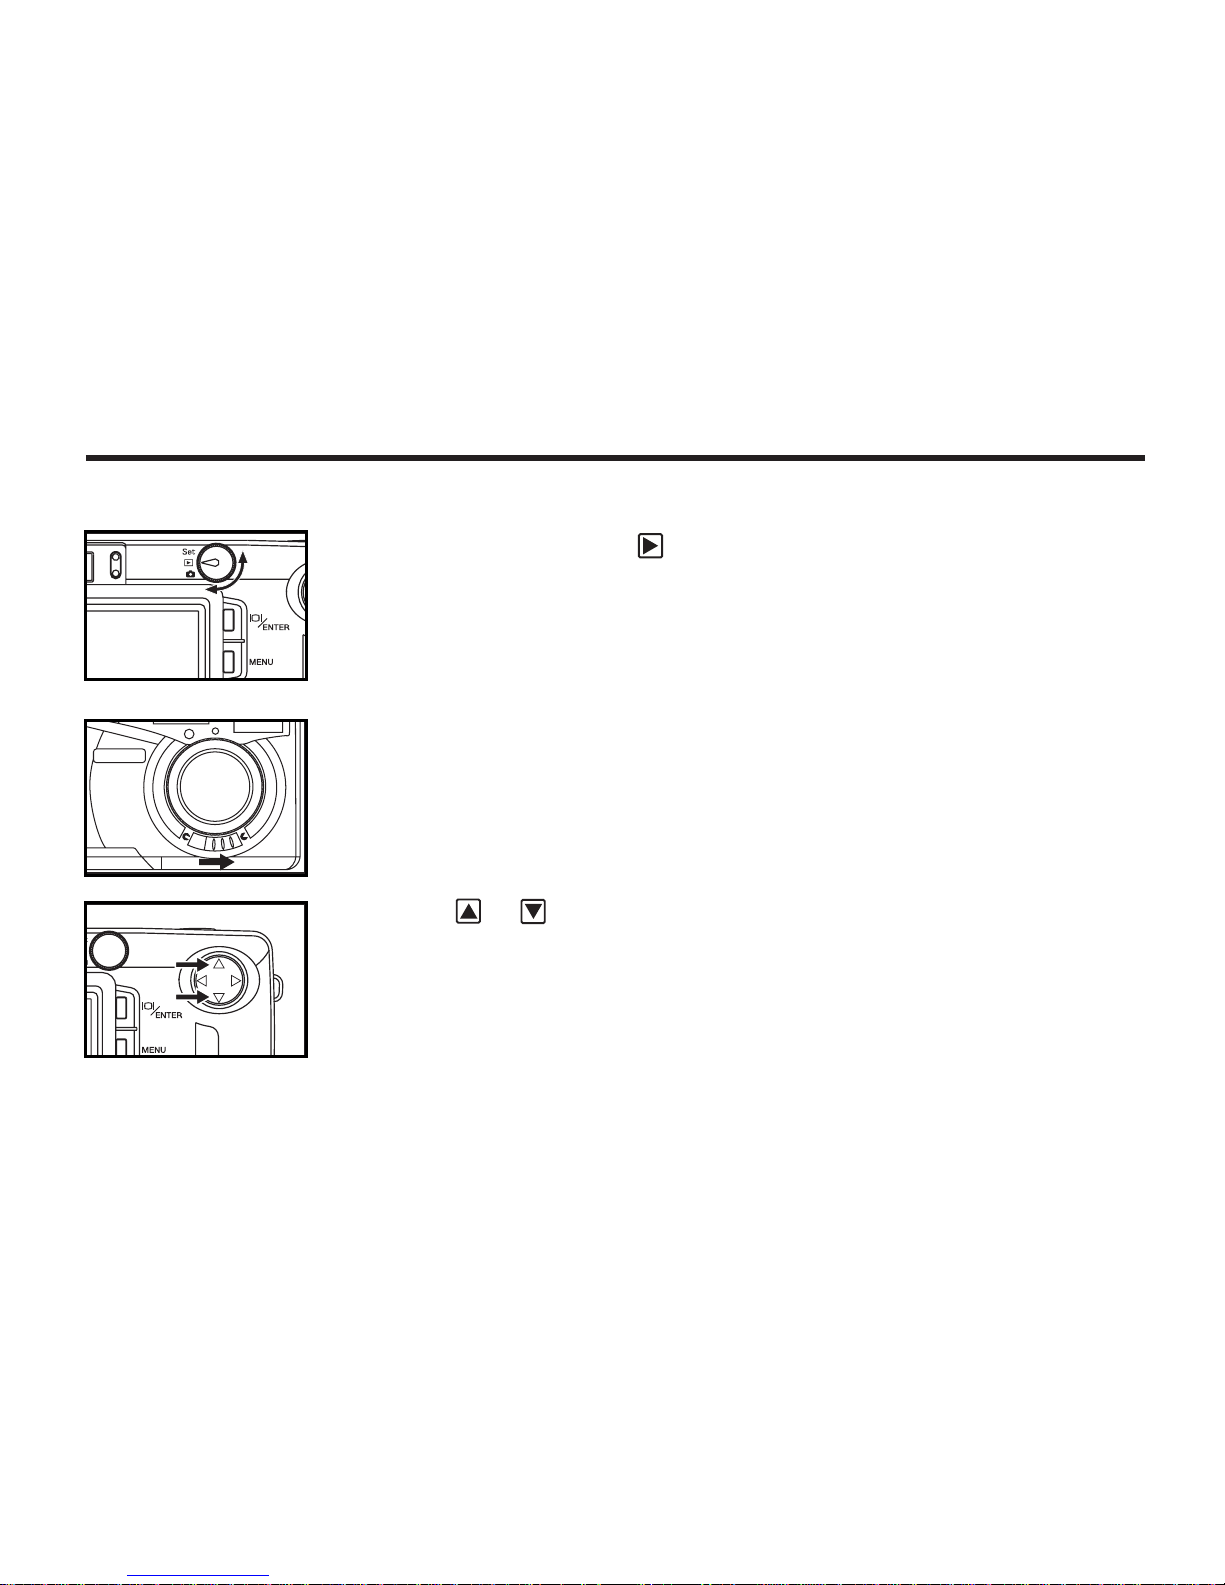
1 Rotate the function dial to .
2 Slide the power switch to turn on the camera.
17
QUICK REFERENCES - CONT'D
MONITORING THE CAPTURED IMAGES – See page 63 for details.
1 Rotate the function dial to .
2 Slide the power switch to turn on the camera.
• The latest image is displayed on the LCD monitor.
3 When the or key is pressed, the display changes to the next or
previous image respectively.
18
QUICK REFERENCES - CONT'D
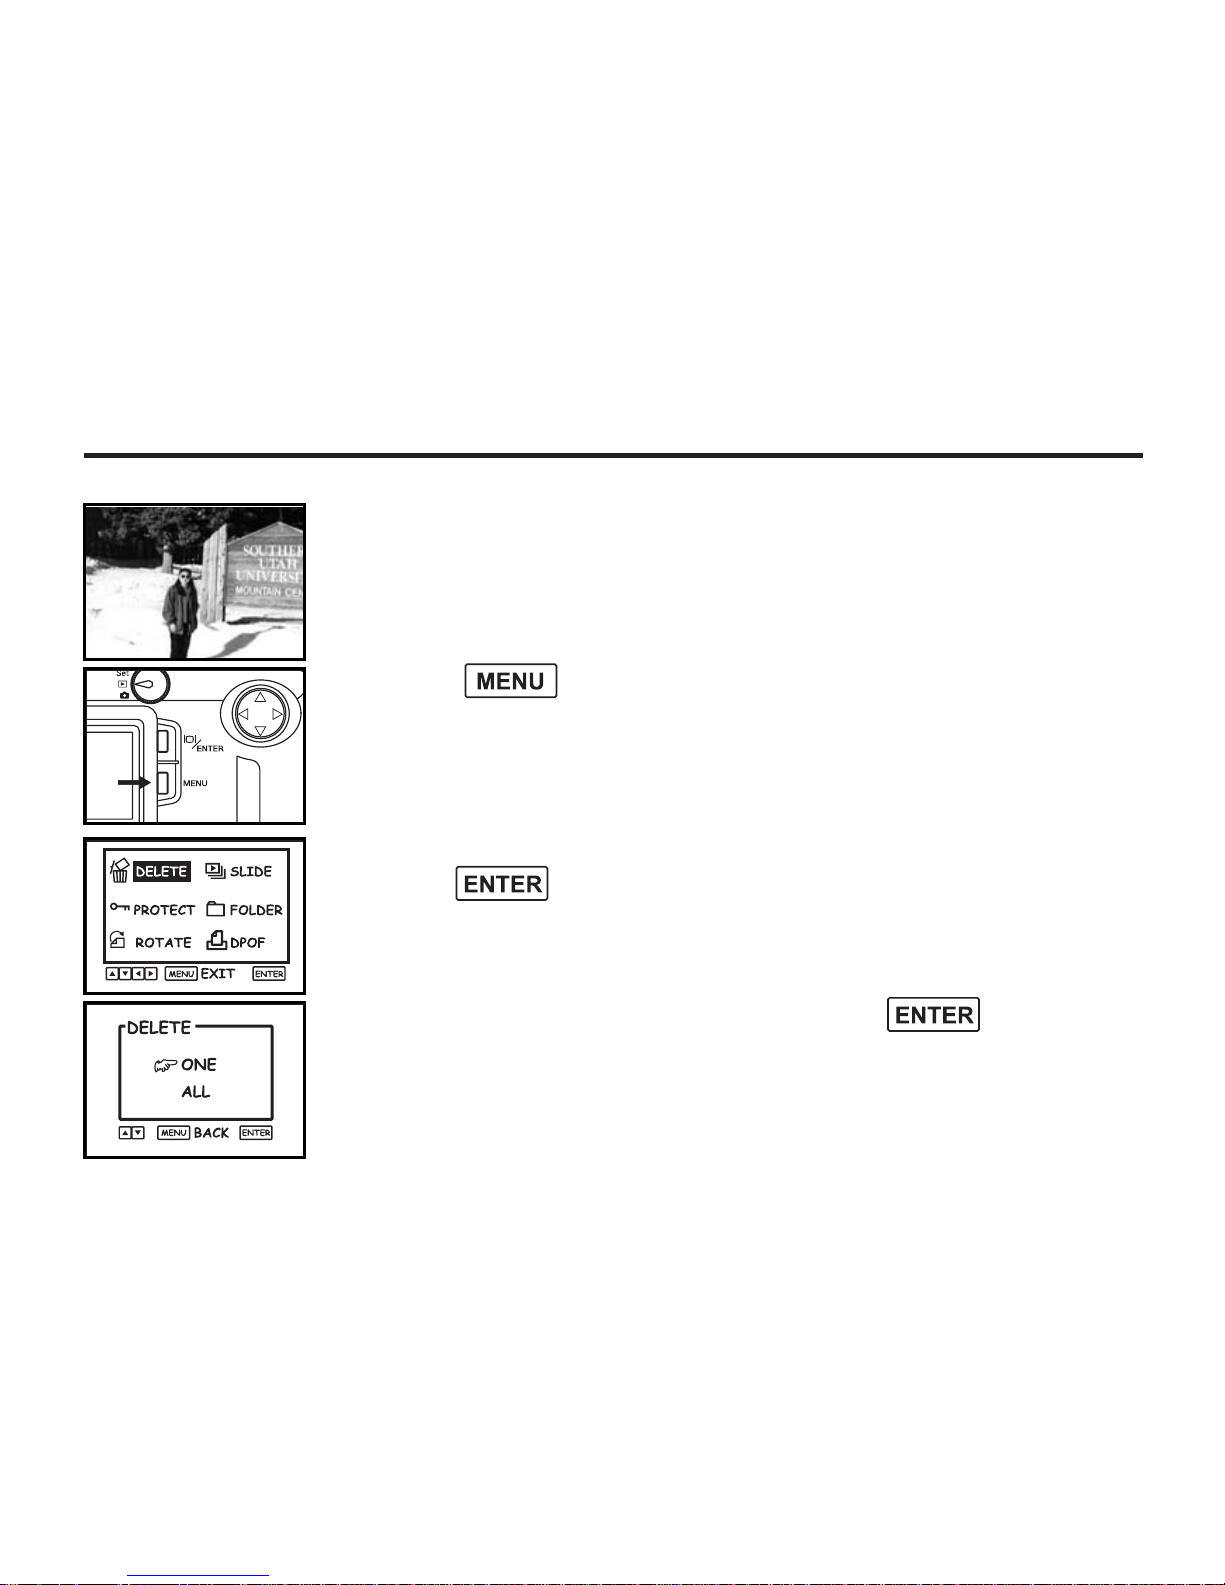
3 After confirming that [DELETE] is highlighted,
press the key.
DELETING IMAGES – See page 71 for details.
1 Display the image to be deleted on the LCD monitor by performing
from steps 1 to 3 of "MONITORING THE CAPTURED IMAGES"
described on the previous page.
2 Press the button.
• The playback mode menu is displayed on the LCD monitor.
4 After confirming that [ONE] is pointed,press the button.
• You may also choose [ALL] to delete all the images in the CF card.
• The protected images cannot be deleted.
19
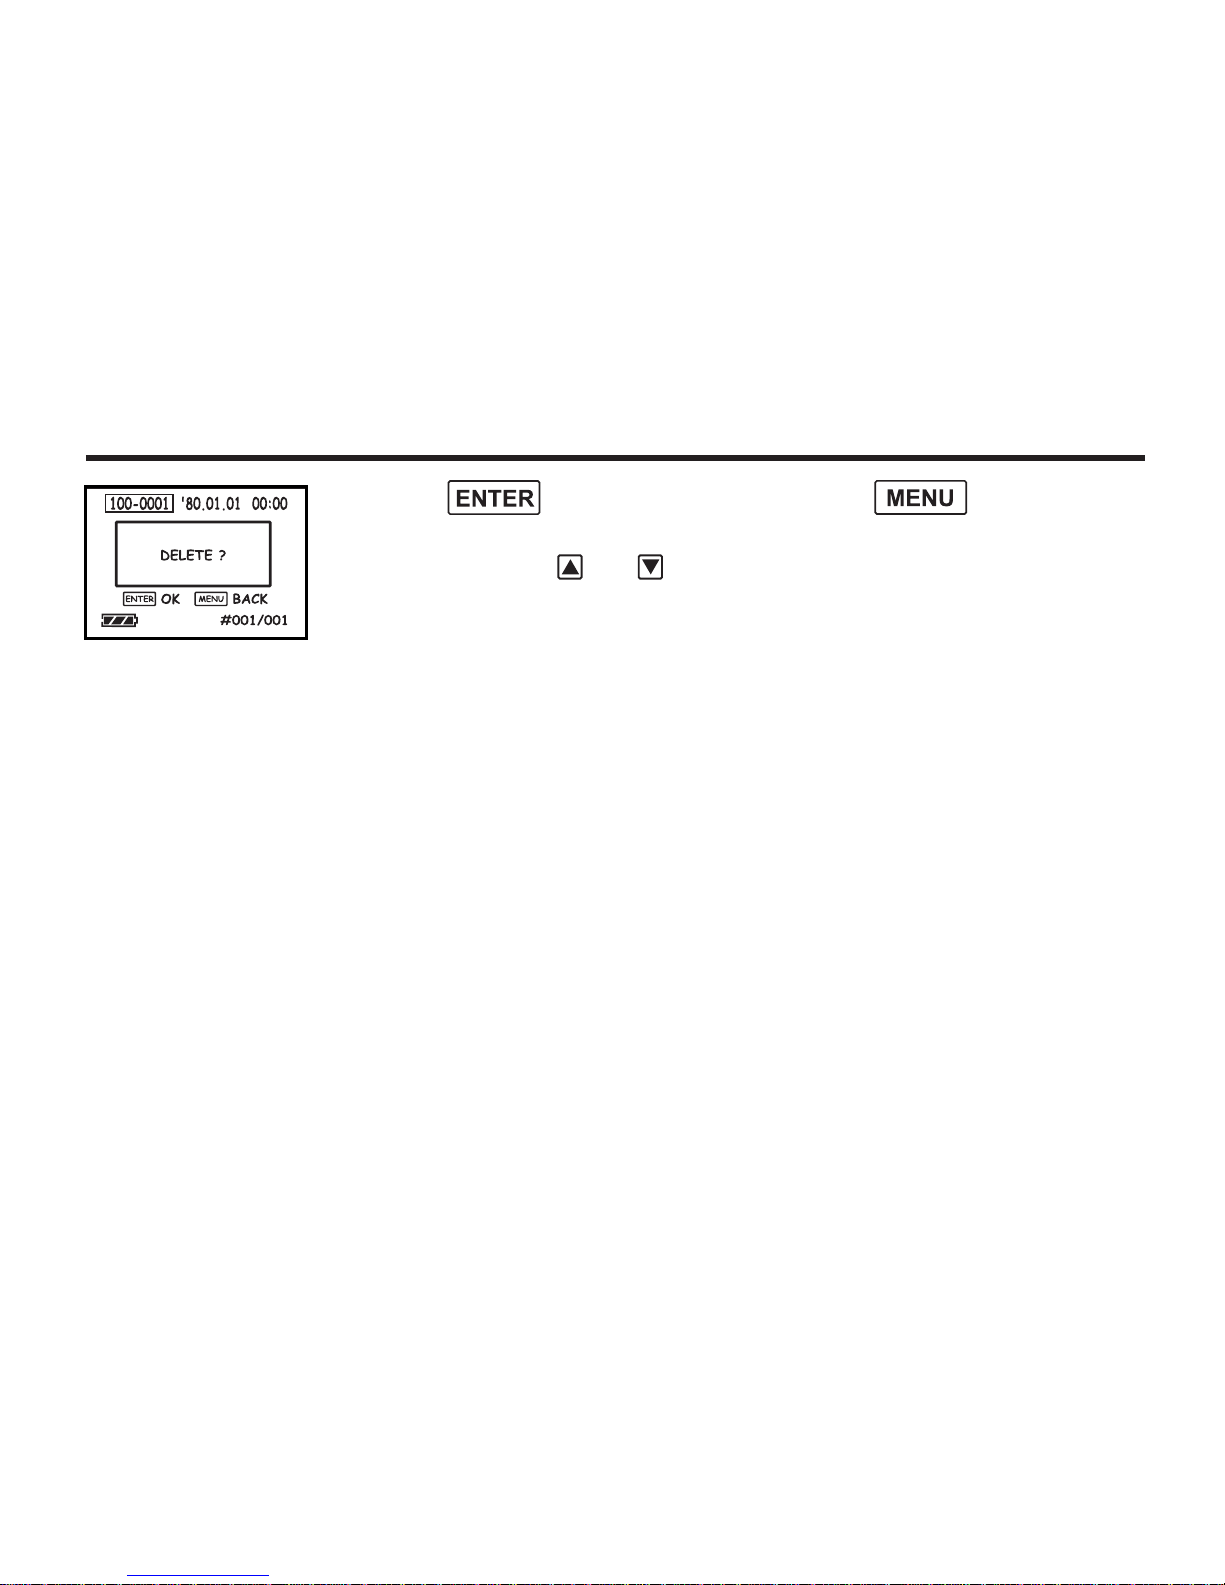
5 Press the button to delete or press the button to
go back to the previous step.
• You can also press or to select the images to be deleted.
QUICK REFERENCES - CONT'D

20
PREPARATION
21
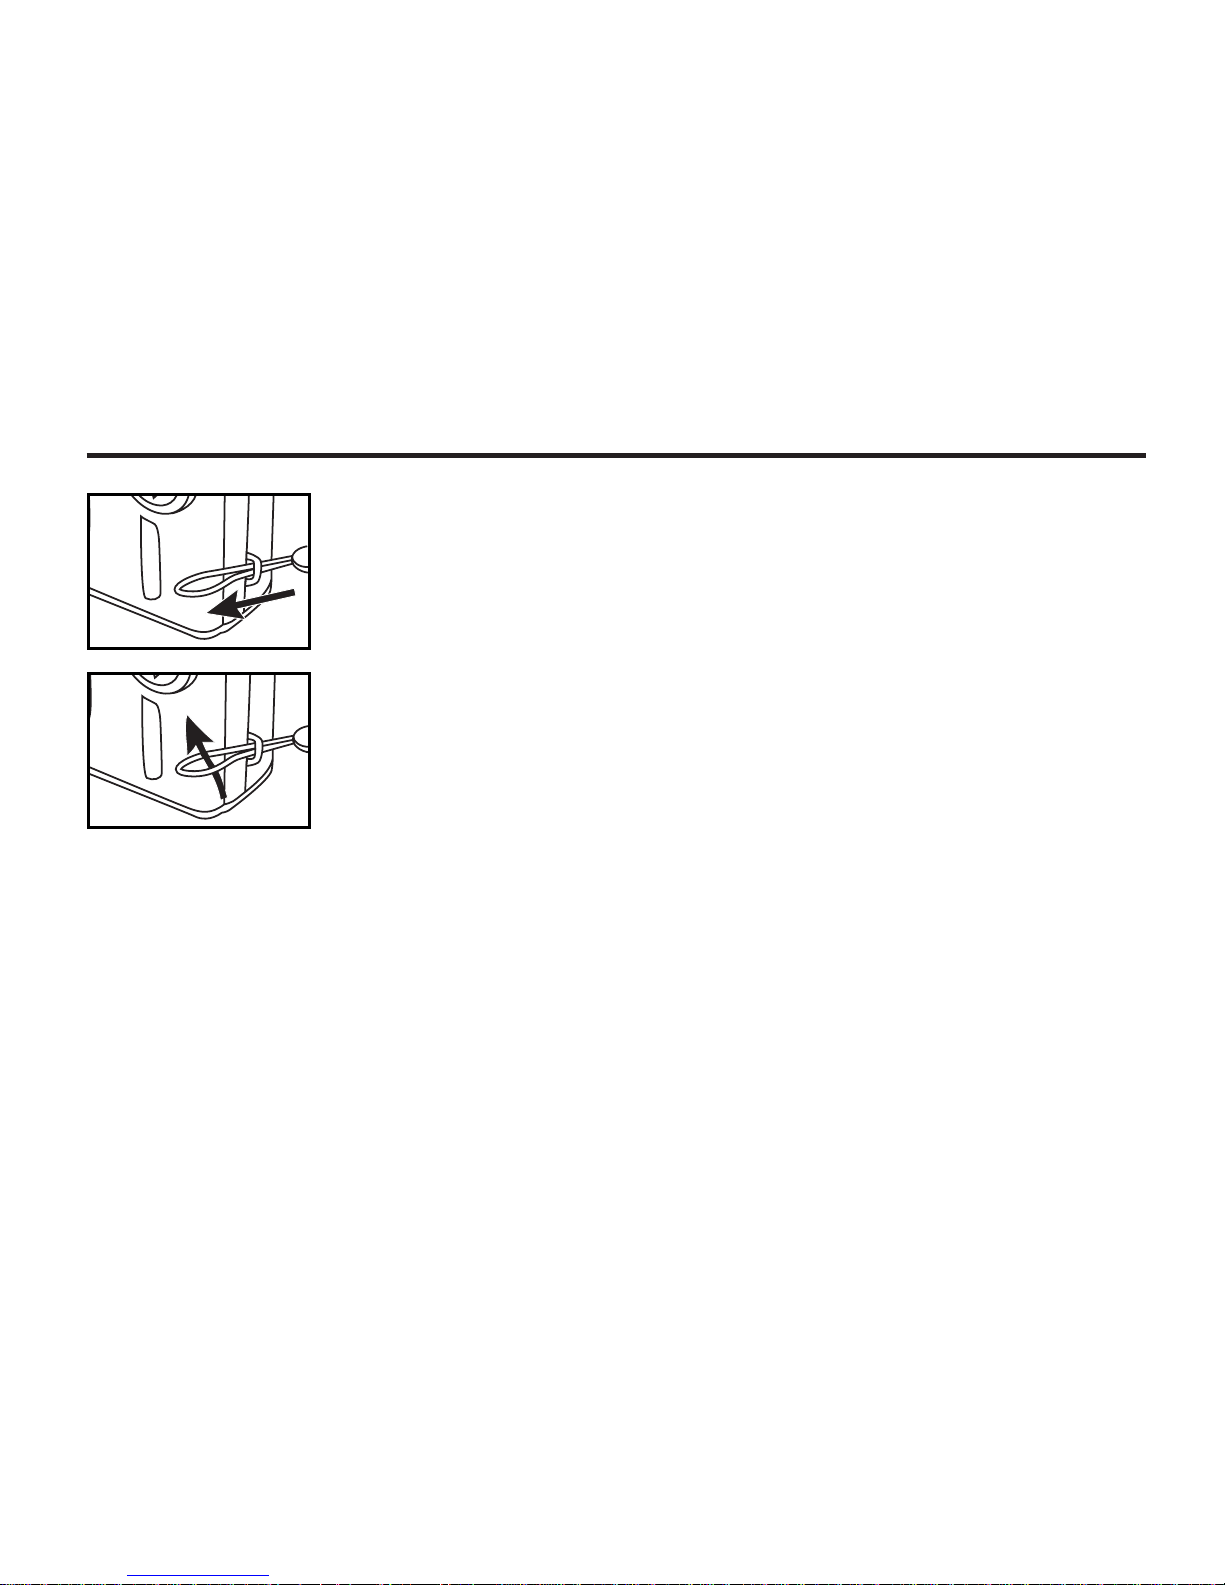
THROUGH THE HAND STRAP
1 Insert the small loop of the hand strap through the strap eyelet.
2 Insert the other end of the hand strap through the small loop.
22
INSERTING THE BATTERIES
This camera uses four AA-size alkaline or Ni-MH batteries.
* When using AA-size Ni-MH batteries, fully recharge them with a vendor-endorsed battery charger.
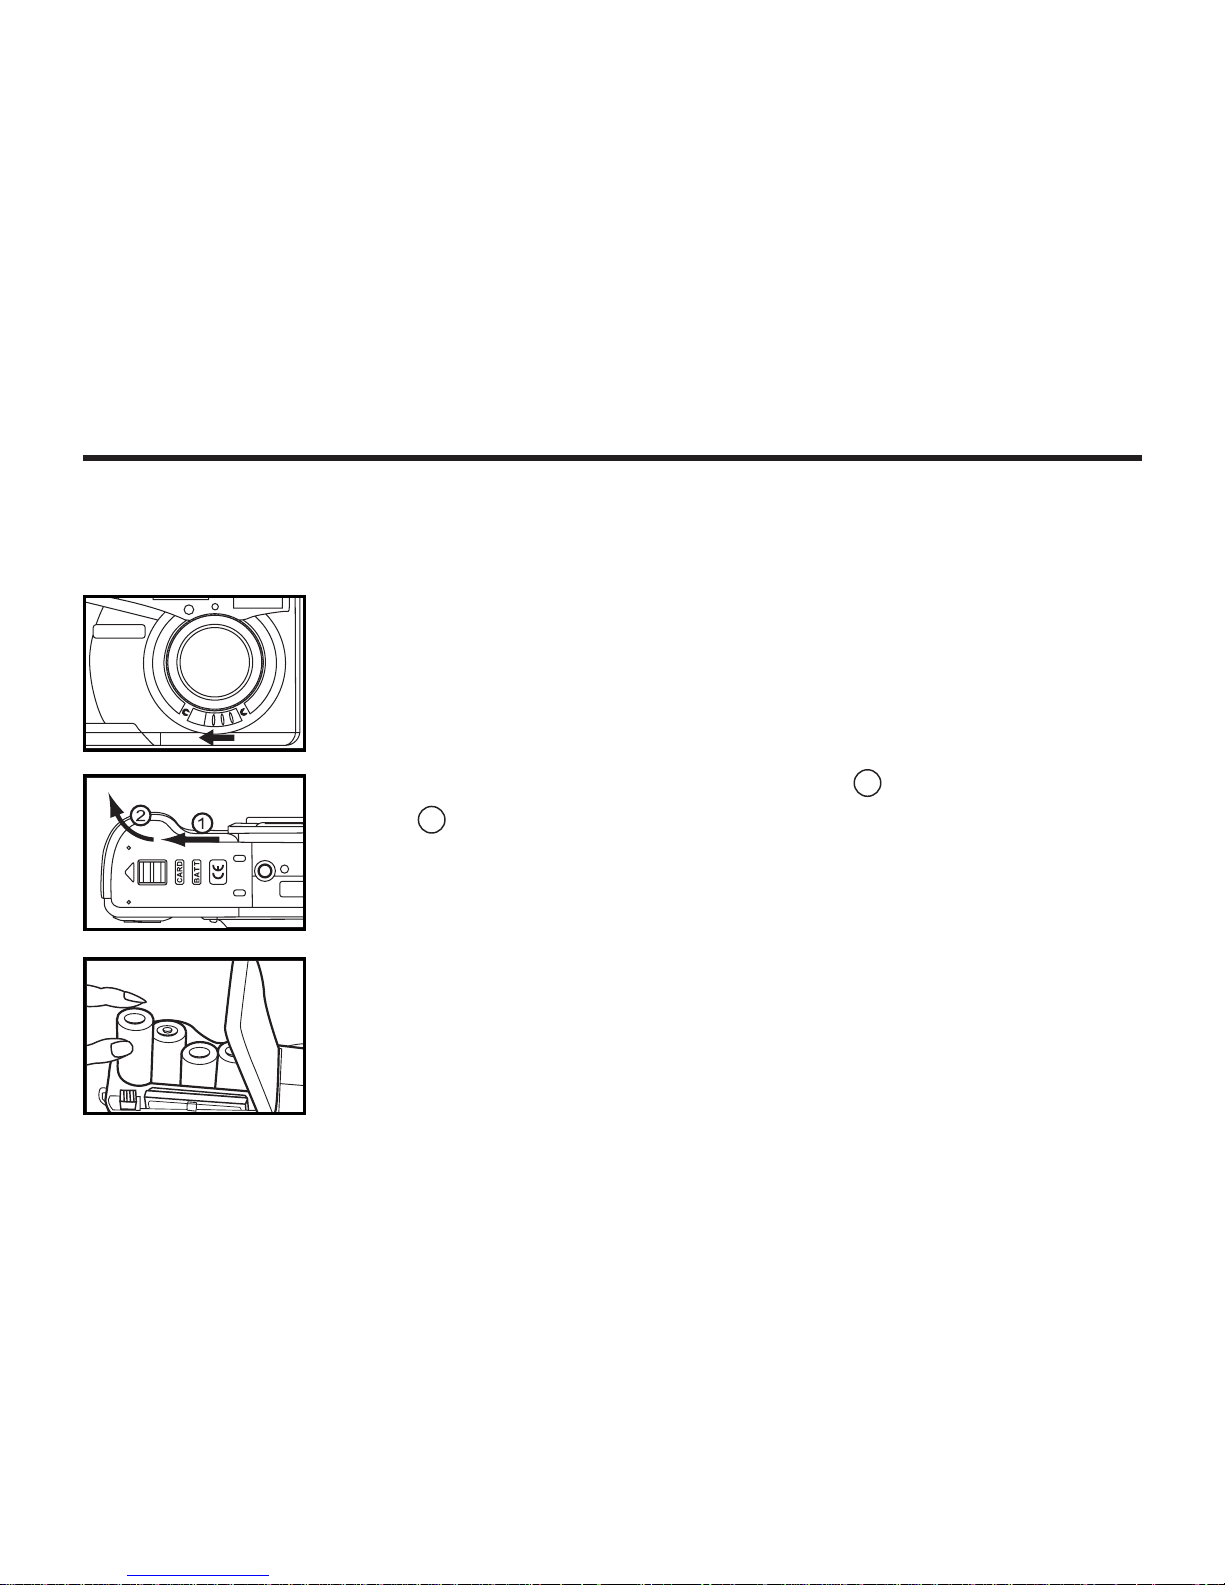
1 When replacing the batteries, slide the power switch to turn off the
camera.
• You may skip this step when inserting the batteries for the first time after a
purchase.
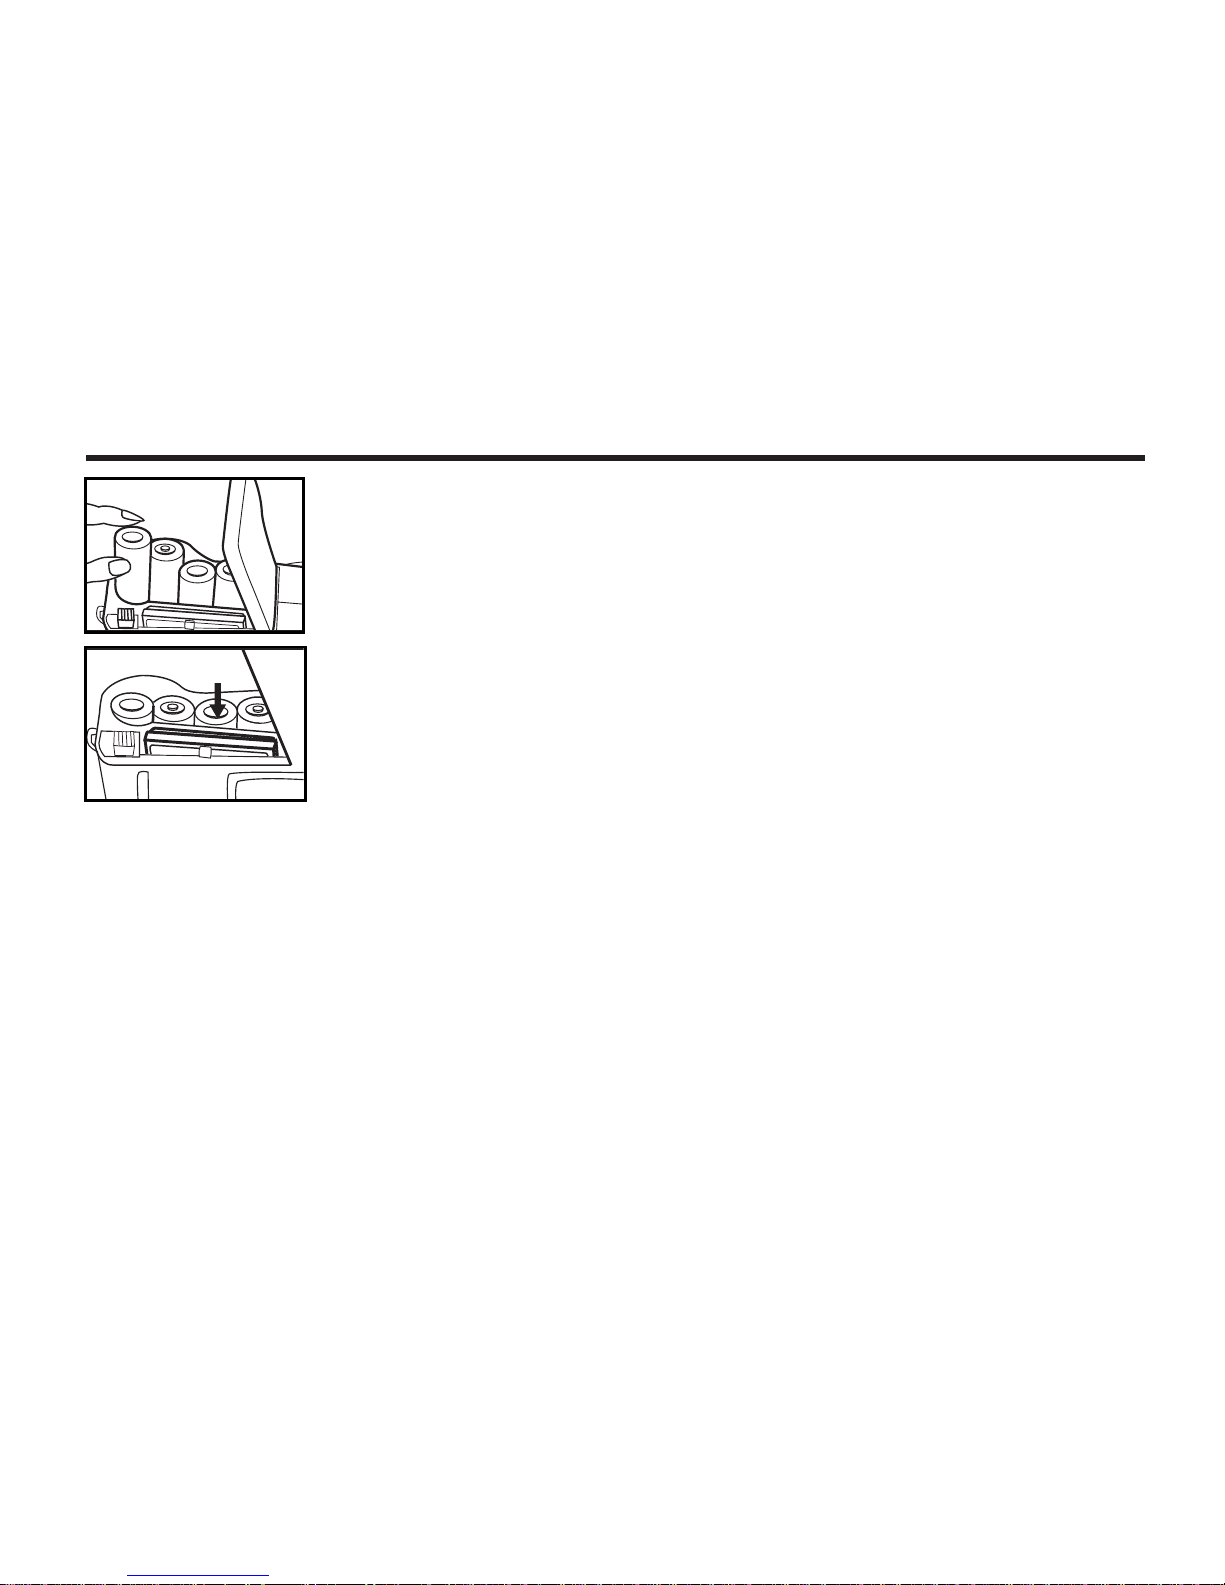
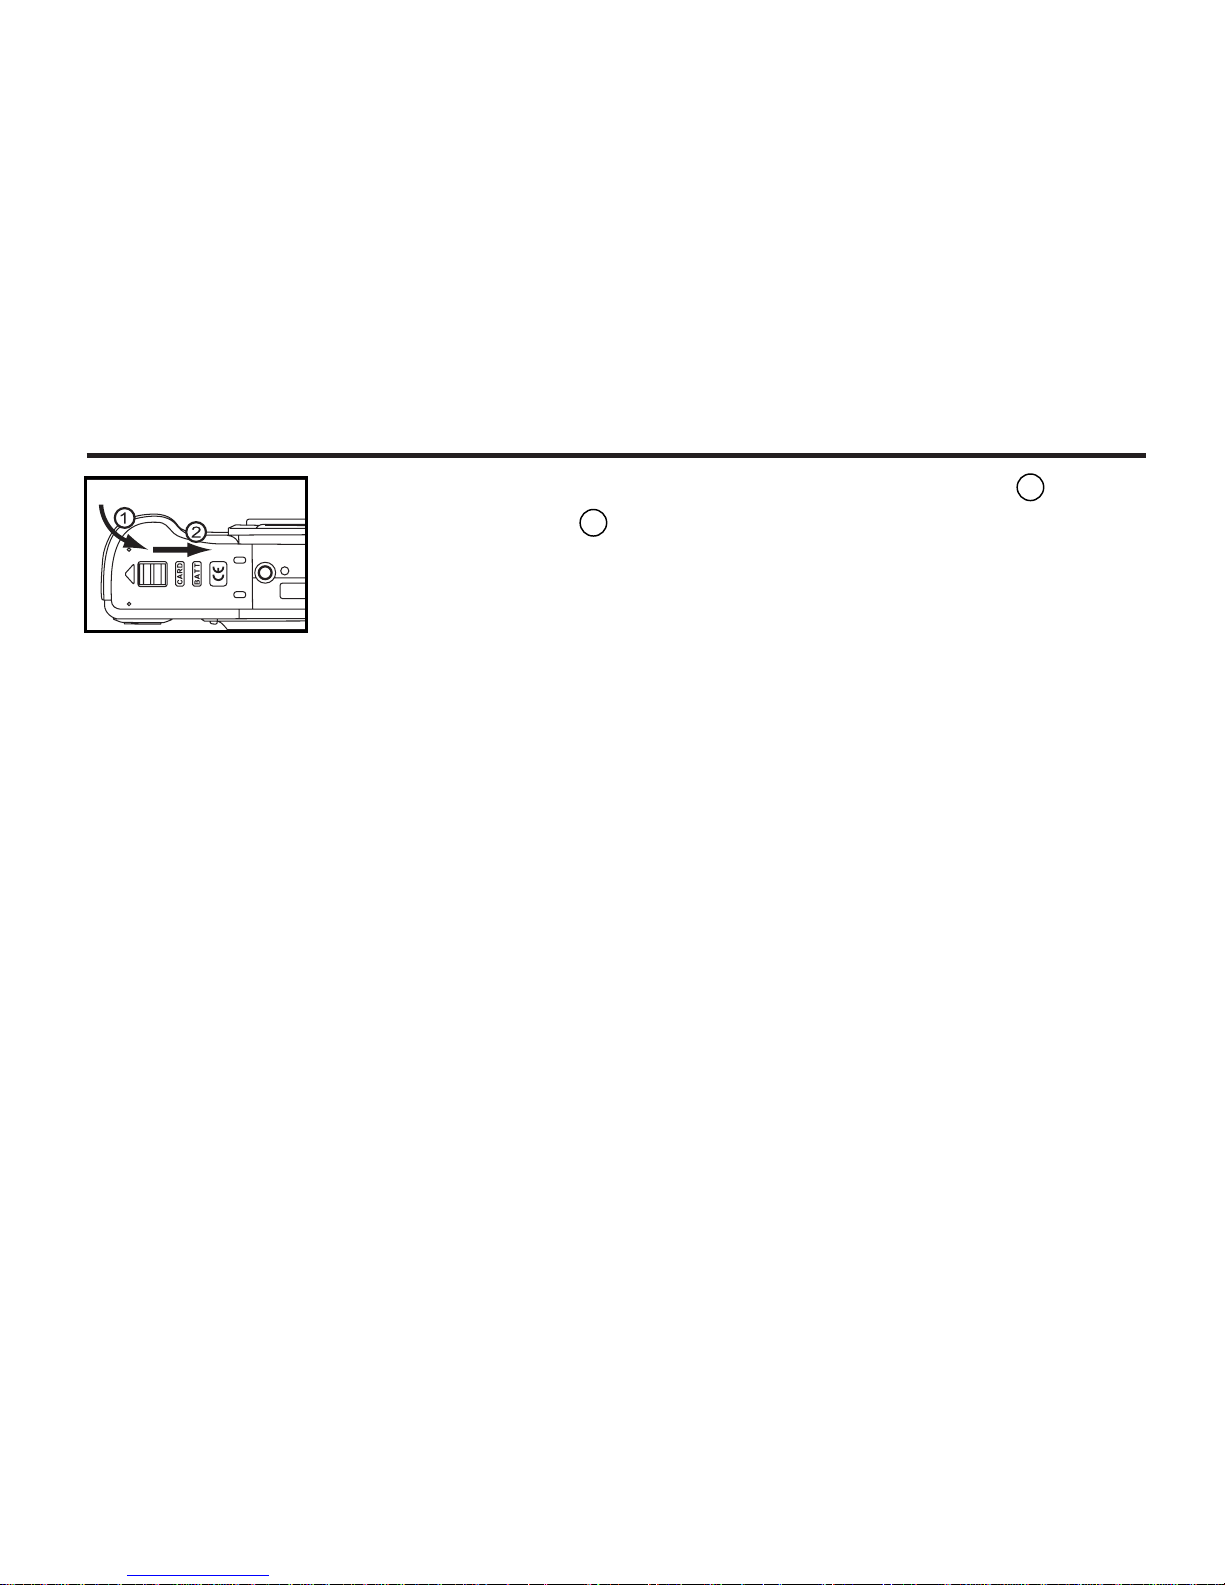
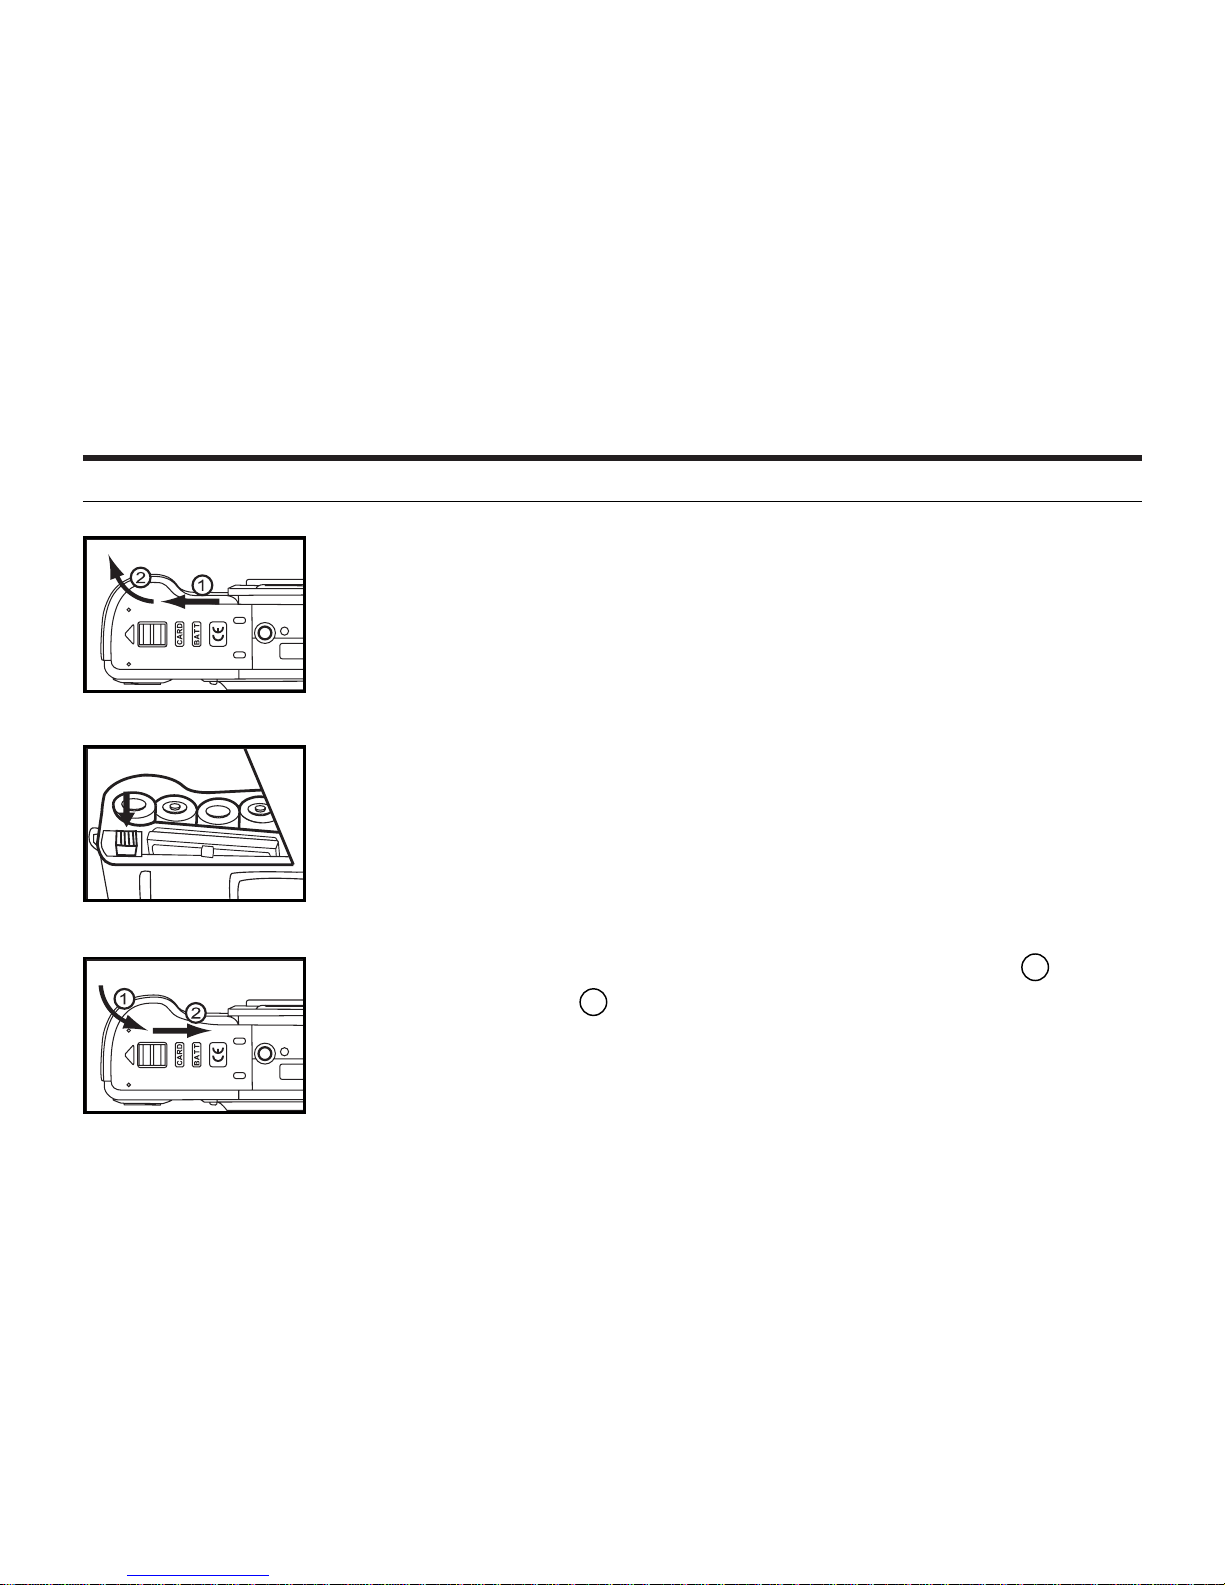
2 Slide the battery-chamber door slightly in the 1 direction and open it
in the 2 direction.
3 Insert the batteries by following the +/- diagram indicated in the back
of the battery-chamber door.
23
INSERTING THE BATTERIES - CONT'D
4 Close the battery-chamber door in the direction of the arrow 1 and
slide it until it clicks 2 .
• After replacing the batteries, check that the built-in clock (date and time) works correctly (See page
108).
If neither AC adapter nor batteries are used more than 5 minutes, the built-in clock may delay or be
reset to the default setting. In this case, set the date and time again by following the procedure
described on page 108.
• Do not place the camera with the battery-chamber door facing down when the battery-chamber
door is open. Doing so may damage the battery-chamber door.
• As the batteries become hot right after the camera is operated, be careful when replacing the batteries.

24
INSERTING THE BATTERIES - CONT'D
CHECKING THE BATTERY POWER
When the batteries are installed in the camera, the camera checks the battery power automatically
and shows the result on the LCD monitor.
The battery power is sufficient.
The battery power is low.
• Red LED lamp blinks 1 time per second.
• The flash might not be fully charged, that is, the picture taken with flash may be
darker than expected.
The battery power is empty.
• Red LED lamp blinks 4 times per second.
• The camera would be turned off automatically after 2 seconds.
The battery power is full.
* When nothing is displayed on the LCD monitor , check that the batteries are installed with a correct
polarity (+/-). When nothing is displayed even though the batteries are installed correctly, replace
the batteries with new ones.
25
INSERTING THE BATTERIES - CONT'D
POWER SAVE
To save the battery power, This camera will turned off automatically if it is not operated for 2 minutes
(Depending on your setting in setup mode). See page 106
To operate the camera, slide the power switch off and turn on the camera again.
• When using the batteries, the time for the power save function can be changed to 1 minute, 2 minutes,3 minutes,5 minutes,10 minutes or off . See page 106 for details.
• When using the AC adapter (sold separately), this camera will turn off automatically if it is not operated for 10 minutes. (The time for the power save function is fixed in 10 minutes.)
• The power save function is disabled while connecting to PC.
USING THE AC ADAPTER (Sold Separately)
We recommend you to use the AC adapter (sold separately) when using the camera indoor where
the AC outlet supplies the power to the camera or when connecting the camera to the personal computer for editing the images.
Be sure to turn off the power of the camera when changing the power supply from the batteries to the
AC adapter or vice versa. Do not change it when the power of the camera is turned on.
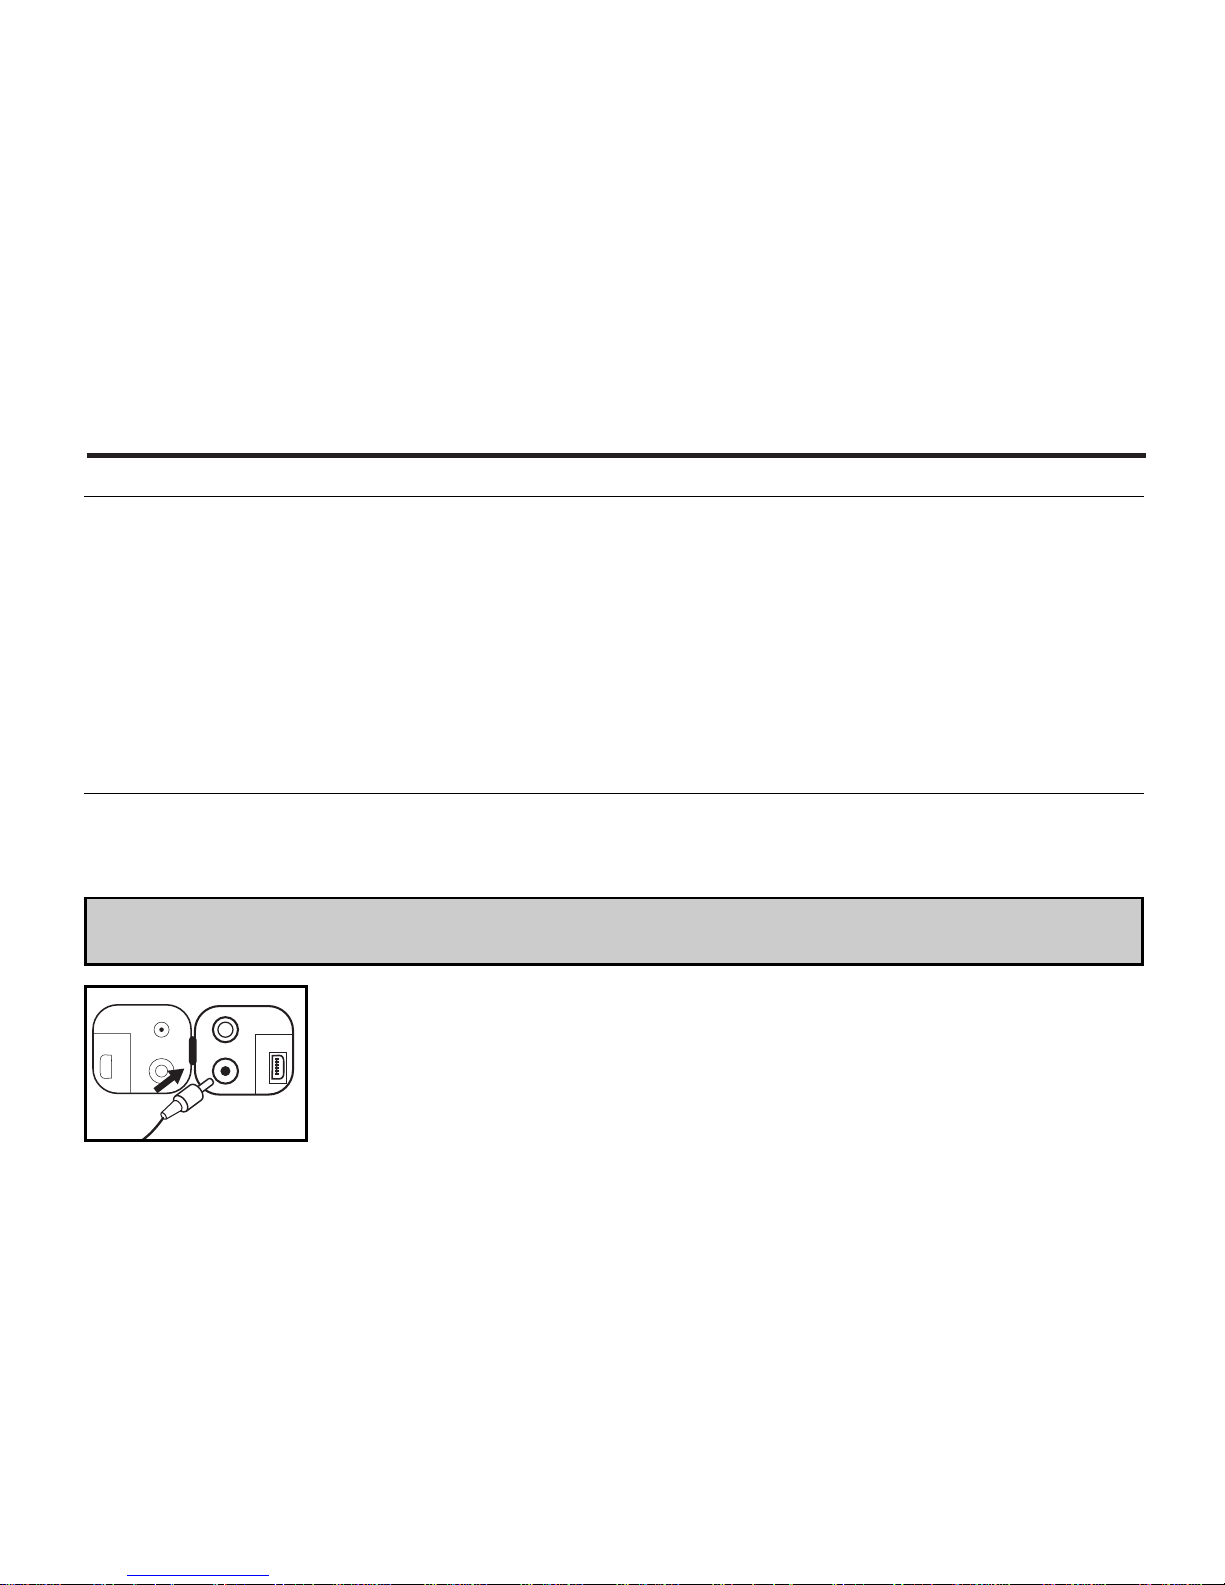
1 Connect the mini plug of the AC adapter to the DC terminal of the
camera.
• The Shape of the mini plug may vary depending on the AC adapter.
2 Connect the power plug of the AC adapter to an AC outlet.
26
INSERTING/REMOVING THE COMPACT FLASH(CF) CARD
Be sure to turn off the power of the camera when inserting or removing the CF card into or from the
camera. Otherwise, the data in the card may be lost or the card may be damaged.
INSERTING THE CF CARD
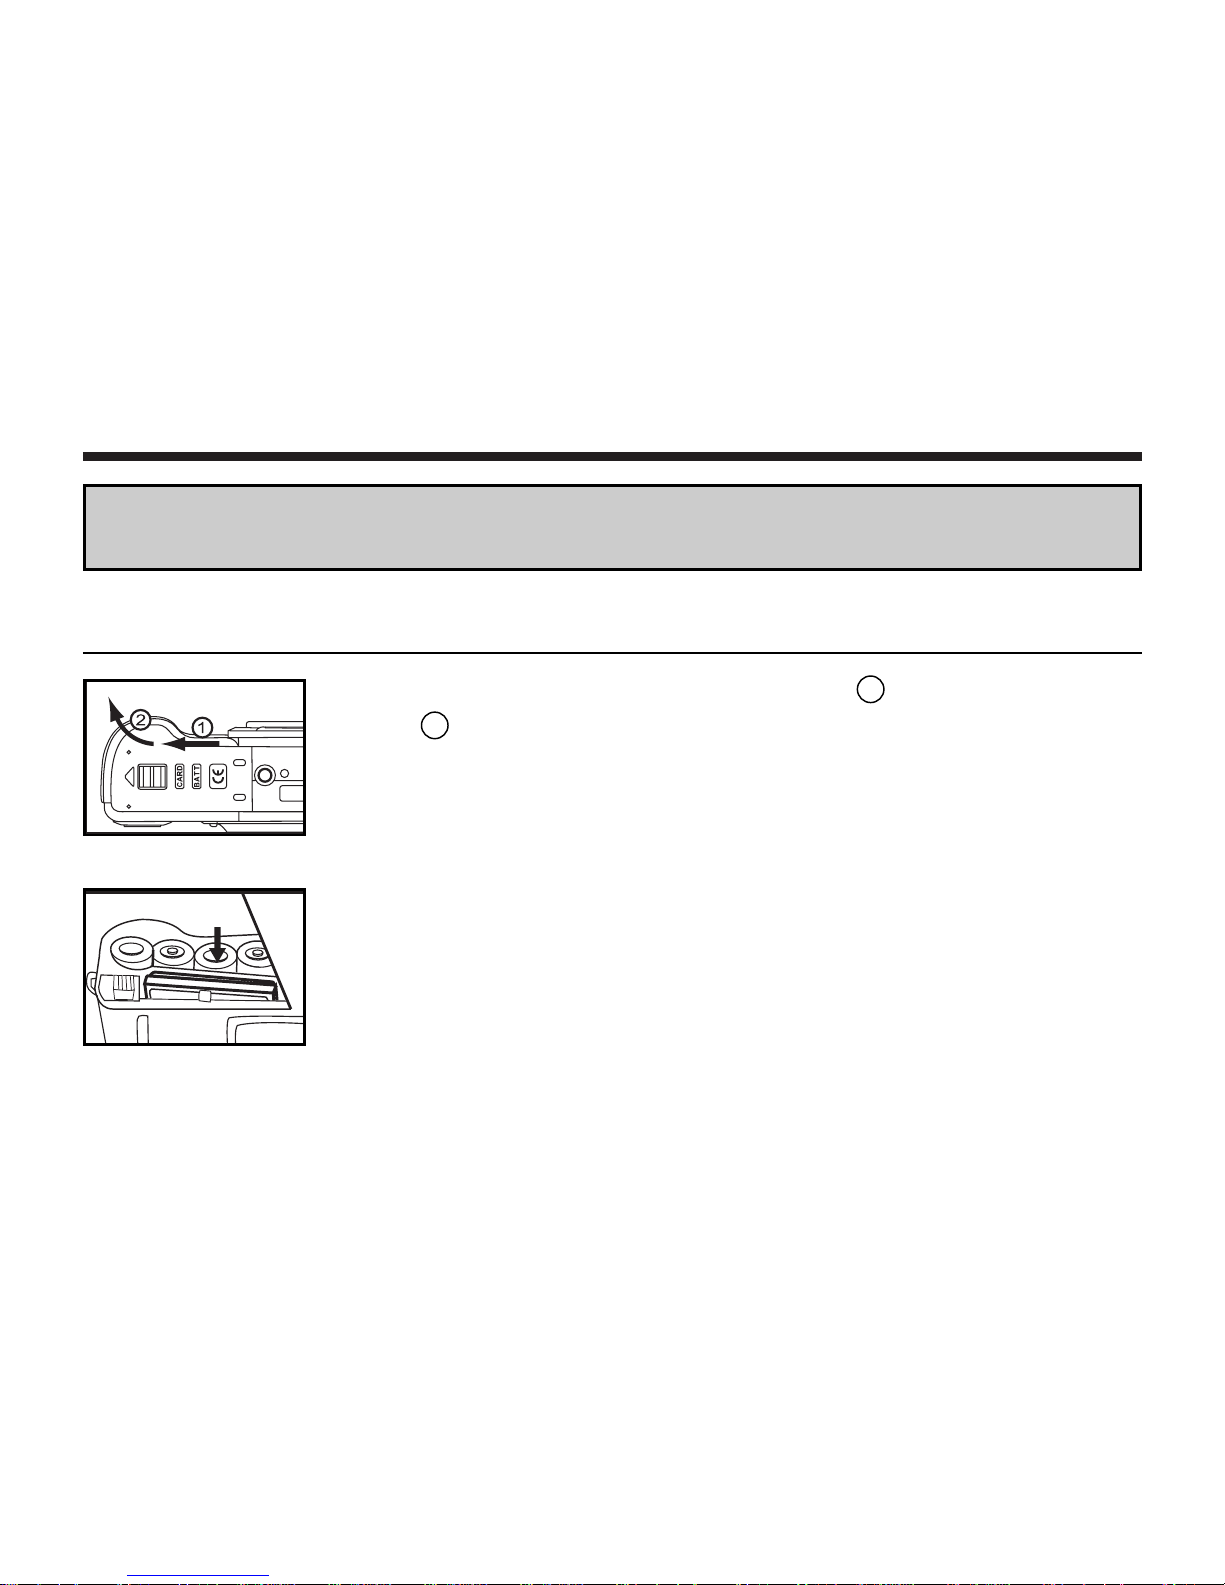
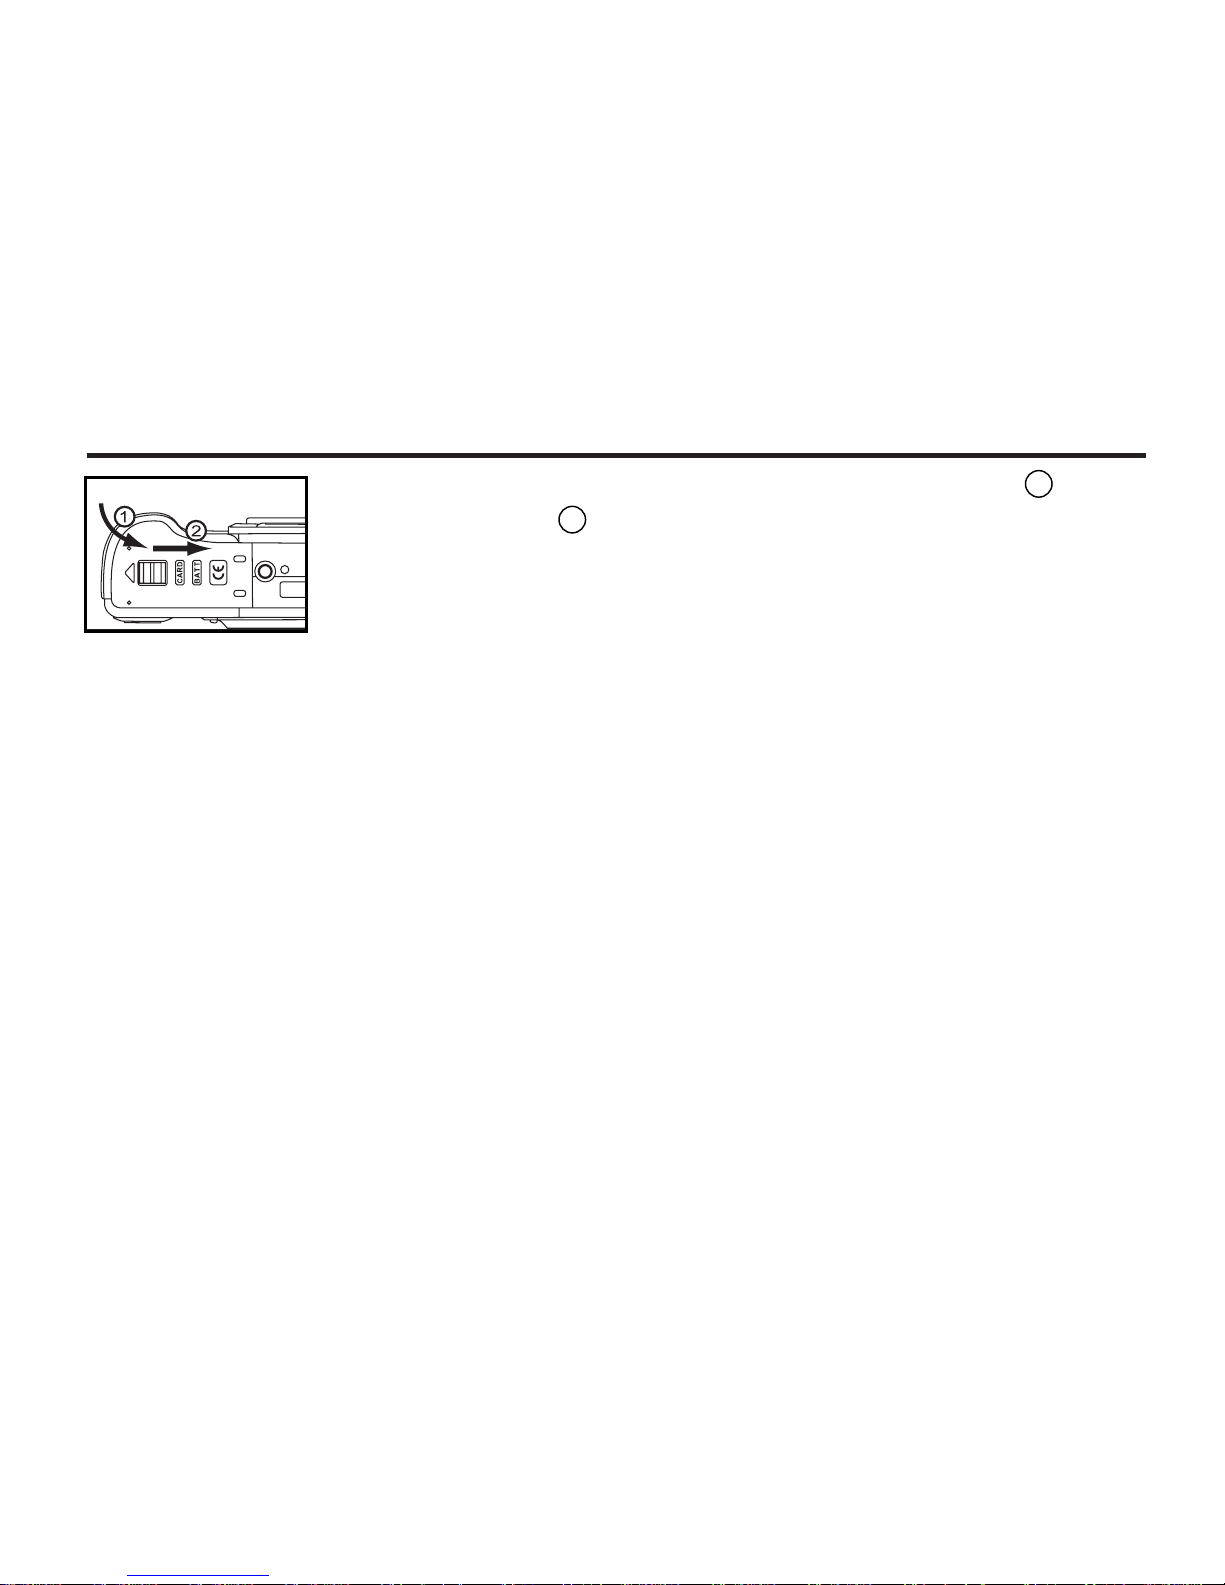
1 Slide the battery-chamber door slightly in the 1 direction and open it
in the 2 direction.
2 Insert the CF card into the card slot.
• Position the flat edge side of the card towards the camera lens and insert the
card with the signal part facing down until the card stops.
• Insert the card straight. Do not insert it on the angle.
• If the card stops halfway, check the direction of the card. Forcing the card
into the slot may damage the card or the camera.
27
INSERTING/REMOVING THE COMPACT FLASH(CF) CARD
3 Close the battery-chamber door in the direction of the arrow 1 and
slide it until it clicks 2 .
28
INSERTING/REMOVING THE COMPACT FLASH(CF) CARD
3 Push in the card-release lever straight.
• As the CF card ejects slightly from the camera, pull out the card.
• Be careful with the card because it may be hot.
• Keep the CF card in the protection bag supplied with the card.
4 Close the battery-chamber door in the direction of the arrow 1 and
slide it until it clicks 2 .
1 Confirm that the power of the camera is turned off.
2 Open the battery-chamber door as shown in the figure.
REMOVING THE CF CARD

29
TAKING PICTURES
 Loading...