

Page 1
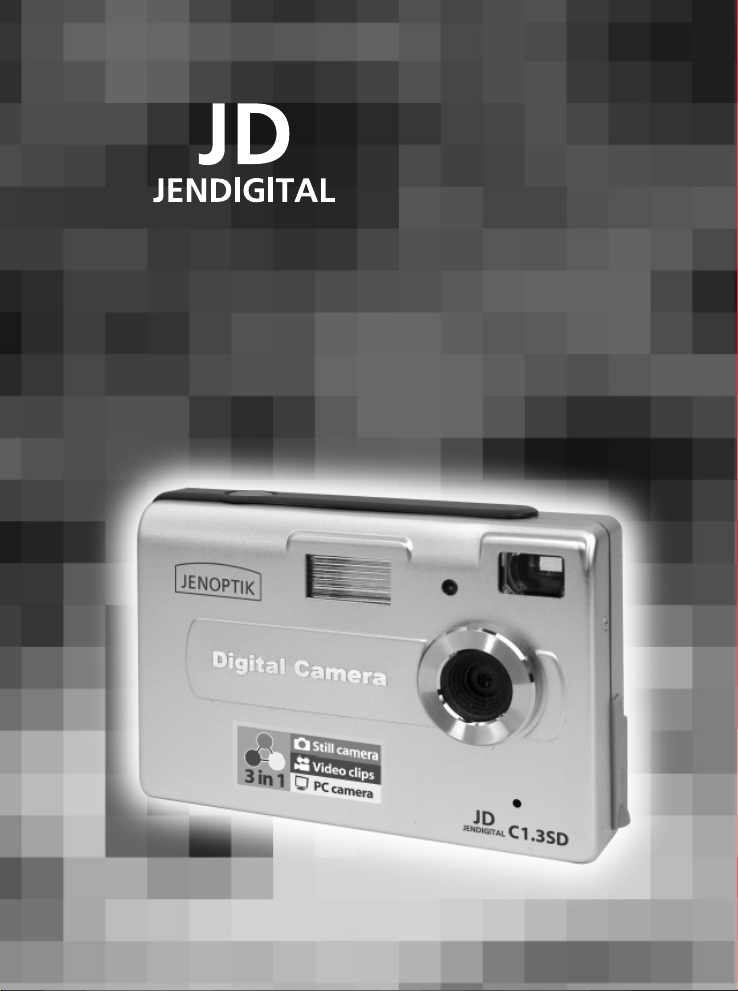
C1.3SD
User’s Guide
User’s Guide
www.jenoptik-camera.com
Page 2

ENGLISH
ENU
This manual is designed to assist you in using the JDC1.3SD. Information in this document
has been carefully checked for accuracy; however, no guarantee is given to the absolute
correctness of the contents.The information in this document is subject to change without
notice. © Copyright 2005 Concord Camera Corp.
FEDERAL COMMUNICATIONS COMMISSION (FCC) COMPLIANCE
This equipment has been tested and found to comply with the limits for a Class B digital device, pursuant
to Part 15 of the FCC Rules. These limits are designed to provide reasonable protection against
harmful interference in a residential installation. This equipment generates, uses, and can radiate radio
frequency energy and, if not installed and used in accordance with the instructions, may cause harmful
interference to radio communications. However, there is no guarantee that interference will not occur in
a particular installation. If this equipment does cause harmful interference to radio or television reception,
which can be determined by turning the equipment off and on, the user is encouraged to try to correct
the interference by one or more of the following measures:
• Reorient or relocate the receiving antenna.
• Increase the separation between the equipment and the receiver.
• Connect the equipment to an outlet on a circuit different from that to which the receiver is
connected.
• Consult the dealer or an experienced radio/TV technician for help.
Note!
Changes or modifications not expressly approved by the party responsible for compliance could void
your authority to operate the equipment.
Use of shielded cable is required to comply with Class B limits in Subpart B of Part 15 of the FCC
rules. Do not make any changes or modifications to the equipment unless otherwise specified in the
manual. If such changes or modifications should be made, you could be required to stop operation of
the equipment.
DECLARATION OF CONFORMITY
This device complies with part 15 of the FCC rules. Operation is subject to the following conditions:
This device may not cause harmful interference.
This device must accept any interference received, including interference that may cause undesired
operation.
CANADIAN DEPARTMENT OF COMMUNICATIONS
This class B digital apparatus meets all requirements of the Canadian Interference-causing Equipment
Regulations.
TRADEMARK RECOGNITION
Concord, and the Concord logo are registered trademarks or trademarks of Concord Camera Corp.,
in the United States and/or other countries. Windows (an abbreviated term referring to the Microsoft
Windows Operation System), NetMeeting, and Media Player are registered trademarks and products of
Microsoft Corporation registered in the USA and other countries. Ulead PhotoExplorer 8.0 SE and COOL
360 are products and trademarks of Ulead Inc. Other corporate, product names, or trade references are
1
Page 3

trademarks or registered trademarks of their respective companies.
GENERAL WARNINGS
When fitting batteries into the camera, check the polarity of the batteries (- and +) to ensure that you
insert the battery correctly. Incorrect polarity may result in the batteries splitting or leaking and causing
a fire, injury, or soiling of the battery compartment. Remove the batteries if the camera will not be used
for an extended period of time. The batteries may leak and cause a fire, injury or soiling of the battery
compartment. If the batteries leak, clean and wipe the battery compartment carefully and install new
batteries. Wash your hands carefully if you touch the battery fluid.
WARNING: Handling the USB cable on this product may expose you to lead, a chemical known
to the State of California to cause birth defects or other reproductive harm. Wash your hands after
handling.
NOTE FOR THE BUILT-IN MEMORY
The JDC1.3SD camera uses a type of internal memory that continually draws power to retain pictures
and/or video clips in the camera’s internal memory, even when the camera is powered off. If the batteries
are dead or removed before turning off the camera for more than 30 seconds, all the pictures and/or
video clips stored in the internal memory will be lost.
If the camera detects the low battery power, it is strongly recommended, when using the internal memory
for the storage of images and /or video clips, that you transfer your images and/or video clips to the
computer promptly.
The JDC1.3SD camera also works with the SD memory card which can store the pictures and /or video
clips even if the batteries are depleted or removed.
NOTE FOR SETTING DIFFERENT “MODES”
After selecting the desired mode, press Shutter button within 3 seconds to activate the selected mode
otherwise the camera will go back to default Capture mode.
ENU
2
Page 4

TABLE OF CONTENTS
ENU
Federal Communications Commission (FCC) Compliance .....................................................................1
Declaration Of Conformity ........................................................................................................................1
Canadian Department Communications ..................................................................................................1
Trademark Recognition ............................................................................................................................1
General Warnings .....................................................................................................................................2
Note For The Built-in Memory ..................................................................................................................2
Note for Setting Different “Modes” ..........................................................................................................2
GENERAL INFORMATION ................................................................................................. 4
Computer System Requirements .......................................................................................................4
Package Contents ..............................................................................................................................4
GETTING STARTED ...........................................................................................................5
Identifying Components ......................................................................................................................5
How to Insert/Remove SD Memory Card ..........................................................................................6
Inserting a Memory Card ..............................................................................................................6
Removing a Memory Card ..........................................................................................................6
USING THE JDC1.3SD ......................................................................................................7
Powering the Camera ON/OFF ..........................................................................................................7
Camera Icons and Descriptions .........................................................................................................7
Capturing Digital Still Images .............................................................................................................8
Setting Image Resolution ...................................................................................................................8
Using the Flash ..................................................................................................................................9
Using the Self-timer ............................................................................................................................9
Using the Continuous shooting ........................................................................................................10
Recording Digital Video ....................................................................................................................10
Deleting Image and Video Files ......................................................................................................10
Deleting the Last File .................................................................................................................10
Deleting All Files .........................................................................................................................11
SOFTWARE INSTALLATION GUIDE ............................................................................... 12
Introduction to Software Applications ...............................................................................................12
Installing Software Applications ........................................................................................................12
DOWNLOADING THE STILL IMAGES/VIDEO CLIPS TO THE COMPUTER ................ 13
USING JDC1.3SD AS A WEB CAMERA .........................................................................14
CAMERA MAINTENANCE ............................................................................................... 15
Caring for Your Camera ....................................................................................................................15
Operational & Storage Environment ...............................................................................................15
Cleaning the JDC1.3SD ..................................................................................................................15
PRODUCT SPECIFICATIONS ..........................................................................................16
TROUBLESHOOTING ..................................................................................................... 17
GETTING HELP ................................................................................................................ 18
3
Page 5

GENERAL INFORMATION
GENERAL INFORMATION
COMPUTER SYSTEM REQUIREMENTS
The JDC1.3SD is designed to work with your home or office computer. To ensure proper operation your
computer must meet the following requirements:
• Pentium II Class 400 MHz processor
• Windows® 98SE/ME/2000/XP
• 128MB RAM
• 310MB free hard disk space
• USB port
• CD-ROM drive
PACKAGE CONTENTS
Open the JDC1.3SD package and examine the contents. Your package should contain the following
items. Note, however, that items included with your camera kit may vary slightly depending upon the
options selected by your camera retailer. Check with your retailer for details, as options will vary by
retailer.
• JDC1.3SD
• Camera wrist strap
• 3 AAA batteries
• USB cable
• User’s Guide
• Software CD containing:
– JDC1.3SD Driver
– Owner’s Manual (PDF)
– Ulead Photo Explorer 8.0SE Basic
– Ulead COOL 360
– Adobe Acrobat Reader
ENU
4
Page 6

GETTING STARTED
GETTING STARTED
ENU
IDENTIFYING COMPONENTS
The following diagrams identify the JDC1.3SD components:
Front
Back
Status LCD
Top
Flash
Viewfinder
LED
Lens
Flash ready
LED
Mode button
Shutter Button
5
Page 7

Side
GETTING STARTED
ENU
Strap ring
Battery
compartment /
SD card slot
USB port
HOW TO INSERT/REMOVE SD MEMORY CARD
The JDC1.3SD accepts a Secure Digital (SD) memory card up to 512MB capacity. The memory card
takes priority over the internal memory. Whenever a memory card is inserted the camera will immediately
use the memory card in preference to the internal memory. Therefore, when a memory card is inserted,
the camera will store images and videos on the memory card. The images and video clips already stored
on the internal memory will not be transferred to the memory card.
Inserting a Memory Card
Insert an SD card into the memory card slot located on the side of the camera, and gently press down
with your finger.
Removing a Memory Card
Gently press down on the memory card and it will partially eject. Pull the card out with your fingers.
Note: To use the internal memory (8MB), please remove the memory card first. Memory card is
recommended to avoid loss of images due to dead battery.
6
Page 8

USING THE JDC1.3SD
USING THE JDC1.3SD
ENU
POWERING THE CAMERA ON/OFF
• To power the camera on, press and hold the button (approx. 2 seconds) until a three-digital
number displays on the LCD. The camera will beep and the status LCD will display camera status
information.
• To power the camera off, press and hold the
Note:
1. The JDC1.3SD automatically powers off after 60 seconds of inactivity.
2. Power Off the camera before removing batteries.
CAMERA ICONS AND DESCRIPTIONS
Icons Descriptions
Capture Mode for capturing digital still images
Self-timer allows 10 seconds to caputure an image.
Movie Mode for capturing video clips
Continuous shooting allows to take 3 continuous shots.
Delete All: Delete all images and/or videos saved in the camera memory or on a memory
card.
Delete Last: Deletes the last image or video stored in the camera or the memory card.
Setup menu to set flash, resolution, compressed or non-compressed mode, U-disk, PC
camera mode and frequency.
Flash Off: The flash will not fire in any lighting condition.
Flash On: The camera will flash regardless of lighting conditions.
Automatic Flash: The flash will fire if there is insufficient ambient light.
button (approx. 3 seconds).
Resolution settings for still images
For compressed mode
For non-compressed mode to take clear pictures
The camera can be used as a removable storage disk in this mode.
7
Page 9

USING THE JDC1.3SD
You may use the camera as a web camera for video conferencing.
You may set the camera’s frequency to 50HZ.
You may set the camera’s frequency to 60HZ.
For exiting the setup menu
Battery level indicator
CAPTURING DIGITAL STILL IMAGES
1. Press and hold the button (approx. 2 seconds) to turn on the camera.
2. Frame your subject through the viewfinder.
3. Hold the camera steady and press the Shutter button firmly to capture an image. The camera will
beep to confirm that the image has been captured, and the status LCD will increment by one.
SETTING IMAGE RESOLUTION
1. Press and hold the button to power on the camera, the resolution is set automatically to 1280 x 1024.
2. Follow the below flow chart to select the desired image resolution.
ENU
SHUTTERSHUTTER
SHUTTERSHUTTER
SHUTTER
640 x 480 VGA, reduced resolution
1024 x 768 1 MP resolution
1280 x 1024 1.3 MP native resolution
1600 x 1200 2 MP interpolated
2048 x 1536 3 MP interpolated
resolution setting (1280 x 1024) is suggested for general use. The resolution will yield a 3
The
mega-pixel image (2048 x 1536) that is generated (calculated) by a process called interpolation, inside
the camera. Superfine images will include finer detail than their 1.3 mega-pixel equivalents, however,
they will consume more memory space. Images captured in (640 x 480) will have noticeably less
detail but require less memory space in the camera. Try capturing some images in all three resolutions
and compare the results.
8
Page 10

USING THE JDC1.3SD
USING THE FLASH
1. Press the button to turn on the camera.
2. Press the
ENU
3. Follow the below flow chart to select the desired flash mode:
button six times until the setup menu appears on the LCD.
SHUTTER SHUTTERSHUTTER
SHUTTER
3. Frame your subject through the viewfinder.
4. Hold the camera steady and press the Shutter button firmly to capture an image.
Note:
1. If the flash is charging , the flash icon on the status LCD will blink. The camera will not capture an
image while this icon is blinking. Wait for the icon to stop blinking before capturing an image.
2. The flash will yield best results when the subject is 5 feet (1.5 meters) away from the camera.
The image may be over exposed if you hold the camera too close to your subject (e.g.less than
5 feet or 1.5 meters away.)
3. The flash setting will be deactivated to the flash off mode if the battery indicator shows only one
segment. Change or recharge the battery to replenish power before using the camera with the
flash.
4. The flash is deactivated in the Movie mode.
USING THE SELF-TIMER
1. Press and hold the button to turn on the camera.
2. Press the button once to enter the self-timer mode.
3. Place your camera on a tripod (or a flat surface) and frame the subject through the viewfinder.
4. When ready to capture an image, press the Shutter button once to start the timer. The camera will
beep and the LED will blink slowly. As the time counts down to 3 seconds, the camera will beep and
flash faster.
9
Page 11

USING THE JDC1.3SD
USING THE CONTINUOUS SHOOTING
1. Press and hold the button to turn on the camera.
2. Press the
3. Shoot the image. The camera will capture 3 continuous pictures in 640 x 480 resolution.
button thrice to enter the continuous shooting mode.
RECORDING DIGITAL VIDEO
1. Press and hold the button (approx. 2 seconds) to turn on the camera.
2. Press the button twice to enter the video mode.
3. Frame your subject through the viewfinder and press the Shutter button once to start recording.
4. To stop recording a video, press the Shutter button again. The status LCD will display the maximum
duration of a video-clip that you can capture based upon the memory.
Note:
The Movie mode deactivates the flash.
If an external memory card is used, the camera will store video on the card.
DELETING IMAGE AND VIDEO FILES
This function allows you to delete images and videos stored on your JDC1.3SD, or on a memory
card.
Deleting the Last File
1. Press and hold the
2. Press the button five times to enter the mode to delete the last file.
button (approx. 2 seconds) to turn on the camera.
ENU
Press Shutter button to erase the last file.
SHUTTER SHUTTERSHUTTER
10
SHUTTER
Page 12

USING THE JDC1.3SD
Deleting All Files
1. Press and hold the
2. Press the
ENU
Press Shutter button to erase all the files.
3. Please note that if a memory card is used, the camera will delete images from the memory card only.
If you want to delete images from internal memory, please remove the memory card and select Delete
ALL again.
After a deletion the status display updates to reflect the amount of memory by showing more storable number
for still image or recordable seconds for movie. The higher resolution setting (
lower number for image storage due to the larger file size, yet containing more details.
Note:
1. Delete ALL is the equivalent of formatting the memory card or the internal memory. Please
download all your images and videos before “deleting all”. Refer to the section “Downloading
Files to Your PC”.
2. The files set to Read-Only in the SD card will be deleted after formatting the memory card.
button (approx. 2 seconds) to turn on the camera.
button four times to enter the mode to delete all the files.
, ) corresponds to the
11
Page 13

SOFTWARE INSTALLATION GUIDE
SOFTWARE INSTALLATION GUIDE
INTRODUCTION TO SOFTWARE APPLICATIONS
Option Description
For Windows 98SE/2000/ME/XP, the camera driver is required for
Camera Driver
Ulead Photo Explorer
8.0 SE Basic
Ulead COOL 360 This software allows to stitch a series of still pictures into panorama.
Adobe Acrobat
Reader
installation so that the camera can work with the PC Cam mode, and the
still images and video clips can be transferred to the computer from the
camera under Windows 98SE.
For Windows 98SE and 2000, you need to install this software which
enables the video clips to be played back on the computer.This software
can be used for editing and enhancing the images.
Adobe Acrobat Reader enables you to view the electronic version of the
User’s Guide.
INSTALLING SOFTWARE APPLICATIONS
Step 1. Make sure that your camera is not connected to the computer. Insert the supplied CD-ROM into
the CD-ROM drive.
The Installer Splash Screen will appear automatically. If it does not appear, double click on the
CD-ROM drive icon, then double click on the autorun icon after you locate the CD-ROM drive
on your computer via “My Computer” on the desktop or “Start Menu”.
Setp 2. Click on the application item directed by the button located on the installer screen.
Note:
• To enable the movie playback under Windows 98SE and 2000, you need to install the Ulead
Photo Explorer
• Restart the computer after the installation of Ulead PhotoExplorer SE Basic is completed.
• Concord Support Website: Direct link to our camera support website. Please establish an internet
connection before clicking on the link.
ENU
Setp 3. Follow the on-screen instructions to complete
the installation.
12
Page 14

DOWNLOADING THE STILL IMAGES/VIDEO CLIPS TO THE COMPUTER
DOWNLOADING THE STILL IMAGES/VIDEO CLIPS TO THE
COMPUTER
ENU
Note:
For Windows 98SE, do not connect the camera to the computer before the camera driver installation
is completed.
1. Connect the camera to the computer by plugging the small end of the USB cable into the camera and
the larger end into the USB port of the computer (located either at the back of the computer or in the
front panel).
• The camera will be powered on.
• Ensure “
computer.
• The computer will detect and recognize the camera, and automatically complete the camera
installation to the computer as a removable disk.
2. a) For Windows XP, the Windows Wizard will launch, you may select “Open folders to view files”
from the listed operation items, then click OK to proceed to Step 3 below. For selecting the other
listed operation items,follow the on-screen instructions to proceed and complete.
” is displayed on the LCD of the camera for the Mass Storage connection to the
b) For Windows 98SE/ME/2000, double click on My Computer.
3. Locate and double click on Removable Disk.
4. Locate and double click on DCIM.
5. Locate and double click on 100IMAGE.
• The stored pictures and video clips in the memory will be displayed.
• To play back the video clips, double click on the desired video file. For Windows 98SE and
2000, the movie playback is required for the installation of Ulead Photo Explorer SE Basic
which is bundled with the supplied CD-ROM.
6. Click and drag the files into a directory in your computer to save them.
13
Page 15

USING JDC1.3SD AS A WEB CAMERA
USING JDC1.3SD AS A WEB CAMERA
You may also use the camera as a web camera and a video conferencing camera.
Note:
The camera driver must be installed before connecting the camera to the computer to play PC Cam
for the first time.
1. Install the camera driver from the supplied CD-ROM.
2. Power on the camera, and press the
• The display of “ “ on the LCD indicates the camera’s entry to the PC Cam mode.
3. Connect the camera to the computer.
4. Launch Microsoft NetMeeting software.
Note:
If you do not have NetMeeting already installed on your computer, please visit www. microsoft.com
for instructions and free download.
Under Windows 2000
When the camera is used in the PC Cam mode and connected to the computer for the first time, the
warning message of “Digital Signature Not Found” will pop up. Click“Yes” to continue to complete the
installation.
button until “ “ is displayed on the LCD of the camera.
ENU
14
Page 16

CAMERA MAINTENANCE
CAMERA MAINTENANCE
ENU
CARING FOR YOUR CAMERA
Do not store or use the camera in the following environments:
• Very humid, dirty or dusty places.
• In direct sunlight or in places subject to extreme temperatures, such as in a closed car during
summer.
• Extremely cold places.
• Places that are subject to strong vibrations, smoke, or steam.
• Places that are subject to strong magnetic fields (near motors, transformers or magnets).
• Places with chemicals such as pesticides or next to rubber or vinyl products for a long period of
time.
• In the rain or snow.
OPERATIONAL & STORAGE ENVIRONMENT
Store your JDC1.3SD in a cool, dry place if you do not intend to use it for a long period of time.
Remove the batteries if the camera will not be used for more than 10 days. Do not exceed the following
temperature and humidity ranges when using and storing your JDC1.3SD.
Operating Temperature 32°F - 104°F (0°C - 40°C)
Operating Humidity 30% - 90% RH
Storage Temperature -40°F - 158°F (-40°C - 70°C)
Storage Humidity 10% - 85% RH
CLEANING JDC1.3SD
Use a small soft brush or lens pen to remove dust from the lens and LCD surface. Wipe the surface
lightly with a soft, lint-free dry cloth. If needed, apply a small amount of lens cleaning liquid to a piece
of lens cleaning paper and wipe it gently. Do not apply cleaning liquid directly to the lens. Do not touch
the lens with your fingers. Do not scratch any part of the camera with sharp objects. Clean the camera’s
body with a soft, dry cloth. Do not use volatile substances such as thinners, benzene or insecticide, as
these may react with camera body and cause deformation to the camera.
15
Page 17

PRODUCT SPECIFICATIONS
PRODUCT SPECIFICATIONS
Sensor 1.3 Mega Pixel sensor
Internal
memory
Image
resolution
Image
capacity²
Video
resolution
File format JPEG (still images), AVI (video clips – no audio)
Exposure Automatic
White balance Automatic
Lens focal
length
Flash Modes Automatic, on (fill), off
Display Monochrome status LCD
Computer
interface
Power source 3 AAA batteries(1.5V)
Power
Management
OS support Windows 98SE/ME/2000/XP
8 MB built-in memory(SDRAM)
5-1: 640 x 480
5-2: 1024 x 768
5-3: 1280 x 1024
5-4: 1600 x 1200¹
5-5: 2048 x 1536¹
Images Stored (approx.)
Image
Quality
Normal 610152037
Economic 10 18 24 40 55
320x240, 10fps
f=8.34mm
USB 1.1
Camera powers-off after 60 seconds of inactivity
2048x1536¹ 1600x1200¹ 1280x1024 1024x768 640x480
Image Size
ENU
1. By internal interpolation. Native resolution is 1280 x 1024.
2. Image and video capacity varies depending upon scene content and complexity.
16
Page 18

TROUBLESHOOTING
TROUBLESHOOTING
If any problems arise with the JDC1.3SD, refer to this troubleshooting chart:
ENU
Symptom Possible cause Solution
Change or recharge the battery. Also,
check for correct polarity (orientation) of the
batteries.
Press and hold the Power button until “ON”
appears in the status display.
The camera powers off automatically after
60 seconds. Make sure the camera’s power
is ON before taking an image.
The camera’s buttons are not functional
when connected to a PC. Disconnect the
camera to capture more images.
Turn the flash mode to Flash ON.
Wait for the camera to store files. The
image number blinks at status LCD while
the camera is processing and stops blinking
when the camera is ready for use.
Check to ensure that all connections are
” is
secure.
Look for Removable Disk under My
Computer.
Install Ulead Photo Explorer SE Basic from
the supplied CD-ROM, and restart your
computer after installing it.
Install the camera driver from the supplied
CD-ROM.
Press the
displayed on the LCD of the camera.
Hold your camera steady until you hear
a “beep” which indicates the exposure is
completed.
The camera doesn’t
turn on.
The camera won’t
capture a image.
Can’t download
images to the PC.
Can’t play back the
video clips on the
computer under
Windows 98SE or
Windows 2000.
Can’t play PC Cam
on the computer.
I get a blurred image
when downloading
my images to my
computer.
The battery is drained.
Power button must be
pressed for 3 to 4 seconds
Is the camera turned on?
Is the camera connected to
a computer?
The light condition is
insufficient.
The camera is processing.
Connection may have failed,
and make sure that “
displayed on the LCD of the
camera.
The software of Ulead Photo
Explorer SE Basic from
the supplied CD-ROM has
not been installed on your
computer.
The camera driver from
the supplied CD-ROM has
not been installed on your
computer.
Make sure “
displayed on the LCD of the
camera.
There may be a momentary
delay between pressing the
shutter button and the actual
exposure.
” is
button until “ ” is
17
Page 19

GETTING HELP
GETTING HELP
You can get help from the troubleshooting section, FAQ or Customer Support on our website.
Troubleshooting Section in this User’s Guide
Please refer to the Troubleshooting section first, as it contains some of the most common problems that
users encounter.
Website FAQ
Please visit our website at www.jenoptik-camera.com to view the Frequently Asked Questions (FAQ).
Website Customer Support
If the problem you are encountering is not listed in the FAQ section, please send us an email through
our web site by clicking on Contact Us.
If you have questions concerning the operation of the camera or software installation, please have the
following information ready before you contact us:
Camera Information: Computer Information:
Name of camera model: Operation System:
Camera Serial Number: Computer Maker and Model:
Exact Error Message Received:
ENU
The Jenoptik trademark is used by Concord Camera Corp. and its subsidiaries under license. Concord and the
Concord logo are registered trademarks or trademarks of Concord Camera Corp., in the United States and/or
other countries. Microsoft and Windows are either registered trademarks or trademarks of Microsoft Corporation
in the United States and/or other countries. All other brands and product names are either registered trademarks
or trademarks of their respective owners.
18
Page 20

Visit Concord on the Internet
www.jenoptik-camera.com
JDC1.3SD User’s Guide
Copyright 2005 Concord Camera Corp.
Version 1.0
585507-00
R1
 Loading...