

Jenoptik JD800i Instruction Manual

- 1 -
1. Camera Introduction
The camera has the following functions:
1. Ability to easily download pictures from the camera to
the computer software
2. Removable memory card
3. Simple and easy-to-use LCD panel
4. Various function mode specifications
5. Automatic power saving device
6. Compact, light weight and easy to carry
Systems requirement:
IBM PC or PC- compatible
1.Microsoft Windows 98 /2000
2.24MB memory , 32MB is recommended
3.VGA color display (TRUE color mode support is recommended)
4.CD-ROM drive and a 3.5* floppy drive
5.Available USB port.
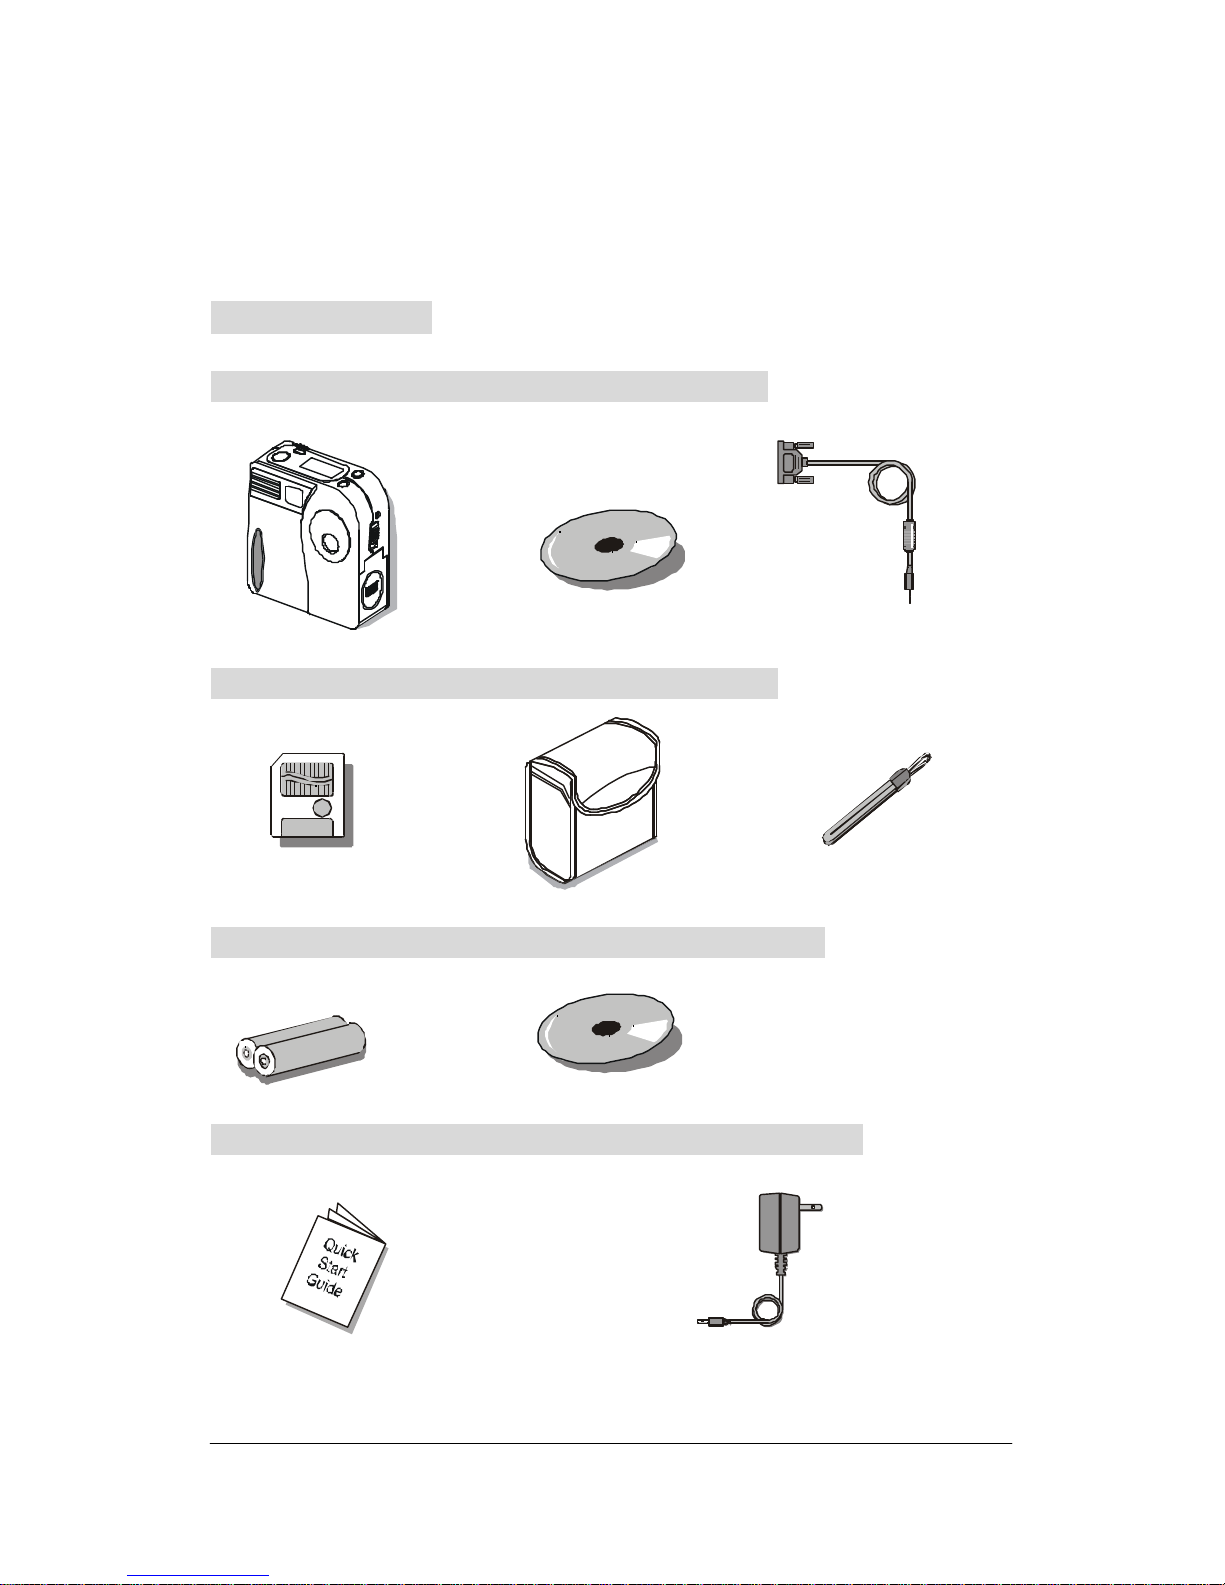
Package contents:
Camera USB cable
User's manual in CD-Rom 2 AA Alkaline Batteries
Quick Start Guide 2MB memory card
Pouch and Strap CD Software
TWAIN Driver in CD-Rom *3V DC Adapter, 1,5A (optional)
- 2 -
Package contents:
Digital Camera CD Software USB cable
Memory card Pouch Strap
Batteries User's manual & Twain Driver in CD
Quick Start Guide *3V DC Adapter, 1,5A (optional)
- 3 -
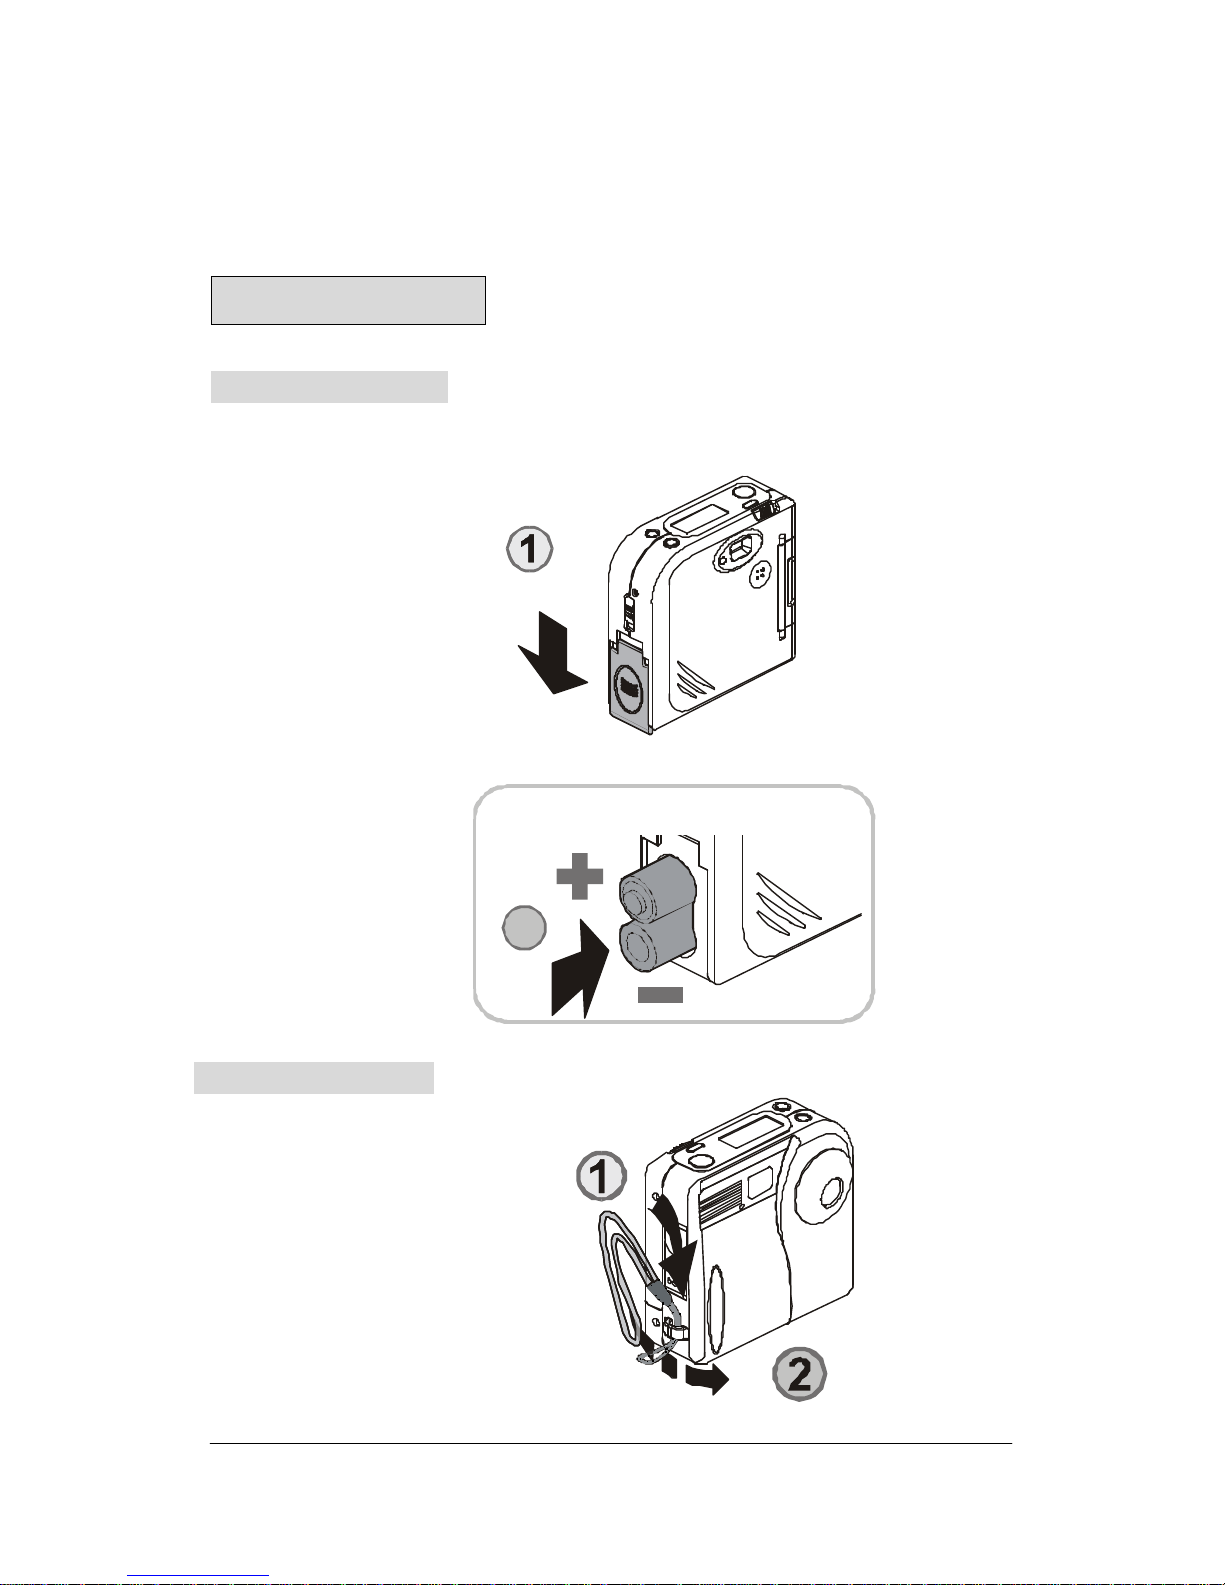
2. Preparation
Loading the battery
To load the battery: (As shown by figures below)
Attaching the strap:
Attaching the strap as shown
in figures 1 and 2 below:
2
?
Please note the correct positive (+) and
negative (-) polarity as shown in figure 2.
- 4 -
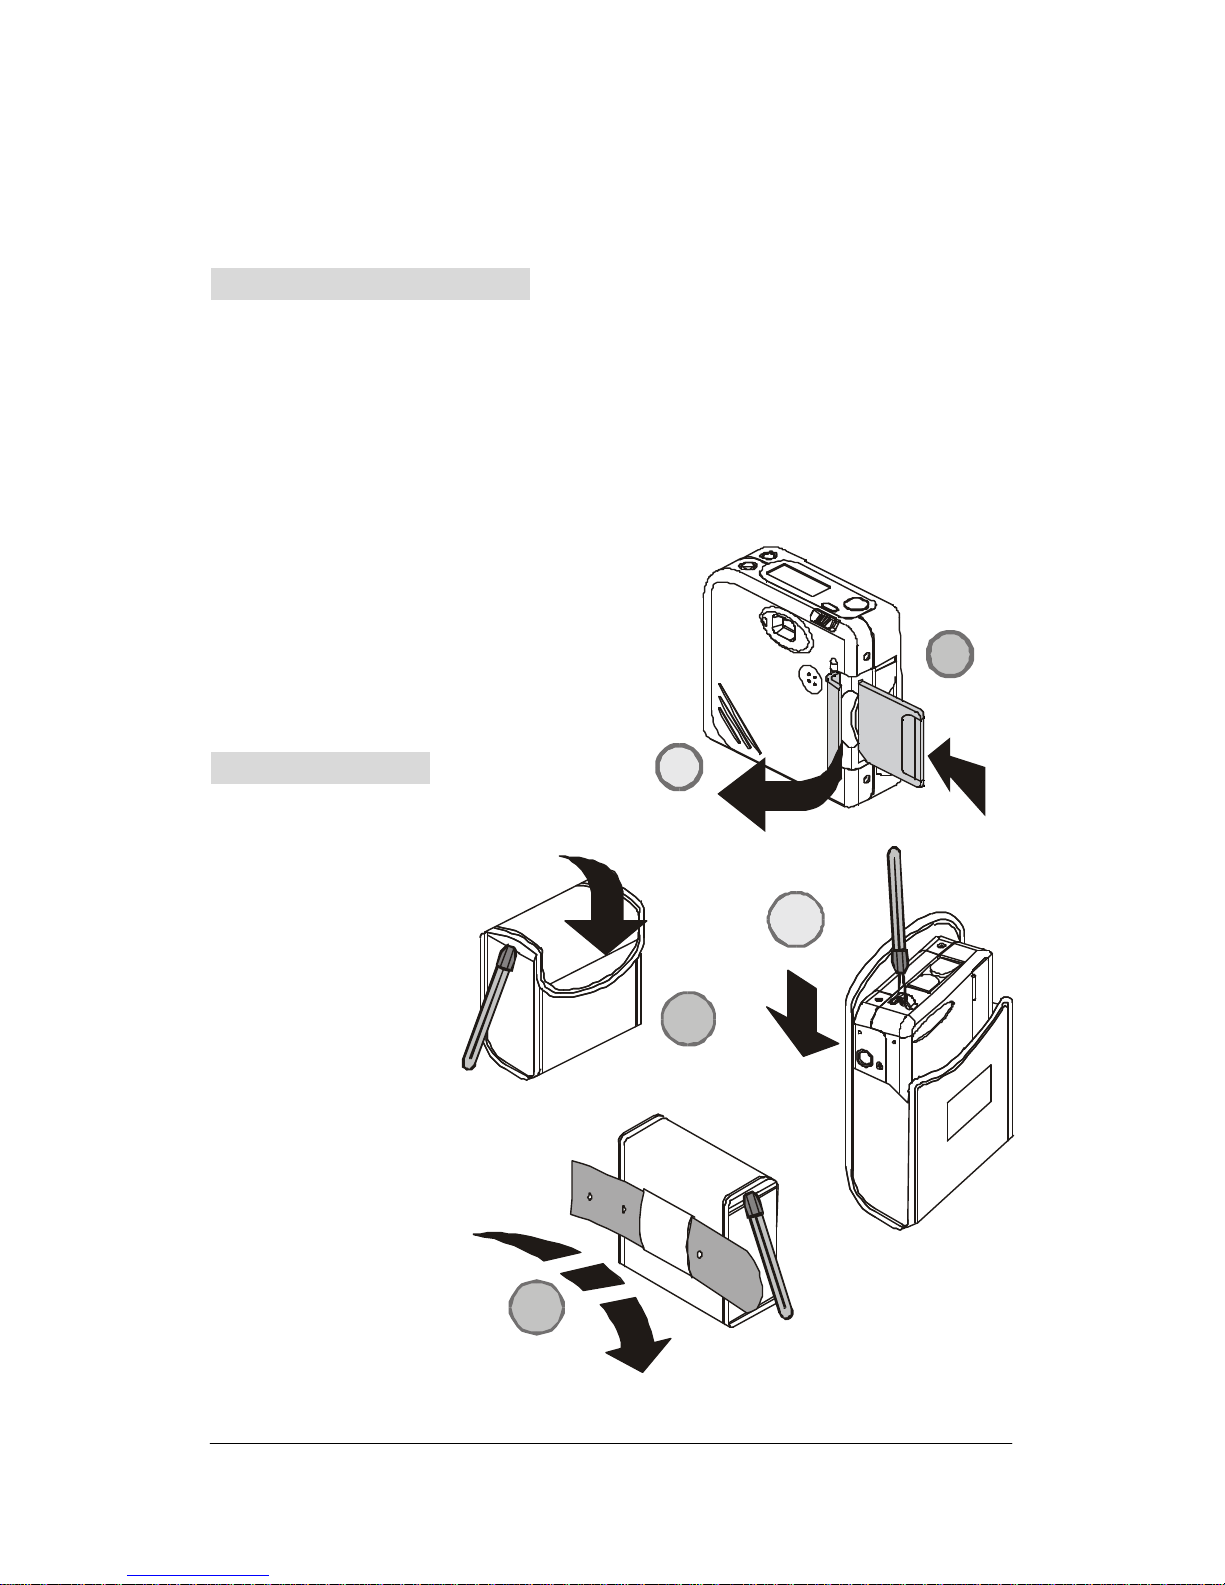
Memory Card Installation:
Installing the memory card as shown in figure 1 and below.
Setting the Pouch:
To set the pouch, please follow
the procedure as below.
The camera is operational only with the installation of memory
card.
Any new memory card used first time by this camera will
have to be formated.
Please see Page 13 for format procedure.
Note : ? Be sure to turn the power off
when you want to replace the
memory card to avoid causing
damage to the card.
Purse function as
shown in figure 3
2
1
1
2
3
- 5 -
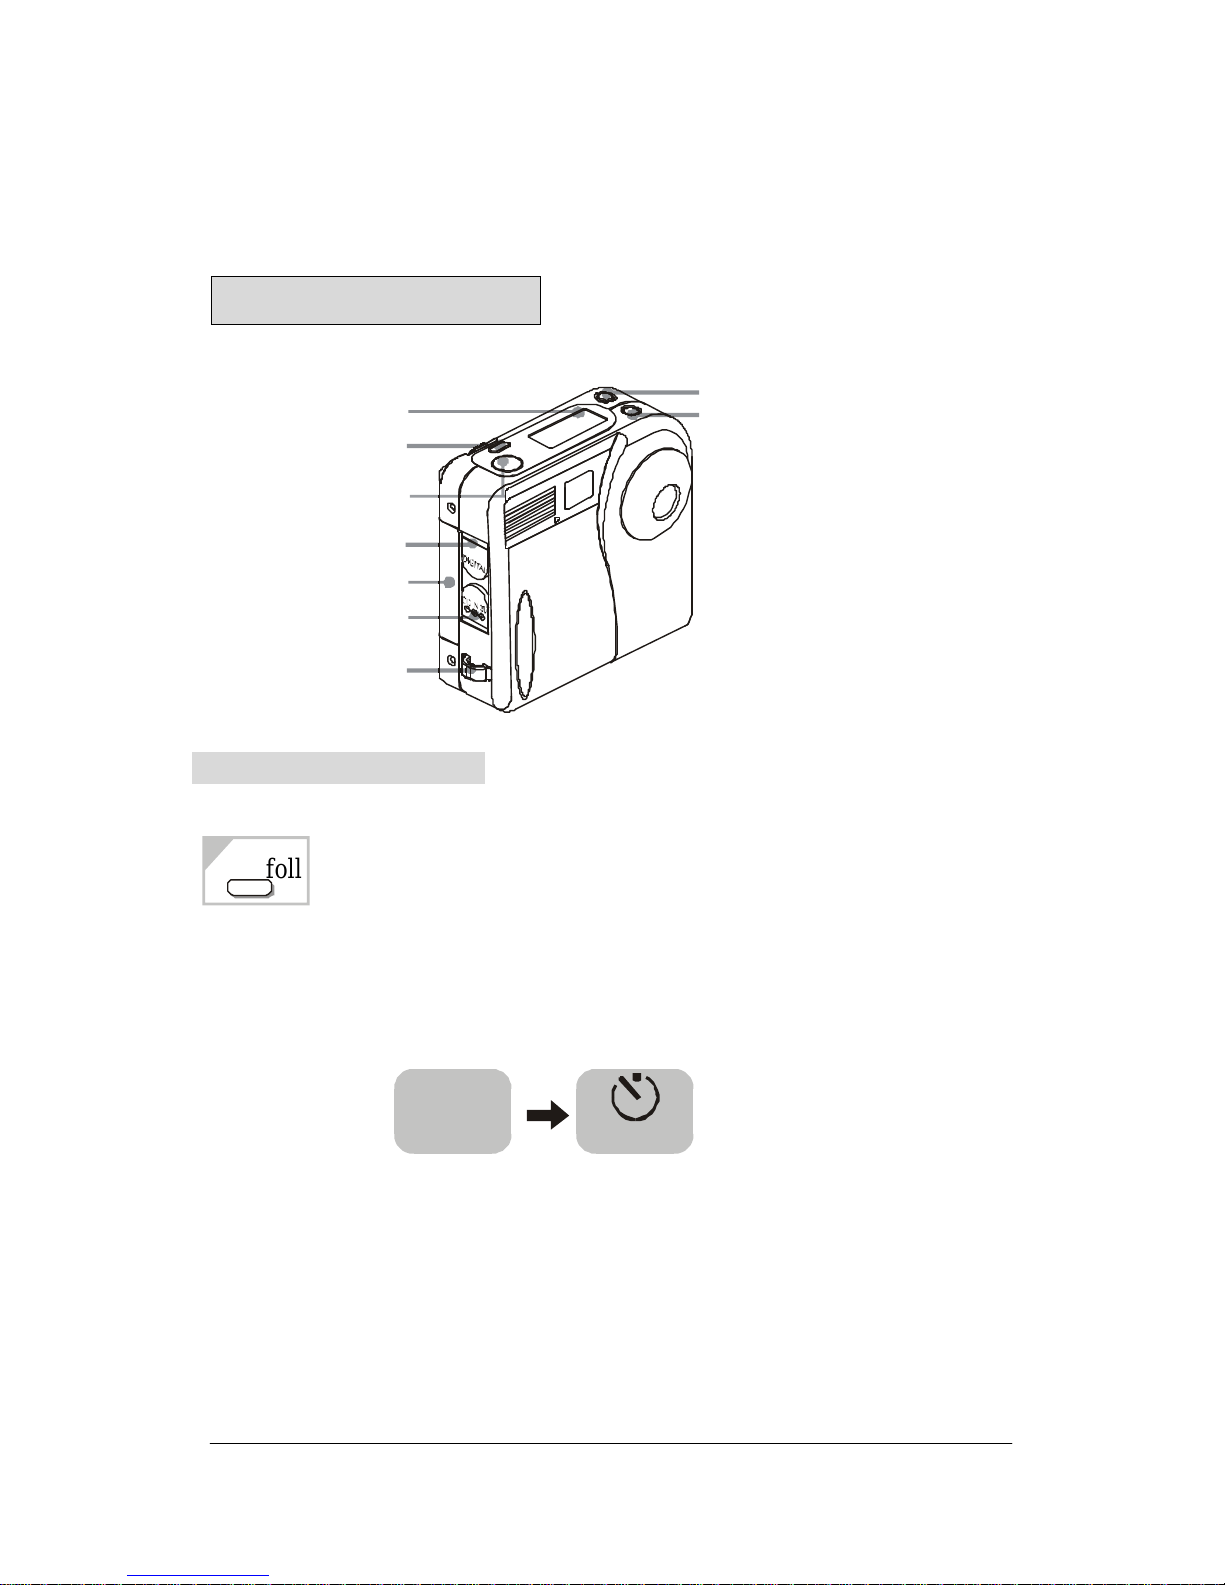
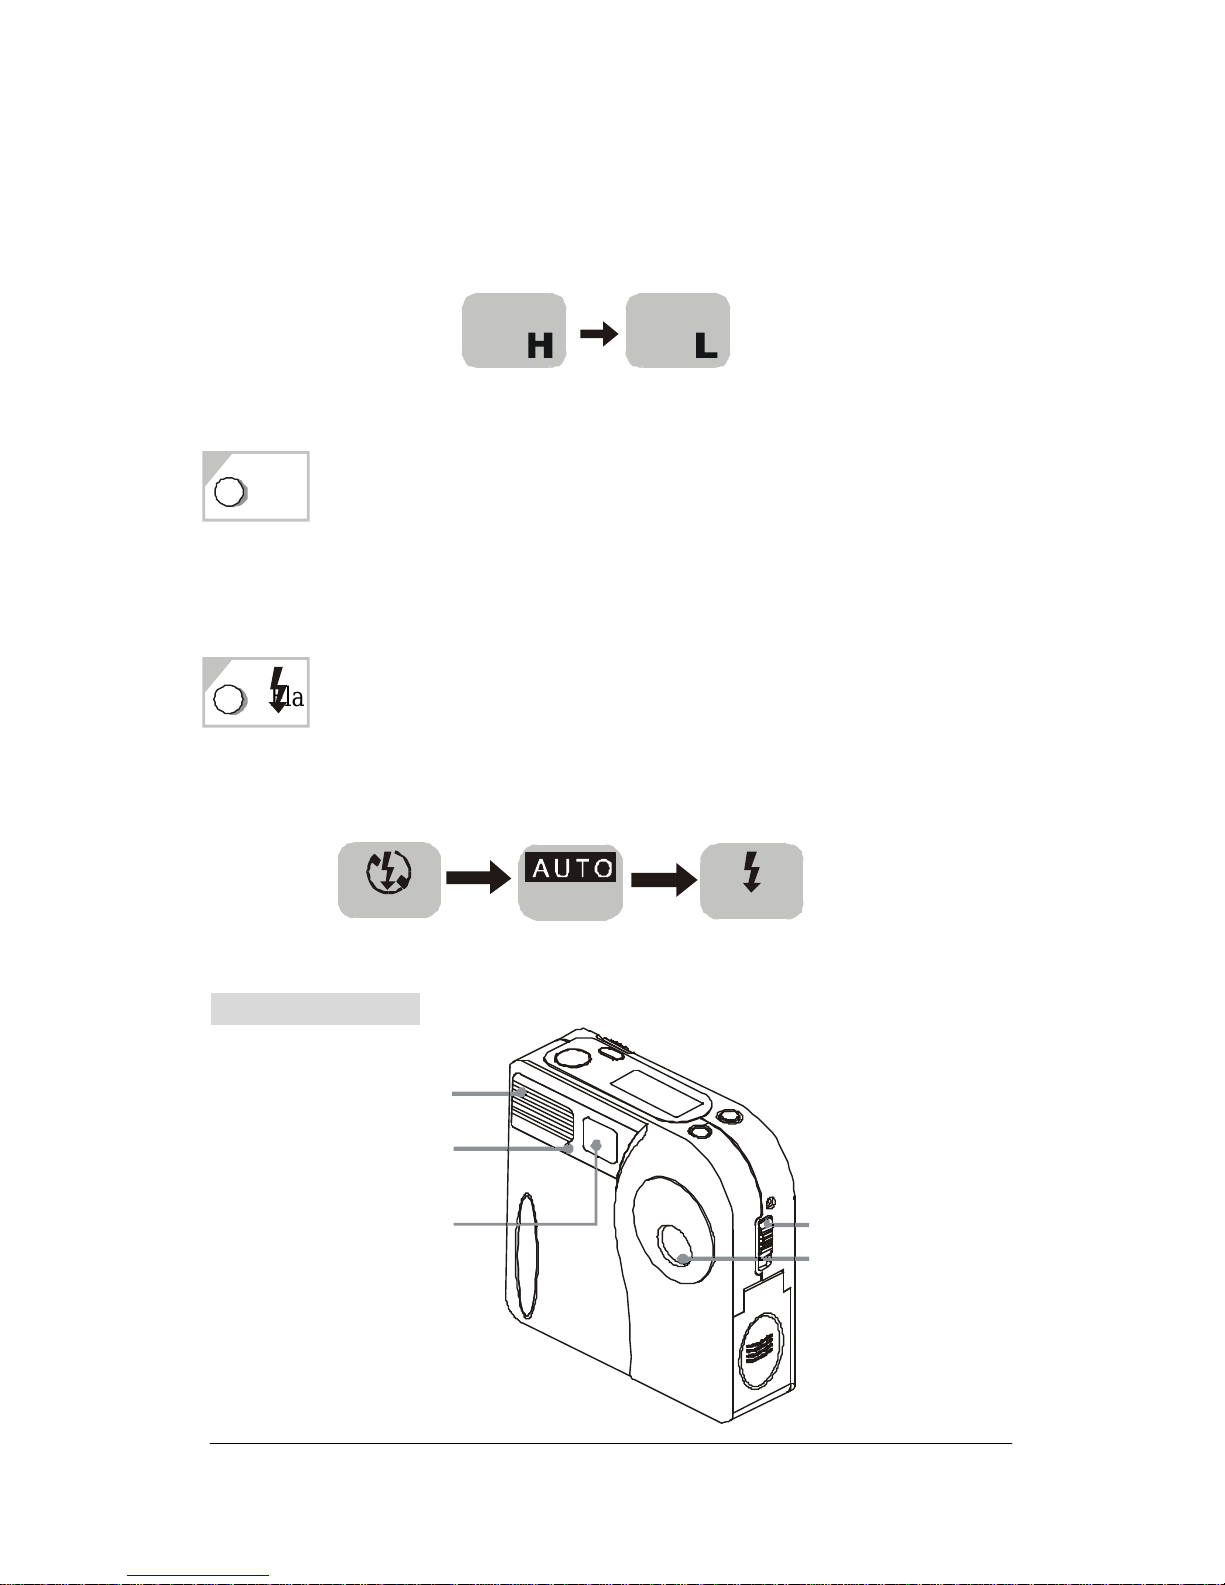
3. Nomenclature:
Mode button operations:
4 different modes will appear on the panel in
following sequence when you press the mode
button.
Normal/Self-timer mode:Press the mode button
once to switch Normal/Self -timer mode.
note: " 1 " is normal condition.
Note:The Self-timer givs you 10 seconds before it
captures the image
High/Low resolution mode : Press the mode
button for 3 seconds to switch High/Low resolution
mode:
Picture deletion button
(DEL)
Mode selection
button
LCD Panel
Shutter release
button
Memory card
cover
DC 3V input
terminal
Strap eyelet
Flash Mode button
1
MODE
Self-timer
1
2
- 6 -
Flash: Flash can be chosen in three modes: fill in,
off and auto, please refer to Page 11 for
detailed operations.
Camera front:
Note : * H refer to 1280x960 pixels resolution
L * refer to 1024x768 pixels resolution
DEL: Delete single picture or all pictures storage,
please refer to Page 10 for detailed
operations.
1
2
2
DEL
3
Auto flash Fill-in flash
Flash off
123
Self-Timer
Lamp (Red)
Flash
Viewfinder
Lens
MACRO
Switch
- 7 -
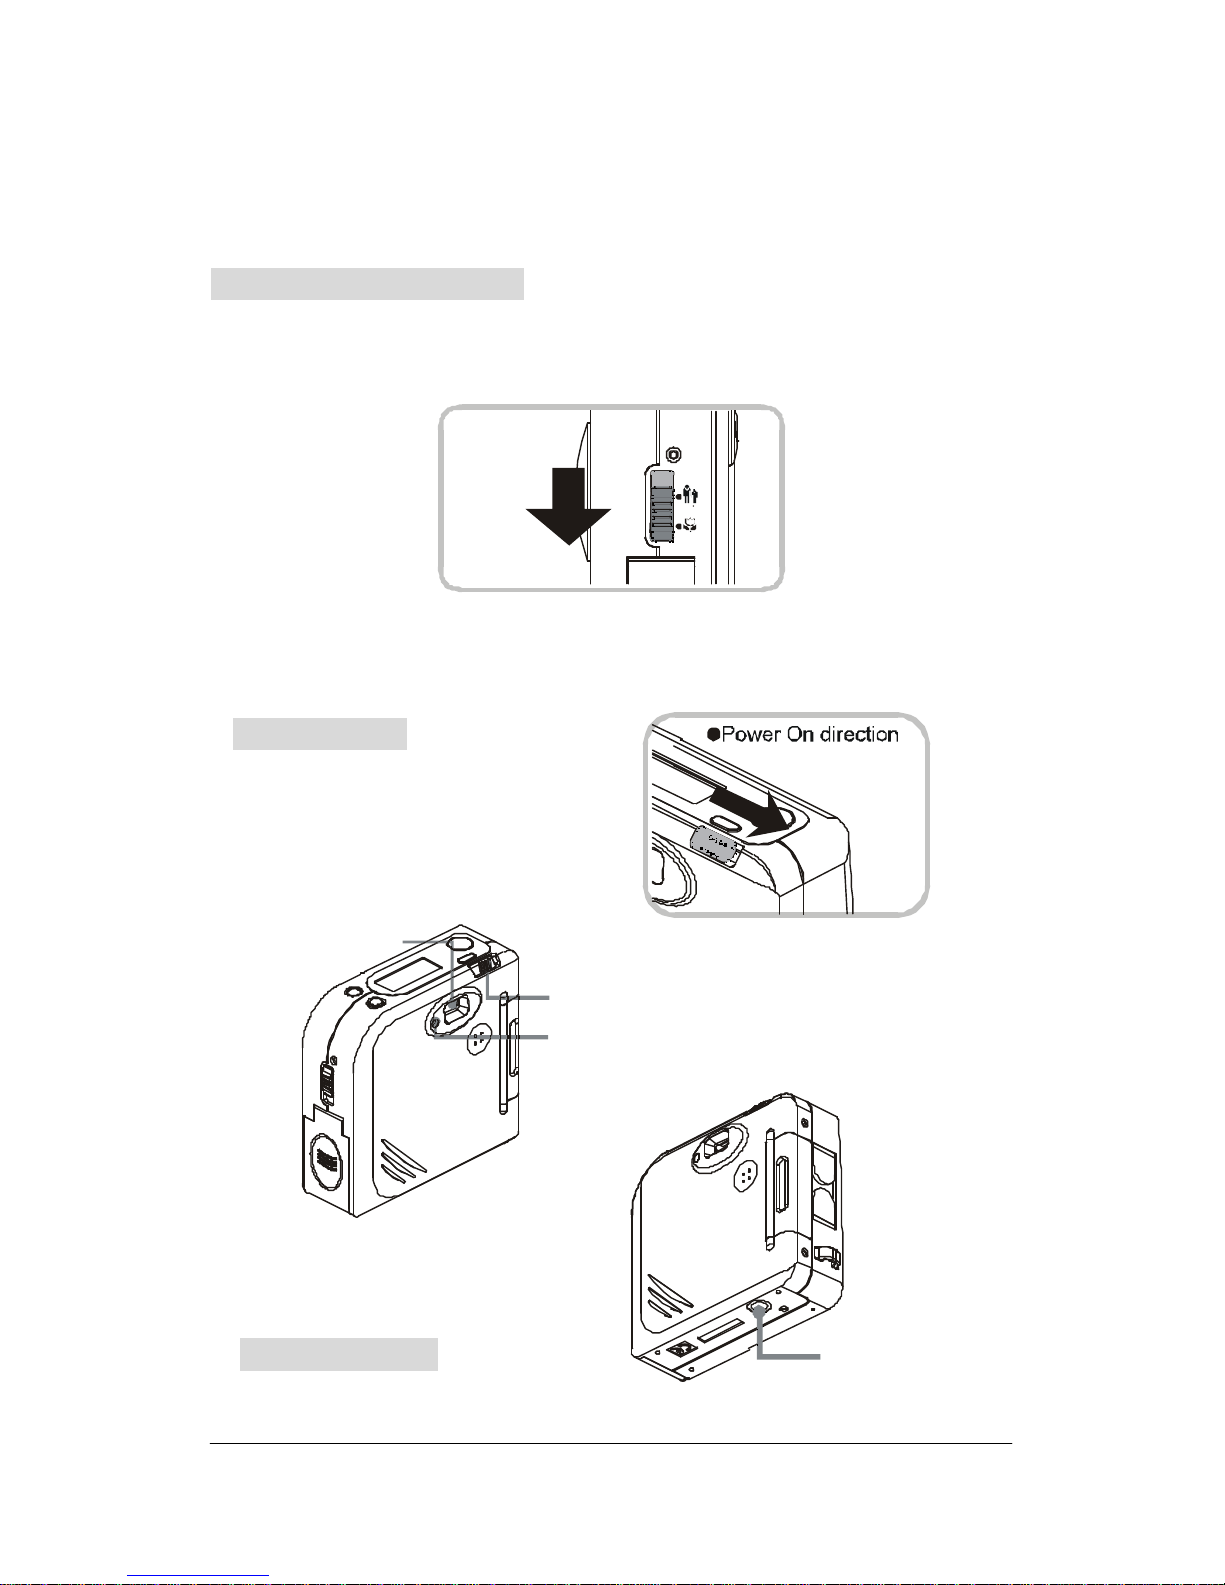
MACRO mode operation:
MACRO mode is shown as in the diagram below.
For more information, please refer to Page 12.
MACRO switch enlarged from the side view.
Camera back:
enlarged diagram
Camera bottom:
Tripod Bush
Viewfinder
Shooting-Ready LED (Green)
Power On/Off Button
- 8 -
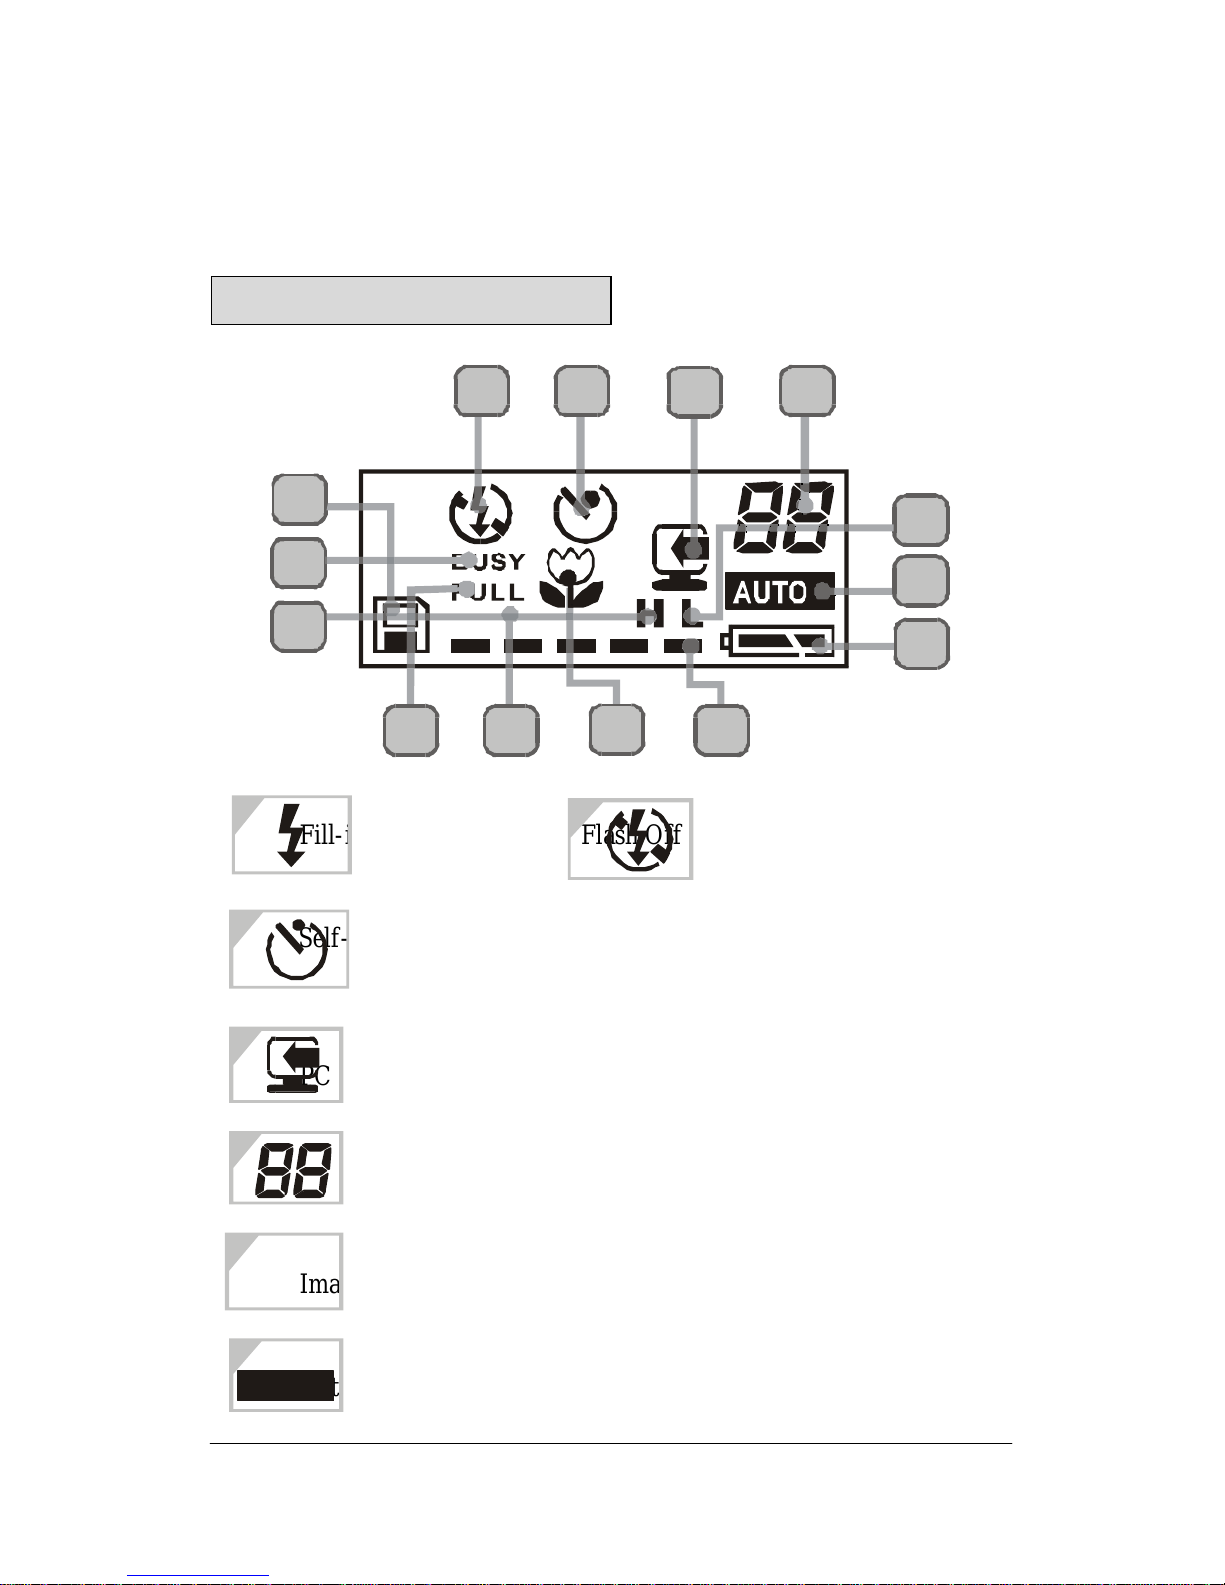
4.LCD Panel Display:
Fill-in Flash mode Flash Off mode
Self-timer
PC linked indicator.
Counter
Image is in 1024x768 pixles resolution.
Auto flash mode
4
ERASE ALL
14
13
12
1243657
11 10
9 8
1
2
1
3
4
6
AUTO
5
L
 Loading...