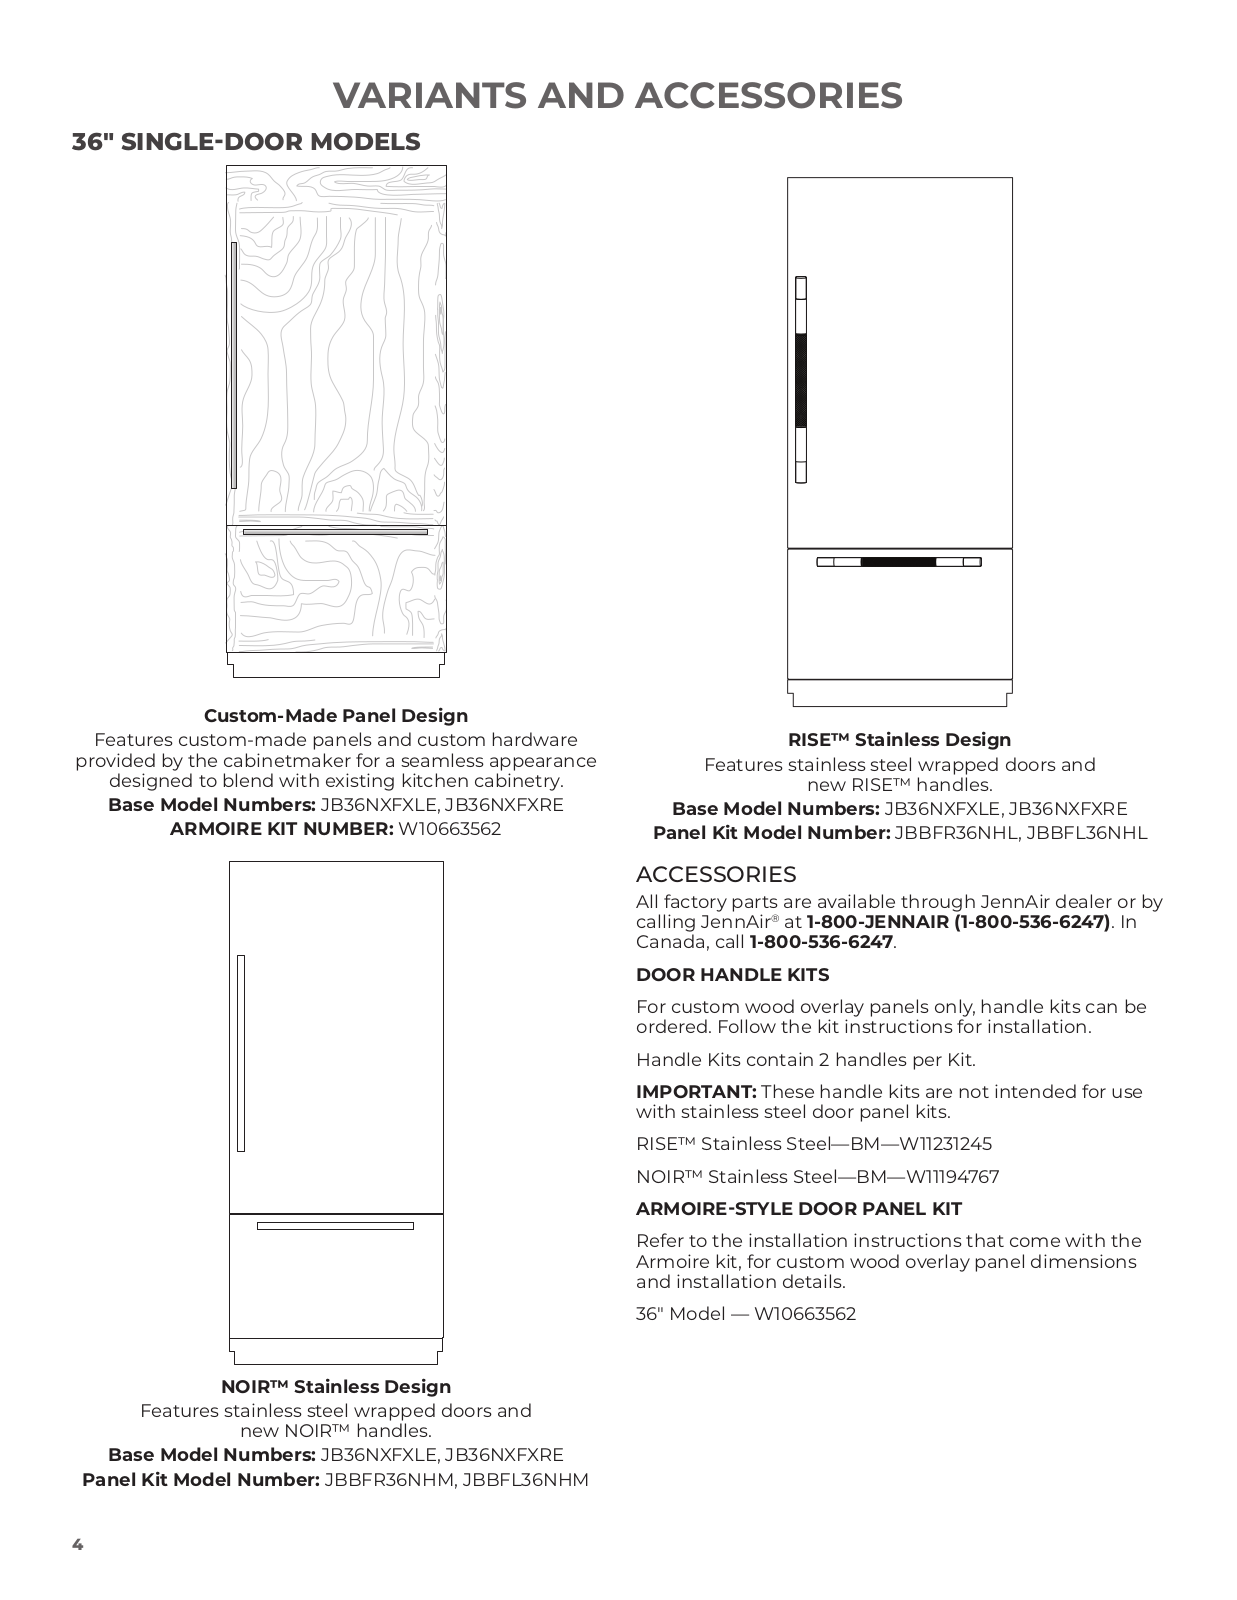
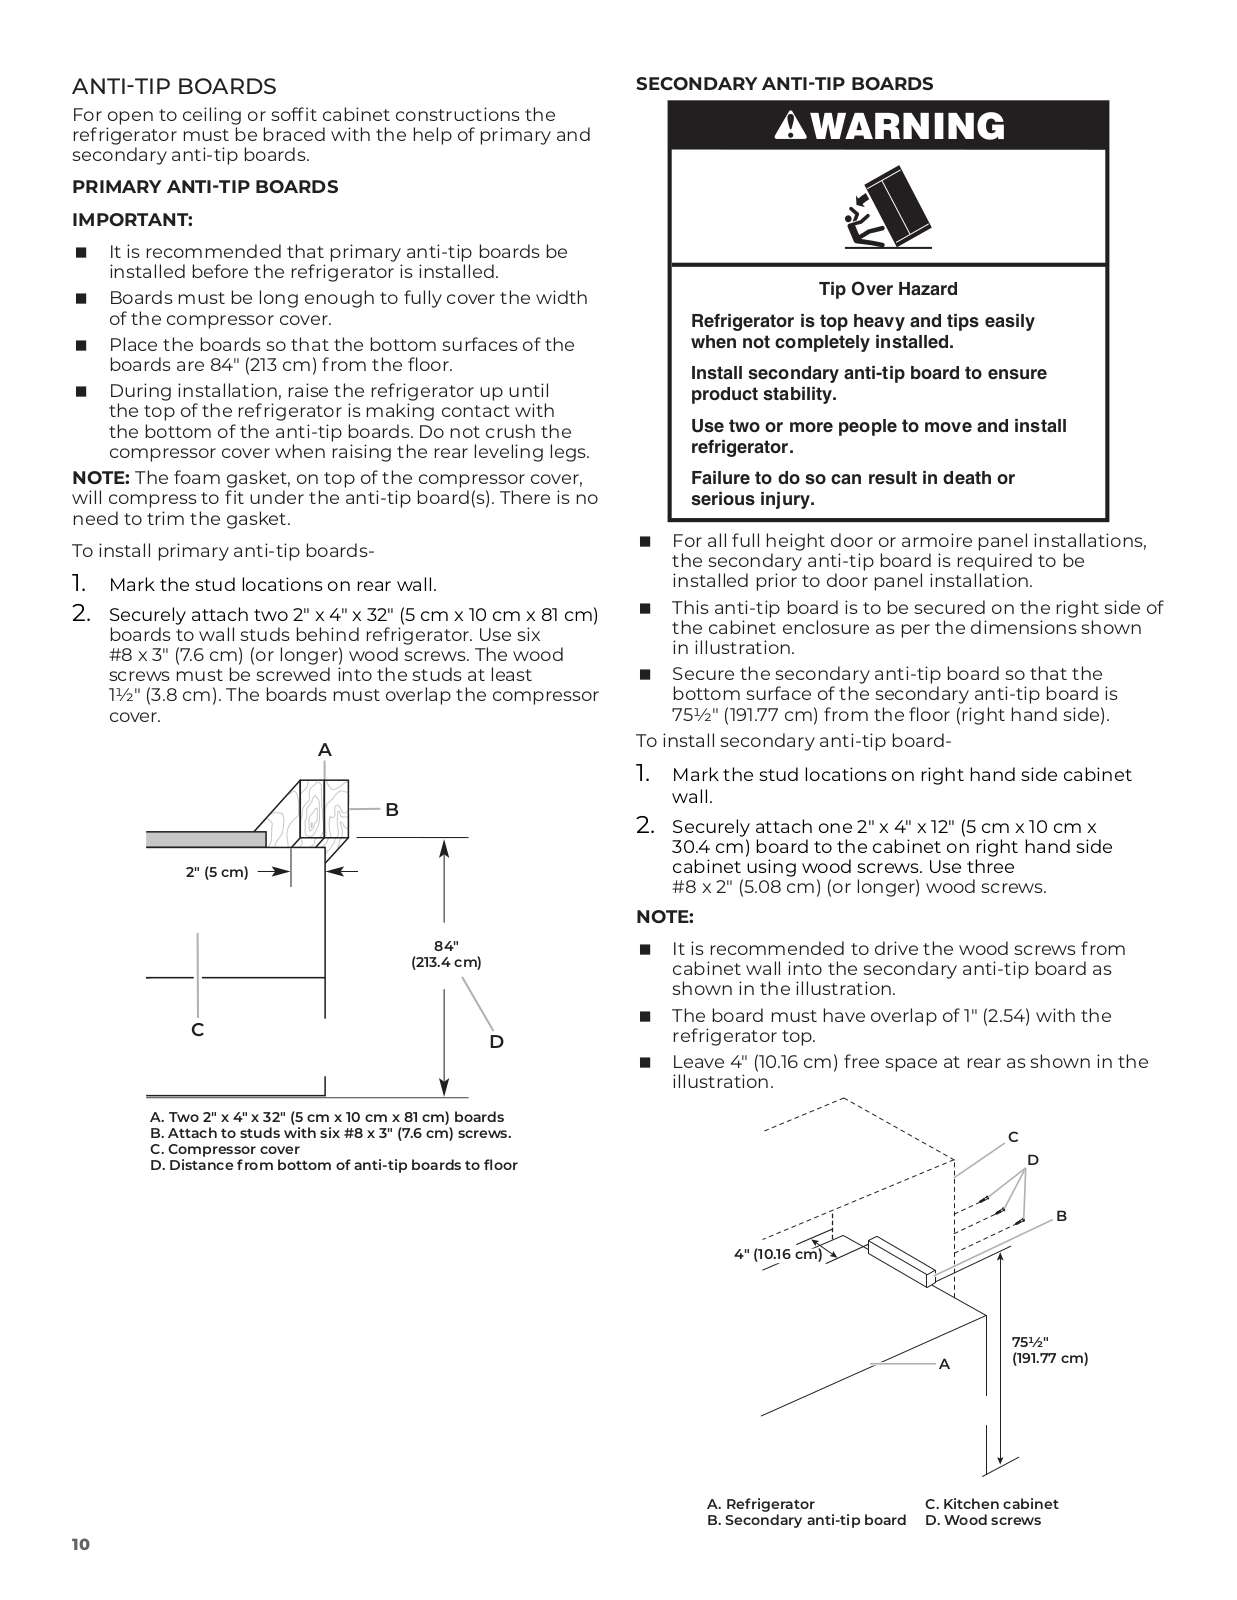
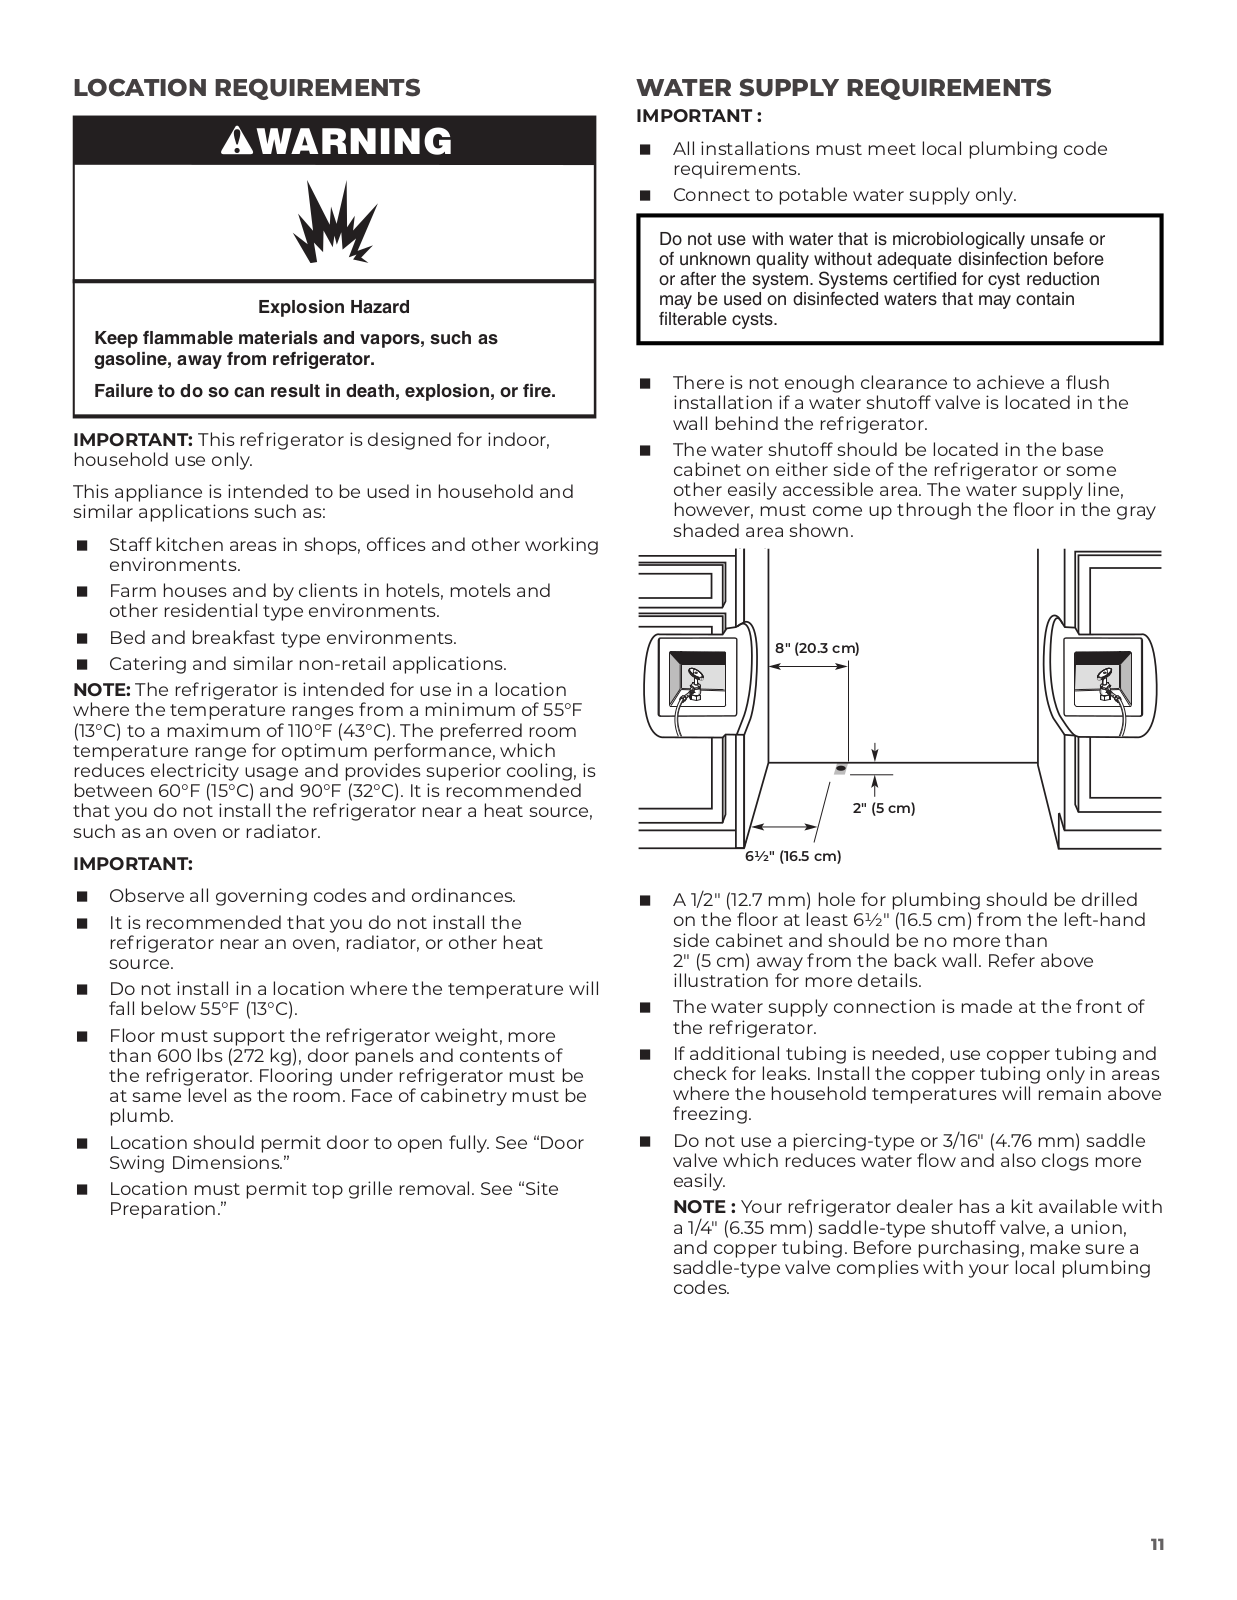
JennAir JB36NXFXLE, JB36NXFXRE, JBBFR36NHL, JBBFL36NHL, JF42NXFXDE Installation Guide
...
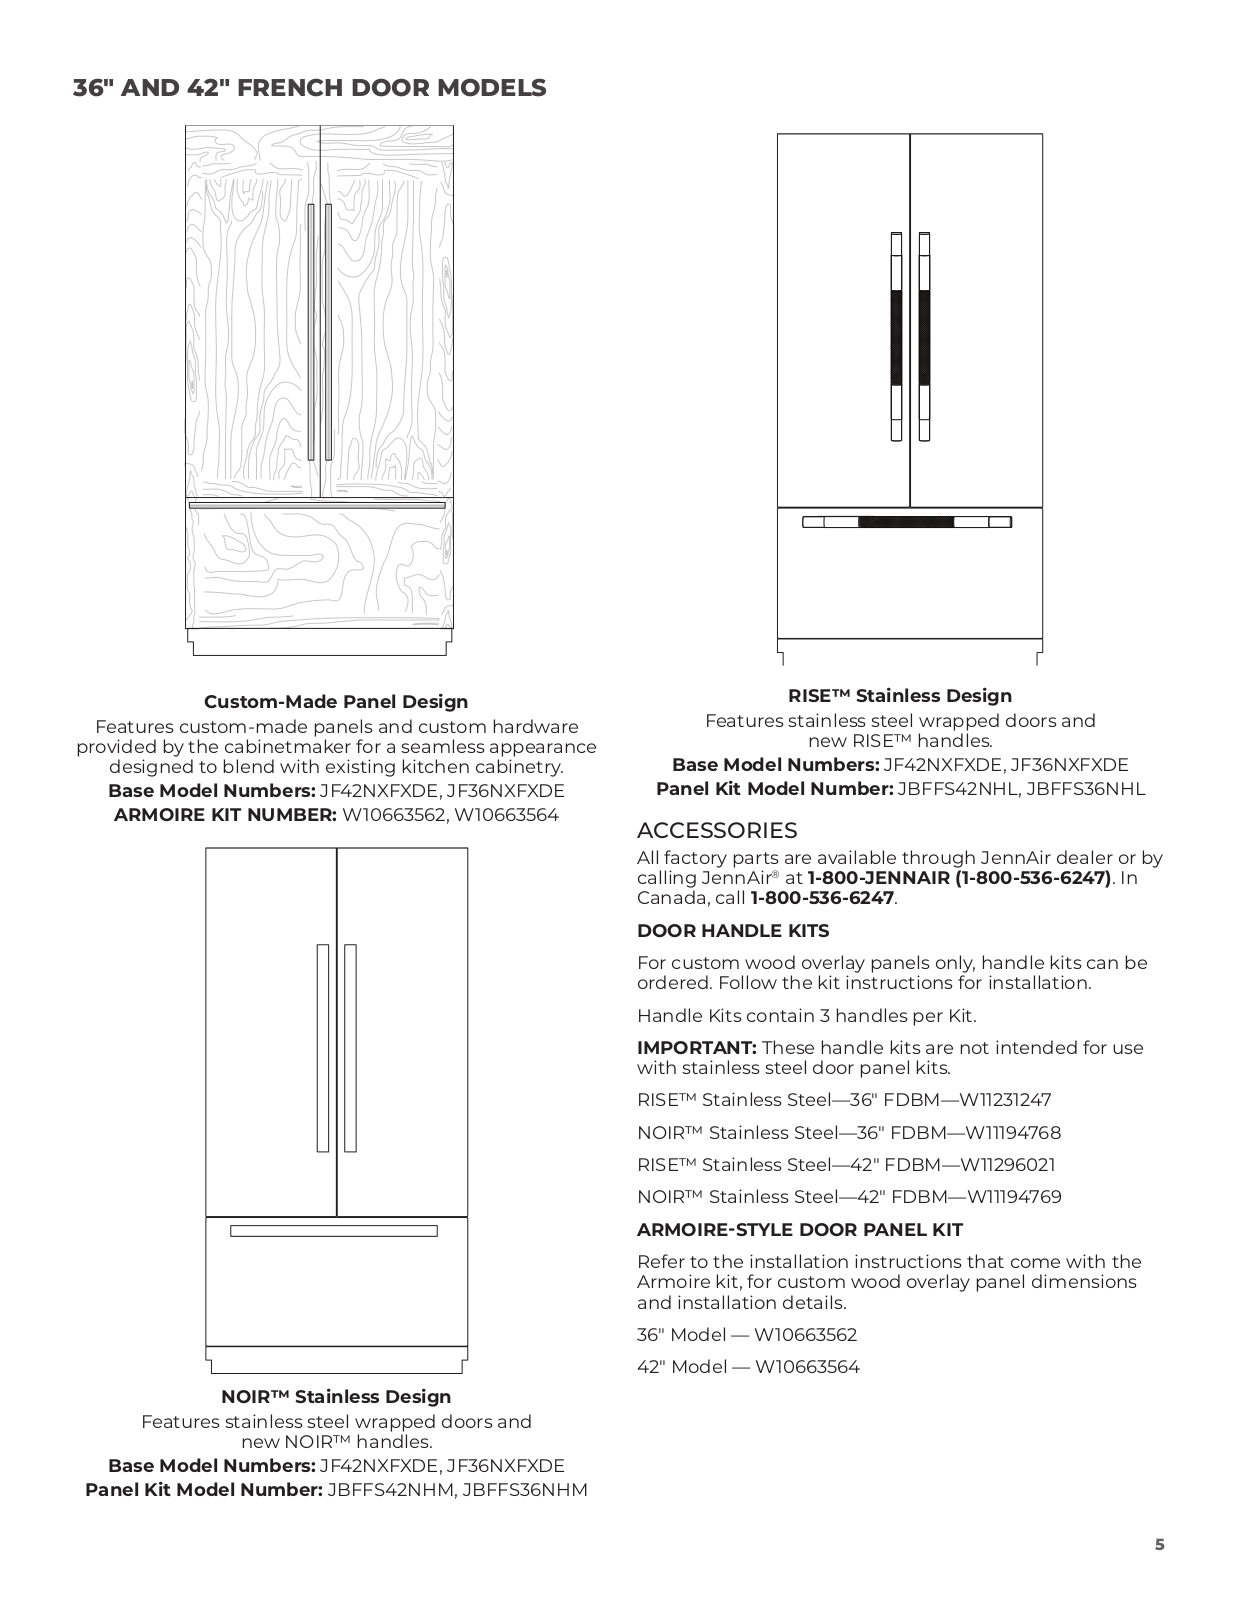
JennAir JB36NXFXLE, JB36NXFXRE, JBBFR36NHL, JBBFL36NHL, JF42NXFXDE, JF36NXFXDE, JBBFR36NHM, JBBFL36NHM, JBFFS42NHL, JBFFS36NHL, JBFFS42NHM, JBFFS36NHM Installation Guide