

Jenn-Air DOUBLE REFRIGERATOR DRAWERS Installation Manual

JENN-AIR® DOUBLE REFRIGERATOR DRAWERS/
CAJÓN REFRIGERADO DOBLE JENN-AIR
®
DOUBLE TIROIR RÉFRIGÉRÉ JENN-AIR
®
IMPORTANT: READ AND
SAVE
MANUAL DE INSTALACIÓN
IMPORTANTE: LEA Y GUARDE ESTAS INSTRUCCIONES. LA INSTALACIÓN REQUIERE DE 2 O MÁS PERSONAS.
IMPORTANT : LIRE ET CONSERVER CES INSTRUCTIONS. L’INSTALLATION NÉCESSITE L’INTERVENTION DE
Table of Contents/Índice/Table des matières...................................................................................... 2
W10122760A
INSTALLATION GUIDE
THESE INSTRUCTIONS. INSTALLATION REQUIRES 2 OR MORE PEOPLE.
GUIDE D’INSTALLATION
2 PERSONNES OU PLUS.

TABLE OF CONTENTS
REFRIGERATOR DRAWERS SAFETY..........................................3
Proper Disposal of Your Old Refrigerated Appliance..................3
DESIGN SPECIFICATIONS............................................................3
Models..........................................................................................3
INSTALLATION REQUIREMENTS................................................4
Tools and Parts ............................................................................4
Style 2: Custom Overlay Drawer Panels......................................4
Product Dimensions.....................................................................5
Location Requirements................................................................6
Electrical Requirements ...............................................................6
ÍNDICE
SEGURIDAD DE LOS CAJONES REFRIGERADOS..................13
Cómo deshacerse adecuadamente de
su aparato refrigerado viejo .......................................................13
ESPECIFICACIONES DE DISEÑO ..............................................13
Modelos......................................................................................13
REQUISITOS DE INSTALACIÓN.................................................14
Piezas y herramientas................................................................14
Estilo 2: Paneles de los cajones recubiertos a la medida.........14
Medidas del producto................................................................15
Requisitos de ubicación.............................................................16
Requisitos eléctricos..................................................................16
INSTALLATION INSTRUCTIONS ..................................................6
Unpack the Refrigerator Drawers ................................................6
Remove the Base Grille................................................................7
Style 2: Install Custom Overlay Drawer Panels ...........................7
Install the Mounting Brackets ......................................................9
Move the Refrigerator Drawers to Final Location......................10
Lower the Leveling Legs ............................................................10
Level the Refrigerator Drawers ..................................................10
Attach the Mounting Brackets to Adjacent Cabinets................11
Reinstall the Base Grille .............................................................11
Complete Installation..................................................................11
INSTRUCCIONES DE INSTALACIÓN.........................................16
Cómo desempacar los cajones refrigerados.............................16
Cómo quitar la rejilla de la base.................................................17
Estilo 2: Instalación de los paneles de
los cajones recubiertos a la medida ..........................................17
Cómo instalar los soportes de montaje.....................................19
Mueva los cajones refrigerados a su posición final...................20
Cómo bajar las patas niveladoras..............................................20
Nivelación de los cajones refrigerados......................................20
Cómo fijar los soportes de montaje a
los gabinetes adyacentes ..........................................................21
Cómo reinstalar la rejilla de la base ...........................................21
Complete la instalación..............................................................21
TABLE DES MATIÈRES
SÉCURITÉ DES TIROIRS RÉFRIGÉRÉS....................................22
Mise au rebut correcte de votre vieil appareil réfrigéré.............22
SPÉCIFICATIONS DU DESIGN ...................................................22
Modèles......................................................................................22
INSTRUCTIONS D’INSTALLATION ............................................23
Outillage et pièces......................................................................23
Style 2 : Panneaux décoratifs de tiroirs personnalisés .............23
Dimensions du produit...............................................................24
Exigences d’emplacement.........................................................25
Spécifications électriques..........................................................25
INSTRUCTIONS D’INSTALLATION............................................26
Déballage des tiroirs réfrigérés ..................................................26
Dépose de la grille de la base....................................................26
Style 2 : Installation des panneaux décoratifs
de tiroir personnalisés ................................................................26
Installation des brides de montage............................................28
Déplacement des tiroirs réfrigérés à leur emplacement final....29
Déploiement des pieds de nivellement......................................29
Réglage de l'aplomb des tiroirs réfrigérés.................................29
Fixation des brides de montage sur les placards adjacents.....30
Réinstallation de la grille de la base...........................................31
Achever l'installation ..................................................................31
2
REFRIGERATOR DRAWERS SAFETY
Your safety and the safety of others are very important.
We have provided many important safety messages in this manual and on your appliance. Always read and obey all safety
messages.
This is the safety alert symbol.
This symbol alerts you to potential hazards that can kill or hurt you and others.
All safety messages will follow the safety alert symbol and either the word “DANGER” or “WARNING.”
These words mean:
You can be killed or seriously injured if you don't immediately
DANGER
WARNING
All safety messages will tell you what the potential hazard is, tell you how to reduce the chance of injury, and tell you what can
happen if the instructions are not followed.
Proper Disposal of Your Old Refrigerated Appliance
WARNING
follow instructions.
can be killed or seriously injured if you don't
You
instructions.
Before You Throw Away Your Old Refrigerated Appliance:
Remove the door or drawer(s).
follow
Suffocation Hazard
Remove door or drawer(s) from your old refrigerated
appliance.
Failure to do so can result in death or brain damage.
IMPORTANT: Child entrapment and suffocation are not problems
of the past. A junked or abandoned refrigerated appliance is still
dangerous – even if it will sit for “just a few days.” If you are
getting rid of your old refrigerated appliance, please follow these
instructions to help prevent accidents.
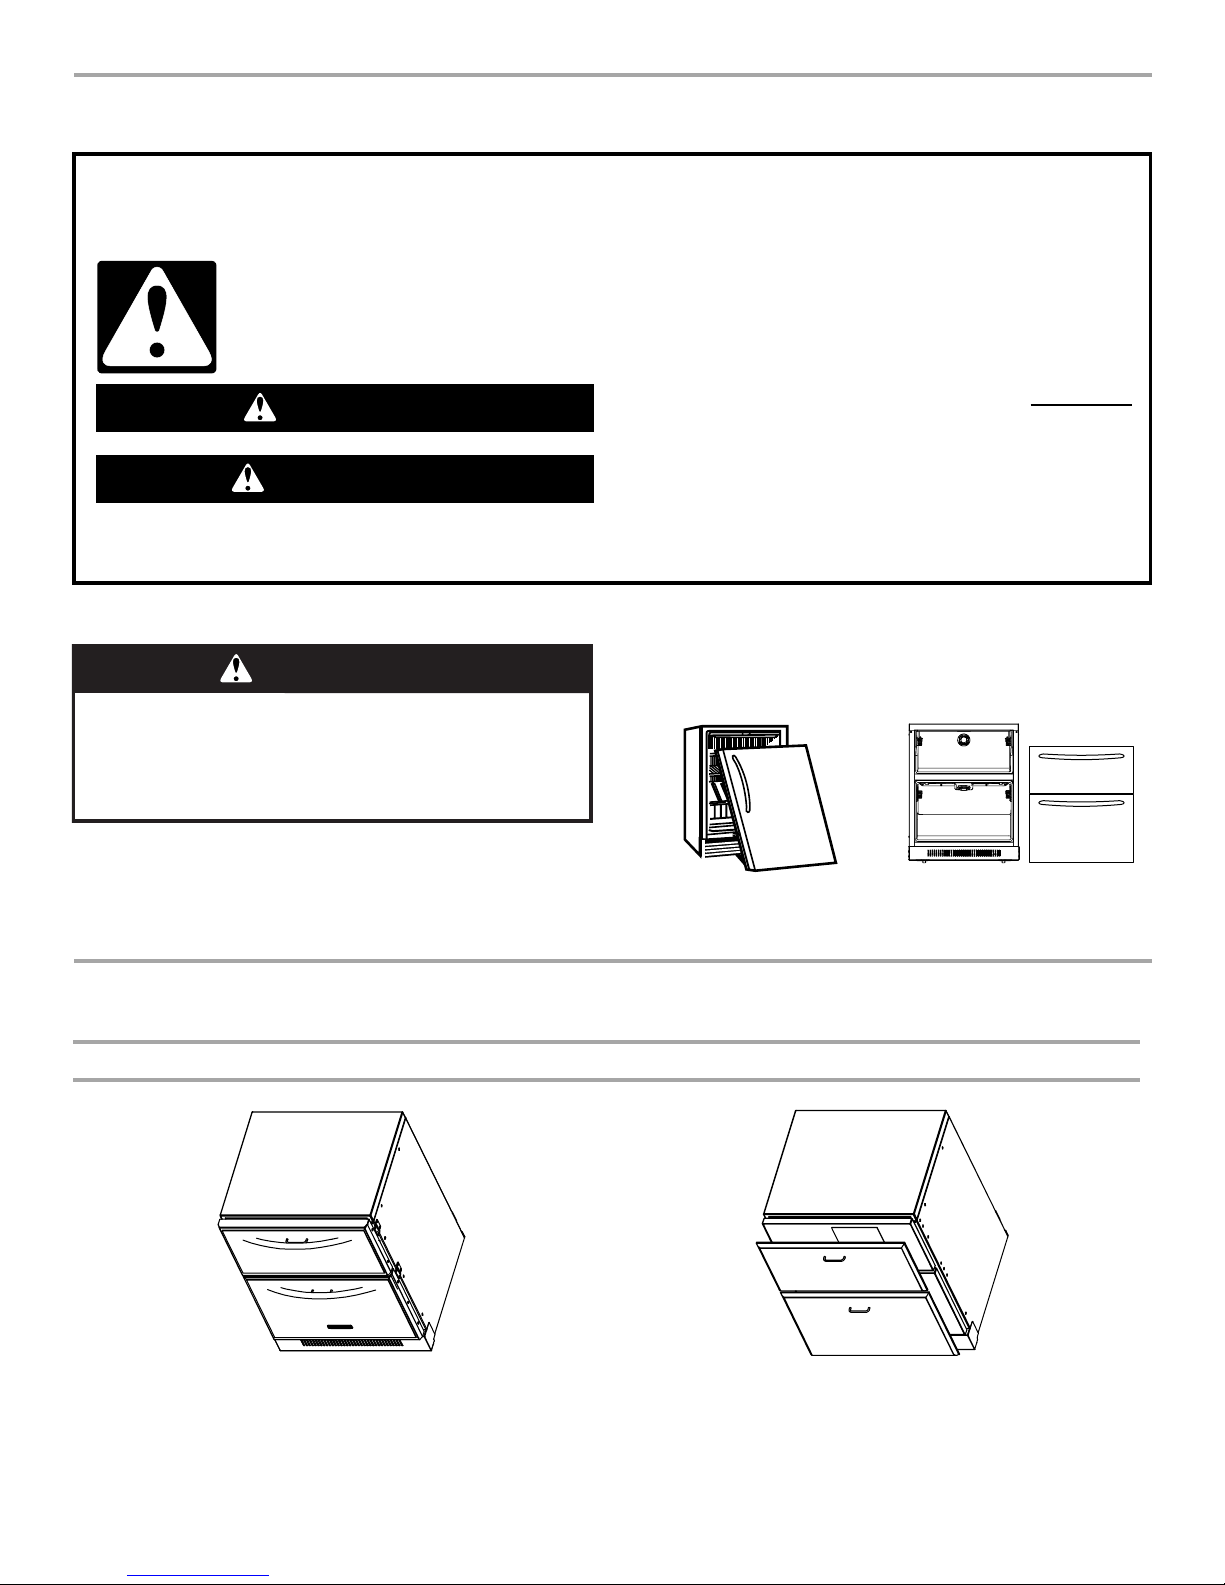
DESIGN SPECIFICATIONS
Models - Refrigerator Drawers
Style 1: Standard
Features wrap-around styling that complements the contoured
door handles. This style provides warm, commercial-looking
refrigerator drawers.
JUD278DBES00
Style 2: Overlay
Features factory-installed, overlay style trim to provide a
“frameless” look. This style requires the installation of custom
panels and handles.
JUD278DBCX00
3
INSTALLATION REQUIREMENTS
Tools and Parts
TOOLS NEEDED:
Gather the required tools and parts before starting installation.
Read and follow the instructions provided with any tools listed
here.
■ Hand drill or electric drill
(properly grounded)
■ ¹⁄₈" Drill bit
■ ⁵⁄₁₆" Socket wrench
■ 6" Socket extension
■ Tape measure
■ Level
■ Phillips screwdriver
■ T30 TORX
®†
screwdriver
(optional)
Additional Tools Needed for Style 2: Overlay (only):
■ Scissors
■ Pencil
■ Scribe
PARTS NEEDED Style 2: Overlay (only):
■ Custom Overlay Drawer Panels —
See “Style 2: Custom Overlay Drawer Panels.”
■ Hardware
■ #8 x ¹⁄₂" Pan-head screws (12) optional
PARTS SUPPLIED:
■ #8 x ¹⁄₂" Pan-head
■ Mounting Brackets (4)
screws (16)
■ Double-sided tape
Style 2: Custom Overlay Drawer Panels
If you plan to install custom wood panels, you will need to create
the panels yourself or consult a qualified cabinetmaker or
carpenter. See dimension drawings for panel specifications.
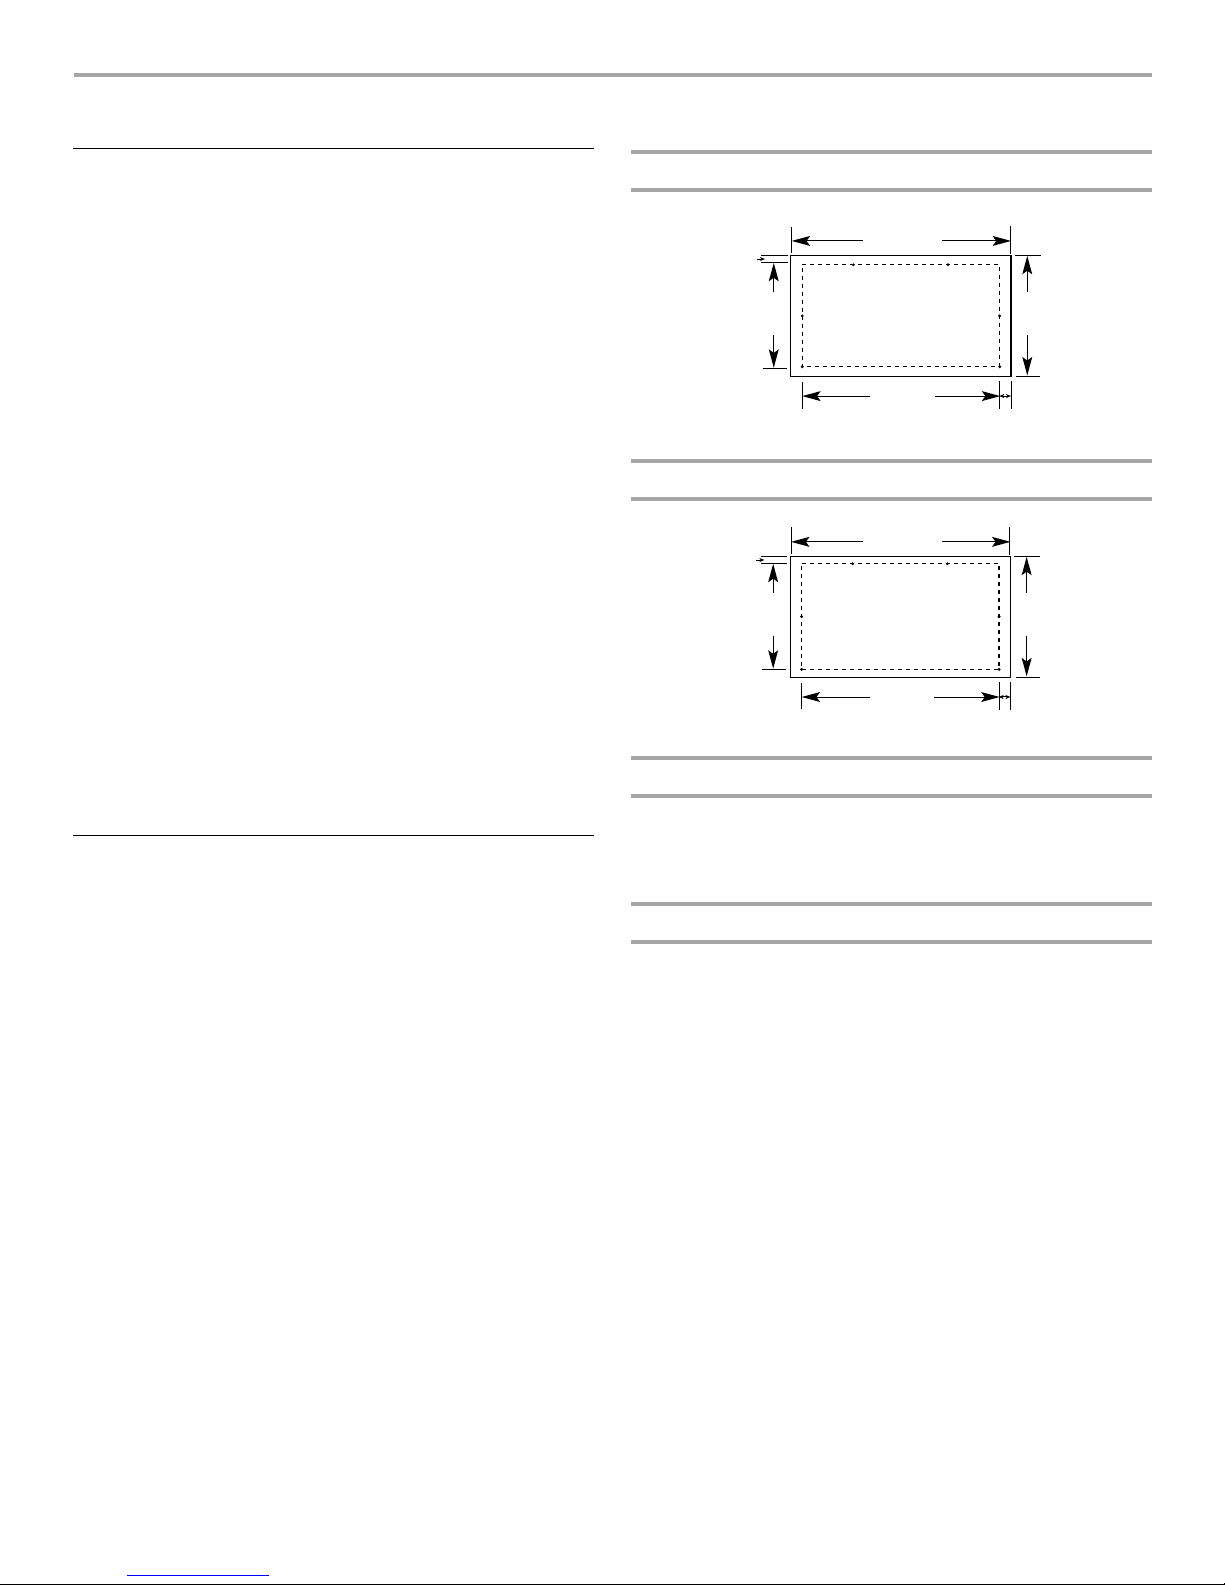
IMPORTANT:
■ The thickness of the overlay panels must be ³⁄₄" (19.05 mm).
■ To avoid damage to the drawers, each overlay panel must not
weigh more than 10 lbs (4.5 kg).
■ Do not exceed the height dimension for the overlay panels.
Panels that exceed the height dimension may damage the
refrigerator drawers, cabinets or countertop.
■ The width of the overlay panels may vary according to the
width of the cabinet opening.
Top Overlay Drawer Panel Dimensions
26.5"
1.25"
(3.2 cm)
10.5"
(26.7 cm)
(67.4 cm)
23.5"
(59.7 cm)
12.7"
(32.2 cm)
1.5"
(3.8 cm)
Bottom Overlay Drawer Panel Dimensions
26.5"
⁷⁄₈"
(2.2 cm)
14.5"
(36.8 cm)
(67.4 cm)
23.5"
(59.7 cm)
16.5"
(42.0 cm)
1.5"
(3.8 cm)
Flat Panels
You can create a custom flat panel using material less than ³⁄₄"
(19.05 mm) thick. The material must be laminated to either
plywood or medium density fiberboard that is ³⁄₄" (19.05 mm)
thick.
Raised Panels
You can create a raised panel design. Be sure to maintain a ³⁄₄"
(19.05 mm) minimum thickness where the overlay panel attaches
to the drawer front.
†®TORX is a registered trademark of Textron Innovations Inc.
4
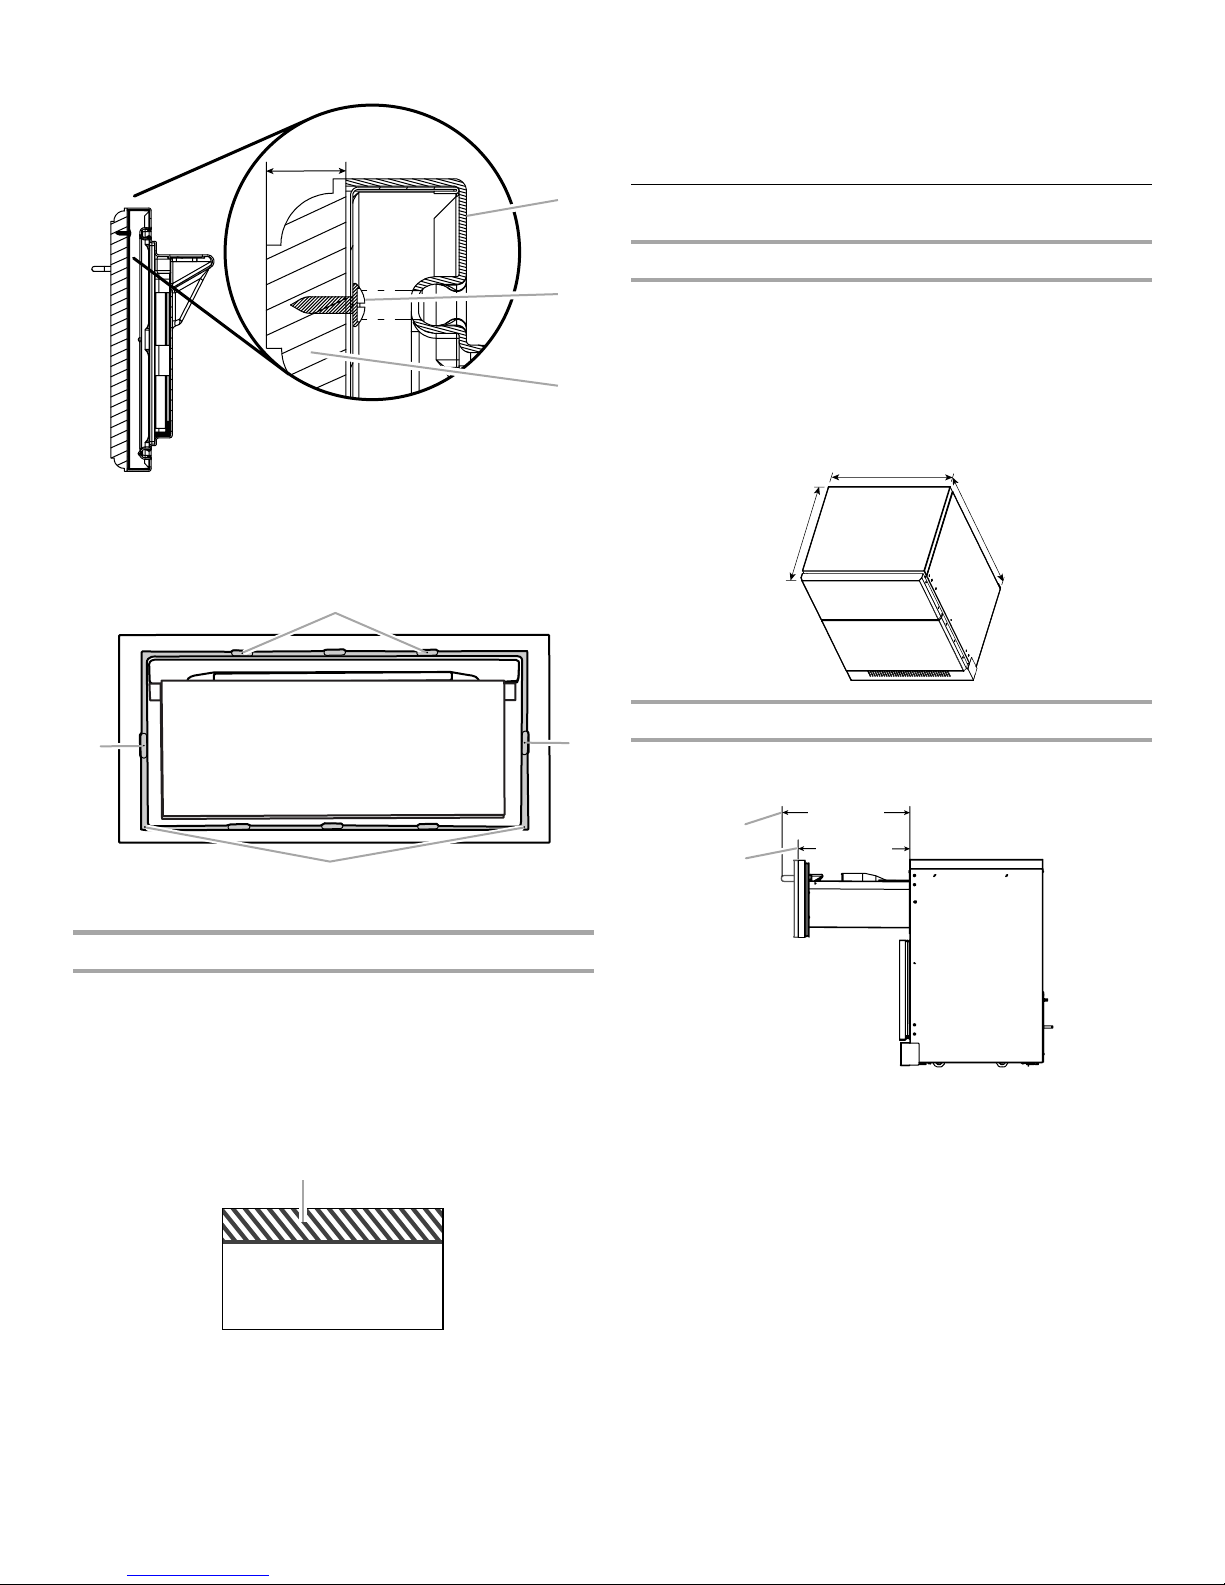
Raised Panel Attachment
A
B
C
³⁄₄"
(19.05 mm)
A. Drawer front
¹⁄₂
B. #8 x
C. Overlay panel
" pan-head screw
Drawer Front #8 x ¹⁄₂" Pan-head Screw Locations
A
2. Center the custom hardware (left to right) onto the overlay
panel. When installing the custom hardware, be sure that the
mounting screws are flush with the back of the overlay
panels.
3. Repeat the process for the other overlay panel.
Product Dimensions
Styles 1 and 2: Standard and Overlay
■ Height dimensions are shown with the leveling legs extended
to ¹⁄₄" (6.35 mm) below the refrigerator drawers.
■ When leveling legs are fully extended to 1" (25 mm) below the
refrigerator drawers, add ³⁄₄" (19.05 mm) to the height
dimensions.
■ The power cord is 60" (152.4 cm) long.
26.7"
(67.9 cm)
23.5"
(59.6 cm)
34.0"
(86.3 cm)
A
A
A. Pre-drilled screw locations
Hardware Installation (optional)
Customer supplied handles (hardware) may be installed at this
time.
1. Measure and mark a line 3" (7.62 cm) down from the top of
the overlay panel as shown.
IMPORTANT: Install hardware a minimum of 3" (7.62 cm)
down from the top of the overlay panel. The space at the top
of the panel is needed in order to attach the overlay panel to
the drawer front.
A
Drawer Opening Dimensions
A
Dimensions vary based on model, as shown.
20.9"
A
B
(53.1 cm)
18.2"
(46.2 cm)
A. Style 1: Standard
B. Style 2: Overlay—Measurement
does not include
overlay panel or optional hardware
³⁄₄
" (19.05 mm)
A. 3" (7.62 cm) area
5
Location Requirements
Electrical Requirements
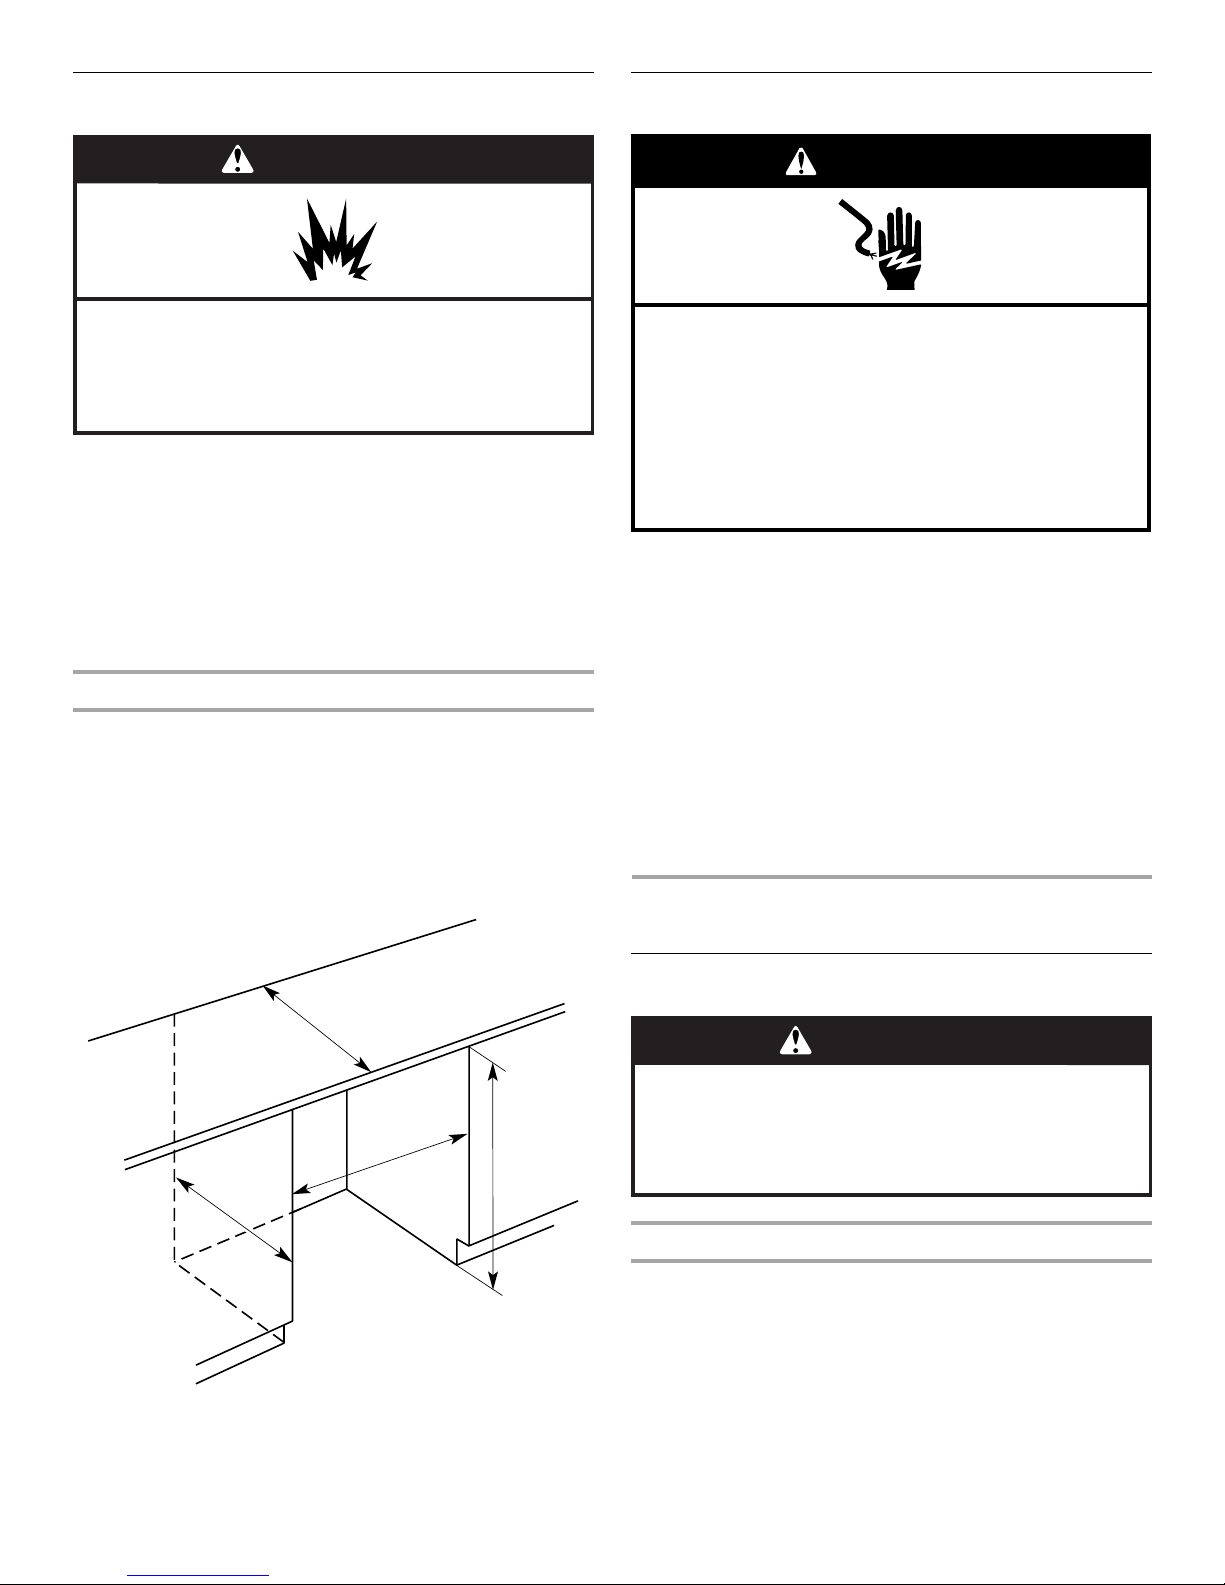
WARNING
Explosion Hazard
Keep flammable materials and vapors, such as
gasoline, away from refrigerator drawer(s).
Failure to do so can result in death, explosion, or fire.
NOTES:
■ For the refrigerator drawers to be flush with the front of the
base cabinets remove any baseboards or moldings from the
rear of the opening. See “Product Dimensions” and later in
this section “Opening Dimensions (both styles).”
■ It is recommended that you do not install the refrigerator
drawers near an oven, radiator, or other heat source.
■ Do not install in a location where the temperature will fall
below 55°F (13°C).
Opening Dimensions (both styles)
■ Height dimensions are shown with the leveling legs extended
to the minimum height of ¹⁄₄" (6.35 mm) below the refrigerator
drawers.
NOTE: When leveling legs are fully extended to 1" (25 mm)
below the refrigerator drawers, add ³⁄₄" (19.05 mm) to the
height dimensions. See “Product Dimensions.”
■ If the floor of the opening is not level with the kitchen floor,
shim the opening to make it level with the kitchen floor.
WARNING
Electrical Shock Hazard
Plug into a grounded 3 prong outlet.
Do not remove ground prong.
Do not use an adapter.
Do not use an extension cord.
Failure to follow these instructions can result in death,
fire, or electrical shock.
Before you move your refrigerator drawers into the final location,
it is important to make sure you have the proper electrical
connection.
Recommended grounding method
A 115 Volt, 60 Hz., AC only, 15- or 20-amp fused, grounded
electrical supply is required. It is recommended that a separate
circuit serving only your refrigerator drawers be provided. Use an
outlet that cannot be turned off by a switch. Do not use an
extension cord.
IMPORTANT: If this product is connected to a GFCI
(Ground Fault Circuit Interrupter) protected outlet, nuisance
tripping of the power supply may occur, resulting in loss of
cooling. Food quality and flavor may be affected. If nuisance
tripping has occurred, and if the condition of the food appears
poor, dispose of it.
INSTALLATION INSTRUCTIONS
25"
(63.5 cm)
24"
(60.96 cm)
27"
(68.6 cm)
6
35"
(88.9 cm)
Unpack the Refrigerator Drawers
WARNING
Excessive Weight Hazard
Use two or more people to move and install
refrigerator drawer(s).
Failure to do so can result in back or other injury.
Remove the Packaging
Properly dispose of packaging. Do not use sharp instruments,
rubbing alcohol, flammable fluids, or abrasive cleaners to remove
tape or glue. These products can damage the surface of your
refrigerator drawers.

Remove the Skids
IMPORTANT:
■ Always lay the appliance on its side when removing the skids.
■ Never place the appliance on its top. It may damage the
compressor.
■ Allow the appliance to sit on its rollers for 4 hours before
plugging into an electrical outlet.
1. Using two or more people, lay the appliance on its side.
2. Using a T30 TORX
bottom of the appliance. Discard the attachment bolts.
3. Using two or more people, turn the appliance upright on its
rollers.
When Moving Your Refrigerator Drawers:
Your refrigerator drawers are heavy. When moving the
appliance for service, be sure to protect the floor. Always
pull the appliance straight out when moving it. Do not
wiggle or “walk” the appliance when trying to move it, as
floor damage could occur.
®†
screwdriver, remove the skids from the
Clean Before Using
After you remove all of the package materials, clean the inside of
your refrigerator drawers before using them. See the cleaning
instructions in the Use & Care Guide.
Style 2: Install Custom Overlay
Drawer Panels
If you have Style 1: Standard refrigerator drawers, skip this step.
Go to “Attach the Mounting Brackets to Adjacent Cabinets” to
continue the installation.
IMPORTANT:
■ Create custom overlay drawer panels according to the
specifications in the “Style 2: Custom Overlay Drawer
Panels” section.
■ Jenn-Air is not responsible for the removal or addition of
molding or decorative panels that would not allow access to
the refrigerator drawers for service.
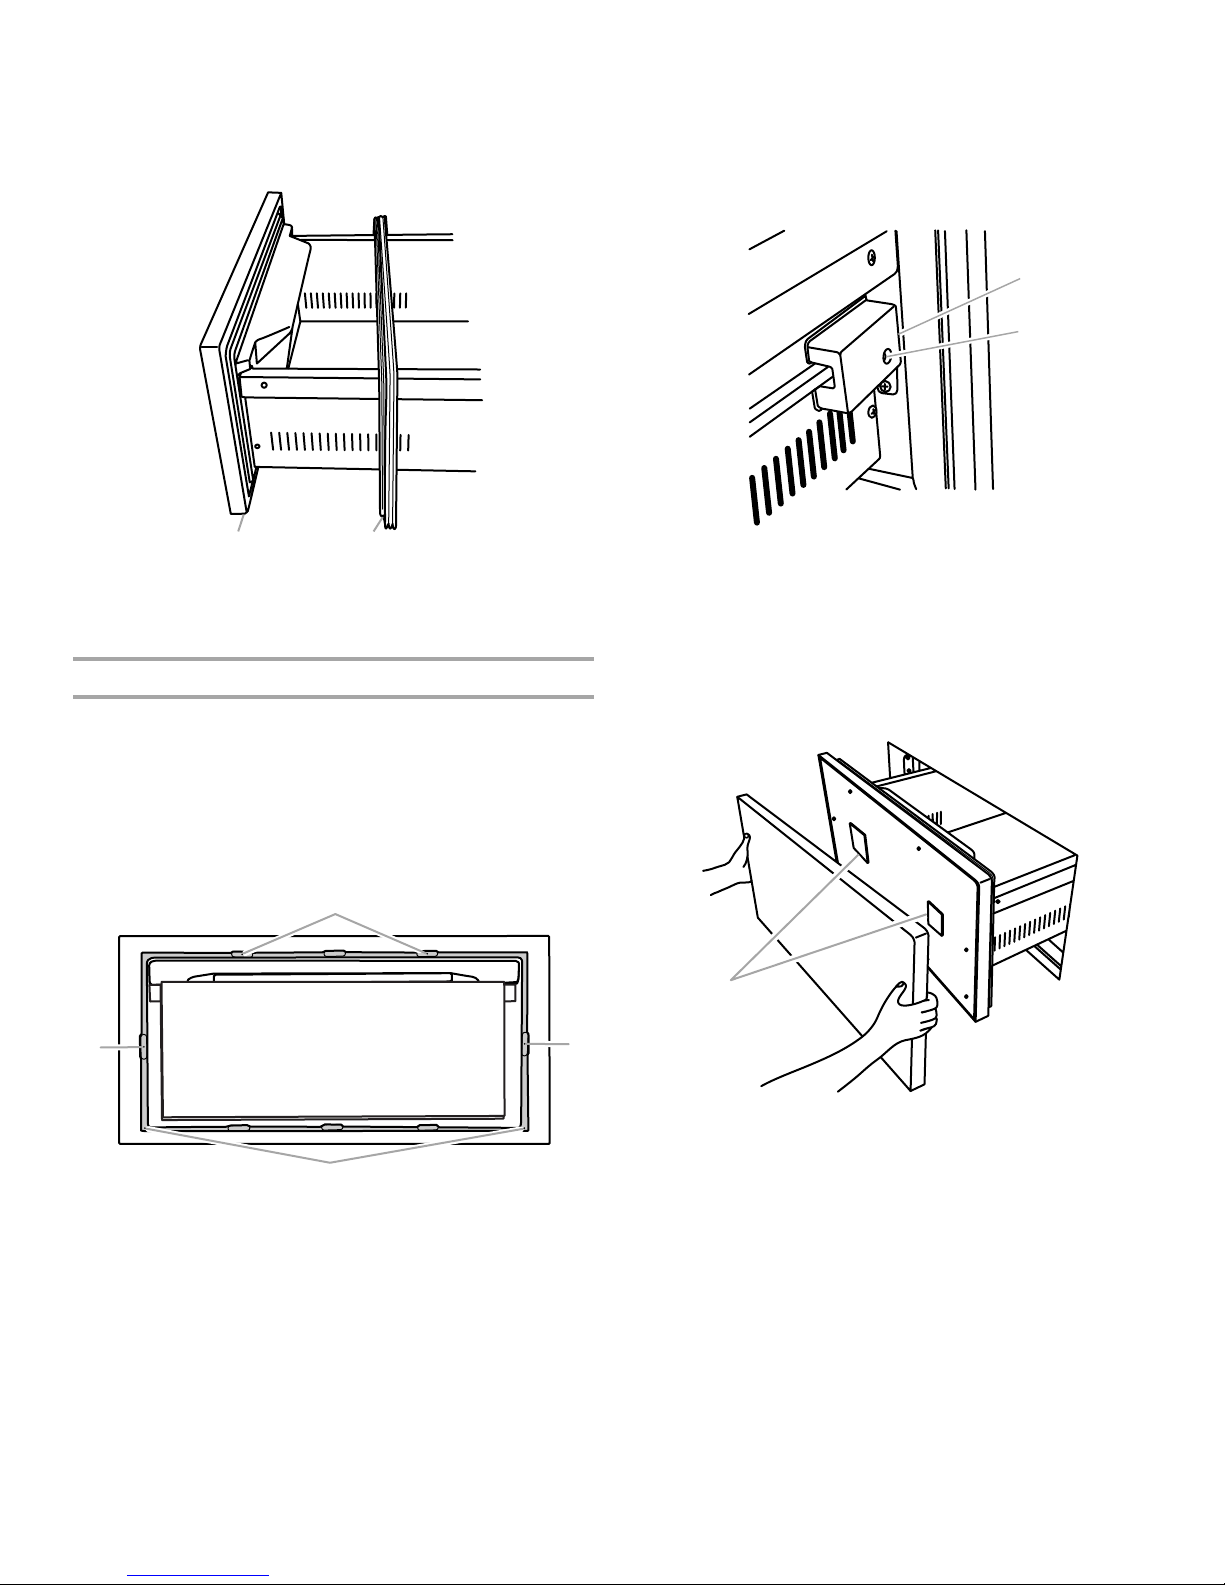
Remove the Wire Baskets
1. Open the drawer to full extension and remove all articles from
the wire baskets.
2. Pull the wire baskets out to full extension and lift out to
remove.
Remove the Base Grille
IMPORTANT: You must remove the base grille in order to lower
the leveling legs. Be sure to reinstall the base grille when the
installation is complete.
1. Using a Phillips screwdriver, remove the four screws from the
base grille as shown.
NOTE: Do not discard the screws.
A
A
A. Screws
2. Place the base grille on a clean, soft working surface for
later use.
A
A. Wire baskets
3. Repeat the process for the other drawer.
Remove the Gaskets
IMPORTANT: The gaskets contain strong magnetic strips. Follow
these instructions and keep screws and other loose metal parts
away from the gaskets to avoid damaging them.
1. Begin at the top right corner. Slowly pull the gasket out of the
corner and continue working slowly toward the opposite side
as shown.
†®TORX is a registered trademark of Textron Innovations Inc.
7
2. Proceed slowly from corner to corner until the gasket is
B
completely free from the groove.
3. Gently push the gasket to the back of the drawer. Be sure to
keep all screws and loose metal parts away from the
magnetic gasket as shown.
2. Using a Phillips screwdriver, remove the wiring plug cover for
the upper drawer as shown. Do not discard the screw or
cover. Set them aside for later use.
NOTE: Removing the wiring plug cover will allow for easier
access when drilling and attaching the drawer front to the
overlay panel. Be sure to replace the wiring plug cover when
installation is complete.
A
AB
A. Drawer front
B. Gasket
4. Repeat the process for the other gasket.
Install the Custom Overlay Panels
IMPORTANT:
■ Before installing the custom overlay panels, be sure to install
any custom hardware. See “Hardware Installation (optional).”
■ Be sure to maintain a ³⁄₈" (9.52 mm) gap between the overlay
panel (top drawer) and the bottom of the kitchen cabinet.
1. Using a Phillips screwdriver or scribe, remove any residual
foam from the pre-drilled pilot holes.
A
A
A
A. Wiring plug cover
B. Screw
3. Remove the backing from the double-sided tape. Install the
overlay panel to the drawer front. Be sure to align all edges of
the drawer front to the overlay panel. Be sure that the overlay
panel is level.
NOTE: The tape will secure the panel in place while drilling
the pilot holes.
A
A. Double-sided tape
A
A. Pre-drilled pilot holes
8
4. Using the pre-drilled holes in the drawer front as a guide, use
a scribe to mark the drilling locations on the overlay panel.
Drill six ¹⁄₈"diam.x¹⁄₂" deep (3.18 mm x 12.7 mm) holes into
the overlay panel.
IMPORTANT: Do not drill deeper than ¹⁄₂" (12.7 mm).
5. Drive six #8 x ¹⁄₂" pan-head screws through the drawer front
into the overlay panel.
6. Be sure that the overlay panels are flush with the bottom of
the drawer fronts.
Top Drawer Bottom Drawer
A
B
A
B
A. Overlay panel
B. Drawer front
7. Repeat the process for the other drawer front.
8. Using a Phillips screwdriver, reinstall the wiring plug cover
(upper drawer).
Reinstall the Gaskets
1. Starting at the corners, and working toward the opposite
corner, press the gasket back into the groove. Be sure to seat
the gasket on all four sides.
2. Repeat the process for the other drawer.
Install the Wire Baskets
Reinstall the wire baskets. See “Remove the Wire Baskets,”
earlier in this section.
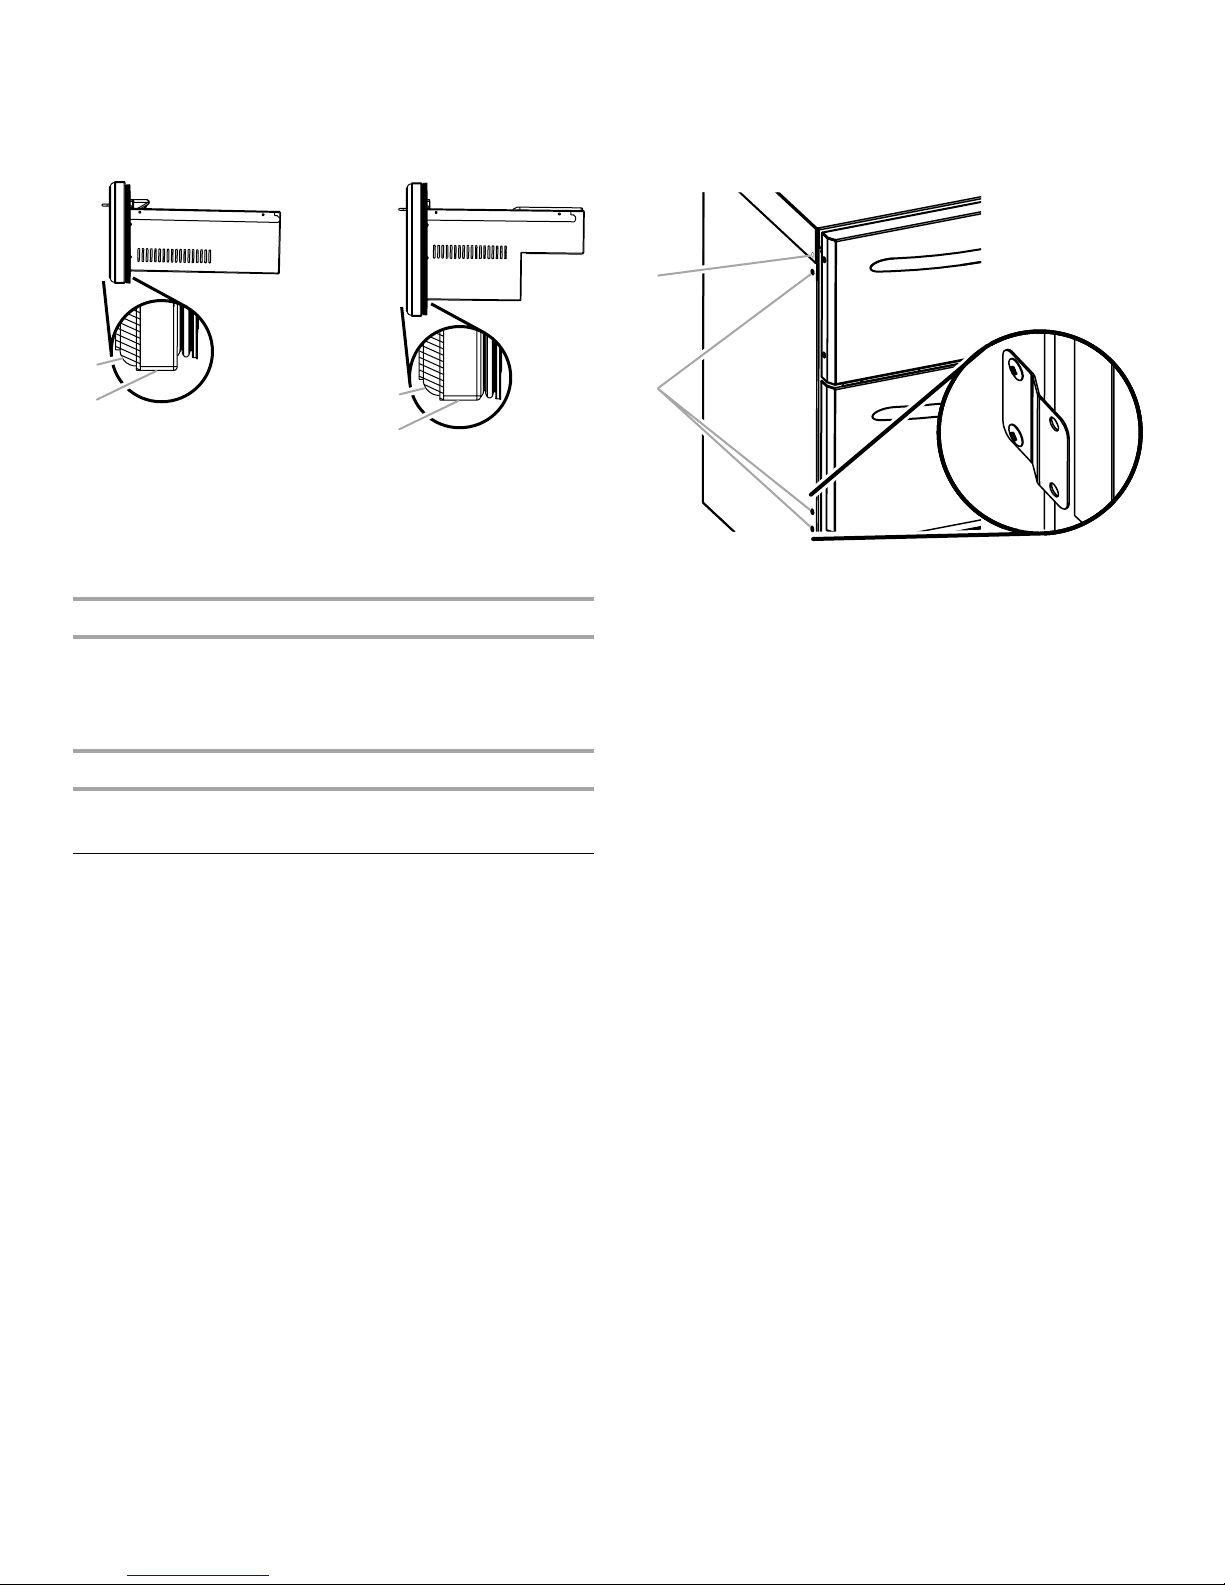
Install the Mounting Brackets
IMPORTANT:
■ Install two mounting brackets (upper and lower) on both sides
of the refrigerator drawers cabinet. The mounting brackets
secure the appliance to the adjacent cabinets.
■ To avoid the appliance pulling out of the opening when the
drawers are opened, secure the mounting brackets to the
adjacent cabinets.
■ The mounting bracket has an offset. Be sure when installing
the mounting brackets to position the offset to the adjacent
cabinets.
1. Begin installation (on each side) at the pre-drilled holes for the
upper mounting brackets.
NOTE: Insulation tape covers the top pre-drilled holes for the
upper mounting brackets. Do not remove the insulation tape
when installing the upper mounting brackets.
A
B
A. Pre-drilled top hole is
underneath the insulation tape
B. Pre-drilled holes
2. Using a Phillips screwdriver and one #8 x ¹⁄₂" pan-head
screw, drive the screw through the bottom hole of upper
mounting bracket and into the pre-drilled hole. Tighten the
screw.
3. Push a pan-head screw through the insulation tape and into
the pre-drilled hole. Tighten the screw.
4. Using a Phillips screwdriver and two #8 x ¹⁄₂" pan-head
screws, drive the screws through the holes in the lower
mounting bracket into the pre-drilled holes. Tighten the
screws.
5. Repeat the process for the other side.
6. Set aside the remaining eight #8 x ¹⁄₂" pan-head screws for
later use. See “Attach the Mounting Brackets to Adjacent
Cabinets.”
9
Move the Refrigerator Drawers to
Final Location
IMPORTANT:
■ To avoid floor damage, make sure the levelers are raised (not
touching floor) and the weight of the appliance is on the
rollers before moving.
■ Rollers are for moving the refrigerator drawers and not for
permanent support.
1. Place top of cardboard carton or plywood under the
appliance. Remove dolly.
2. Do not remove protective film or cover.
WARNING
Electrical Shock Hazard
Plug into a grounded 3 prong outlet.
Do not remove ground prong.
Do not use an adapter.
Do not use an extension cord.
Failure to follow these instructions can result in death,
fire, or electrical shock.
3. Plug into a grounded 3 prong outlet.
4. Move the refrigerator drawers straight back and evenly in
front of the opening.
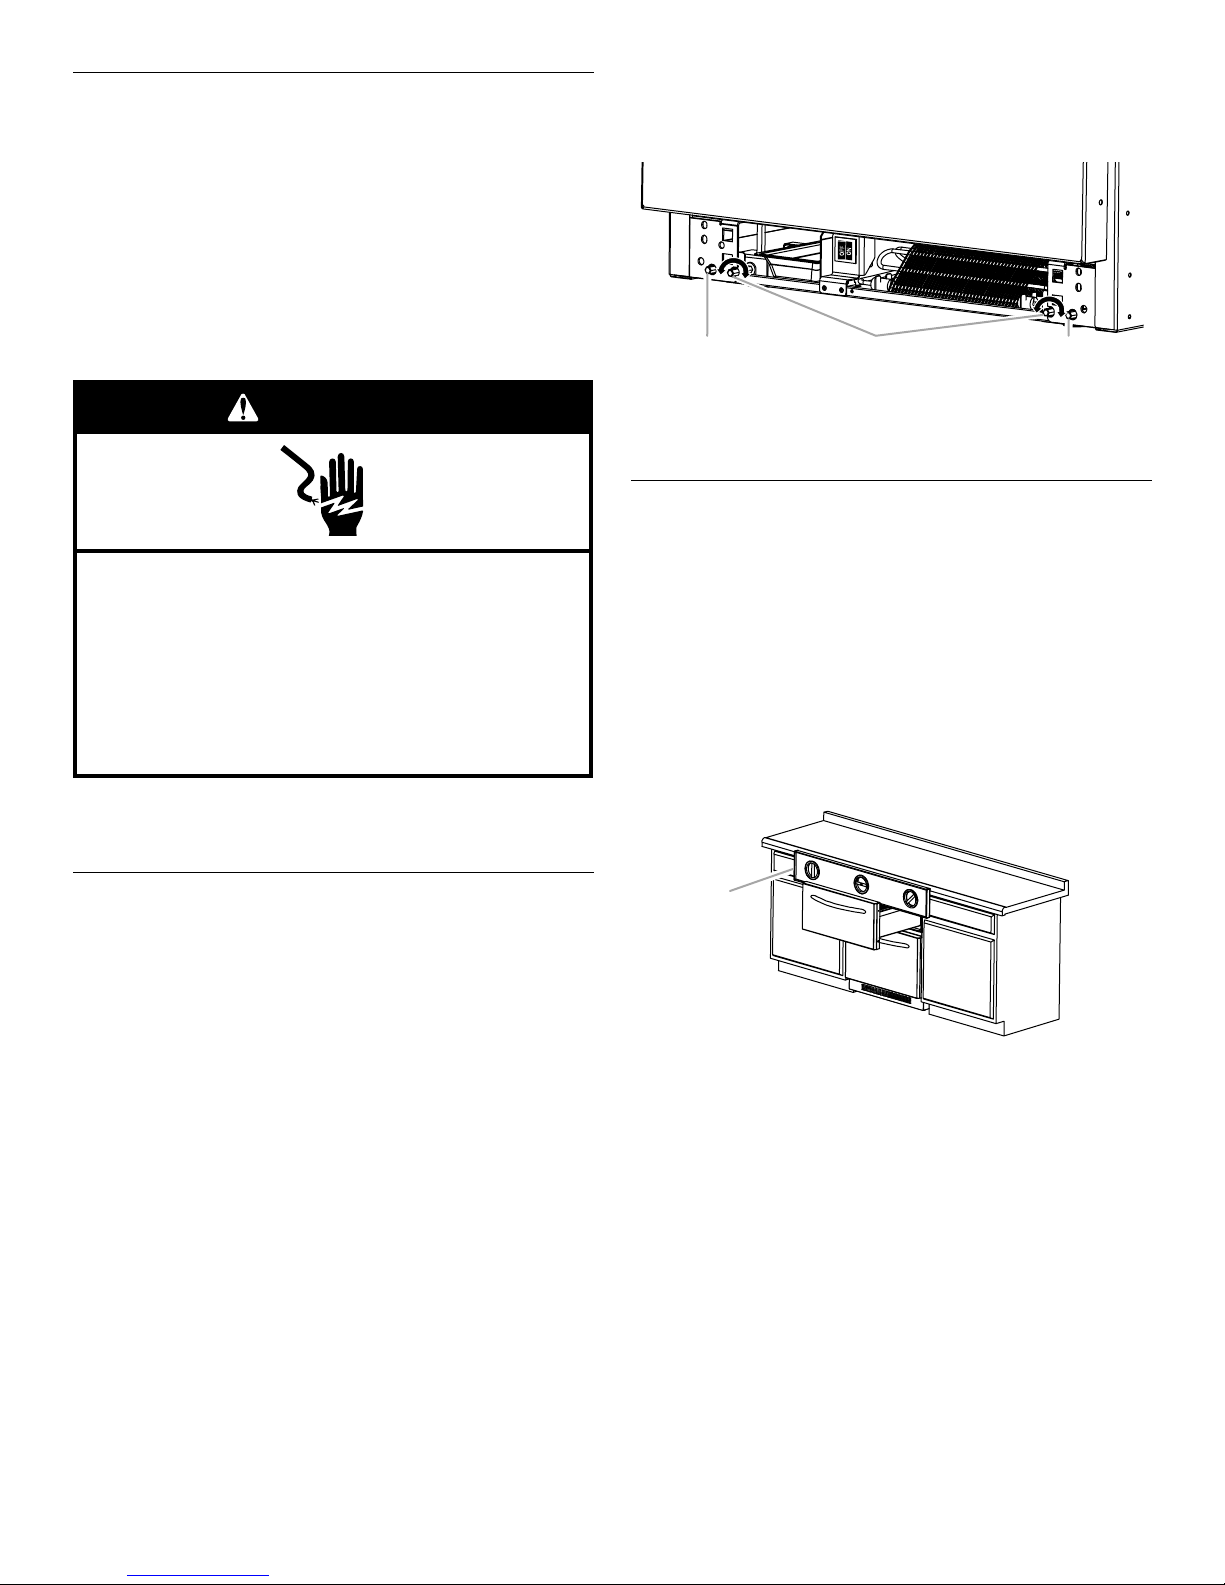
1. Using a ⁵⁄₁₆" socket wrench (and extension if necessary), turn
the leveling bolts on both sides of the refrigerator drawers to
the right (clockwise) until the leveling legs support the
refrigerator drawers’ weight.
BA A
A. Rear leveling bolt
B. Front leveling bolt
2. Lower all four leveling legs until the refrigerator drawers are
the proper height.
Level the Refrigerator Drawers
IMPORTANT:
■ Style 2–Overlay: Be sure to install the custom overlay drawer
panels before leveling the refrigerator drawers for the Overlay
Model. See “Style 2: Install Custom Overlay Drawer Panels.”
■ Before installing the refrigerator drawers, be sure that the
countertop is level.
■ If the countertop is not level, adjust the refrigerator drawers’
front and rear leveling bolts until the appliance is square with
the countertop. Be sure to maintain ³⁄₈" (9.5 mm) minimum
gap between the top of the drawer and the countertop.
1. Open the top drawer and place the level across the top
drawer as shown. Check the level from left to right.
Lower the Leveling Legs
IMPORTANT:
■ All four leveling legs must contact the floor to support and
stabilize the full weight of the refrigerator drawers.
■ Rollers are for moving the refrigerator drawers and not for
permanent support.
■ To avoid cabinet/countertop damage, do not apply more than
50 inch–pounds (58 cm - kg) of torque to the leveling legs.
■ When leveling, be sure that the gap between the upper
drawer and the bottom edge of the countertop is a minimum
of ³⁄₈" (9.5 mm).
■ Style 2: Overlay—Be sure to install the custom overlay drawer
panels before leveling the refrigerator drawers. See “Style 2:
Install Custom Overlay Drawer Panels.”
A
A. Check the level from left to right.
2. Using the front and rear leveling bolts, adjust the refrigerator
drawers cabinet until the top drawer measures level from left
to right. See “Lower Leveling Legs.”
NOTE: Adjusting the front and rear leveling bolts together will
either raise or lower the side of the refrigerator drawers
cabinet.
3. Remove the level and close the top drawer. Check the gap
between the top of the drawer and the countertop. If the gap
measures less than ³⁄₈" (9.5 mm) minimum, turn all four
leveling bolts equally to the left to raise the leveling legs (this
will lower the appliance). Recheck the level.
10
 Loading...