

Jenn-Air AST2780A, ACM1580A, AST3080A, AMC7159TA, JMC9158AA Installation Instructions Manual
MICROWAVE OVEN BUILT-IN TRIM KIT
INSTALLATION INSTRUCTIONS
Built-In Trim Kit Models AST2780A, AST3080A
For use with microwave oven models ACM1580A, AMC7159TA, JMC9158AA
UL listed for use over built-in electric ovens:
27" (68.6 cm): AOES2730, AOCS2740, ACO27SE1, JJW8127, JJW8527, JJW9527
30" (76.2 cm): AOES3030, AOCS3040, JJW8130, JJW8530, JJW9530
Table of Contents
MICROWAVE OVEN SAFETY........................................................... 1
INSTALLATION INSTRUCTIONS ..................................................... 2
Tools and Parts............................................................................... 2
Minimum Cutout Dimensions ......................................................... 2
Trim Kit Frame Dimensions ............................................................ 2
Electrical Requirements.................................................................. 2
Microwave Oven Preparation ......................................................... 3
Bottom Duct and Upper Duct Assembly........................................ 3
Upper Duct Assembly..................................................................... 3
Anti-Tip Bracket Installation............................................................ 4
Microwave Oven Placement........................................................... 4
Trim Kit Frame Installation ............................................................. 4
MICROWAVE OVEN SAFETY
Your safety and the safety of others are very important.
We have provided many important safety messages in this manual and on your appliance. Always read and obey all safety
messages.
This is the safety alert symbol.
This symbol alerts you to potential hazards that can kill or hurt you and others.
All safety messages will follow the safety alert symbol and either the word “DANGER” or “WARNING.”
These words mean:
You can be killed or seriously injured if you don't immediately
DANGER
WARNING
All safety messages will tell you what the potential hazard is, tell you how to reduce the chance of injury, and tell you what can
happen if the instructions are not followed.
follow instructions.
can be killed or seriously injured if you don't
You
instructions.
follow
W10141588A
INSTALLATION INSTRUCTIONS
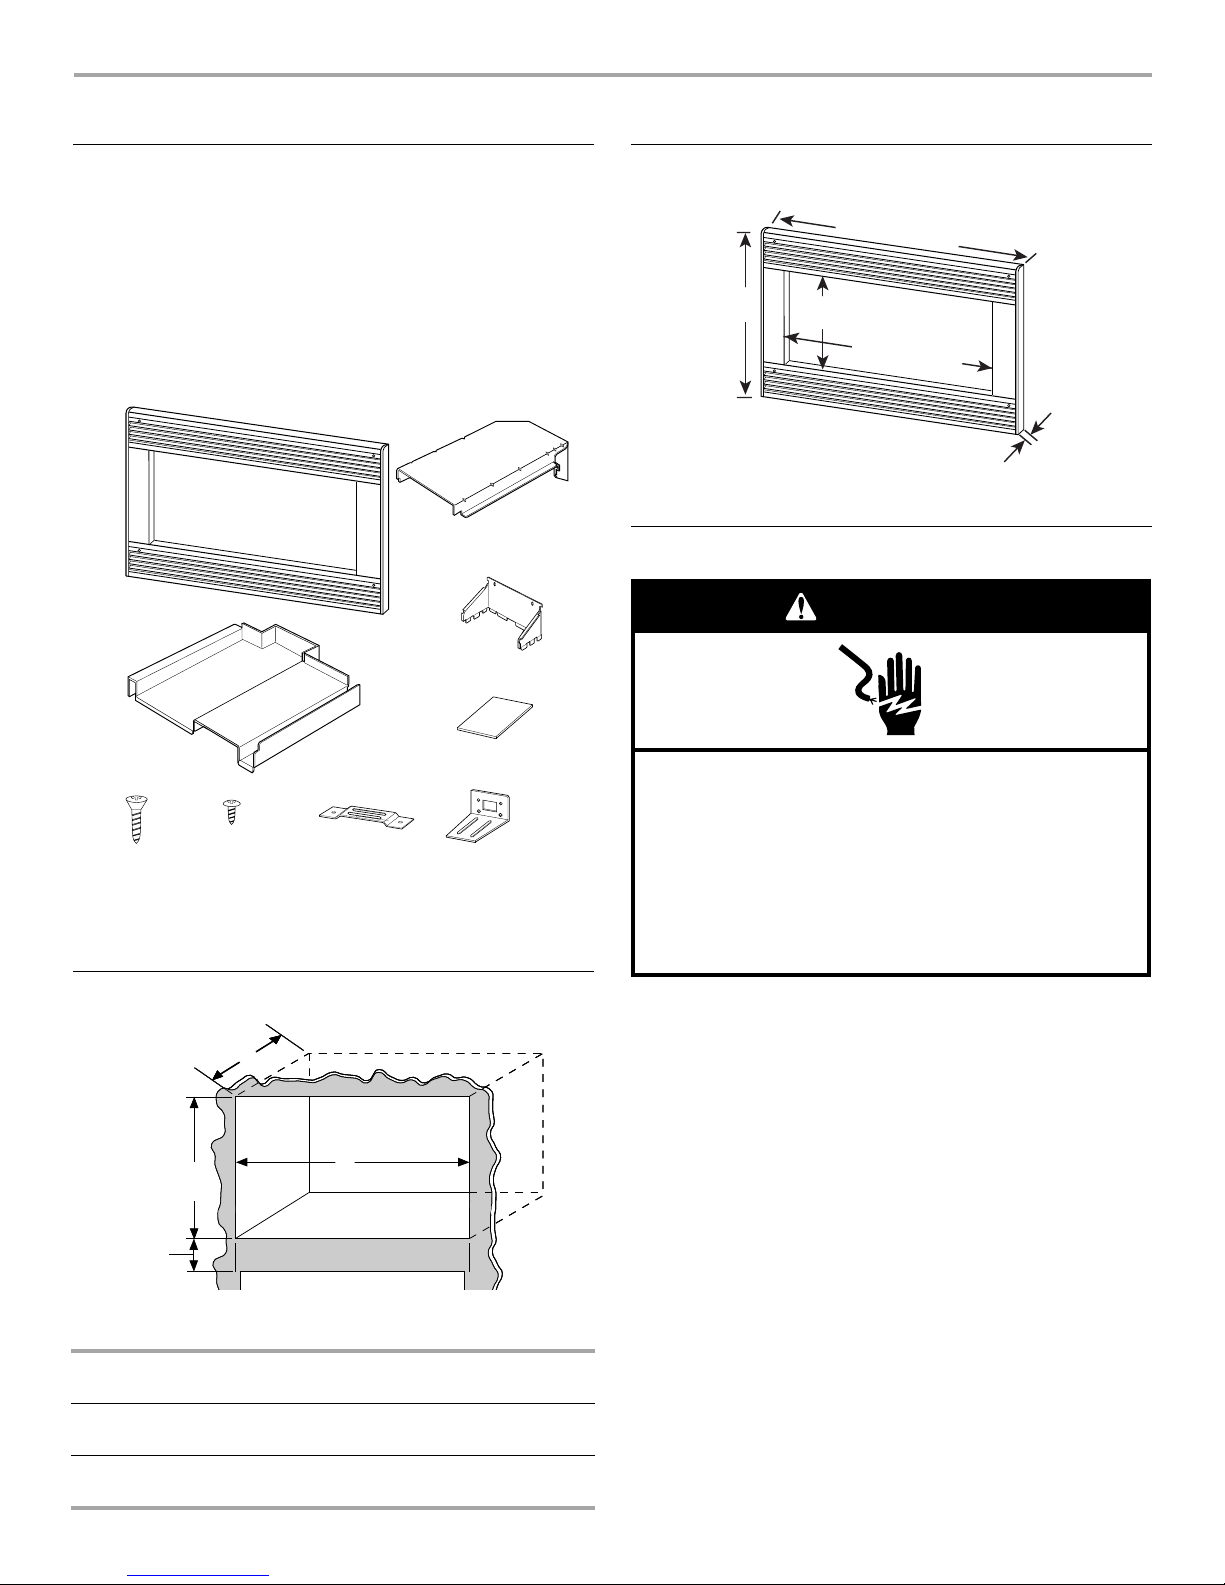
Tools and Parts
Tools Needed
Gather the required tools and parts before starting installation.
Read and follow the instructions provided with any tools
listed here.
■ Measuring tape
■ Pencil
■ Scissors
Parts Supplied
A
D
■ Phillips screwdriver
■ 5/64" drill
B
C
E
Trim Kit Frame Dimensions
26
³⁄₄
" (67.8 cm)*
29
³⁄₄
" (75.6 cm)**
20⁵⁄₁₆"
(50.9 cm)
14⁷⁄₈"
(37.8 cm)
22
⁵⁄₈
" (57.5 cm)
*For installation over 27" (68.6 cm) built-in oven
**For installation over 30" (76.2 cm) built-in oven
Electrical Requirements
WARNING
¹³⁄₁₆"
(2.1 cm)
F
A. Trim kit frame
B. Upper duct (1)
C. Rear duct (1)
D. Bottom duct (1)
E. Template
GH
Minimum Cutout Dimensions
17¹⁄₄"
(43.8 cm)
3"
(7.6 cm)
Electrical Shock Hazard
I
Plug into a grounded 3 prong outlet.
Do not remove ground prong.
F. 1" screws (4, plus 2 extra)
G. 1/2" screws (16, plus 2 extra)
H. Anti-tip bracket (1)
I. Bottom bracket (1)
Do not use an adapter.
Do not use an extension cord.
Failure to follow these instructions can result in death,
fire, or electrical shock.
Observe all governing codes and ordinances.
Required:
A
WidthWidth
B
A. Depth
B. Width
■ A 120 Volt, 60 Hz, AC only, 15- or 20-amp electrical supply
with a fuse or circuit breaker.
OVER 27" (68.6 CM)
BUILT-IN OVEN
OVER 30" (76.2 CM)
BUILT-IN OVEN
Depth 21¹⁄₂" (54.6 cm) min. with flush mount receptacle;
23³⁄₄" (60.3 cm) min. without flush mount receptacle
Width 25¹⁄₂" (64.8 cm) 25¹⁄₂" (64.8 cm) min;
28¹⁄₂" (72.4 cm) max.
2
 Loading...