

Jenn-Air A912 Owner's Manual
ICE MAKER
OWNER'S
GUIDE
TABLE OF CONTENTS
Introduction ..............................................................................2
Safety .......................................................................................3
Installation ............................................................................4-9
Operation ................................................................................10
Care and Cleaning .......................................................11-12
Before Calling for Service .........................................13-18
Warranty ..................................................................................20
Guide du Proprietaire ........................................................21
Guia del Propietario ...........................................................41
_JENN-AIR _,oo7621
Operation
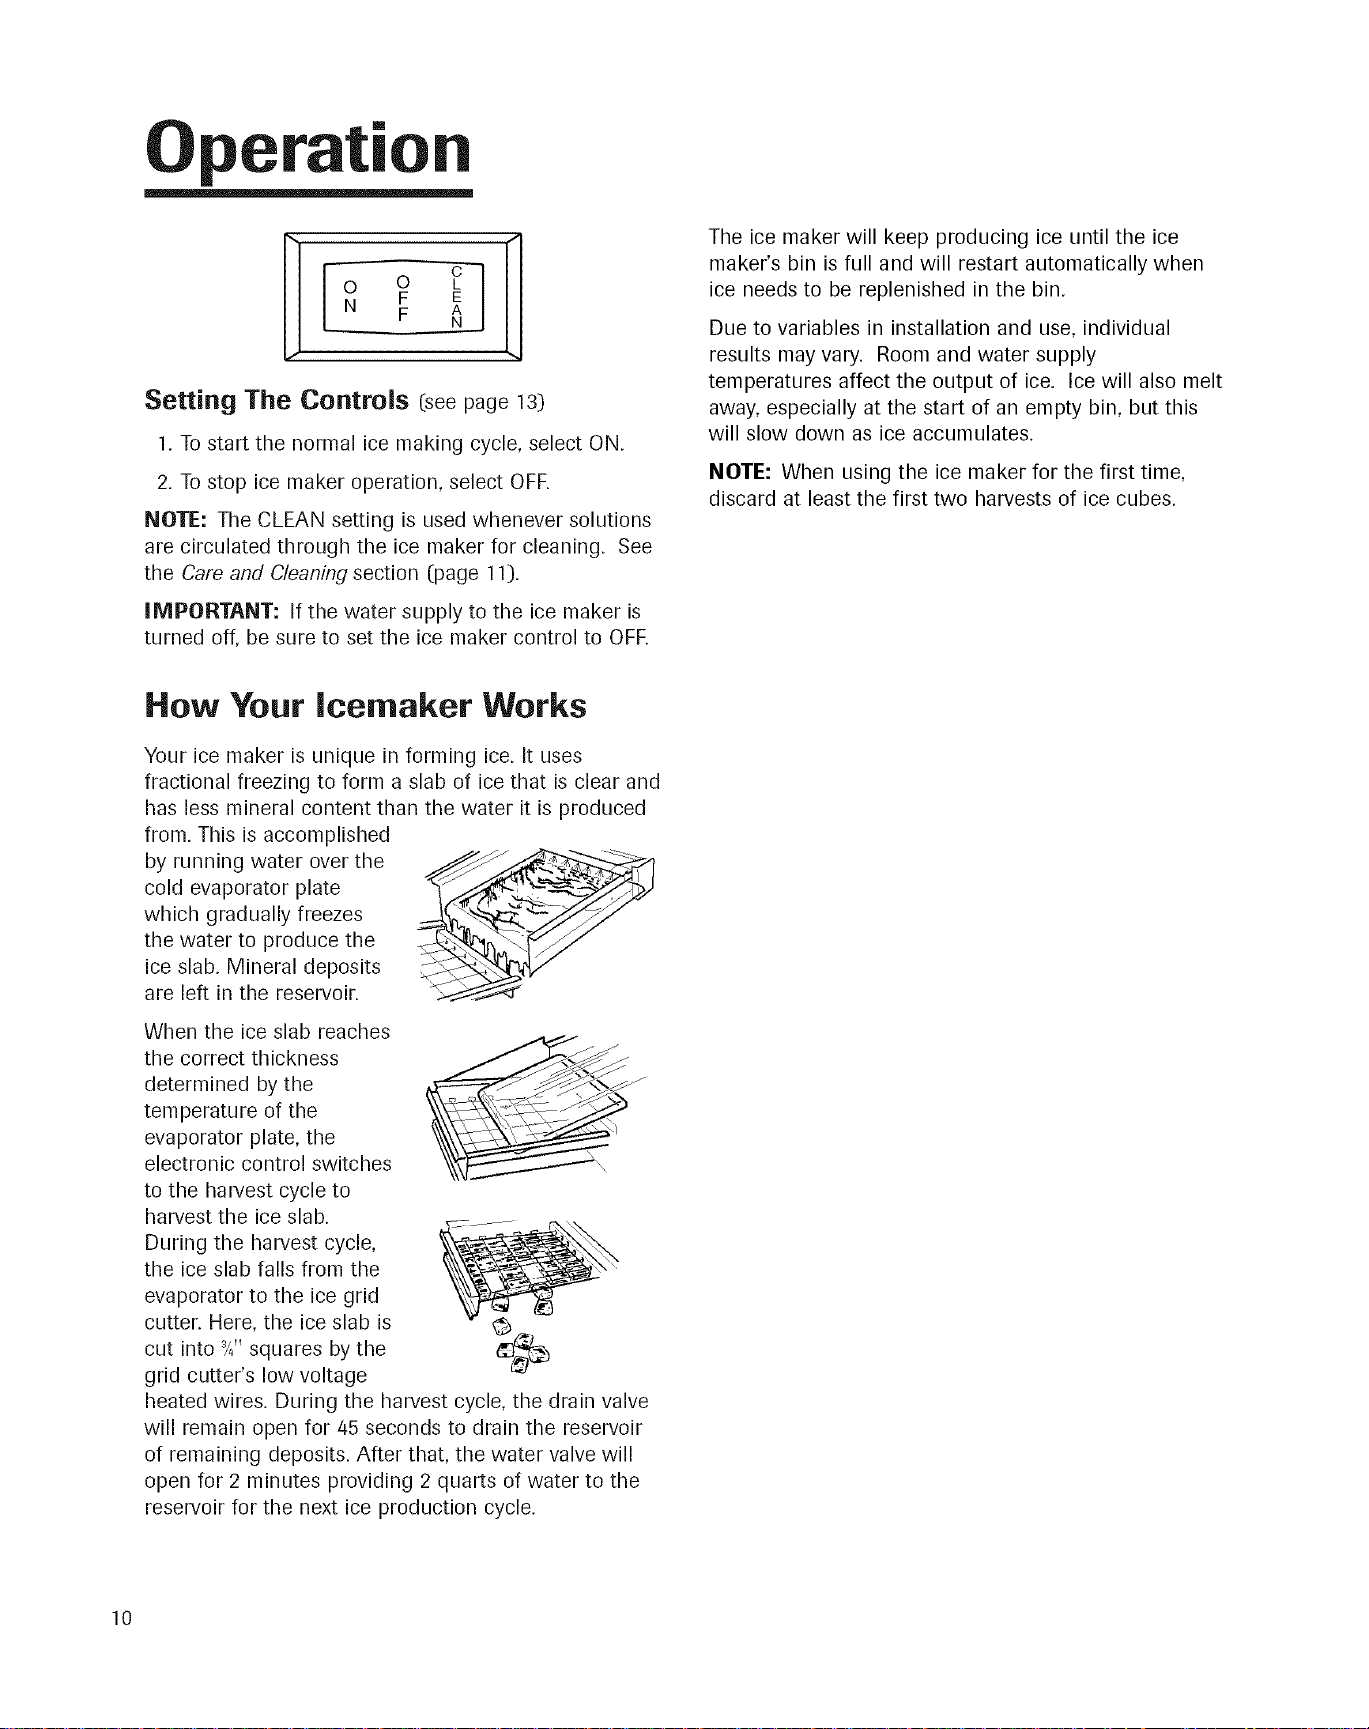
_ F
IIOOFC IIEL
Setting The Controls (seepage 13)
1. To start the normal ice making cycle, select ON.
2. To stop ice maker operation, select OFE
NOTE: The CLEAN setting is used whenever solutions
are circulated through the ice maker for cleaning. See
the Care and Cleaning section (page 11).
IMPORTANT: If the water supply to the ice maker is
turned off, be sure to set the ice maker control to OFE
How Your Icemaker Works
The ice maker will keep producing ice until the ice
maker's bin is full and will restart automatically when
ice needs to be replenished in the bin.
Due to variables in installation and use, individual
results may vary. Room and water supply
temperatures affect the output of ice. Ice will also melt
away, especially at the start of an empty bin, but this
will slow down as ice accumulates.
NOTE: When using the ice maker for the first time,
discard at least the first two harvests of ice cubes.
Your ice maker is unique in forming ice. It uses
fractional freezing to form a slab of ice that is clear and
has less mineral content than the water it is produced
from. This is accomplished
by running water over the
cold evaporator plate
which gradually freezes
the water to produce the
ice slab. Mineral deposits
are left in the reservoir.
When the ice slab reaches
the correct thickness
determined by the
temperature of the
evaporator plate, the
electronic control switches
to the harvest cycle to
harvest the ice slab.
During the harvest cycle,
the ice slab falls from the
evaporator to the ice grid
cutter. Here, the ice slab is
cut into 3/4"squares by the
grid cutter's low voltage
heated wires. During the harvest cycle, the drain valve
will remain open for 45 seconds to drain the reservoir
of remaining deposits. After that, the water valve will
open for 2 minutes providing 2 quarts of water to the
reservoir for the next ice production cycle.
\
10
Care and Cleanin
Both the ice making system and the condenser need to
be cleaned regularly.
Cleaning the ice Maker
System
Some impurities and minerals will remain and build-up
in the ice maker and stick to the ice maker's parts over
time. This build-up must be removed for proper ice
production, ice quality, and ice maker life. Your ice
maker is equipped with a cleaning mode that will help
in cleaning out these impurities.
Clean the ice and water system at least annually to
remove buildup. Frequency of cleaning depends on
water hardness. With very hard water (>14 gpg),
cleaning may be required as frequently as every
6 months.
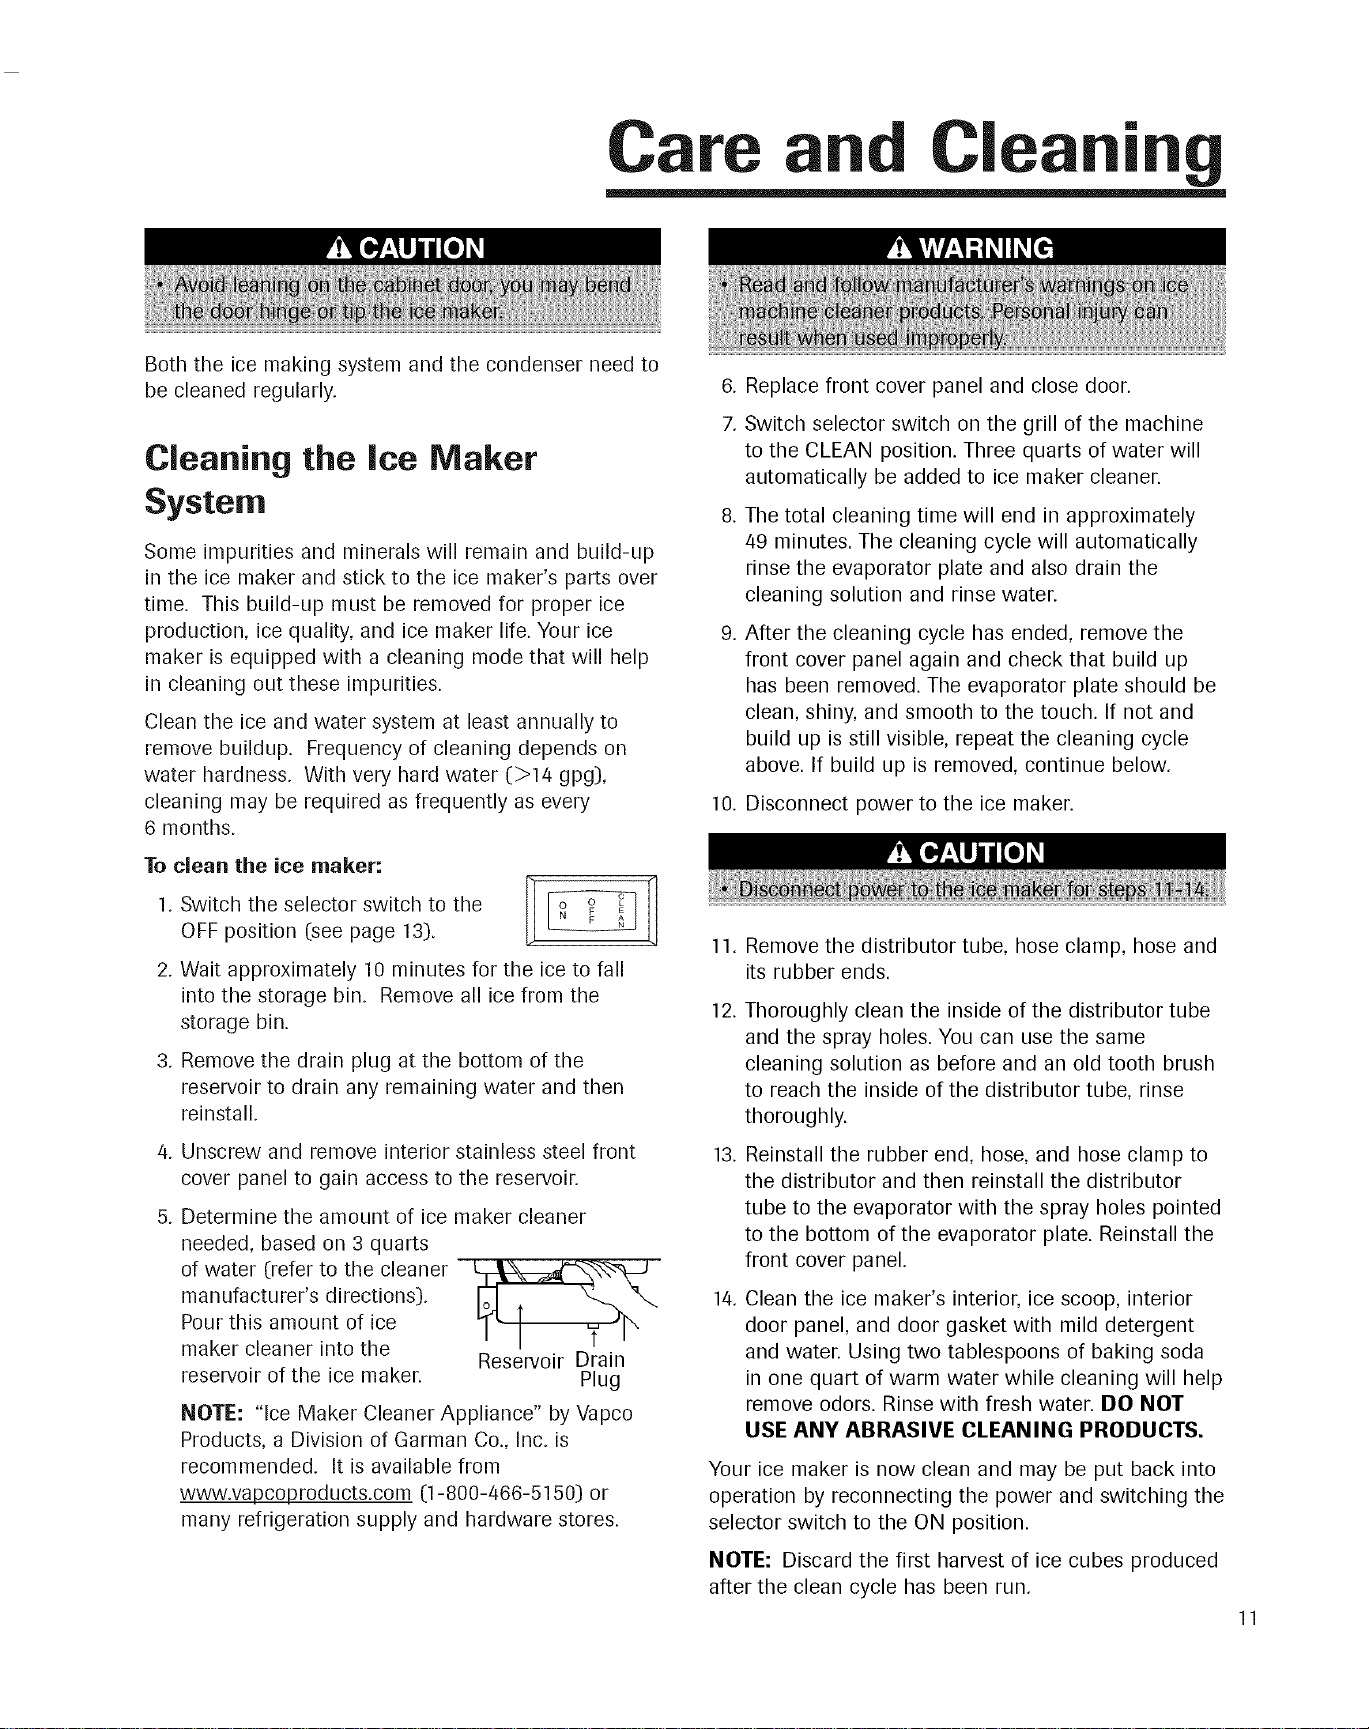
To clean the ice maker:
Swtchthe eectorswtchtothe!cO
OFF position (see page 13). F N
2_
Wait approximately 10 minutes for the ice to fall
into the storage bin. Remove all ice from the
storage bin.
3_
Remove the drain plug at the bottom of the
reservoir to drain any remaining water and then
reinstall.
4_ Unscrew and remove interior stainless steel front
cover panel to gain access to the reservoir.
5. Determine the amount of ice maker cleaner
needed, based on 3 quarts
of water (refer to the cleaner
manufacturer's directions).
Pour this amount of ice
maker cleaner into the
reservoir of the ice maker.
NOTE: "ice Maker Cleaner Appliance" by Vapco
Products, a Division of Garman Co., Inc. is
recommended. It is available from
www.vapcoproducts.com (1-800-466-5150) or
many refrigeration supply and hardware stores.
Reservoir Drain
Plug
.
Replace front cover panel and close door.
7.
Switch selector switch on the grill of the machine
to the CLEAN position. Three quarts of water will
automatically be added to ice maker cleaner.
.
The total cleaning time will end in approximately
49 minutes. The cleaning cycle will automatically
rinse the evaporator plate and also drain the
cleaning solution and rinse water.
.
After the cleaning cycle has ended, remove the
front cover panel again and check that build up
has been removed. The evaporator plate should be
clean, shiny, and smooth to the touch. If not and
build up is still visible, repeat the cleaning cycle
above. If build up is removed, continue below.
10. Disconnect power to the ice maker.
11. Remove the distributor tube, hose clamp, hose and
its rubber ends.
12.
Thoroughly clean the inside of the distributor tube
and the spray holes. You can use the same
cleaning solution as before and an old tooth brush
to reach the inside of the distributor tube, rinse
thoroughly.
13.
Reinstall the rubber end, hose, and hose clamp to
the distributor and then reinstall the distributor
tube to the evaporator with the spray holes pointed
to the bottom of the evaporator plate. Reinstall the
front cover panel.
14.
Clean the ice maker's interior, ice scoop, interior
door panel, and door gasket with mild detergent
and water. Using two tablespoons of baking soda
in one quart of warm water while cleaning will help
remove odors. Rinse with fresh water. DO NOT
USE ANY ABRASIVE CLEANING PRODUCTS.
Your ice maker is now clean and may be put back into
operation by reconnecting the power and switching the
selector switch to the ON position.
NOTE: Discard the first harvest of ice cubes produced
after the clean cycle has been run.
11
 Loading...