

Jenn-Air 8113P757-60 User Manual

JENN-AIR® GAS SLIDE-IN RANGE
PRO-STYLE
TM
USE & CARE
GUIDE
TABLE OF CONTENTS
Important Safety Instructions .....................................1-4
Care & Cleaning ..............................................................5-7
Maintenance..................................................................... 8-9
Troubleshooting ......................................................... 10-11
Surface Cooking......................................................... 12-13
Oven Cooking.............................................................. 14-20
Options .......................................................................... 21-24
Favorites ...............................................................................25
Setup .............................................................................. 26-28
Accessories .........................................................................28
Warranty & Service........................................................... 29
Guide d’utilisation et d’entretien .................................30
Guía de uso y cuidado ....................................................60
®
Form No. A/01/08 Part No. 8113P757-60 ©2006 Maytag Appliances Sales Co. All rights reserved. Litho U.S.A .
Installer: Please leave this guide with this appliance.
Consumer: Please read and keep this guide for future
reference. Keep sales receipt and/or cancelled check as
proof of purchase.
Model Number __________________________________
Serial Number __________________________________
Date of Purchase ________________________________
If you have questions, call:
Jenn-Air Customer Assistance
1-800-JENNAIR (1-800-536-6247)
1-800-688-2080 (U.S. TTY for hearing or speech impaired)
(Mon.-Fri., 8 am-8 pm Eastern Time)
Internet: http://www.jennair.com
In our continuing effort to improve the quality and
performance of our cooking products, it may be necessary
to make changes to the appliance without revising this
guide.
For service information, see page 29.
IMPORTANT SAFETY
INSTRUCTIONS
technician. Do not attempt to adjust, repair, service,
or replace any part of your appliance unless it is
specifically recommended in this guide. All other
servicing should be referred to a qualified servicer.
Always disconnect power to appliance before servicing.
WARNING
If the information in this guide is not followed
exactly, a fire or explosion may result causing
property damage, personal injury or death.
– Do not store or use gasoline or other
flammable vapors and liquids in the vicinity
of this or any appliance.
– IF YOU SMELL GAS:
• Do not try to light any appliance.
• Do not touch any electrical switch.
• Do not use any phone in your building.
• Immediately call your gas supplier from a
neighbor’s phone. Follow the gas supplier’s
instructions.
• If you cannot reach your gas supplier, call
the fire department.
– Installation and service must be performed by
a qualified installer, service agency or the gas
supplier.
Warning and Important Safety Instructions appearing in
this guide are not meant to cover all possible conditions
and situations that may occur. Common sense, caution,
and care must be exercised when installing,
maintaining, or operating the appliance.
Always contact the manufacturer about problems or
conditions you do not understand.
Recognize Safety Symbols, Words, Labels
WARNING
WARNING – Hazards or unsafe practices which
COULD result in severe personal injury or death.
CAUTION
CAUTION – Hazards or unsafe practices which
COULD result in minor personal injury.
Read and follow all instructions before using this
appliance to prevent the potential risk of fire, electric
shock, personal injury or damage to the appliance as a
result of improper usage of the appliance. Use appliance
only for its intended purpose as described in this guide.
WARNING
Gas leaks may occur in your system and result in a
dangerous situation. Gas leaks may not be detected
by smell alone. Gas suppliers recommend you
purchase and install an UL approved gas detector.
Install and use in accordance with the manufacturer’s
instructions.
General Instructions
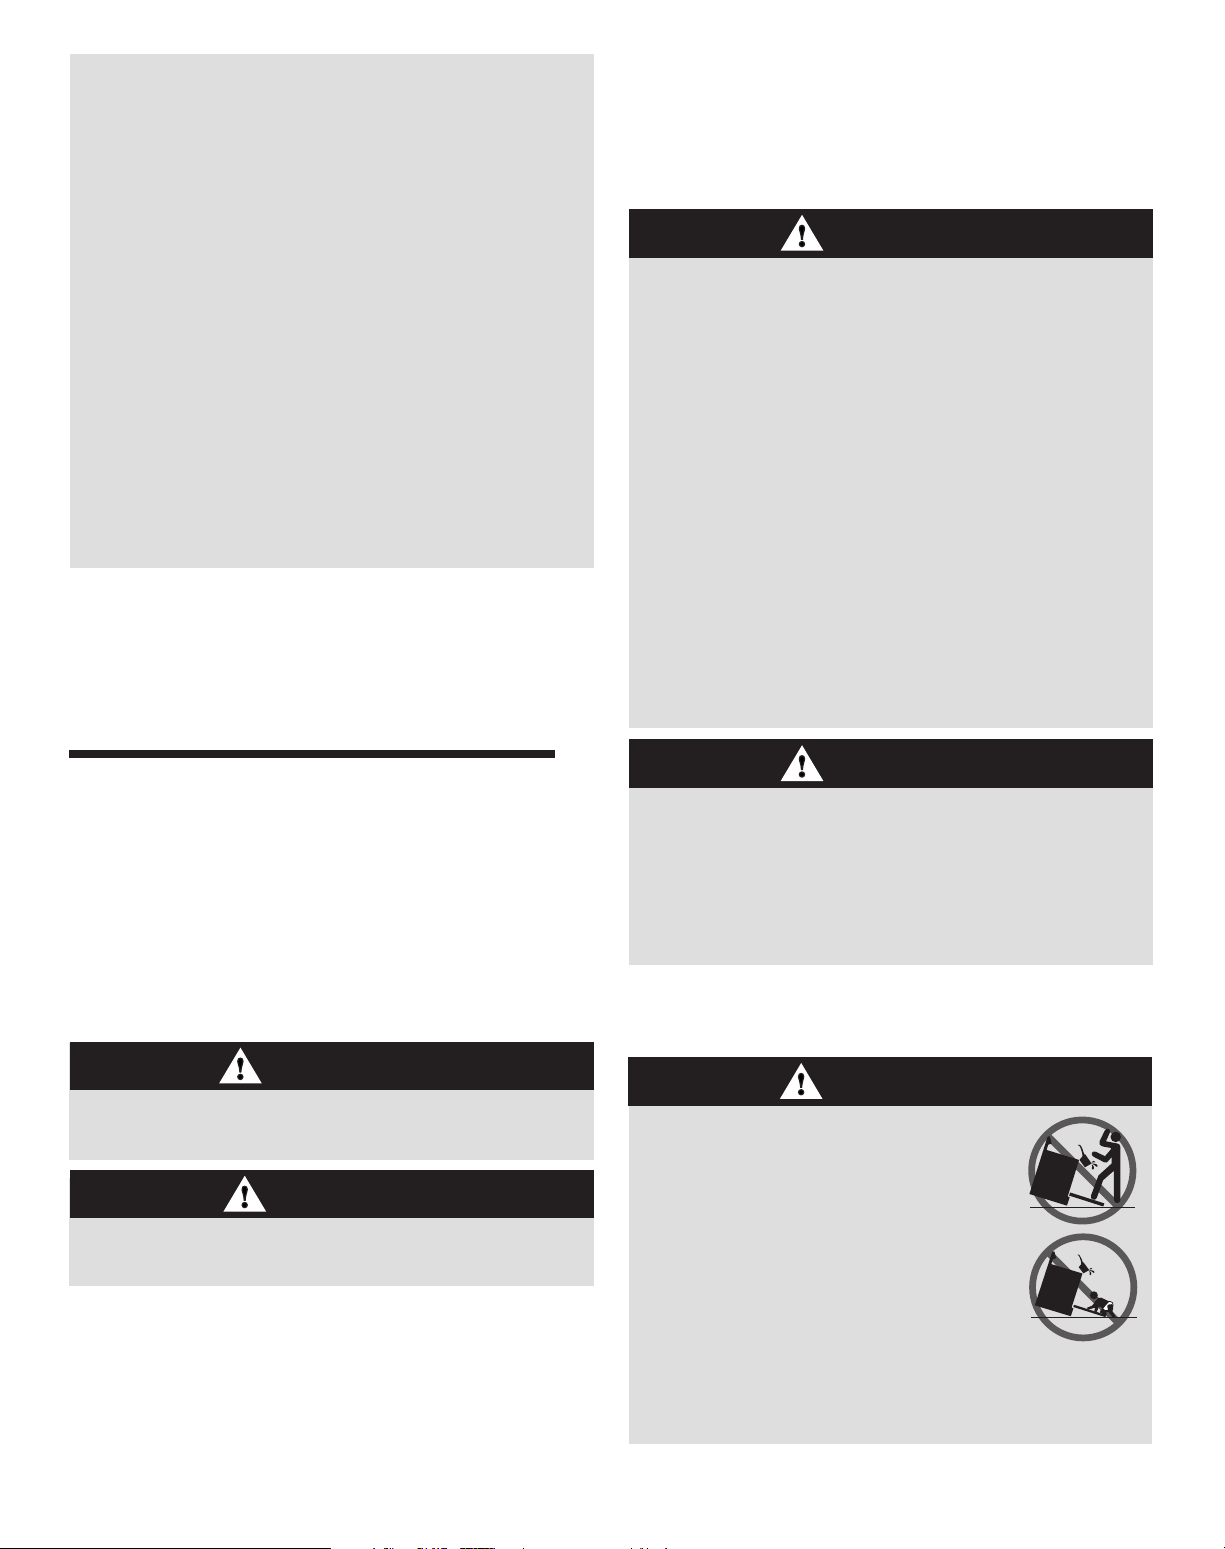
WARNING
• ALL RANGES CAN TIP AND
CAUSE INJURIES TO PERSONS
• INSTALL ANTI-TIP DEVICE
PACKED WITH RANGE
• FOLLOW ALL INSTALLATION
INSTRUCTIONS
WARNING: To reduce risk of
tipping of the appliance from
abnormal usage or by excessive loading of the
oven door, the appliance must be secured by a
properly installed anti-tip device.
To ensure proper and safe operation: Appliance
must be properly installed and grounded by a qualified
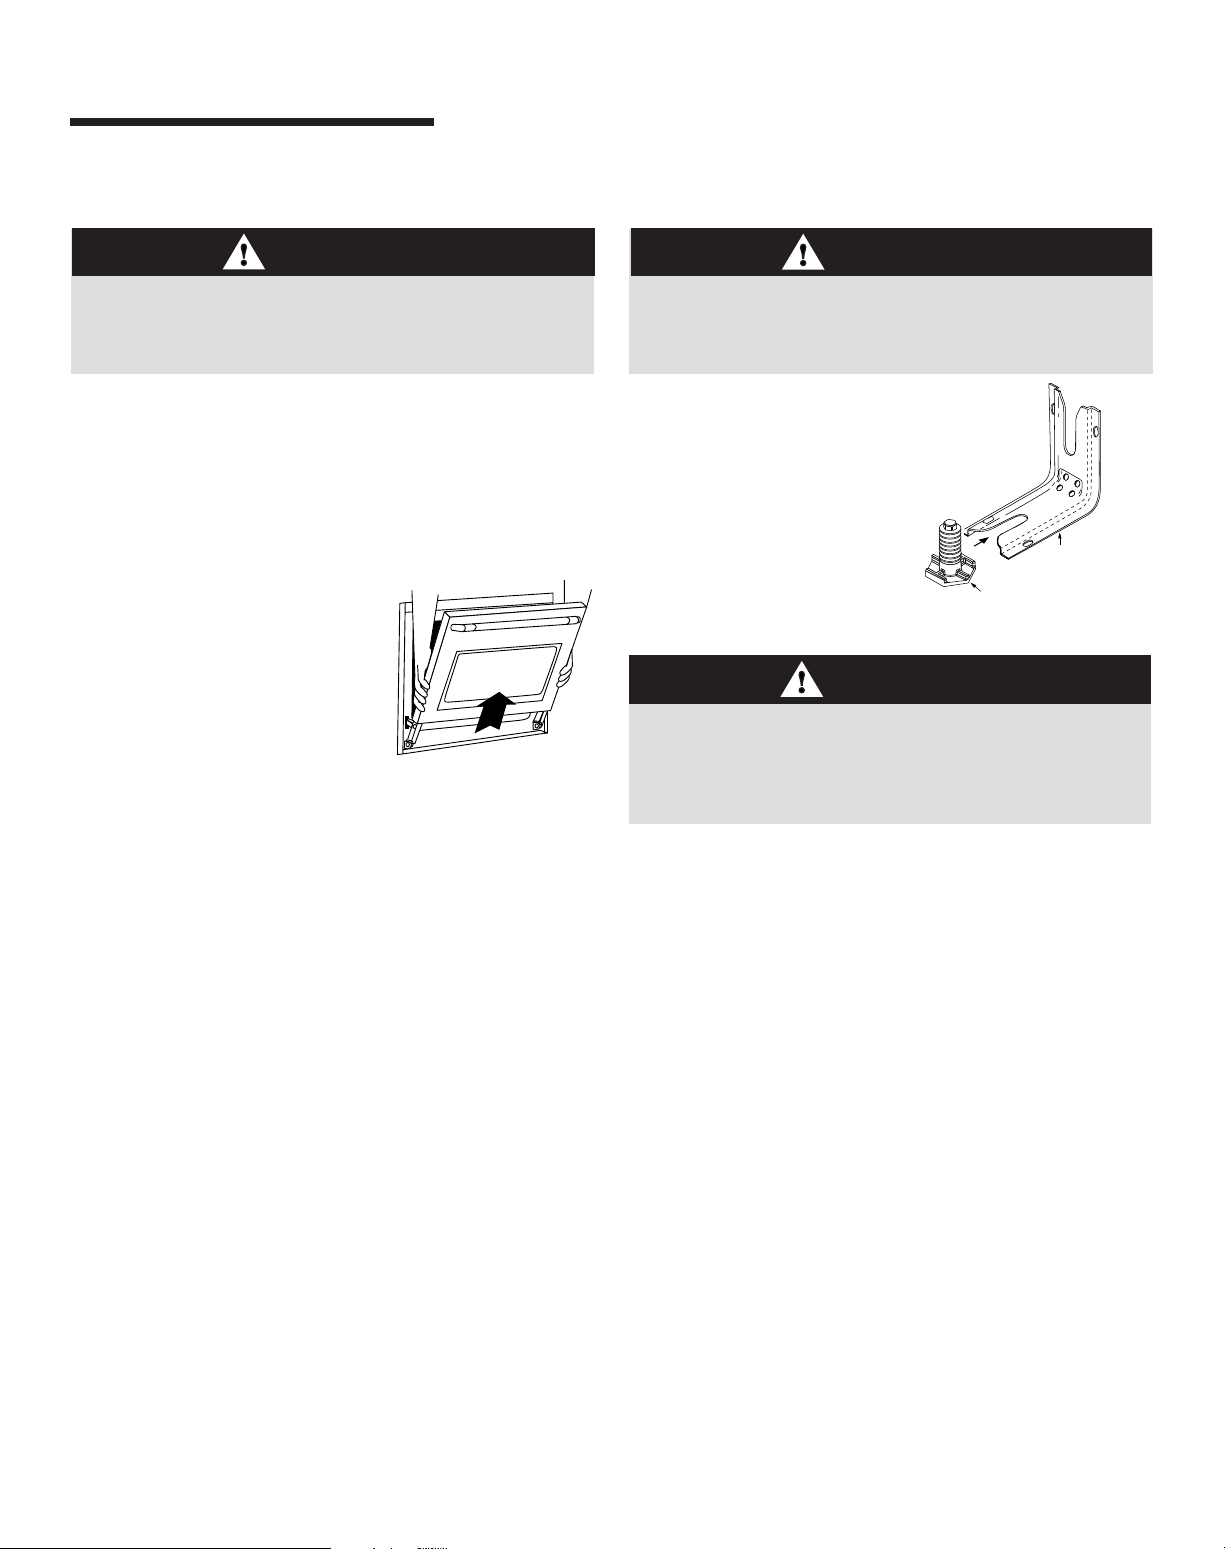
To check if device is properly installed, look underneath
range with a flashlight to make sure one of the rear
1

leveling legs is properly engaged in the bracket slot. The
anti-tip device secures the rear leveling leg to the floor
when properly engaged. You should check this anytime
the range has been moved.
To Prevent Fire or Smoke
Damage
Be sure all packing materials are removed from the
appliance before operating it.
Keep area around appliance clear and free from
combustible materials. Flammable materials should not
be stored in an oven.
Many plastics are vulnerable to heat. Keep plastics away
from parts of the appliance that may become warm or
hot. Do not leave plastic items on the cooktop as they
may melt or soften if left too close to the vent or a
lighted surface burner.
Child Safety
CAUTION
NEVER store items of interest to children in cabinets
above an appliance or on backguard of a range.
Children climbing on the appliance door to reach items
could be seriously injured.
NEVER leave children alone or unsupervised near the
appliance when it is in use or is still hot. Children should
never be allowed to sit or stand on any part of the
appliance as they could be injured or burned.
Children must be taught that the appliance and utensils in
it can be hot. Let hot utensils cool in a safe place, out of
reach of small children. Children should be taught that an
appliance is not a toy. Children should not be allowed to
play with controls or other parts of the appliance.
To prevent grease fires, do not let cooking grease or
other flammable materials accumulate in or near the
appliance.
If appliance is installed near a window, proper
precautions should be taken to prevent curtains from
blowing over burners.
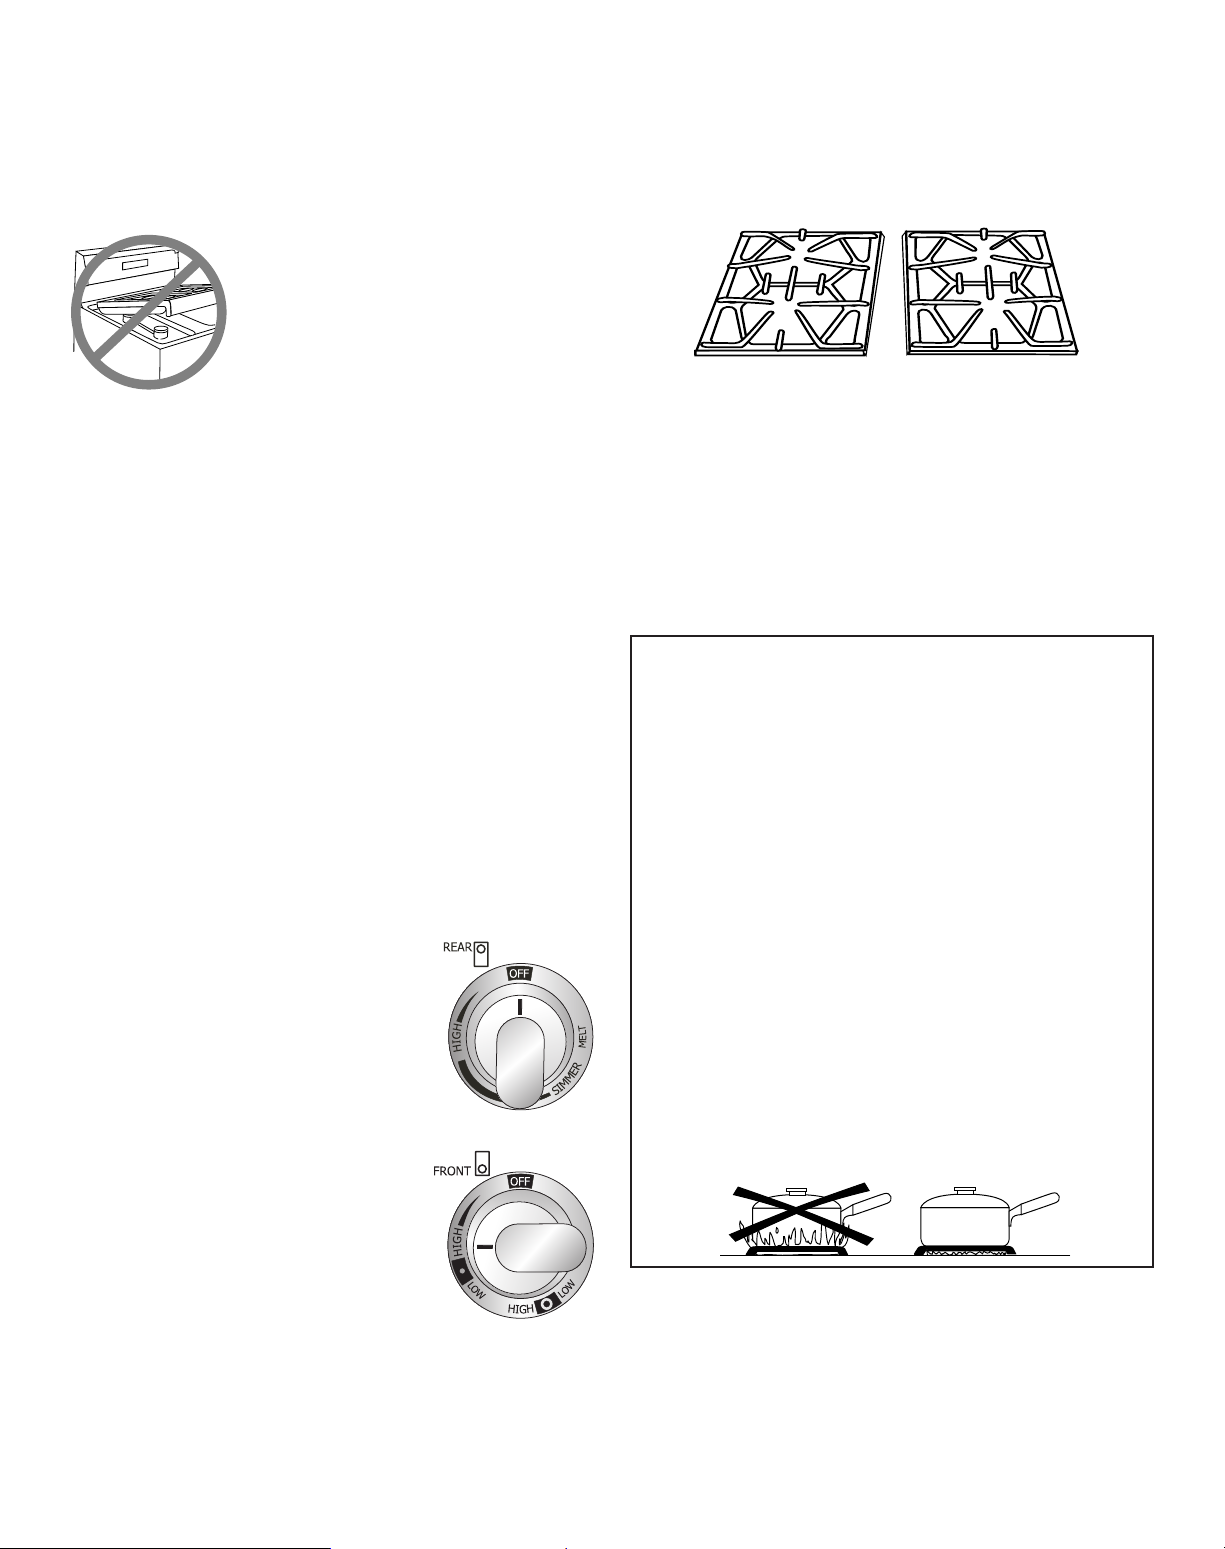
NEVER leave any items on the cooktop. The hot air from
the vent may ignite flammable items and may increase
pressure in closed containers which may cause them to
burst.
Many aerosol-type spray cans are EXPLOSIVE when
exposed to heat and may be highly flammable. Avoid
their use or storage near an appliance.
To eliminate the hazard of reaching over hot surface
burners, cabinet storage should not be provided
directly above a unit. If storage is provided, it should be
limited to items which are used infrequently and which
are safely stored in an area subjected to heat from an
appliance. Temperatures may be unsafe for some items,
such as volatile liquids, cleaners or aerosol sprays.
In Case of Fire
Turn off appliance and ventilating hood to avoid
spreading the flame. Extinguish flame, then turn on
hood to remove smoke and odor.
• Cooktop: Smother fire or flame in a pan with a lid or
cookie sheet.
• NEVER pick up or move a flaming pan.
• Oven: Smother fire or flame by closing the oven door.
Do not use water on grease fires. Use baking soda, a
dry chemical or foam-type extinguisher to smother fire
or flame.
About Your Appliance
WARNING
NEVER use appliance door as a step stool or seat as this
may result in possible tipping of the appliance and serious
injuries.
NEVER use this appliance as a space heater to heat
or warm a room. Doing so may result in carbon
monoxide poisoning and overheating of the oven.
NEVER cover any slots, holes or passages in the oven
bottom or cover the entire rack with materials such as
aluminum foil. Doing so blocks air flow through the
oven and may cause carbon monoxide poisoning.
Aluminum foil may also trap heat, causing a fire
hazard.
NEVER obstruct the flow of combustion and ventilation
air by blocking the oven vent or air intakes. Doing so
restricts air to the burners and may result in carbon
monoxide poisoning.
Avoid touching oven vent area while oven is on and for
several minutes after oven is turned off. Some parts of
the vent and surrounding area become hot enough to
cause burns. After oven is turned off, do not touch the
oven vent or surrounding areas until they have had
sufficient time to cool.
Other potentially hot surfaces include cooktop, areas
facing the cooktop, oven vent, surface near the vent
opening, oven door, area around the oven door and oven
window.
Cont.
2

Do not touch a hot oven light bulb with a damp cloth as
the bulb could break. Should the bulb break, disconnect
power to the appliance before removing bulb to avoid
electrical shock.
To prevent potential hazard to the user and damage to
the appliance, do not use appliance as a space heater to
heat or warm a room. Also, do not use the oven as a
storage area for food or cooking utensils.
NEVER use aluminum foil to cover an oven rack or oven
bottom. Misuse could result in risk of electric shock, fire,
or damage to the appliance. Use foil only as directed in
this guide.
Cooking Safety
Always place a pan on a surface burner before turning it
on. Be sure you know which knob controls which surface
burner. Make sure the correct burner is turned on and
that the burner has ignited. When cooking is completed,
turn burner off before removing pan to prevent exposure
to burner flame.
Always adjust surface burner flame so that it does not
extend beyond the bottom edge of the pan. An excessive
flame is hazardous, wastes energy and may damage the
appliance, pan or cabinets above the appliance.
NEVER leave a surface cooking operation unattended,
especially when using a high heat setting or when deep
fat frying. Boilovers cause smoking and greasy spillovers
may ignite. Clean up greasy spills as soon as possible.
Do not use high heat for extended cooking operations.
NEVER heat an unopened container on the surface
burner or in the oven. Pressure build-up may cause
container to burst resulting in serious personal injury or
damage to the appliance.
Use dry, sturdy potholders. Damp potholders may cause
burns from steam. Dish towels or other substitutes
should never be used as potholders because they can
trail across hot surface burners and ignite or get caught
on appliance parts.
Always let quantities of hot fat used for deep fat frying
cool before attempting to move or handle.
Do not let cooking grease or other flammable materials
accumulate in or near the appliance, hood or vent fan.
Clean hood frequently to prevent grease from
accumulating on hood or filter. When flaming foods
under the hood, turn the fan on.
NEVER wear garments made of flammable material or
loose fitting or long-sleeved apparel while cooking.
Clothing may ignite or catch utensil handles.
Always place oven racks in the desired positions while
oven is cool. Slide oven rack out to add or remove food,
using dry, sturdy potholders. Always avoid reaching into
the oven to add or remove food. If a rack must be
moved while hot, use a dry potholder. Always turn the
oven off at the end of cooking.
Use care when opening the oven door. Let hot air or
steam escape before moving or replacing food.
PREPARED FOOD WARNING: Follow food
manufacturer’s instructions. If a plastic frozen food
container and/or its cover distorts, warps, or is otherwise
damaged during cooking, immediately discard the food
and its container. The food could be contaminated.
NEVER use aluminum foil to cover oven racks or oven
bottom. This could result in risk of electric shock, fire, or
damage to the appliance. Use foil only as directed in this
guide.
Utensil Safety
Use pans with flat bottoms and handles that are easily
grasped and stay cool. Avoid using unstable, warped,
easily tipped or loose-handled pans. Also avoid using
pans, especially small pans, with heavy handles as they
could be unstable and easily tip. Pans that are heavy to
move when filled with food may also be hazardous.
Be sure utensil is large enough to properly contain food
and avoid boilovers. Pan size is particularly important in
deep fat frying. Be sure pan will accommodate the
volume of food that is to be added as well as the bubble
action of fat.
To minimize burns, ignition of flammable materials and
spillage due to unintentional contact with the utensil, do
not extend handles over adjacent surface burners.
Always turn pan handles toward the side or back of the
appliance, not out into the room where they are easily hit
or reached by small children.
Never let a pan boil dry as this could damage the utensil
and the appliance.
Follow the manufacturer’s directions when using oven
cooking bags.
Only certain types of glass, glass/ceramic, ceramic or
glazed utensils are suitable for cooktop or oven usage
without breaking due to the sudden change in
temperature. Follow manufacturer’s instructions when
using glass.
This appliance has been tested for safe performance
using conventional cookware. Do not use any devices
or accessories that are not specifically recommended in
this guide. Do not use element covers for the surface
units, stovetop grills, or add-on oven convection
systems. The use of devices or accessories that are not
expressly recommended in this guide can create serious
safety hazards, result in performance problems, and
reduce the life of the components of the appliance.
3

Deep Fat Fryers
Use extreme caution when moving the grease pan or
disposing of hot grease. Allow grease to cool before
attempting to move pan.
Ventilating Hoods
Clean range hood and filters frequently to prevent
grease or other flammable materials from accumulating
on hood or filter and to avoid grease fires.
When flaming foods under the hood, turn the fan on.
Cleaning Safety
Turn off all controls and wait for appliance parts to cool
before touching or cleaning them. Do not touch the
burner grates or surrounding areas until they have had
sufficient time to cool.
Clean cooktop with caution. Use care to avoid steam
burns if a wet sponge or cloth is used to wipe spills on a
hot surface. Some cleaners can produce noxious fumes
if applied to a hot surface.
Self-Clean Oven
CAUTION
Before self-cleaning the oven, remove the oven racks,
broiler pan, food and any other utensils. Wipe
spillovers to prevent excessive smoke and flare-ups.
Clean only parts listed in this guide. Do not clean door
gasket. The door gasket is essential for a good seal.
Care should be taken not to rub, damage, or move the
gasket.
Important Safety Notice
and Warning
The California Safe Drinking Water and Toxic
Enforcement Act of 1986 (Proposition 65) requires the
Governor of California to publish a list of substances
known to the State of California to cause cancer or
reproductive harm, and requires businesses to warn
customers of potential exposures to such substances.
Users of this appliance are hereby warned that when
the oven is engaged in the self-clean cycle, there may
be some low-level exposure to some of the listed
substances, including carbon monoxide. Exposure to
these substances can be minimized by properly venting
the oven to the outdoors by opening the windows and/
or door in the room where the appliance is located
during the self-clean cycle.
IMPORTANT NOTICE REGARDING PET BIRDS:
Never keep pet birds in the kitchen or in rooms where
the fumes from the kitchen could reach. Birds have a
very sensitive respiratory system. Fumes released during
an oven self-cleaning cycle may be harmful or fatal to
birds. Fumes released due to overheated cooking oil, fat,
margarine and overheated non-stick cookware may be
equally harmful.
Do not use oven cleaners or oven liners of any kind in
or around any part of the self-clean oven.
It is normal for the cooktop of the range to become hot
during a self-clean cycle. Therefore, touching the
cooktop during a clean cycle should be avoided.
Save These Instructions for Future Reference
4
CARE & CLEANING
Self-Clean Oven
CAUTION
• It is normal for parts of the oven to become hot during a
self-clean cycle.
• To prevent damage to oven door, do not attempt to open
the door when LOCK is displayed.
• Avoid touching door, window or oven vent area during a
clean cycle.
• Do not use commercial oven cleaners on the oven finish
or around any part of the oven. They will damage the
finish or parts.
The self-clean cycle uses above-normal cooking temperatures
to automatically clean the oven interior.
The oven should be cleaned regularly by wiping up spillovers
to prevent excessive smoke and flare-ups. Do not allow a
heavy build-up of soil to accumulate in the oven.
During the cleaning process, the kitchen should be well
ventilated to get rid of normal odors associated with cleaning.
Before Self-Cleaning
1. Turn off the oven light before cleaning. The oven light may
burn out during the clean cycle.
2. Remove broiler pan, all pans, and oven racks from the
oven. The oven racks will discolor and may not slide easily
after a self-clean cycle if they are not removed.
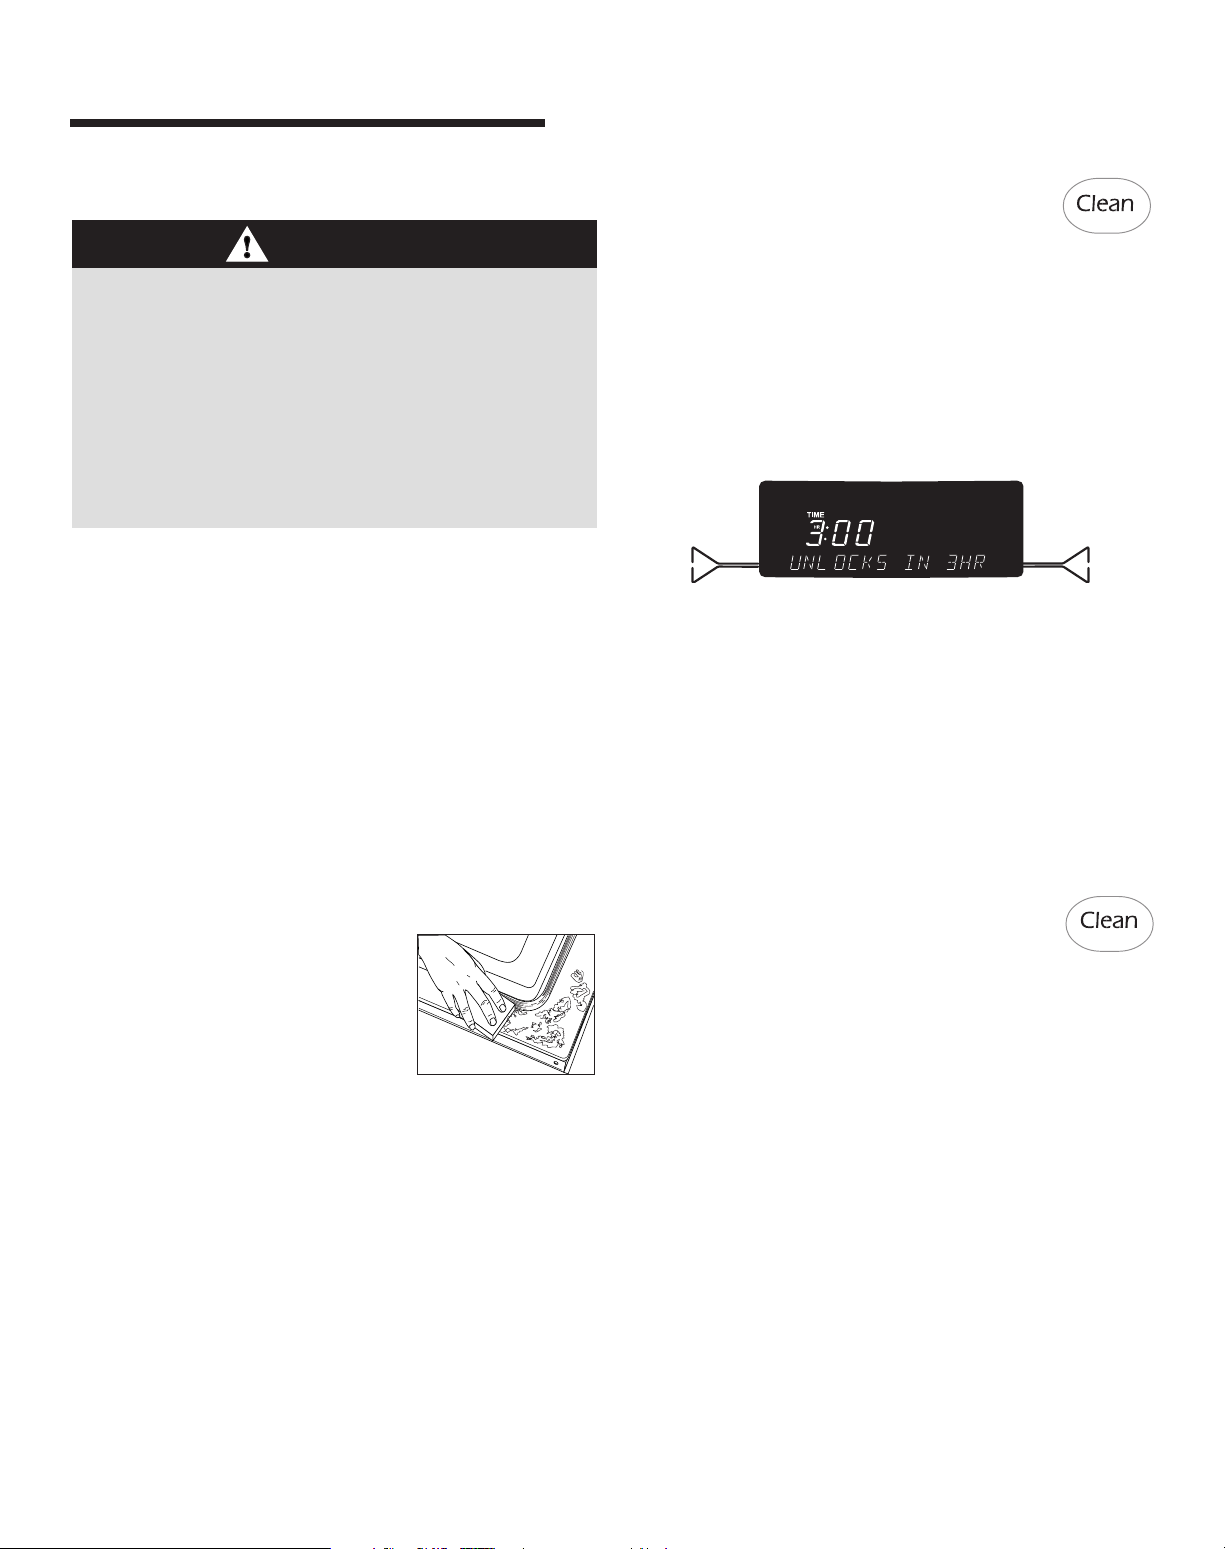
3. Clean oven frame, door frame, area
outside of gasket, and around the
opening in the door gasket with a
nonabrasive cleaner such as Bon
Ami* or detergent and water. The
self-cleaning process does not
clean these areas. They should be
cleaned to prevent soil from baking on during the clean
cycle. (The gasket is the seal around the oven door and
window.)
4. To prevent damage, do not clean or rub the gasket around
the oven door. The gasket is designed to seal in heat
during the clean cycle.
5. Wipe up excess grease or spill-overs from the oven
bottom. This prevents excessive smoking, flare-ups or
flaming during the clean cycle.
6. Wipe up sugary and acidic spillovers such as sweet
potatoes, tomato, or milk-based sauces. Porcelain enamel
is acid-resistant, not acid-proof. The porcelain finish may
discolor if acidic or sugary spills are not wiped up before a
self-clean cycle.
* Brand names for cleaning products are registered trademarks of the respective manufacturers.
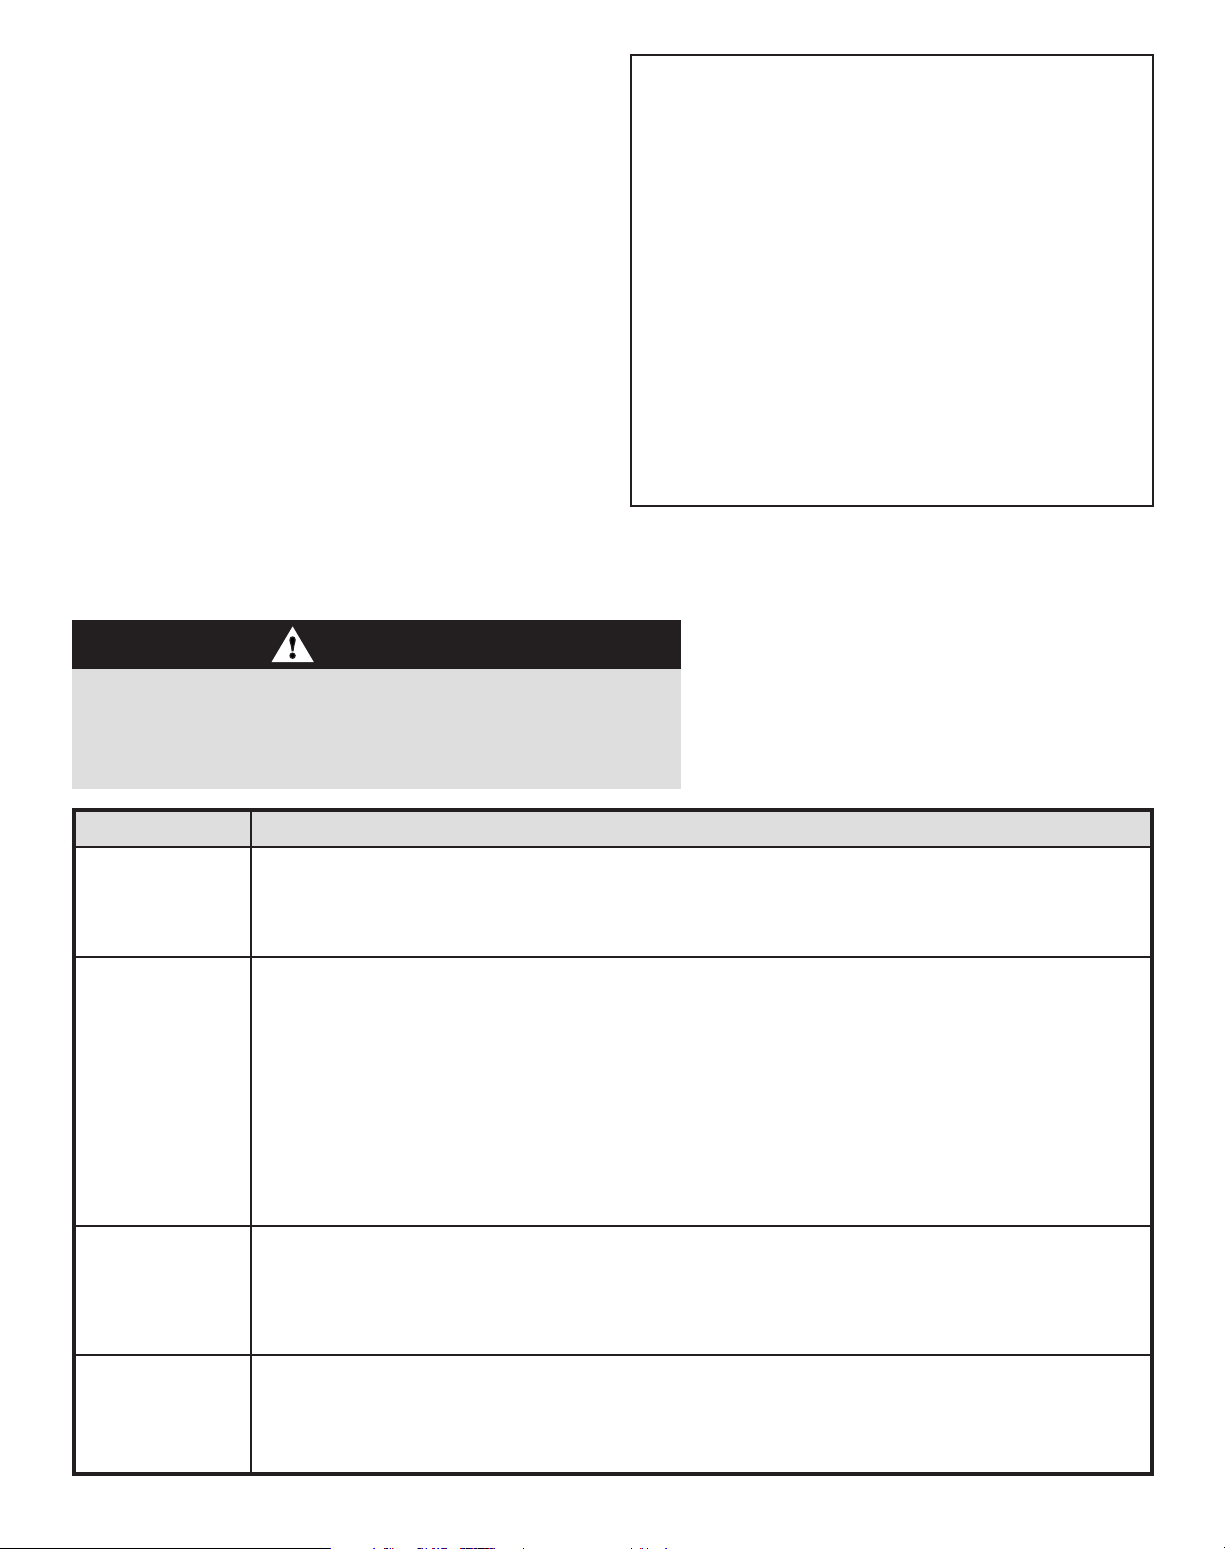
To set Self-Clean:
1. Press Clean pad.
2. REMOVE RACKS will be displayed. Remove the racks.
3. Select CONTINUE using the Quickset pad. The Quickset
pads are located on either side of the control panel dsplay.
4. Set LIGHT soil level by entering 200 using the number
pads for two hours of cleaning time. Press the Enter pad.
OR
Select MEDIUM for a moderately soiled oven and three
hours of cleaning time.
OR
Select HEAVY for a heavily soiled oven and four hours of
cleaning time.
5. CLEAN, TIME, LOCKED and the cleaning time countdown
will be displayed while the oven is cleaning. OVEN
COOLING will appear in the display when the cleaning
time has been completed and the oven is still locked.
Important: The door lock will disengage approximately one
hour after the cleaning time is completed. OVEN COOLING
will go off in the display when the oven door has unlocked.
To Delay a Self-Clean Cycle:
1. Press Clean pad.
2. REMOVE RACKS will be displayed.
Remove the racks.
3. Select CONTINUE using the Quickset pad.
4. Set LIGHT soil level by entering 200 using the number
pads for two hours of cleaning time. Press the Enter pad.
OR
Select MEDIUM for a moderately soiled oven and three
hours of cleaning time.
OR
Select HEAVY for a heavily soiled oven and four hours of
cleaning time.
5. The door will lock. CLEAN, TIME, LOCKED and the
cleaning time countdown will be displayed
6. After door locks, press the More Options pad.
7. Select DELAY using the Quickset pad.
8. Select the number of hours you want to delay the start of the
self-clean cycle.
9. The delay time and cleaning time will be displayed.
5
After Self-Cleaning
About one hour after the end of the clean cycle, the lock
will disengage and OVEN COOLING will go off in the
display. At this point, the door can be opened.
Some soil may leave a light gray, powdery ash which can be
removed with a damp cloth. If soil remains, it indicates that
the clean cycle was not long enough. The soil will be removed
during the next clean cycle.
If the oven racks were left in the oven and do not slide
smoothly after a clean cycle, wipe racks and embossed rack
supports with a small amount of vegetable oil to restore ease
of movement.
A white discoloration may appear after cleaning if acidic or
sugary foods were not wiped up before the clean cycle. This is
normal and will NOT affect performance.
Cleaning Procedures
Notes:
• If the oven door is left open, CLOSE DOOR will appear in
the display until the door is closed.
• If more than 30 seconds elapse between pressing the
Clean pad and pressing a number pad, the program will
automatically return to the previous display.
• The oven door will be damaged if it is forced to open
during cleaning or cooling process.
• The first few times the oven is cleaned, some smoke and
odor may be detected. This is normal and will lessen or
disappear with use. If the oven is heavily soiled, or if the
broiler pan was accidently left in the oven, excessive
smoke and odor may occur.
• As the oven heats and cools, you may hear sounds of
metal parts expanding and contracting. This is normal
and will not damage your appliance.
CAUTION
• Be sure appliance is off and all parts are cool before handling
or cleaning. This is to avoid damage and possible burns.
• To prevent staining or discoloration, clean appliance after each use.
• If a part is removed, be sure it is correctly replaced.
PART PROCEDURE
Broiler Pan Never cover insert with aluminum foil as this prevents the fat from draining to the pan below.
and Insert • Place soapy cloth over insert and pan; let soak to loosen soil.
• Wash in warm, soapy water. Use scouring pad to remove stubborn soil.
• Broiler pan and insert can be cleaned in dishwasher.
Burner Caps and Removable Burner Caps
Sealed Gas • Allow burner to cool. Remove burner cap and wash in soapy water with a plastic scouring pad. For
Burners stubborn soils, clean with a soap-filled, nonabrasive pad or Cooktop Cleaning Creme*
(Part #20000001)** and a sponge.
• Do not clean in the dishwasher or self-cleaning oven.
Sealed Gas Burners
• Clean frequently. Allow burner to cool. Clean with soap and plastic scouring pad. For stubborn or
dried-on soils, clean with a soap-filled, nonabrasive pad, stiff brush, toothbrush, the soft rubber tip on
the toothbrush (if equipped) or a straight pin. Do not enlarge or distort holes.
• Be careful not to get water into burner ports.
• Use care when cleaning the ignitor. If the ignitor is wet or damaged the surface burner will not light.
* Brand names are registered trademarks of the
respective manufacturers.
** To order call 1-800-JENNAIR (1-800-536-6247).
Burner Grates - • Wash with warm, soapy water and a nonabrasive, plastic, scrubbing pad. For stubborn soils,
Porcelain on clean with a soap-filled, nonabrasive, plastic pad or Cooktop Cleaning Creme* and a sponge. If soil
Cast Iron remains, reapply Cooktop Cleaning Creme, cover with a damp paper towel and soak for 30 minutes.
Scrub again, rinse and dry.
• Do not clean in the dishwasher or self-cleaning oven.
Clock and • To activate control lock for cleaning, see Locking the Control, page 15.
Control Pad • Wash, rinse and dry. Do not use abrasive cleaning agents as they may scratch the finish.
Area • Glass cleaners may be used if sprayed on a cloth first. DO NOT spray directly on control pad and
display area.
Cont.
6
PART PROCEDURE
Control Knobs • Remove knobs in the OFF position by pulling forward.
• Wash, rinse and dry. Do not use abrasive cleaning agents as they may scratch the finish.
• Turn on each burner to be sure the knobs have been correctly replaced.
Cooktop and Porcelain enamel is glass fused on metal and may crack or chip with misuse. It is acid-resistant, not
Control Panel - acid-proof.
Porcelain All spillovers, especially acidic or sugary spillovers, should be wiped up immediately with a dry cloth.
Enamel • When cool, wash with soapy water, rinse and dry.
• Never wipe off a warm or hot surface with a damp cloth. This may cause cracking or chipping.
• Never use oven cleaners, abrasive or caustic cleaning agents on exterior finish of range.
Side Panels, • When cool, wash with warm, soapy water, rinse and dry. Never wipe a warm or hot surface with a damp
Warming cloth as this may damage the surface and may cause a steam burn.
Drawer, • For stubborn soil, use mildly abrasive cleaning agents such as baking soda paste or Bon Ami*. Do not use
and Door abrasive cleaners such as steel wool pads or oven cleaners. These products will scratch or permanently
Handles - damage the surface.
Painted Enamel Important: Use a dry towel or cloth to wipe up spills, especially acidic or sugary spills. Surface may
discolor or dull if soil is not immediately removed. This is especially important for white surfaces.
Oven Window • Avoid using excessive amounts of water which may seep under or behind glass, causing staining.
and Door - Glass • Wash with soap and water. Rinse with clear water and dry. Glass cleaner can be used if sprayed on a cloth
first.
• Do not use abrasive materials such as scouring pads, steel wool or powdered cleaners as they will scratch
glass.
Oven Interior • Follow instructions on pages 5-6 to set a self-clean cycle.
Oven Racks • Clean with soapy water.
• Remove stubborn soil with cleansing powder or soap-filled scouring pad. Rinse and dry.
• Racks will permanently discolor and may not slide out smoothly if left in the oven during a self-clean
operation. If this occurs, wipe the rack and embossed rack supports with a small amount of vegetable oil
to restore ease of movement, then wipe off excess oil.
Stainless Steel • DO NOT USE ANY CLEANING PRODUCT CONTAINING CHLORINE BLEACH.
• DO NOT USE ABRASIVE OR ORANGE CLEANERS.
• ALWAYS WIPE WITH THE GRAIN WHEN CLEANING.
• Daily Cleaning/Light Soil –– Wipe with one of the following - soapy water, white vinegar/water solution,
Formula 409 Glass and Surface Cleaner* or a similar glass cleaner - using a sponge or soft cloth.
Rinse and dry. To polish and help prevent fingerprints, follow with Stainless Steel Magic Spray*
(Part No. 20000008)**.
• Moderate/Heavy Soil –– Wipe with one of the following - Bon Ami, Smart Cleanser, or Soft Scrub* using a damp sponge or soft cloth. Rinse and dry. Stubborn soils may be removed with a damp ScotchBrite* pad; rub evenly with the grain. Rinse and dry. To restore luster and remove streaks, follow with
Stainless Steel Magic Spray*.
• Discoloration –– Using a damp sponge or soft cloth, wipe with Cameo Stainless Steel Cleaner*. Rinse
immediately and dry. To remove streaks and restore luster, follow with Stainless Steel Magic Spray*.
* Brand names for cleaning products are registered trademarks of the respective manufacturers.
** To order direct, call 1-800-JENNAIR (1-800-536-6247).
7
ANTI-TIP BRACKET
LEVELING LEG
MAINTENANCE
Oven Door
CAUTION
NEVER place excessive weight on or stand on an open
oven door. This could cause the range to tip over, break
the door, or injure the user.
• NEVER attempt to open or close door or operate oven until
door is properly replaced.
• NEVER place fingers between hinge and front oven frame.
Hinge arms are spring mounted. If accidentally hit, the
hinge will slam shut against oven frame and could injure
your fingers.
To remove:
1. When cool, open the oven door
to the broil stop position
(opened about four inches).
2. Grasp door at each side. Do not
use the door handle to lift door.
3. Lift up evenly until door clears
hinge arms.
To replace:
1. Grasp door at each side.
2. Align slots in the door with the hinge arms on the range.
3. Slide the door down onto the hinge arms until the door is
completely seated on the hinges. Push down on the top
corners of the door to completely seat door on hinges.
Door should not appear crooked.
Important: The oven door on a new range may feel “spongy”
when it is closed. This is normal and will decrease with use.
Oven Window
To protect the oven door window:
1. Do not use abrasive cleaning agents such as steel wool
scouring pads or powdered cleansers as they may scratch
the glass.
2. Do not hit the glass with pots, pans, furniture, toys, or
other objects.
Leveling Legs
CAUTION
Be sure the anti-tip bracket secures one of the rear
leveling legs to the floor. This bracket prevents the range
from accidentally tipping.
Be sure the range is leveled when installed. If
the range is not level, turn the leveling legs,
located at each corner of the range, until range
is level.
ANTI-TIP BRACKET
LEVELING LEG
Oven Light
CAUTION
• Disconnect power to oven before replacing light bulb.
• Allow oven to cool before replacing light bulb.
• Make sure bulb cover and bulb are cool before touching.
To assure the proper replacement bulb is used, order bulb
from Jenn-Air. Call 1-800-JENNAIR (1-800-536-6247), ask for
part number 74004458 - halogen bulb.
To Replace Oven Light Bulb:
1. Disconnect power to the wall oven.
2. When oven is cool, use fingertips to grasp edge of bulb
cover. Pull out and remove.
3. Carefully remove old bulb by pulling straight out of
ceramic base.
4. To avoid damaging or decreasing the life of the new bulb,
do not touch the bulb with bare hands or fingers. Hold
with a dry cloth or paper towel. Push new bulb prongs
straight into small holes of ceramic base.
5. Replace bulb cover by snapping into place.
6. Reconnect power to the oven. Reset clock.
3. Do not close the oven door until the oven racks are in
place.
Scratching, hitting, jarring or stressing the glass may weaken
its structure causing an increased risk of breakage at a later
date.
8

Electrical Connection
Appliances which require electrical power
are equipped with a three-prong
grounding plug which must be plugged
directly into a properly grounded threehole 120 volt electrical outlet.
Always disconnect power to appliance before servicing.
The three-prong grounding plug offers protection against
shock hazards. DO NOT CUT OR REMOVE THE THIRD
GROUNDING PRONG FROM THE POWER CORD PLUG.
If an ungrounded, two-hole or other type electrical outlet is
encountered, it is the personal responsibility of the
appliance owner to have the outlet replaced with a
properly grounded three-hole electrical outlet.
Removal of Gas Appliance
Gas appliance connectors used to connect this appliance to
the gas supply are not designed for continuous movement.
Once installed, DO NOT repeatedly move this gas appliance
for cleaning or to relocate. If this appliance has to be moved
and/or removed for servicing, follow the procedure described
in the installation instructions. For information, contact JennAir Customer Service at 1-800-JENNAIR (1-800-536-6247).
To prevent range from accidentally tipping, range must be
secured to the floor by sliding rear leveling leg into the antitip bracket.
9
TROUBLESHOOTING
PROBLEM SOLUTION
For most concerns, try these first. • Check if oven controls have been properly set.
• Check to be sure plug is securely inserted into receptacle.
• Check or re-set circuit breaker. Check or replace fuse.
• Check power supply.
Part or all of appliance does not • Check if surface and/or oven controls have been properly set. See pgs. 12 & 16.
work. • Check if oven door is unlocked after self-clean cycle. See pg. 6.
• Check if oven is set for a delayed cook or clean program. See pgs. 16 & 5.
• Check if control lock is activated. See pg. 15.
• Check if control is in Sabbath Mode. See pg. 27.
Clock, indicator words, and/or • Oven may be set for a Cook & Hold or delay function.
lights operate but oven does • Control lock may have been set. See pg. 15.
not heat.
Surface burner fails to light. • Check to be sure unit is properly connected to power supply.
• Check for a blown circuit fuse or a tripped main circuit breaker.
• Check to be sure ignitor is dry and clicking. Burner will not light if ignitor is damaged,
soiled or wet. If ignitor doesn’t click, turn control knob OFF.
The flame is uneven. • Burner ports may be clogged.
Surface burner flame lifts • Check to be sure a pan is sitting on the grate above.
off ports.
Baking results are not as • Check the oven temperature selected. Make sure oven is preheated when recipe
expected or differ from or directions recommend preheat.
previous oven. • Make sure the oven vent has not been blocked. See page 20 for location.
• Check to make sure range is level.
• Temperatures often vary between a new oven and an old one. As ovens age, the oven
temperature often “drifts” and may become hotter or cooler. See page 27 for
instructions on adjusting the oven temperature. Important: It is not recommended
to adjust the temperature if only one or two recipes are in question.
• Use correct pan. Dark pans produce dark browning. Shiny pans produce light
browning.
• Check rack positions and pan placement. Stagger pans when using two racks. Allow
1-2 inches between pans and oven wall.
• Check the use of foil in the oven. Never use foil to cover an entire oven rack. Place
a small piece of foil on the rack below the pan to catch spillovers.
Food is not broiling properly or • Check oven rack positions. Food may be too close to flame.
smokes excessively. • Aluminum foil was incorrectly used. Never line the broiler insert with foil.
• Trim excess fat from meat before broiling.
• A soiled broiler pan was used.
• Preheat oven for 2-3 minutes before placing food in the oven.
• Broil with the oven door closed.
10
Cont.
PROBLEM SOLUTION
Oven will not self-clean. • Check to make sure the cycle is not set for a delayed start. See pg. 5.
• Check if door is closed.
• Check if control is in Sabbath Mode. See pg. 27.
• Oven may be over 400° F. Oven temperature must be below 400° F to program a
clean cycle.
Oven did not clean properly. • Longer cleaning time may be needed.
• Excessive spillovers, especially sugary and/or acidic foods, were not removed prior
to the self-clean cycle.
Oven door will not unlock after • Oven interior is still hot. Allow about one hour for the oven to cool after the
self-clean cycle. completion of a self-clean cycle. The door can be opened when the LOCKED indicator
word is not displayed.
• The control and door may be locked. See pg. 15.
There are no beeps and • Oven may be in Sabbath Mode. See page 27.
no display.
Moisture collects on oven • This is normal when cooking foods high in moisture.
window or steam comes from • Excessive moisture was used when cleaning the window.
oven vent.
There is a strong odor or light • This is normal for a new range and will disappear after a few uses. Initiating a clean
smoke when oven is turned on. cycle will “burn off” the odors more quickly.
• Turning on a ventilation fan will help remove the smoke and/or odor.
• Excessive food soils on the oven bottom. Use a self-clean cycle.
Fault Codes • The oven may detect a fault during programming or during operation. If a fault is
detected, the message FAULT DETECTED - PRESS POWER TO CLEAR or FAULT
DETECTED - PRESS ENTER TO TRY AGAIN may appear. Follow directions in the display.
If the fault reappears or does not clear, call an authorized servicer or the toll-free
number in the display.
• If the same operation is attempted before having the oven repaired, the message
FEATURE NOT AVAILABLE will appear. The feature will remain inoperable until service
is obtained.
• If the oven is heavily soiled, excessive flareups may result in a fault code during
cleaning. Press the CANCEL pad and allow the oven to cool completely, wipe out
excess soil, then reset the clean cycle. If the fault code reappears, contact an
authorized servicer.
Noises may be heard. • The oven makes several low-level noises. You may hear the oven relays as they go on
and off. This is normal.
• As the oven heats and cools, you may hear sounds of metal parts expanding and
contracting. This is normal and will not damage your appliance.
SAb flashing and then • Oven is in Sabbath Mode. To cancel, press and hold the Setup pad for five
displayed continuously. seconds.
Cannot add another Favorite. • Favorites is full. To delete a favorite and add another, see page 25.
11
SURFACE COOKING
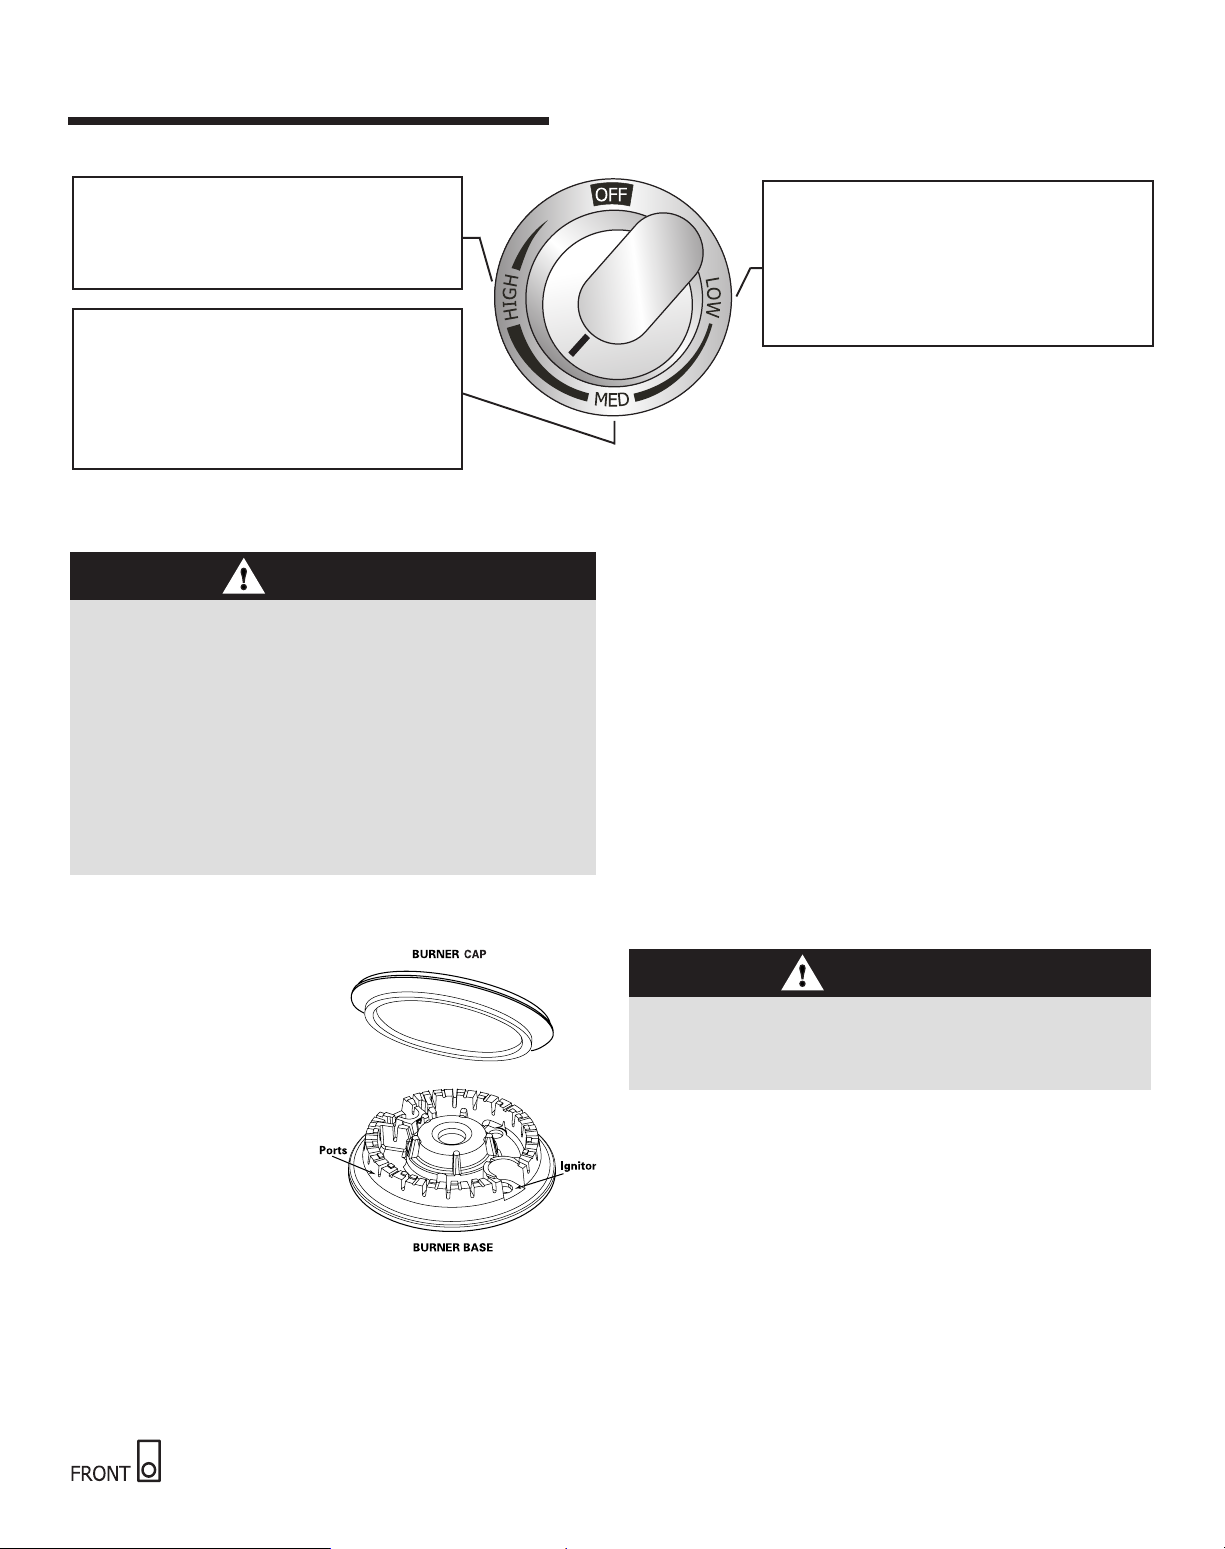
HIGH: Use to bring liquid to a boil, or reach
pressure in a pressure cooker. Always
reduce setting to a lower heat when liquids
begin to boil or foods begin to cook.
An intermediate flame size is used to
continue cooking. Food will not cook any
faster when a higher flame setting is used
than needed to maintain a gentle boil.
Water boils at the same temperature
whether boiling gently or vigorously.
Surface Controls
CAUTION
• If flame should go out during a cooking operation and
the burner does not reignite itself, turn the burner off. If a
strong gas odor is detected, open a window and wait five
minutes before relighting the burner.
• Be sure all surface controls are set in the OFF position
prior to supplying gas to the range.
• NEVER touch cooktop until it has cooled. Expect some
parts of the cooktop, especially around the burners, to
become warm or hot during cooking. Use potholders to
protect hands.
LOW: Use to simmer foods, keep foods
warm and melt chocolate or butter. Some
cooking may take place on the LOW
setting if the pan is covered. It is possible
to reduce the heat by rotating the knob
toward OFF. Be sure flame is stable.
Setting the controls:
The size and type of cookware will affect the heat setting.
1. Place a pan on the burner grate.
• The burner flame may lift off or appear separated from
the port if a pan is not placed on the grate.
2. Push in and turn the knob to the desired setting.
• A clicking (spark) sound will be heard and the burner
will light.
Important: Each surface burner is equipped to provide
automatic reignition if the flame should somehow get blown
out.
Operating During a
Pilotless Ignition
Pilotless ignition eliminates the
need for a constant standing
pilot light. Each surface burner
has a spark ignitor. Use care
when cleaning around the
surface burner.
If the surface burner does
not light, check if ignitor is
broken, soiled or wet.
Surface Control Knobs
Use to turn on the surface burners. An infinite choice of heat
settings is available from LOW to HIGH. At the HIGH setting a
detent or notch may be felt. The knobs can be set on or
between any of the settings.
Graphics next to the knob identify which burner
the knob controls. For example, the graphic at left
shows a front burner location.
Power Failure
CAUTION
When lighting the surface burners, be sure all of the
controls are in the OFF position. Strike the match first and
hold it in position before turning the knob on.
1. Hold a lighted match to the desired surface burner head.
2. Push in and turn the control knob slowly on.
3. Adjust the flame to the desired level.
12
Cooktop
To prevent the cooktop from discoloring
or staining:
• Clean cooktop after each use.
• Wipe acidic or sugary spills as soon as the cooktop has
cooled as these spills may discolor the
porcelain.
Unlike a range with standard gas burners,
this cooktop does not lift-up nor is it
removable. Do not attempt to lift the
cooktop for any reason.
Sealed Burners
The sealed burners of your range are secured to the cooktop
and are not designed to be removed. Since the burners are
sealed into the cooktop, boilovers or spills will not seep
underneath the cooktop.
However, the burner should be cleaned after each use. The
cap portion of the burner is easily removed for cleaning. (See
page 6 for cleaning directions.)
The burner capss must be correctly placed on the burner
base for proper operation of the burner.
High Performance Burner
There is one 16,000 BTU* high speed burner on your range,
located in the right front position. This burner offers higher
speed cooking that can be used to quickly bring water to a
boil and for large-quantity cooking.
Low Turn Down Burner
This burner is located in the left or right
rear position. The simmer burner offers a
lower BTU flame for delicate sauces or
melting chocolate.
* BTU ratings will vary when using LP gas.
Dual Ring Burner
The cooking surface is equipped with a
dual ring burner located in the left front
position. To operate, push in on the
control knob and turn counterclockwise to
light the burner. Continue turning until
the desired setting is reached. The
lighting sequence is: inner burner on HIGH,
then inner burner on LOW, then both rings
on HIGH, then both rings on LOW.
Burner Grates
The grates must be properly positioned before cooking.
When installing the grates, place the tab ends toward the
center, matching the straight bars.
Improper installation of the grates may result in chipping of
the cooktop.
Do not operate the burners without a pan on the grate.
The grate’s porcelain finish may chip without a pan to
absorb the heat from the burner flame.
Use care when stirring food in a pot/pan sitting on the burner
grate. The grates have a smooth finish for ease of cleaning.
The pot/pan will slide if the handle is not held. This may result
in spilling of hot food items and may be a burn hazard.
Although the burner grates are durable, they will gradually
lose their shine and/or discolor, due to the high temperatures
of the gas flame.
Notes:
• A properly adjusted burner with clean ports will light
within a few seconds. If using natural gas, the flame
will be blue with a deeper blue inner cone.
If the burner flame is yellow or is noisy, the air/gas
mixture may be incorrect. Contact a service technician
to adjust. (Adjustments are not covered by the
warranty.)
With LP gas, slight yellow tips on the flames are
acceptable. This is normal and adjustment is not
necessary.
• With some types of gas, you may hear a “popping”
sound when the surface burner is turned off. This is a
normal operating sound of the burner.
• If the control knob is turned very quickly from HIGH to
LOW, the flame may go out, particularly if the burner is
cold. If this occurs, turn the knob to the OFF position,
wait several seconds and relight the burner.
• The flame should be adjusted so it does not extend
beyond the edge of the pan.
13
OVEN COOKING
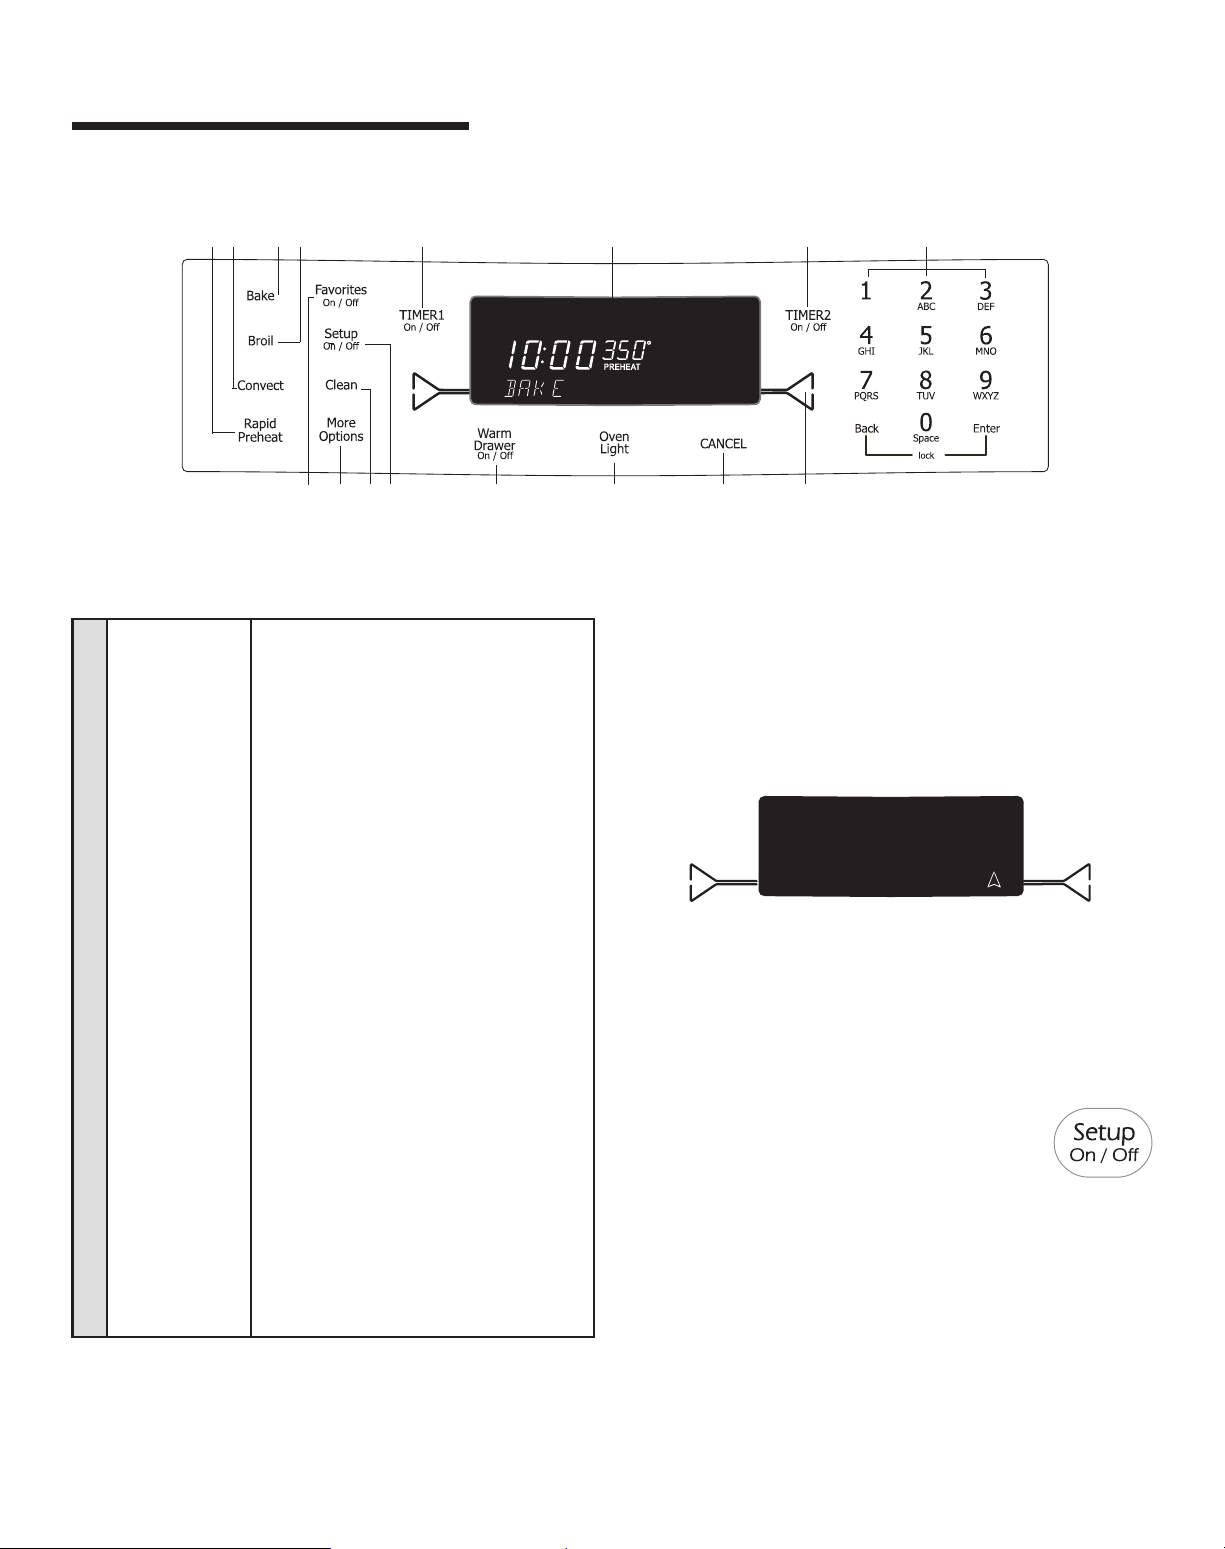
Control Panel
A B C D E F G H
I J K L M N O P
The control panel is designed for ease in programming. The display window shows options for each function and moves from step
to step through the programming process. Control panel features vary by model. Oven display above is programmed for a bake
operation.
A Rapid Preheat Use to decrease preheating time.
B Convect Use for convection baking and roasting.
C Bake Use for baking and roasting.
D Broil Use for broiling and top browning.
E TIMER 1 Sets timer.
F Display Displays oven functions, options and
window time of day.
G TIMER 2 Sets timer.
H Number Pads Use to enter time and temperature,
or to enter Favorites names.
I Favorites Use to access, program or save
baking cycles.
J More Options Use to access additional features.
K Clean Use to set self-clean cycle.
L Setup Use to view or change factory
default settings.
M Warm Drawer Use to control the Warming Drawer.
N Oven Light Use to turn the oven light on or off.
O CANCEL Cancels all operations except Timer,
Clock, Favorites, Setup and Warm
Drawer (select models).
P Quickset pads Use to select options in display
window (next to display window
on both sides).
Quickset Pads
Quickset pads are located on each side of the display window
and are used to select the desired function or option in the
display window. To select the option or function, press the
Quickset pad next to the word.
If you need to back out of a function or option in the display,
press the Back pad. When your programming is complete,
press the Enter pad or wait four seconds and the function will
start automatically.
Up arrows indicate additional screens with additional options.
Press the Quickset pads next to the arrows to scroll through
the display.
Important: Four seconds after entering the function,
option, number or letter, the function will automatically be
entered. If more than 30 seconds elapse between steps in
programming, the function will be canceled and the
display will return to the previous display.
Clock
Setting the Clock:
1. Press the Setup pad.
2. Select CLOCK using the Quickset pads.
3. Select TIME.
4. Enter the time using the number pads.
5. Press Enter pad.
6. Select AM or PM in 12 hour mode. (For 24 hour clock, see
page 15.)
7. To exit the Setup mode, press Setup pad.
Cont.
14

Activating and canceling the clock/day
of week display:
1. Press Setup pad.
2. Select CLOCK.
3. Press the arrow to scroll until DISABLE is displayed.
4. Select DISABLE.
5. Select TIME.
6. Select OFF to turn the clock display off, or select ON to turn
the clock display on.
7. Select OFF to turn the day of the week display off. Select
ON to turn the weekday display on.
8. To exit the Setup mode, press Setup pad.
Entering the day of the week:
1. Press Setup pad.
2. Select CLOCK.
3. Press the arrow to scroll until DAY is displayed.
4. Use Quickset arrow to scroll through the days.
5. Select day desired.
6. To exit the Setup mode, press Setup pad.
To set the clock for a 12 or 24 hour format:
The clock can be set to display time in either a 12 hour or 24
hour format.
1. Press the Setup pad.
2. Select CLOCK.
3. Use the arrow to scroll to the next screen.
4. Select 12/24 HOUR.
5. Select 12 HR or 24 HR.
6. To exit Setup mode, press Setup pad.
Timers
Setting the Timers (Timer 1 or Timer 2):
1. Press TIMER 1 or TIMER 2 pad.
2. Press one of the displayed times using the
Quickset pads, or press the number pads to
enter the desired time.
Important: Each press of the displayed time choices adds
additional time. For example, pressing “10 MIN” three
times provides 30 minutes on the timer (0:30).
3. Press Enter pad.
Changing the amount of time entered once the
Timer starts:
1. Press the TIMER 1 or TIMER 2 pad once.
2. Press the displayed times on the Quickset
pads repeatedly until the desired time is
entered.
OR
3. Press the number pads to enter the new desired time.
4. Press Enter pad.
Canceling the Timer:
1. Press the TIMER 1 or TIMER 2 pad twice.
If both Timers are active:
If the desired Timer is already in the foreground, press once
for edit mode and twice to cancel the Timer. If the desired
Timer is not in the foreground, follow the steps below.
1. Press the desired TIMER pad once. The selected Timer will
come to the foreground.
2. Press the TIMER pad a second time to access the edit
mode in order to make changes.
3. Pressing the TIMER pad a third time will cancel the Timer.
Changing the Timer beeps:
The signal beeps for TIMER 1 and TIMER 2 can be changed.
The options available are two beeps every thirty seconds, two
beeps every sixty seconds or one beep only. The default
setting is one beep.
1. Press the Setup pad.
2. Select the arrow to scroll until TONES
is displayed.
3. Select TONES.
4. Select TIMERS TONES.
5. Select the desired timer beep format (2-30 SEC, 2-60 SEC
or 1 BEEP).
6. Press Setup pad to exit Setup mode.
Locking the Control and Oven Door
The oven control and oven door can be locked to prevent
accidental programming. If an oven function is currently
being used, the control and door cannot be locked.
To lock the control and door:
Press the Back and Enter pads at the same time, holding for
three seconds or until CONTROL LOCKED appears in the
display.
To unlock the control and door:
Press the Back and Enter pads at the same time, holding for
three seconds. UNLOCKING DOOR will appear in the display
when the control and door are unlocking.
15
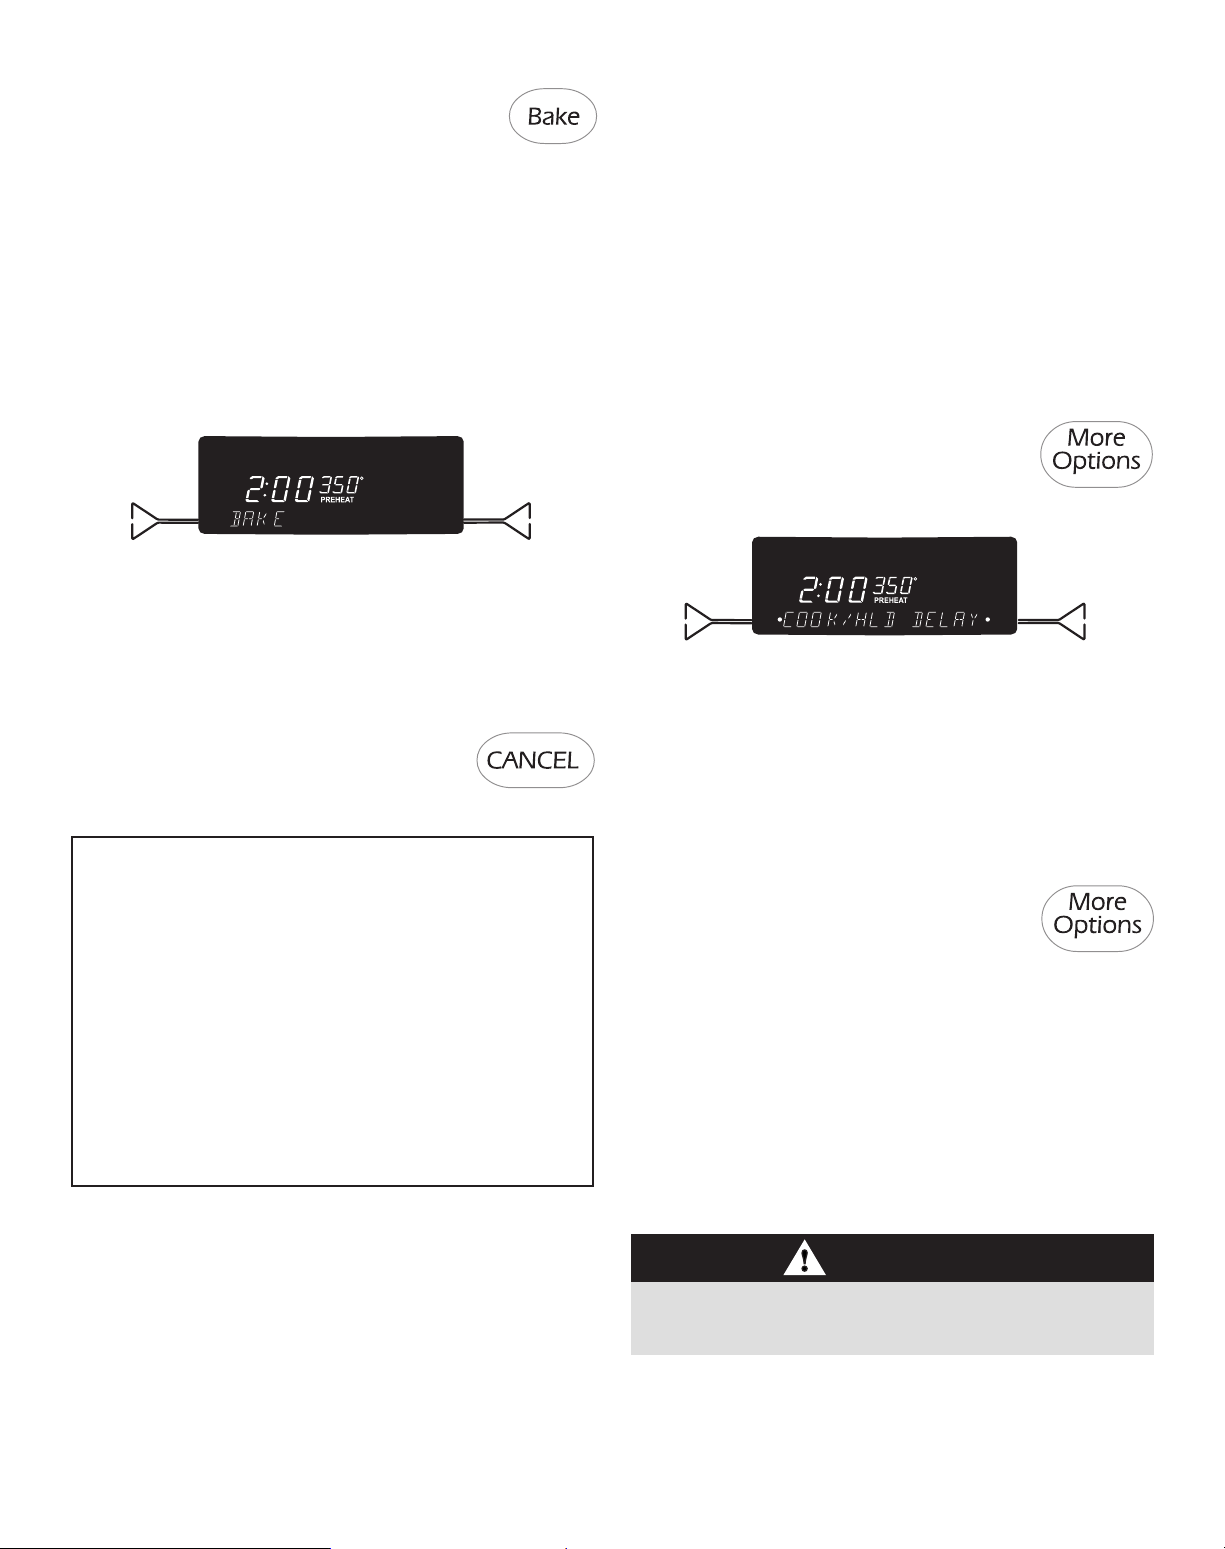
Baking
To set Bake:
1. Press the Bake pad.
2. Select the oven temperature using the Quickset pads.
OR
Enter the desired temperature using the number pads.
Press Enter pad to set.
• The temperature can be set from 170° F to 550° F
in 5° increments.
• After three seconds, the oven will begin to preheat.
BAKE and PREHEAT will appear in the display along
with 100° or the actual oven temperature, whichever
is higher.
• The temperature in the display will increase in 1°
increments until the oven reaches the preset
temperature. Allow about 15 minutes for the oven
to preheat.
• When the oven is preheated, the oven will beep and
PREHEAT will no longer be displayed.
3. At the end of cooking, turn the oven off by
pressing the CANCEL pad. Remove food
from the oven. The oven will continue
operating until the CANCEL pad is pressed.
Notes:
• If more than thirty seconds elapse between pressing a
pad and pressing a number pad, the display will return
to the previous display.
• Whenever the temperature appears in the display, the
oven is heating.
• To change the oven temperature during cooking, press
the Bake pad and select a displayed temperature or use
the number pads to enter the desired temperature.
• The oven will automatically shut off after 12 hours if it is
accidentally left on. To set a Sabbath Mode, see Sabbath
Mode, page 27.
Bake Options
Cook & Hold and Delay options are available when baking.
When using the Cook & Hold option, the oven begins to heat
immediately after the control has been set. Then, the oven
cooks for a specified length of time. When that time has
elapsed, the oven will automatically reduce temperature to
170° F and keep the food warm for up to an hour and then
automatically turn off.
When using Delay, the oven begins to cook later in the day.
Set the amount of time that you want to delay before the oven
turns on and how long you want to cook. The oven begins to
heat at the selected time and cooks for the specified length of
time. When that time has elapsed, the oven will keep the food
warm for up to an hour then automatically turn off.
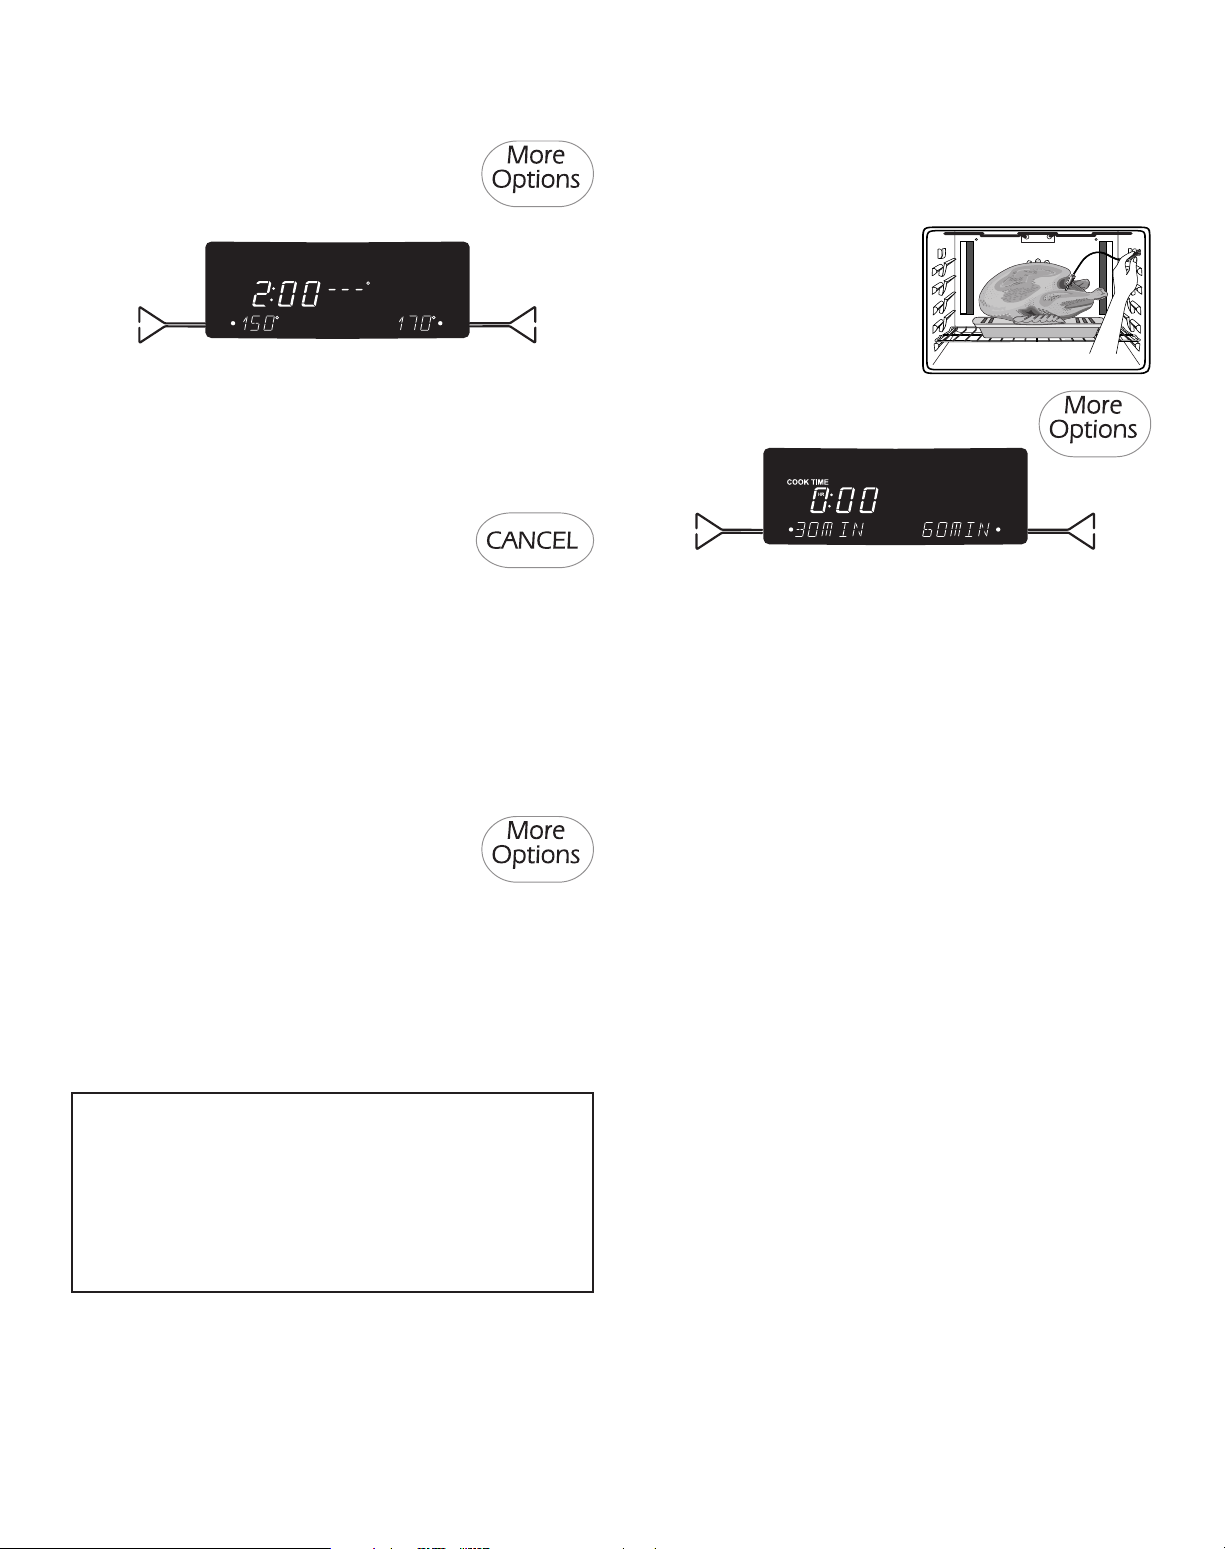
To set Cook & Hold:
1. After Bake has been programmed, press
the More Options pad.
2. Select COOK/HLD.
3. Select the amount of time you want to bake by pressing
the Quickset pads or the number pads.
4. Press Enter pad.
5. COOK TIME, the cook time countdown, PREHEAT, BAKE
and the actual temperature will be displayed.
The oven will cook for the selected time, then keep food warm
for one hour.
To set a Delay:
1. After Bake has been programmed, press
the More Options pad.
2. Select DELAY.
3. Select the amount of time you want to delay the start of
cooking using the displayed times or the number pads.
4. Select the amount of time you want to cook using the
displayed times or the number pads.
5. The display will show BAKE, the temperature, the delay
time and the cook time countdown.
6. When the delay time has expired, the oven will begin
heating. COOK TIME, the cook time countdown, PREHEAT,
BAKE and the actual oven temperature will be displayed.
CAUTION
Do not use delayed baking for highly perishable foods such
as dairy products, pork, poultry or seafood.
16
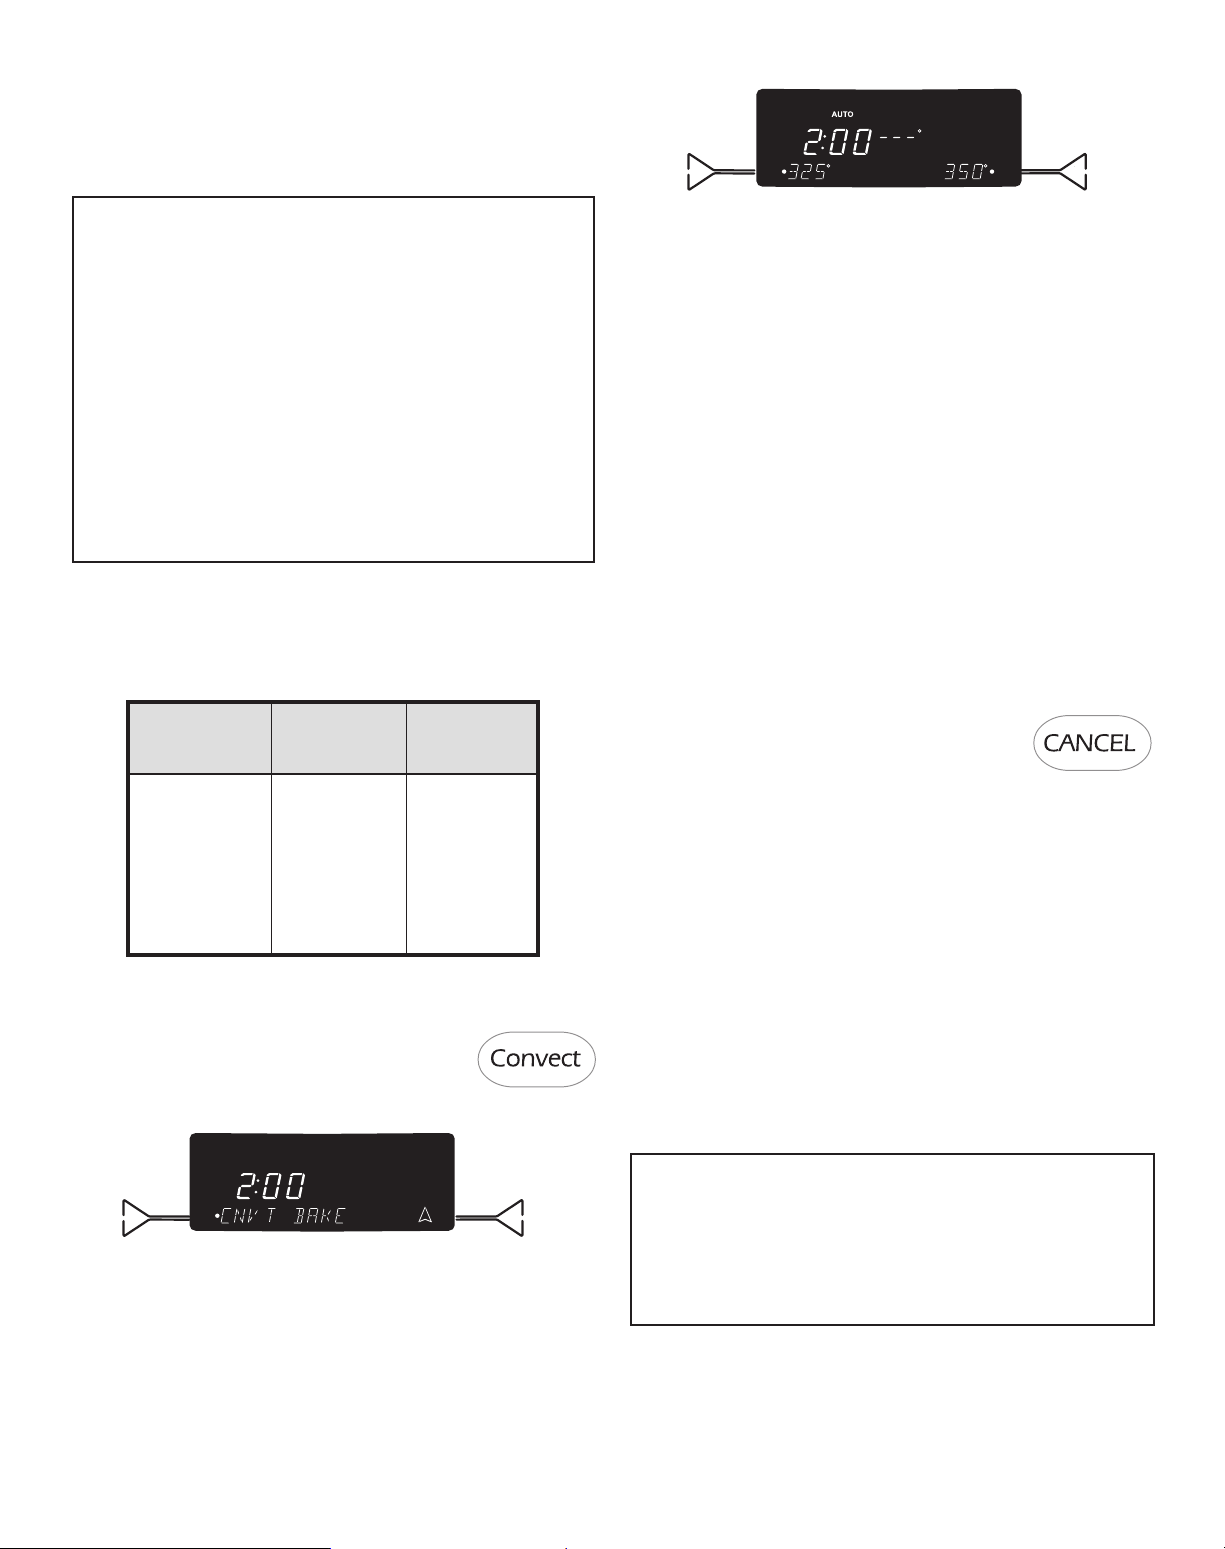
Convect
Convection uses a fan to circulate hot air evenly over, under
and around the food. As a result, foods are evenly cooked
and browned, often in shorter times, at lower temperatures
and with the flexibility of using more than one rack at a time.
3. Select the oven temperature using the Quickset pads
Notes:
• The oven control comes from the factory set for Auto
Convect Conversion. When using Convect Bake and
Convect Pastry enter the conventional baking
temperature. The control automatically converts the
temperature to 25° less than the conventional
temperature.
• When using Convect Roast the temperature will not be
automatically reduced. Enter the conventional roasting
temperature and time. The control then lets you know
when 75% of the time has elapsed and alerts you to
check the food for doneness.
• To turn Auto Convect Conversion off, see page 26.
Convect Options
Cook & Hold and Delay options are available when convect
cooking. See page 21 for information on how to program a
Cook & Hold or Delay option.
CONVECT CONVECT CONVECT
BAKE ROAST PASTRY
Multiple-Rack Whole Chicken Frozen Pie
Baking of Whole Turkey Turnovers
Cookies/Biscuits Vegetables Cream Puffs
Breads Pork Roasts Puff Pastry
Casseroles Beef Roasts
Tarts/Tortes
Cakes
Convect Bake
To set Convect Bake:
1. Press the Convect pad.
2. Select CNVT BAKE using the Quickset pads.
OR
Enter the desired temperature using the number pads.
Press Enter pad to set.
• The temperature can be set from 195° F to 550° F
degrees in 5° increments. If Auto Convect Conversion is
turned off, you can set 170° F.
• After three seconds, the oven will begin to preheat.
CNVT BAKE and PREHEAT will appear in the display
along with 100° or the actual oven temperature,
whichever is higher.
• The temperature in the display will increase in 1°
increments until the oven reaches the preset
temperature. Allow about 15 minutes for the oven
to preheat.
• When the oven is preheated, the oven will beep and
PREHEAT will turn off and CNVT BAKE will be displayed.
AUTO will be displayed if Auto Convect Conversion
feature is turned on.
• Place food in the oven.
4. At the end of cooking, turn the oven off by
pressing the CANCEL pad. Remove food
from the oven. The oven will continue
operating until the CANCEL pad is pressed.
Rapid Preheat
Use to decrease preheating time when using Bake or Convect
Bake. Use for all foods when baking on one rack.
• After Bake or Convect Bake has been programmed and
activated, press the Rapid Preheat pad.
• 1 RACK ONLY will display, after 10 seconds the display will
show RAPID and PREHEAT.
To return to Standard Preheat:
• Press Rapid Preheat pad again. This will provide standard
preheat and PREHEAT and the selected function will be
displayed.
Notes:
• For best results, use rack position 2 or 3 when using the
Rapid Preheat option.
• For optimum baking and browning results, Rapid Preheat
is not recommended when baking on multiple racks.
17
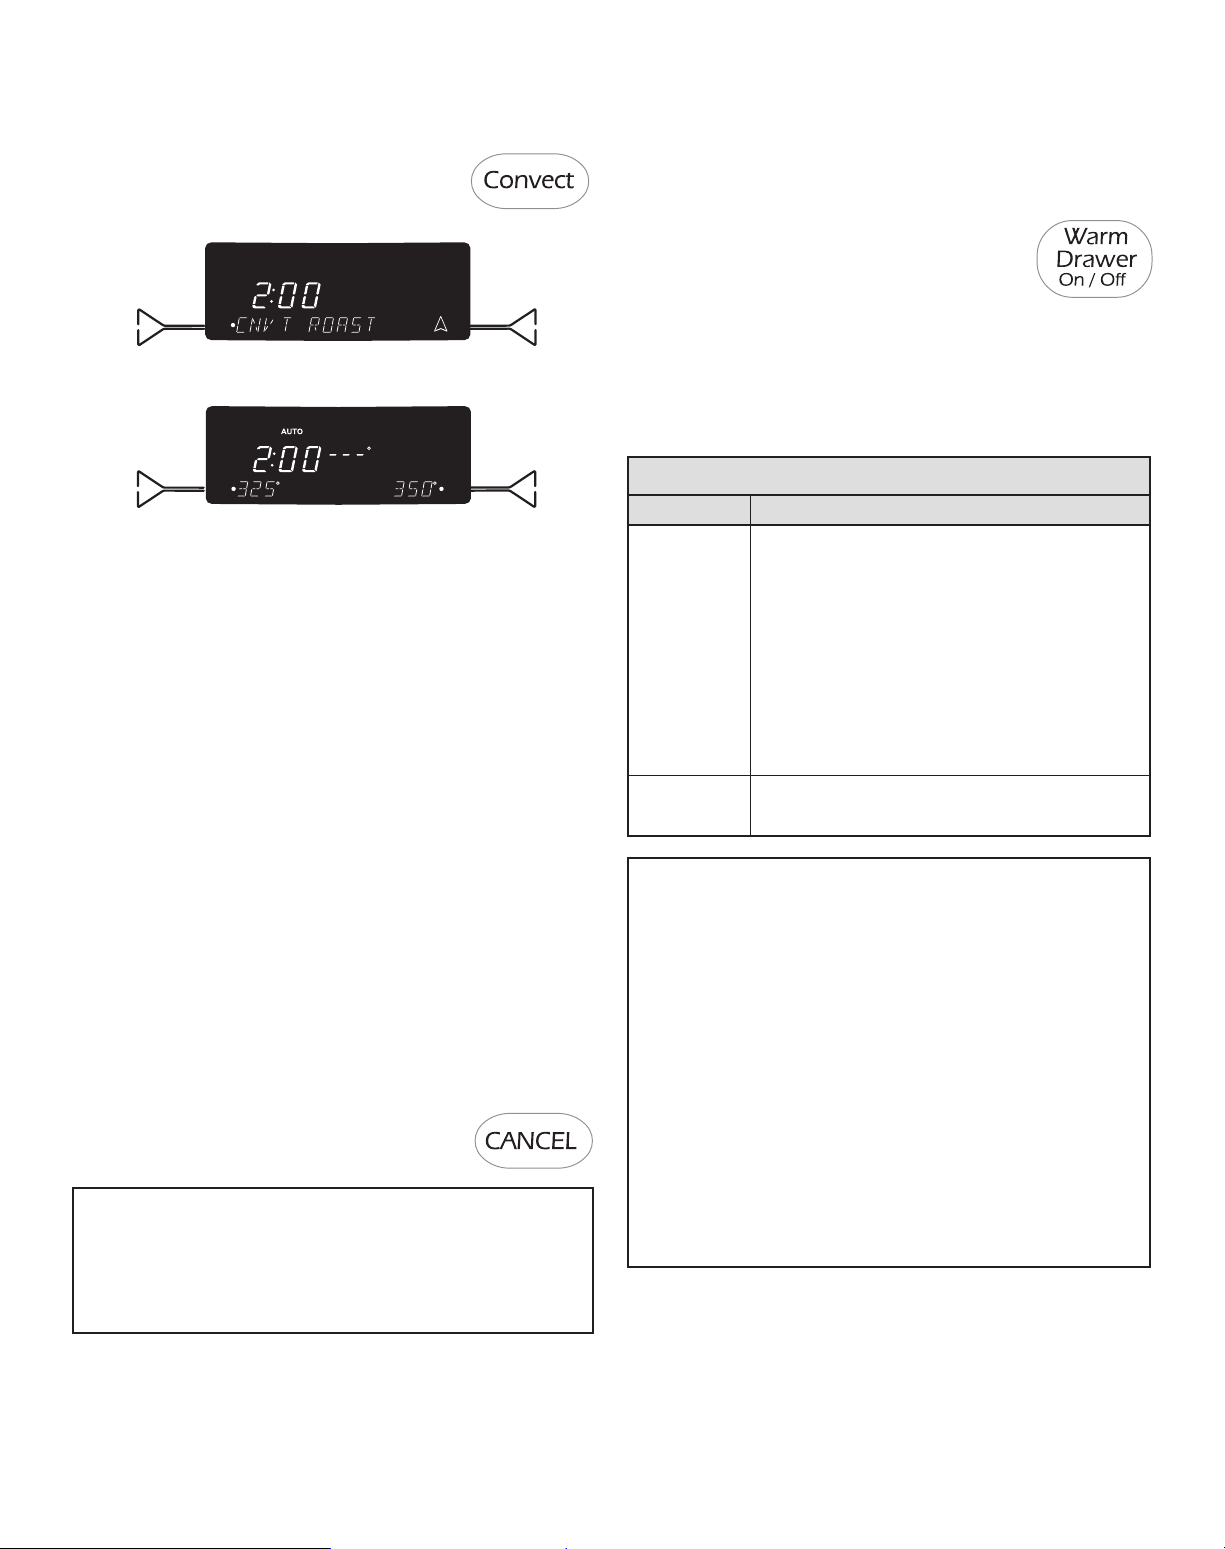
Convect Roast
To set Convect Roast:
1. Place food in the oven.
2. Press the Convect pad.
3. Select CNVT ROAST using the
Quickset pads.
4. Select the oven temperature using the Quickset pads.
OR
Enter the desired temperature using the number pads.
Press Enter pad to set.
• The temperature can be set from 170° F to 550° F
degrees in 5° increments.
5. Enter desired cook time. Enter the conventional roasting
time using the number pads.
• After three seconds, the oven will begin to heat. CNVT
ROAST will appear in the display along with 100° or the
actual oven temperature, whichever is higher.
• The temperature in the display will increase in 1°
increments until the oven reaches the preset
temperature.
• Cook time will begin to count down.
6. At 75% of the cooking time the oven will beep to let
you know to check food. Check food using a meat
thermometer. If food is done, take food out of oven and
press CANCEL pad to turn oven off.
7. If food is not done, continue roasting.
Once the set time has elapsed the oven will automatically
go into Keep Warm mode for 1 hour and then shut off. If
food is taken from the oven before the hour
has elapsed, press CANCEL pad.
Notes:
• If the recipe suggests preheating the oven, add 15
minutes to cook time.
• If Auto Convect is off, roast time will not be required.
Warming Drawer
The Warming Drawer is used for keeping hot foods at serving
temperature. It may also be used for warming breads and
pastries.
Operating the Controls:
1. Press the Warm Drawer pad to turn on.
2. Select HIGH or LOW.
3. Allow the drawer to preheat for ten minutes.
4. Place food in warming drawer.
5. When finished, press the Warm Drawer pad to turn off.
Remove food from the drawer.
Warming Chart
SUGGESTED SETTINGS
Setting Type of Food
High Bacon Beef - Rare
Casseroles Cooked Cereals
Dinner Plate Eggs
Enchiladas Fish/Seafood
Fried Food Gravy, Cream Sauces
Ham Hamburger Patties
Hors d’oeuvres Lamb
Pancakes Pizza
Pork Potatoes - Baked
Potatoes - Mashed Poultry
Vegetables Waffles
Low Biscuits Coffee Cake
Pies Warming - Plates
Notes:
• Do not warm food for more than one hour (eggs
30 minutes) after cooking.
• Food must be at serving temperature before being
placed in the drawer.
• Breads, pastries and fruit pies may be warmed from
room temperature using High setting.
• Use only oven-safe cookware.
• Remove food from plastic bags and place in oven-safe
cookware.
• Serving dishes and plates can be warmed while
preheating the drawer.
• Cover food with a lid or aluminum foil. Do not use
plastic wrap. ( Fried foods do not need to be covered.)
18
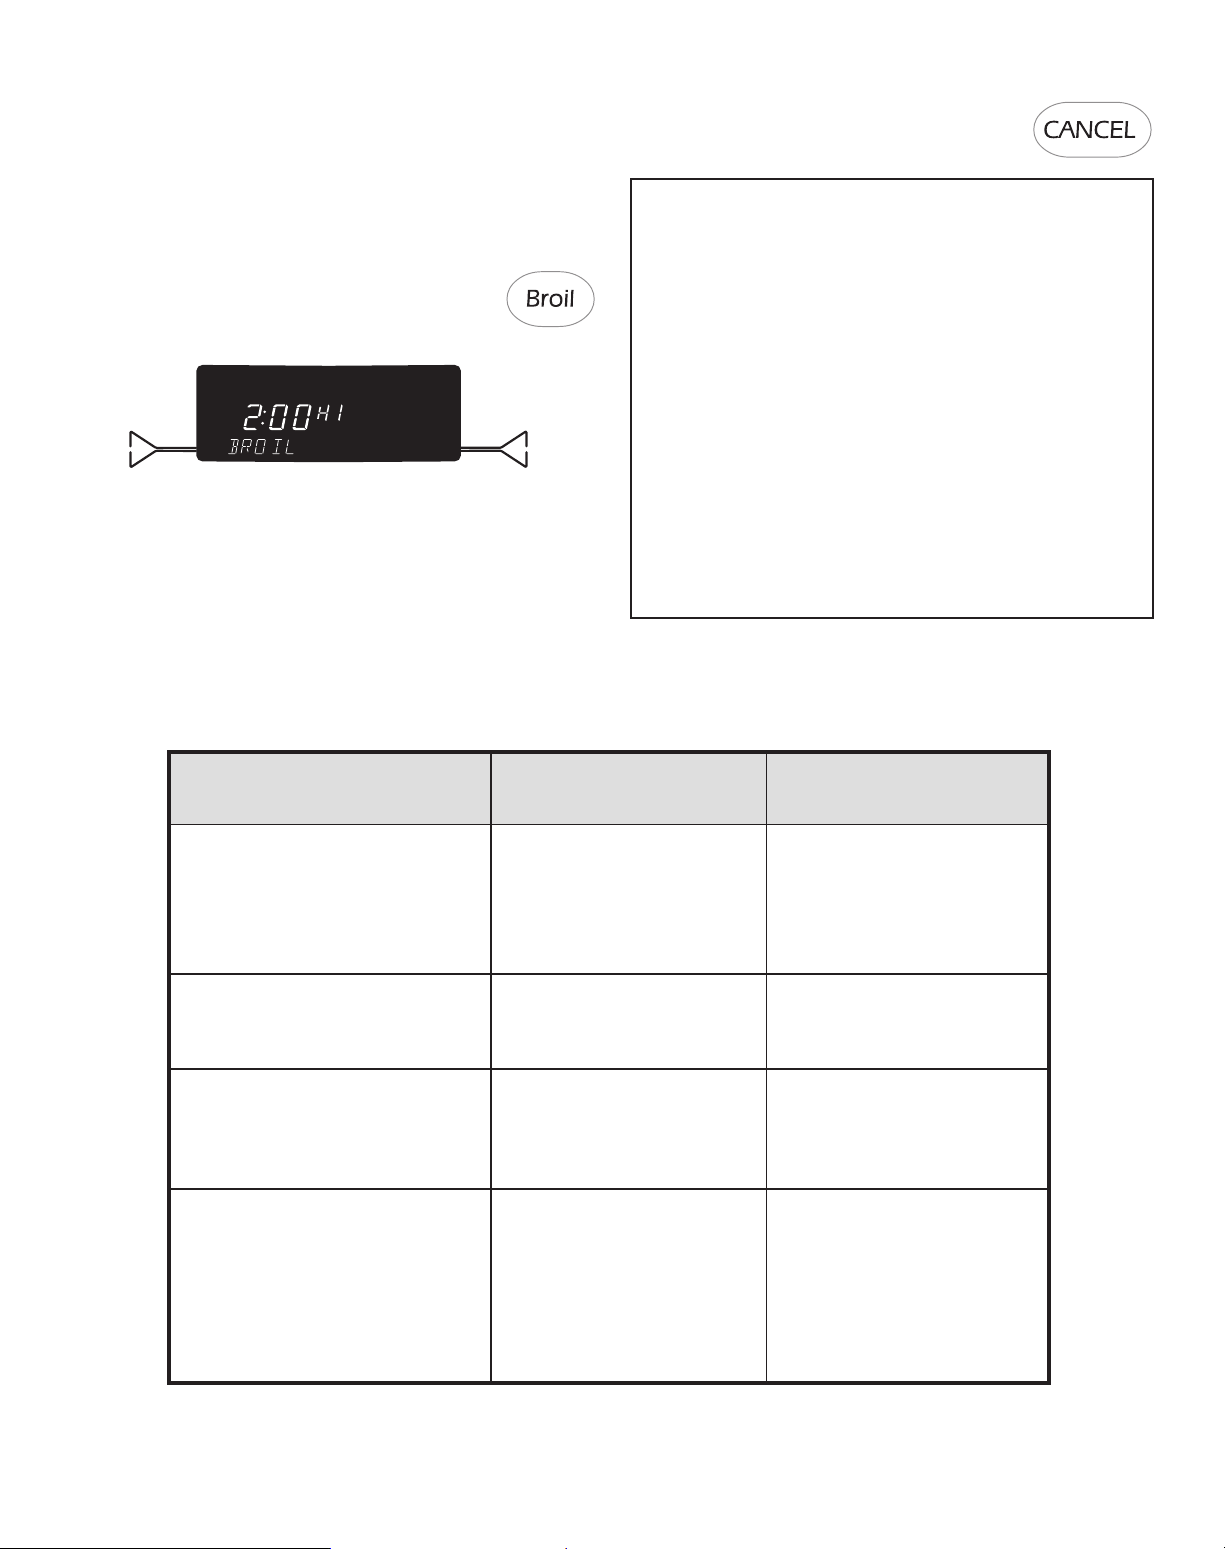
Broil
For optimal results, preheat for five minutes with the door
closed and use a pan designed for broiling.
To set Broil:
1. Place the oven rack in the proper rack position (see
Broiling Chart).
2. Press the Broil pad.
3. Select HIGH – 550° F for high broil.
OR
Select LOW – 450° F for low broil.
• The oven has a variable broil feature which means that
a lower broil temperature can be selected (300°-550° F).
To select a lower temperature, press the appropriate
number pads. Press Enter pad to set the lower
temperature.
4. Preheat the oven for five minutes.
5. Place food in the oven and close the door.
6. Press the CANCEL pad when broiling
is done.
Notes:
• See Broiling Chart for foods and broiling times.
• If more than 30 seconds elapse between pressing the
Broil pad, Quickset pads, or number pads, the oven will
not be set and the display will return to the previous
display.
• HIGH is used for most broiling. Use a lower broil
temperature when broiling longer-cooking foods. The
lower temperature allows food to cook to the well done
stage without excessive browning.
• Food should be turned halfway through broiling time.
• Broil times may be longer when lower broiling
temperatures are selected.
Broiling Chart
SUGGESTED RACK
FOODS BROIL TIME POSITION*
Beef (broiled to 165° F)
6 Hamburgers, 1/2” thick 10 – 12 minutes 5
2 Ribeye Steaks, 1” thick 18 - 22 minutes 5
2 New York Strip Steaks, 1” thick 18 - 22 minutes 5
2 T-Bone Steaks, 1” thick 18 - 22 minutes 5
Poultry (broiled to 170° F on Low) Low Broil
4 Boneless/Skinless Breasts 12 – 15 minutes 5
4 Bone-in Chicken Breasts 20 – 33 minutes 5
Pork (broiled to 160° F)
4 Boneless Pork Chops, 1” thick 20 - 28 minutes 4
4 Bone-in Pork Chops, 1” thick 25 - 28 minutes 4
Ham Slice, 1” thick 12 - 16 minutes 4
Fish (broiled to 140° F)
4 Swordfish Steaks, 1” thick 10 - 14 minutes 4
2 Halibut Steaks, 1” thick 10 - 14 minutes 4
Orange Roughy, 1 ” thick 10 - 12 minutes 4
Shrimp (16-20 ct. per lb.) 8 - 10 minutes 4
2 Salmon Fillets, 1/2” thick 8 - 12 minutes 4
2 Salmon Steaks, 1” thick 10 - 14 minutes 4
*Note: To reduce browning and excess smoke when broiling, use a lower rack position and increase the
broil time.
19
Oven Fan
A convection fan is used to circulate hot air in the oven when
the convection feature is selected.
Important: The convection fan will automatically stop when
the oven door is opened.
Oven Vent
The oven vent is located along the back edge of the cooking
surface.
When the oven is in use, the area near the oven vent may
become hot enough to cause burns. Do not block the vent
opening for best baking results.
Oven Light
The oven light automatically comes on when
the door is opened. When the door is closed,
press the Oven Light pad to turn the oven
light on and off. A beep will sound every time
the Oven Light pad is pressed. If the oven light is on when the
door is opened, the light will go off when the door is closed.
Oven Bottom
Protect oven bottom against spillovers, especially acidic or
sugary spills, as they may discolor the porcelain enamel. Use
the correct pan size to avoid spillovers and boilovers. Do not
place utensils or aluminum foil directly on the oven
bottom.
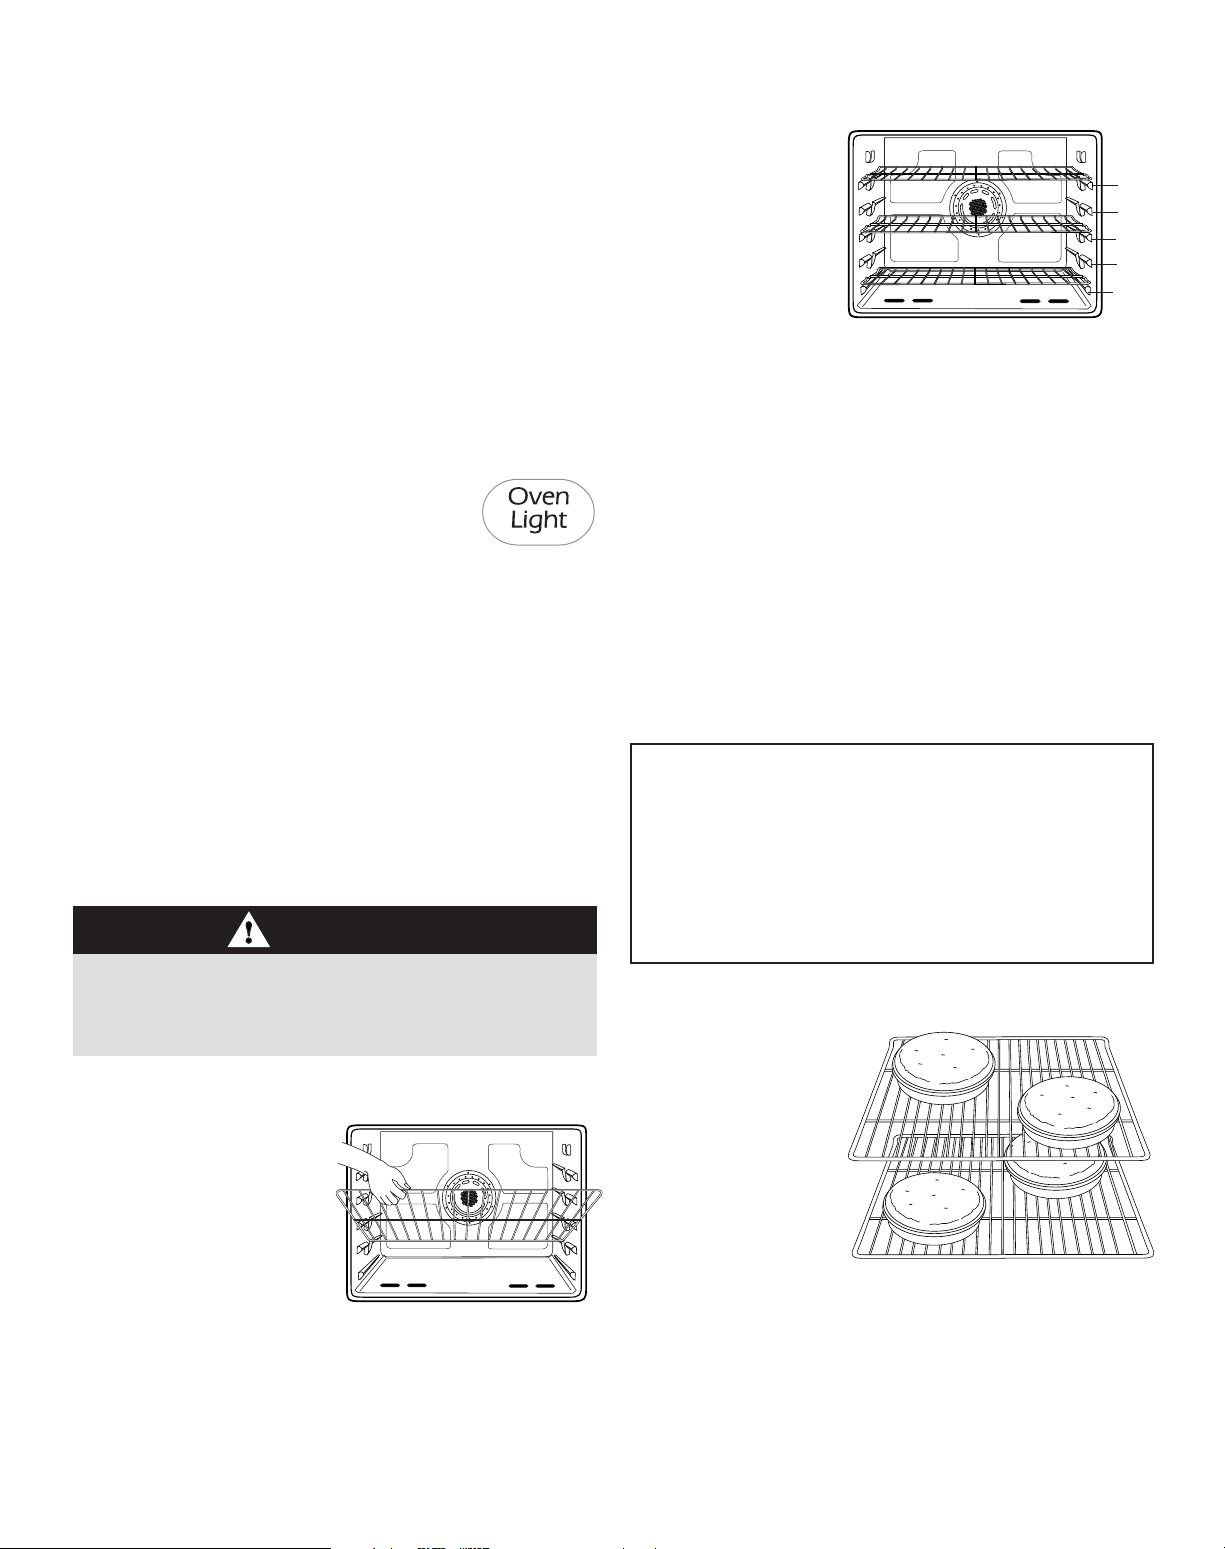
Oven Racks
CAUTION
Rack Positions
RACK 5 (highest position):
Used for two-rack
cooking and broiling.
RACK 4:
Used for two-rack
baking and broiling.
RACK 3:
Used for most baked
goods on a cookie
sheet or jelly roll pan, layer cakes, fruit pies, or frozen
convenience foods.
RACK 2:
Used for roasting small cuts of meat, casseroles, baking
loaves of bread, bundt cakes, custard pies, frozen pies or
two-rack baking.
RACK 1:
Used for roasting large cuts of meat and poultry, dessert
souffles, angel food cake, or two-rack baking.
MULTIPLE RACK COOKING:
Two rack: Use rack positions 2 and 4.
Three rack (convection only): Use rack positions 1, 3
and 5 (see illustration).
Notes:
• When convect baking on two or three racks (select
models), check foods at the minimum suggested time to
avoid over-browning or over-cooking.
• Do not cover an entire rack with aluminum foil or place foil
on the oven bottom. Baking results will be affected and
damage may occur to the oven bottom.
Three-rack Convection Cooking
5 Flat
4
3 Flat
2
1 Flat
• Do not attempt to change the rack position when the oven
is hot.
• Do not use the oven for storing food or cookware.
Three standard flat racks were packaged for the oven.
To remove:
1. Pull forward to the “stop”
position.
2. Lift up on the front of the
rack and pull out.
To replace:
1. Place rack on the rack
support in the oven.
2. Tilt the front end up slightly; slide rack back until it clears
the lock-stop position.
3. Lower front and slide into the oven.
Baking Layer Cakes on Two Racks
For best results when
baking cakes on two
racks with or without
convection, use racks 2
and 4.
Place the cakes on the
rack as shown.
20
OPTIONS
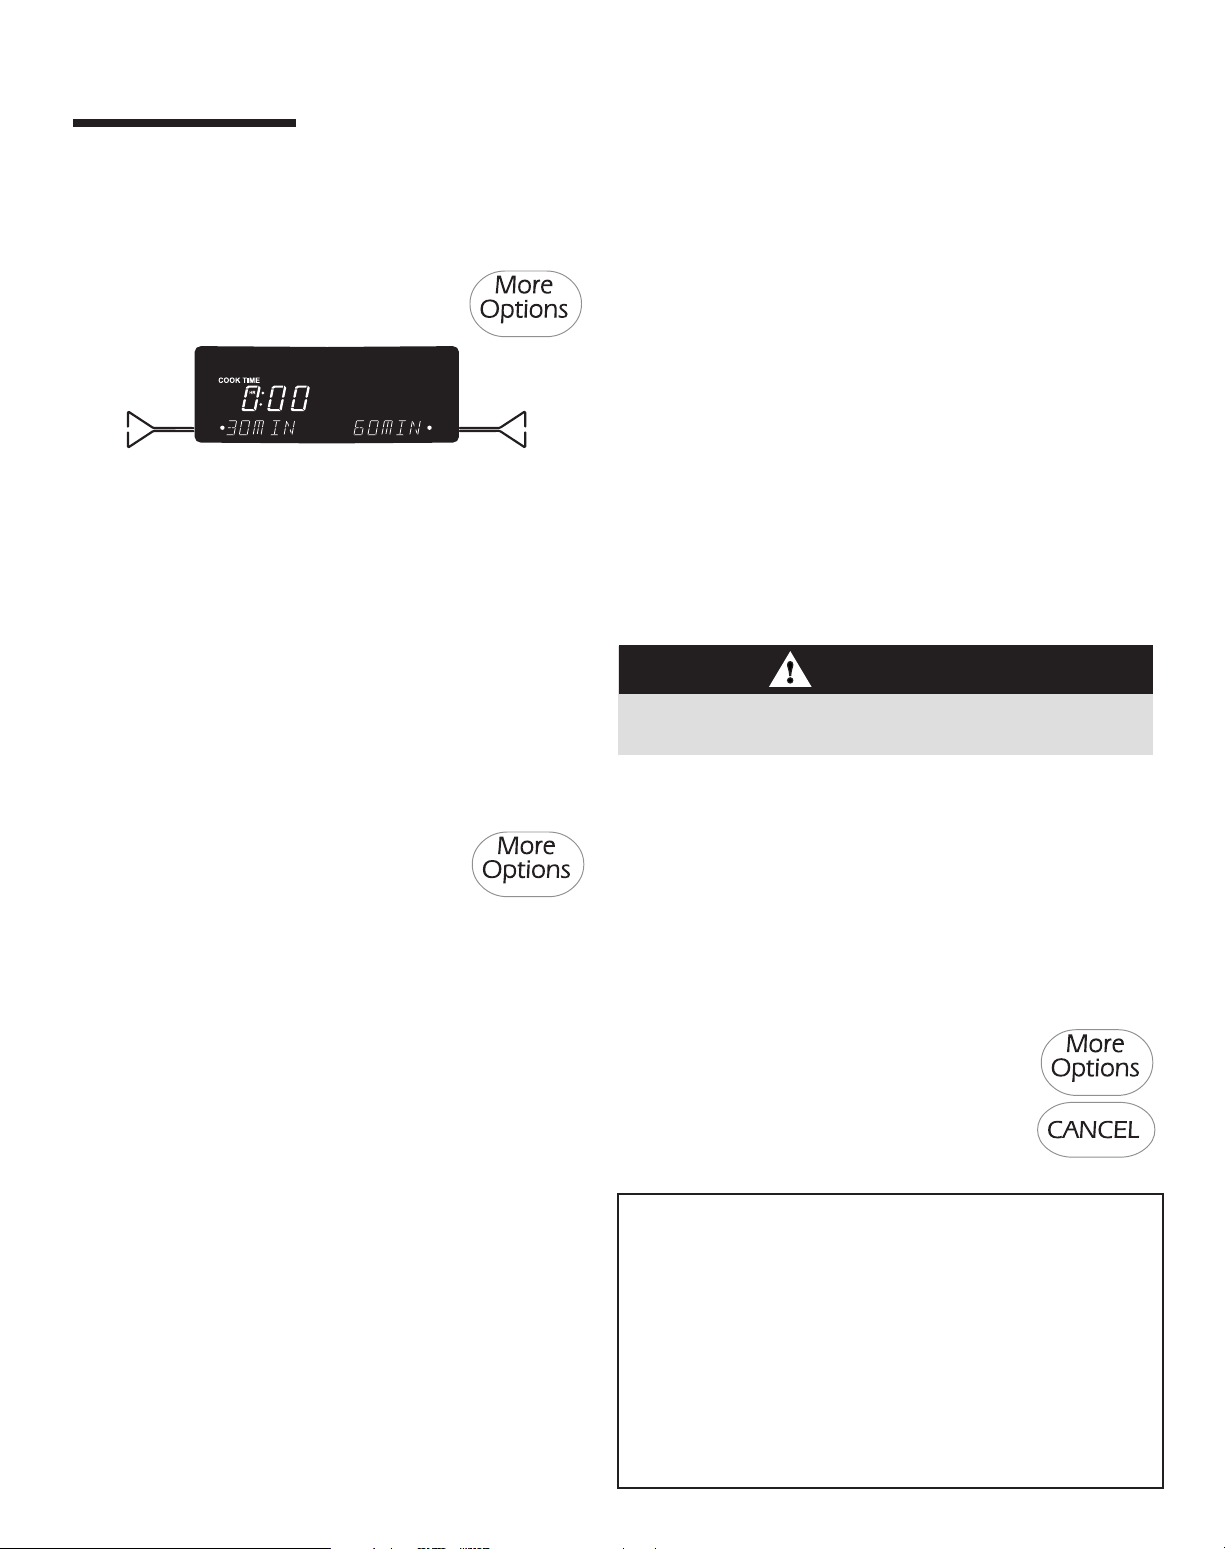
More Options
Cook & Hold (select models)
1. Press the More Options pad.
2. Select COOK/HOLD.
3. Enter cook time using Quickset pads or the number pads.
4. Select BAKE or CONVECT.
5. When BAKE is pressed, select the temperature using
Quickset pads or the number pads.
6. When CONVECT is pressed, select CNVT BAKE, CNVT
ROAST or CNVT PASTRY, then select the desired
temperature using the Quickset pads or the number pads.
The oven will cook for the selected time, then Keep Warm for
one hour. The oven will automatically turn off.
Important: If the recipe recommends preheating the oven,
add 15 minutes to the cook time.
5. The display will show CONVECT DELAY, the selected function,
the preset temperature and the delay time countdown. When
the delay time has expired, the cook time will be displayed and
the oven will begin to preheat.
To set Delay Clean:
1. Follow “Delay” steps 1-4 (see below left).
2. REMOVE RACKS will show in the display. Remove the racks
from the oven and select CONTINUE.
3. Set LIGHT soil level by entering 200 using the number pads
for two hours of cleaning time. Select MEDIUM or HEAVY
soil level using the Quickset pads. There is a brief delay while
the door locks.
4. DELAY CLEAN, the cleaning time, the delay time and unlock
time (based on the selected soil level) will show in the display.
When the delay time has expired, the clean time will be
displayed and the oven will begin to preheat.
For more information on self-cleaning, see page 5.
CAUTION
Do not use delayed baking for highly perishable foods such as
dairy products, pork, poultry, or seafood.
Delay
1. Press the More Options pad.
2. Press the arrow until DELAY is displayed.
3. Select DELAY.
4. Select Delay time using Quickset pads or the number
pads.
5. Select BAKE, CONVECT or CLEAN, then select
temperature using the Quickset or number pads.
To set Delay Bake:
1. Follow “Delay” steps 1-4 (see above).
2. Select from the displayed temperatures or use the number
pads to enter the temperature.
3. Select the time to cook from the displayed times or use the
number pads to enter the cooking time.
4. The display will show DELAY TIME, the selected function,
the preset temperature and the delay time countdown.
When the delay time has expired, the cook time will be
displayed and the oven will begin to preheat.
To set Delay Convect: (select models)
1. Follow “Delay” steps 1-4 (see above).
2. Select BAKE, ROAST or PASTRY.
3. Select from the displayed temperatures or use the number
pads to enter the temperature.
4. Select the time to cook from the displayed times or use the
number pads to enter the cooking time.
Proofing (select models)
The Proofing feature can be used to raise yeast-based bread
products prior to baking. There are two proofing methods
available – Rapid and Standard.
Standard proofing in the oven protects dough from room
temperature changes or drafts that commonly affect proofing
done on the countertop.
Rapid proofing provides faster proofing results than countertop
or Standard proofing, without harming the yeast.
1. Press More Options pad.
2. Select PROOFING.
3. Select RAPID or STANDARD.
4. When proofing is complete, remove the
dough from the oven and press the CANCEL pad.
Notes:
• For any dough that requires one rise, either Standard or
Rapid Proofing can be used.
• When using frozen bread dough, choose RAPID PROOFING.
There is no need to thaw dough before proofing.
• For dough requiring two rises, Standard Proofing must be
used for the first rising period. Either Standard or Rapid
Proofing can be used for the second rise.
• If oven temperature is too high for proofing, OVEN COOLING
will appear in the display.
21
Keep Warm
The Keep Warm feature is used to safely keep hot foods warm
or for warming breads and plates.
1. Press More Options pad.
2. Press the arrow to scroll.
3. Select KEEP WARM.
4. Select one of the displayed temperatures or enter desired
temperature using the number pads. Temperatures can be
selected between 145° and 190° F.
5. KEEP WARM and the temperature will be displayed.
6. When oven has preheated, a beep sounds and KEEP
WARM and the temperature will be displayed.
7. When finished, press the CANCEL pad and
remove food or plates from the oven.
To Warm Dinner Rolls:
• Cover rolls loosely with foil and place in oven.
• Press More Options pad.
• Select KEEP WARM.
• Select 170° temperature. Warm for 12-15 minutes.
To Warm Plates:
• Place two stacks of up to four plates each in the oven.
• Press More Options pad.
• Select KEEP WARM.
• Select 170° temperature.
• Warm for five minutes. Turn off the oven by pressing the
CANCEL pad and leave plates in the oven for 15 minutes
more.
• Use only oven-safe plates, check with the manufacturer.
• Do not set warm dishes on a cold surface as rapid
temperature changes could cause crazing or breakage.
Notes:
• Food should be hot when placed in oven.
• For optimal food quality, foods should be kept warm for
no longer than 1 hour.
• To keep foods from drying, cover loosely with foil or a
glass lid.
Meat Probe
Using the probe supplied with your oven assures excellent
roasting results every time.
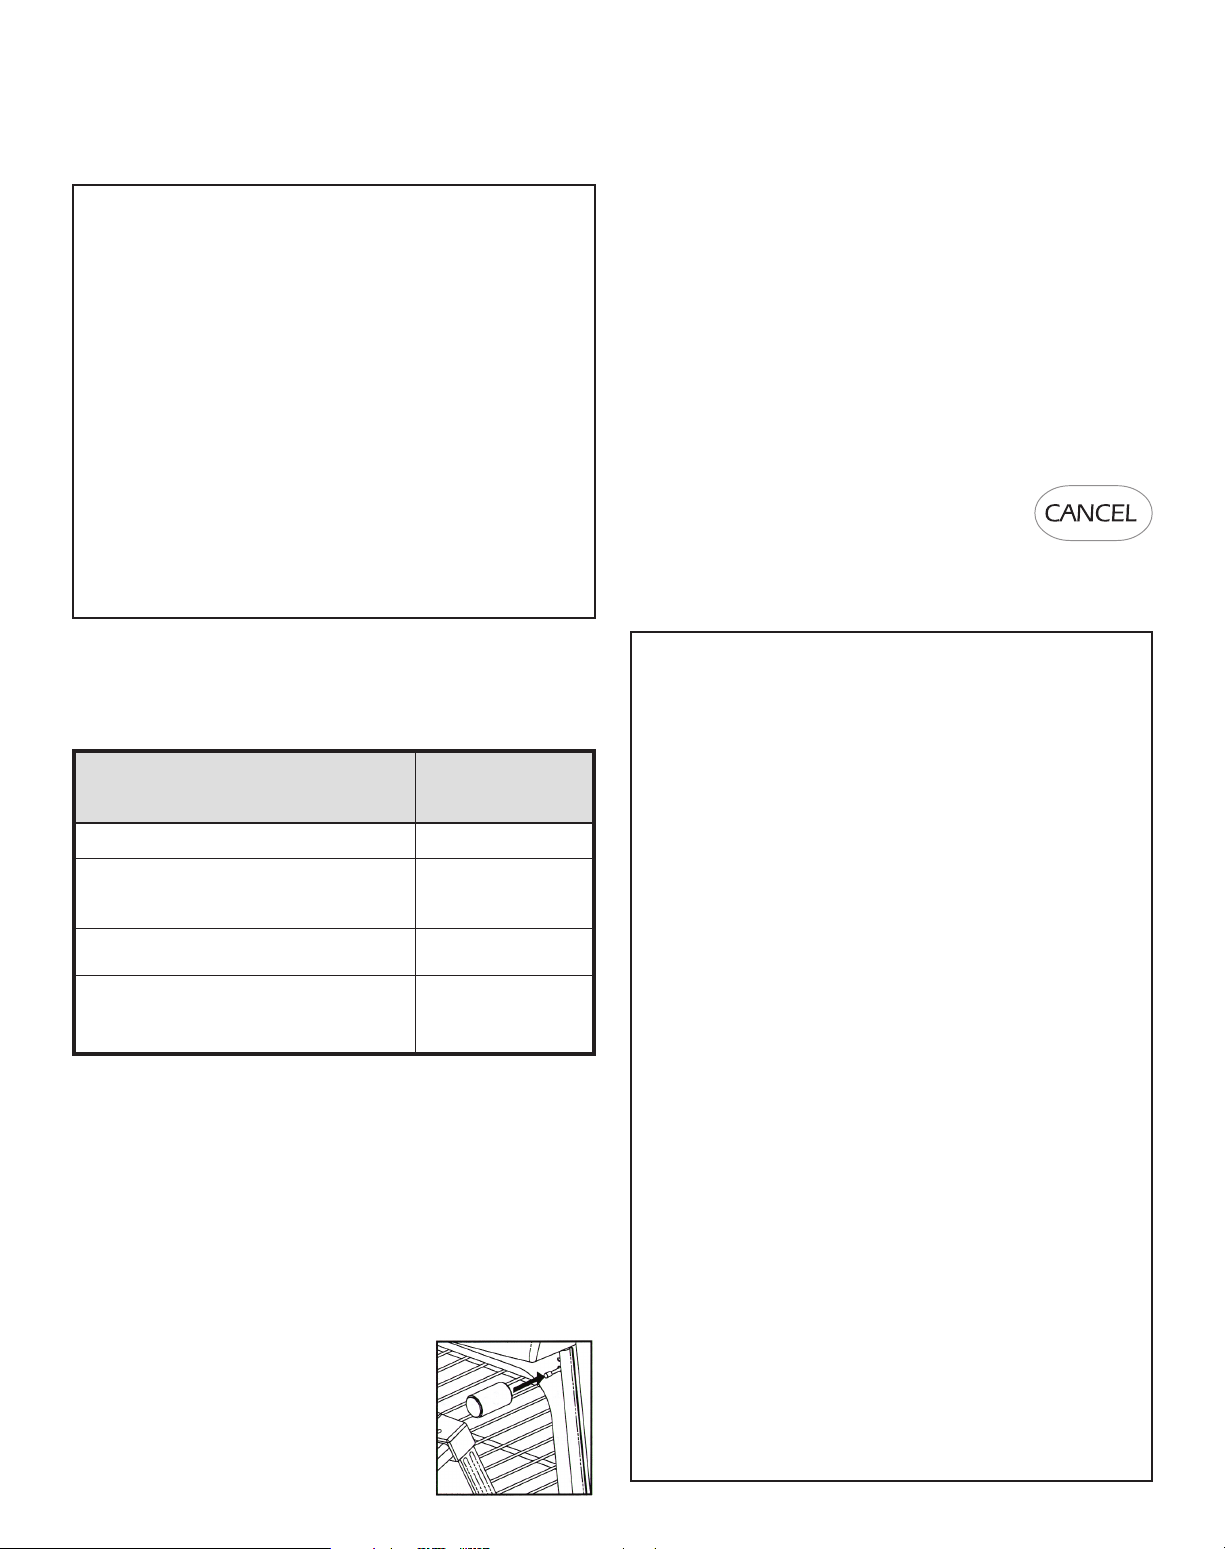
1. Insert the probe into the food item. For meats, the probe
tip should be located in the center of the thickest part of
the meat and not into the fat or touching a bone.
2. Insert the probe plug into the
receptacle located on the top
right of the oven. Be sure to
insert plug into the receptacle
all the way.
3. Press More Options pad.
4. Press the arrow to scroll.
5. Select MEAT PROBE.
6. Set the internal food temperature desired by selecting
one of the displayed temperatures or enter the
temperature using the number pads. The probe
temperature can be set from 100° - 185° F. If the meat
probe is not inserted, INSERT PROBE will be displayed.
7. Select BAKE or CONVECT.
8. Set the oven temperature by selecting one of the
displayed temperatures or enter the temperature using
the number pads.
Important: If the probe is removed from the oven receptacle
at any time during the cooking process, the control will prompt
INSERT PROBE. If the probe is not reinserted within 30
seconds, the program will be canceled and the oven will turn
off.
When BAKE is selected:
• The display will briefly show the selected temperatures
for the oven and probe.
• After 10 seconds, the display will show the actual oven
temperature and actual probe temperature.
When CONVECT is selected:
• Select CNVT BAKE, CNVT ROAST or CNVT PASTRY.
• Set the oven temperature by selecting one of the
displayed temperatures or enter the temperature using
the number pads.
• The display will briefly show the selected temperatures
for the oven and probe.
• After 10 seconds, the display will show the actual oven
temperature and actual probe temperature.
22
9. When the selected internal temperature of the food has
been reached, the oven will shut off and a beep will sound.
10. Remove the probe from the oven receptacle. The probe
will be hot. Hold probe plug with an oven mitt or
potholder when removing from the oven.
Notes:
• The probe must be removed from the oven when it is not
being used.
• Because of the excellent insulation of the oven, the
retained heat continues to cook the food after the beep
has sounded and the oven has turned off. For this
reason, it is important to remove the food from the oven
as soon as the beep sounds.
• Use the handle of the probe for inserting or removing.
Do not pull on the cable.
• The probe is hot after cooking – use a potholder or
oven mitt to remove.
• To clean cooled probe, wipe with a soapy dishcloth.
Do not submerge probe in water or wash in
dishwasher.
• Gently close the door until the spacer magnet makes
contact with the oven door. The magnet will hold the
spacer in the proper position during the drying process
and allows the door to be opened at any time during
drying without losing proper positioning.
Important: If the spacer is not placed correctly, the convection fan will not operate.
2. Press Convect pad.
3. Press the arrow to scroll.
4. Select DRYING.
5. Select a displayed temperature or enter a temperature with
the number pads. Temperatures can be set between
100° F and 200° F.
6. DRYING and the temperature will be displayed. PREHEAT
will be displayed until the programmed temperature is
reached.
7. When drying is complete, remove food from
oven and press CANCEL pad.
Follow the Drying Guide on page 24 for drying times.
Check foods at minimum times given. Cool foods to room
temperature before testing for doneness.
Suggested Internal Food Temperatures
INTERNAL
FOOD TEMPERATURE
Ground Beef 165° F
Fresh Beef, Veal, Lamb Medium Rare 145° F
Medium 160° F
Well Done 170° F
Chicken, Turkey Whole 180° F
Breast 170° F
Pork Medium 160° F
Well Done 170° F
Ham, Precooked 140° F
Drying
For best results, use a drying rack. A drying rack allows air to
circulate evenly around the food.
The convection fan will operate during the drying procedure.
To set Drying:
1. The oven door needs to be opened slightly to allow
moisture to escape from the oven during the drying
process.
• Open the oven door slightly.
• Place the magnetic door spacer
(Part No. 8010P146-60) over the
plunger switch at the upper right
side of the oven frame. The spacer
provides a gap between the oven
frame and the oven door to allow
moisture to escape.
Notes:
• To purchase a drying rack, contact your Jenn-Air
dealer for the “DRYINGRACK” Accessory Kit or call
1-800-JENNAIR (1-800-536-6247).
• Most fruits and vegetables dry well and retain their color
when dried at 140° F. Meat and jerky should be dried at
145° - 150° F. For optimal flavor, dry herbs at 100° F,
however, at this lower temperature expect extended
drying times of up to 8 hours.
• The length of drying times vary due to the following:
Water and sugar content of food, size of food
pieces, amount of food being dried, humidity in the
air.
• Check foods at the minimum drying time. Dry longer if
necessary.
• Fruits that turn brown when exposed to air should be
treated with an antioxidant. Try one of the following
methods:
1. Dip fruit in a mixture of two parts bottled lemon juice
to one part cool water.
2. Soak fruit in a solution of 1 tsp. ascorbic acid or
commercial antioxidant to 1 quart of cold water.
• Foods may drip during the drying process. After drying
high acid or sugary foods, clean the oven bottom with
soap and water. The porcelain oven finish may discolor if
acidic or sugary food soils are not wiped up prior to high
heat or a self-cleaning cycle.
• More than one rack of food may be dried at the same
time. However, additional drying time is needed.
• Refer to other resources at your local library or call your
local County Extension service for additional information.
23
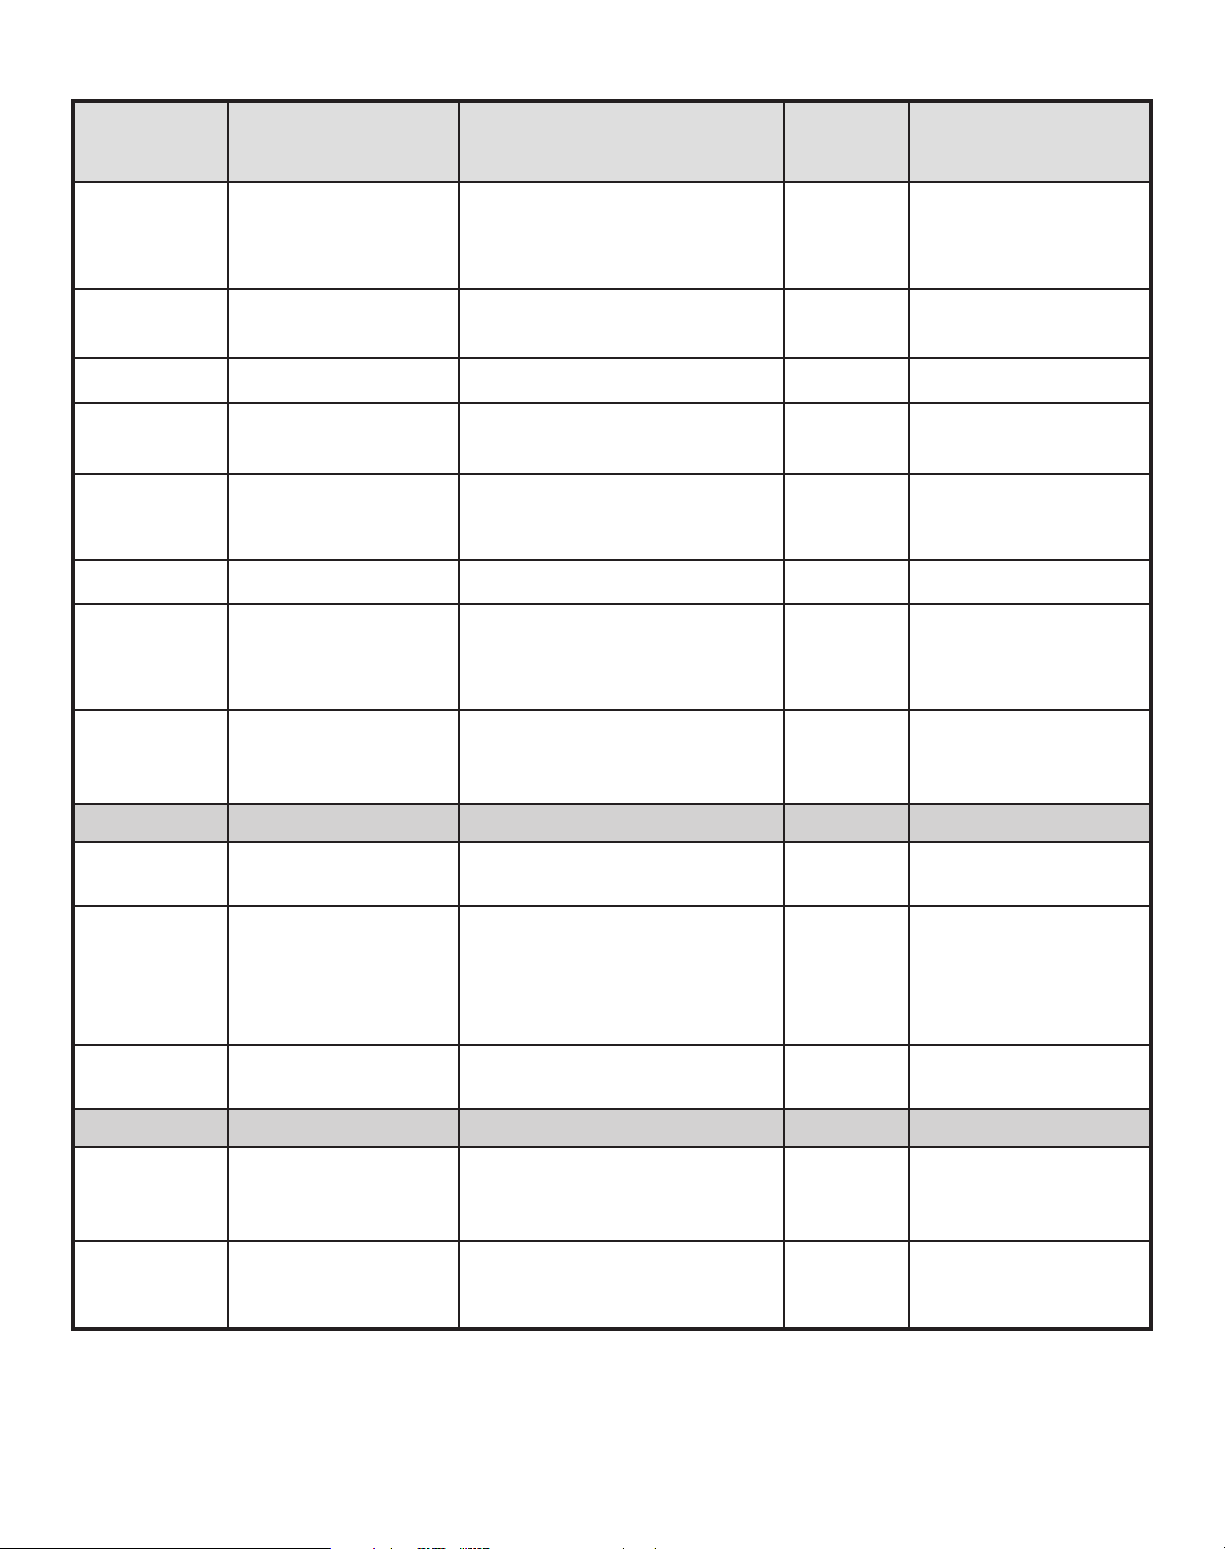
Drying Guide
APPROX.
FRUITS VARIETIES BEST PREPARATION DRY TIME TEST FOR DONENESS
FOR DRYING at 140° F ** AT MIN. DRY TIME
Apples* Firm varieties: Graven Wash, peel if desired, core and slice 4-8 hours Pliable to crisp. Dried
Stein, Granny Smith, into 1/8” slices. apples store best when
Jonathan, Winesap, they are slightly crisp.
Rome Beauty, Newton.
Apricots* Blenheim/Royal most Wash, halve, and remove pits. 18-24 hours Soft, pliable.
common. Tilton also good.
Bananas* Firm varieties Peel and cut into 1/4” slices. 17-24 hours Pliable to crisp.
Cherries Lambert, Royal Ann, Wash and remove stems. Halve and 18-24 hours Pliable and leathery.
Napoleon, Van or Bing. remove pits.
Nectarines Freestone varieties. Halve and remove pits. Peeling 24-36 hours Pliable and leathery.
and Peaches* is optional but results in
better-looking dried fruit.
Pears* Bartlett Peel, halve and core. 24-36 hours Soft and pliable.
Pineapple Fresh or canned. Wash, peel and remove thorny eyes. Canned: Soft and pliable.
Slice lengthwise and remove the 14-18 hours
small core. Cut crosswise into Fresh:
1/2” slices. 12-16 hours
Orange and Select rough-skinned fruit. Wash well. Thinly peel the outer 1-2 hours Tough to brittle.
Lemon Peel Do not dry the peel of fruit 1/16 to 1/8” of the peel. Do not use
marked “color added”. the white bitter pith under the peel.
VEGETABLES
Tomatoes Plum, Roma Halve, remove seeds. Place tomatoes 12-18 hours Tough to crisp.
skin side up on rack. Prick skins.
Carrots Danvers Half Long, Do not use carrots with woody fiber 4-8 hours Tough to brittle.
Imperator, Red Cored or pithy core. Wash, trim tops and
Chantenay peel if desired. Slice crosswise or
diagonally into 1/4” slices. Steam
blanch for 3 min.
Hot Peppers Ancho, Anaheim Wash, halve and seed. Prick 4-6 hours Pods should appear
skin several times. shriveled, dark red and crisp.
HERBS
Parsley, Mint, Rinse in cold water. Pat dry with a 1-3 hours Brittle and crumbly.
Cilantro, Sage, paper towel. Leave stems on until
Oregano leaves are dry, then discard.
Basil Cut leaves 3 to 4” from top of plant 2-5 hours Brittle and crumbly.
just as buds appear. Rinse leaves in
cold water.
* Fruits requiring an antioxidant to prevent discoloration and loss of nutrients. Refer to the notes on page 23 for specific methods.
** 12 Hour Off will not occur during drying functions.
24
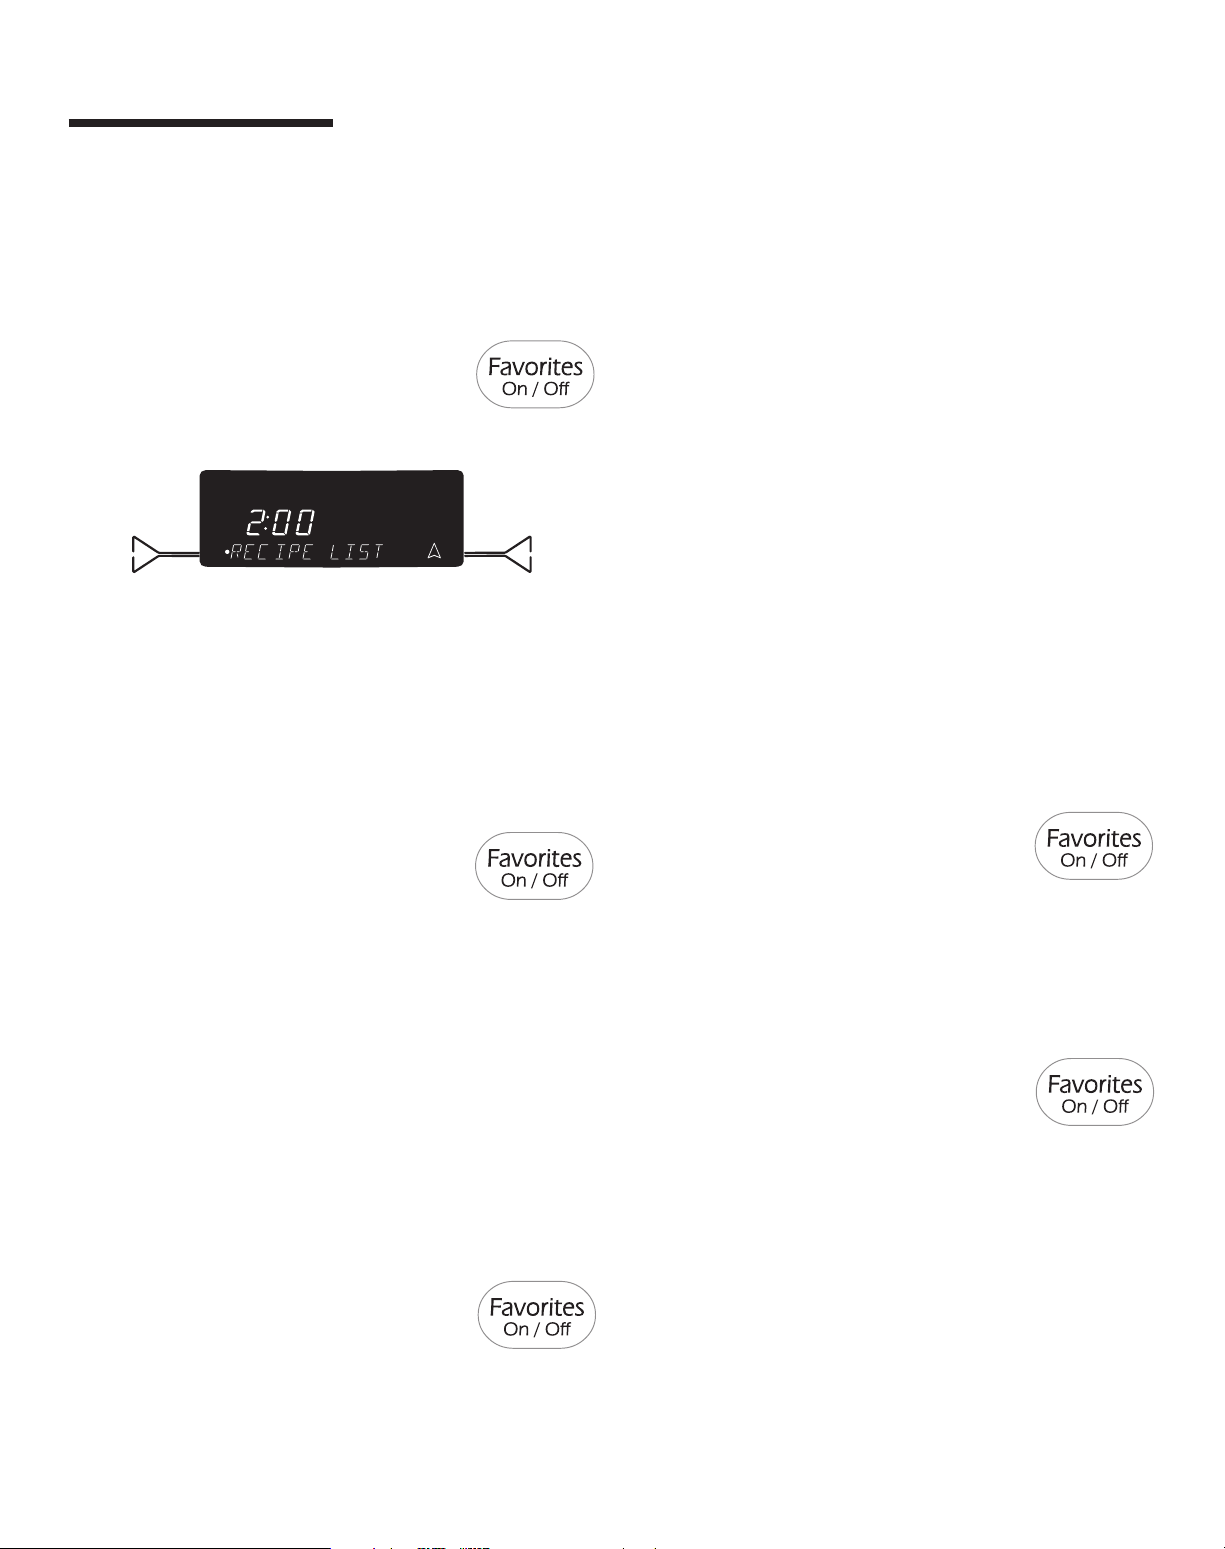
FAVORITES
Favorites
Favorites stores the oven mode, cook time and temperature
for up to 10 of your favorite recipes. Convection ovens come
with five preprogrammed recipes.
To select a recipe from the preset Recipe List:
1. Press Favorites pad.
2. Select RECIPE LIST.
3. Select desired recipe on screen or press
arrow key to scroll to the desired recipe.
4. Once the recipe is selected, oven will begin preheating to
the set program.
• You may press the More Options pad to add
COOK/HOLD or DELAY.
5. When finished, press the CANCEL pad and remove food
from the oven.
To Save the Last Recipe Completed:
(Bake, Convect Bake, Convect Roast, Convect Pastry, Convect
Broil, Drying, Keep Warm, Proofing)
1. Press Favorites pad.
2. Select SAVE LAST.
3. Enter the name using the keypads.
• For example, to save lasagna, press the <JKL> pad three
times for “L”; Press the <ABC> pad once for “A”; press
the <STU> pad once for “S”. Continue until you’ve
finished the word.
4. After each desired letter appears, wait three seconds or
press Enter pad before moving on the next letter.
• Up to 14 letters including spaces can be used.
5. When the recipe name has been entered, the last settings
will be displayed for a few seconds.
6. RECIPE LIST will then be displayed to scroll through the list.
7. Press Favorites pad to exit the Favorites menu.
To Create a New Favorite Recipe:
1. Press Favorites pad.
2. Press arrow key to scroll through selections.
3. Select CREATE NEW with touchpad on left.
4. Enter the name using the keypads.
• For example, to save lasagna, press the <JKL> pad three
times for “L”; Press the <ABC> pad once for “A”; press
the <STU> pad once for “S”. Continue until you’ve
finished the word.
• After each desired letter wait three seconds until an
underline appears in the next space or press
Enter pad before moving on the next letter.
• Up to 14 letters including spaces can be used.
5. Press Enter pad to save name.
6. Select cooking mode, such as BAKE, CONVECT BAKE,
CONVECT ROAST, etc.
7. Select the oven temperature using the Quickset pads.
OR
Enter the desired temperature using the number pads.
8. Add Cook/Hold by selecting YES or omit Cook/Hold by
selecting NO.
9. If you selected YES, enter cook time using the Quickset
pads or the number pads.
10. Add Delay by selecting YES or omit Delay by selecting
NO.
11. If you selected YES, enter the delay time by using the
Quickset pads or the number pads.
12. The control will display programmed settings then return
to the Favorites menu.
13. Press Favorites pad to exit the Favorites menu.
To Edit a Saved Recipe:
1. Press Favorites pad.
2. Press arrow key to scroll.
3. Select EDIT RECIPE.
4. Select desired recipe to edit. You may need to press arrow
key to find desired recipe.
5. Follow menu to revise recipe settings as desired.
6. The display will return to the Favorites menu. RECIPE LIST
will be displayed.
7. Press Favorites pad to exit Favorites menu.
To Delete a Favorite Recipe:
1. Press Favorites pad.
2. Press arrow key to scroll.
3. Select DELETE RECIPE.
4. Find recipe to be deleted. You may need to press arrow
key to find desired recipe.
5. The Control will ask again to make sure you want to delete
that recipe. Select YES or NO.
6. Press Favorites pad to exit Favorites menu.
To exit out of Favorites at any time, press the Favorites pad.
25
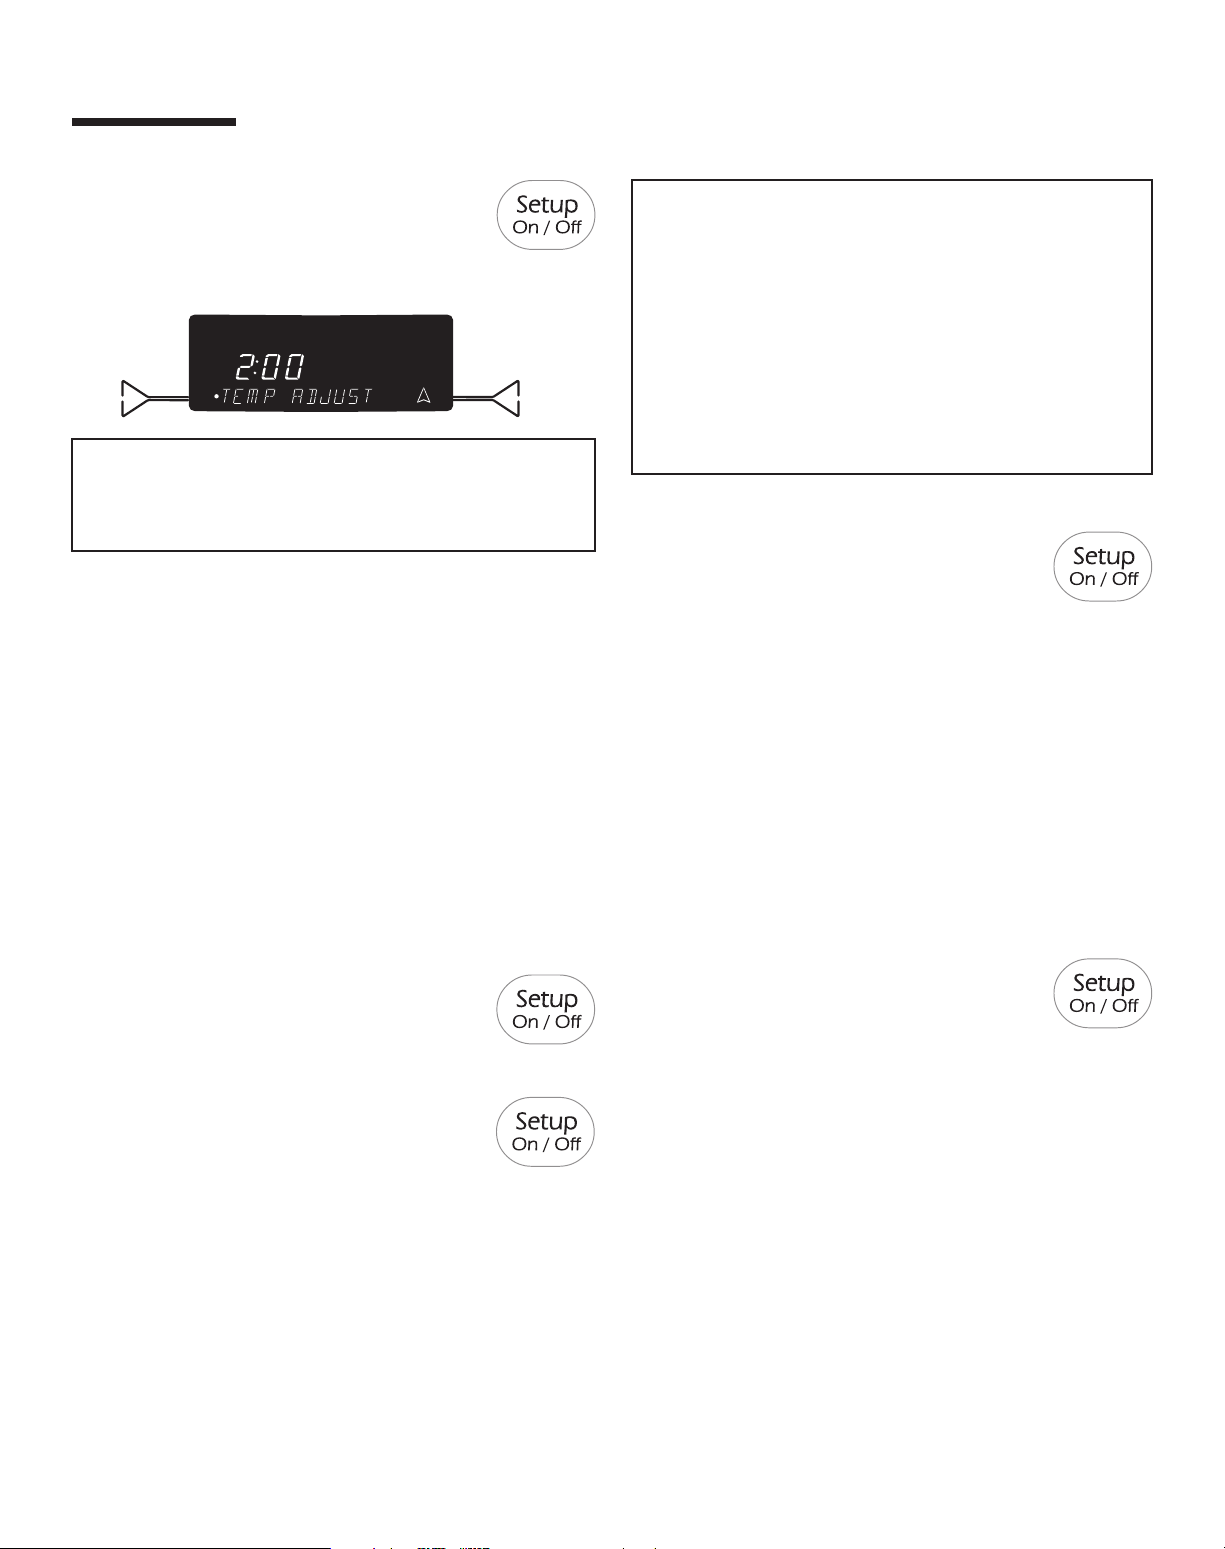
SETUP
Setup
1. Press the Setup pad.
2. Use the arrow to scroll through the Setup options.
3. Select the desired option by pressing the Quickset pads.
Note: To back out of a screen without making any
changes, press the Setup pad. The display will return to
the time of day.
Clock
See pages 14-15 for more details. Use the Clock option to:
• Set the time of day.
• Set day of week.
• Select AM or PM (12-hour mode only). AM or PM will not
show with the time of day in the display.
• Choose a 12 or 24 hour clock display.
• Disable the clock display.
Notes:
• When using Convect Bake and Convect Pastry with the
Auto Convect Conversion option turned off, reduce the
set temperature by 25° F.
• If Convect Roasting with the Auto Convect Conversion
option turned off, you will not be required to program a
cooking time. Check food at 75% of the conventional
time.
• If the Auto convect Conversion is disabled, do not enter
a convect roast time.
To deactivate Auto Convect Conversion:
1. Press Setup pad.
2. Select AUTO CONVECT.
3. Select OFF.
4. Press Setup pad to exit the Setup menu.
To reactivate Auto Convect Conversion:
1. Press Setup pad.
2. Select AUTO CONVECT.
3. Select ON.
4. Press Setup pad to exit the Setup menu.
Language
The language of the screens in the display window can be
set to English, French or Spanish. To change the display
language from English:
1. Press Setup pad.
2. Select LANGUAGE.
3. Use the arrow to scroll to next screen, if needed.
4. Select the desired language.
5. Press Setup pad to exit the Setup menu.
Auto Convect Conversion
The oven comes from the factory set for Auto Convect
Conversion.
Auto Convect Conversion automatically reduces the set
temperature by 25° for Convect Bake and Convect Pastry.
For Convect Roast the control will alert you at 75% of the
programmed roasting time to check foods for doneness.
Convect roast temperatures are not reduced.
C/F
The displayed temperature scale can be changed from
Fahrenheit to Celsius.
To change the scale:
1. Press Setup pad.
2. Use the arrow to scroll to the next screen.
3. Select C/F.
4. Select the desired temperature scale.
5. Press Setup pad to exit the Setup menu.
26

Sabbath Mode
The oven is set to shut off after 12 hours if you accidentally
leave it on. The Sabbath Mode overrides the 12-hour shut-off
and can either be set to come on automatically or can be set
manually as desired.
Only Bake or Cook/Hold Bake will operate when the oven is in
Sabbath Mode. All other functions are invalid. If a function other
than Bake or Cook/Hold Bake is in operation when Sabbath
Mode starts, the function will be canceled.
To activate Sabbath Mode:
1. Press Setup pad.
2. Press the arrow to scroll.
3. Select SABBATH.
4. Select AUTO or MANUAL.
• AUTO will automatically prompt you to enter a Bake
temperature on Friday at 2 pm and stay in Sabbath
mode for 33 hours. SABBATH and SABBATH ENABLE
appear in the display for 90 minutes. If Bake or Cook/
Hold Bake are desired during Sabbath Mode, they must
be programmed during this 90 minute time before AUTO
Sabbath Mode is active.
• MANUAL sets the oven to Sabbath Mode for 72 hours.
SABBATH and SABBATH ENABLE appear in the display
for five minutes. If Bake or Cook/Hold Bake are desired
during Sabbath Mode, they must be programmed during
this five minute time before the MANUAL Sabbath Mode
is active.
5. Select ON or OFF.
6. Press Setup pad to exit the Setup menu.
Notes:
• The oven must be idle to program Sabbath Mode.
• Sabbath Mode cannot be turned on if the keypads are
locked out or when the door is locked.
• If the oven is baking when Auto Sabbath Mode starts,
there will be no audible beeps.
• All prompts, messages and beeps are deactivated when
the Sabbath Mode is active.
• If the oven light is desired while in Sabbath Mode, it
must be turned on before the Sabbath Mode is set.
• The self-clean cycle and automatic door lock do not
operate during the Sabbath Mode.
• The Bake temperature can be changed during an Active
Sabbath Mode. Simply press the Bake pad and then
enter the desired temperature using the Quick set pads.
• Pressing the CANCEL pad will cancel a Bake cycle,
however the control will stay in the Sabbath Mode.
• The day of the week and AM/PM must be set for
Sabbath Mode to operate correctly.
Temp Adjust
Oven temperatures are carefully tested at the factory. It is
normal to notice some baking time or browning differences
between a new oven and an old one. As ovens get older, the
oven temperature can shift.
You may adjust the oven temperature if you think the oven is
not baking or browning correctly. To decide how much to
change the temperature, set the oven temperature 25° F
higher or lower than the temperature in your recipes, then
bake. The results of the first bake should give you an idea of
how much to adjust the temperature.
To adjust the oven temperature:
1. Press Setup pad.
2. Press the arrow to scroll.
3. Select TEMP ADJUST.
4. Enter the desired temperature change using the number
pads.
5. Select “+/-” to indicate an increase or decrease in
temperature. The temperature change is displayed at the
top of the window.
6. Press Enter pad or wait three seconds to accept the
change.
7. Press Setup pad to exit the menu.
The oven temperature does not need to be readjusted if there
is a power failure or interruption.
Broiling and cleaning temperatures cannot be adjusted.
Tones (beeps)
The number of beeps heard at the end of cooking and at the
end of timer operation and their volume can be adjusted.
To adjust the beeps:
1. Press Setup pad.
2. Use the arrow to scroll.
3. Select TONES.
To change the beeps at the end of cooking:
1. Follow “Tones” steps 1-3 (see above).
2. Select COOK TONE.
3. Use the arrow to scroll.
4. Select 1-30 MIN to hear one beep every thirty seconds.
OR
Select 1-60 MIN to hear one beep every sixty seconds.
OR
Select 1 BEEP to hear one beep only at the end of cooking.
5. Press the Setup pad to exit.
To cancel Sabbath Mode:
Press and hold the Setup pad for five seconds.
The Bake mode may be cancelled by pressing
the CANCEL pad during Sabbath.
27
 Loading...