

Jenn-Air 790-0007, 790-0006 Installation Instructions And Use & Care Manual

®
JENN-AIR
ROTISSERIE KIT
Installation Instructions and Use & Care Guide
For question about features, operation/performance, parts, accessories, or service, call:
1-800-554-5799
JUEGO DE ROSTIZADOR
Instrucciones de instalación y Manual de uso y cuidado
Si tiene preguntas respecto a las características, funcionamiento, rendimiento, partes, accesorios o
servicio técnico, llame al:
1-800-554-5799
TROUSSE DE TOURNEBROCHE
Instructions pour l'installation, mode d'emploi et guide d'entretien
Pour tout renseignement sur les caractéristiques, la marche/performance, les pièces détachées,
les accessoires ou le service, veuillez appeler le:
1-800-554-5799
Table of Contents / Índice / Table des matières …………….2
IMPORTANT:
Save for local electrical inspector’s use.
Installer: Leave installation instruction with the homeowner.
Homeowner: Keep installation instructions for future reference.
IMPORTANTE:
Guarde para tener a disposición del inspector de electricidad local.
Instalador: Deje las instrucciones de instalación con el propietario.
Propietario: Conserve las instrucciones de instalación para referencia futura.
IMPORTANT:
À conserver pour l'inspecteur local des installations électriques.
Installateur : Laissez les instructions concernant l'installation au propriétaire/occupant.
Propriétaire/occupant : Conservez les instructions concernant l'installation pour future référence.
®
JENN-AIR
Models / Modelos / Modèles: 790-0007, 790-0006

TABLE OF CONTENTS
Safety Instructions....................3-4
Rotisserie Kit Contents………..5
Rotisserie Assembly................6-8
Operation Instructions.............8-9
Care & Maintenance………….9
Troubleshooting……………....9
Warranty……………………….9-11
TABLE DES MATIÈRES
Consignes de sécurité.........................................21-22
Contenu de la trousse de tournebroche ………..23
Montage du tournebroche...................................24-26
Mode d'emploi.....................................................27
Soin et entretien …………..................................28
Dépannage………………....................................28
Garantie………………………..............................28-30
ÍNDICE
Instrucciones de seguridad ...............12-13
Contenido del juego de rostizador ….14
Ensamblaje del rostizador ……..…....15-17
Instrucciones de funcionamiento…....17-18
Cuidado y mantenimiento ………......18
Solución de problemas ……….....….18
.
Garantía ………................................19-20
2
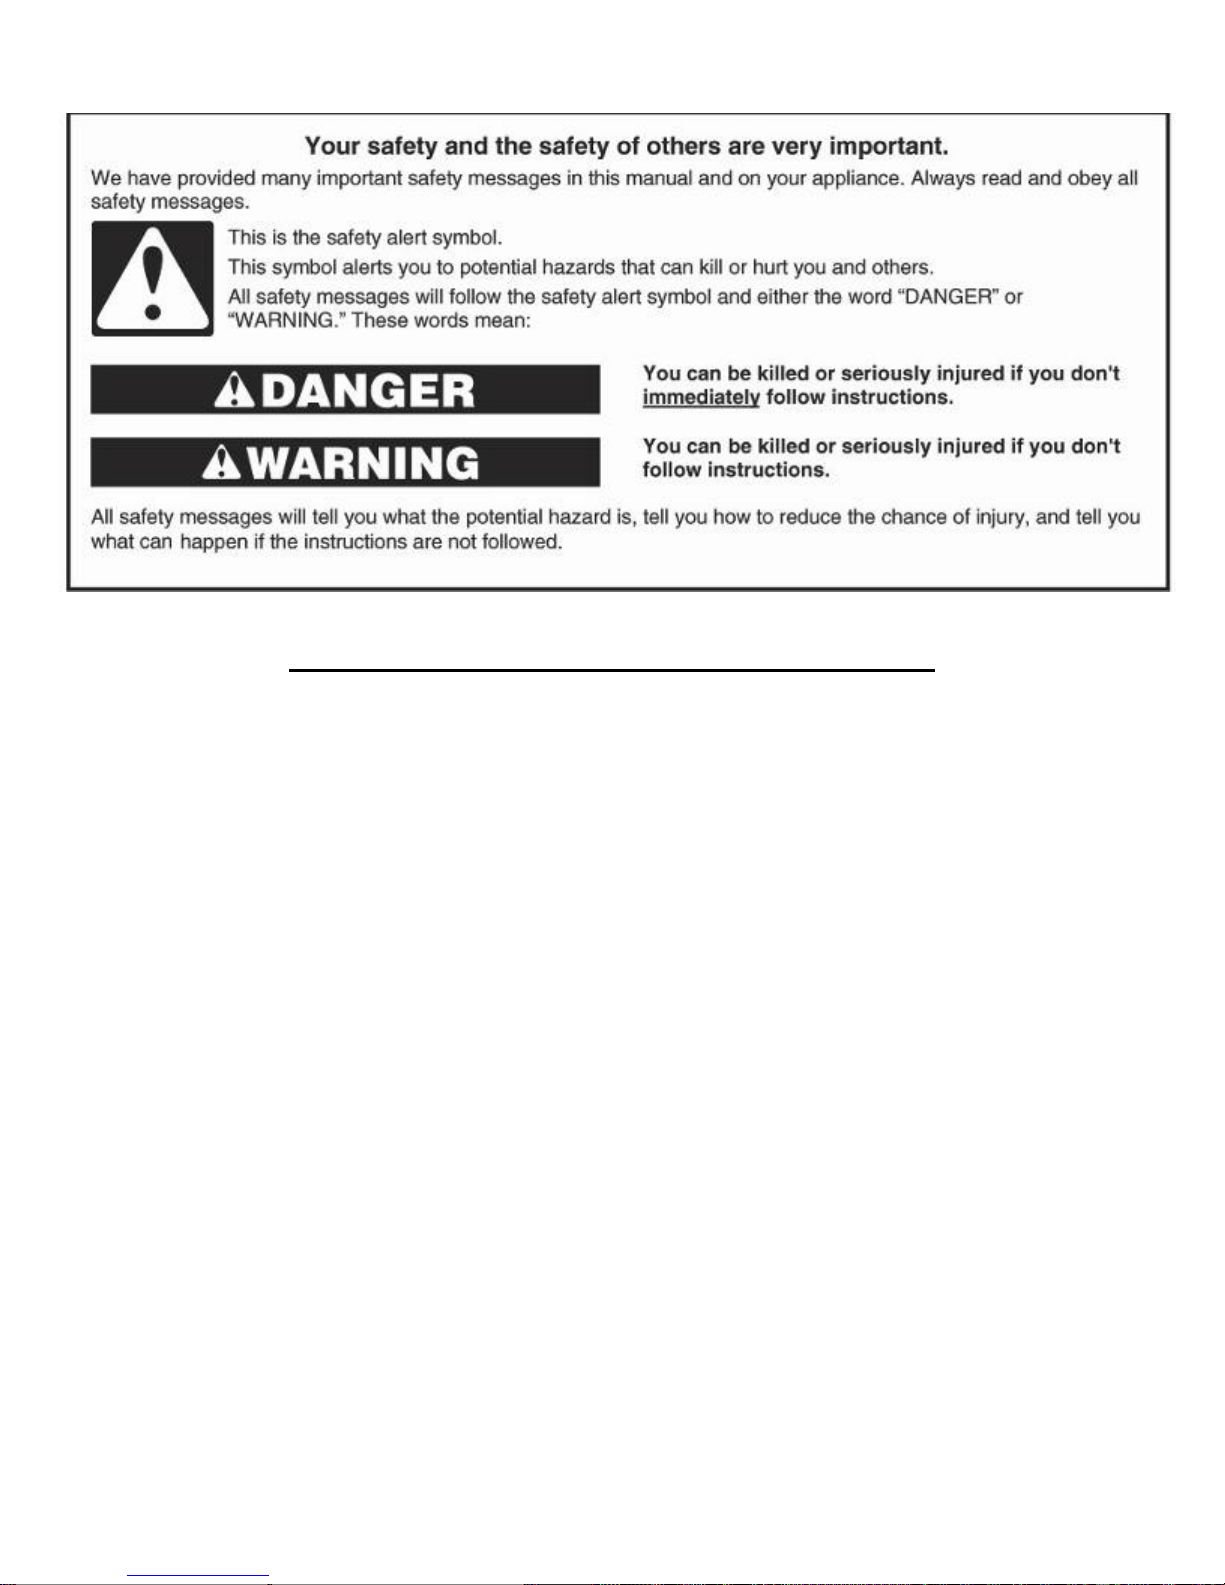
IMPORTANT SAFETY INSTRUCTIONS
To protect against shock hazard connect only to properly grounded outlet.
Read the following important safety instructions before using the rotisserie motor.
1. Read all instructions before assembly, installation, and use.
2. Do not touch hot surface with bare hands.
3. To protect against electrical shock do not immerse cord, plug, or motor in water or any liquid.
4. Adult supervision is necessary when any appliance is used by or near children.
5. Unplug the rotisserie motor from outlet when not in use.
6. Allow the rotisserie to cool before cleaning or taking off any parts.
7. Do not operate any appliance with a damaged cord or plug or after the appliance has been
damaged in any manner.
8. The use of other accessory attachments is not recommended by the appliance manufacturer
as it may cause injuries.
9. Do not let electric cord touch hot surfaces or hang over edge of a table or counter.
10. Do not place on or near a hot gas or electrical burner, or in a heated oven.
11. Caution must be used when assembling the pointed end of spit rod and the meat forks as the
ends are sharp.
12. Always attach plug to appliance first, then plug cord into the wall outlet. If the plug does not fit
into the outlet, contact a qualified electrician. DO NOT attempt to modify the plug and override
this safety feature.
13. Do not use appliance for other than intended use.
14. Fuel, and/or charcoal briquettes, is not to be used with this appliance.
15. Do not expose to rain.
16. To ensure continued protection against risk of electrical shock, connect to properly grounded
outlets only
17. A short power supply cord is provided to reduce the risk of becoming entangled or tripping over
a longer cord.
18. Longer detachable power-supply cords or extension cords may be used if care is exercised in
their use.
3

19. If a longer detachable power-supply cord or extension cord is used, the marked electrical rating
should be at least as great as the electrical rating of the appliance, and the cord should be
arranged so that it will not pose a risk of being pulled on or tripped over.
20. To reduce the risk of electrical shock, keep extension cord connection dry and off the ground.
21. Store the rotisserie kit indoors when not in use-out of the reach of children.
22. Always follow the directions provided with your Rotisserie as each unit differs in design and
capabilities.
23. Always follow all safety procedures as stated in your Rotisserie and Grill manual.
24. To avoid injury let the grill cool down before removing the drip pan.
SAVE THESE INSTRUCTIONS
4
Installation Requirements
Model# 790-0007 (Fits most 27 inches to 32 inches barbeque grills)
Model #790-0006 (Fits most 36 inches barbeque grills)
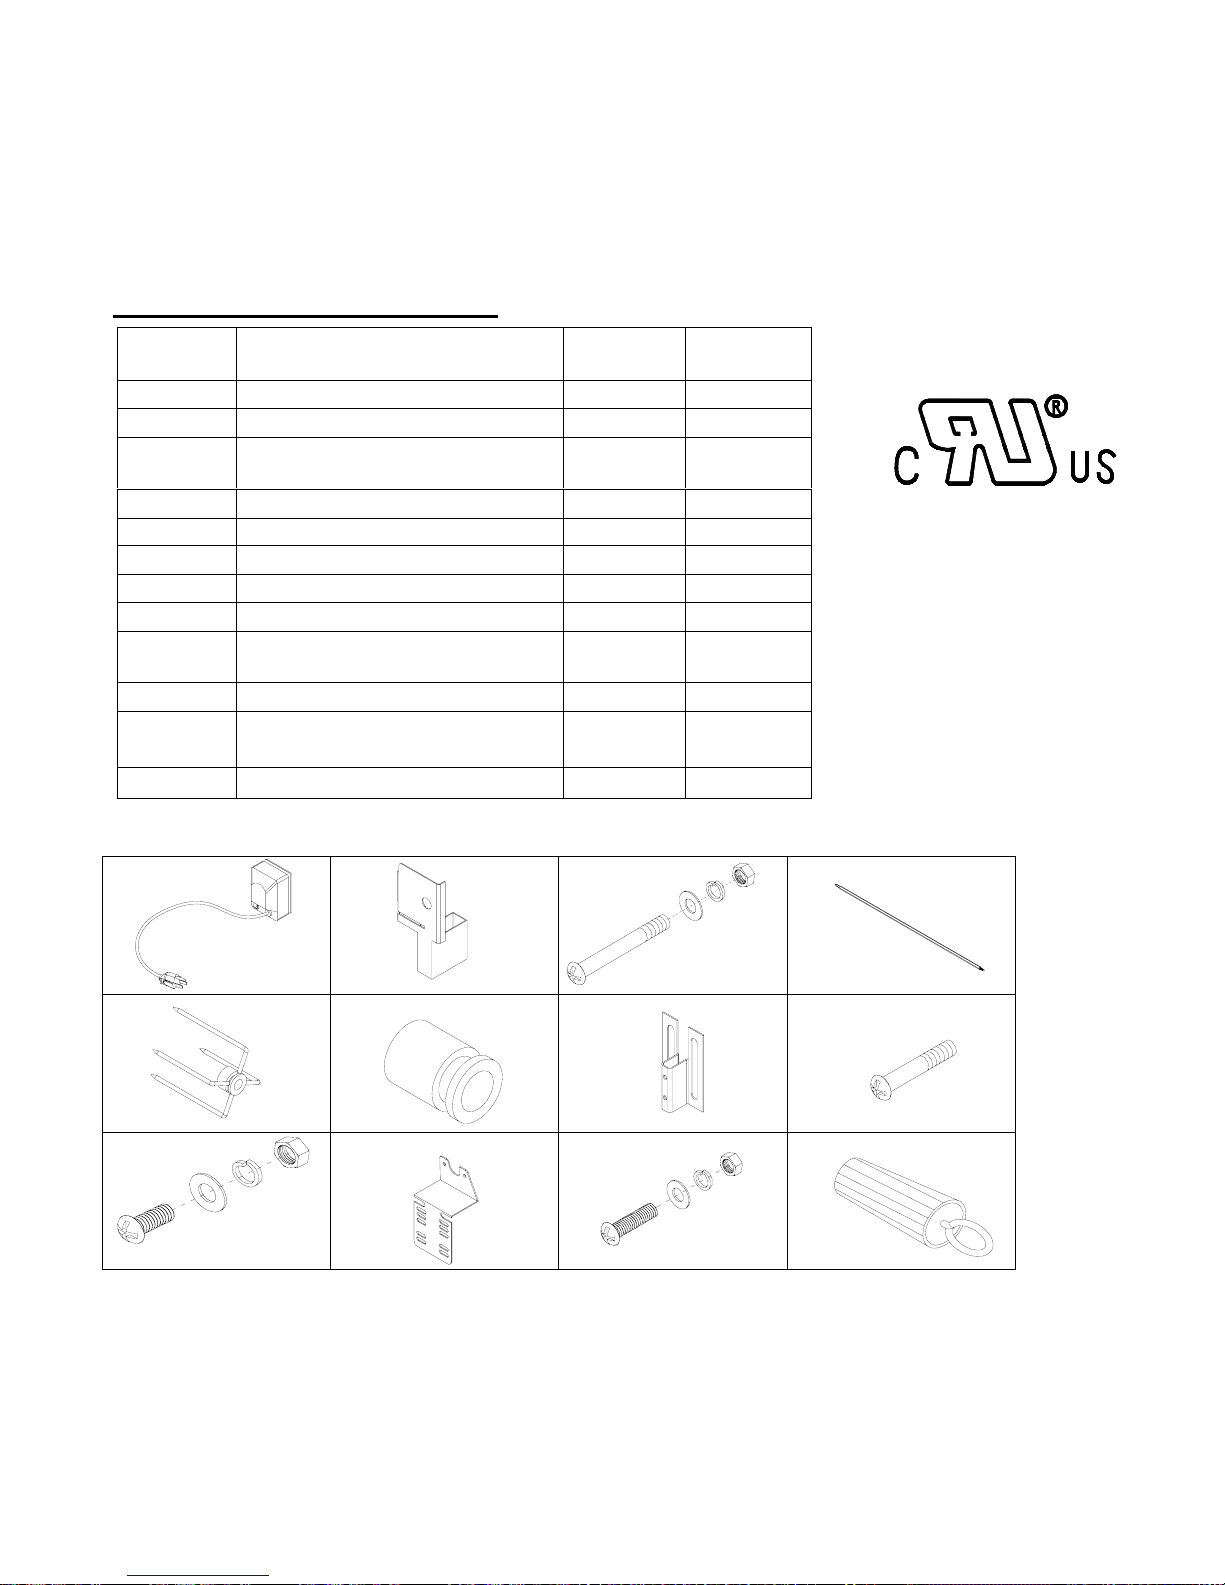
ROTISSERIE KIT CONTENTS
Parts Description Quantity
A Motor 1 1
B Motor Bracket 1 1
C
D Spit Rod 1 1
E Meat Fork 4 2
F Shaft Collar 1 1
G
H
A B C D
I
J
K
L
2-3/4-in. Screw w/Flat
Washer/Lock Washer/Nut
Universal Bracket
2-in. Bracket Bolt
1/4-in. Screw W/Flat
Washer/Lock Washer/Nut
Support Bracket
3/16-in. Screw W/Flat
Washer/Lock Washer/Nut
Plastic Handle
790-0006
2 2
1 1
2 2
2 2
1 1
2 2
1 1
Quantity
790-0007
The electric motor involved in the
rotisserie kit is UL and cUL
recognized component. The
certified number is E199757
E F G H
I J K L
Questions, problems, missing parts? Before returning to your retailer, call our customer service
department at 1-800-554-5799, 8 a.m. – 6 p.m., PST, Monday - Friday, 8 a.m. – 12 p.m. Saturday.
5

Electrical Requirements
If codes permit and a separate ground wire is used, it is recommended that a qualified electrician
determine that the ground path is adequate.
Check with a qualified electrician if you are not sure whether the grill is properly grounded.
A 120-volt, 60-Hz, AC-only, 15-amp, fused electrical supply is required.
It is recommended that a separate circuit servicing only this grill be provided.
■ To avoid electrical shock, do not immerse cord or plugs in water or other liquid.
■ Unplug from the outlet when not in use and before cleaning. Allow to cool before putting on or taking
off parts.
■ Do not operate any outdoor cooking gas appliance with a damaged cord, damaged plug, or after the
appliance malfunctions or has been damaged in any manner. Contact the manufacturer for repair.
■ Do not let the cord hang over the edge of a table or touch hot surfaces.
■ Do not use an outdoor cooking appliance for purposes other than intended.
■ When connecting, first connect plug to the outdoor cooking gas appliance then plug appliance into
the outlet.
■ Use only a Ground Fault Interrupter (GFI) protected circuit with this outdoor cooking gas appliance.
■ Do not remove the ground prong or use with an adapter of 2 prongs.
■ Use only extension cords with a 3 prong grounding plug rated for the power of the equipment and
approved for outdoor use with a W-A marking.
ROTISSERIE ASSEMBLY
Jenn-Air grills:
Estimated Assembly Time: Approximately 10 minutes
Required Tools: Phillips Screwdriver (not included)
1. To attach the universal bracket (G) to the motor bracket (B), align the
pre-drilled holes in both brackets and secure together using two 2-in.
bolts (H) as shown in Fig. 1.
2. Align the holes in the universal bracket (G) to the pre-drilled holes on
the left side of the grill. Attach the universal bracket using two 1/4-inch
screws with flat washer/lock washers/nut (I) as shown in Fig.2.
Note: The universal bracket may have to be adjusted once the
motor is attached and the spit rod is inserted.
3. Slide rotisserie motor (A) over motor bracket (B) as shown in Fig. 3.
Fig.1
Fig.2
Fig. 3
6
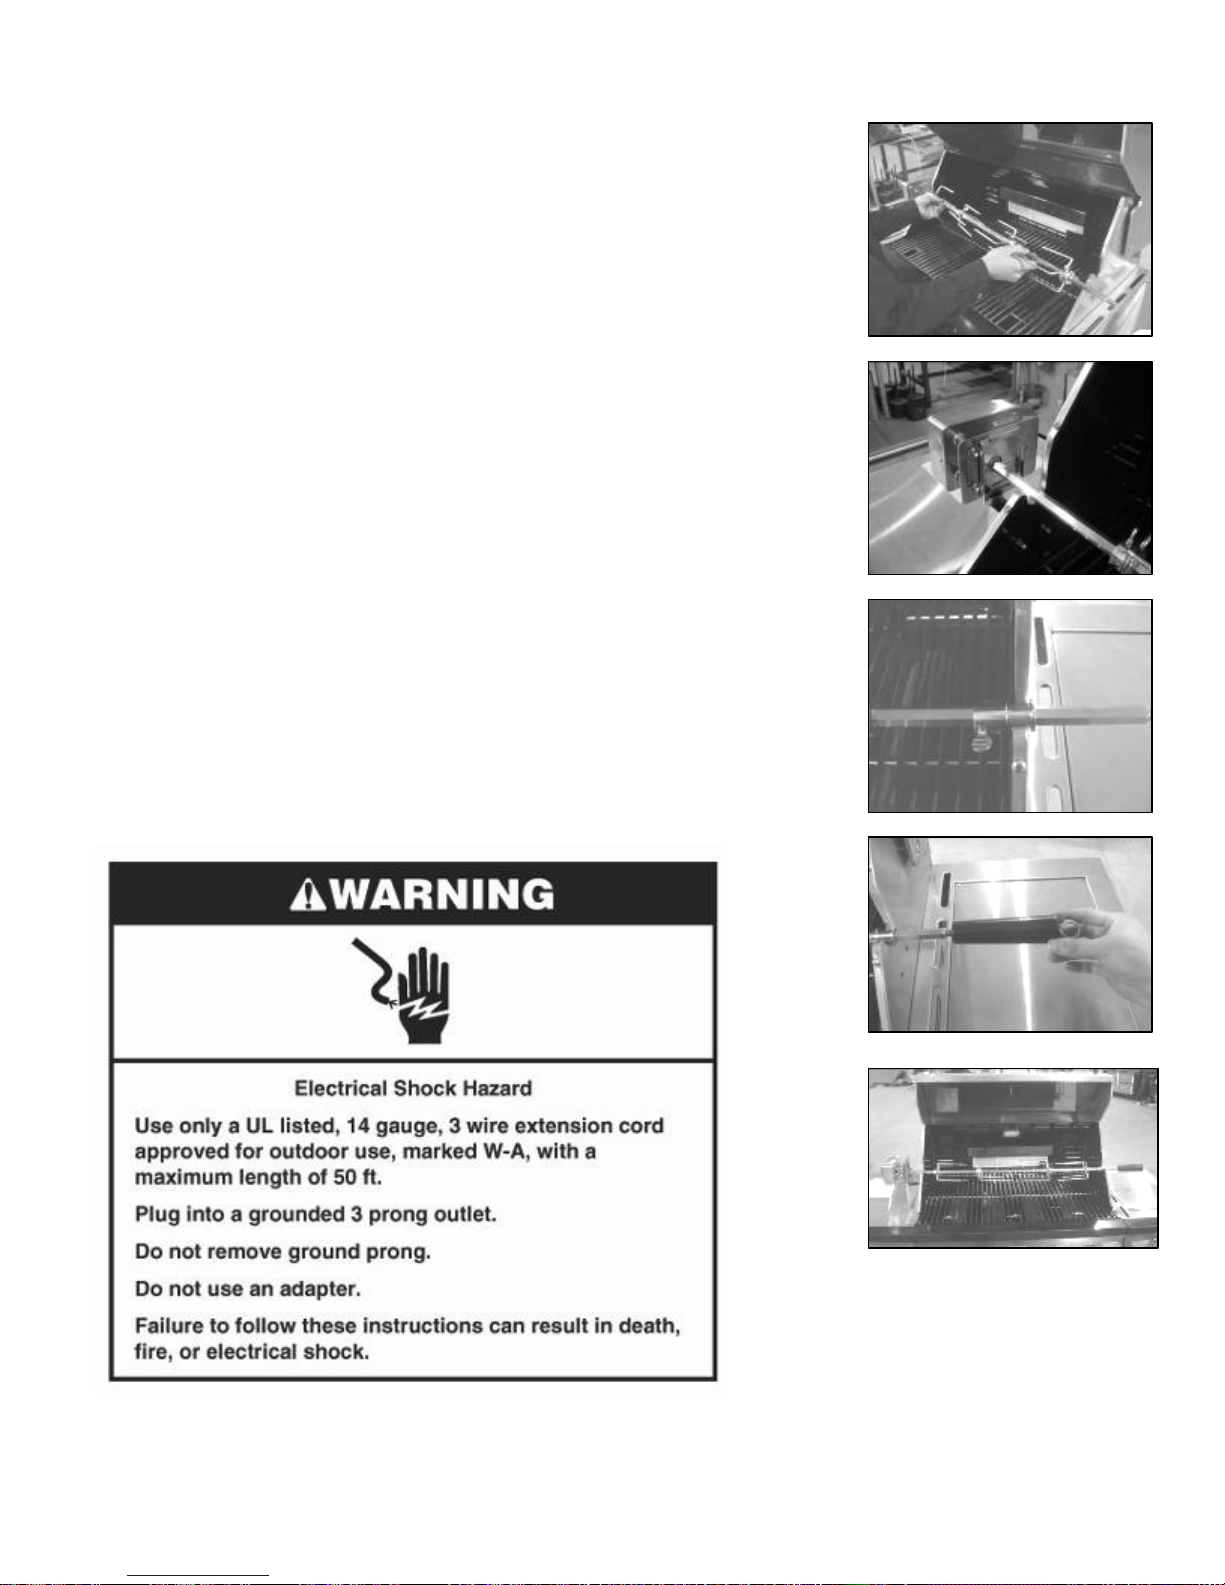
4. Place the meat forks (E) onto the spit rod (D) as shown in Fig. 4.
Note: The rotisserie forks are sharp.
5. Place the spit rod (D) into the motor (A), making sure the rod aligns with
the motor correctly as shown in Fig. 5.
6. Slide the shaft collar (F) onto the opposite end of the spit rod and place
into the slot on the right side of the grill. The thumbscrew for the shaft
should be inside the grill firebox as shown in Fig 6
7. Assembly instructions for the plastic handle (L) as shown in Fig. 7.
Fig. 4
Fig. 5
Fig. 6
Fig. 7
Fig. 8
8. Plug into a grounded 3 prong outlet.
7

9. Completed Assembly as shown in Fig. 8.
Non-Jenn-Air grills:
A: For Horizontal Firebox Mount Holes:
1. Align the holes in the support bracket (J) to the pre-drilled holes on
the right side of the grill. Attach the support bracket using two
3/16-in. screws with flat washers/lock washers/nuts (K) as shown
in Fig. A1.
2. Follow Jenn-Air Grills assembly instructions from step 1 to step 8 to
finish assembly.
Note: You need to place shaft collar (F) into the slot on the support
bracket (J) .
B: For Vertical Firebox Mount Holes:
1 Align the holes in the motor bracket (B) to the pre-drilled holes on the left side of the grill. Attach
the motor bracket using two 2-3/4 -in. screws with flat washer/lock washers/nuts (C) provided as
shown in Fig. B1.
2 Following JennAir Grill assembly instructions from step 2 to step 8 to finish assembly.
OPERATING INSTRUCTIONS
Fig. A1
Fig. B1
ROTISSERIE OPERATING INSTRUCTIONS
IMPORTANT: Your grill may be equipped with rotisserie burners. The instructions below
include operation for grill equipped with rotisserie burners and instructions for grill not
equipped with rotisserie burners. Be sure to follow the instructions appropriate for your grill.
Use of the rotisserie (also see grill instruction manual)
After installing the spit rod, slide one of the meat forks onto the rod (prongs toward the meat.) Center
the product to be cooked on the rod, then push the meat forks firmly together. Tighten the wing nuts.
It may also be necessary to wrap the food with butcher’s string to secure loose portions. Never use
nylon or plastic string.
Once the food is secure, insert the pointed end of the rotisserie rod into the motor assembly and rest
the shaft collar at the other end in the slot on the right-hand side of the grill. Turn the power switch to
the “ON” position to start the rotisserie motor. Remove rotisserie when not in use.
ROTISSERIE USE WITH ROTISSERIE BURNER
When the rotisserie is mounted and in operation, only the rotisserie burner should be used for cooking.
The main burners on the grill should be in the “OFF” position when the rotisserie burner is in use.
IMPORTANT: To keep the rotisserie handle from becoming hot, do not use the side burner when the rotisserie is
in use.
1. Check for clearances with the cooking grids before lighting the grill as the cooking grids will
become hot. If the meat touches the cooking grids during any part of rotation, the cooking grids
8

must be removed. NOTE: If cooking grids are removed, make sure food is not touching the
burner(s).
2. Place a shallow drip pan underneath the food to catch drippings and make cleanup easier.
3. Turn the power switch to the “ON” position to start the rotisserie motor. To begin, have rotisserie
burner on the lowest setting.
4. Check the speed of the rotisserie rod. If the rod does not turn at a constant speed, reposition the
food on the forks to avoid lopsided rotation of the rotisserie motor. An unbalanced rotisserie rod
will damage the motor.
5. Check food frequently and adjust burner temperature based on observations. This will require
some experimentation as each grill differs with heating and cooking characteristics.
ROTISSERIE USE WITHOUT ROTISSERIE BURNER
1. Do not use burners located directly below the food on the spit rod as the use of these burners
could cause flare ups and burn the food.
2. Check the food frequently and adjust the temperature based on observations. This will require
some experimentation as each grill differs with heating and cooking characteristics.
CARE & MAINTENANCE
1. The meat forks and spit rod should be washed in warm soapy water after each use. Do not
immerse the motor, cord or plug in water.
2. Store the rotisserie kit indoors when not in use; out of the reach of children.
TROUBLESHOOTING
PROBLEMS WHAT TO DO
Parts are missing or the motor Call customer service at 1-800-554-5799
won’t work.
The spit rod flexes when it’s turning. It is normal for the spit rod to flex when larger
cuts of meat are being cooked.
The rod is not rotating at a constant Reposition the meat on the rod to adjust the
speed. weight distribution.
LIMITED WARRANTY (Model # 790-0007 / 790-0006)
Nexgrill warrants to the original consumer-purchaser
0006) shall be free from defects in workmanship and materials after correct assembly and under
normal and reasonable home use for the periods indicated below beginning on the date of purchase.
The manufacturer reserves the right to require photographic evidence of damage, or that defective
parts be returned, postage and or freight pre-paid by the consumer, for review and examination.
ALL PARTS: 1 Year LIMITED warranty
*Does not cover chipping, scratching, cracking surface corrosion, or rust.
Upon consumer supplying proof of purchase as provided herein, Manufacturer will repair or replace
the parts which are proven defective during the applicable warranty period. Parts required to complete
only that this product (Model #790-0007/790-
9
 Loading...