


Wi-Fi DOSING PUMP 3.4
USER’S MANUAL
WARNING
● Only for indoor use. Position to avoid moisture ingress and
splashing. Water damage will void warranty.
● Do not use with corrosive liquids or liquids that will easily
crystallize.
● Before use, please must make full of the inlet & outlet hose
with liquid via manual mode, and calibrate the flow rate of each
pump. To ensure the precision on the work process.
● Do not disassemble the product, in case of the damage if not
professional or not instruct by professional.
:

Ⅰ
Model
Voltage
(V)
Flow
(ml/min)
Length
(m)
Watts
(W)
DOSER 3.4
12501.5
6
.Introduction
Jebao Wi-Fi dosing pump is a modern product which
enables to add different kinds of nutrition liquids in
certain time and portion automatically. Before operating
correctly , please read the manual carefully.
Pump Features
●
Wi-Fi +Manual Control Function
●
Automatic dosing in high precision
●
Mini Size, Elegant appearance
●
Automatic/handle to control the dosing liquid
:
Product Specification
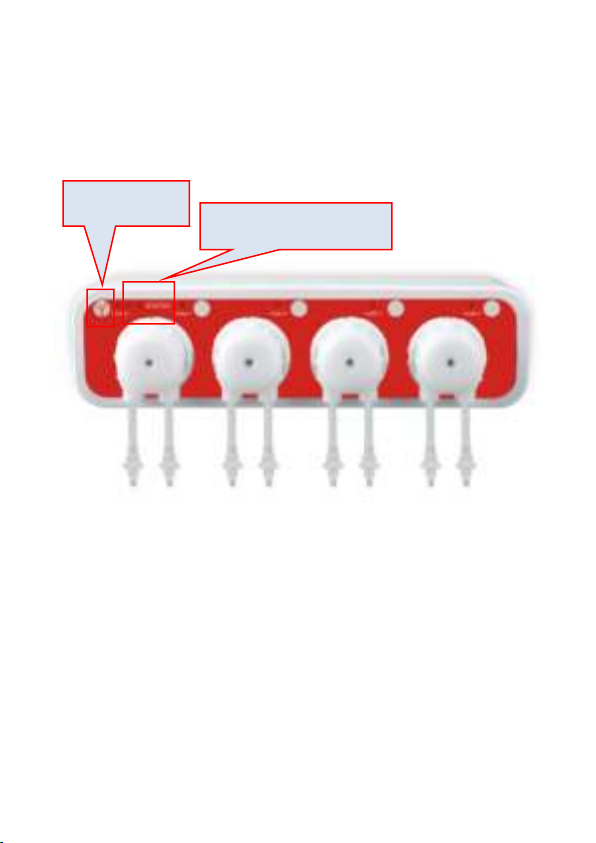
Ⅱ.Wi-Fi Control Operations
Wi-Fi button
Wi-Fi indication light
1. Wi-Fi Indication Light and Wi-Fi Button Instruction
●Wi-Fi Indication Light
A. Wi-Fi indication light is flashing in green and red while the
Pump is on Wi-Fi configuration mode.
B. Wi-Fi indication light is flashing in green while the Pump is ever
connected to Wi-Fi but not connected to the router yet.
C. Wi-Fi indication light is green when the Pump is connected to

the cloud server.
D. Wi-Fi indication light is red when the Pump is connected to the
router but not connected to the cloud server.
E. Wi-Fi indication light is flashing in red when Wi-Fi is reset.
●Wi-Fi Button Instruction
A. Press Wi-Fi button for about 5 seconds and the Wi-Fi indication
light starts flashing in green and red. The Pump is into connection
mode.
B. Press Wi-Fi button for about 10 seconds and the Wi-Fi
indication light starts flashing in red. The Wi-Fi is reset.
C. The Wi-Fi indication light is green when connection is
successful.
NOTE: For initial use, the Wi-Fi should be reset. To reset, press
Wi-Fi button for about 10 seconds and the Wi-Fi indication light
starts flashing in red.
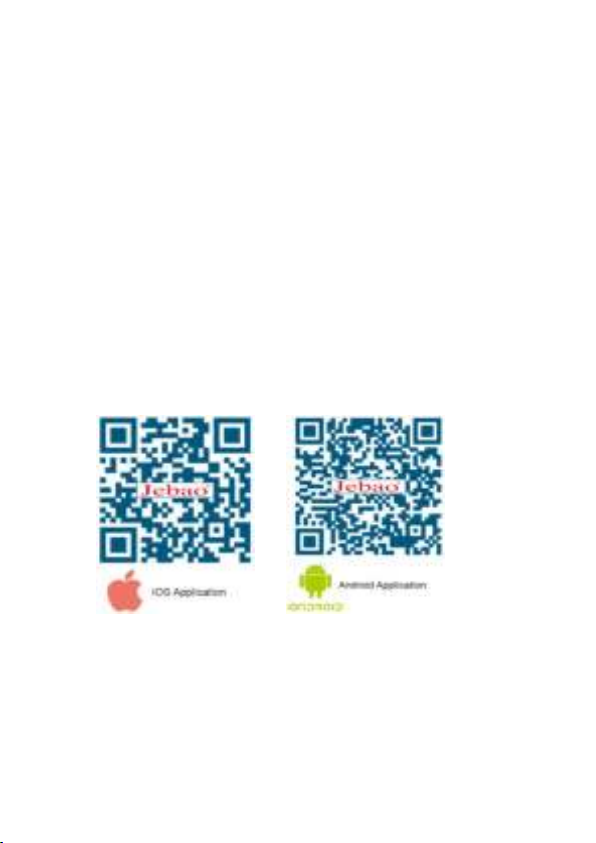
2.APP Download and Instruction
2.1 Download
The APP, Jebao Aqua, is available in App Store for Apple users
and Google Play for Android system users. User can search Jebao
Aqua in either App Store or Google Play to download the
application. Alternately user may scan the barcode on the package
or user’s manual to download the application. (Note: Scan
function in certain countries or area may not be able to read the
barcode properly.)
2.2、User registration, login and password reset
2.2.1 Email registration

①
Switch registration method
Open Jebao Aqua App and tap "Register".
②
Switch to email registration, fill in the information, and tap
"Register", go back, enter your account number and password to
log in.
2.2.2 Reset Password
Tap "Forget Password" on the login page. On the Forget Password
page,select "Reset by email",enter email address,tap Next,
then enter your mailbox, sign in to the App after resetting your
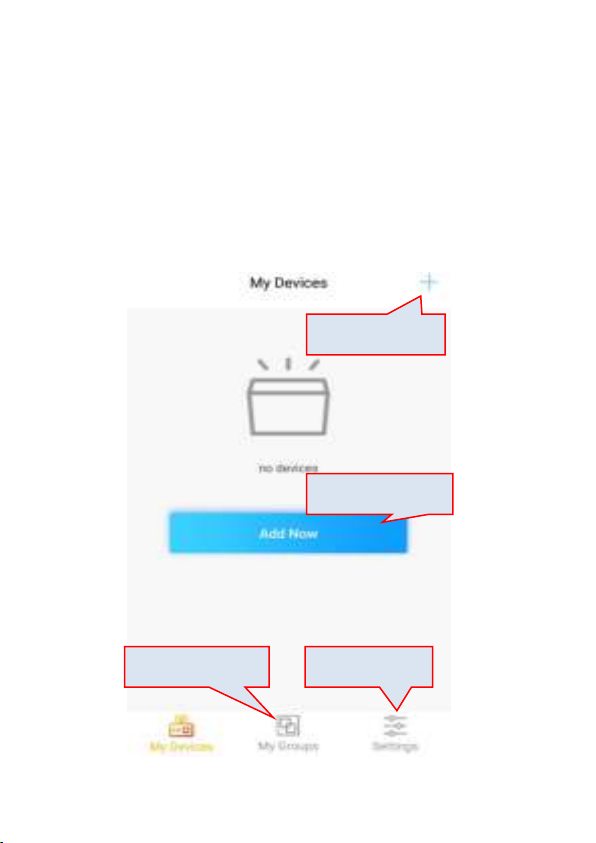
Go to My Groups.
Go to Settings.
Add new devices.
Add new devices.
password.
2.3 App Instructions
2.3.1. Main page
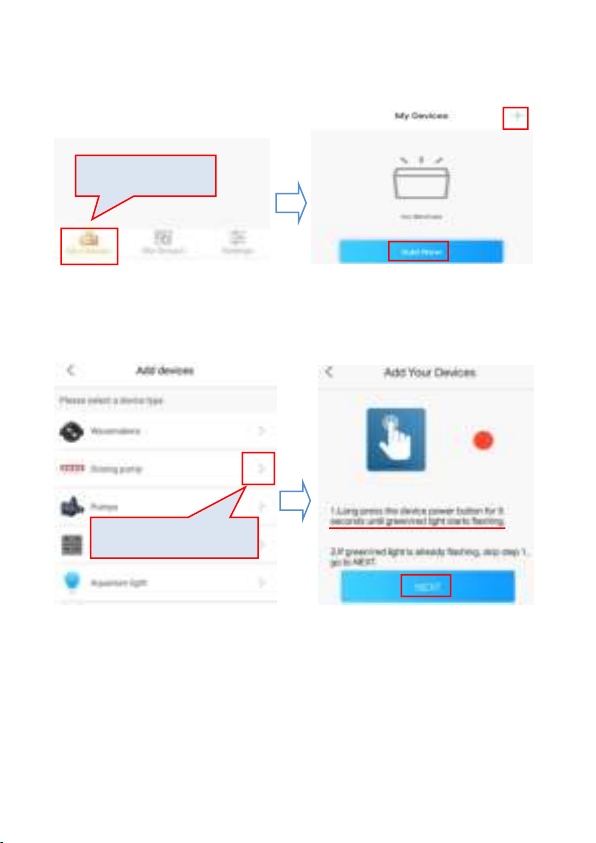
2.3.2 Add new pump
Tap My Devices.
Choose Dosing Pump
Tap “Add Now” or the” +” sign on the upper right-hand side to add
your devices.
Before connecting your pump to Wi-Fi, please make sure your
pump is on connection status – the Wi-Fi Indication Light is
flashing in green and red. Press the Wi-Fi button for 10 seconds
to reset the Wi-Fi. All previous network information will be
deleted.

Choose the network you want to connect to and enter the correct
Enter Wi-Fi password
Connecting to network
Choose the pump you want to add.
password. Make sure you enter the password correct. Otherwise
you need to start over again.
Select the device you want to add and tap Confirm to Add.
Note:
1. Press the Wi-Fi button for 10 seconds for resetting.

2. It’s recommended that you have the pump, mobile device and
Press for 2 seconds
Power button
Press and hold the
channel icon to the
setting page
router in close proximity when connecting the pump to Wi-Fi.
3. After connection completion, the Wi-Fi indication light is green.
2.3.3 Pump Control
After adding the pump successfully, press the icon of the pump for
2 seconds to the pump control page.
Manual Mode:
Press and hold the channel icon to the setting page.

Tap the channel power button, then the channel current status is
Channel power button
on and the channel is working. Tap the channel power button
again, then the channel current status will change to be off and
the channel will stop working.
When the channel is in the manual mode and back to the pump
control page, the manual icon is lit next to the channel.
Other channels manual mode settings are the same.

Liquid Flow Rate Calibration:
Manual Mode icon is lit
Tap the top right corner of the pump control page.
And tap the “Liquid flow rate calibration” to the setting page.

Enter the liquid volume, and select the calibration channel.
Tap
Tap
Enter the liquid volume
Select channel

NOTE: For increasing the dosing precision, please refer to the
Tap to start
actual dosing liquid volume for calibration. The calibration liquid
volumes can be set to 10,20,30,40,50,60,70,80,90,100 (ml), and
the calibration duration will be stored in the memory. The closer
the calibration volume is to the actual dosing liquid volume, the
more accurate the actual dosing liquid volume will be.
For example: If user want the pump automatically dose about
10~30ml of the liquid, the calibration liquid volume can be
entered 20 (ml), and the channel is selected to 1. This calibration
duration will be automatically stored in the memory.
Calibration Method: Make sure the pump tubing is primed with
the liquid first by manual mode. Using a measuring cylinder (20ml
or larger), put the channel 1 outlet hose into the cylinder, and put
the channel 1 inlet hose into the liquid. Tap the “Start calibration”
switch to be on, then the channel 1 calibration starts.

When the cylinder liquid is 20ml, tap the “Start calibration” switch
Tap to stop
to be off, then the channel 1 calibration stops.
The calibration duration is shown. And the channel 1 calibration
completes.
Other channel calibration is the same.
NOTE: Please keep the pump on the horizontal plane either during
calibration or use, for increasing the precision.
Timer Mode:
Press and hold the channel icon to the channel setting page. Tap
the Timer setting “>” icon to the Timer setting page.

Set the Interval time. The Interval time can be chosen from 0 to 30
Press and hold the
channel icon to the
setting page
Set Timer Mode
days. 0 means no interval. Tap Save to save.
NOTE: When the device power is off, the interval time information
will not be got. After the device power restarts, the pump will
recount the interval time.

Set the Recharge and the Recharge time. Tap Save to save.
Set Interval time
Save
Maximum 24 Recharge time can be set.
NOTE: When the recharge is set to 0 at some recharge time, this
recharge is invalid. The pump will not work even the recharge time
is come.

Set Recharge and
Recharge time
Save
Tap to back

Back to the channel setting page. Tap the “Start Timer” switch to
be on. The channel 1 Timer setting completes.
Back to the pump control page, and the timer icon is lit next to the
channel.

Other channels timer mode settings are the same.
Timer Mode icon is lit
2.3.4 Rename and Delete
User can rename the pump for easy device management. User can
also remove the pump from APP. To add the pump back, user need
to reconnect it to Wi-Fi network.
Reset the Wi-Fi module of your pump if necessary.

2.3.5 Error Report
Tap
Rename Delete Device

When the pump functions abnormal, open the APP the error box
APP display
explain
Wi-Fi module with
motherboard
communication failure
Wi-Fi module is bad contact to
mainboard. The communication part
is damaged.
Manual dosing button
and dosing indication light
will pop up and display in the error list.
Ⅲ. Manual Control Operation

When the Wi-Fi connection is abnormal, user can
DISPOSAL:
Do not dispose this product as unsorted municipal
waste. Collection of such waste separately for
manually control the liquid dosing.
When the manual dosing button is pressed, the dosing
indication light will be on and the pump body
corresponding to the button will start working. When
the manual dosing button is pressed again, the dosing
indication light will be off and the pump body will stop
working.
special treatment is necessary. This product must not be disposed
together with the domestic waste. This product has to be
disposed at an authorized place for recycling of electrical and
electronic appliances. By collecting and recycling waste, you help
save natural resources, and make sure the product is disposed in
an environmental friendly and healthy way.

Jebao Co., Ltd.
Add:Tongmao Industrial Park, Dongsheng, Zhongshan, Guangdong, China
Tel:+86-760-28136708, 28136720
E-mail:
info@jebao.com Website: http://www.jebao.com
 Loading...