

DC Pump
OWNER’S MANUAL
DCP-2500,DCP-3000,DCP-4000,DCP-5000,DCP-6500, DCP-8000,
DCP-10000, DCP-15000,DCP-18000,DCP-20000
Introduction
The DCP pumps are carefully inspected and tested to ensure both safety and operating
performance. However, failure to follow the instructions and warnings in this manual
may result in the pump’s damage and/or serious injury. Be sure to read and save this
manual for future reference.
Pump Features
● High performance with innovative motor and energy saving up to 65%
● super quiet operation.
● IC electronic detection, automatic power-off protection if no water.
● No-copper element.
● Suitable for both marine and fresh water
● Rust free. With anti-resistant ceramic shaft, Longer operation file.
Controller Features
● Adjustable flow rate.
● “Feed” Mode – pauses pump for 10 minutes and then restarts
● Memory function – after power off ensures that the pump retains parameter
settings.
Control and Panel Function
1. LED display and controller key Instructions
The LED display indicates the power/speed setting/fault codes - the key panel is touch
controlled.
2. Operating instructions
The pump must be connected with the controller and the 24V or 36V power adaptor
correctly before use.
Lock / unlock function:
Press the "+" or "-" button for three seconds until the LED light flashes twice, the
controller is locked; Similarly, press the "+" or "-" button for three seconds until the
LED indicator light flashes twice, the controller is unlocked
Feed Function:
When the pump is running, press "II" button, pump stops working, the "10min"
indicator lights up. The pump re starts automatically at previous settings after 10
minutes. Or you can press the “II” button at any time to make the pump re start.
Normal Operation:
After connecting the pump, the controller is set as per the last setting (memory
function). Touch the “II” button and the pump will stop working, and Feed indicates in
LED. Touch “II” button again, and the pump will resume working. Normal operating
mode is with PXXX shown on LED (P is short for power). There are 71 settings for
speed. When touching up/down buttons, the LED will indicate the current speed setting
(FXX). You can set speed ranging from 30% to 100% in 1% increments. After more
than 1 second with no press of the +/- button, the display will revert to Watts display
(PXXX).
Power save mode
Turn on the power - after more than 25 seconds with no touch to the control buttons,
the LED brightness will reduce; the led returns to normal brightness when any button is
pressed.
Dry Running Automatic shut off:
If pump runs dry for 2 minutes, the pump will automatically shut off.
To restart, disconnect the power and re connect power.
3. Error code and description
The LED will display a flashing error code when a fault is detected. Error code
explanation is as below:
Er01: Abnormal Working current - Check if the pump power adapter is functioning
correctly or broken.
Er02: Controller overheating - Check if the controller exposed to the direct sunshine or
is in a high temperature environment.
Er03: Pump idling – Check if the pump is working dry.
Er04: Impeller stops running - Check if the impellor is dirty or jammed.
Er05: Abnormal Working voltage. Check the input supply voltage.
●Note: for indoor use, the power socket must be installed with the leakage current
protecting device, and the leakage current shall not exceed 30mA.
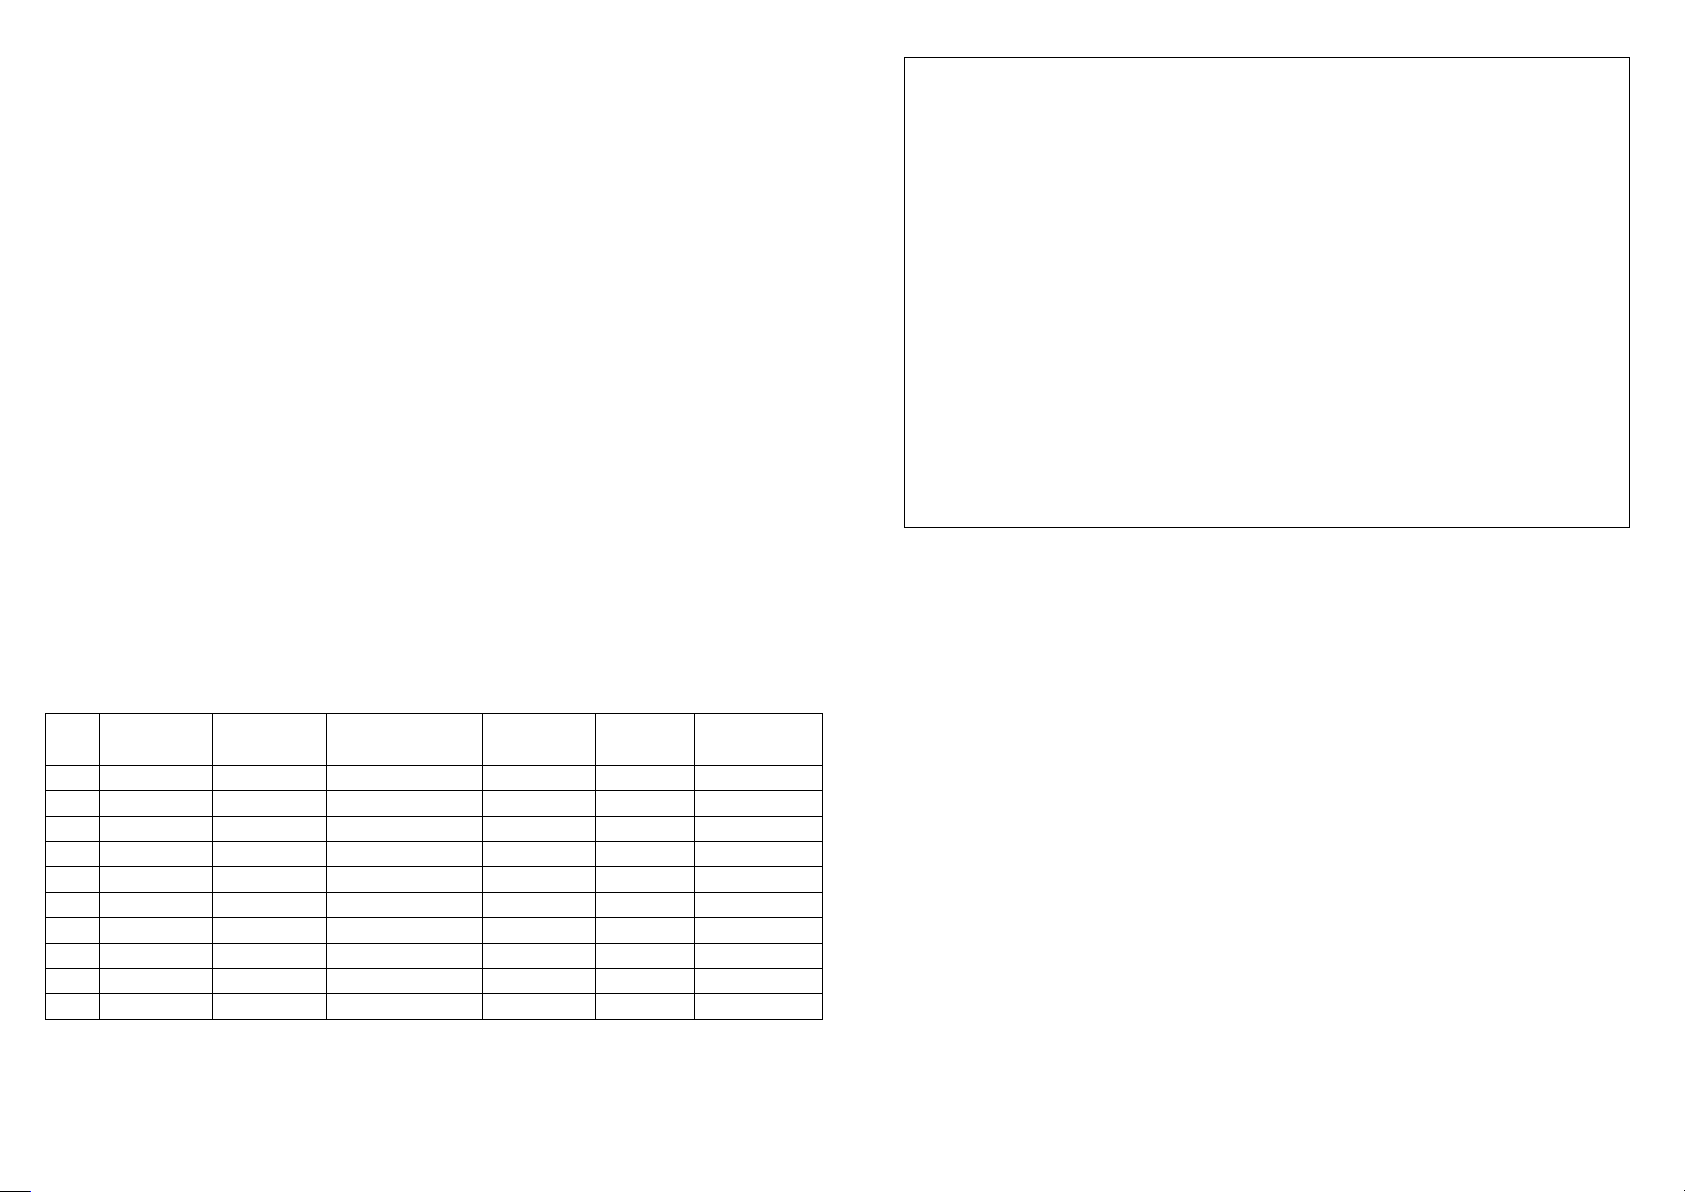
Performance Parameters Table
No:
Model No:
Voltage
Control box (W)
Consumption
(W)
Flow rate
(L/H)
Head Max (M)
1
DCP-2500
DC 24V
DCP-2500
23
2500
2.5
2
DCP-3000
DC 24V
DCP-3000
25
3000
3.0
3
DCP-4000
DC 24V
DCP-4000
32
4000
4.0
4
DCP-5000
DC 24V
DCP-5000
40
5000
4.0
5
DCP-6500
DC 24V
DCP-6500
55
6500
4.5
6
DCP-8000
DC 24V
DCP-8000
65
8000
5.2
7
DCP-10000
DC 24V
DCP-10000
80
10000
6.0
8
DCP-15000
DC 24V
DCP-15000
105
15500
7.0
9
DCP-18000
DC 36V
DCP-18000
130
18000
9
10
DCP-20000
DC 36V
DCP-20000
165
20000
9.5
WARNING
Do not connect to any power supply over the rated voltage
Do not immerse the pump in the flammable liquid.
Do not use the pump in the water temperature above 35℃.
Maximum water depth 1.5M
Maximum head - please see the parameter table.
Do not immerse the plug/connectors into water or any other liquid.
This appliance is not allowed to use by persons (including children) with
reduced physical, sensory or mental capabilities, or lack of experience and
knowledge, unless they have been given supervision or instruction concerning
use of the appliance by a person responsible for their safety.
Children should be supervised to ensure that they do not play with the
appliance.
This appliance can be used by children aged from 8 years and above and
persons with reduced physical, sensory or mental capabilities or lack of
experience and knowledge if they have been given supervision or instruction
concerning use of the appliance in a safe way and understand the hazards
involved.
CAUTION
Always disconnect the pump from the power supply before cleaning, maintenance and
handling.
Do not let the pump work dry.
Do not lift the pump by holding the power cord only
Do not use the pump in heated liquid.
The pump is suitable for both fresh water and sea water
The pump can used submersed or externally (non-submersed) – the pump housing must
be primed with water.
The pump is not suitable for use in swimming pools.
General
A clogged or dirty intake screen will reduce the pump performance.
If the pump is used on a dirty surface, raise it slightly to reduce the amount of debris
contacting the intake.
Do not let the pump run dry. Place pump into water before powering on. Initially the
pump may not work due to air in the pipe work If this is the case, please power off and
on several times and this will help prime the pump.

Used as submersible pumps (Figure 1)
IMPORTANT: Do not let the pump run dry – this could cause
damage to the motor.
Submerse the pumps completely in your aquarium so as to make the pump body
fill with water.
A water level of approx. 15 cm (6.5 in.) is required for submersible use in order to
prevent the pump from taking in air.
To prevent the filter becoming prematurely clogged, place the aquarium pump
above any detritus in the aquarium!
Install the enclosed intake screen to prevent the inlet from becoming clogged.
Used as non-submersible pumps (Figure 2)
Position the pump lower than the water surface on the side of the pond so that the
water can be drained to the pump because it is not self-priming.
Remove the filter cover and connect suction hose (A: inlet) and pressure hose (B:
outlet) from the pump. The connection should be waterproof.
Fill the suction hose and pump with water before turning it on.
To prevent the pump from becoming clogged, provide the suction hose with an
adequate suction filter.
Never let the pump run dry.
Installation diagram (Figure 3)
Figure 1 Figure 2
min.2m/6.0feet
15CM
place indoor
Adaptor
DCP Pump Controller
Figure 3
MAINTENANCE
To clean the pump, remove the back cover, sealing cover and the impeller.
Use a small brush or stream of water to remove any debris.
If the pump does not work, check as following:
Check the circuit. Please try to plug on another power socket, to ensure the pump
switched on with power. Note, please do not plug on before operation.
Check the pump impellor and outlet – they may be clogged/dirty.
Check the inlet to ensure not clogged by debris.
Remove the pump inlet to access the impeller. Turn around the rotor to check if
broken or jammed.
Monthly maintenance will prolong your pump’s life. Clean the impellor, remove
the dirt. etc
NOTE: Ensure the electrical cord loops below the power socket like a “Drip
Loop”. It will prevent the water from running around the cable into the power
socket
DISPOSAL:
Do not dispose this product as unsorted municipal waste. Collection
of such waste separately for special treatment is necessary. This
product must not be disposed together with the domestic waste. This
product has to be disposed at an authorized place for recycling of electrical and
electronic appliances. By collecting and recycling waste, you help save natural
resources, and make sure the product is disposed in an environmental friendly and
healthy way.
Jebao Co.,Ltd
Tongmao Industrical Park, Dongsheng Town, Zhongshan, Guangdong. China.
Email: info@jebao.com Website: www.jebao.com
Tel: +86-760-28136717/19/20 Fax: +86-760-28136725
Outlet
Screw Nut
Controller
Adaptor
Holder
Rubber
Pump Body
Pump Cover
Rotor
O-Ring
O-Ring
Inlet
WATTS
DCP-200W
Pump Controller
A
B
 Loading...