

company
IP65 PIR LED Floodlights
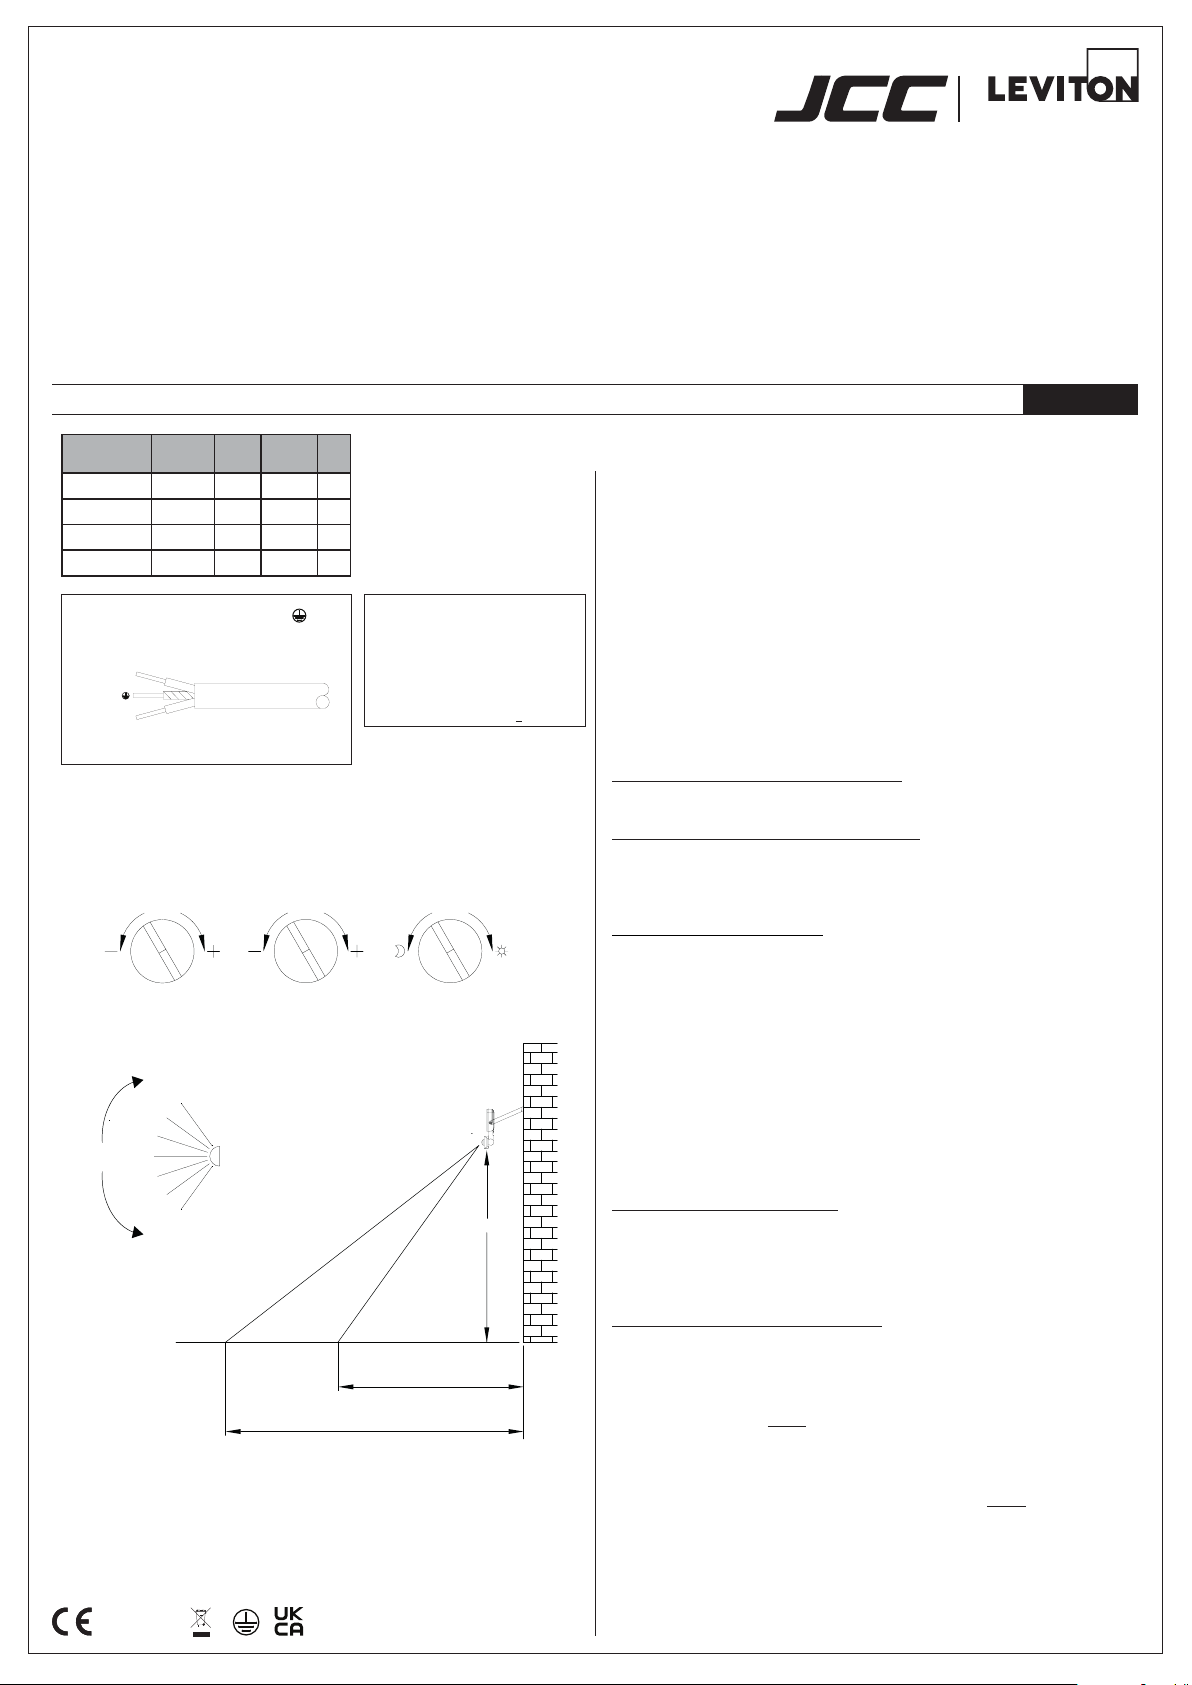
Live (+)
blue
SENS
LUX
TIME
4m to 10m5 lux to 2000 lux
120°
R
Installation guide for LED Floodlights
Warnings & Cautions
a
• To avoid electric shock, serious injury or property damage,
isolate power before installing, removing or servicing the product.
• It is recommended that luminaires are installed by a qualied
electrician to ensure the installation complies with the local
current wiring regulations.
• Any broken or damaged parts should be replaced as soon as possible.
• JCC will not accept responsibility for claims arising from
sub-standard installations; which will void the warranty.
• These products are designed for connection to a 220-240V~ 50/60Hz.
• The light source of this luminaire is not replaceable: When the light source reaches
• It may be necessary to upgrade your MCBs to allow for increased inrush current.
• Terminal block not included. Installation may require advice from a qualied person.
• Do not install in areas that are exposed to continual running water or prone
• Ensure that the mounting surface is both at and stable.
• Never remove the lens cover as this will damage the sensor & render all
INSTALLATION
Total circuit
wattage
10W 1000 100 4000K 70
20W 2100 105 4000K 70
30W 2800 93 4000K 70
50W 4500 90 4000K 70
220-240V 50/60Hz / Class I
Figure 1. Mains input
yellow/green
Wiring colours are for reference only
Terminal block must comply to EN 60998-2-1 or EN 60998-2-2
• Read instructions and check that you have all of the tools and
accessories required to complete the installation correctly. Isolate
power supply before starting the installation.
Lumens LpcW Colour
brown
Earth
Neutral (-)
temp.
Ra
Beam angle: 110°
Available nishes:
10W/20W/30W Black and
White, 50W Black only
PIR Specication
Time Delay:
Ambient Light:
Detection Distance*:
Detection Range:
Installation Height:
Standby Power Consumption:
*Detection distance will vary,
depending on installation height
3s to 8 mins
5lux-2000lux
4-10m
120°
2.5m
<0.5W
the end of it’s life, the whole of the luminaire must be replaced.
to ooding.
warranties invalid.
ENGLISH
Installation procedure
1. Prepare the mains input cable for termination. Note that this
product is class I and as such must be tted with an earth connection.
2. Drill mounting holes and insert suitable wall plugs.
3. Rotate tting to access screw mounting points on the bracket and secure
using suitable xings.
4. Terminate input wiring to the tting as per Fig. 1 to the left using a
suitable IP rated connector.
5. Check seals, gaskets and the cable gland integrity before testing
the luminaire.
6. Turn on power supply and test for correct operation.
The oodlight will light up for 5 seconds, then turn off. It is now in automatic
PIR detection mode.
Note: The PIR has a manual override function.
To operate the manual override function:
Turn the power OFF/ON/OFF/ON within 3 seconds.
To return to Automatic PIR detection mode:
Turn off power for 5 seconds, then turn power ON.
If the power is off for longer than 15 seconds the oodlight will light up for 5
seconds before activating automatic PIR detection mode.
Fig. 4
3s to 8mins
Fig. 2Fig. 3
PI
2.5 Metres
4 Metres
10 Metres
General Maintenance
JCC recommends that all exterior products, especially those with stainless steel
components are cleaned with warm water and dried with a chamois leather or
absorbent dry cloth. Weathering, environmental pollution and bird droppings should be
cleaned off with a non-abrasive cleaner suitable for the material type. To preserve the
nish of the product, clean every two to three months. After installation is complete,
then bi-annually, grease or lubricate removable xings, to help ensure maintenance is
trouble free.
RoHS
Compliant
IP65 jcc.co.uk V7_May_2022_RS
Positioning The Unit (Fig. 2)
When selecting the mounting position take into account the following points:
1. The sensor is designed for optimum performance when mounted 2.5
meters above ground level.
2. Avoid positioning close to trees or shrubs; which may cause false
triggering during windy weather.
3. Avoid pointing at or positioning close to heat sources such as u’s of heat
extraction units; which may cause false triggering.
4. Avoid positioning too close to bright lights, the unit will not function when
setting LUX level to dark.
5. The sensor is most sensitive to movement across the detection area as
opposed to directly towards or away from the unit.
The Field of Detection (Fig. 3)
The eld of detection can be adjusted by rotating the PIR both horizontally
and vertically to avoid any false detections from neighbouring grounds
or streets.
Operation Mode & Adjusting (Fig. 4)
1. ADJUSTING THE LUX CONTROL LEVEL: The LUX control module has a built
in sensing device (photocell) that detects daylight and darkness by rotating
the LUX knob clockwise or anti clockwise/light to dark, you can set unit to
the desired LUX level. Note: Wait for 5 - 10 seconds for the stability of the
photocell (CDS) when adjusting the LUX level.
2. ADJUSTING THE DURATION TIME: The length of time sensor remains on
after activation can be adjusted from (3seconds to 8minutes). Rotate the
TIME knob to increase or decrease the duration time. Note: Once the load
has been triggered by the PIR detector any subsequent detection will restart
the time period.
3. ADJUSTING THE DISTANCE: Rotate the SENS knob to increase of decrease
the distance of which movement will be picked up, from 4-10 metres.
Important warranty information
This product is supported by a 2-year standard warranty which will extend to 3 years if registered within the first year of purc
Please register at jcc.co.uk/warranty - Terms and conditions apply.
The installer will be asked to provide the following information, which is detailed on a label attached to the luminaire’s chas
Product Code/Date Code.
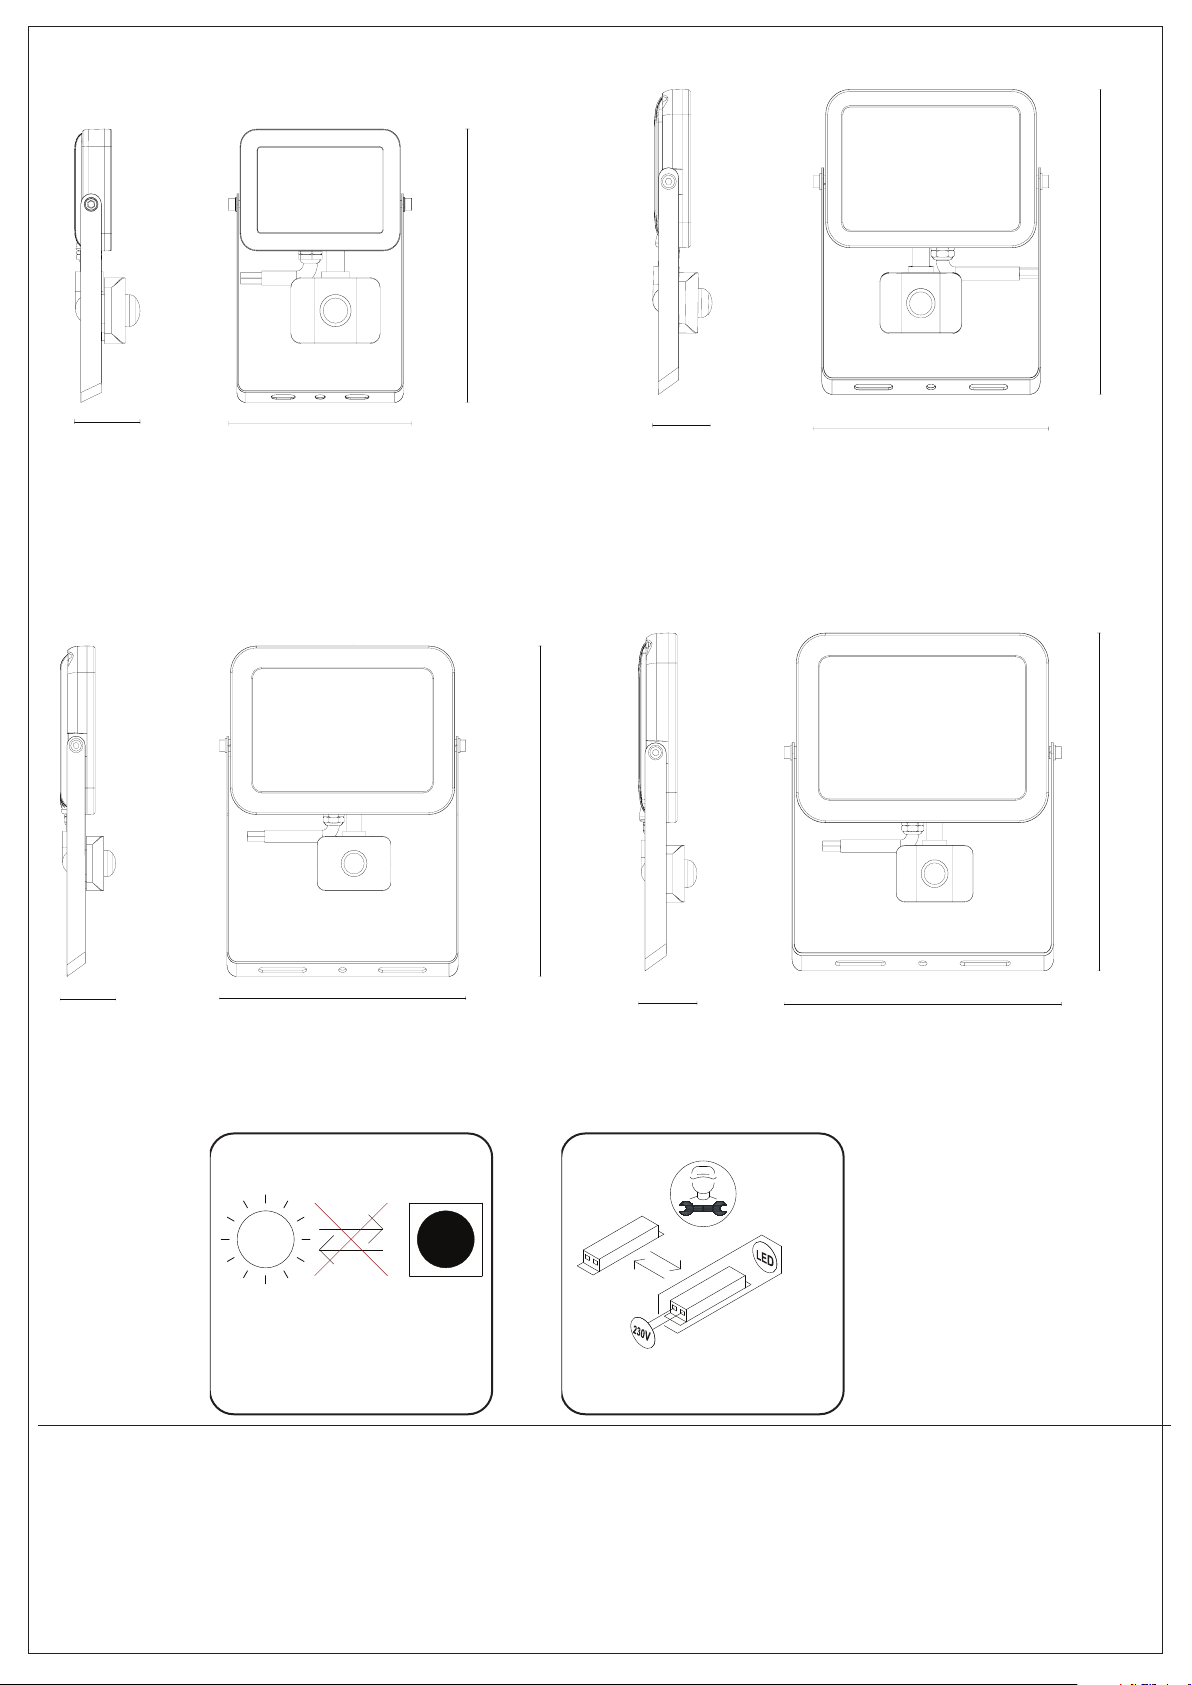
Prole & Dimensions
131.4
190.8
46
216
278.9
47
186
234
46
231.5
277
47
ISO9001 - 2015 - Registered Firm Certificate No. GB 1552
10W 20W
30W 50W
LED
LED
All dimensions in millimetres
Non-replaceable light source
Replaceable control gear
by a professional
JCC Lighting Products Ltd. Lux Park, Chichester Business Park, City Fields Way, Tangmere, Chichester, West Sussex, PO20 2FT
Technical Support: +44(0)1243 838986 Customer Services: +44(0)1243 838999
hase.
sis:
 Loading...