

JB5TRBLSR
5 SHELF UNIT
ASSEMBLY INSTRUCTIONS
1/4
2/4
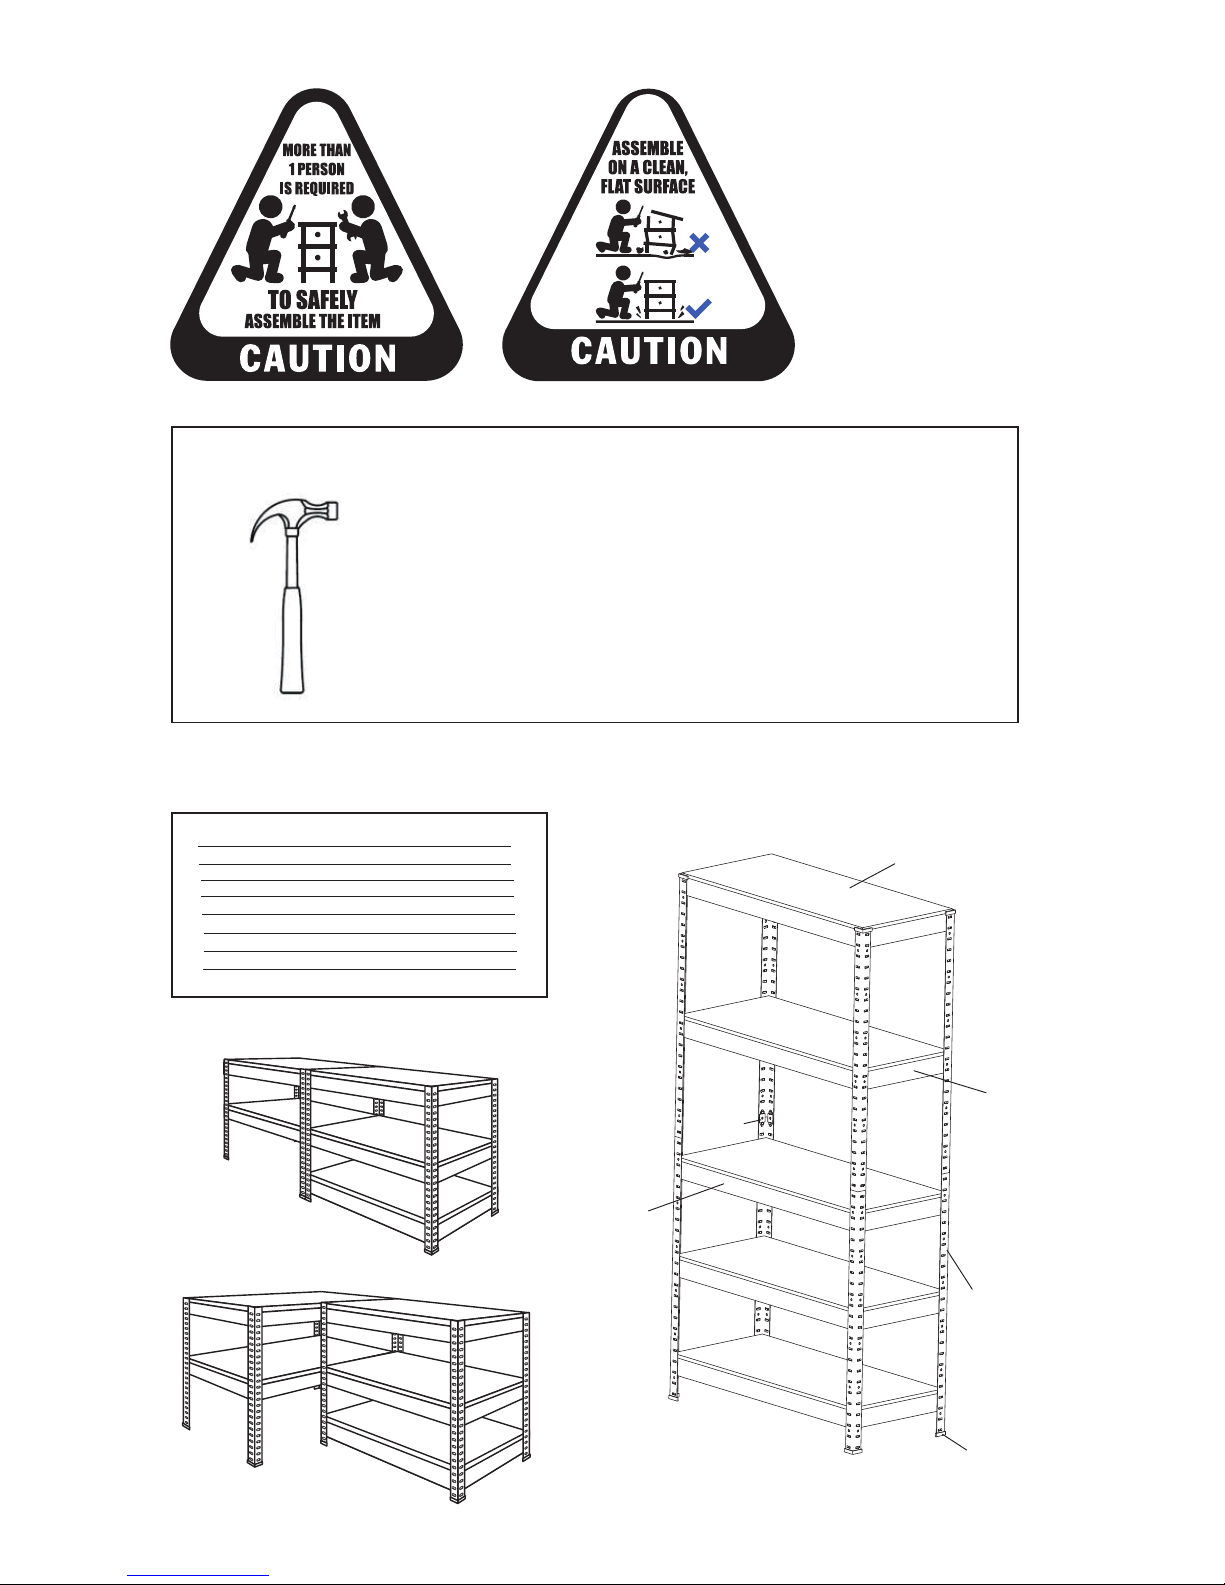
Tools Required
Hardware List
PARTS INVENTORY CHECKLIST
5 Shelf
A MDF shelves 5
B Short Shelf Supports 8
C Long Shelf Supports 8
D Leg Angle Sections 8
E Leg Angle Joiners 8
F Plastic Floor Protectors 8
G Nuts and Bolts 4
D
F
B
C
A
E
Alternative assembly configurations:

4
For assembly as a 5 shelf unit,
use the leg joiners in each leg
angle as illustrated if none of
your shelves are positioned at
this point. Refer to Step 3. for
putting a shelf at this point.
5
Fit the MDF shelves onto the shelf
supports after full assembly.
The corners of the shelves will fit into
the corners of the leg angles.
34
1
2
Fit another 2 short shelf supports
at the desired height then fit the 2
long shelf suppor ts to match the
short shelf suppor ts.
Decide on the position you require the bottom shelf to be.
Fit 1 shor t shelf support between the 2 leg angles.
Repeat this again making sure that the same shor t shelf support
is at the same height.
Now fit the 2 long shelf supports matching the
2 short shelf supports.
Always hammer gently, being sure the shelf
support tabs are in line with the leg angle slots.
If the tabs are out of line, simply bend
them to line up either way to suit.
Do not use force and damage the tabs.
When hammering the shelf supports, do not
hit the upturned flange, always hammer the
leg sur face closest to the angle.
For assembly as a
5 shelf unit, fit the
short shelf suppor t
between the top
leg angles using
the bottom suppor t
to join the top and
bottom leg angles
in the centre unit
as illustrated (3a).
Now repeat this at
the other end and
fit the 2 long shelf
supports again
matching the shor t
shelf supports.
3

Fit the floor protectors
provided on the end of
each leg.
Assembling as a standard bench
Refer to Step 1 and Step 2, except in Step 2, the centre
4 shelf supports go to the top of 4 leg angles and move the
bottom 4 midway to suit your needs. Repeat this again and bolt
the two frames together with the nuts and bolts supplied,
then place the 5 MDF shelves as in step 5.
Assembling as a corner bench
The same assembly instru
ctions apply as Step 7 except
you bolt the bench together at right angles as illustrated.
6
7
8
MAY WE SUGGEST...
● Your Hammer fast Shelving should be fastened to the
wall where possible with the necessary fasteners (not included).
● Always place heavier items on the lower shelves.
● Always evenly distribute your loads across the shelves where possible.
Add extra shelf
for 5 shelf units only.
Add extra shelf
for 5 shelf units only.
4/4
For damaged or missing parts, please email products@geelongsales.com.au
 Loading...