

Page 1
Page 2
Page 3

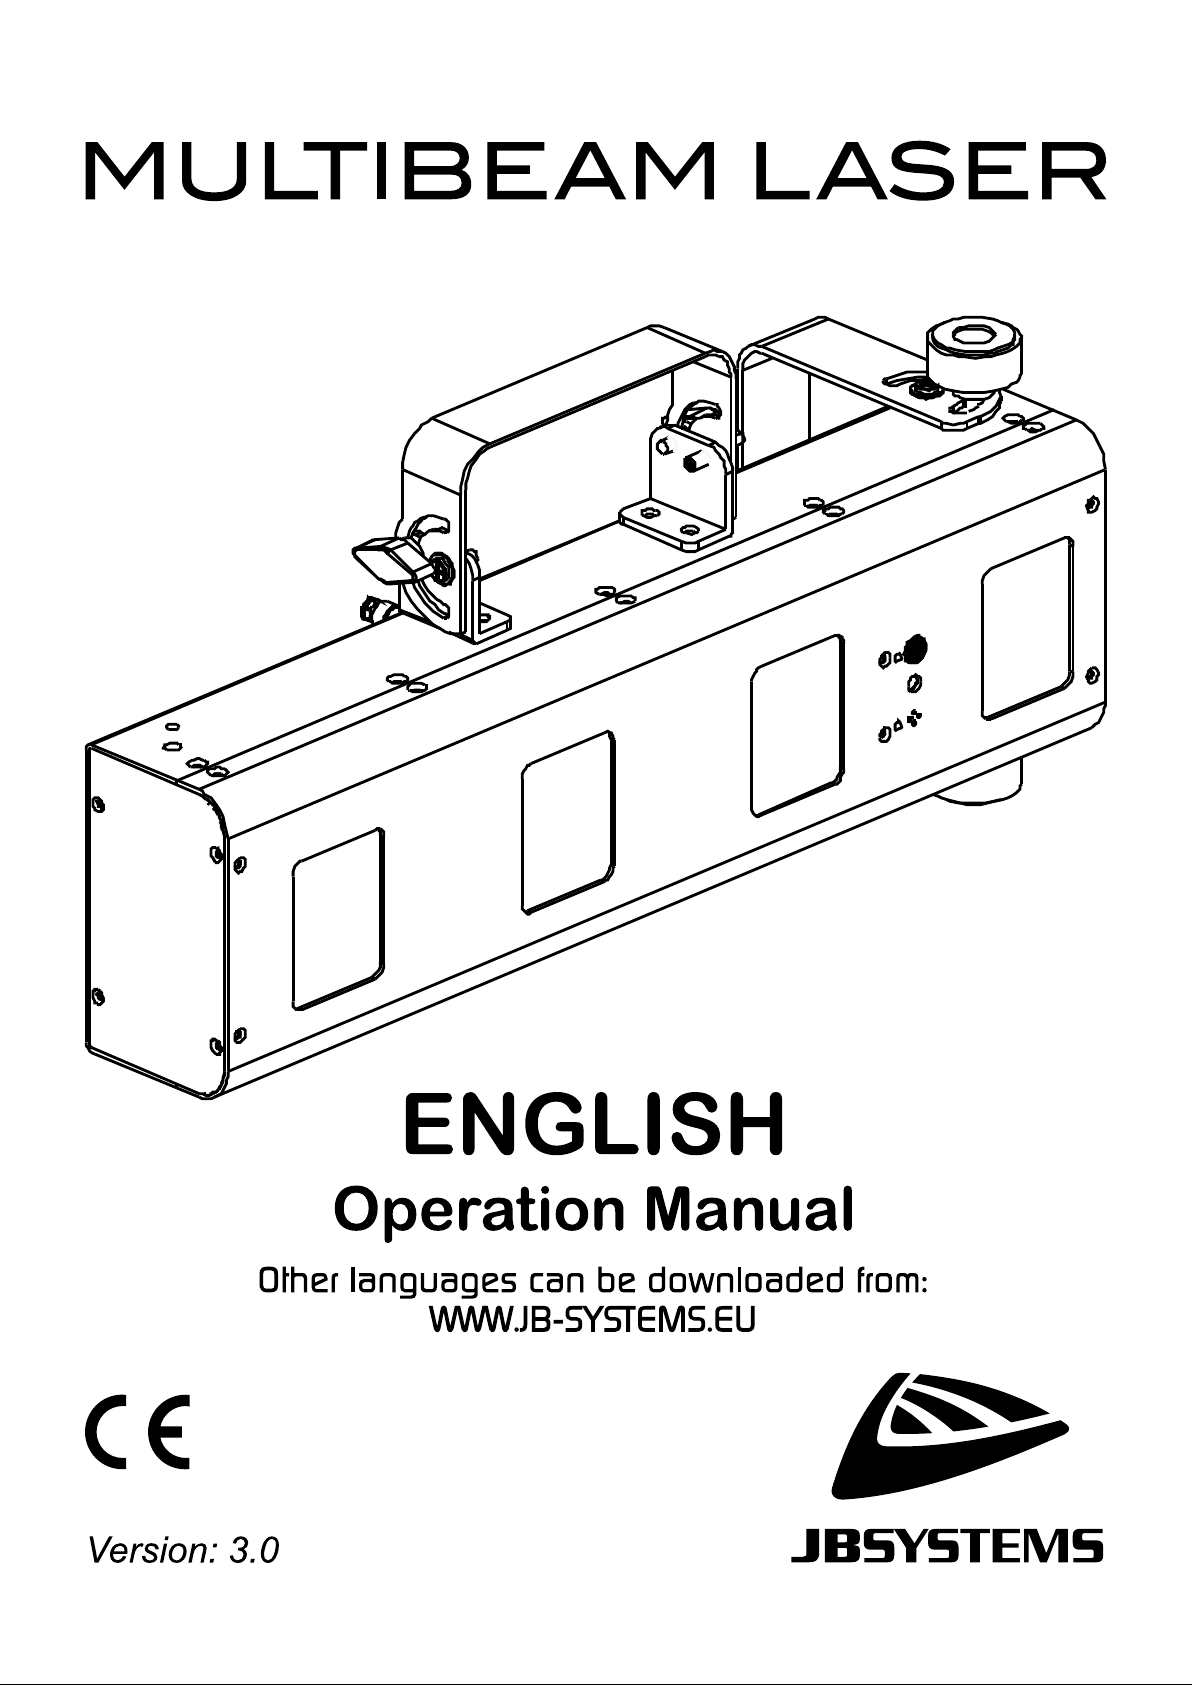
ENGLISH USER MANUAL
OPERATION MANUAL
Thank you for buying this JB Systems
safety, please read these operati ng instr uct ions ver y caref ully before you start using this unit.
®
product. To take full advantage of all possibilities and f or your own
FEATURES
• A superb 850 mWatt Class-3B RGRB color laser equipped with 4 powerful, temperature controlled lasers:
• 2 x 150mW Red laser (650nm)
• 1 x 50mW Green laser (532nm)
• 1 x 500mW Blue laser (450nm)
• The 4 user modes make this laser very easy to use:
• MUSIC CONTROL: 100% plug & play, just connect the laser to the mains to start an incredible,
music controlled, laser show based on the internal patterns! Perfect for hiring companies!!!
• MASTER/SLAVE mode: Several units can be used in completely synchronized music mode:
amazing and very simple to use!
• AUTOMATIC mode: all internal pr ograms will be shown automatically, no music need ed. D ep end ing
your needs you can choose a fast or soft show.
• DMX mode: two options possible:
• 2 channel for extremely easy setup and use!
• 10 channels to take full control of all internal programs!
• LED-display for easy navigation in the setup menu.
• Perfect for use in clubs, discotheques, mobile DJ’s and many more …
• Prepared for wireless DMX: just plug-in an optional WTR-DMX DONGLE ! (Briteq
• SAFETY FIRST! Class-3B lasers (more than 5 00mW output) can dam age the human eye very badl y so
never buy such high power laser without checking if it passed the severe laser safety tests! This laser
complies to the Europ ean EN 60825-1:2014 for Laser Safety! It is equipped with extra safet y measures
like:
• Interlock connection with mechan ical shutter: press the safety switch to shut down the output.
• Key switch: only authorized and well trained operator s are allowed to use the las er .
®
order code: 4645)
BEFORE USE
• Before you start using this unit, pleas e check if there’s no tr ansportati on damage. Should there b e any, do
not use the device and consult your dealer first.
• Important: This device left our fac tory in perfect condition and well packaged. It is absolutel y necessary
for the user to stric tly foll ow the s afety instr uctions and warn ings in th is user m anual. Any dam age caused
by mishandling is not subject to warr ant y. The dea ler will not acc ept resp onsibi lity f or an y result ing d efec ts
or problems caused by disregarding this user manual.
• Keep this booklet in a safe plac e for future consultation. If you sell the fixture, be sure to add this user
manual.
Check the contents:
Check that the carton contains the following items:
• MULTIBEAM LASER
• 2 keys (for key switch)
• Mains cable
• Operating instructions
• Cable connector for remote interlock
JB SYSTEMS® 1/9 MULTIBEAM LASER
Page 4
ENGLISH USER MANUAL
CAUTION
SAFETY INSTRUCTIONS:
CAUTION: To reduce the risk of electric shock , do not remove the top cover.
No user-serviceable parts inside. Refer servicing to qualified service
personnel only.
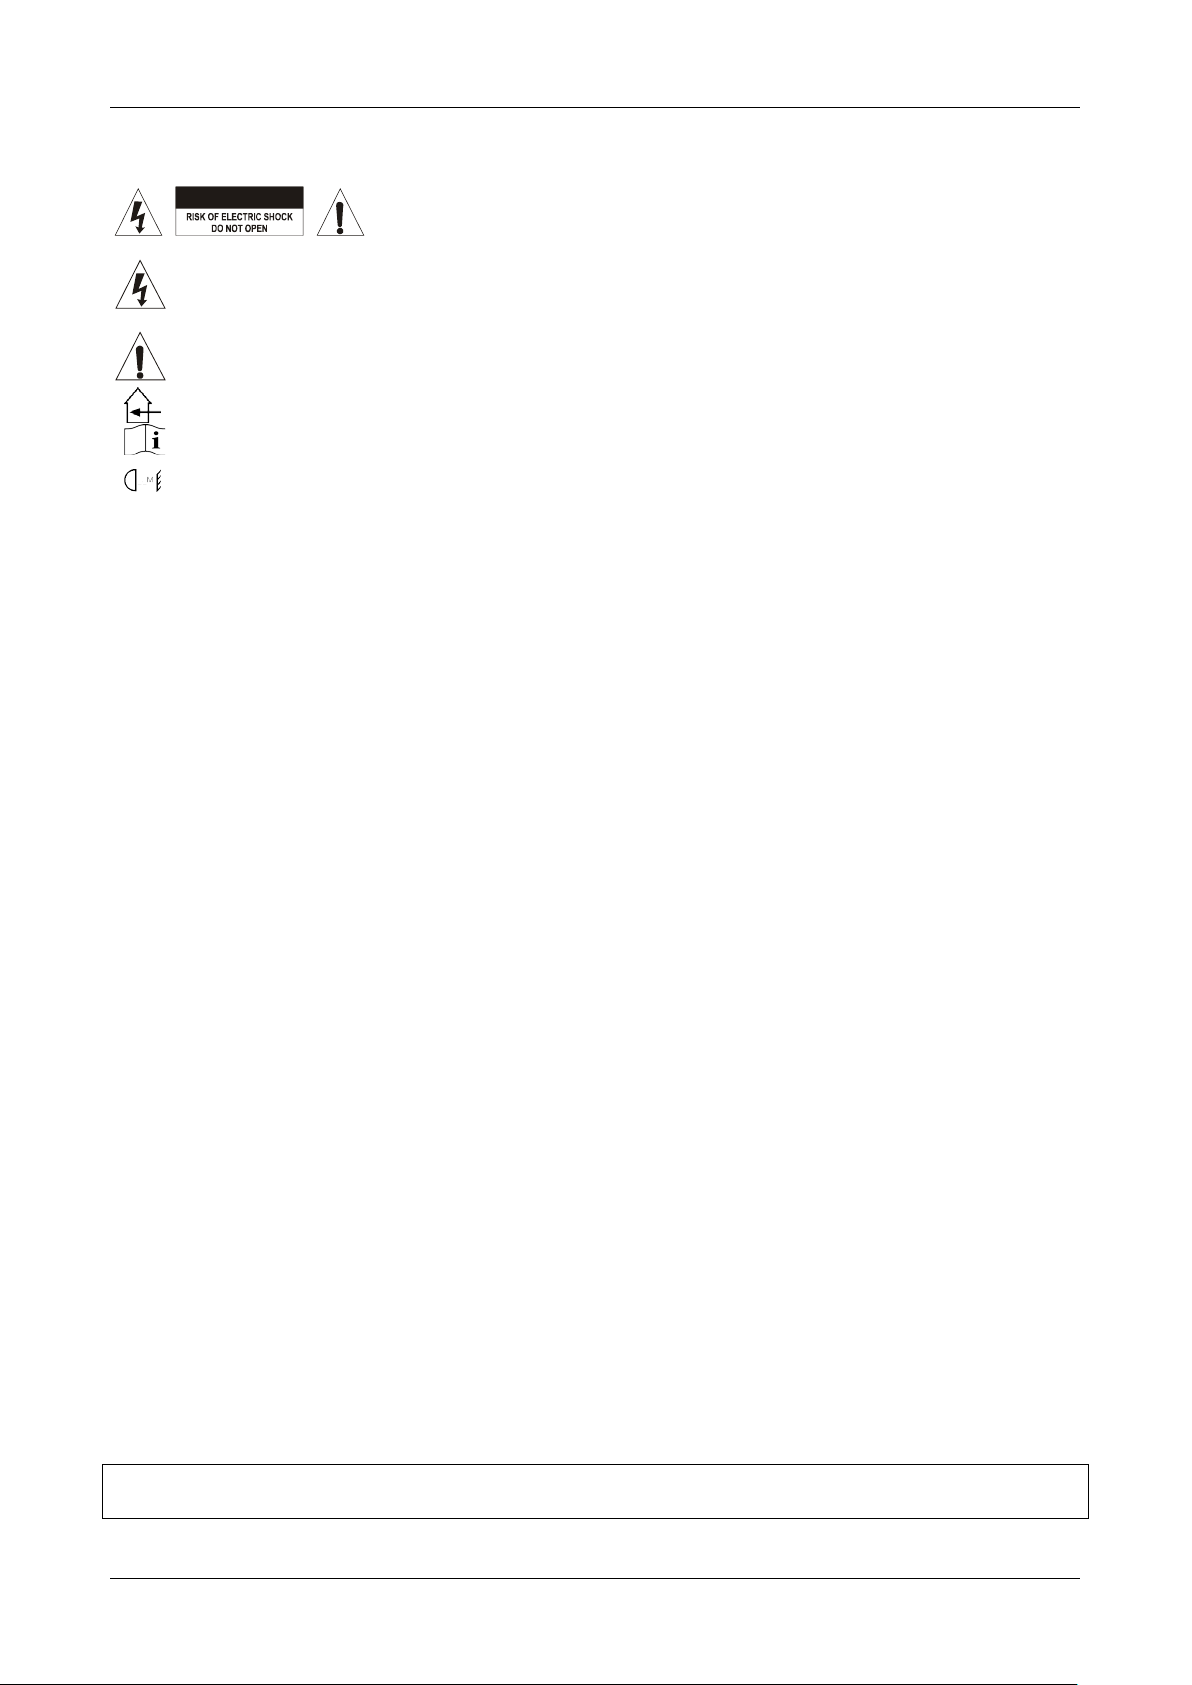
The lightning flash with arro whead symbol within the equ ilateral triangle is inten ded to alert the use
or the presence of un-insulated “dangerous voltage” within the product’s enclosure that may be of
sufficient magnitude to constitute a risk of electric shock.
The exclamation point with in the equilateral triangle is inten ded to alert the user to the presence of
important operation and maintenance (servicing) instructions in the literature accompanying this
appliance.
This symbol means: indoor use only.
This symbol means: Read instructions.
This symbol determines: the minimum distance from lighte d obj ec ts. T he minimum distance between
light-output of this laser and the illuminated surface must be more than 2.5 meters.
• To protect the environment, please try to recycle the packing material as much as possible.
• A new light eff ect sometimes causes s ome unwanted sm oke and/or sm ell. This is norm al and disappears
after some minutes.
• To prevent fire or shock hazard, do not expose this appliance to rain or moisture.
• To avoid condensati on to be formed ins ide, allow the unit to adapt to t he surrounding tem peratures when
bringing it into a warm room after transport. Condense som etimes prevents the unit from work ing at full
performance or may even cause damages.
• This unit is for indoor use only.
• Don’t place metal obj ects or s pill liqu id insi de the unit. Electr ic shoc k or malf unction m ay result. If a for eign
object enters the unit, immediately disconnect the mains power.
• Locate the fixture in a well ventilated spot, away from any flamm able materials and/or li quids. The fixture
must be fixed at least 50cm from surrounding walls.
• Don’t cover any ventilation openings as this may result in overheating.
• Prevent use in dusty environments and clean the unit regularly.
• Keep the unit away from children.
• Inexperienced persons should not operate this device.
• Maximum save ambient temperature is 40°C. Don’t use this unit at higher ambient temperatures.
• Make sure the area below the i nstallation place is free from unwanted persons during rigging, de-rigging
and servicing.
• Allow the device about 10 minutes to cool down before servicing.
• Always unplug the unit when it is not used for a longer time or before replacing the bulb or start servicing.
• The electrical instal lation should be car ried out by qualif ied personal onl y, according to the reg ulations for
electrical and mechanical safety in your country.
• Check that the available voltage is not higher than the one stated on the rear panel of the unit.
• The power cord should alw a ys be in perfect condition. Switch the un it im mediately off when the power cor d
is squashed or damaged. I t must be replaced by the m anufacturer, its service agent or sim ilarly qualified
persons in order to avoid a hazard.
• Never let the power-cord come into contact with other cables!
• This fixture must be earthed to in order comply with safety regulations.
• Don’t connect the unit to any dimmer pack.
• Always use an appropriate and certified safety cable when installing the unit.
• In order to prevent elec tric shock , do not o pen the cov er. Apar t fr om the lamp and mains fuse there ar e n o
user serviceable parts inside.
• Never repair a fuse or bypass the fuse holder. Always replace a dam aged fuse with a fuse of the s ame
type and electrical specifications!
• In the event of serious operating problems, stop using the fixture and contact your dealer immediately.
• The housing and the lenses must be replaced if they are visibly damaged.
• Please use the original pack ing when the device is to be transpor ted .
• Due to safety reasons it is prohibited to make unauthorized modifications to the unit.
Important: Never look direc tly into t he light so urce! Don’t us e the eff ect in th e pr esence of per sons s uff ering
from epilepsy.
JB SYSTEMS® 2/9 MULTIBEAM LASER
Page 5

ENGLISH USER MANUAL
LASER SAFETY INSTRUCTIONS:
• According to the EN 60825-1:2014 regulations, this laser falls under the classification 3B. Direct eye
exposure can be dangerous.
DANGER: LASER RADIATION !
Avoid direct eye exposure! Laser radiation can cause eye damage
and/or skin damage. All protective measures for a safe operation of
this laser must be applied.
• This product is a so-called show las er, emitting radiation with a wavelength spectr um between 400 and
700 nm and producing lighting effects for shows.
• Due to the construction of this las er, the b eam is moved so f ast, t hat it can only hit t he eye very short. This
is why the use of this laser for a Laser-Light-Show can
be regarded as save.
• Never direct the las er beam to people or an imals and
never leave this device running unattended.
• This laser ma y only be used for sho ws. The operation
of this class 3B show laser is only allowed if it is done
by a professional operator.
• Depending on the classification, operating a laser
product can produce laser radiation that may cause
permanent eye damage and/or skin damage. The
legal instructions for using a laser product vary from country to country. The user must always inform
himself on the legal instructions valid in his country and apply them to his situation.
Please note that JB Systems cannot be made liable for damages caused by incorrect installations and
unskilled operation!
DESCRIPTION:
1. HANGING BRACKET : for hanging the Multibeam Laser in vertical position.
2. SAFETY EYE: used to attach a safety cable when the unit is rigged (see paragraph “overhead rigging”)
3. DISPLAY: shows the different working modes with their respective options and settin gs
JB SYSTEMS® 3/9 MULTIBEAM LASER
Page 6

ENGLISH USER MANUAL
4. DMX OUTPUT: 3pin female XLR-connector used to connect the laser with the next unit in the DMX
chain.
5. DMX INPUT: 3pin male XLR-connector used to connect universal DMX-cables. This input receives
instructions from a DMX-controller.
6. HANGING BRACKET: for hanging the Multibeam Laser in
horizontal position.
7. ON/OFF KEY ACTIVATED SWITCH: used to switch the laser
beam on/off. Use the keys to make sure only an authorized
operator is able to switch the laser on.
8. MAINS IN- AND OUTPUT: with IEC socket and integrated fuse
holder, connect the sup plied mains cable here and link a second
Multibeam Laser (you can use our JB Systems combi cable
IEC/XLR)
9. INTERLOCK input: used to connect the optional em ergency stop switch (s ee picture). When you push
this switch it will activate the mechanical safety shutter so the laser beam will disappear immediately.
IMPORTANT! For your own safety we strongly recommend to connect this optional switch!
10. M-DMX INPUT: Pleas e not e that this U SB-con nector i s NOT used for updates or to connect the unit to a
PC! Instead this USB-connector makes it very easy to add wireless DMX to the unit! Just add the
(optional) WTR-DMX DONGLE from BRITEQ
to connect other DMX-controlled equipment to the DMX-output so you can share the wireless DMX
function with all connected units! No extra settings to be made in the setup menu, just follow the
procedure in the user manual supplied with the WTR-DMX DONGLE from BRITEQ
WTR-DMX DONGLE is available from WWW.BRITEQ-LIGHTING.COM (order code: 4645)
11. MENU BUTTON: used to browse the different functions and working modes in the menu.
12. UP BUTTON: used to go to the upper option or to increase a parameter of a function or working mode.
13. DOWN BUTTON: used to go to a lower option or to decrease a parameter of a function or working mode
14. ENTER BUTTON: Used to confirm the selected value or function that is shown on the display.
15. CO OLING FAN: used to cool the components i nside the enclosure. Make sure to ne ver cover this fan
outlet!
16. POWER LED : Indicates that the unit is switched on.
17. MUSIC LED : in music mode this LED blinks to the rhythm of the music.
18. MIC : The built-in microphone is used to synchronize the laser show to the beat of the music.
19. MIC SENSITIVITY : This potentiometer is used to adjust the music input sensitivity. Turn the
potentiometer until the laser works in sync with the music.
20. IR : IR-sensor, used to control the unit by the wireless IR remote control.
®
and you will g et wir eless DMX! Mor eover you will be a ble
®
. The separate
JB SYSTEMS® 4/9 MULTIBEAM LASER
Page 7

ENGLISH USER MANUAL
OVERHEAD RIGGING
• Important: The installation must be carried out by qualified service personal only. Improper
installation can result in serious injuries and/or damage to property. Overhead rigging requires
extensive experience! Working load limits should be respected, certified installation materials
should be used, the installed device should be inspected regularly for safety.
• Make sure the area belo w the installation place is free from unwanted persons during rigging, de-rigging
and servicing.
• Locate the fixture in a well ventilated spot, far away from any flammable materials and/or liquids. The
fixture must be fixed at least 50cm from surrounding walls.
• The device should be instal led out of reach of people and outs ide ar eas where per sons ma y walk by or be
seated.
• Before rigging mak e sure that the instal lation area c an hold a minim um point load of 10times the de vice’s
weight.
• Always use a certified saf ety cabl e that can h old 12 times the weight of the devic e when installing the unit.
This secondary safety attachment should be installed in a way that no part of the installation can drop
more than 20cm if the main attachment fails.
• The device should be well fixed; a free-swinging mounting is dangerous and may not be considered!
• Don’t cover any ventilation openings as this may result in overheating.
• The operator has to make sure that the safety-relating and machine-technical installations are approved by
an expert before using t hem f or the fir st time. T he install ations s hould be inspect ed every year by a skilled
person to be sure that safety is still optimal.
CAUTION EYEDAMAGE: Always position the laser in a way that prevents the
audience from looking directly into the laser beams. The installation should assure that
the beam will not strike the audience.
JB SYSTEMS® 5/9 MULTIBEAM LASER
Page 8
ENGLISH USER MANUAL
! IMPORTANT INFORMATION – READ BEFORE USE !
Best ambient temperature is +/- 20° to 35°C
HOW TO SET UP AN D CO NTROL THE UNIT
• Regular breaks during ope ration are essential to maxim ize the life of this device as it is not designe d for
continual use.
• Do not switch the unit on and off in short time intervals as this reduces the lifetime of the lasers.
• Always unplug the unit when it is not used for a longer time.
• In the event of serious operating problems, stop using the fixture and contact your dealer immediately.
• Important: Never look directly into the laser beam! Don’t use the effect in the presence of persons
suffering from epilepsy.
This laser contains 3 different lasers. One of the lasers is a GREEN 532nm DPSS LASER (Diode
Pumped Solid State laser).
DPSS lasers need a warmup period of about 5-15 minutes to reach a stable working temperature.
During warmup the power output an d beam undergo large f luctuat ions, som etim es the gr een laser beam
will only appear after some minutes. As t he warm-up progr esses DPSS lasers become more and m ore
stable until they finally reach the optimum temperature for operation. This is normal with all DPSS
lasers and is not a defect.
You can operate the unit in several ways:
1) STANDALONE MODE USING THE BUILD-IN PROGRAMS:
The laser runs a preprogrammed sequence automatically or to the rhythm of the
music. Select this m ode when only 1 laser is used (standalone) or when the laser is
placed as the first (m aster) unit in a chain with several [MULTIBEAM LASER] lasers
(master/slave mode).
• Press the [MENU]-button until the display shows [P--]
• Press [Enter] to select the preprogrammed shows [P 1 … P 12]
• Press the [UP / DOWN] buttons to choose one of the shows.
• Press [Enter] to confirm the selected show.
2) STANDALONE MODE USING THE BUILD-IN PROGRAMS (MUSIC
CONTROLLED:
• Press the [MENU]-button until the display shows [Sn1]
• Press the [ENTER]-button to confirm your choice.
• Put on some mus ic and adjust the [MU SIC SENSITIVITY]-knob (18) unt il the laser
works nicely to the rhythm of the music.
Note: When no music is detected, the laser output will be shut off (blackout).
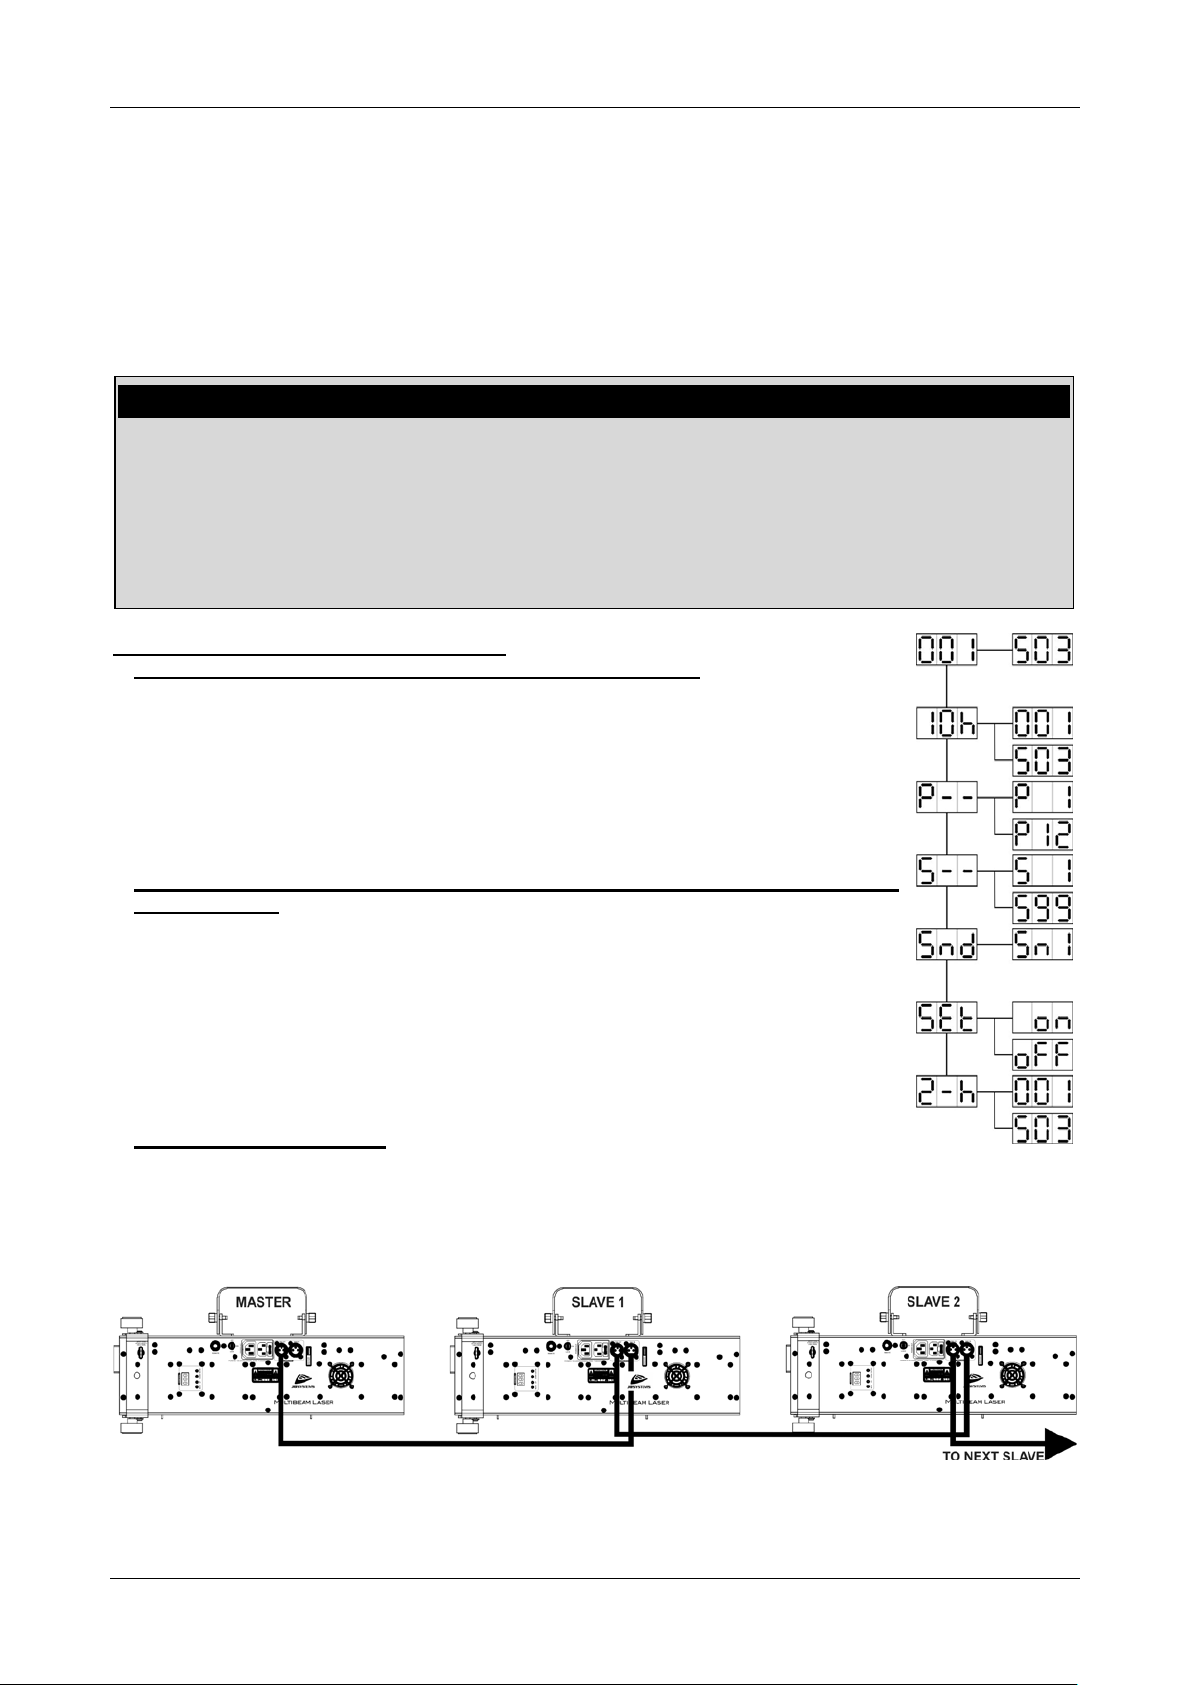
3) MASTER/SLAVE MODE:
You can connect several [MULTIBEAM LASER] lasers together.
Connect the DMX input of the first laser to the DMX output of the previous laser in the chain.
Please put the first un it of the chain in “Mus ic or automatic m ode” and all the other un its in [2-h] or [10h ]
mode.
The lasers will follow the instructions giv en b y the first [MULTIBEAM laser] (master) in the chain.
JB SYSTEMS® 6/9 MULTIBEAM LASER
Page 9

ENGLISH USER MANUAL
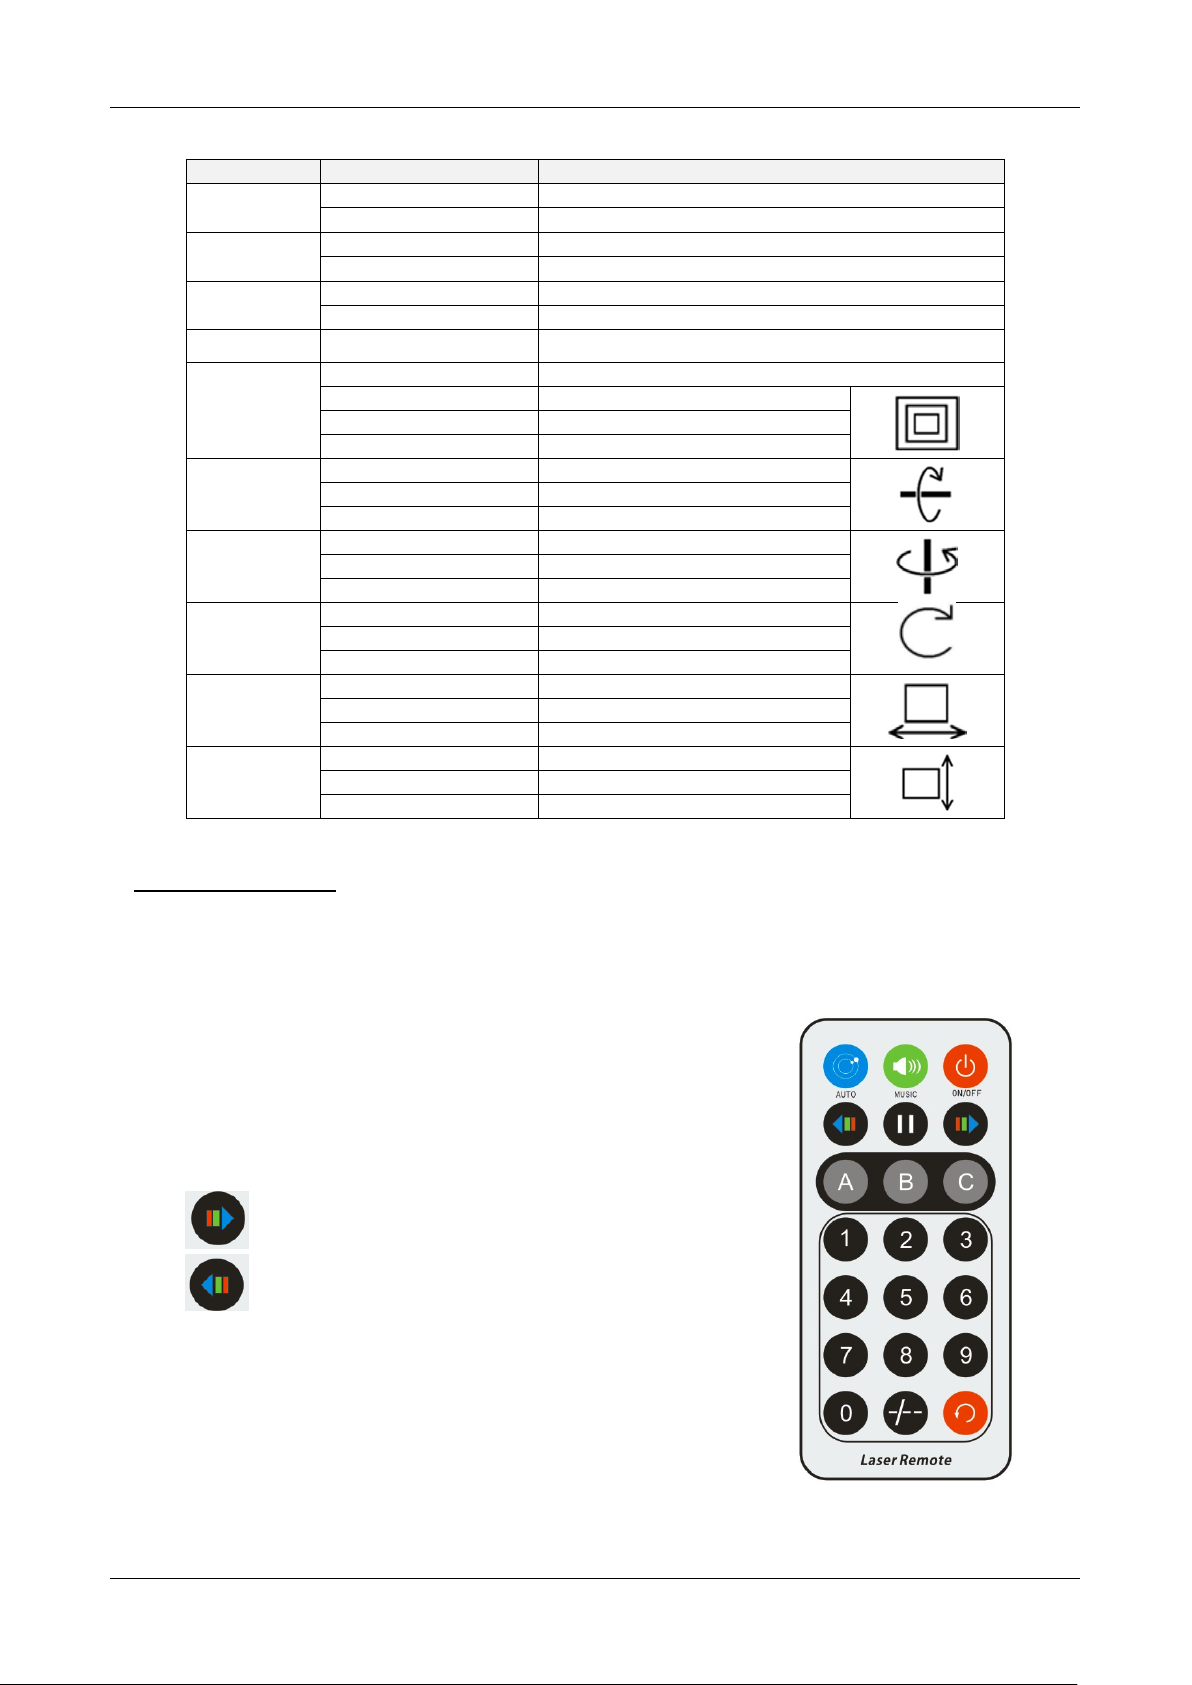
CHANNEL
VALUE
FUNCTION
000‐015
Blackout
016‐035
Program 1
036‐055
Program 2
056‐075
Program 3
076‐095
Program 4
096‐115
Program 5
116‐135
Program 6
136‐155
Program 7
156‐175
Program 8
176‐195
Program 9
196‐215
Program 10
216‐235
Program 11
236‐255
Program 12
000‐200
Program speed
201‐255
Programs will run sound activated
4) DMX MODE:
The laser can be controlled by any standard DMX-controller in 2 different DMX-modes:
• 2 CHANNEL MODE: for extremely easy setup and use! (display shows “2-h”)
• 10 CHANNEL MODE: for full control of all possibilities. (display shows “10h”)
• Connect the DMX input of the las er to the DMX ou tput of the previous unit in the c hain or dir ectly to the
DMX-output of your controller.
• Press the [MENU] button to select the desired DMX-mode. (2-h or 10h)
• Press the [ENTER]-button to confirm your choice.
• Press the [UP / DOWN] buttons to choos e the desired DMX-addres s (from 001 to 503 (10h) or 001 to
511 (2-h))
• Press the [ENTER]-button to confirm your choice.
Please refer to the DMX-chart below for the functions of the different channels.
Some more information on DMX512:
The DMX-protocol is a widely used high speed s ignal to control intelligent light equipment. You need to
“daisy chain” your DMX controller and all the connected light effects with a good quality XLR M/F
balanced cable. To prevent strange behavior of the light effects, due to
interferences, you must use a 90Ω to 120Ω terminator at the en d of t he c h ain . Ne v er
use Y-splitter cables, this simply won’t work!
Each effect in the c hain ne eds to have its prop er starti ng address so it kn ows whi ch
commands from the controller it has to decode.
2 channel DMX MODE:
CH 1
CH 2
JB SYSTEMS® 7/9 MULTIBEAM LASER
Page 10
ENGLISH USER MANUAL
CHANNEL
VALUE
FUNCTION
000‐015
Channel 3-10 are active
016‐255
See 2-channel DMX mode
000‐200
Program speed
201‐255
Programs run sound activated
000-015
Blackout 016-255
Control four laser outputs
CH 4
000-127
Pattern size : 100%-5%
128-169
Zooming in 170-209
Zooming out
210-255
Zooming in & out
000-127
0 -359 degree fixed X axis rolled
128-191
Clockwise rolling
192-255
Anticlockwise rolling
000-127
0 -359 degree fixed Y axis rolled
128-191
Clockwise rolling
192-255
Anticlockwise rolling
000-127
0 -359 degree fixed Z axis rotate
128-191
Clockwise rotating
128-255
Anticlockwise rotating
000-127
128 different fixed position on X
128-191
Clockwise moving
128-255
Anticlockwise moving
000-127
128 different fixed position on Y
128-191
Clockwise moving
128-255
Anticlockwise moving
10 channel DMX MODE:
CH 1
CH 2
CH 3
000-255 Patterns
CH 5
CH 6
CH 7
CH 8
CH 9
CH 10
5) IR Remote control:
The laser can also be controlled by the IR remote control :
• Press the [MENU] button to select the correct mode [SET]
• Press the [ENTER]-button to confirm your choice.
• Press the [UP / DOWN] buttons to choose [on] or [off] to enable or disable the IR remote control
• Press the [ENTER]-button to confirm your choice.
ON/OFF : Blackout
AUTO : runs programs in automatic mode
MUSIC : runs programs in sound controlled mode
: Speed up (faster)
: Speed down
1 – 9 : program 1 – 9
The other buttons have no function.
JB SYSTEMS® 8/9 MULTIBEAM LASER
Page 11

ENGLISH USER MANUAL
MAINTENANCE
• Make sure the area below the installation place is free from unwanted persons during servicing.
• Switch off the unit, unplug the mains cable and wait until the unit has been cooled down.
During inspection the following points should be checked:
• All screws used for ins talling the device and any of its parts should be tightly fastened and may not be
corroded.
• Housings, fixations and installations spots (ceiling, truss, suspensions) should be totally free from any
deformation.
• When an optical lens is visibly damaged due to cracks or deep scratches, it must be replaced.
• The mains cables must be in impeccable condition and should be replaced immediately when even a
small problem is detected.
• In order to protect the device f rom overheat the cooling fans and ventilation openings should b e cleaned
monthly.
• The interior of the device should be cleaned annually by experienced service people.
Attention: We strongly recommend internal cleaning to be carried out by qualified personnel only!
SPECIFICATIONS
This unit is radio-int erfer ence suppr essed. This produ ct m eets the requirem ents of the curr ent Europ ean and
national guidelines. Co nf or mity has been established and t he r e leva nt s tatem ents and d oc uments have been
deposited by the manufacturer.
Mains Input: AC 100~240V, 50/60Hz
Fuse: 250V 1.6A slow blow (20mm glass)
Total Power consumption: 65W
Sound Control: Internal microphone
DMX connections: 3pin XLR male / female
DMX channels: 2 or 10 channels
DMX starting address: 001 503/511 (10 channel or 2 channel mode)
Laser Power: 50mW Green CW laser (λ = 532nm)
2 x 150mW Red CW laser (λ = 650nm)
500mW Blue CW laser (λ = 450nm)
Laser radiation class: Class 3B
Laser Safety Standard: EN 60825-1:2014 for Laser Safety
Size (WxHxD): 53,7cm x 26,8cm x 17cm
Weight: 5.05kg
Every information is subject to change without prior notice.
You can download the latest version of this user manual on our website:
www.jb-systems.eu
JB SYSTEMS® 9/9 MULTIBEAM LASER
Page 12

 Loading...