

Page 1
Page 2
Page 3

ENGLISH USER MANUAL
OPERATION MANUAL
Thank you for buying this JB Systems® product. To take full advantage of all possibilities and for your own
safety, please read these operating instructions very carefully before you start using this unit.
FEATURES
5 different effects in one single unit !
3 individual Led Projectors for colored beams + UV/Blacklight effect (9x8W Red-Green-Blue-UV Leds)
LED effect: 84x0.75W Leds (Red-Green-Blue-Amber) for dynamic multibeam patterns
Led Strobe: 12x 0.5Watt White Leds
Laser: red (100mW) and green (30mW) laser patterns
Use the unit in any way you like it !
Standalone: sound activated (internal mic) or automatic shows. IR remote controller included.
Master/slave function for wonderful synchronized shows when several units are used.
DMX-control: via 3, 9, 11 or 28 Channels.
3-digit LED display for easy menu navigation
IEC mains input + output for easy linking (check out our combi cables)
Key activated on/off switch and emergency switch (interlock) input for additional laser safety
Complies to EN/IEC 60825-1 for Laser Safety
BEFORE USE
Before you start using this unit, please check if there’s no transportation damage. Should there be any, do
not use the device and consult your dealer first.
Important: This device left our factory in perfect condition and well packaged. It is absolutely necessary
for the user to strictly follow the safety instructions and warnings in this user manual. Any damage caused
by mishandling is not subject to warranty. The dealer will not accept responsibility for any resulting defects
or problems caused by disregarding this user manual.
Keep this booklet in a safe place for future consultation. If you sell the fixture, be sure to add this user
manual.
Check the contents:
Check that the cardboard box contains the following items:
ALIEN unit
2 keys (for key switch)
Spare connector for emergency stop
Mains cable
IR Remote controller
Operating instructions
JB SYSTEMS® 1/14 ALIEN
Page 4
ENGLISH USER MANUAL
CAUTION
SAFETY INSTRUCTIONS:
CAUTION: To reduce the risk of electric shock, do not remove the top cover.
No user-serviceable parts inside. Refer servicing to qualified service
personnel only.
The lightning flash with arrowhead symbol within the equilateral triangle is intended to alert the use
or the presence of un-insulated “dangerous voltage” within the product’s enclosure that may be of
sufficient magnitude to constitute a risk of electric shock.
The exclamation point within the equilateral triangle is intended to alert the user to the presence of
important operation and maintenance (servicing) instructions in the literature accompanying this
appliance.
This symbol means: indoor use only.
This symbol means: Read instructions.
This symbol determines: the minimum distance from lighted objects. The minimum distance between
light-output and the illuminated surface must be more than 1 meter.
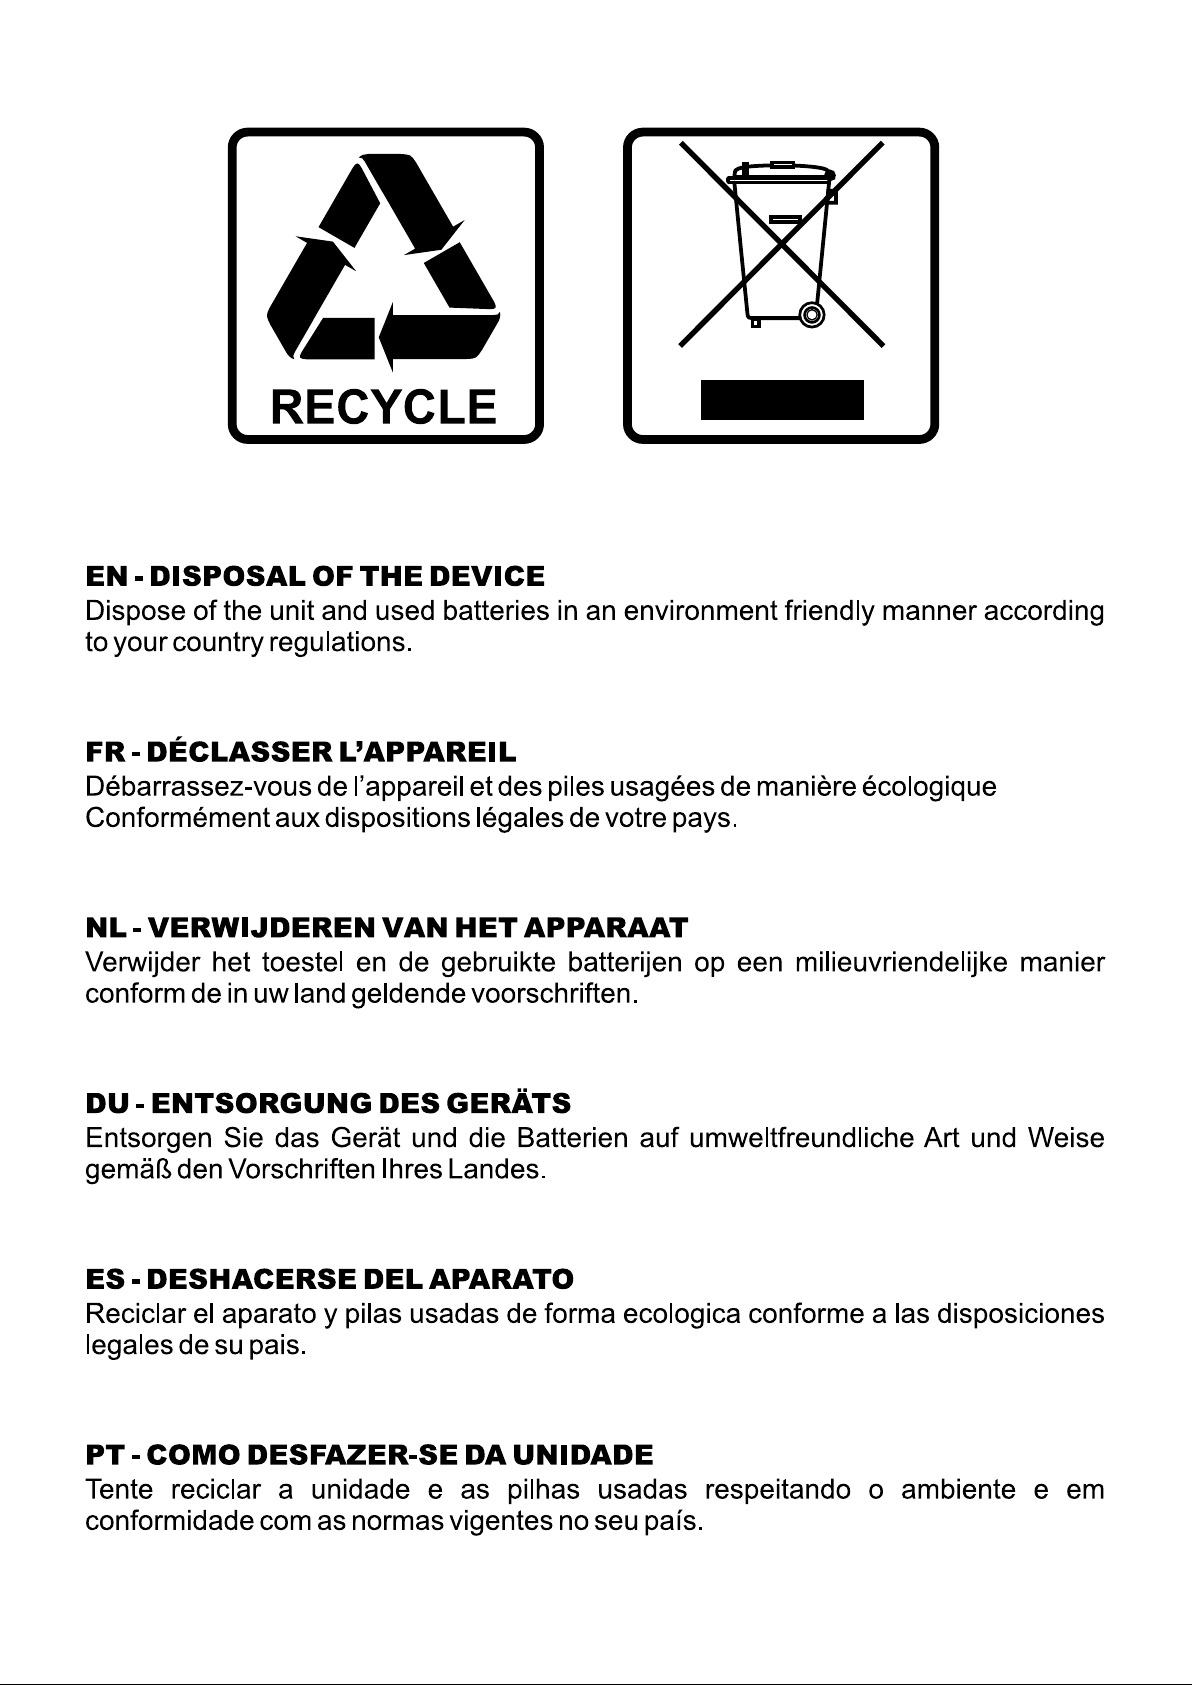
To protect the environment, please try to recycle the packing material as much as possible.
A new light effect sometimes causes some unwanted smoke and/or smell. This is normal and disappears
after some minutes.
To prevent fire or shock hazard, do not expose this appliance to rain or moisture.
To avoid condensation to be formed inside, allow the unit to adapt to the surrounding temperatures when
bringing it into a warm room after transport. Condense sometimes prevents the unit from working at full
performance or may even cause damages.
This unit is for indoor use only.
Don’t place metal objects or spill liquid inside the unit. Electric shock or malfunction may result. If a foreign
object enters the unit, immediately disconnect the mains power.
Locate the fixture in a well ventilated spot, away from any flammable materials and/or liquids. The fixture
must be fixed at least 50cm from surrounding walls.
Don’t cover any ventilation openings as this may result in overheating.
Prevent use in dusty environments and clean the unit regularly.
Keep the unit away from children.
Inexperienced persons should not operate this device.
The save ambient temperature is between 15° & 40°C. Don’t use this unit at higher ambient temperatures.
Make sure the area below the installation place is free from unwanted persons during rigging, de-rigging
and servicing.
Always unplug the unit when it is not used for a longer time or before replacing the bulb or start servicing.
The electrical installation should be carried out by qualified personal only, according to the regulations for
electrical and mechanical safety in your country.
Check that the available voltage is not higher than the one stated on the rear panel of the unit.
The power cord should always be in perfect condition. Switch the unit immediately off when the power cord
is squashed or damaged. It must be replaced by the manufacturer, its service agent or similarly qualified
persons in order to avoid a hazard.
Never let the power-cord come into contact with other cables!
This fixture must be earthed to in order comply with safety regulations.
Don’t connect the unit to any dimmer pack.
Always use an appropriate and certified safety cable when installing the unit.
In order to prevent electric shock, do not open the cover. Apart from the lamp and mains fuse there are no
user serviceable parts inside.
Never repair a fuse or bypass the fuse holder. Always replace a damaged fuse with a fuse of the same
type and electrical specifications!
In the event of serious operating problems, stop using the fixture and contact your dealer immediately.
The housing and the lenses must be replaced if they are visibly damaged.
Please use the original packing when the device is to be transported.
Due to safety reasons it is prohibited to make unauthorized modifications to the unit.
Important: Never look directly into the light source! Don’t use the effect in the presence of persons suffering
from epilepsy.
JB SYSTEMS® 2/14 ALIEN
Page 5
ENGLISH USER MANUAL
LASER SAFETY INSTRUCTIONS:
According to the EN/IEC 60825-1 regulations, this laser falls under the classification 3R. Direct eye
exposure can be dangerous.
DANGER: LASER RADIATION !
Avoid direct eye exposure! Laser radiation can cause eye damage
and/or skin damage. All protective measures for a safe operation of
this laser must be applied.
This product is a so-called show laser, emitting radiation with a wavelength spectrum between 400 and
700 nm and producing lighting effects for shows.
Laser Light is different from any other light source with which you may be familiar. The light from this
product can potentially cause eye injury if not set up and used properly. Laser light is thousands of times
more concentrated than light from any other kind of light source. This concentration of light power can
cause instant eye injuries, primarily by burning the retina (the light sensitive portion at the back of the eye).
Even if you cannot feel “heat” from a laser beam, it can still potentially injure or blind you or your audience.
Even very small amounts of laser light are potentially
hazardous even at long distances.
Never look into the laser aperture or laser beams
Never direct the laser beam to people or animals and
never leave this device running unattended.
This laser may only be used for shows. The
operation of a class 3R show laser is only allowed if
the operation is controlled by a skilled and welltrained operator.
Depending on the classification, operating a laser
product can produce laser radiation that may cause permanent eye damage and/or skin damage. The
legal instructions for using a laser product vary from country to country. The user must always inform
himself on the legal instructions valid in his country and apply them to his situation.
The parent document and cornerstone of laser safety standards ANSI Z136.1 provides guidance for the
safe use of lasers and laser systems by defining control measures for each of the four laser classes. This
valuable document can be obtained from www.laserinstitute.org
Please note that JB SYSTEMS cannot be made liable for damages caused by incorrect installations and
unskilled operation!
DESCRIPTION:
JB SYSTEMS® 3/14 ALIEN
Page 6

ENGLISH USER MANUAL
DMX
On
DMX input present
AUTO
On
Master mode
SLAVE
On
Slave mode
SOUND
Flashing
Sound activation
MENU
To browse the different menu options
UP
To go forward in the selected functions or to increase a value
DOWN
To go backward in the selected functions or to decrease a value
ENTER
To confirm the selected functions
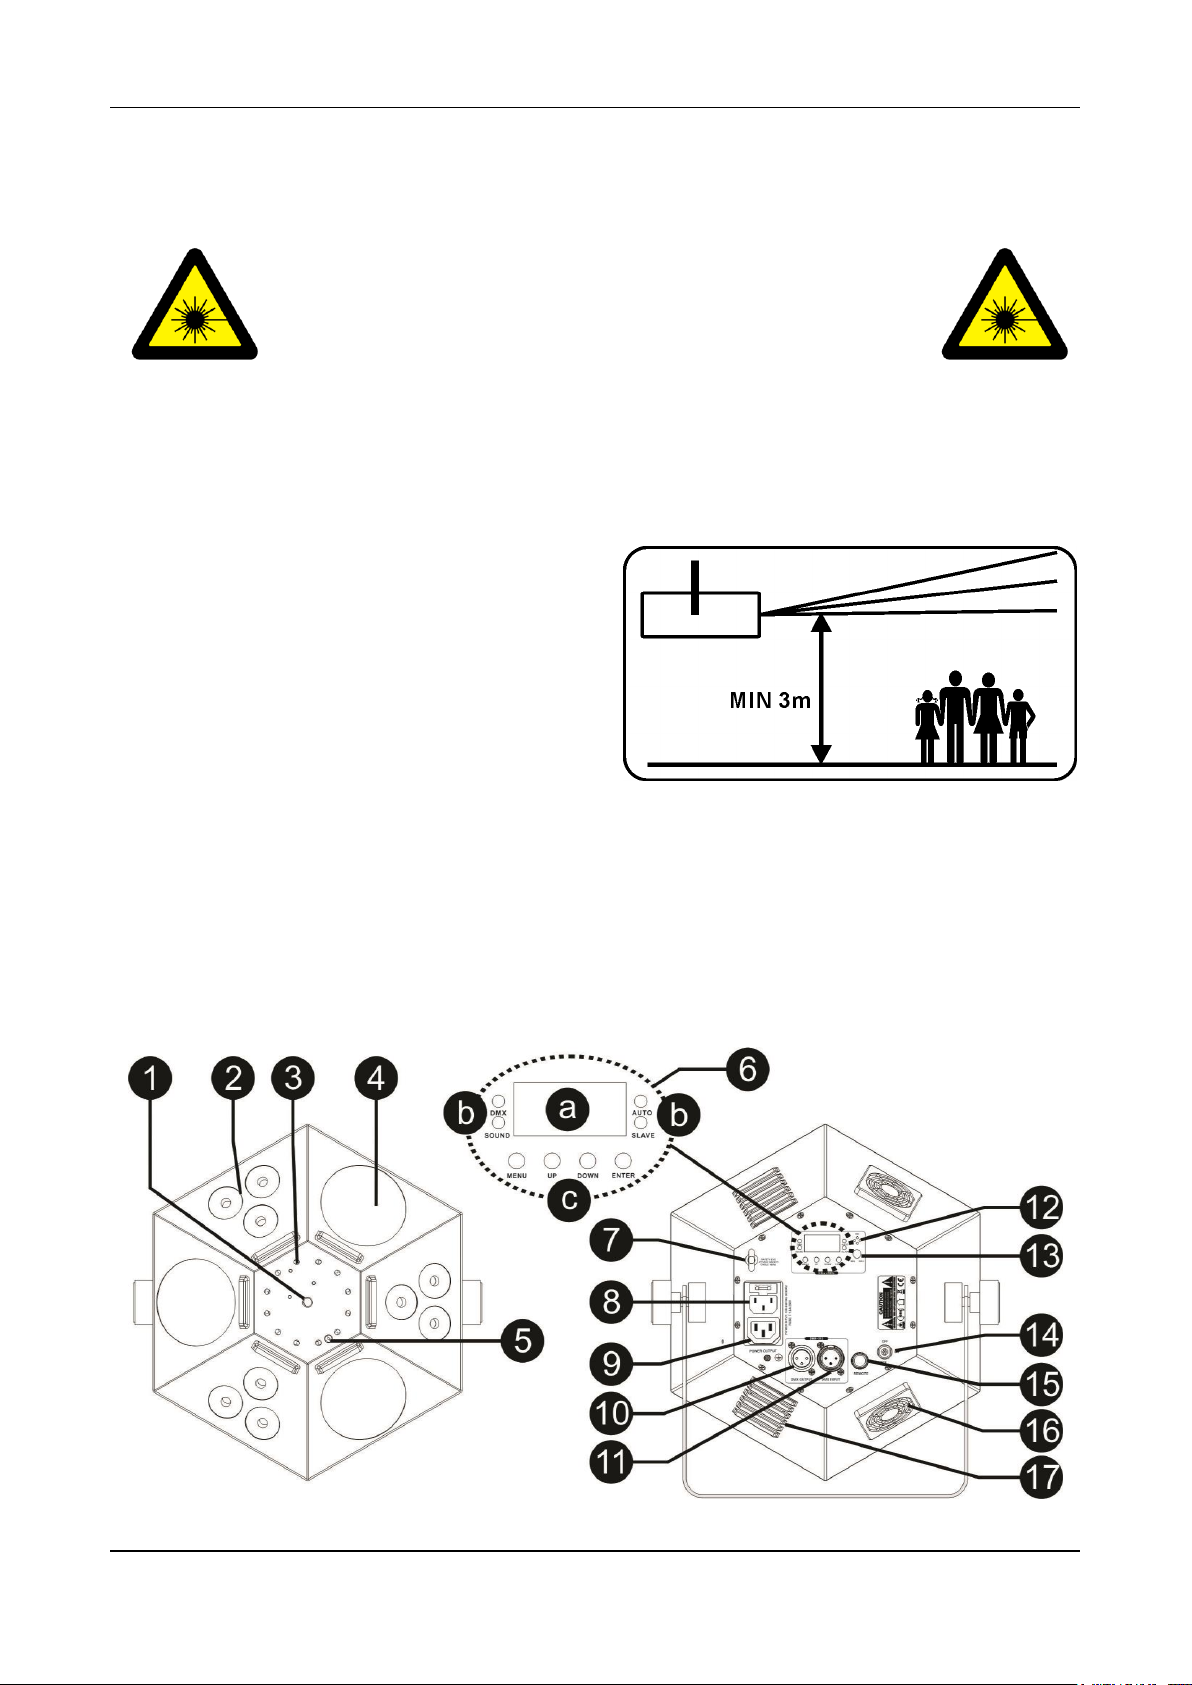
1. LASER OUTPUT: This is where the laser beams exit the enclosure, make sure to NEVER look inside
the unit through this opening while the laser effect is switched on!
2. WASH PROJECTOR LENSES: output of the colored led projector for colored beams + UV effect. Don’t
expose to direct sunlight !
3. STROBE EFFECT LENSES: White SMD LEDs for the strobe effect!
4. LED EFFECT LENSES: output of the colored led effect. Don’t expose to direct sunlight !
5. IR RECEIVER: when you use the IR remote controller, you should point the remote controller to this spot
6. CONTROL PANEL:
a. DISPLAY: shows the various menus and the selected functions.
b. LEDS:
c. BUTTONS:
7. SAFETY EYEBOLT: used to attach a safety cable when the unit is rigged (see paragraph “overhead
rigging”
8. MAINS INPUT: with IEC socket and integrated fuse holder; connect the supplied mains cable here.
9. MAINS OUTPUT: you can use our “combi cables” and this IEC output to easily daisy-chain the next unit
10. DMX OUTPUT: 3pin female XLR-connector used to connect the LASER with the next unit in the DMX
chain.
11. DMX INPUT: 3pin male XLR-connector used to connect universal DMX-cables. This input receives
instructions from a DMX-controller.
12. INTERNAL MICROPHONE: The built-in microphone is used to synchronize the show to the beat of the
music.
13. SENSITIVITY KNOB: The unit works to rhythm of the beat when used in standalone or master/slave
mode. With this knob you can set the input sensitivity of the build-in microphone.
14. ON/OFF KEY ACTIVATED SWITCH: used to switch the unit on/off. Use the keys to make sure only a
skilled operator is able to switch the laser on.
15. INTERLOCK input: used to connect the optional emergency stop switch (see picture). When you push
this switch the laser beam will disappear immediately.
IMPORTANT! For your own safety we strongly
recommend to connect this optional switch!
THERE WILL BE NO LASER OUTPUT WHEN THE
INTERLOCK INPUT IS NOT USED!
Temporary solution: install the spare connector
on the laser. (see picture)
16. FAN: assures the cooling of the unit. Do not cover!
17. VENTILATION OPENING: used for the cooling of the unit. Do not cover the opening !
OVERHEAD RIGGING
Important: The installation must be carried out by qualified service personal only. Improper
installation can result in serious injuries and/or damage to property. Overhead rigging requires
extensive experience! Working load limits should be respected, certified installation materials
should be used, the installed device should be inspected regularly for safety.
Make sure the area below the installation place is free from unwanted persons during rigging, de-rigging
and servicing.
Locate the fixture in a well ventilated spot, far away from any flammable materials and/or liquids. The
fixture must be fixed at least 50cm from surrounding walls.
JB SYSTEMS® 4/14 ALIEN
Page 7

ENGLISH USER MANUAL
The device should be installed out of reach of people and outside areas where persons may walk by or be
seated.
Before rigging make sure that the installation area can hold a minimum point load of 10times the device’s
weight.
Always use a certified safety cable that can hold 12 times the weight of the device when installing the unit.
This secondary safety attachment should be installed in a way that no part of the installation can drop
more than 20cm if the main attachment fails.
The device should be well fixed; a free-swinging mounting is dangerous and may not be considered!
Don’t cover any ventilation openings as this may result in overheating.
The operator has to make sure that the safety-relating and machine-technical installations are approved by
an expert before using them for the first time. The installations should be inspected every year by a skilled
person to be sure that safety is still optimal.
CAUTION EYE DAMAGE: Always position the laser in a way that prevents the
audience from looking directly into the laser beams. The installation should assure that
the beam will not strike the audience.
HOW TO SET UP AND CONTROL THE UNIT
You can operate the unit in 4 ways:
1) MUSIC CONTROLLED MODE:
The unit runs a preprogrammed sequence to the rhythm of the music. Select this mode when only 1 unit is
used (standalone) or when the unit is placed as the first (master) unit in a chain with several units.
Press the [MENU] button until the display shows: [Sou]
Now use the [UP] or [DOWN] to browse the different sound modes.
Press the [ENTER] button to select the desired sound mode:
o [SouP] = Wash projector effects [SP 1] to [SP 6]
o [Soub] = Led Beam effects [Sb 1] to [Sb10]
o [SouL] = Laser effects [SL 1] to [SL 3]
o [SouF] = White Flash effects [SF 1] to [SF10]
o [SouM] = Mixed effect [SM 1] to [SM 8]
JB SYSTEMS® 5/14 ALIEN
Page 8

ENGLISH USER MANUAL
With the [UP] & [DOWN] buttons, you can choose different programs for the selected sound mode. (see
above)
Press the [ENTER] button to confirm your choice.
Put on some music and set the sensitivity of the microphone by using the sensitivity knob (7) so that the
effect reacts perfectly to the sound level of your music.
You can connect several units together: just put the first unit of the chain in one of the sound activated
effect modes and all other units in “Slave mode” (display shows “SLA”) to make them all work in perfect
sync!
Note: When no music is detected, the output of the unit will be shut off (blackout).
2) FULL AUTOMATIC MODE:
The unit automatically runs a preprogrammed sequence. Select this mode when only 1 unit is used
(standalone) or when the unit is placed as the first (master) unit in a chain with several units.
Press the [MENU] button until the display shows [Aut]
Now use the [UP] or [DOWN] to browse the different automatic modes.
Press the [ENTER] button to select the desired automatic mode:
o [AutP] = Wash projector effects [AP 1] to [AP 8]
o [Autb] = Led Beam effects [Ab 1] to [Ab10]
o [AutL] = Laser effects [AL 1] to [AL 6]
o [AutF] = White Flash effects [AF 1] to [AF 8]
o [AutM] = Mixed effect [AM 1] to [AM 8]
With the [UP] & [DOWN] buttons, you can choose different programs for the selected sound mode. (see
above)
Press the [ENTER] button to confirm your choice.
Now use the [UP] or [DOWN] buttons to select the speed:
o S 1 = Fastest speed
o S 100 = Slowest speed
Press the [ENTER] button to confirm your choice.
You can connect several units together: just put the first unit of the chain in one of the automatic effect
modes and all other units in “Slave mode” (display shows “SLA”) to make them all work in perfect sync!
3) SLAVE MODE:
The unit follows the instructions given by the first unit (master) in the chain. Like this you can obtain nice
synchronized shows.
Connect the DMX input of the unit to the DMX output of the previous unit in the chain.
Press the FUNC-button until the display shows [SLA]
Press the ENTER-button to confirm your choice.
You can connect several units together. Please put the first unit of the chain in “Music or automatic mode”
and all other units in “Slave mode” to make them all work in perfect sync!
JB SYSTEMS® 6/14 ALIEN
Page 9

ENGLISH USER MANUAL
Channel
Value
Description
CH1
000-005
Blackout
006-055
Auto Wash Par/ Sound Wash Par
056-105
Auto Beam/ SoundBeam
106-155
Auto Laser/ Sound Laser
156-205
Auto Flash LED/ Sound Flash LED
206-255
Auto MIX/ Sound MIX
CH2
Wash
000-005
Blackout
006-032
AP01/ SP01
033-064
AP02/ SP02
065-096
AP03 /SP03
097-128
AP04/ SP04
129-160
AP05/ SP05
161-192
AP06/ SP06
193-224
AP07/ SP06
225-255
AP08/ SP06
000-005
Blackout
006-030
AP01/ SP01
031-055
AP02/ SP02
056-080
AP03 /SP03
4) DMX512 MODE:
The laser can be controlled by any standard DMX-controller in 4 different DMX-modes.
Press the [MENU] button until the display shows [dMX]
Press the [ENTER] button
The display will show the actual DMX address
Press [ENTER] to enter the setup
Use the [UP] or [DOWN] buttons to select the DMX mode you want to use. [3Ch], [9Ch], [11Ch] or
[28Ch]
Press the [ENTER] button to confirm your choice.
Use the [UP] or [DOWN] buttons to select the desired DMX address
Press the [ENTER] button to confirm the DMX address
Note: the display blinks when the unit is in DMX-mode and no DMX-signal is detected.
Some more information on DMX512:
The DMX-protocol is a widely used high speed signal to control intelligent light
equipment. You need to “daisy chain” your DMX controller and all the connected light
effects with a good quality XLR M/F balanced cable. To prevent strange behavior of
the light effects, due to interferences, you must use a 90Ω to 120Ω terminator at the
end of the chain. Never use Y-splitter cables, this simply won’t work!
Each effect in the chain needs to have its proper starting address so it knows which commands from the
controller it has to decode.
3 CHANNEL DMX-MODE:
JB SYSTEMS® 7/14 ALIEN
Page 10

ENGLISH USER MANUAL
BEAM
081-105
AP04/ SP04
106-130
AP05/ SP05
131-155
AP06/ SP06
156-180
AP07/ SP06
181-205
AP08/ SP08
206-230
AP09/ SP09
231-255
AP10/ SP10
Laser
000-005
Blackout
006-046
AL01/ SL01
047-088
AL02/ SL02
089-130
AL03/ SL03
131-172
AL04/ SL04
173-214
AL05/ SL05
215-255
AL06/ SL06
Strobe
000-005
Blackout
006-032
AF01/ SF01
033-064
AF02/ SF02
065-096
AF03/ SF03
097-128
AF04/ SF04
129-160
AF05/ SF05
161-192
AF06/ SF06
193-224
AF07/ SF07
225-255
AF08/ SF08
Beam
000-005
Blackout
000-085
AM01/ SM01
086-170
AM02/ SM02
171-255
AM03/ SM03
CH3
Speed
000-250
0: slow,255: fast
Sound active
251-255
Sound activated show
Channel
Value
Description
CH1
Red
000-255
Brightness
CH2
Green
000-255
Brightness
CH3
Blue
000-255
Brightness
CH4
UV
000-255
Brightness
CH5
Wash
000-005
MANUAL (Ch 1-2-3-4 active)
006-032
AP01/ SP01
033-064
AP02/ SP02
065-096
AP03 /SP03
097-128
AP04/ SP04
129-160
AP05/ SP05
161-192
AP06/ SP06
193-224
AP07/ SP07
225-255
AP08/ SP08
000-005
Blackout
006-030
AP01/ SP01
031-055
AP02/ SP02
056-080
AP03 /SP03
9 CHANNEL DMX-MODE:
JB SYSTEMS® 8/14 ALIEN
Page 11

ENGLISH USER MANUAL
CH6 Beam
081-105
AP04/ SP04
106-130
AP05/ SP05
131-155
AP06/ SP06
156-180
AP07/ SP06
181-205
AP08/ SP08
206-230
AP09/ SP09
231-255
AP10/ SP10
CH7
Laser
000-005
Blackout
006-046
AL01/ SL01
047-088
AL02/ SL02
089-130
AL03/ SL03
131-172
AL04/ SL04
173-214
AL05/ SL05
215-255
AL06/ SL06
CH8
Strobe
000-005
Blackout
006-032
AF01/ SF01
033-064
AF02/ SF02
065-096
AF03/ SF03
097-128
AF04/ SF04
129-160
AF05/ SF05
161-192
AF06/ SF06
193-224
AF07/ SF07
225-255
AF08/ SF08
CH9
Speed
000-250
0: slow,250: fast
Sound active
251-255
Sound actived shows
Channel
Value
Description
CH1
Wash
000-255
Red brightness
CH2
000-255
Green brightness
CH3
000-255
Blue brightness
CH4
000-255
UV brightness
CH5
000-100
Total Brightness
101-250
Strobe slow to fast(0.3HZ-20HZ)
251-255
Strobe activated by sound
CH6
LED
000-005
Blackout
006-018
R
019-032
G
033-046
B
047-060
A
061-074
RG
075-088
RB
089-102
RA
103-116
GB
117-130
GA
131-144
BA
145-158
RGB
159-172
RGA
173-186
RBA
11 CHANNEL DMX-MODE:
JB SYSTEMS® 9/14 ALIEN
Page 12

ENGLISH USER MANUAL
187-200
GBA
201-214
RGBA
215-228
COLOR CHANGE 1
229-242
COLOR CHANGE 2
243-255
COLOR CHANGE 3
CH7
CH6 =
006-214
000-005
No Strobe
006-250
Strobe slow to fast(0.3HZ-20HZ)
251-255
Strobe activated by sound
CH6 =
215-255
000-250
0: slow,250: fast
251-255
Sound activated
CH8
LASER
000-005
Black out
006-048
R
049-089
G
090-131
RG
132-173
R flash G on
174-215
R on G flash
216-255
RG flash
CH9
000-005
No Strobe
006-250
Strobe slow to fast(0.3HZ-20HZ)
251-255
Sound activated
CH10
Motor
000
Stop
001-127
Rotate clock from slow to fast
128
Stop
129-255
Rotate wise-clock slow to fast
CH11
Strobe
000-005
Block out
006-0010
On
011-250
Strobe slow to fast(0.3HZ-20HZ)
251-255
Sound activated
Channel
Value
Description
CH1
Wash 1
000-255
Red brightness
CH2
000-255
Green brightness
CH3
000-255
Blue brightness
CH4
000-255
UV brightness
CH5
000-100
Total Brightness
101-250
Strobe slow to fast(0.3HZ-20HZ)
251-255
Strobe activated by sound
CH6
Wash 2
000-255
Red brightness
CH7
000-255
Green brightness
CH8
000-255
Blue brightness
CH9
000-255
UV brightness
CH10
000-100
Total Brightness
101-250
Strobe slow to fast(0.3HZ-20HZ)
251-255
Strobe activated by sound
CH11
Wash 3
000-255
Red brightness
CH12
000-255
Green brightness
CH13
000-255
Blue brightness
CH14
000-255
UV brightness
CH15
000-100
Total Brightness
101-250
Strobe slow to fast(0.3HZ-20HZ)
28 CHANNEL DMX-MODE:
JB SYSTEMS® 10/14 ALIEN
Page 13

ENGLISH USER MANUAL
251-255
Strobe activated by sound
CH16
LED1
000-005
Blackout
006-018
R
019-032
G
033-046
B
047-060
A
061-074
RG
075-088
RB
089-102
RA
103-116
GB
117-130
GA
131-144
BA
145-158
RGB
159-172
RGA
173-186
RBA
187-200
GBA
201-214
RGBA
215-228
Color change 1
229-242
Color change 2
243-255
Color change 3
CH17
If 6CH is
006-214
000-005
No Strobe
006-250
Strobe slow to fast(0.3HZ-20HZ)
251-255
Strobe activated by sound
If 6CH is
215-255
000-250
Show speed, 0: slow, 250: fast
251-255
Strobe activated by sound
CH18
LED2
000-005
Blackout
006-018
R
019-032
G
033-046
B
047-060
A
061-074
RG
075-088
RB
089-102
RA
103-116
GB
117-130
GA
131-144
BA
145-158
RGB
159-172
RGA
173-186
RBA
187-200
GBA
201-214
RGBA
215-228
Color change1
229-242
Color change2
243-255
Color change3
CH19
CH18 =
006-214
000-005
No Strobe
006-250
Strobe slow to fast(0.3HZ-20HZ)
251-255
Strobe activated by sound
CH18 =
215-255
000-250
Show speed, 0: slow, 250: fast
251-255
Sound active
000-005
Blackout
006-018
R
019-032
G
033-046
B
047-060
A
JB SYSTEMS® 11/14 ALIEN
Page 14

ENGLISH USER MANUAL
CH20
LED3
061-074
RG
075-088
RB
089-102
RA
103-116
GB
117-130
GA
131-144
BA
145-158
RGB
159-172
RGA
173-186
RBA
187-200
GBA
201-214
RGBA
215-228
COLOR CHANGE1
229-242
COLOR CHANGE2
243-255
COLOR CHANGE3
CH21
CH20 =
006-214
000-005
No Strobe
006-250
Strobe slow to fast(0.3HZ-20HZ)
251-255
Strobe activated by sound
CH20 =
215-255
000-250
Show speed, 0: slow, 250: fast
251-255
Sound active
CH22
Laser
000-005
Black out
006-048
R
048-89
G
090-131
RG
132-173
R flash G on
174-215
R on G flash
216-255
RG flash
CH23
000-005
No Strobe
006-250
Strobe slow to fast(0.3HZ-20HZ)
251-255
Strobe activated by sound
CH24
Motor
0
Stop
001-127
Rotate clock from slow to fast
128
Stop
129-255
Rotate wise-clock from slow to fast
CH25
Strobe
000-005
Blackout
006-010
ON
011-250
Strobe slow to fast(0.3HZ-20HZ)
251-255
Strobe activated by sound
CH26
Modes
000-005
Blackout
006-055
Auto Wash/ Sound Wash
056-105
Auto Beam/ SoundBeam
106-155
Auto Laser/ Sound Laser
156-205
Auto Flash LED/ Sound Flash LED
206-255
Auto MIX/ Sound MIX
CH27
Wash
000-005
Blackout
006-032
AP01/ SP01
033-064
AP02/ SP02
065-096
AP03 /SP03
097-128
AP04/ SP04
129-160
AP05/ SP05
161-192
AP06/ SP06
193-224
AP07/ SP07
225-255
AP08/ SP08
000-005
Blackout
006-030
AP01/ SP01
JB SYSTEMS® 12/14 ALIEN
Page 15

ENGLISH USER MANUAL
CH27
BEAM
031-055
AP02/ SP02
056-080
AP03 /SP03
081-105
AP04/ SP04
106-130
AP05/ SP05
131-155
AP06/ SP06
156-180
AP07/ SP06
181-205
AP08/ SP08
206-230
AP09/ SP09
231-255
AP10/ SP10
Laser
000-005
Blackout
006-046
AL01/ SL01
047-088
AL02/ SL02
089-130
AL03/ SL03
131-172
AL04/ SL04
173-214
AL05/ SL05
215-255
AL06/ SL06
Strobe
000-005
Blackout
006-032
AF01/ SF01
033-064
AF02/ SF02
065-096
AF03/ SF03
097-128
AF04/ SF04
129-160
AF05/ SF05
161-192
AF06/ SF06
193-224
AF07/ SF07
225-255
AF08/ SF08
Mixed shows
000-005
Blackout
000-085
AM01/ SM01
086-170
AM02/ SM02
171-255
AM03/ SM03
CH28
Speed
000-250
Show speed, 0: slow, 250: fast
Sound show
251-255
Show activated by sound
Button
Function
Description
ON/OFF
To switch the effect On or Off
MIX AUTO
Click several times for different programs
MIX SOUND
Click several times for different programs
WASH PROJECTOR
Click several times for different programs
LASER
Click several times for different programs
WHITE FLASH
Click several times for different programs
AUTO / SOUND
Used to toggle between automatic and sound mode
PAUSE
Used to pause the program
WASH COLOR
Color selection for the Wash projectors
SPEED
Select the speed for the automatic programs
IR REMOTE CONTROLLER
EXTRA MENU OPTIONS
Press the [MENU] button till [SYS] appears on the display
Press [ENTER] and use the [UP] & [DOWN] buttons to browse the different options:
[LEdS]: use this option to select if the display needs to go out when it is not used or if it has to be lit
JB SYSTEMS® 13/14 ALIEN
all the time
Page 16

ENGLISH USER MANUAL
[LEdr]: use this option to reverse the display. This can be useful when the unit is positioned upside-
down.
[tESt]: when you select this option, the unit will run an automatic test program, so you can easily
check visually if all the Leds or lasers are still working.
[rESt]: use this option to restore the initial factory settings.
MAINTENANCE
Make sure the area below the installation place is free from unwanted persons during servicing.
Switch off the unit, unplug the mains cable and wait until the unit has been cooled down.
During inspection the following points should be checked:
All screws used for installing the device and any of its parts should be tightly fastened and may not be
corroded.
Housings, fixations and installations spots (ceiling, truss, suspensions) should be totally free from any
deformation.
When an optical lens is visibly damaged due to cracks or deep scratches, it must be replaced.
The mains cables must be in impeccable condition and should be replaced immediately when even a
small problem is detected.
In order to protect the device from overheat the cooling fans (if any) and ventilation openings should be
cleaned monthly.
The interior of the device should be cleaned annually using a vacuum cleaner or air-jet.
The cleaning of internal and external optical lenses and/or mirrors must be carried out periodically to
optimize light output. Cleaning frequency depends on the environment in which the fixture operates: damp,
smoky or particularly dirty surroundings can cause greater accumulation of dirt on the unit’s optics.
Clean with a soft cloth using normal glass cleaning products.
Always dry the parts carefully.
Clean the external optics at least once every 30 days.
Clean the internal optics at least every 90 days.
Attention: We strongly recommend internal cleaning to be carried out by qualified personnel!
SPECIFICATIONS
This device was designed to produce decorative effect lighting and is used in light show systems.
This unit is radio-interference suppressed. This product meets the requirements of the current European and
national guidelines. Conformity has been established and the relevant statements and documents have been
deposited by the manufacturer.
Mains Input: AC 100~240V, 50/60Hz
Fuse: 250V 1.6A slow blow (20mm glass)
Max. Power consumption: 70W
Sound Control: Internal microphone
DMX connections: 3pin XLR male / female
DMX channels: 3 / 9 / 11 / 28 channels
Par LEDs: 9x8Watt Red-Green-Blue-UV Led’s
Beam effect LEDs: 84x0.75Watt Led’s
(24x Red + 18x Green + 18x Blue + 24x Amber)
Strobe LEDs: 12x 0.5Watt LEDs
Laser Power: 100mW Red (λ = 650nm) + 30mW Green laser (λ = 532n)
Laser radiation class: 3R
Working temperature: 10°C to 40°C
Laser Safety Standard: EN/IEC 60825-1
Size: 335x312x191mm
Weight: 3.12 kg
All the information is subject to change without prior notice
You can download the latest version of this user manual on our website: www.jb-systems.eu
JB SYSTEMS® 14/14 ALIEN
Page 17

 Loading...