

Page 1
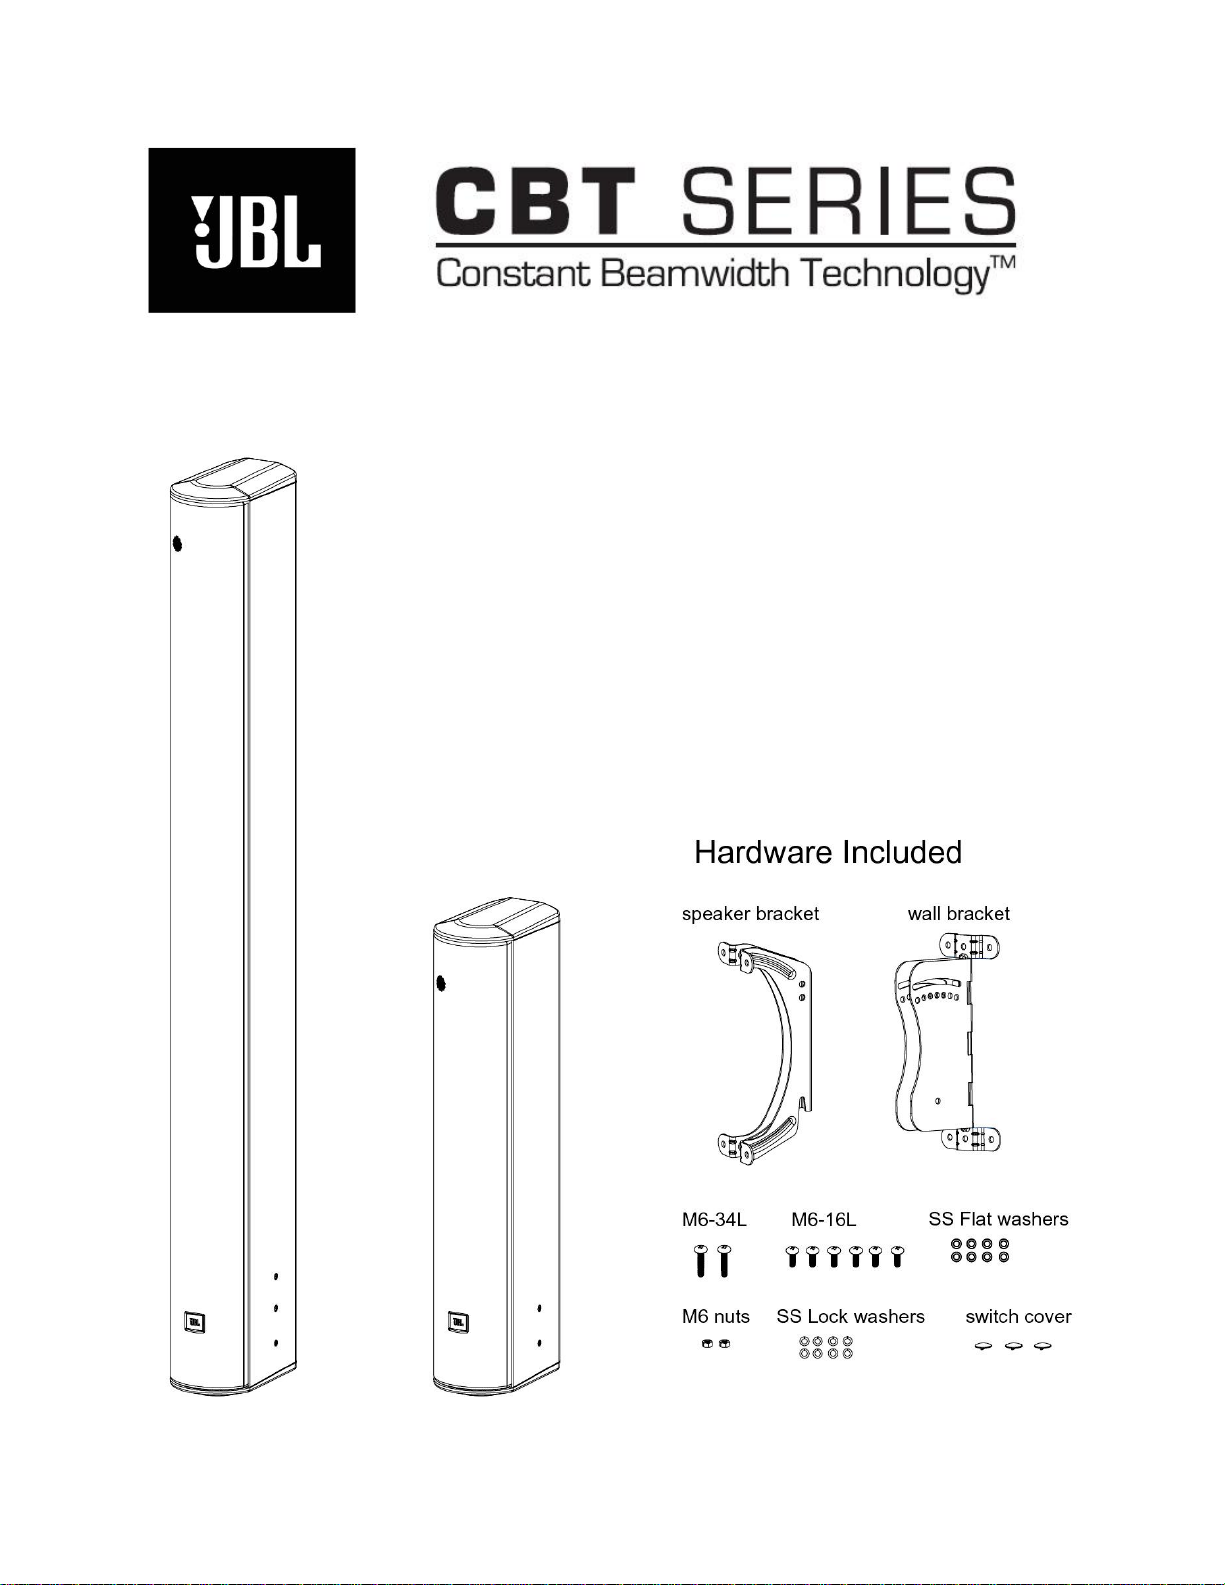
CBT 100LA
CBT 50LA
CBT 100LA and CBT 50LA Bracket Installation Guide
Page 2
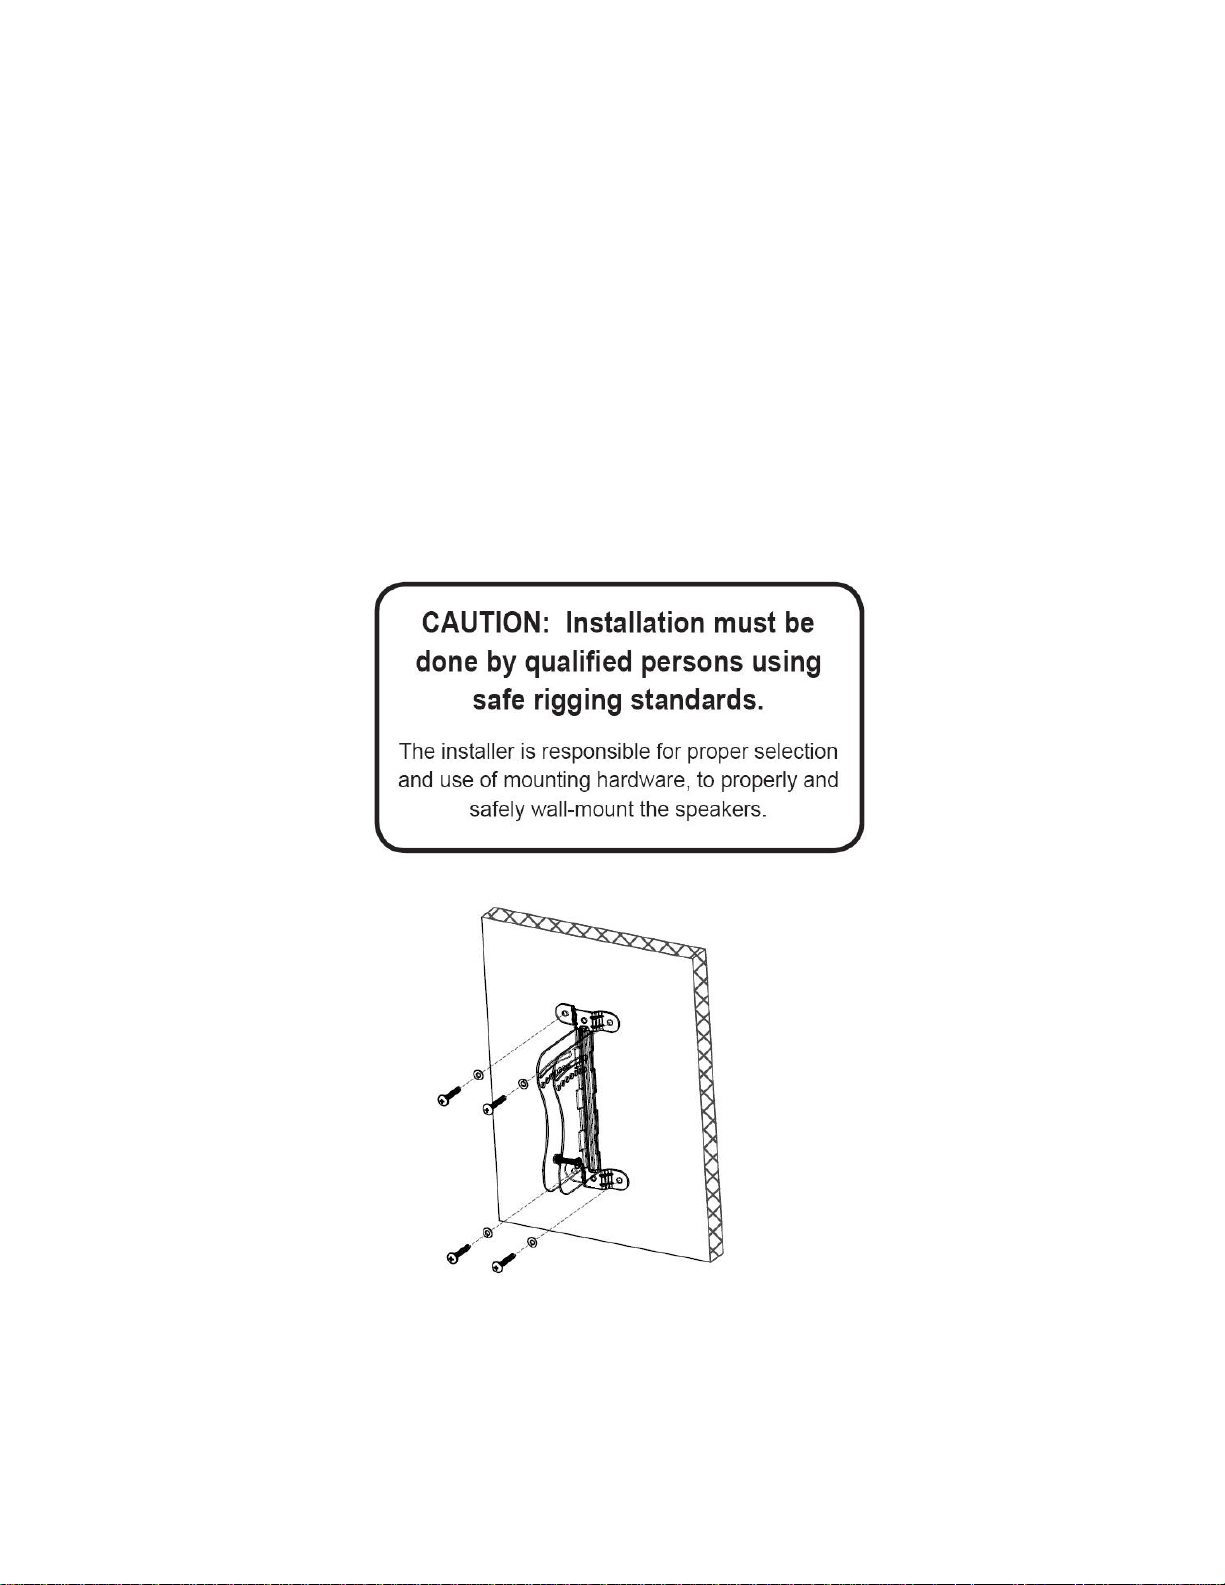
WALL SURFACE MOUNTING
Note that the BRACKET ASSEMBLY consists of a
WALL BRACKET.
1) RUN WIRING -- Run the wiring from the power amplifier to the location
desired for mounting the JBL CBT Loudspeakers.
2) ATTACH WALL BRACKET TO WALL -- Using a level to ensure that the
BRACKET
the appropriate wall anchors for attaching the bracket. Use all four screw
holes for maximum integrity and safety. Be sure that the slot feature is at
the top.
is straight, secure the
WALL BRACKET
SPEAKER BRACKET
to the wall. Be sure to use
and a
WALL
Hardware for attaching WALL BRACKET to wall is not included.
Page 3

3) ATTACH SPEAKER BRACKET TO SPEAKER
3a) CBT 50LA -- Mount the
SPEAKER BRACKET
to the speaker with the
provided M6 hardware. For the CBT 50LA there are three (3) mounting
position. Choose the one that best suits the application. Be sure the hook
feature is downward.
Page 4

3b) CBT 100LA -- Mount the
SPEAKER BRACKET
to the speaker with the
provided M6 hardware. For the CBT 100LA there are seven (7) mounting
position. Choose the one that best suits the application. Be sure the hook
feature is downward.
Page 5

4) SLIDE SPEAKER WITH
SPEAKER BRACKET
ONTO
WALL BRACKET
the wall mount and speaker mount have been attached, slide the speaker
forward into the
WALL BRACKET
, dropping the hook slot in the speaker
bracket onto the pivot bolt (which will already be installed loosely in the
WALL BRACKET
).
-- Once
5) SET THE TILT ANGLE – Once the speaker has nested securely on the pivot
bolt, slide the second M6 34mm bolt into one of the holes in top of the wall
bracket to set the angle.
5a) TILT ANGLES -- The bracket allows for +/-15 degrees of tilt. Some of the
extreme tile angles are not recommended as the speaker will run into the
wall first.
Page 6

5b) PRE- SET ANGLES and CONTINUOUSLY VARIABLE ANGLE -- The
bracket has through holes for mounting angles of +/- 15 degrees in 5 degree
increments. There is also a slot above the holes for continuously variable
adjustment. The pre-set angles are recommended for accurate aiming.
5C) SECURE THE ANGLE SETTING -- Once the angle has been chosen
tighten both bolts with hardware provided.
6) Attach a safety cable (not included) to any of the 6 mm inserts on the back
of the CBT 100LA/50LA cabinet using the included M6 mm bolt. Prepare to
attach the other end of the cable to a secondary attachment point on the
wall.
CBT Install 07/09
 Loading...