

Page 1
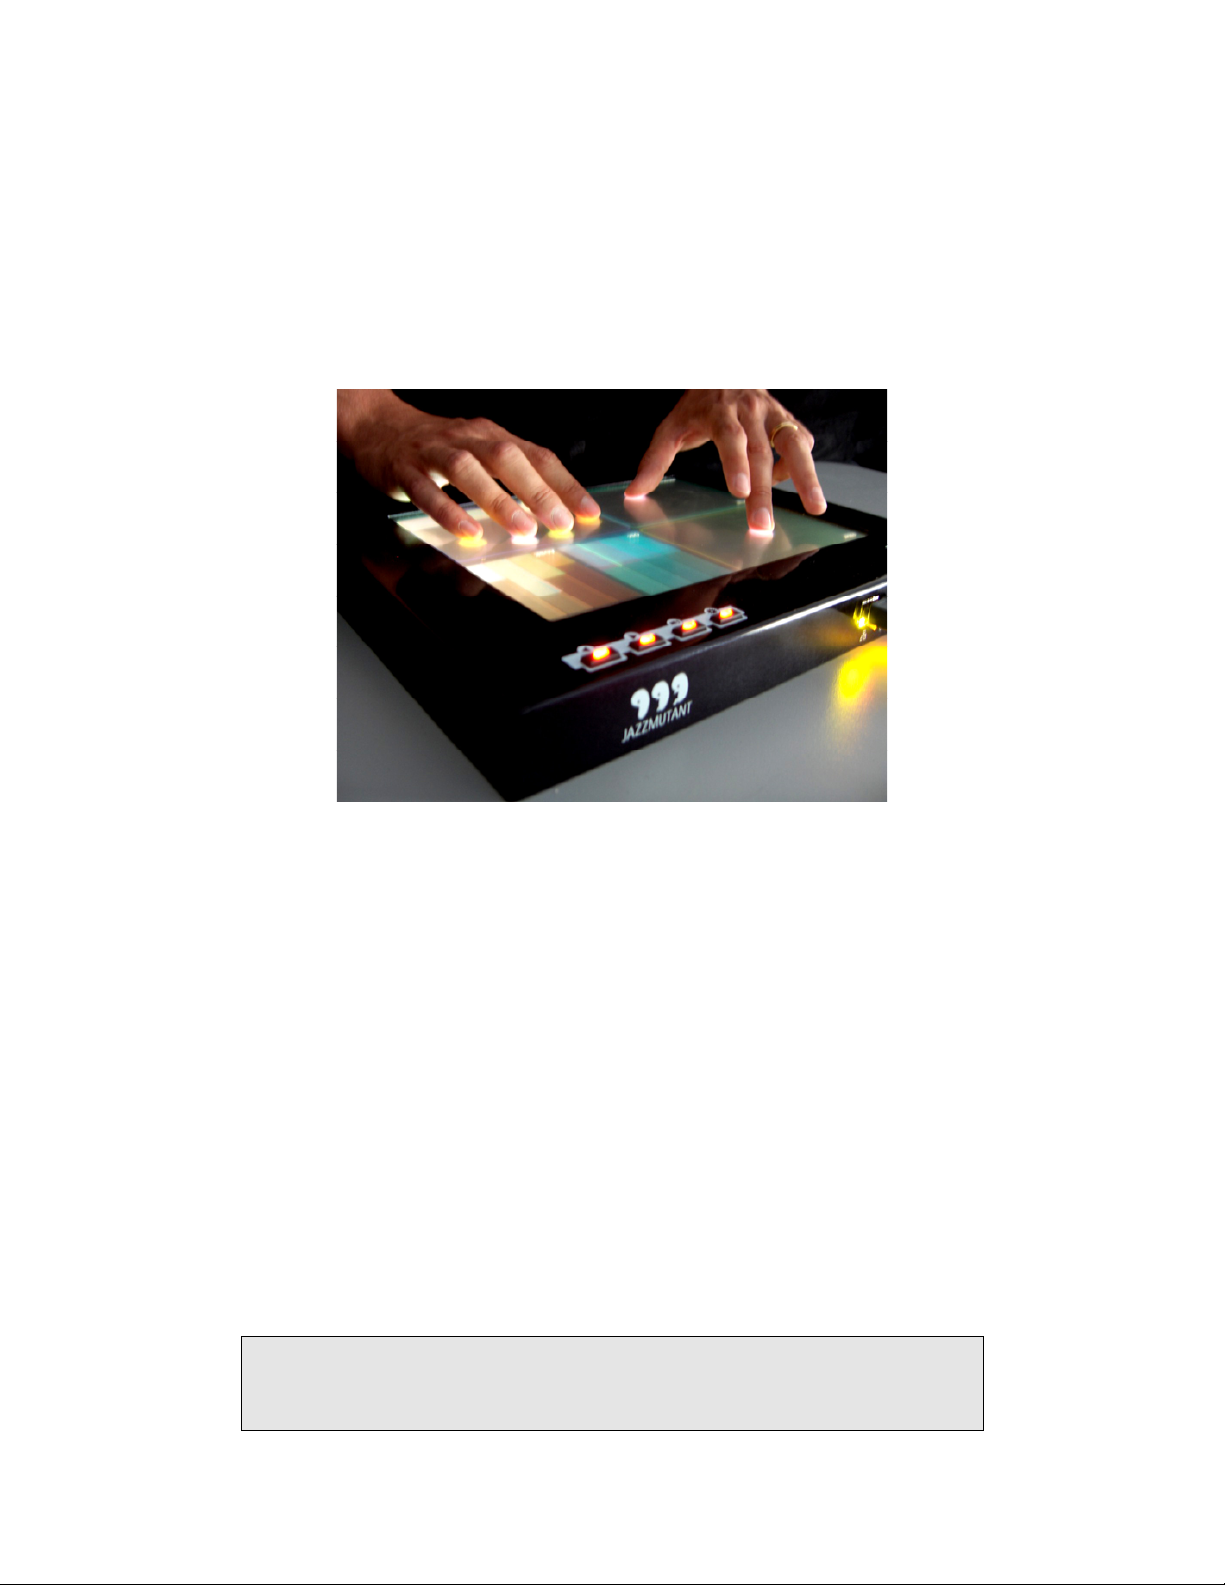
1
The Lemur Owner’s
Manual
Revision of 31 October 2005
© 2005 Jazz Mutant SAS and Cycling ’74 — All rights reserved
Congratulations on your choice of the JazzMutant Lemur. This manual tells you:
• Important safety information
• How to network your Lemur and your computer
• How to create interfaces for your Lemur using the JazzEditor application for Mac OS
X and Windows XP
• How to use your Lemur to control software compatible with the Open Sound Control
protocol
• How to use your Lemur to send MIDI messages to compatible software
Before using this unit, carefully read the IMPORTANT SAFETY
INFORMATION included in this manual, which provides important
information concerning the proper operation of the unit.
Page 2

2
To understand the features and possibilities of your new Lemur, we recommend that you
read the Owner's Manual in its entirety and retain it for future reference.
Page 3

3
Table of Contents
Contact Information ........................................................................................................ 7
For the United States and Canada................................................................................ 7
For all Other Countries................................................................................................ 7
Important Safety Information ......................................................................................... 8
What’s Included in the Box?.......................................................................................... 11
Regulatory Information ................................................................................................. 12
For EU Countries...................................................................................................... 12
For USA ................................................................................................................... 12
For Canada................................................................................................................ 12
Notes for Proper Operation .......................................................................................... 13
Power Supply ........................................................................................................... 13
Placement.................................................................................................................. 13
Maintenance.............................................................................................................. 13
Additional Precautions .............................................................................................. 14
Getting Started with the Lemur ..................................................................................... 15
Know Your Lemur .................................................................................................... 15
Lemur System Overview ........................................................................................... 16
Connect Up the Lemur.............................................................................................. 16
Lemur Networks ....................................................................................................... 17
Basic Setup Using the Lemur Settings Window ......................................................... 18
Connecting a Lemur Directly to Your Computer ....................................................... 19
Using a Lemur in a Local Area Network .................................................................... 25
Installing the JazzEditor Software ............................................................................. 26
Getting Your Lemur Connected to the JazzEditor...................................................... 27
Interfaces and Objects ................................................................................................... 31
JazzEditor Overview................................................................................................. 31
Creating Interfaces..................................................................................................... 32
Creating Objects........................................................................................................ 33
Changing Object Properties ....................................................................................... 35
Navigating Interfaces ................................................................................................. 38
Projects......................................................................................................................... 40
Working with the Project Browser............................................................................. 40
Saving Your Project ................................................................................................... 41
More About the Lemur – JazzEditor Relationship .................................................... 41
Summary................................................................................................................... 46
Page 4

4
Using the Lemur with Open Sound Control Applications ............................................. 48
Using the JazzEditor Settings Window ...................................................................... 48
Connecting the Lemur to Max/MSP .......................................................................... 50
Understanding the Lemur’s Open Sound Control Messages ...................................... 53
Controlling Max/MSP with the Lemur ...................................................................... 53
Controlling the Lemur from Max/MSP ...................................................................... 55
Lemur Object Reference ................................................................................................ 57
Guide to Object Reference Pages ............................................................................... 57
Fader............................................................................................................................. 58
Variables ................................................................................................................... 58
Dimensions ............................................................................................................... 58
General Properties..................................................................................................... 58
Properties Example ................................................................................................... 59
Behavior Properties................................................................................................... 60
OSC Data.................................................................................................................. 61
Monitor ........................................................................................................................ 62
Variables ................................................................................................................... 62
Dimensions ............................................................................................................... 62
General Properties..................................................................................................... 62
Behavior Properties................................................................................................... 62
OSC Data.................................................................................................................. 63
Multiball....................................................................................................................... 64
Variables ................................................................................................................... 64
Dimensions ............................................................................................................... 64
General Properties..................................................................................................... 64
Behavior Properties................................................................................................... 65
OSC Data.................................................................................................................. 67
MultiSlider.................................................................................................................... 68
Variables ................................................................................................................... 68
Dimensions ............................................................................................................... 68
General Properties..................................................................................................... 68
Behavior Properties................................................................................................... 68
OSC Data.................................................................................................................. 69
Pads .............................................................................................................................. 70
Variables ................................................................................................................... 70
Dimensions ............................................................................................................... 70
General Properties..................................................................................................... 70
Behavior Properties................................................................................................... 71
Page 5

5
OSC Data.................................................................................................................. 72
RingArea....................................................................................................................... 73
Variables ................................................................................................................... 73
Dimensions ............................................................................................................... 73
General Properties..................................................................................................... 73
Behavior Properties................................................................................................... 73
OSC Data.................................................................................................................. 74
SignalScope................................................................................................................... 75
Variables ................................................................................................................... 75
Dimensions ............................................................................................................... 75
General Properties..................................................................................................... 75
Behavior Properties................................................................................................... 75
Switches........................................................................................................................ 77
Variables ................................................................................................................... 77
General Properties..................................................................................................... 77
Behavior Properties................................................................................................... 78
OSC Data.................................................................................................................. 78
Variables and Expressions ............................................................................................. 79
Using Objects to Control Behavior............................................................................ 79
Scaling Output with Expressions............................................................................... 80
Using List Variables .................................................................................................. 84
Using Variables and Expressions to Display Data...................................................... 87
Advanced Expression Features...................................................................................... 90
Available Built-in Functions and Operators............................................................... 90
Local and Global Variables ........................................................................................ 90
Defining and Using Functions.................................................................................... 91
Operating on Vectors ................................................................................................ 92
Using the Time Variable ............................................................................................ 93
Using the Lemur with MIDI Applications .................................................................... 96
JazzEditor MIDI Settings ......................................................................................... 97
MIDI Mapping......................................................................................................... 97
Multiple MIDI Controllers ....................................................................................... 99
Updating the Firmware of Your Lemur........................................................................ 102
Downloading New Firmware................................................................................... 102
Connecting To Your Lemur and Updating the Firmware.......................................... 103
Index........................................................................................................................... 105
Page 6

6
Page 7

7
Contact Information
For software updates, examples, and other supporting software, visit the JazzMutant
web site at www.jazzmutant.com
For the United States and Canada
Cycling ’74 (distributor for JazzMutant)
379A Clementina
San Francisco, CA 94103 - USA
+ 1 (415) 974-1818
For all Other Countries
JazzMutant SAS
2, allée du Doyen Georges Brus
33600 Pessac - FRANCE
+33 (0)556 46 03 44
Page 8

8
Important Safety Information
In order to prevent fire, electric shock, or injury to the user, always observe the following
guidelines:
• Before using this unit, make sure to read the instructions below and the Owner's
Manual.
• Do not open or modify the unit or its AC adaptor in any way.
• Do not attempt to repair the unit, or replace parts within it. Refer all servicing to your
retailer or authorized Jazz Mutant distributor, as listed on the Information page.
• Never use or store the unit in places that are:
• Subject to extreme temperature (e.g., direct sunlight, an enclosed vehicule, near a
heating duct, on top of heat-generating equipment)
• Damp (e.g., baths washroom, on wet floors)
• Humid
• Exposed to rain or snow
• Dusty
• Subject to high levels of vibration
• Be sure to use only the AC adaptor supplied with the unit. Also, make sure the line
voltage at the installation matches the input voltage specified on outside of the AC
adaptor. Other AC adaptors may use a different polarity or be designed for a different
voltage, so their use could result in damage, malfunction, or electric shock.
• Do not excessively twist or bend the power cord, nor place heavy objects on it. Doing
so can damage the cord, producing severed elements and short circuits. Damaged
electrical cords are fire and shock hazards!
• Do not allow any objects (e.g., flammable material, coins, pins) or liquid of any kind
(water, soft drinks, etc.) to penetrate the unit.
• In the case of any of the following events, immediately switch off the unit, remove the
AC adaptor from the outlet, and request service by your retailer or authorized
JazzMutant distributor:
• The AC adaptor or the power-supply cord as been damaged;
• Smoke or unusual odours are observed;
Page 9

9
• Objects have fallen into, or liquid has spilled onto the unit;
• The unit has been exposed to rain (or otherwise has become wet);
• The unit does not appear to operate normally or exhibits a marked change in
performance.
• In households with small children, an adult should provide supervision until the child
is capable of following all the rules essential for the safe operation of the unit.
• Protect the unit from strong impact. Do not drop it!
• Do not force the unit's power-supply cord to share an outlet with an unreasonable
number of other devices. Be especially careful when using extension cords—the total
power used by all devices you have connected to an extension chord must never
exceed the cord’s power rating (watts/amps). Excessive loads can cause the insulation
on the cord to heat up or even melt down.
• The unit and the AC adaptor should be located so their location or position does not
interfere with the proper ventilation of the unit.
• Always grasp only the output plug or the body of the AC adaptor when plugging or
unplugging the unit.
• Any accumulation of dust between the AC adaptor and the power outlet can result in
poor insulation and possibly cause a fire. Periodically wipe away such dust with a
dry cloth. Also, disconnect the power plug from the outlet whenever the unit is to
remain unused for an extended period of time.
• Try to prevent cords and cables from becoming entangled. Also, all cords and cables
should be placed so they are out of the reach of children.
• Never step on, nor place heavy objects on the unit.
• Never handle the AC adaptor body, or its output plugs, with wet hands when
plugging into, or unplugging from, an outlet or this unit.
• If you need to move the unit, make sure to have a firm grip, to protect yourself from
injury and the unit from damage. Also, don't forget to disconnect all cords and cables!
• Before cleaning the unit, turn off the power and unplug the AC adaptor from the
outlet.
• Whenever you suspect the possibility of lightning in your area, disconnect the AC
adaptor from the outlet.
Page 10

10
• Should you remove security screws, make sure to put them in a safe place out of
children's reach, so there is no chance of them being swallowed accidentally.
Page 11

11
What’s Included in the Box?
• The main thing that’s included, of course, is your Lemur multitouch control surface.
• Ethernet cable intended for direct connections between the Lemur and your computer.
• External power supply: switching, 100-240V, 50-60Hz AC input; 12V DC 2 Amp /
24W output. This is a fairly hefty output. Using a power supply with a lower output
rating poses a serious fire hazard.
• CD containing the JazzEditor applications for Mac and Windows that you’ll use to
program the Lemur, a PDF version of this documentation, a demo of Max/MSP, and
useful Max goodies for working with the Lemur.
Page 12

12
Regulatory Information
For EU Countries
CE This product complies with the requirements of European Directive 89/336/EEC.
For USA
FCC REGULATION WARNING
This equipment has been tested and found to comply with the limits for a Class B digital
device, pursuant to Part 15 of the FCC Rules. These limits are designed to provide
reasonable protection against harmful interference in a residential installation. This
equipment generates, uses, and can radiate radio frequency energy and, if not installed and
used in accordance with the instructions, may cause harmful interference to radio
communication. However, there is no guarantee that interference will not occur in a
particular installation. If this equipment does cause harmful interference to radio or
television reception, which can be determined by turning the equipment off and on, the
user is encouraged to try to correct interference by one or more of the following measures:
• Reorient or relocate the receiving antenna.
• Increase the separation between the equipment and receiver.
• Connect the equipment into an outlet on a circuit different from that to which the
receiver is connected.
• Consult the dealer or an experienced radio/TV technician for help.
• Unauthorized changes or modification to this system can void the user’s authority to
operate this equipment.
For Canada
NOTICE: This Class B digital apparatus meets all requirements of the Canadian
Interference-Causing Equipment Regulation.
AVIS: Cet appareil numérique de la classe B respecte toutes les exigences du Règlement
sur le matériel brouilleur du Canada.
Page 13

13
Notes for Proper Operation
Power Supply
• Do not use this unit on the same power circuit with any device that generates line
noise (such as an electric motor or variable lightning system).
• The AC adaptor will generate heat after long hours of continuous use. This is normal
and should not cause any alarm.
• Before connecting the unit to other devices, turn off the power to all units. This will
help prevent malfunctions and/or damage to speakers or other devices.
Placement
• Using the unit near power amplifiers (or other equipment containing large power
transformers) may induce “hum”. To alleviate this problem, change the orientation of
this unit, or move it farther away from the source of interference.
• This device may interfere with radio and television reception. Do not use this device
in the vincinity of such receivers.
• Noise may be produced if wireless communications devices, such as cell phones, are
operated in the vicinity of this unit. Such noise could occur when receiving or
initiating a call, or while conversing. Should you experience such problems, try
relocating the wireless devices so that they are further from this LEMUR, or switch
them off.
• Do not expose the unit to direct sunlight, place it near devices that radiate heat, leave
it inside an enclosed vehicle, or otherwise subject it to temperature extremes.
• When moved from one location to another where there is a major change in
temperature and/or humidity, water droplets (condensation) may form inside the unit.
Damage or malfunction may result if you attempt to use the unit in this condition.
Therefore, before using the unit, you must leave it idle for several hours until the
condensation has completely evaporated.
Maintenance
• For everyday cleaning wipe the unit with a soft, dry cloth or one that has been
slightly dampened with water. To remove stubborn dirt, use a cloth with a mild, non-
Page 14

14
abrasive detergent. Afterwards, be sure to wipe the unit thoroughly with a soft, dry
cloth.
• Never use benzine, thinners, alcohol or solvents of any kind; such chemical may cause
discoloration and/or deformation.
Additional Precautions
• When working with the unit’s buttons, display, or other controls or when using its
cords and cables try to be reasonably gentle. Rough handling can lead to malfunctions.
• Never strike or apply strong pressure to the display.
• When connecting/disconnecting all cables, grasp the connector itself-never pull on the
cable. This way you will avoid causing shorts, or damage to the cable's internal
elements.
• When transporting the unit, please ensure it is properly packed to protect it from
shock and damage, using, for example, a sturdy laptop case (15” or 17” should fit).
Place an additional protective layer over the display.
• Use the Ethernet cable supplied with the unit. If using some other cable, please ensure
it is not a crossover Ethernet cable.
Page 15
15
Getting Started with the Lemur
Know Your Lemur
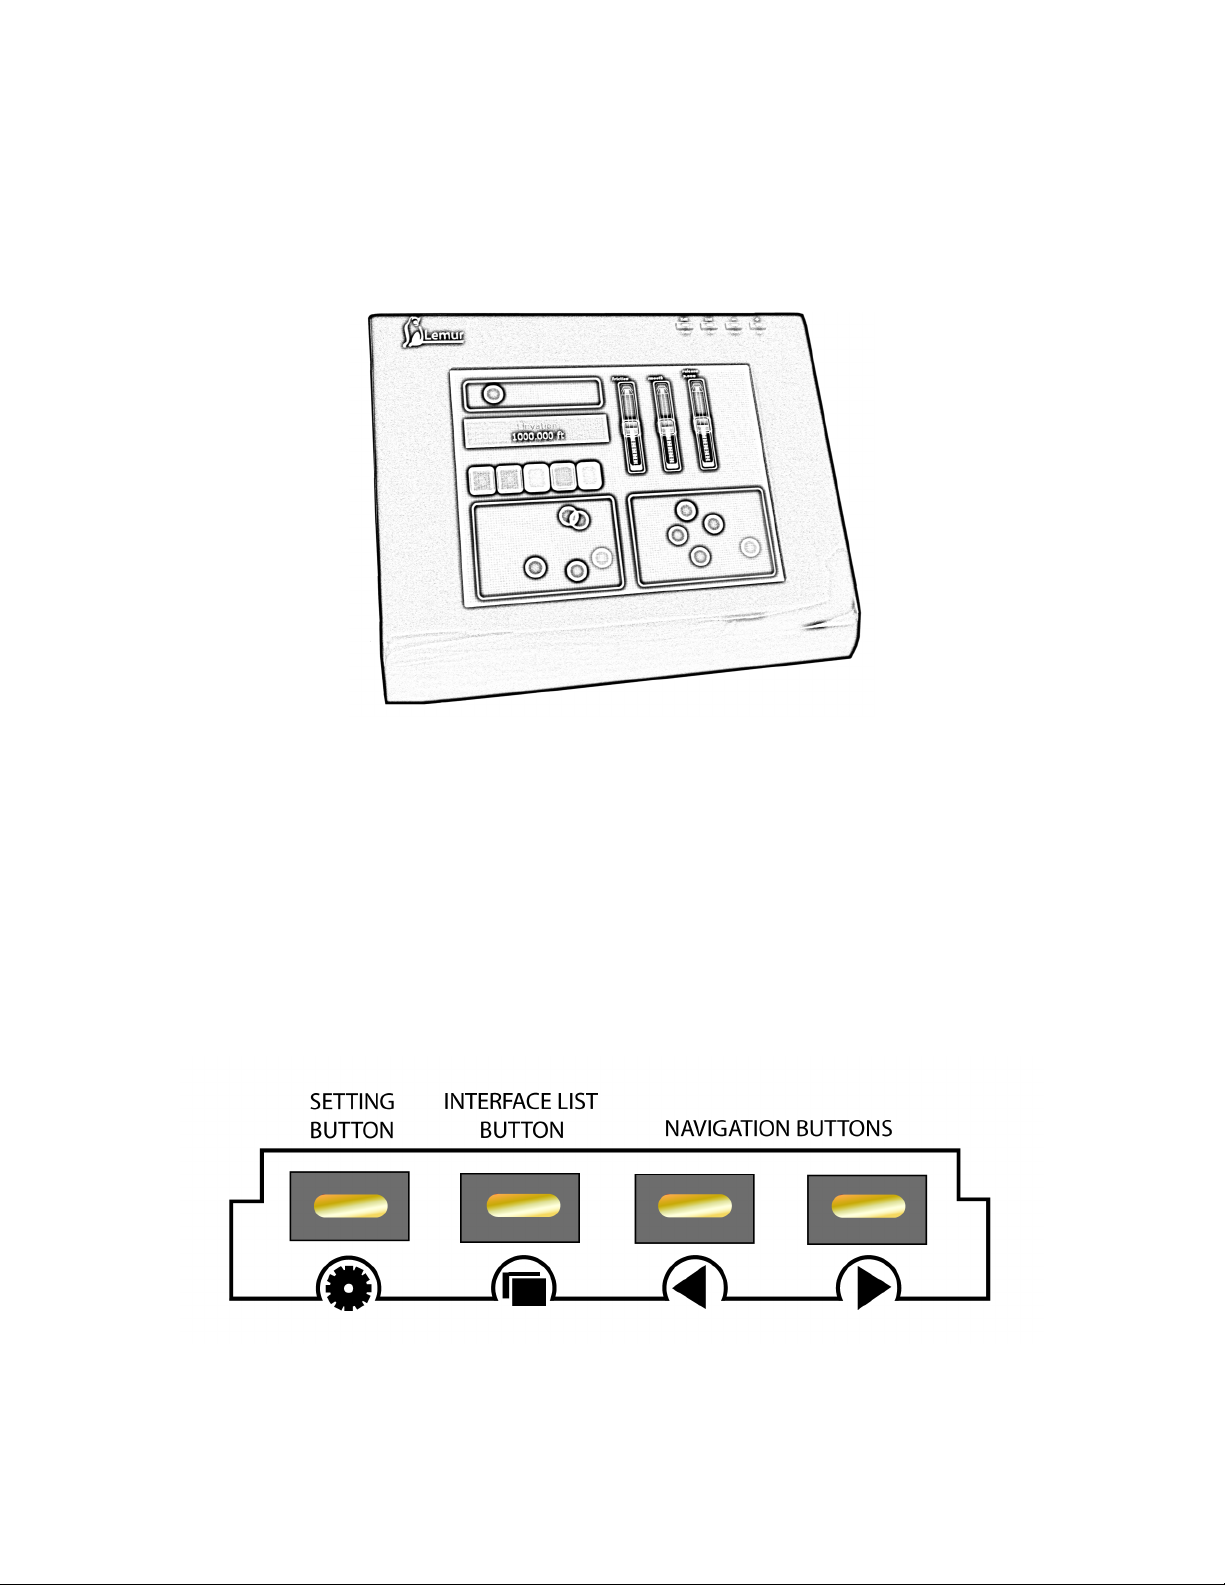
The top of the Lemur includes a touchscreen and four buttons.
• The Settings button displays the current Lemur network configuration and software
version.
• The Interface List button displays a gallery of thumbnails corresponding to each
interface currently stored on the unit. Touch the desired interface to display it.
• The two Navigation buttons allow you to move forward and backward among the
interfaces currently stored on the unit.
Page 16
16
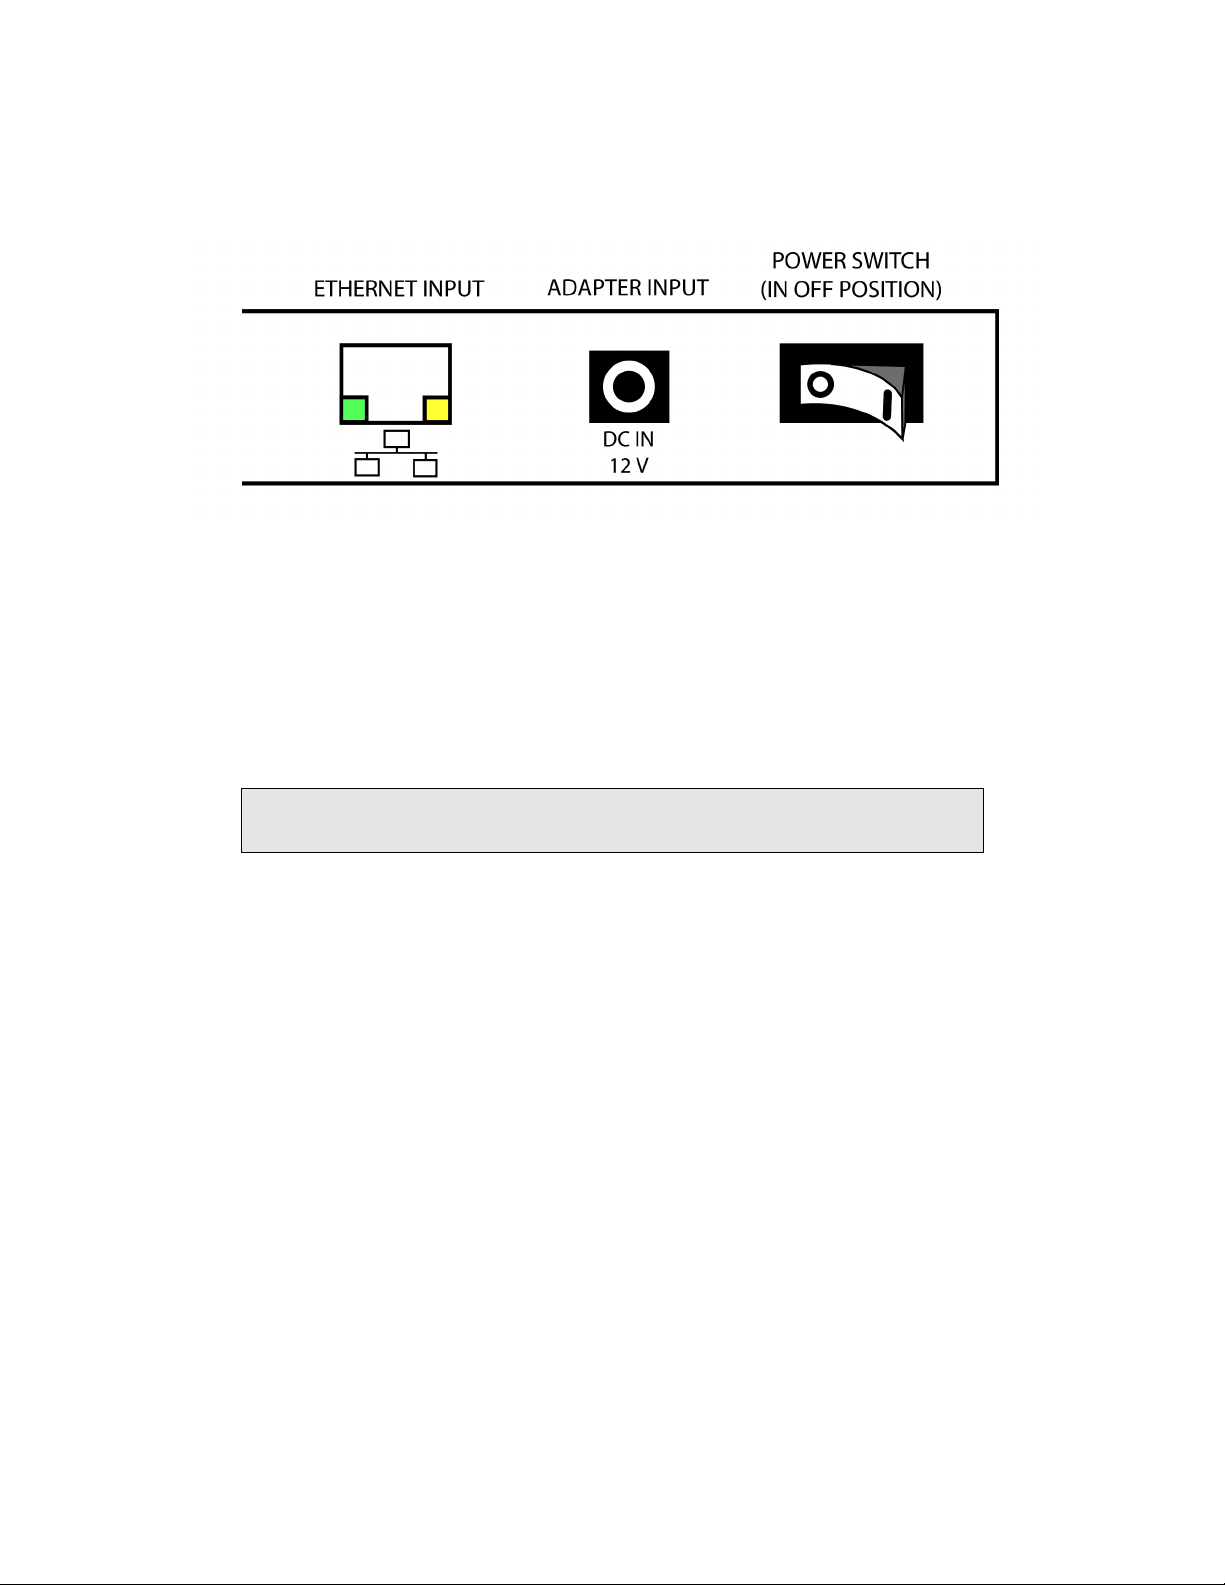
The rear panel of the Lemur houses the power switch, power input jack, and Ethernet
jack with status lights.
Lemur System Overview
To use the Lemur you will need
• an network connection from the LEMUR to a computer (running Mac OS X 10.2 or
later, or Windows XP). If you are connecting the Lemur directly to your computer,
please use the Ethernet cable supplied in your Lemur box.
You can also connect the LEMUR to your computer’s network using
routers and/or switches. See the Lemur Networks section below for details.
• the JazzEditor software, which lets you create interfaces consisting of graphic objects
on your computer and store them in the LEMUR
• a software application compatible with the OpenSoundControl protocol, such as
Max/MSP from Cycling ’74 or Reaktor from Native Instruments, or a MIDI-
compatible software application
We’ll take you step by step through the process of getting your LEMUR up and running.
Please follow these instructions closely, especially if you are not experienced with
computer networking concepts.
Connect Up the Lemur
• Plug in the Lemur using its supplied AC adaptor.
Page 17

17
• Turn on the power switch on the back of the Lemur. You should see the four buttons
on the top of the unit light up. After the startup sequence has finished, a yellow
Lemur should be visible on the screen.
If you don’t see the yellow Lemur but you are sure the unit is turned on
and plugged in, the unit may be malfunctioning. Please contact your
JazzMutant retailer or distributor for technical support and/or repair
service.
Lemur Networks
The Lemur uses an Ethernet-based network to communicate with your computer. This
allows it to be connected directly to your computer with a single Ethernet cable, or placed
on a local area network.
So, first, you have to decide how you want to connect.
You may want to use a local area network if any of the following are true:
Page 18
18
• You use your computer’s Ethernet port to connect to the internet, and you want to
stay connected while you use your Lemur.
• You use a wireless connection to the internet with a wireless router, and you would
like to access your Lemur wirelessly by connecting it to your router.
• You have several Lemur devices you would like to use to control your computer at
the same time (lucky you!).
You may want to connect your Lemur directly to you computer with a single cable if any
of the following are true:
• Your Lemur is the only Ethernet device you have (either because you don’t own any
others or you connect wirelessly to other Ethernet network devices)
• You are looking for the simplest possible configuration for live performance
First, we’ll discuss the Lemur Settings Window where you can setup the Lemur side of
your configuration. Then we’ll discuss how to configure your Lemur in the direct
connection and router scenarios.
Basic Setup Using the Lemur Settings Window
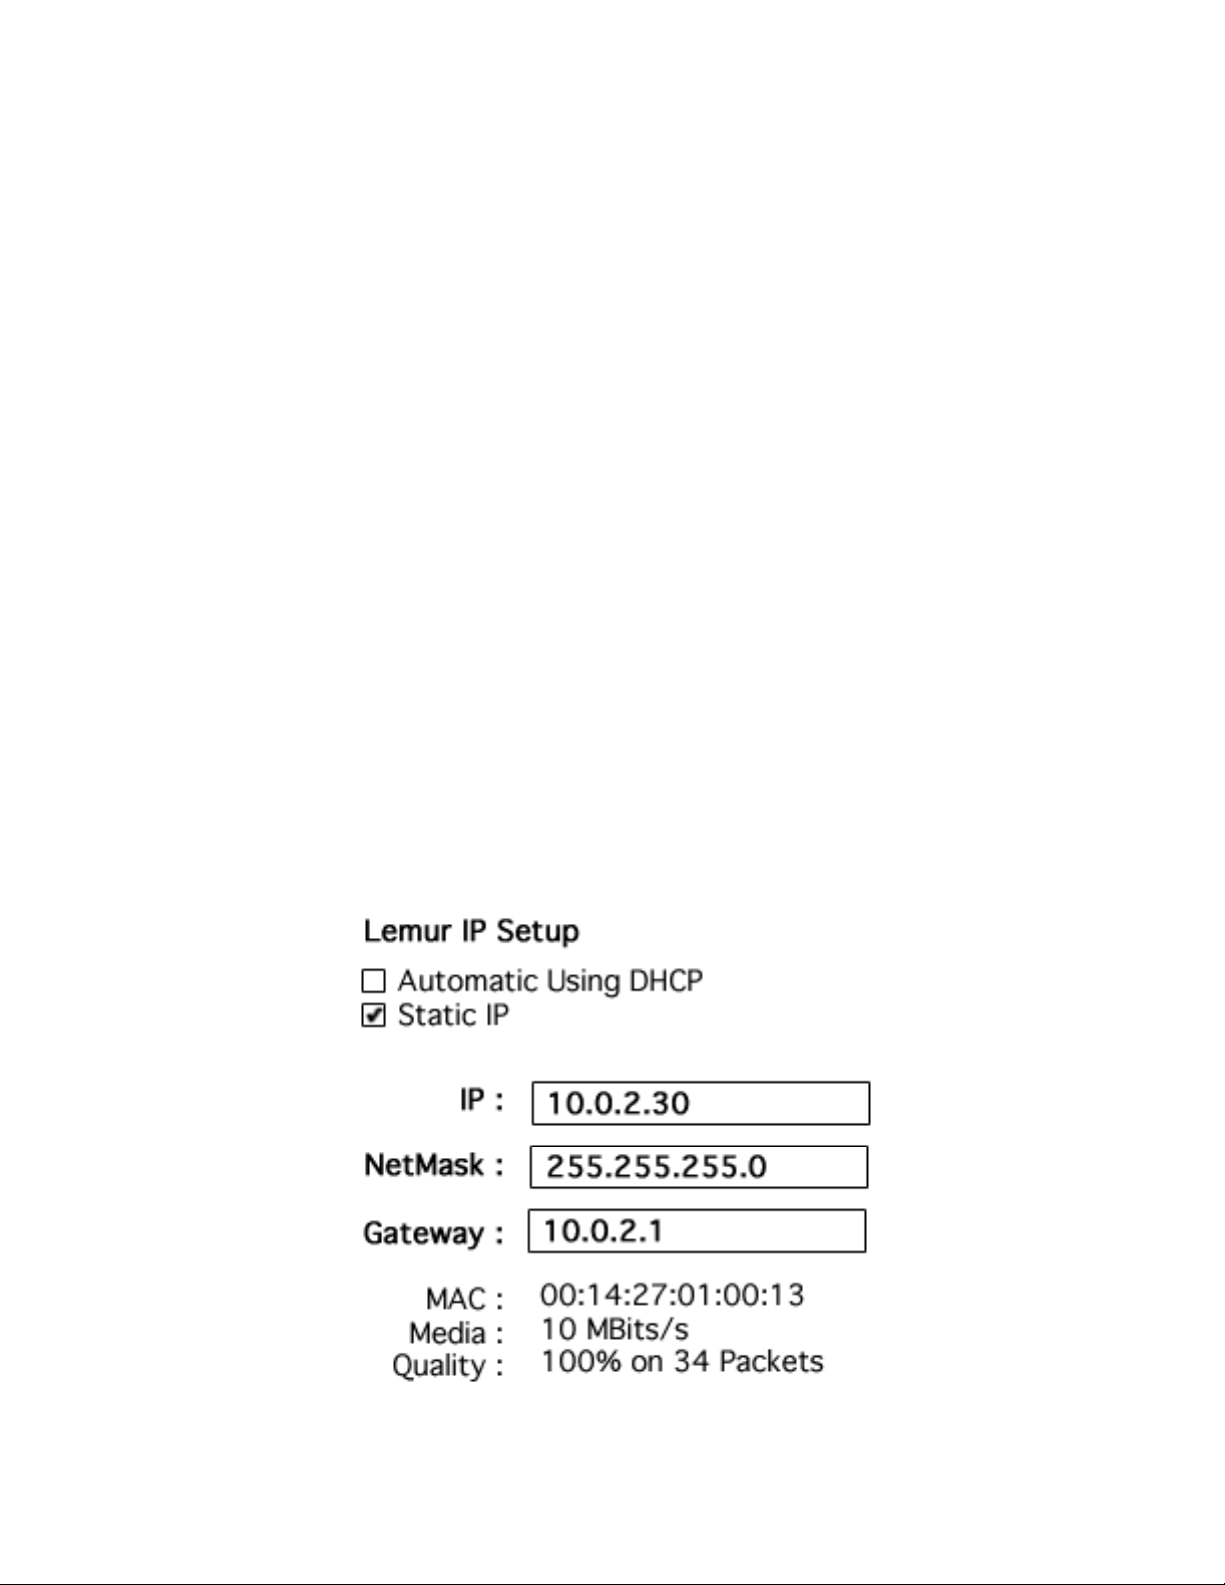
• Press the Settings button on top of the Lemur. You’ll see the following screen,
although the details will be different for your setup.
Page 19
19
• To check if you’ve successfully connected your Lemur to your computer or a router,
check the Media display near the bottom of the screen. If connected, it will report the
speed of the connection (in the screen shown, it is 10 Megabits per second). If there is
a problem, the Media will be displayed as Disconnected.
• To use a fixed IP address to the Lemur (useful when you are connecting directly to the
computer), touch the words Static IP. To use DHCP to assign the IP address
automatically (best when using a router), touch Automatic using DHCP.
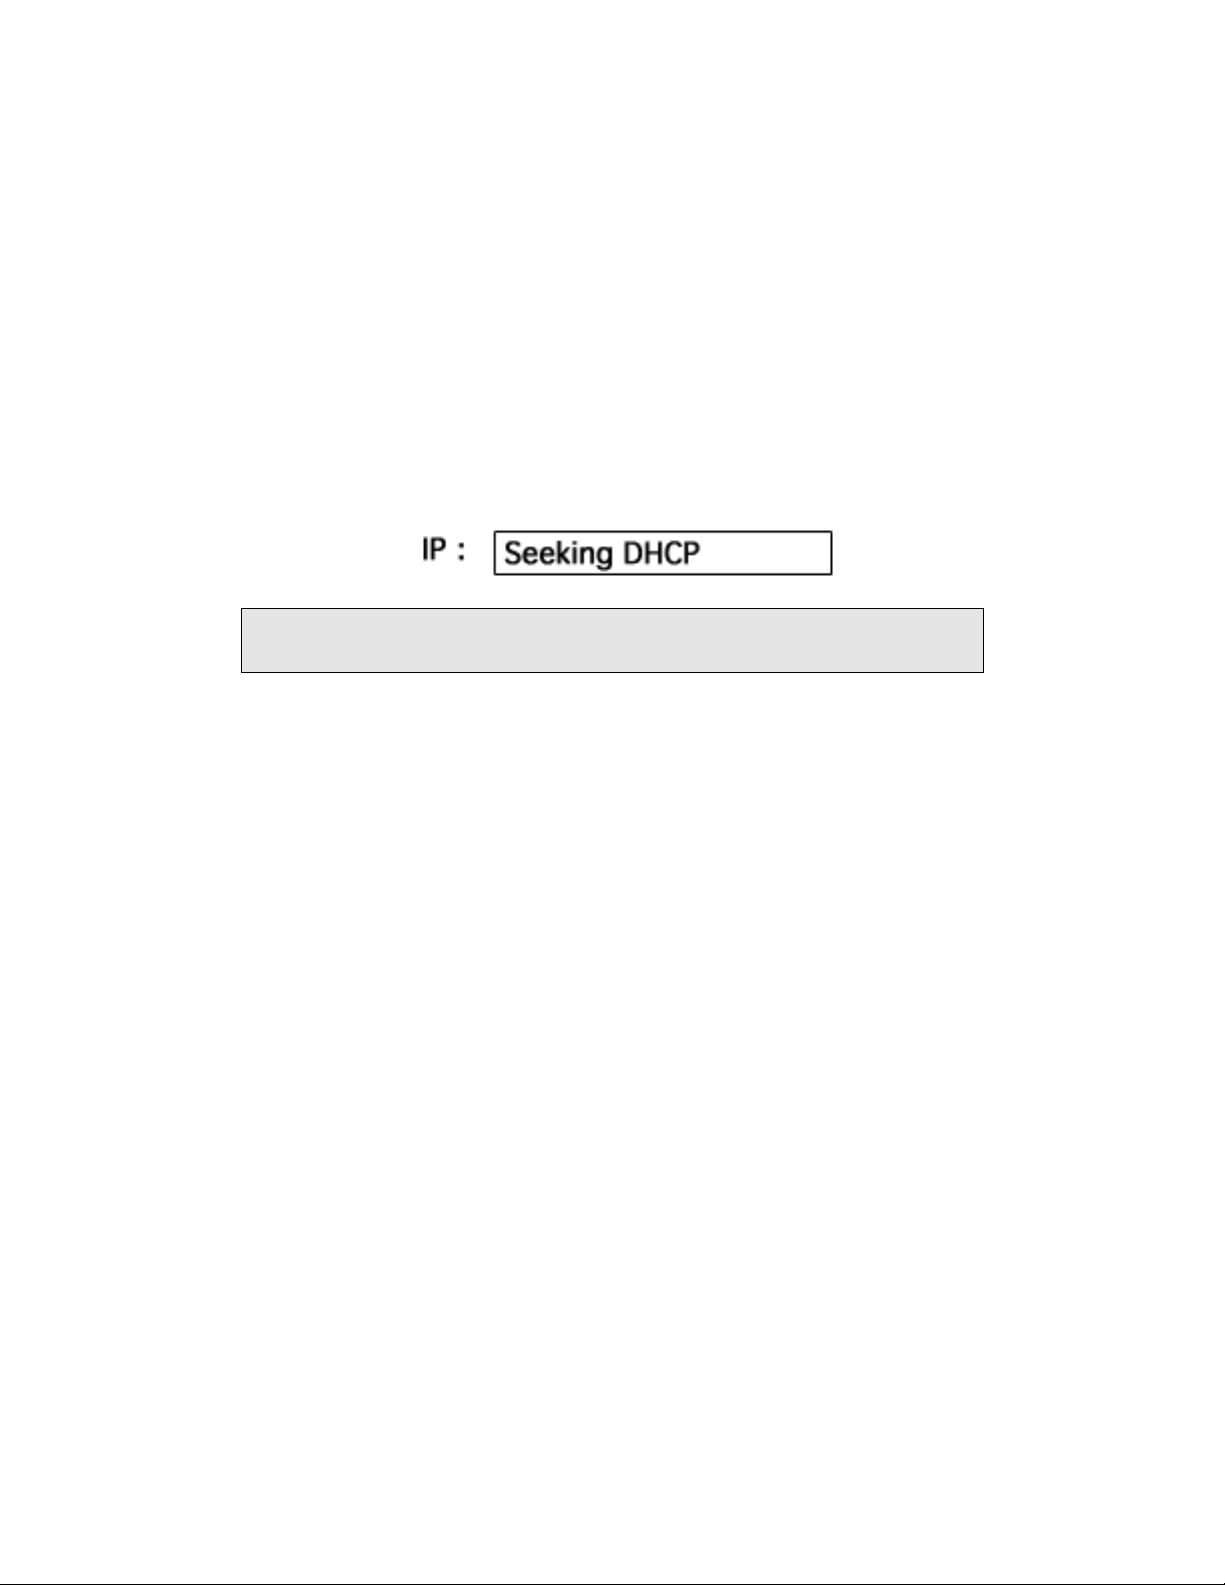
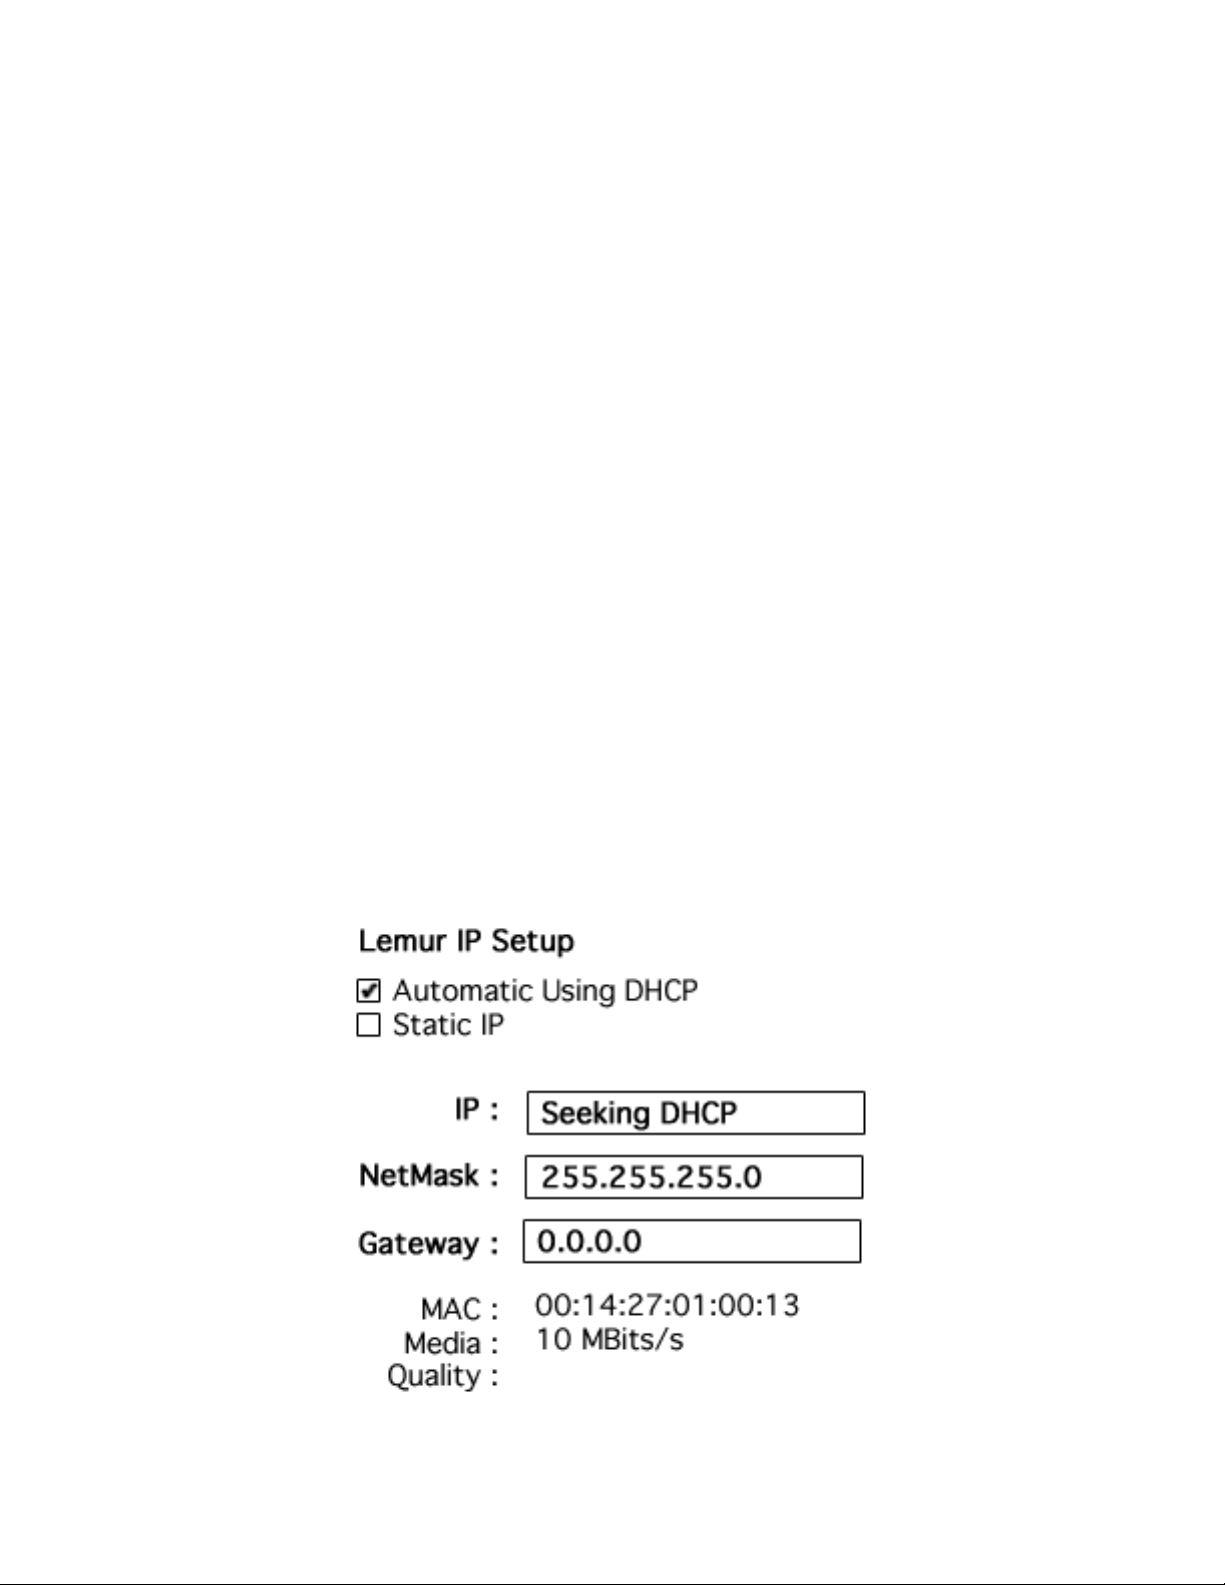
The current IP address is displayed to the right of the word IP. If DHCP is assigned and
the unit is trying to find a DHCP server, the words Seeking DHCP will be displayed (as
shown below).
It is useful to keep the Lemur Settings Window open while configuring and
troubleshooting your network connection.
Connecting a Lemur Directly to Your Computer
First, we’ll configure the Lemur to use a fixed IP address. The instructions for doing this
will be the same whether you’re using a Mac or a Windows machine.
• Turn on your Lemur and connect the Ethernet cable sup plied with your Lemur to the
Ethernet jack on the back of the unit. Then connect the other end of the cable to your
computer’s Ethernet jack.
• Check the Settings Window on the Lemur. If your computer is turned on and
connected, the Media display should report the connection speed. If it says
Disconnected, make sure your computer is turned on, then check the cable and
connections.
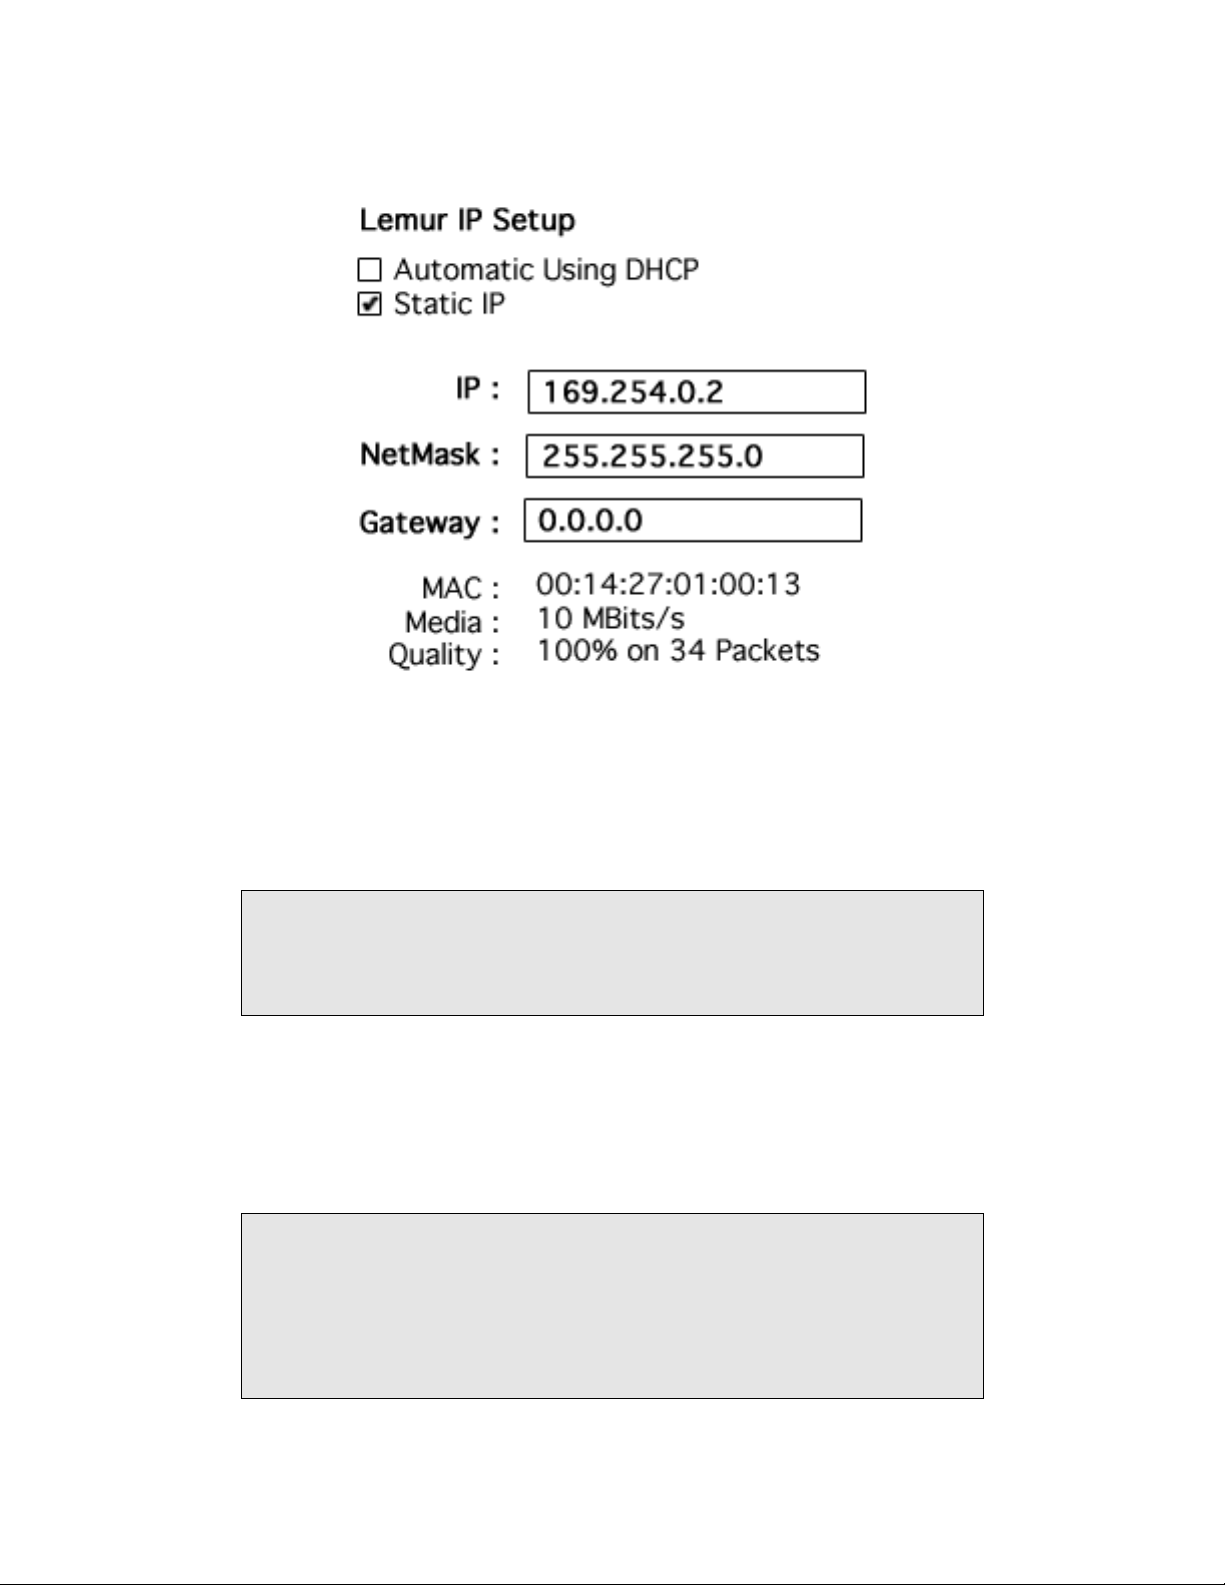
• We’ll configure the Lemur to use a fixed IP address. Touch the words Static IP and
touch the Apply button at the bottom of the screen.
• Next, drag your finger over the IP address value. Use the “keypad” at the right of the
screen to enter an IP address. If you don’t need to use a particular address, use
169.254.0.2.
• Ensure that the NetMask is 255.255.255.0 (touch the NetMask value and use the
keypad if it’s necessary to change the current value).
• For Gateway, enter 0.0.0.0.
Page 20
20
Once you’re finished, touch the Apply button. Your setting should look similar to this:
Now you will need to configure your computer’s network settings to work with this
address as follows. First we’ll talk about how to do this on Mac OS X, then on Windows
XP.
Mac OS X Direct Configuration
These settings only apply to connecting your computer to your Lemur
directly with a single Ethernet cable. For other configurations (which we
recommend if you use a router), see the section below entitled Using a
Lemur in a Local Area Network.
• Open the Network Preferences panel by choosing Location -> Network Preferences…
from the Apple menu.
• Once the Network Preferences window appears, choose Built-in Ethernet from the
Show menu.
If Built-in Ethernet does not appear in the menu, choose Network Port
Configurations from the Show menu, and make sure Built-in Ethernet is
checked. If it is already checked, ensure that the cable is connected and the
Lemur is turned on. We will only need to be concerned with the TCP/IP
settings, which appear by default. You have two options for these
changing these settings.
Page 21
21
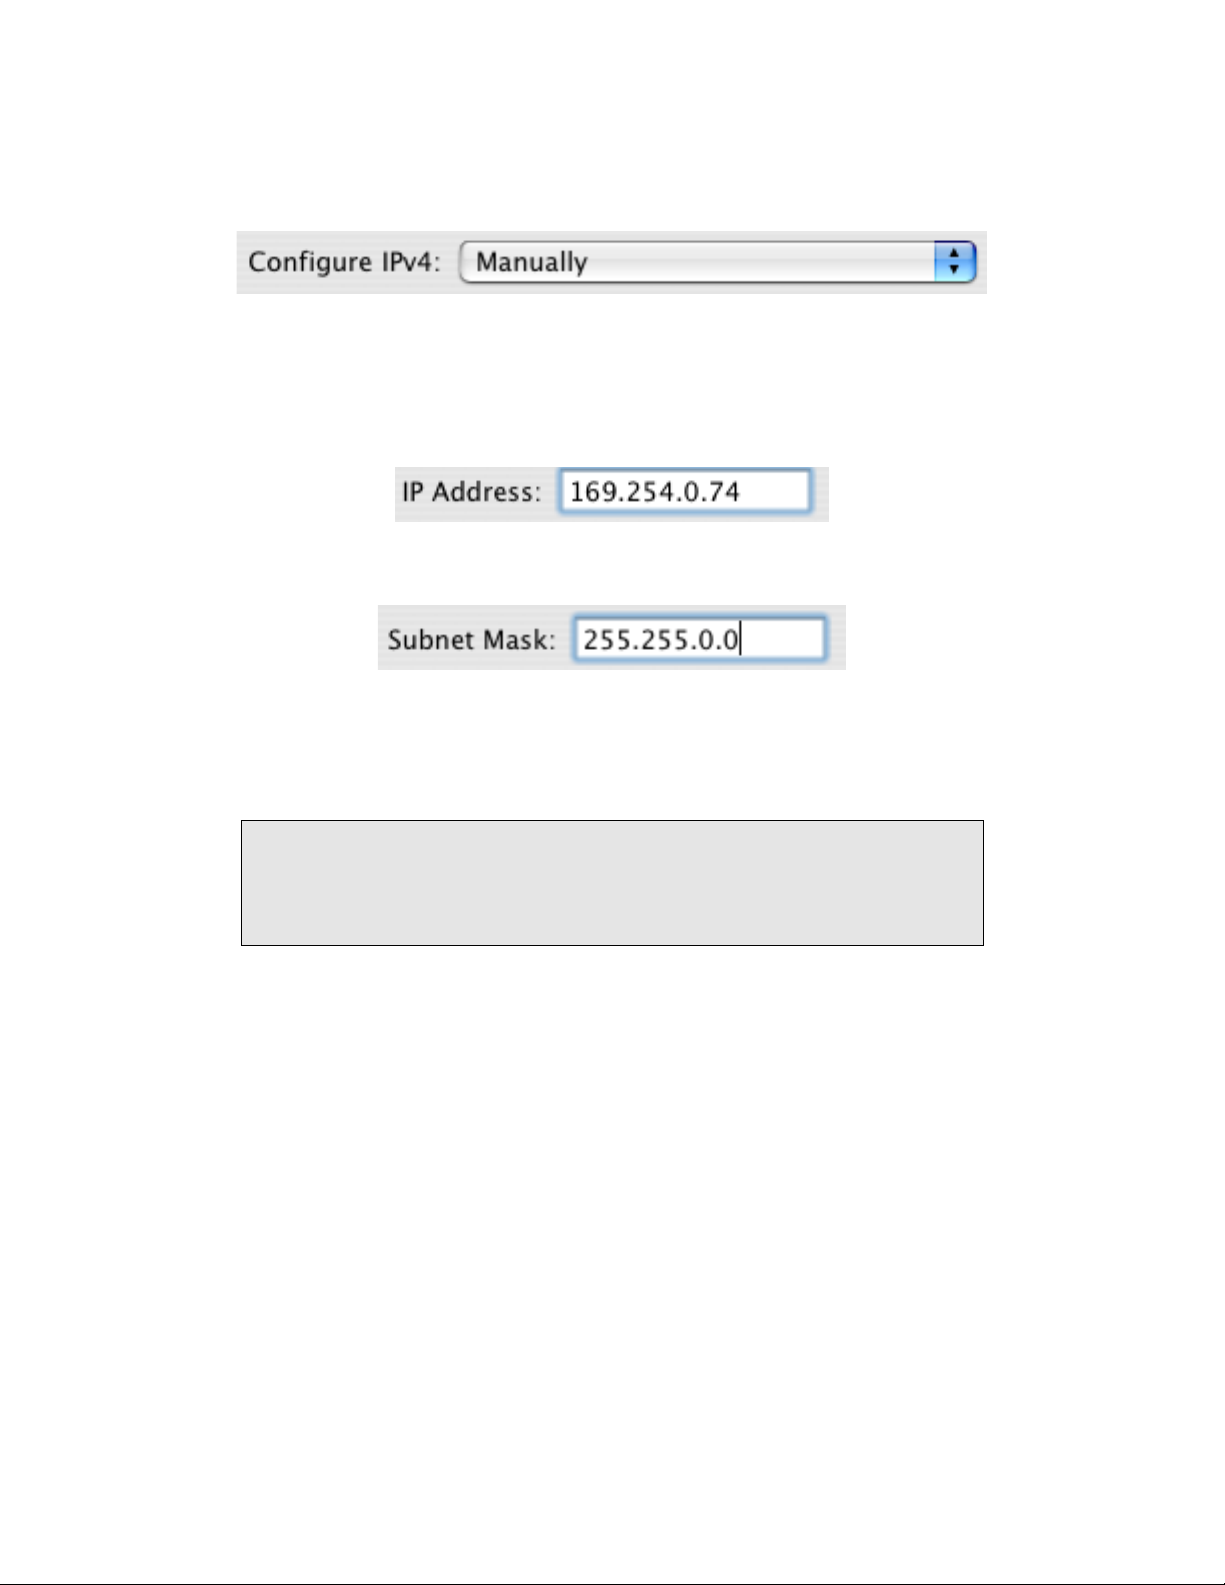
Now we’ll configure the IP address manually. Choose Manually from the Configure IPv4
menu.
• Set the first two numbers of the IP address to 169.254. Set the next two numbers to
anything that does not match the Lemur’s IP address as shown in the Settings
window on the touchscreen. For instance, if the Lemur’s IP address is displayed as
169.254.0.2, you can enter 169.254.0.74.
Next, set the Subnet Mask to 255.255.0.0:
Your computer should now be ready to talk to your Lemur.
Windows XP Direct Configuration
These settings only apply to connecting your computer to your Lemur
directly with a single Ethernet cable. For other configurations (which we
recommend if you use a router), see the section below entitled Using a
Lemur in a Local Area Network.
Page 22
22
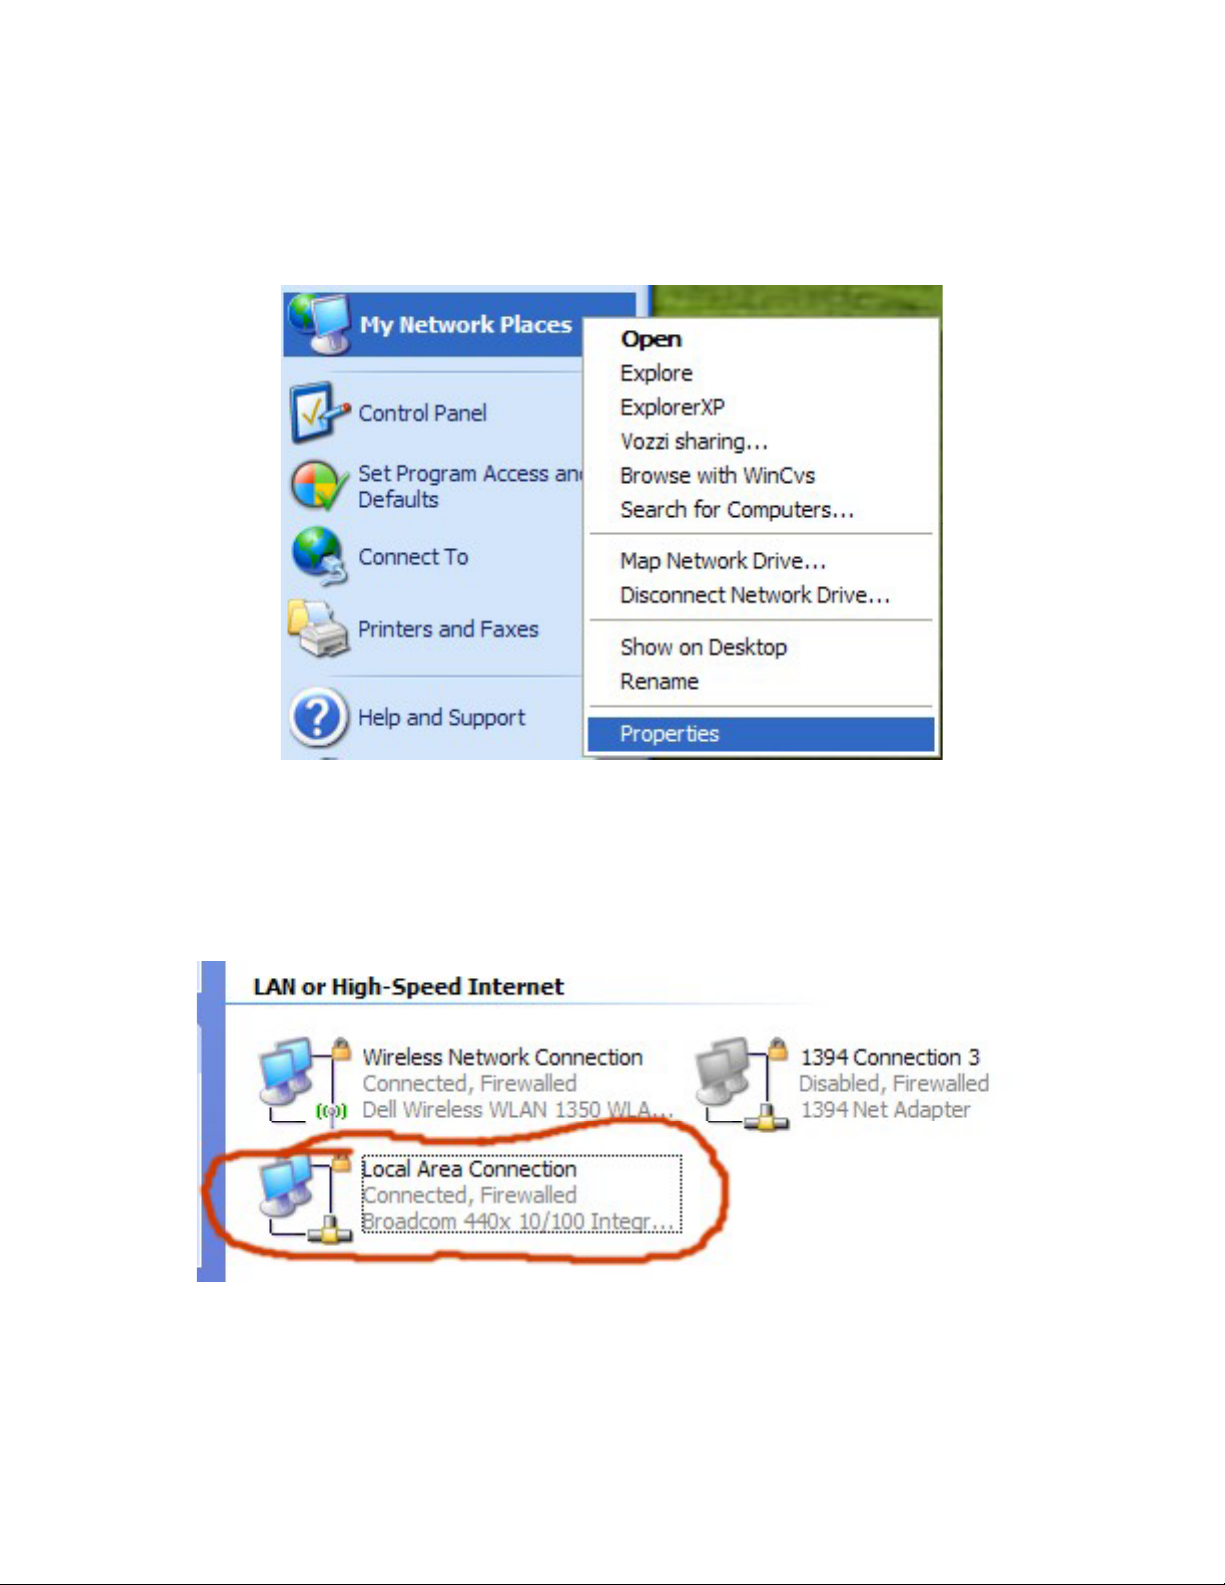
First, let’s examine the existing network connections on our computer.
• Click Start, the right click on My Network Places in the Start menu. Choose
Properties from the pop-up menu that appears.
The Network Connection settings window will appear. In the window you will see
different categories of network devices. To examine a direct Ethernet connection, look for
the "LAN or High-Speed Internet" category for one probably described as a "Local Area
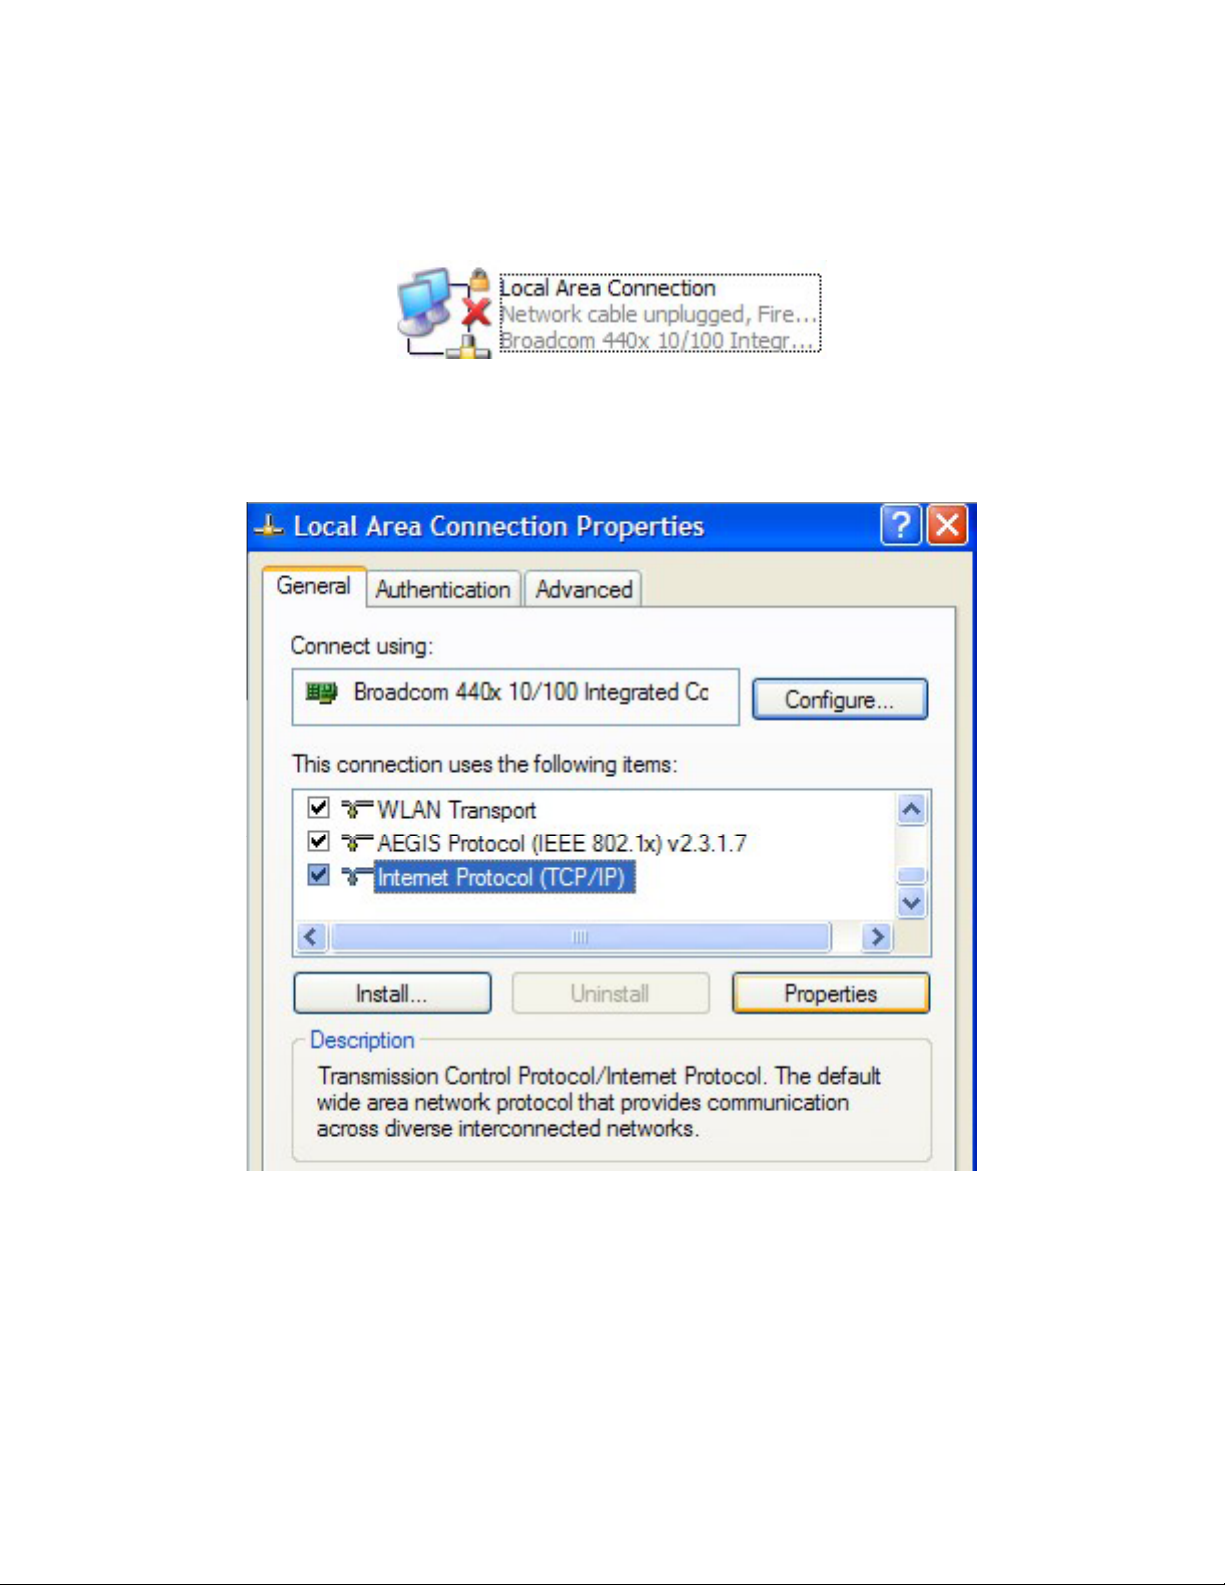
Connection.” In the window shown below there are three devices, Wireless Network
Connection, 1394 Connection 3, and Local Area Connection.
• Once you find the relevant device, check the line that shows its status. The example
above, the Local Area Connection is “Connected, Firewalled" meaning that the cable is
Page 23
23
plugged into another Ethernet device and the firewall is enabled. If the cable is not
plugged in (or the target device is not on or working properly then you may see the
following:
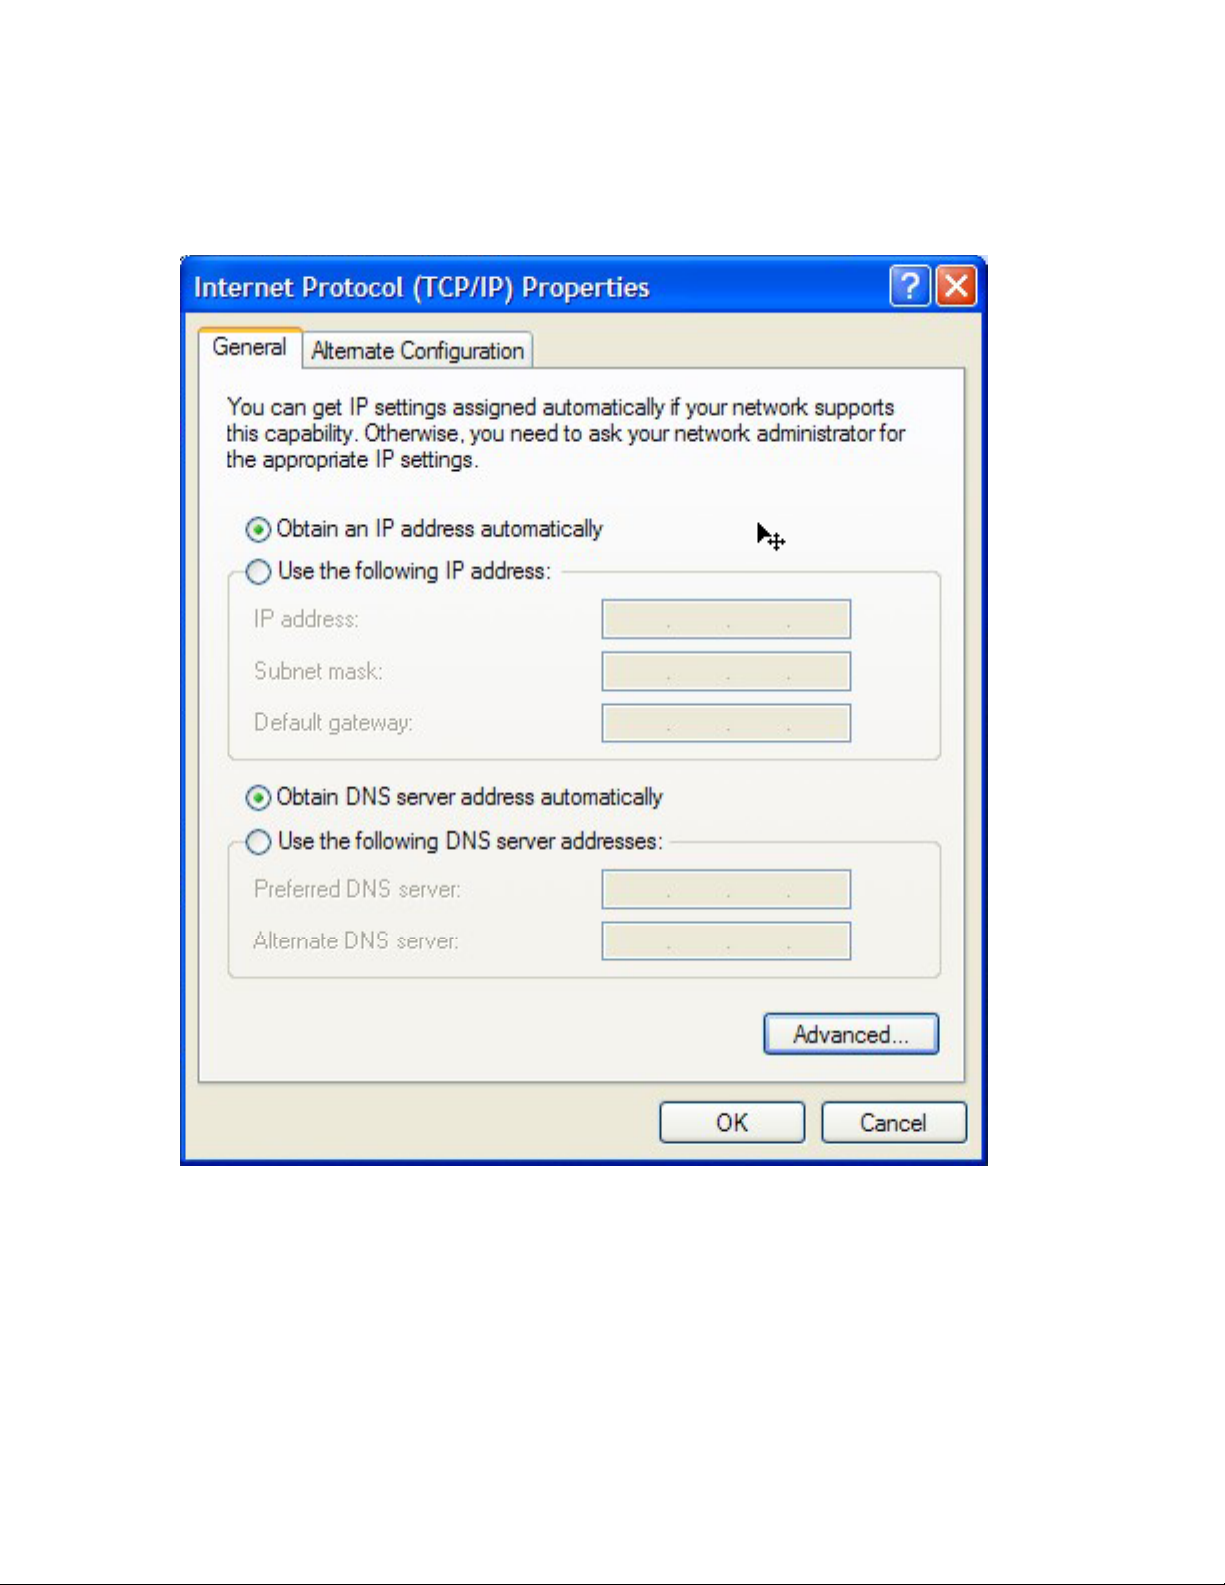
To configure the IP address of your computer, right-click on the Local Area Connection
(or whatever you’ve decided is the name of your Ethernet connection.) Choose Properties
from the po p-up menu. The Local Area Connection Properties window appears.
Page 24
24
• Select the Internet Protocol (TCP/IP) and click the Properties button. This brings up
the TCP/IP Properties window.
• For a direct connection to the Lemur not on a network and not using DHCP, click
Use the following IP address and enter the following information:
IP address: 169.254.0.100
Subnet mask: 255.255.255.0
Default gateway: Leave blank
• Leave the DNS part of the Properties window empty.
Page 25
25
• Click OK to close the window.
Using a Lemur in a Local Area Network
Your local area network can use either a switch or a router. A router typically assigns
network addresses to each device using a DHCP (dynamic host control protocol) server.
Many people use wireless routers, which include both Ethernet ports and a wireless
connection. If you use a wireless router to connect to the Internet, you can connect your
Lemur to the router and access your Lemur wirelessly.
Using a Router
First, we’ll examine the case where your computer is already connected using a router
which provides your computer with its IP address, and you would like to connect your
Lemur to this same router.
The instructions for this case are exactly the same for Mac OS X and Windows, because
they don’t involve you touching the computer at all!
• Connect your Lemur to the router by connecting one end of a network cable to the
Ethernet jack on the back of the Lemur, and the other end to an Ethernet input jack on
the router.
• After you see the yellow Lemur, press the Settings button on your Lemur. You’ll
likely see something like this:
Page 26
26
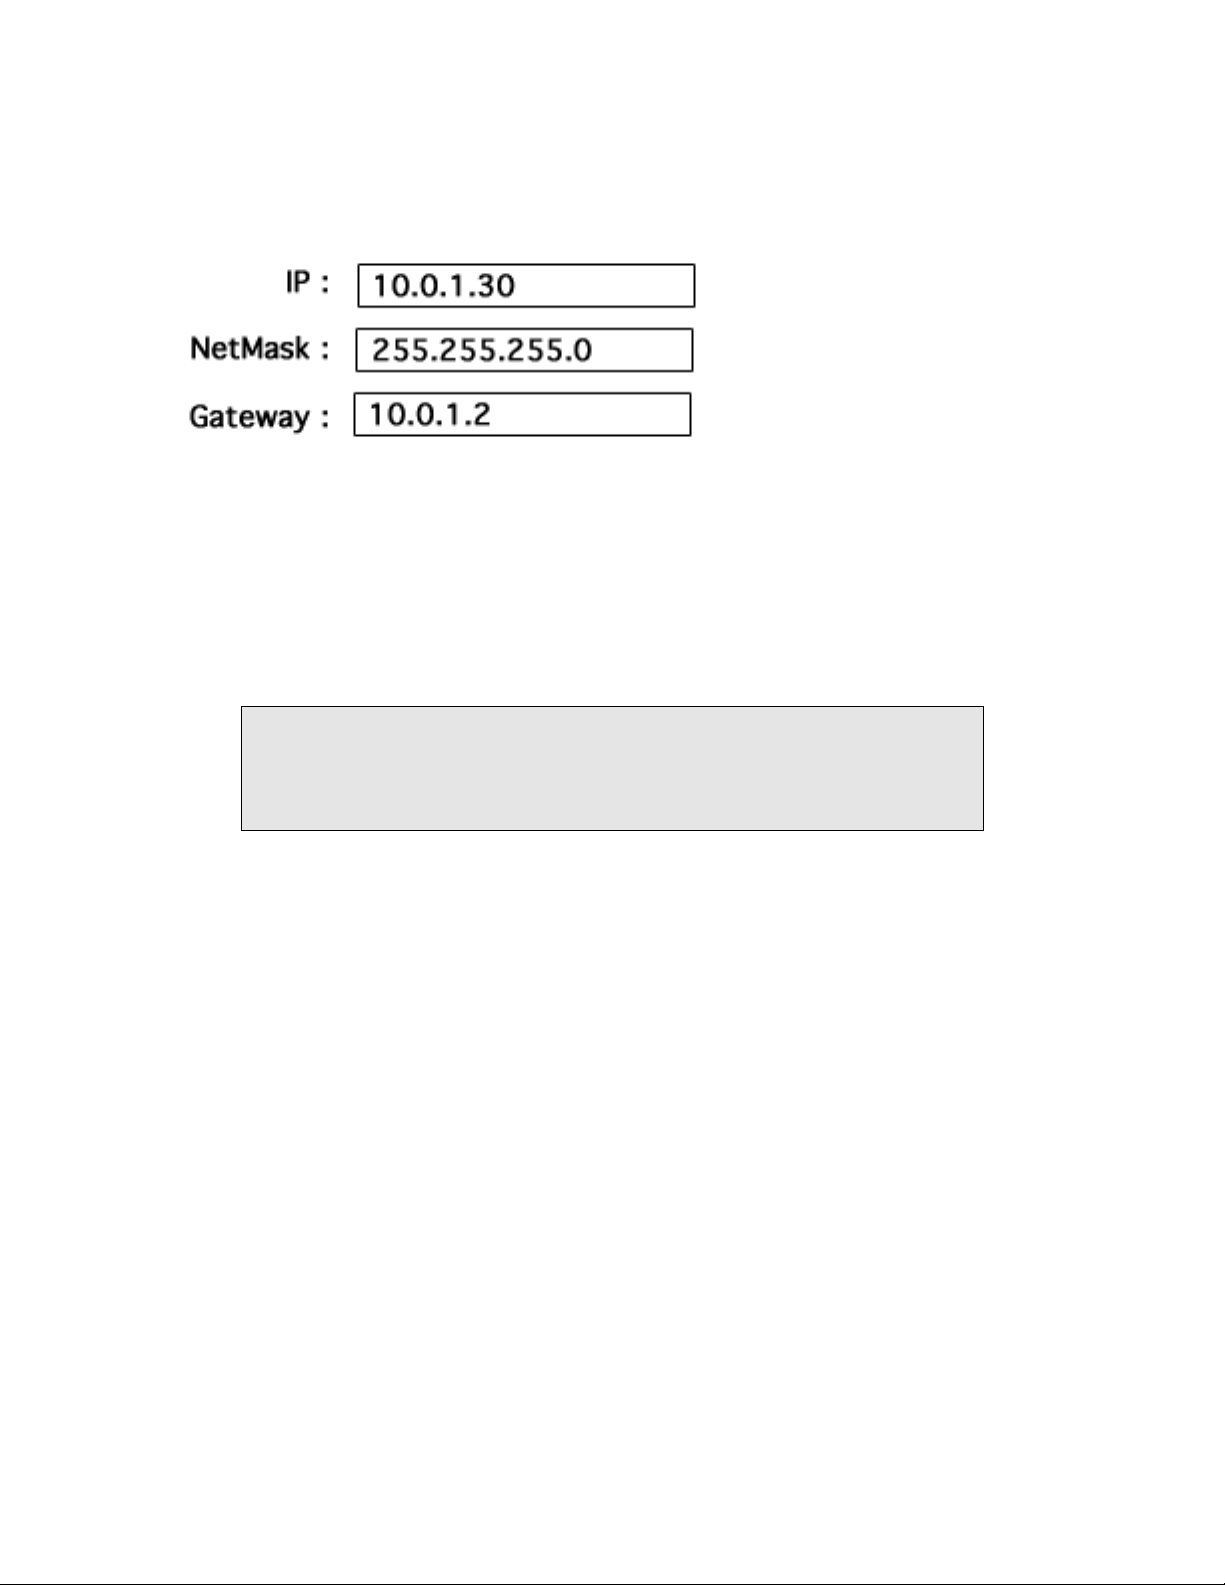
If the Lemur talks successfully to the DHCP server in your router, you should see it
display its DHCP-assigned IP address as well as the Gateway address of the router itself,
such as this:
Assuming the DHCP configuration was successful, the Lemur should now be on the same
network as your computer.
Using a Switch or Hub
In this scenario, your computer is connected to an Ethernet switch or hub, and you would
like to connect the Lemur to this same switch or hub.
If your switch or hub is connected to a router using DHCP, your
configuration is essentially identical to the router case described above.
Both your computer and the Lemur will be assigned IP addresses by the
DHCP server in the router.
If your computer is not connected to a router, or uses a static IP address, then you will
need to modify the TCP/IP settings for your Ethernet connection to match those of the
Lemur as described under the section entitled Connecting a Lemur Directly to Your
Computer above.
Now that we’ve established a network configuration, its time to fire up the JazzEditor
and get it talking to your Lemur.
Installing the JazzEditor Software
The Lemur requires no special drivers, so once you copy the JazzEditor application,
you’ll be ready to work with the unit on your computer.
Page 27

27
Mac OS X
Insert the CD-ROM supplied with your Lemur into the CD-ROM drive of your
computer. When the CD appears, double-click on the CD’s icon to display the contents.
You’ll see the Lemur icon for the JazzEditor application.
Drag the JazzEditor to the Applications folder on your computer.
When you first play with the Lemur, you’ll probably be firing up the JazzEditor a fair
amount, so you may want to add it to your dock. Drag the JazzEditor icon from its
location in your Applications folder to the dock.
Windows XP
• Insert the CD-ROM supplied with your Lemur into the CD-ROM drive of your
computer.
• Click Start, then choose My Computer from the Start menu.
• Locate the icon that shows your CD drive, and double-click it to view the Contents of
the CD.
• Drag the JazzEditor application folder to the C: drive of your computer. If you place
the application in the Program Files folder, it will appear in the Start menu.
Getting Your Lemur Connected to the JazzEditor
At this point you’ve:
• turned on your Lemur
• connected it to your computer
Page 28
28
• configured the network settings on your computer
• installed the JazzEditor software
Now we’ll use the JazzEditor application on your computer to find the Lemur on the
network and talk to it.
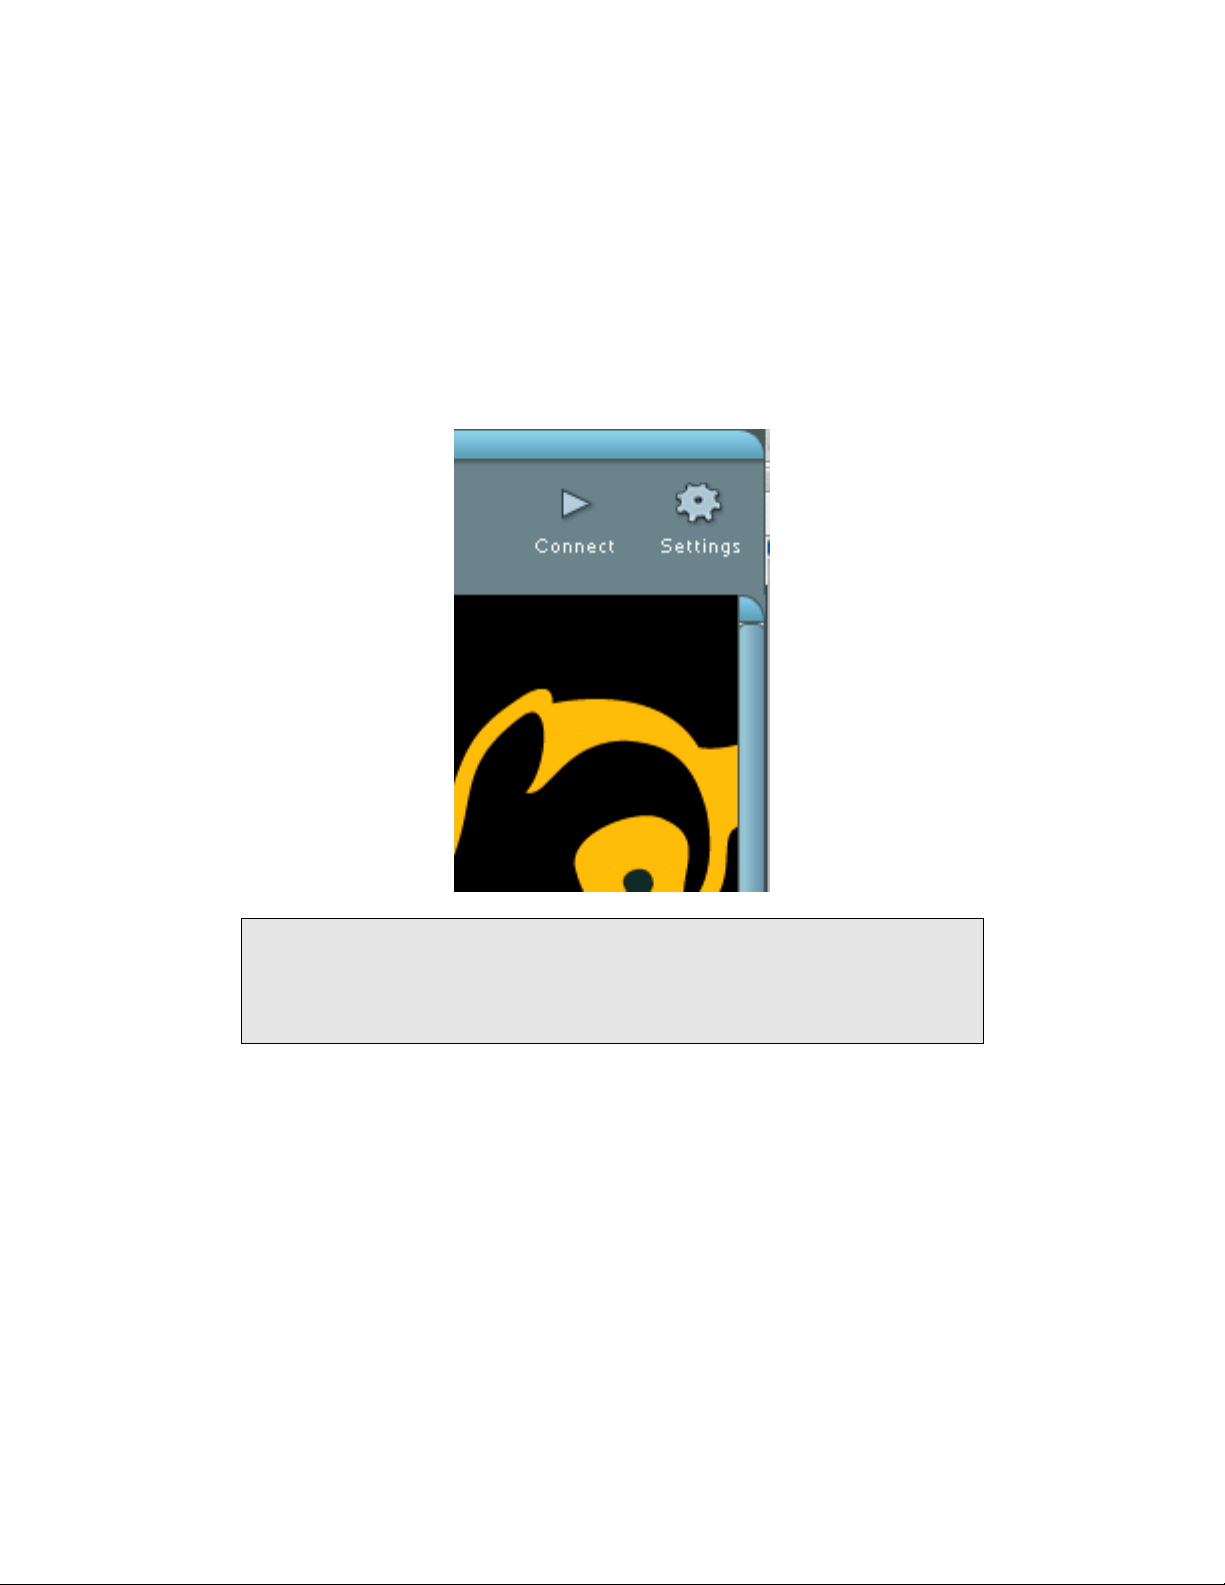
• Launch the JazzEditor. You’ll see the main window with a yellow lemur. Click the
Connect button at the top of the main window.
If the JazzEditor repeatedly fails to launch, try restarting your computer
and trying again. If you’re still experiencing problems starting up the
JazzEditor, please contact the technical support of your Lemur
distributor.
Page 29
29
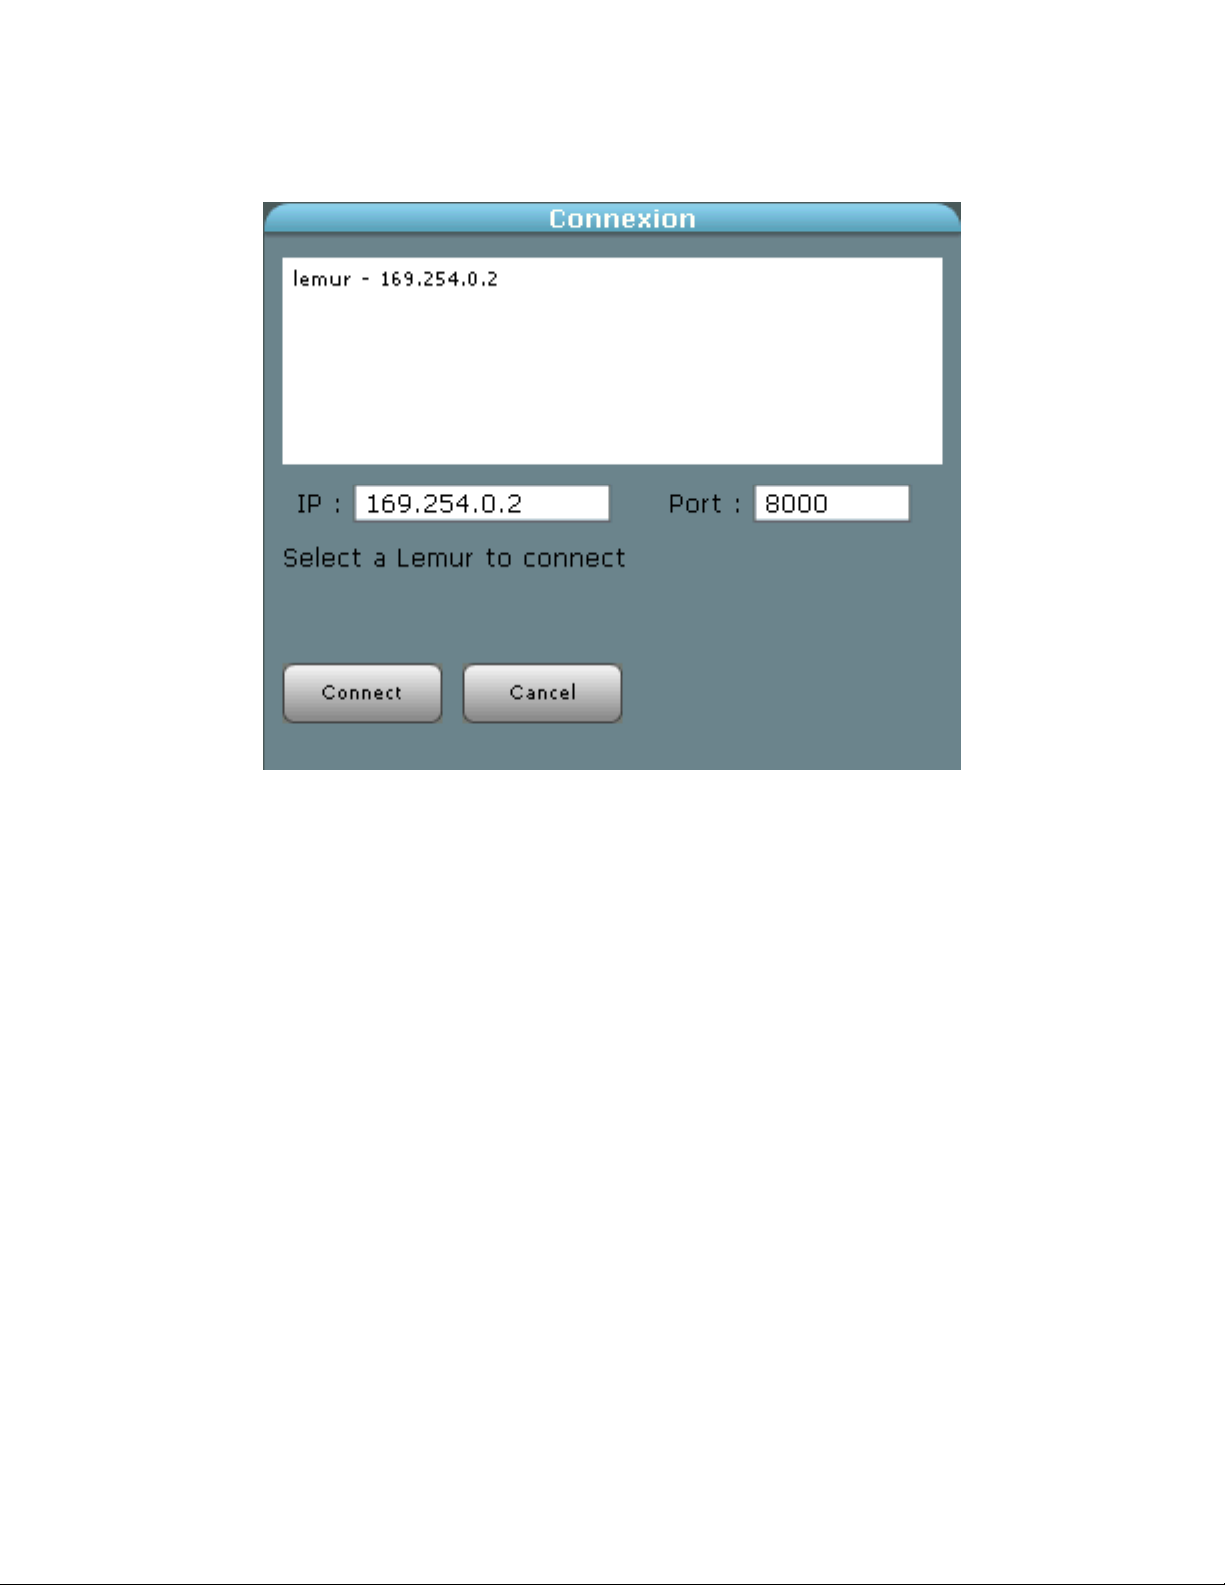
After clicking Connect, you’ll see the following window:
The Connection Window
If the JazzEditor can see your Lemur, you should see the word lemur followed by an IP
address at the top of the window. If you have multiple Lemurs connected, you may see
several IP addresses listed.
If you do not see a Lemur listed, your network connection has not been properly
established.
Another possibility is that you just turned on the Lemur and it will take a moment before
it appears on the network.
Page 30
30
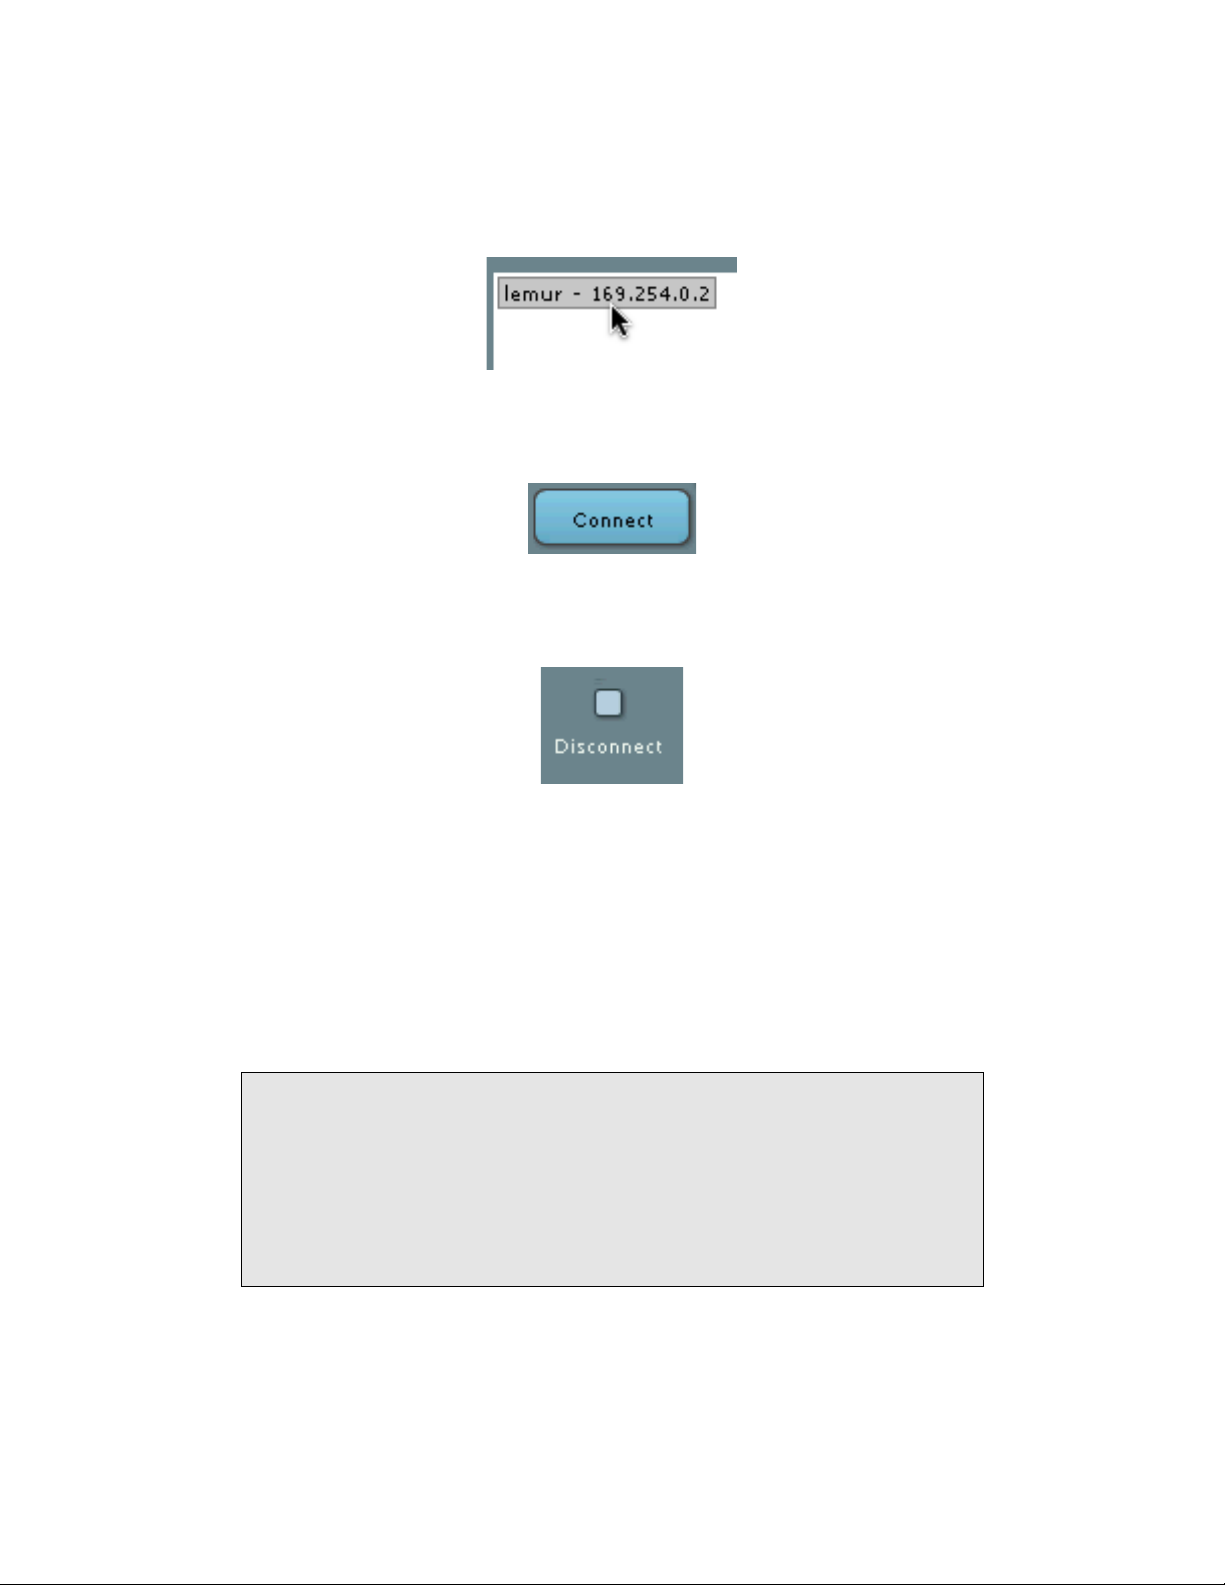
• Before you get too excited and click the Connect button, you need to select the
desired Lemur by clicking on its IP address as shown here:
You can either double-click the IP address of the Lemur, or click it once and then click the
Connect button.
If the connection is successful, the Connection window will disappear and the icon at the
top of the main window will change to Disconnect as shown below.
If you get an error attempting to connect, first just try it again. Sometimes the connection
process will fail the first time when using a wireless connection. If the connection attempt
fails the second time, try turning your Lemur off, waiting a few seconds, and turning it on
again. After it starts up, its IP address should reappear in the list in the connection
window.
If you’re connected, it’s time to learn about the JazzEditor and designing Lemur
interfaces.
Your Lemur is now connected to your computer but it is not yet ready to
talk to OpenSoundControl applications. If you plan to use the Lemur with
an OSC application such as Max/MSP or Reaktor, please refer to chapter
"Using the Lemur with Open Sound Control Applications" for further
information on setting up your computer's IP address as the Lemur's
Target IP. If you are planning to use the Lemur with software that is
controlled via MIDI, you do not need to set up the Lemur's Target IP.
Page 31
31
Interfaces and Objects
The JazzEditor application defines the interfaces and behavior of your Lemur. The
application functions largely identically on the Mac and Windows platform. With the
JazzEditor, you work with Projects, which are XML files that contain the specification
for one or more Interfaces you will build out of Objects.
In other words, Projects are the Lemur’s documents. You’ll save them to your
computer’s hard drive, and open them when you want to send them to the Lemur. We’ll
discuss Projects in more detail in the next chapter, but first, we want to get you started
creating Interfaces and Objects.
JazzEditor Overview
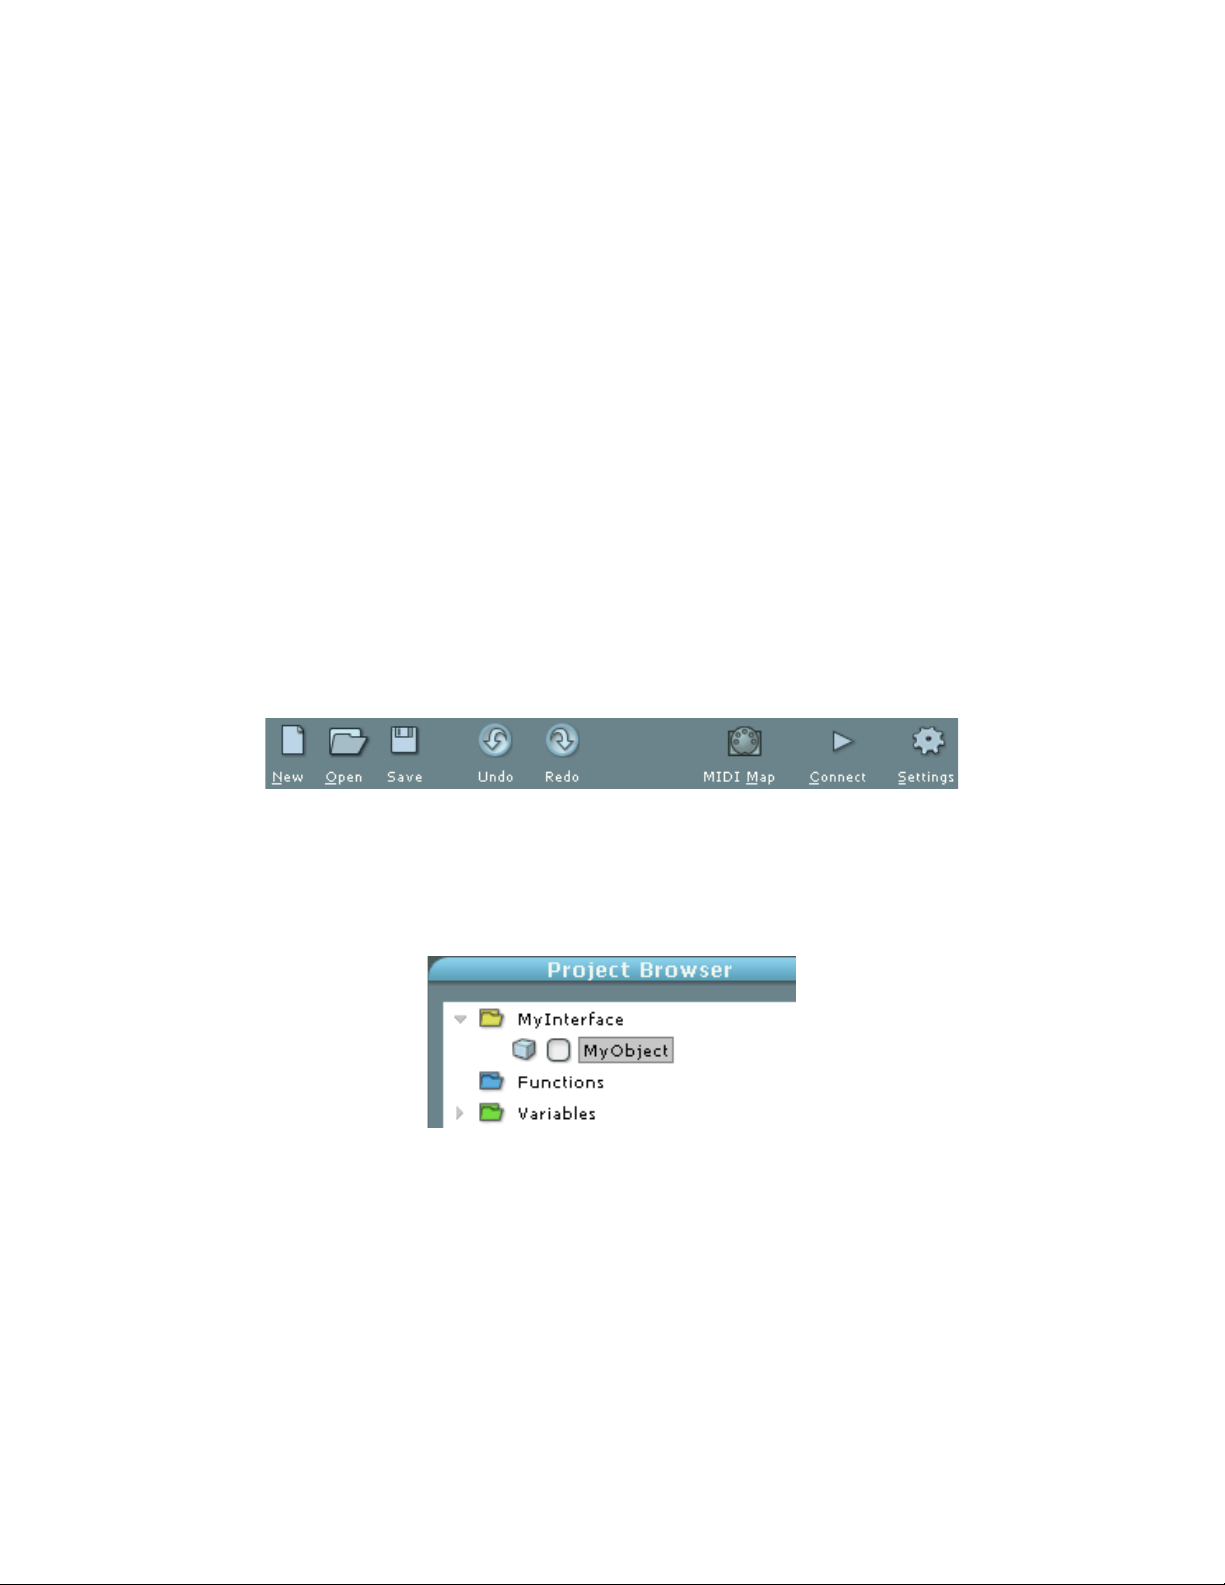
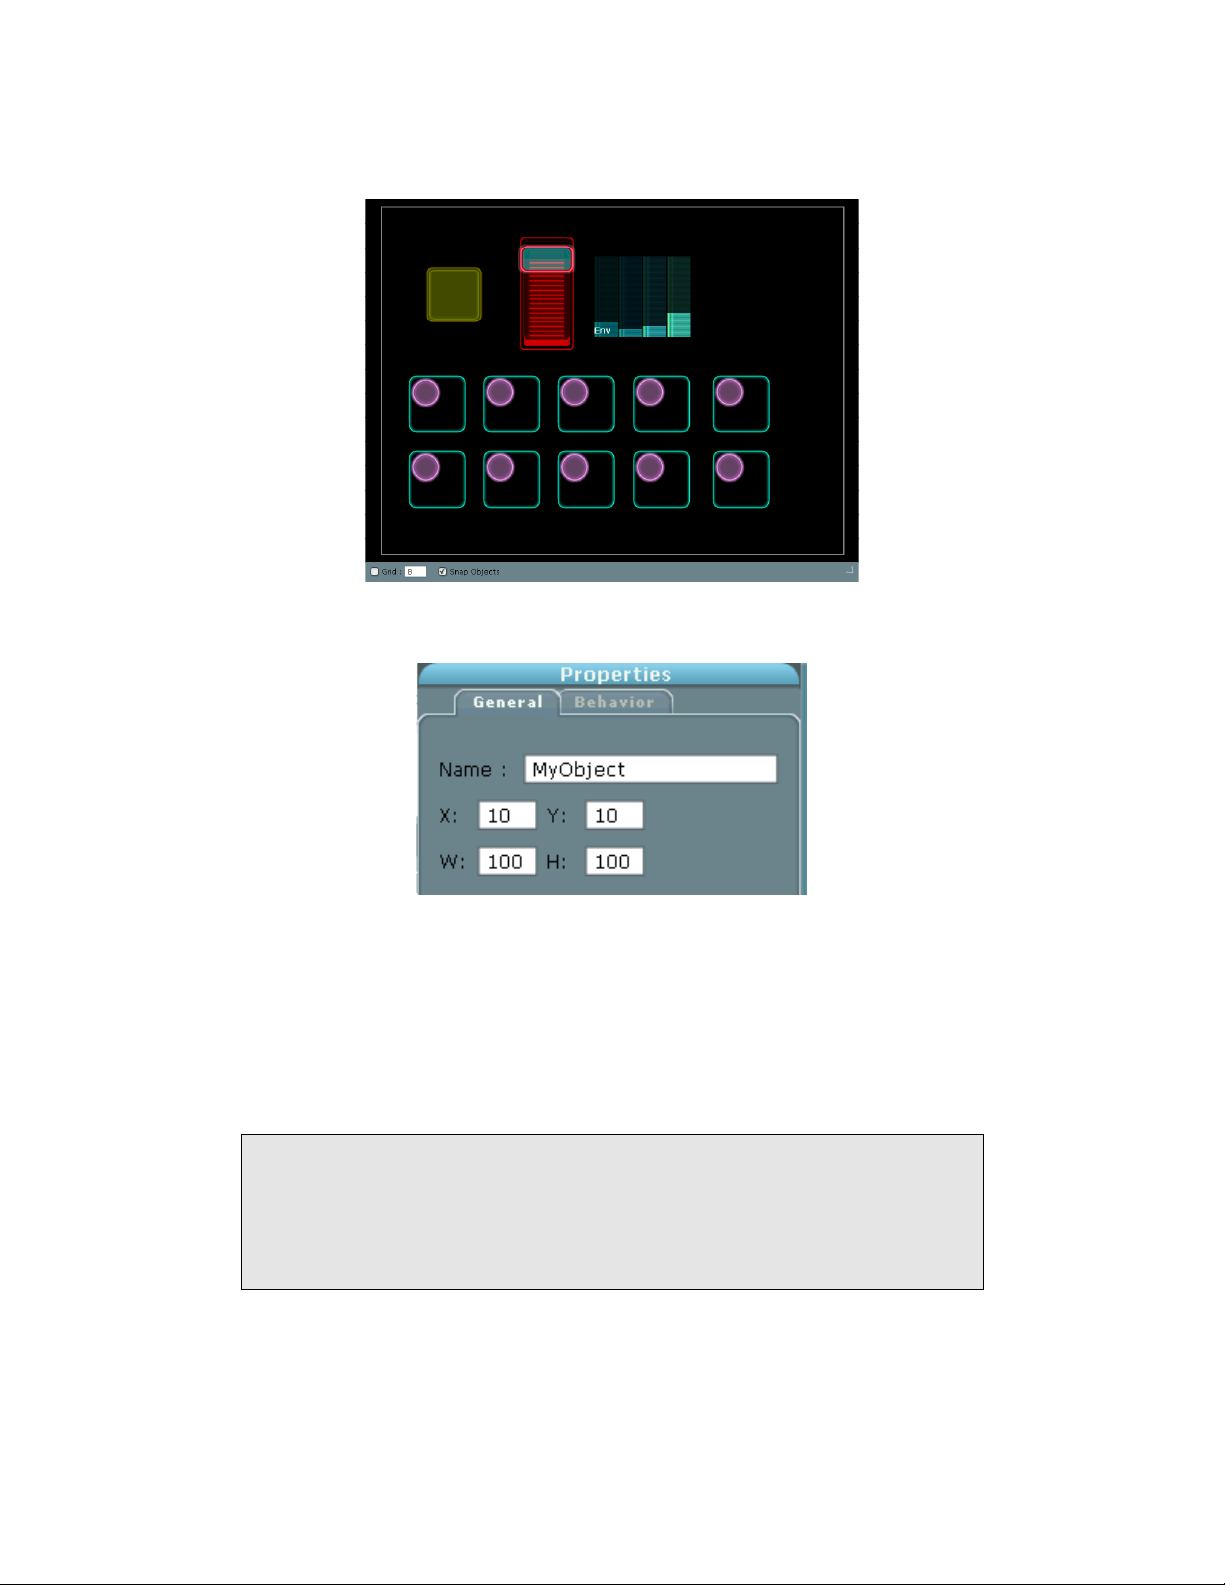
• The Toolbar contains ty pical items you might find in an application’s File and Edit
menus, such as New, Open, Save, Undo and Redo. The Toolbar also contains
commands for configuring the Lemur.
• The Project Browser provides a hierarchical view of your current project (interfaces,
objects, and expressions).
Page 32
32
• The Editing Area is where you will design interfaces for the Lemur.
• The Properties Browser allows you to edit the details of the selected interface object.
Creating Interfaces
When you first open the JazzEditor, the default Project contains no data.
• If the JazzEditor is not already connected to the Lemur, click the Connect button,
choose the desired Lemur in the Connection window, and click Connect.
You can create interfaces with the JazzEditor without being connected to a
Lemur. However, we assume in this chapter that you want to see the
changes you make in the JazzEditor immediately on the screen of the
Lemur, so we suggest connecting. For more information on consistency
between the JazzEditor and the Lemur, see the Projects chapter.
The first step toward programming the Lemur is to create a new Interface.
Page 33
33
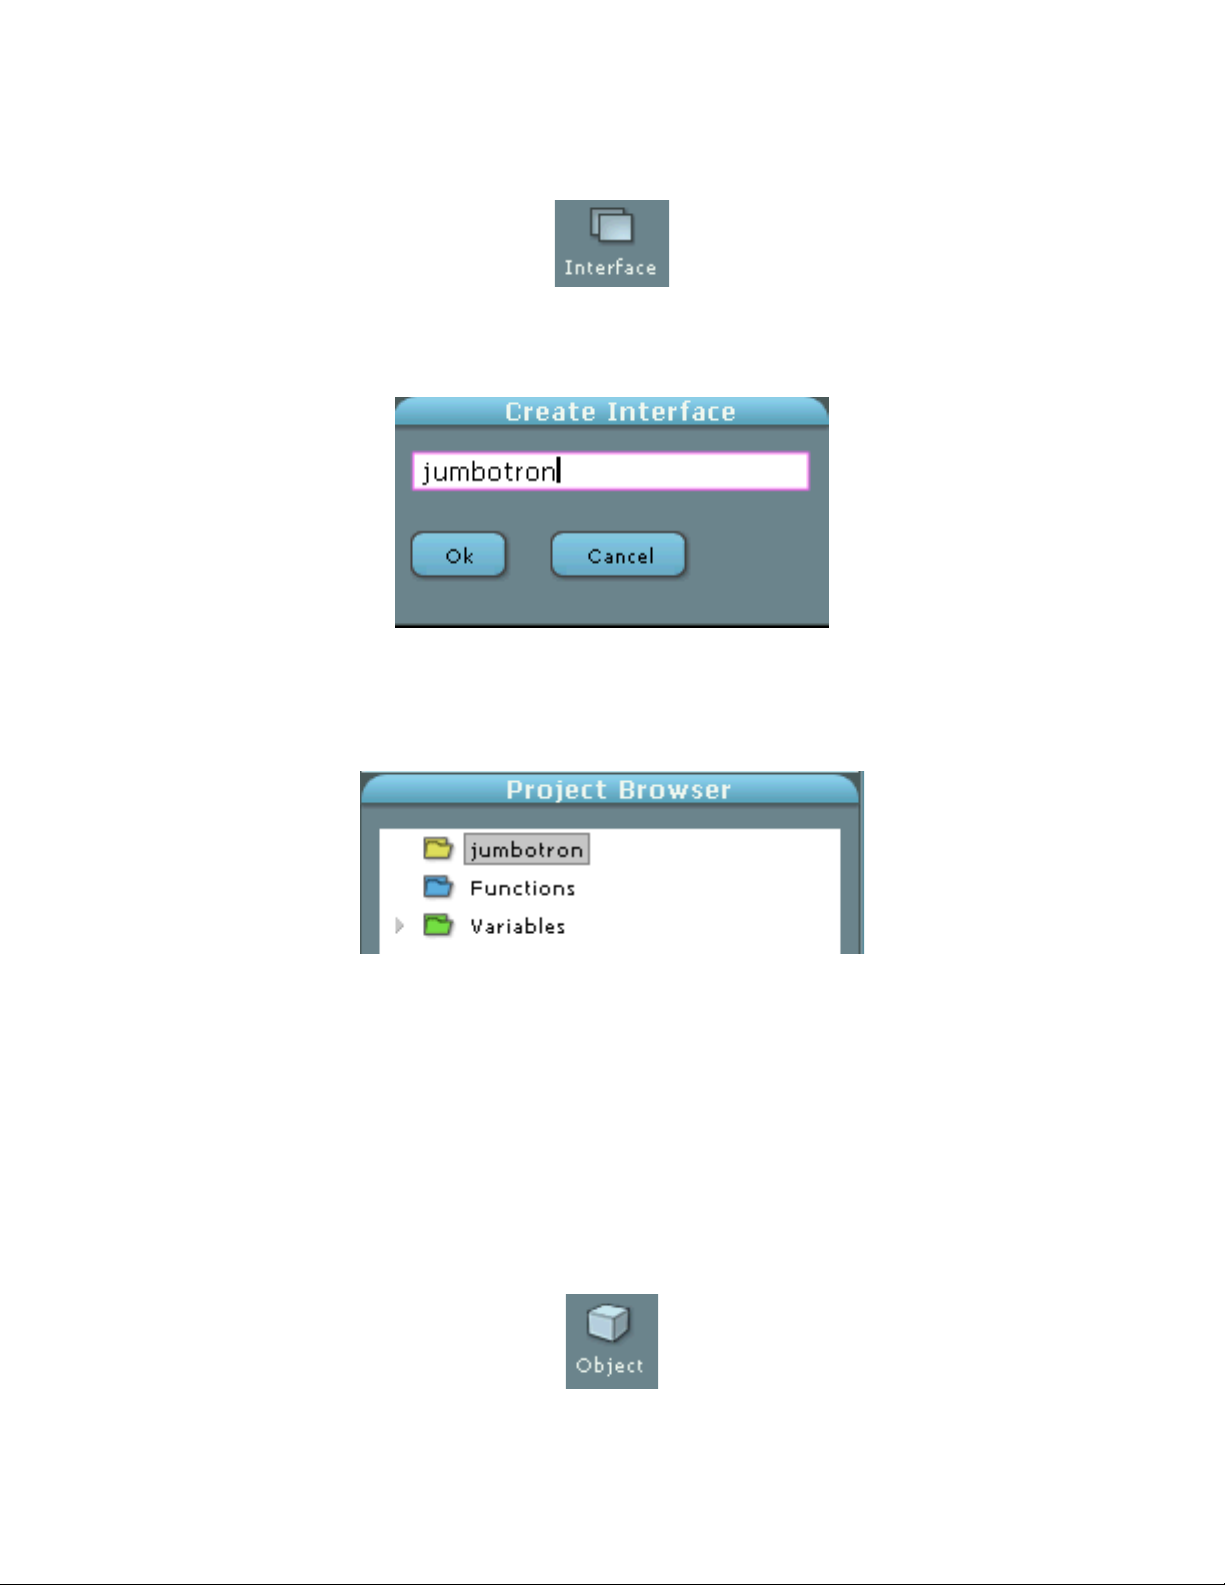
• Click the Interface button on the bottom of the JazzEditor window.
• A dialog will ap pear where you name the interface. Use the default name or type in a
new one (you can change it later).
After you create the interface, the main window (and the screen of the Lemur) will turn
black. In additon, the Project Browser at the bottom left of the JazzEditor window will
show a new interface with the name you typed in.
Project Browser showing jumbotron as the selected Interface
(By the way, we’ll explain Functions and Variables, which are also part of a Project, in a
later chapter.)
Now that we have an interface, it’s time to put some objects in it.
Creating Objects
Click Object at the bottom of the JazzEditor window.
Page 34
34
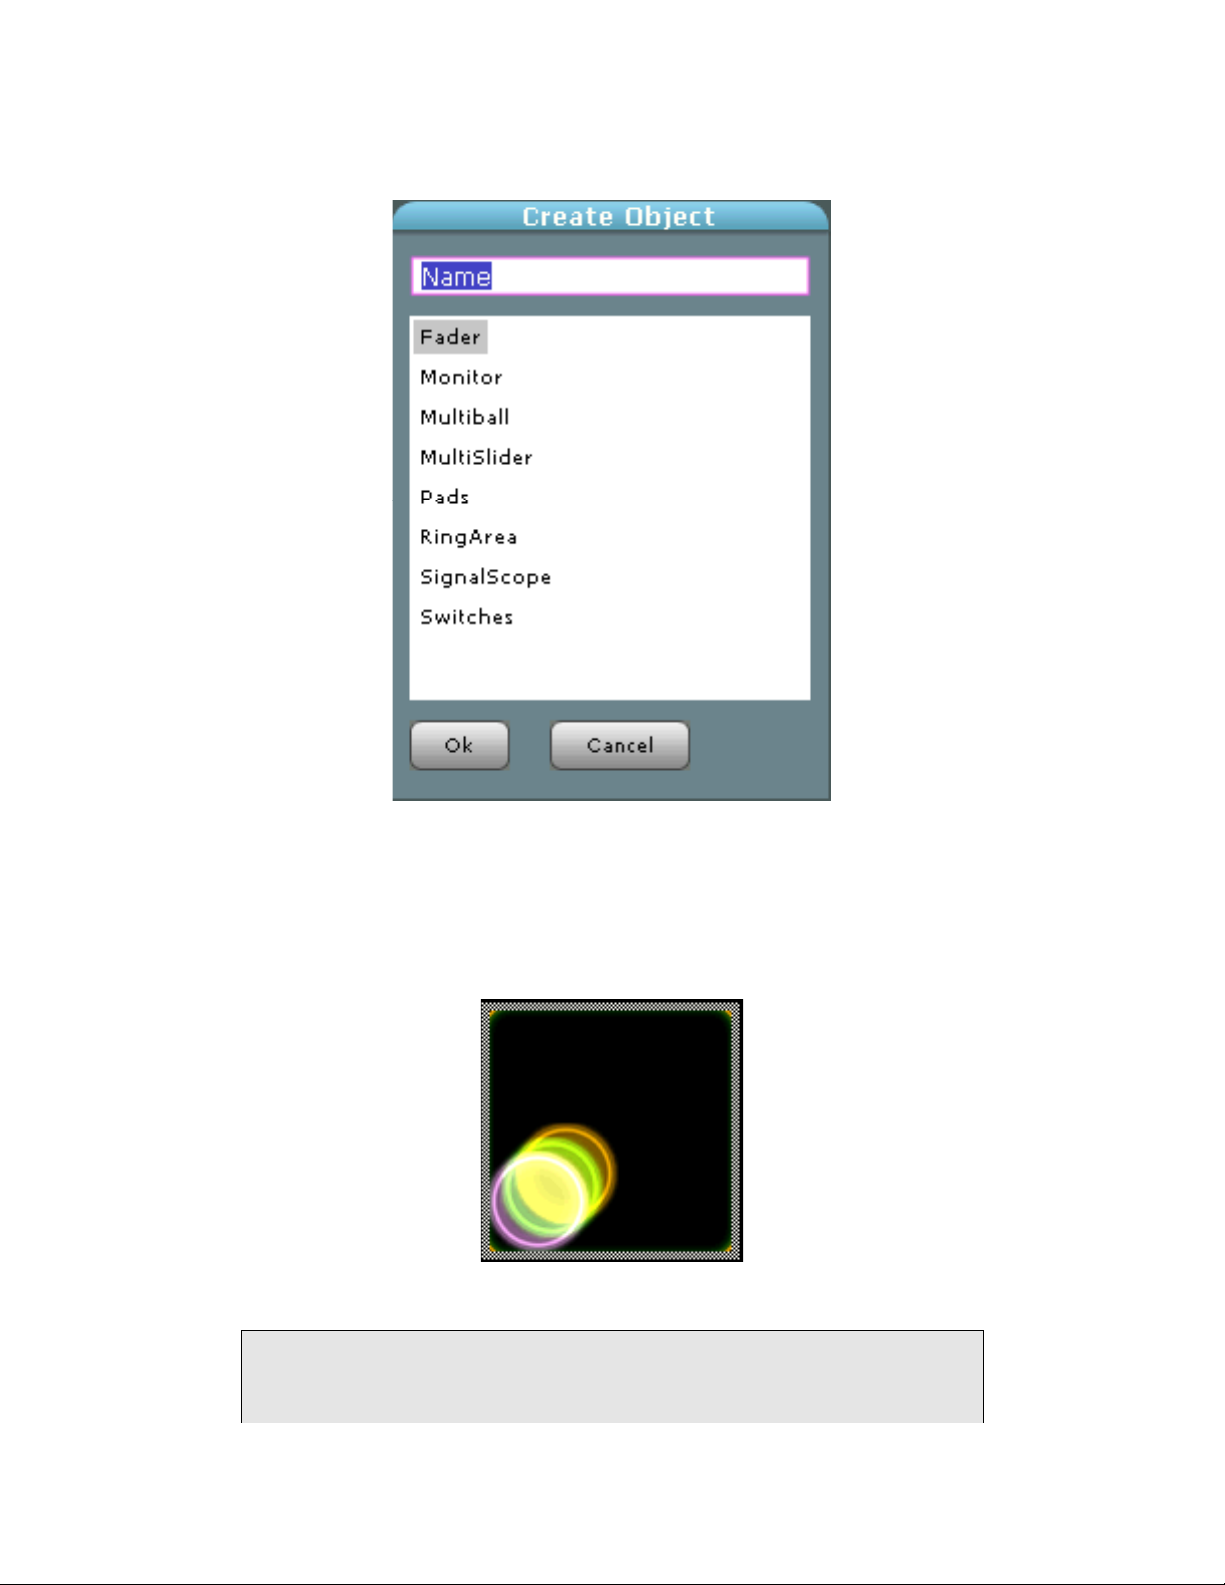
A list of the available objects appears.
In this window, you select the type of object you want and give it a name. You can
change the name later. Note that all Object names within an Interface must be unique.
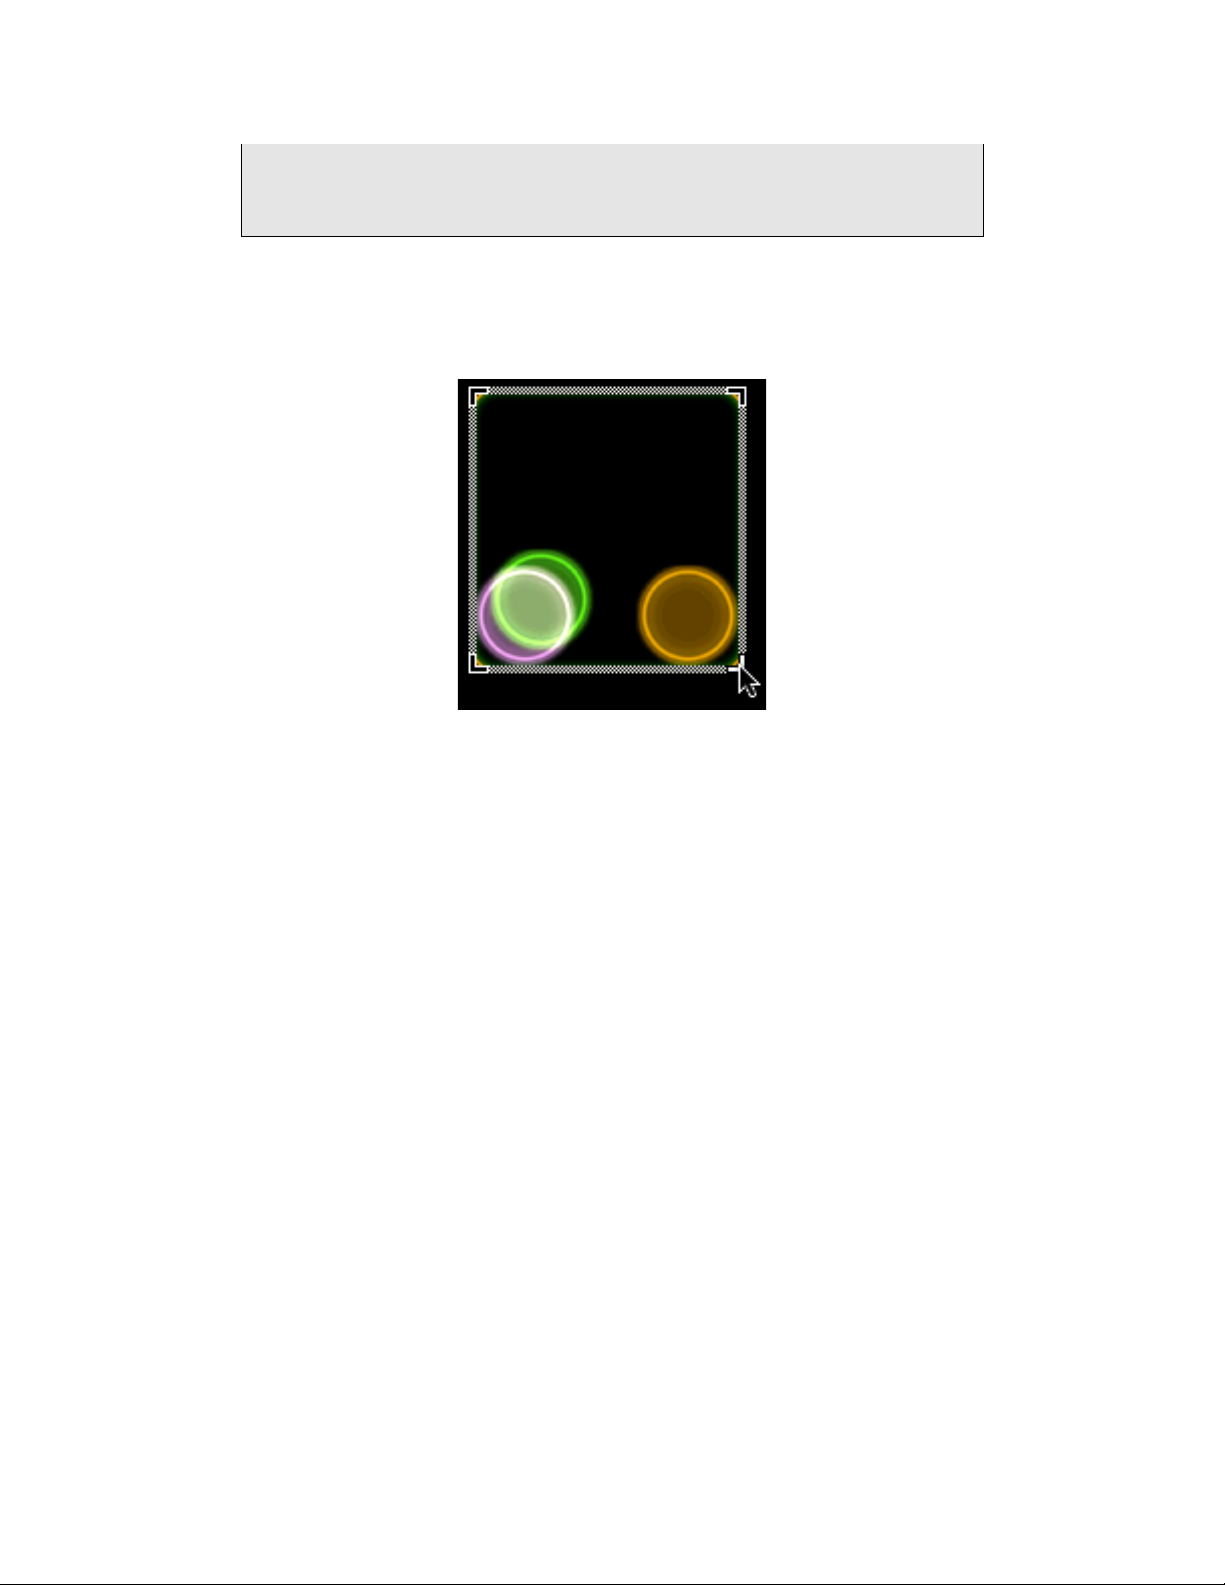
For this exercise, select Multiball and click OK. A new Multiball object should appear on
your JazzEditor screen and your Lemur.
If the Multiball does not appear on your Lemur, make sure that the button
on the top of the main window does not say Connect (it should say
Disconnect, indicating that a connection with the Lemur has been
Page 35
35
established). If the button does say Connect, click the Connect button and
repeat the procedure described above in the section Getting Your Lemur
Connected to the JazzEditor above.
You can move an Object in the JazzEditor window by clicking and dragging on the inside
of the rounded rectangle. Clicking on the outline resizes the Object. The change should
update on your Lemur shortly after you make it on your computer.
Resizing an Object
• Try touching the Multiball on your Lemur. You should see the balls move around on
your Lemur and your computer.
Changing Object Properties
Now we’ll look at using the Project Browser and Properties sections of the JazzEditor to
modify details of our Area object.
Each type of Object will have slightly different settings, so the specifics of the user
interface we’ll be describing apply only to the Multiball object.
Project Browser Settings
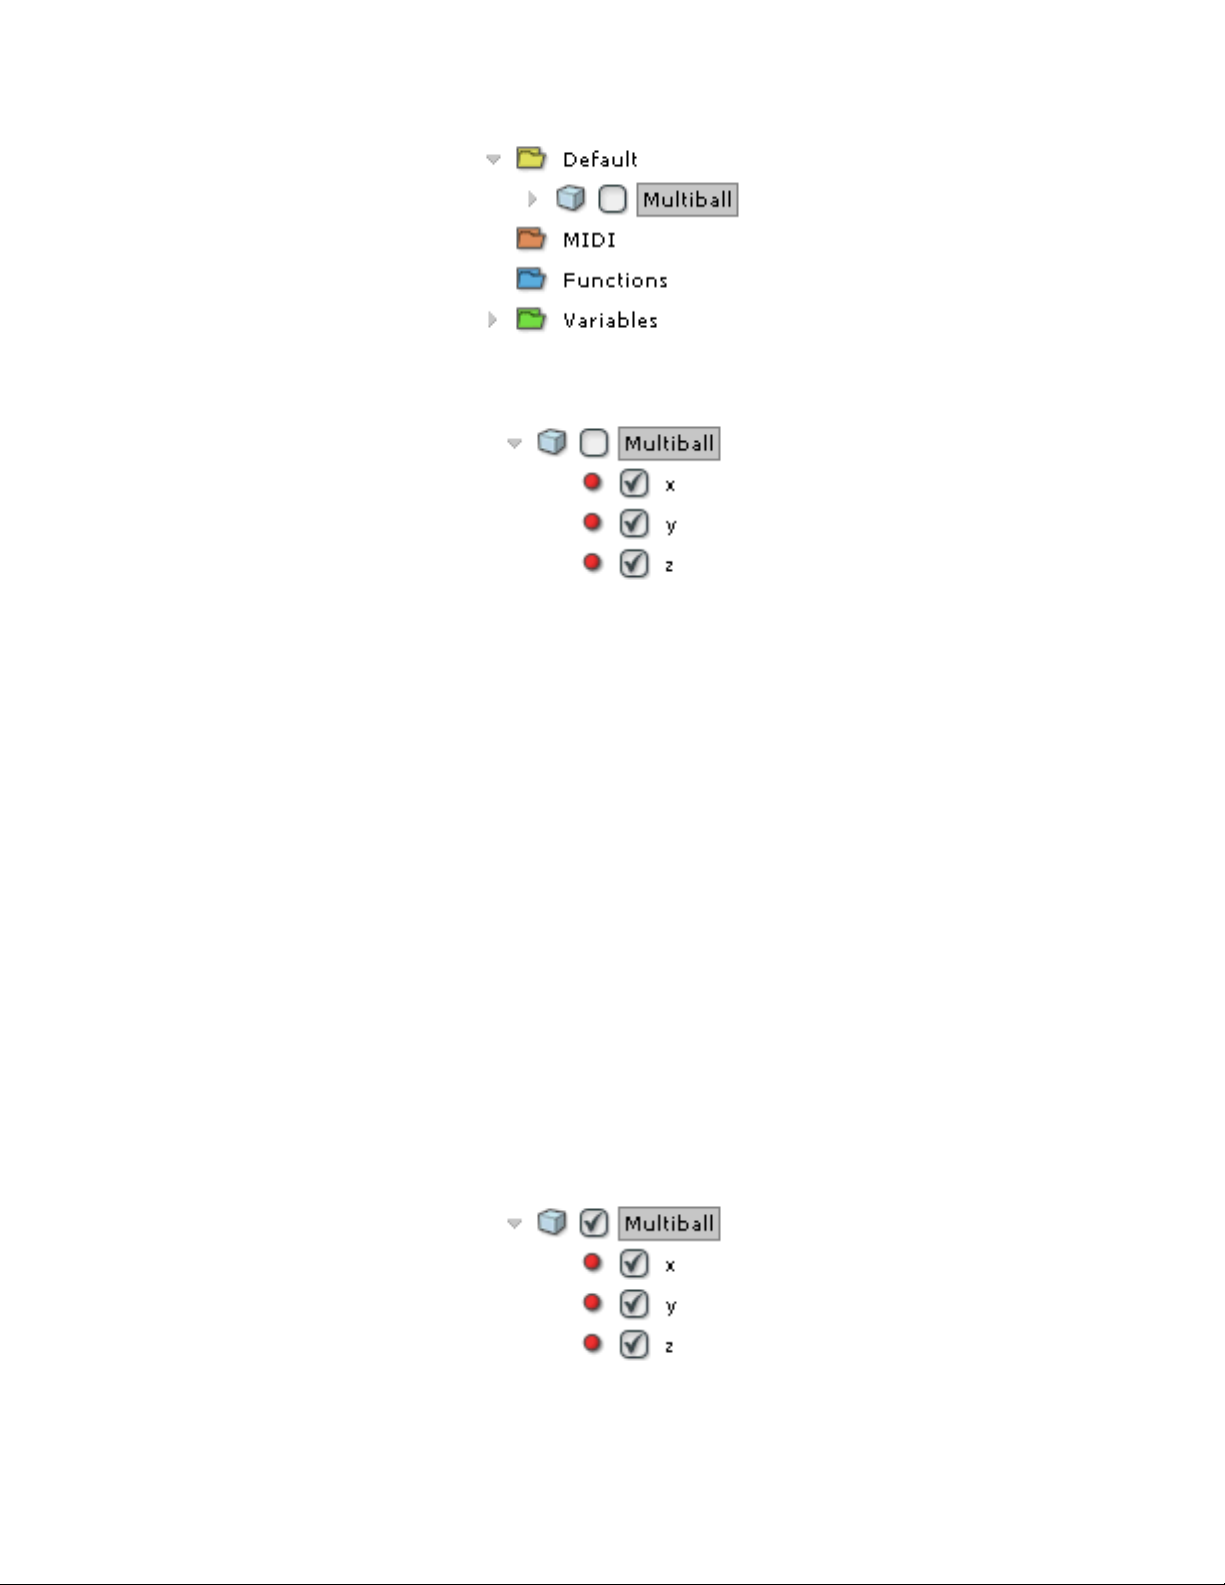
After you created the Multiball, the Project Browser displayed it as an item inside the
Interface “folder.” It is the object called Multiball shown below.
Page 36
36
If we click on Multiball’s disclosure triangle, we see some additional details.
The check boxes next to Multiball, x, y, and z are extremely important. The check box next
to Multiball must be checked before the object will send any data to the computer when
you are using the Lemur to control an application. In addition, the check box next to x
must be checked in order for the Lemur to send horizontal positional data when you
touch this Area object. And, you guessed it, the check box next to y must be checked in
order for the Area object to send vertical positional data when you touch this object. (The
checkbox next to z is used to send “brightness” data when a ball fades in and out.)
Why wouldn’t you want to send data to the application you were using? There are two
reasons: one would be if you were using an object merely to display information coming
from your computer. The Mulitball object could represent the state of something
happening on your computer. The other reason is that you would transmit the data from
the object to your computer via a variable containing a mathematical expression, which
transforms the x and y values to another range of values more appropriate for what
you’re controlling. We’ll learn about this technique in the Variables and Expressions
chapter.
In the beginning case, we will want to use the Multiball for transmitting the position of
the purple ball to our computer, so we should check Multiball as well as x, y, and z.
Page 37
37
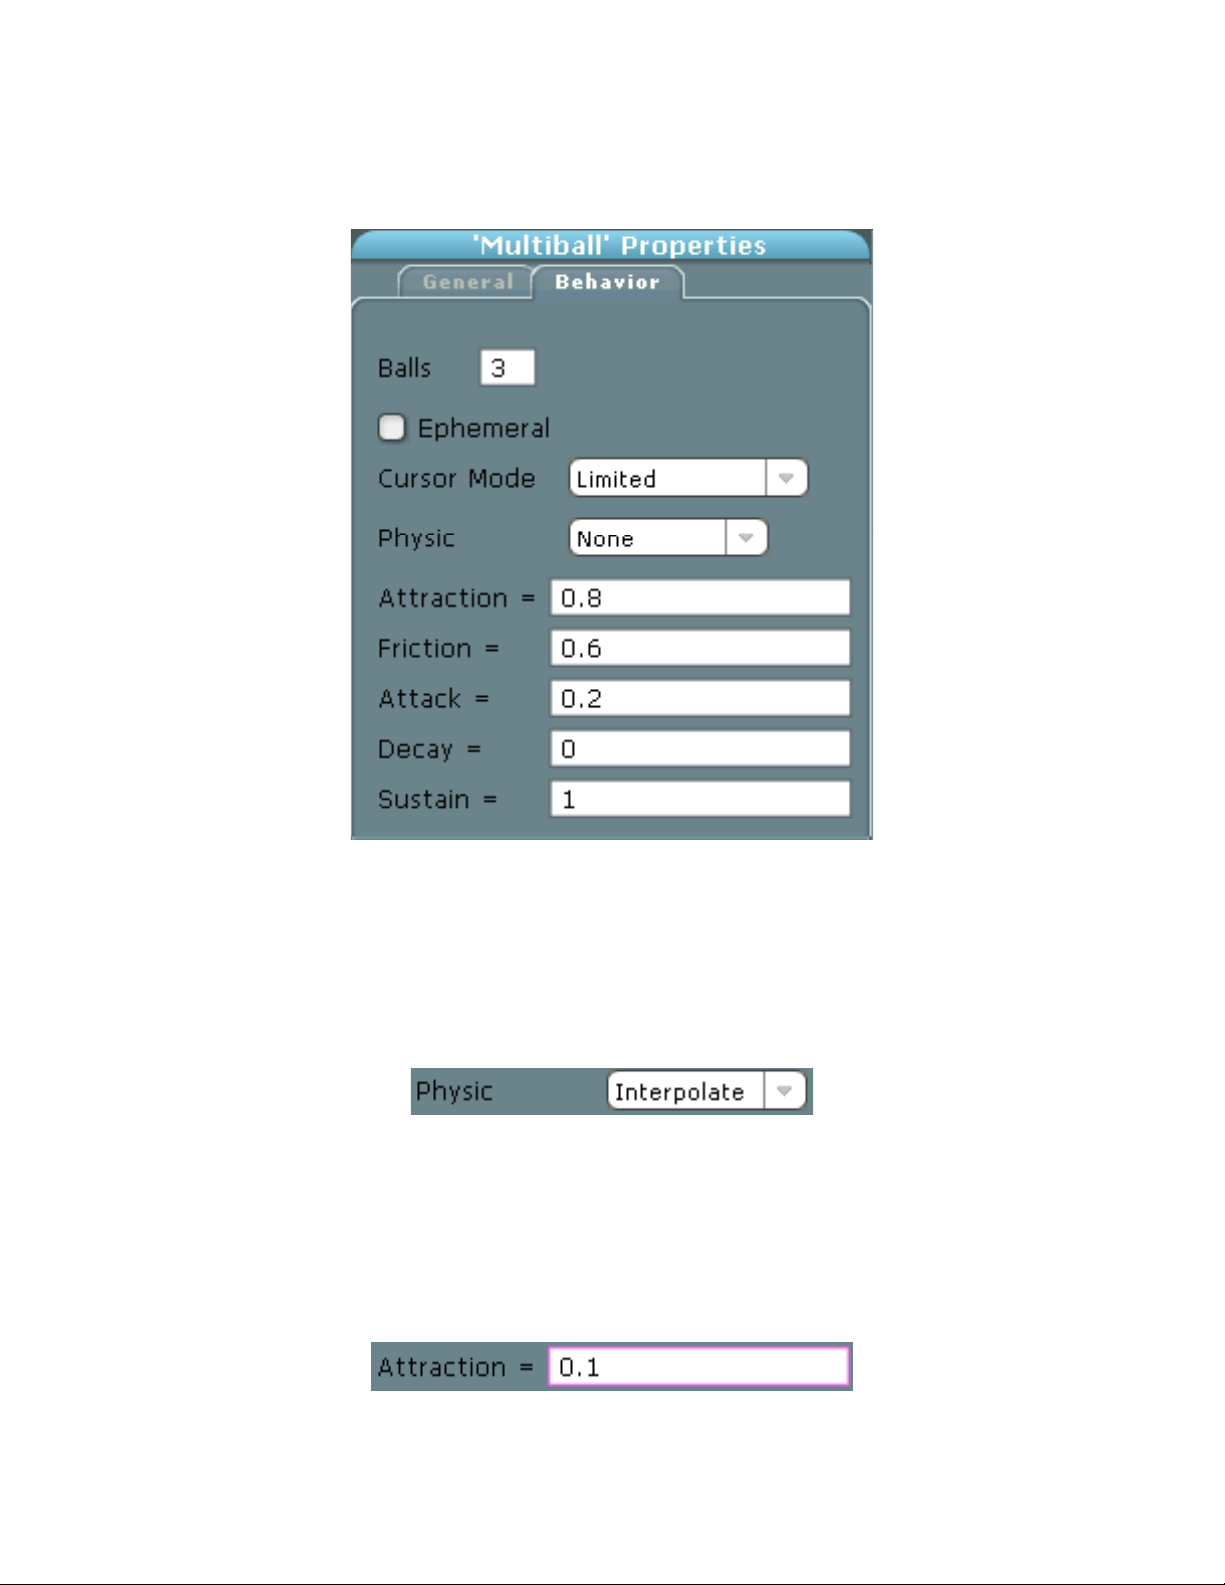
With one of the fields of the Multiball object selected in the Project Browser, click on the
Behavior tab in the Properties section. The following display will appear:
The Physic menu has three modes that define the behavior of the balls. When Physic is
set to None, the ball moves immediately to where your finger is and stays there. It also
follows your finger around as you drag your finger on the touch screen, and immediately
stops when you lift up your finger.
• Choose Interpolate from the Physic menu.
• Touch the Lemur screen somewhere in the Multiball, but not on top of a ball. A ball
will move toward your finger according to the value of the Attraction property
instead of immediately.
• Let’s modify Attraction to make the ball move more slowly to your finger. Enter a
value of 0.1 for Attraction.
Page 38
38
• Touch the Lemur screen somewhere inside the Multiball where there isn’t a ball. A
ball should take a much longer time getting to your finger.
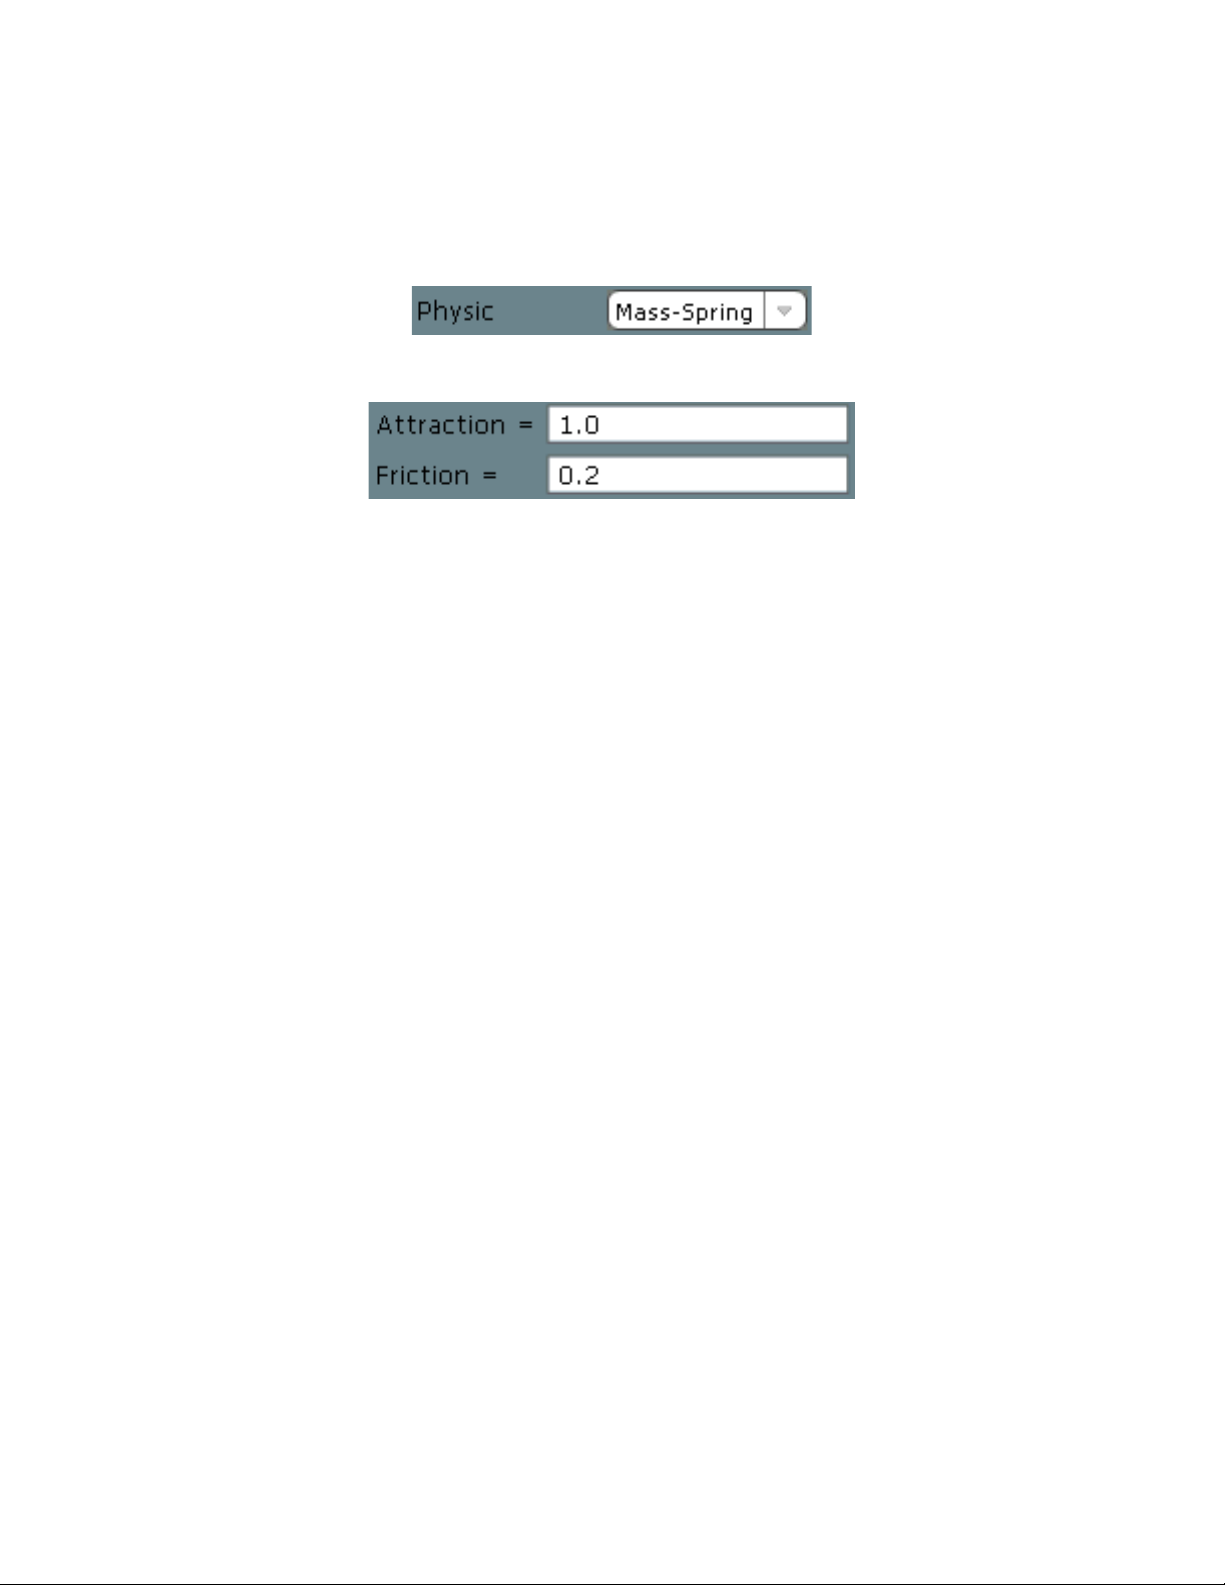
• Now let’s try the final behavior mode. Choose Mass-Spring from the Physic menu.
• Change the attraction value to 1.0 and the friction to 0.2.
• Try touching a ball in the Multiball now. It bounces off the “walls” of the object and
eventually slows down. The Mass-Spring mode is something like Interpolation,
except that the ball has friction (or a lack of it), can bounce off of things, and in certain
cases, the ball may oscillate before coming to a complete rest.
This example should give you a brief overview of the three basic functions of the
JazzEditor:
• Creating Interfaces
• Creating Objects
• Modifying Object Properties
For more information on working with the other Lemur objects, refer to the Object
Reference chapter.
Navigating Interfaces
Now that we’ve created one interface, it’s worth creating a second one so you can see
how the Lemur allows you to change the interface that appears on the screen.
• Click the Interface button at the bottom of the JazzEditor window. Name the new
Interface, and click OK.
Notice that the screen of both the Lemur and the JazzEditor have turned blank.
• Click the Object button, add a new object (perhaps a MultiSlider), name it, and click
OK.
• Drag the borders of the object you added to resize it to cover the entire screen.
Page 39
39
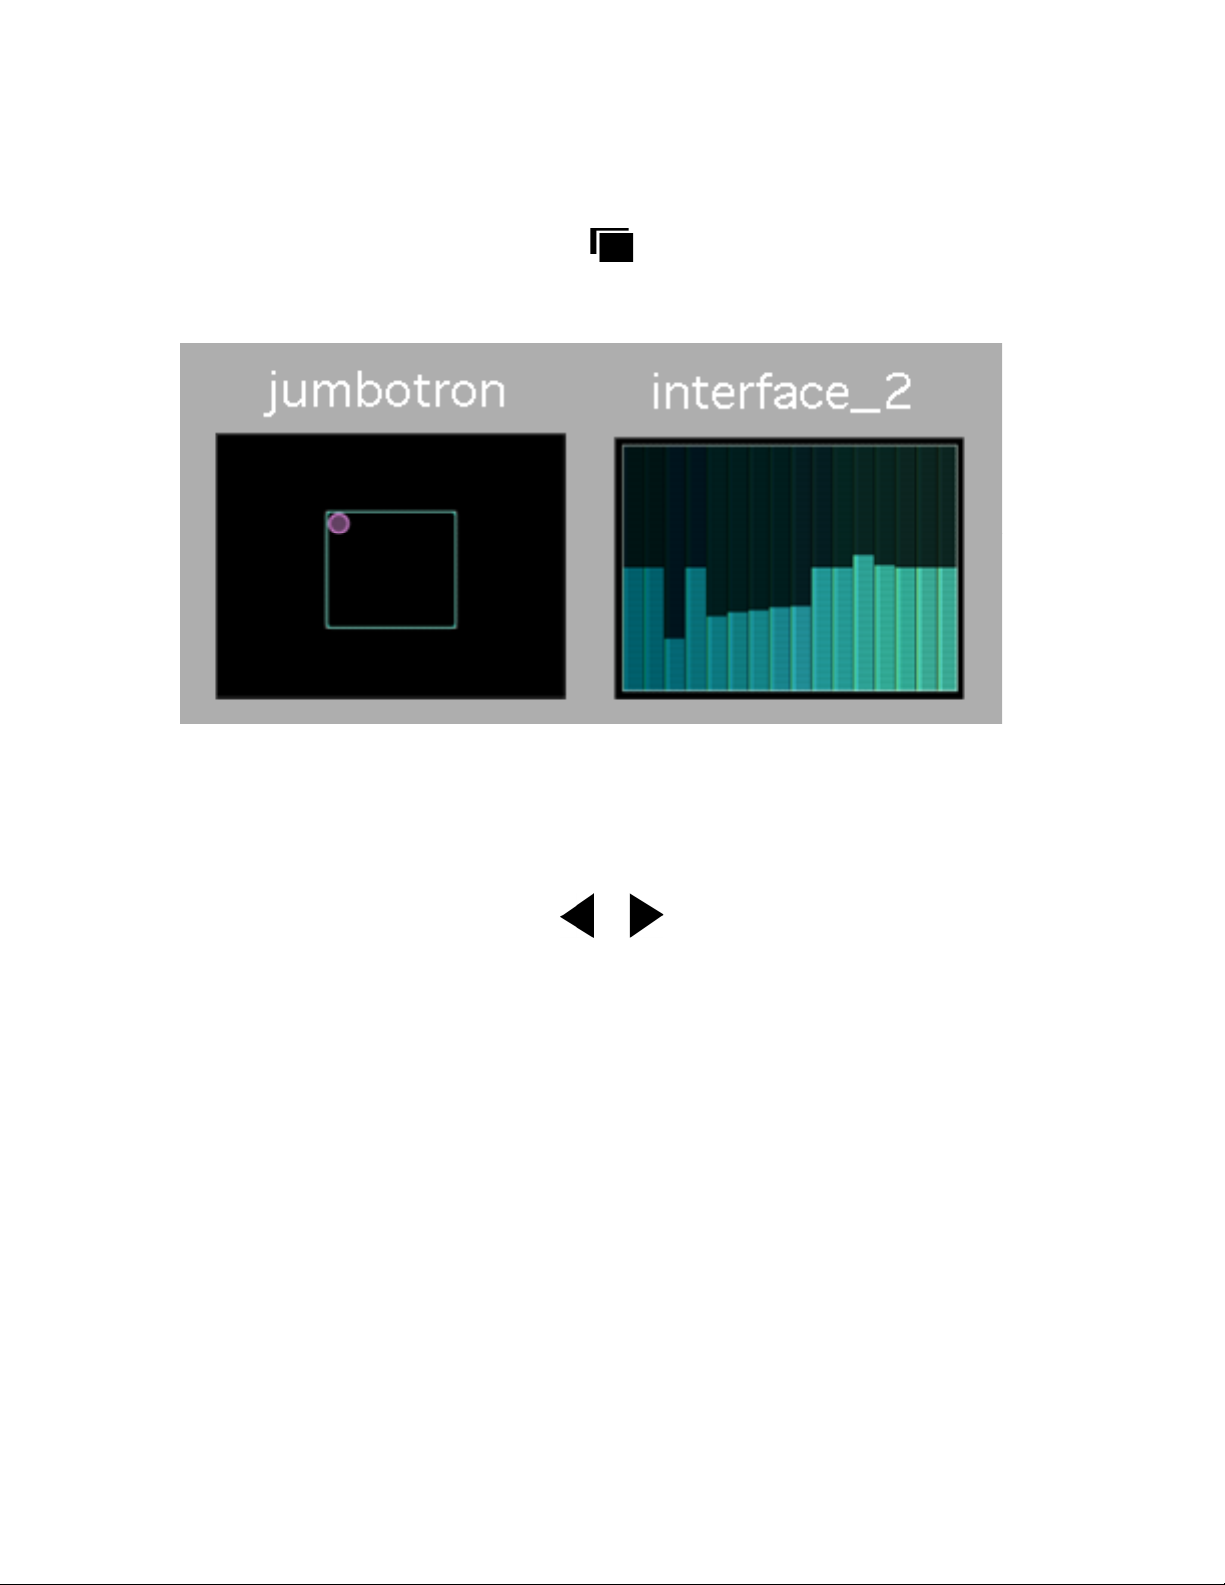
• Press the Interface List button on the top of your Lemur.
The upper left corner of the screen of the Lemur should look something like this.
• Touch the picture of the interface you want to use, and it instantly covers the entire
screen.
• Next, try pressing the Navigation buttons on the top of the Lemur.
They move from one interface screen to the next with a single button press.
Page 40
40
Projects
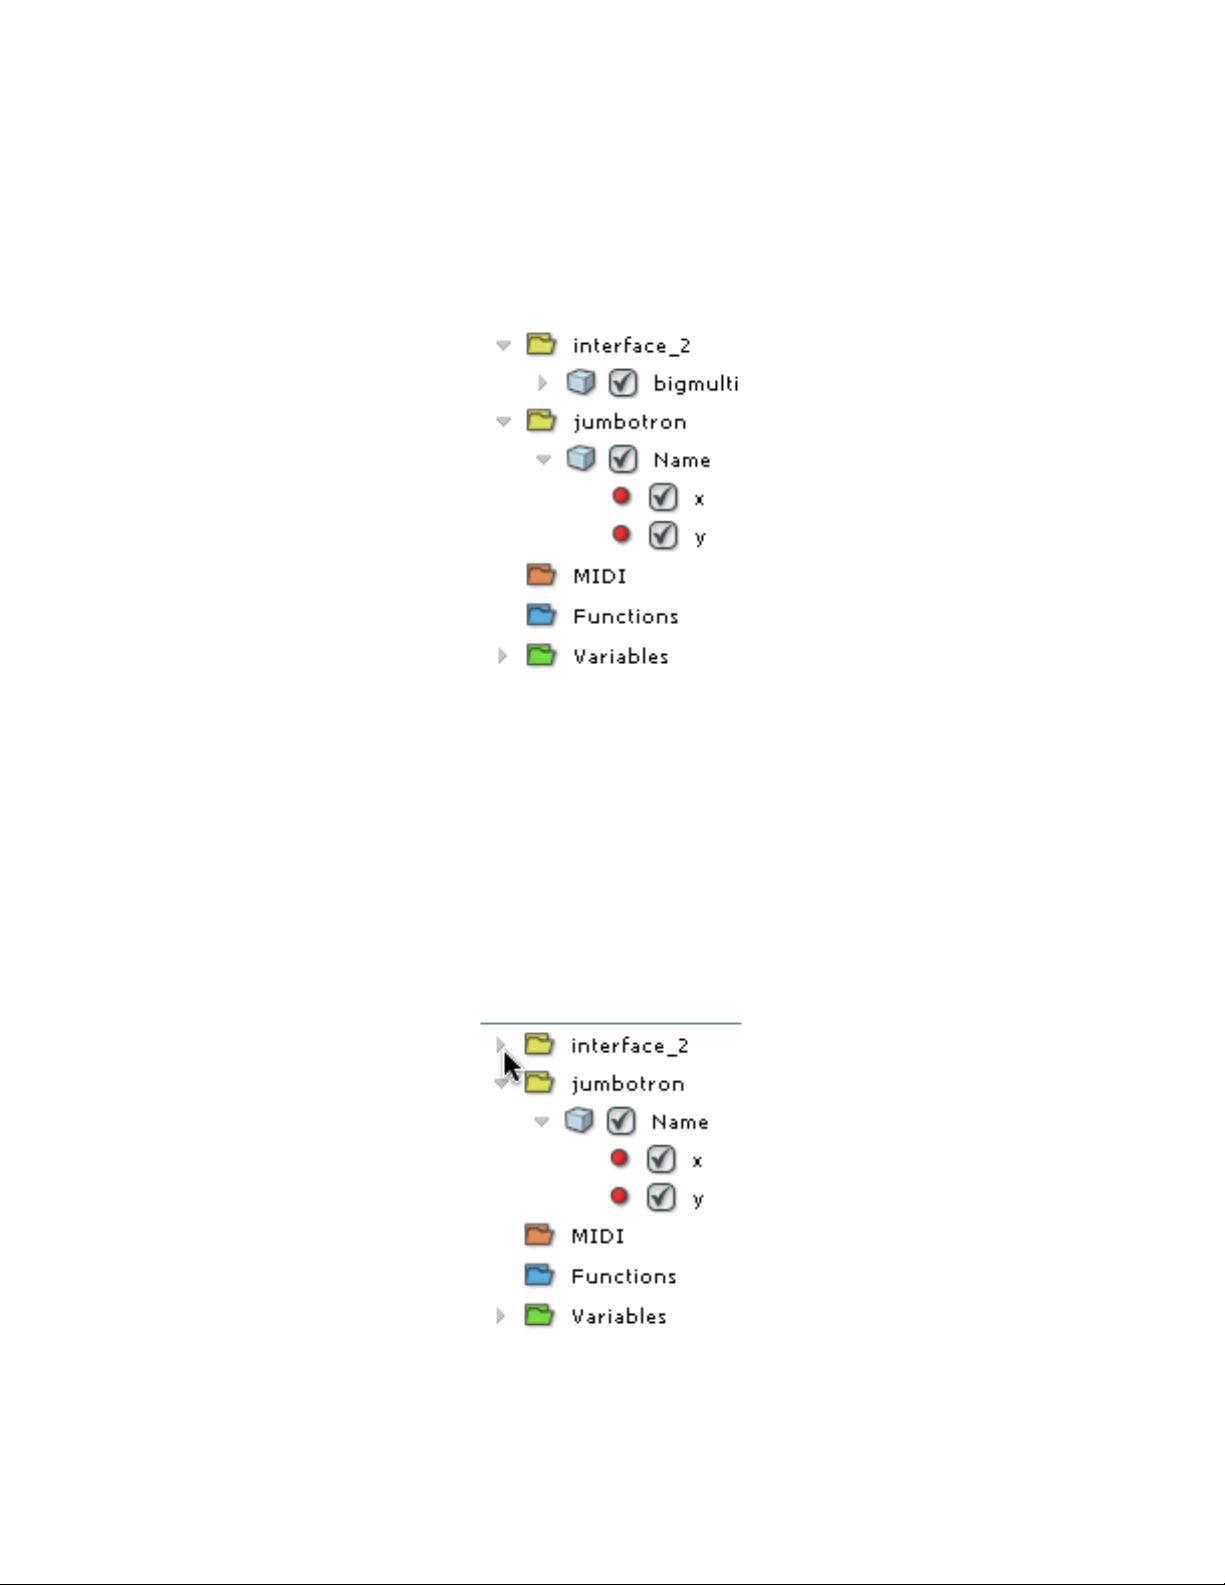
This chapter discusses Lemur Project files. In the previous chapter, we created a Project
consisting of two Interfaces. Our Project Browser should look something like this:
Working with the Project Browser
You can use the Project Browser to select the current interface you want to edit.
However, this does not switch the interface currently displayed on the Lemur. To sync
up the Lemur with the JazzEditor, use the Interface List button to select the desired
interface.
As you work several interfaces that use many objects, you may wish to use the
disclosure triangle to “close up” an interface and hide its contents.
Page 41
41
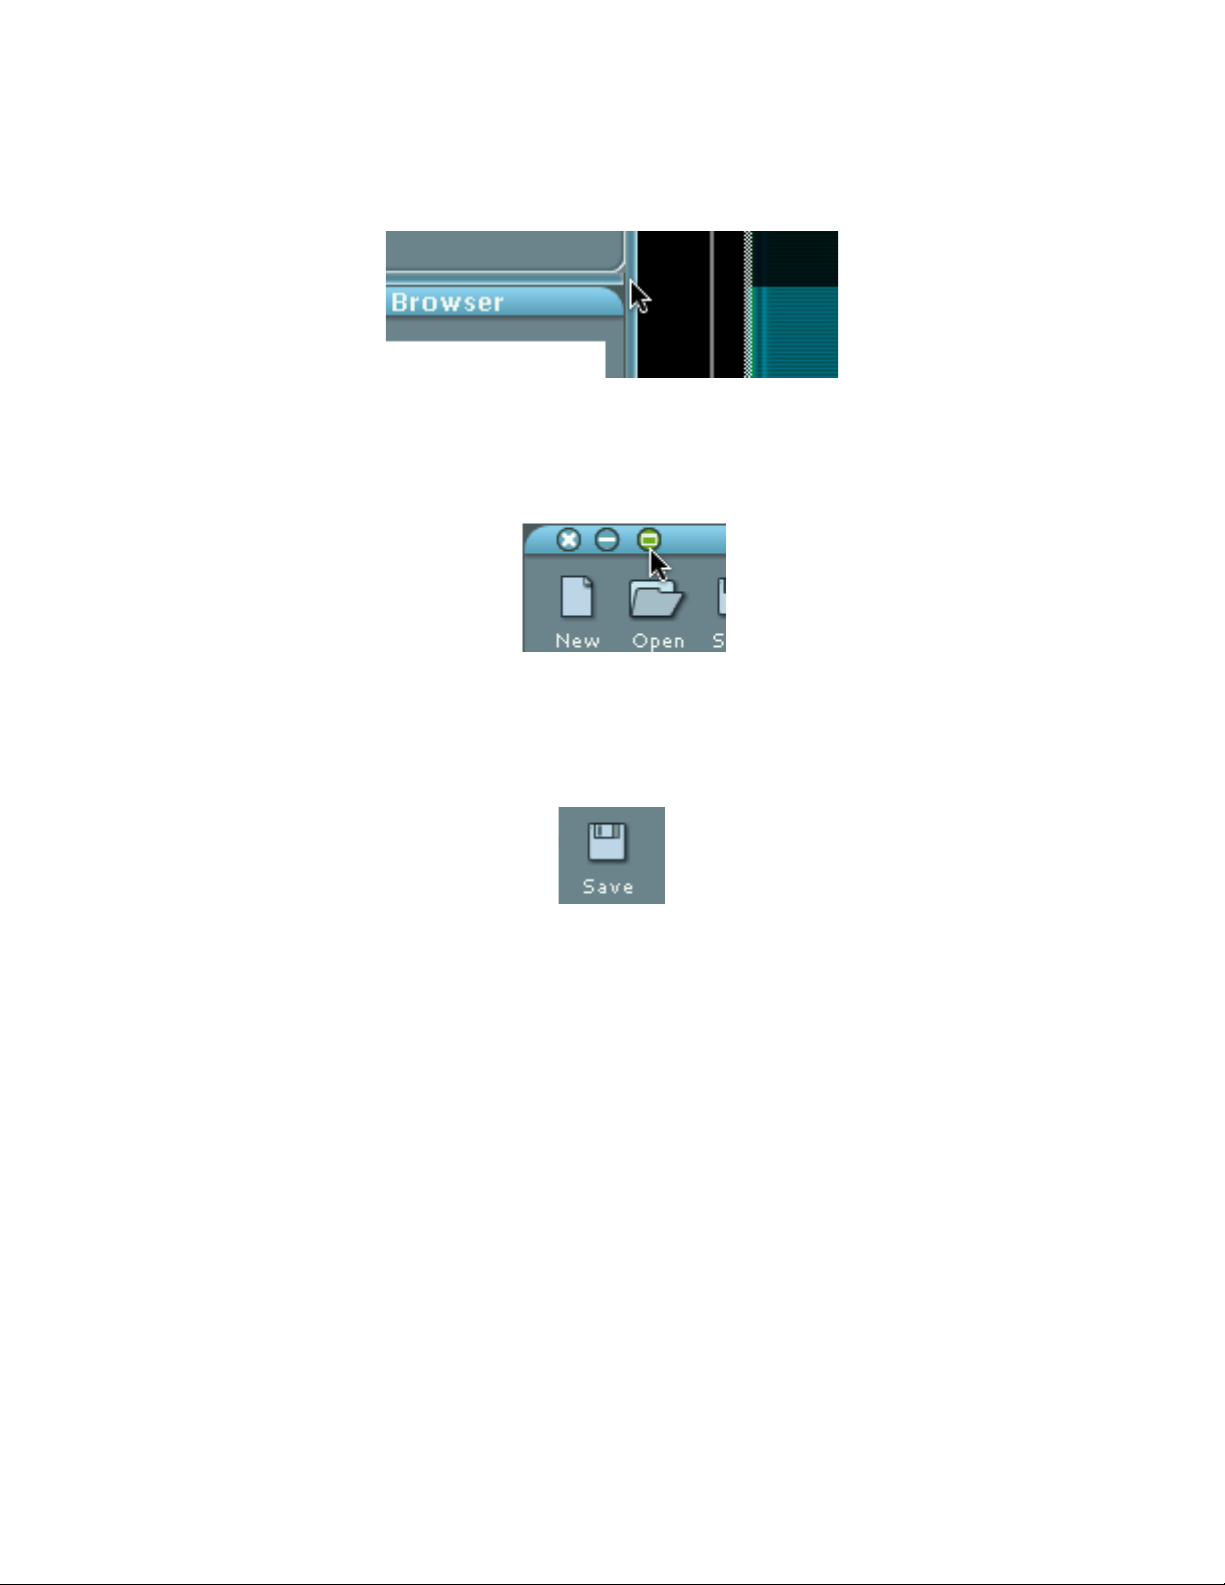
You can also resize the Project Browser by dragging the area that separates it from the
Properties area and the Interface editing area.
Or click the Maximize/Minimize button at the top of the JazzEditor window to fill the
size of the entire display.
Saving Your Project
To save your project, click the Save button.
(For those of you slightly younger computer users out there who might be wondering, the
icon represents a 3.5” floppy disk. What’s a floppy disk? Oh never mind.)
A standard save file dialog appears, prompting you to save your file. The default name is
Untitled.xml. Your file must end in .xml in order for it to be opened with the JazzEditor.
Project files are stored in XML format. If you know a little about XML, it will not be
difficult for you to figure out how to make changes to the file in its textual form.
However, if you don’t know what you are doing, you could easily corrupt your Project,
so it may be best to experiment with a duplicate copy of the Project file.
More About the Lemur – JazzEditor Relationship
The relationship between the Project you are editing in the JazzEditor, what is saved on
the hard drive of your computer, and what is currently in the Lemur is potentially
confusing. The JazzEditor software attempts to be somewhat intelligent about managing
this relationship, but its ideas about the matter might be different from yours.
Page 42

42
We’ll try to sort it all out in this section.
An important point to keep in mind is that the JazzEditor tries to prevent you from losing
your work. This has several implications:
• There is no straightforward way to erase the current contents of your Lemur. Well,
actually there is one, but you might not like it: turn the Lemur off and back on again:
The Lemur has no non-volatile memory for Projects.
• Clicking the New button in the JazzEditor clears the JazzEditor, but it also
disconnects the JazzEditor from the Lemur. Do not think of the New button as
simply an “erase your Lemur button.”
• The JazzEditor knows (or at least it thinks it knows) whether the contents of your
Lemur differ from what has been saved on your computer. If it thinks the Lemur
contains work that hasn’t been saved, it will ask you to confirm before taking any
action.
• Clicking the Connect button always has the effect of reconciling the contents of the
JazzEditor and the Lemur. If there are differences, you will be asked how you want to
proceed in this reconciliation process.
The best way to understand all of this is to go through a few examples. To make
everything clear, we will start fresh. We assume you’ve saved your current project as
directed in the previous section.
Example 1: Opening a Saved Project
• Start by quitting the JazzEditor, then turning your Lemur off and back on again.
• Launch the JazzEditor again.
• Click the Connect button to establish a connection with the Lemur.
• Click the Open button.
• Locate a Project file you’ve saved and open it.
• The contents of your Project will immediately be uploaded to the Lemur.
This was pretty easy, right? There were no complications because the Lemur didn’t
already have anything in it. Now things are about to get interesting.
Page 43
43
Example 2: The New Button, Part 1
• Click the New button.
Notice that you are immediately disconnected from the Lemur. The Disconnect button
changes to the Connect button.
• Click the Connect button. After choosing the desired Lemur and connecting, the
contents of your Lemur will be sent back to the JazzEditor.
The principle is this: when connected to your Lemur, the JazzEditor wants its state to be
the same as the Lemur. Use the Disconnect button to edit Lemur interfaces “off-line.”
Example 3: The New Button, Part 2
• Continuing with the example, click the New button again. Again, your Lemur is
disconnected.
• Click the Interface button at the bottom of the JazzEditor to make a new Interface.
Notice that no change occurs on your Lemur, because it is disconnected.
• Click the Object button to create a new object. Name it and position as desired.
• Click the Connect button. After choosing the desired Lemur and connecting, you’ll see
the following dialog box in the JazzEditor window.
Page 44

44
(For the purposes of this example dialog box, the previously saved Project we opened
was called test2.xml.)
You’ll click Yes if you want to overwrite the contents of the Lemur with what you
currently have in the JazzEditor. Click No if you want to remain disconnected and leave
the state of the Lemur as is.
Again, the principle is this: if you want to connect to the Lemur, you’d better be
prepared to reconcile its state with the JazzEditor.
• Click Yes. The new Interface and Object are visible on the Lemur, and the JazzEditor
is connected.
Example 4: Opening a Project, Again
In this example, we’ll show you how you can lose your work if you are not careful.
• Continuing with our previous example, click Open and reselect the same XML file
you opened in example 1. The previous Interface you created in step 3 is blown
away, and the Lemur now holds the saved Project.
Example 5: Updating a Project You Changed While Disconnected
Continuing with our previous example, we assume you’ve just uploaded a project file to
the Lemur.
• Click the Disconnect button.
• Click the Interface button and create a new Interface. Name it something like
“Update.”
• Click the Object button and add an object to the Interface.
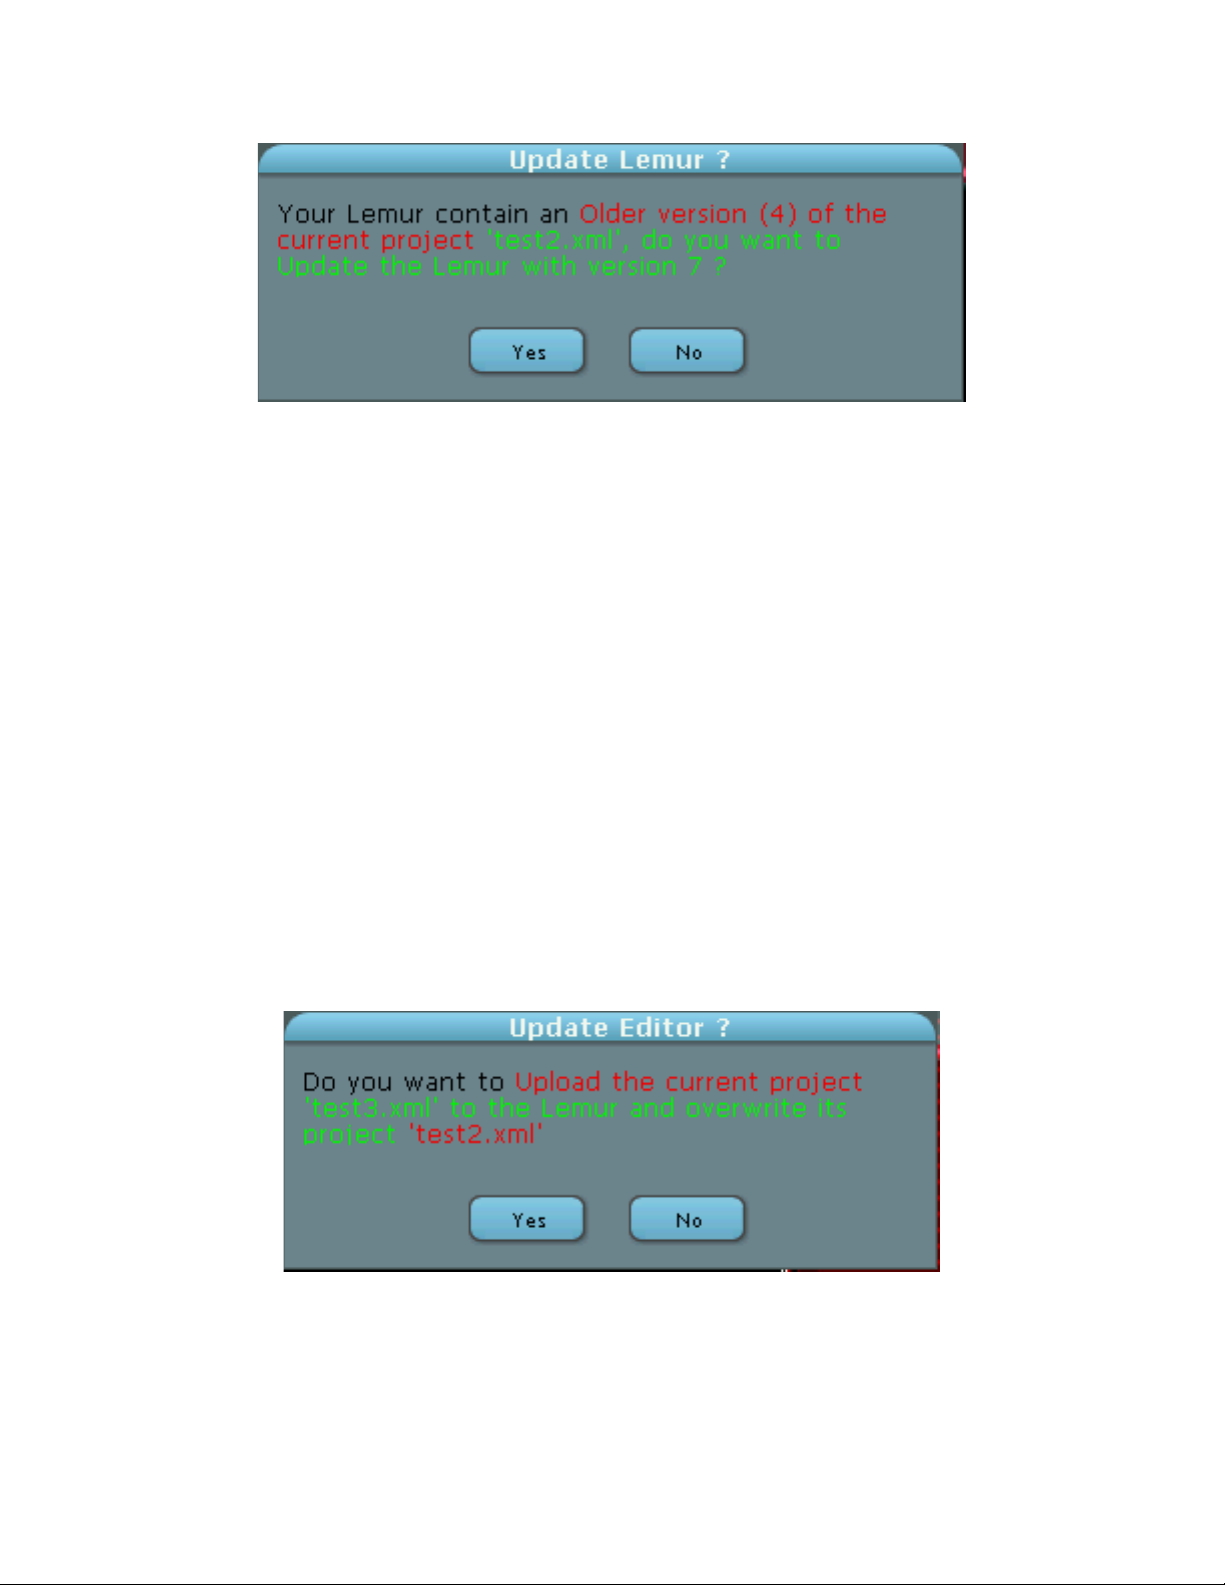
• Click the Connect button. After selecting the desired Lemur and connecting, you will
see the following dialog box.
Page 45
45
As you might be able to predict by now, clicking Yes will send the JazzEditor version to
the Lemur, while clicking No will keep you disconnected.
We have one more example to consider. In this particular case, the JazzEditor’s behavior
is a little confusing, but harmlessly so.
Example 6: Saving a Project Under a New Name
Continuing from our previous example, we assume you have a project file that has been
uploaded to the Lemur. It’s not important whether you’ve modified it since you uploaded
the saved version.
• Click the Save button. Use the save file dialog to choose a new name for the project.
For example, if your project file was called test2.xml, rename it test3.xml.
• Click the Disconnect button.
• Click the Connect button. After choosing the desired Lemur and connecting, you will
see the following dialog box.
Now, in this case, there is actually no difference between the contents of the Lemur and
the contents of the JazzEditor. However, the JazzEditor is concerned about the fact that
the name of the project has changed.
Page 46

46
• In this particular case, you’ll almost always want to click Yes.
Example 7: Downloading Your Lemur’s Contents into Your Computer
Let’s say we get ourselves into a situation in which the Lemur holds the only copy of our
Project. This might happen if you quit the JazzEditor without saving your project. Or,
perhaps we made some changes while disconnected that we don’t want, and we would
like to return to the version sitting on the Lemur.
How can you get the Lemur’s version of a Project back into your JazzEditor?
Continuing with our previous example, we’ll get ourselves into this situation artificially.
• Quit the JazzEditor. Oops, we didn’t save our work!
• Launch the JazzEditor again.
• Click the Connect button. After choosing the desired Lemur (notice that its project
name is shown) and connecting, the JazzEditor will immediately contain the project
stored on the Lemur.
Now we’ll create another interface we don’t want to keep.
• Click the New button. You are disconnected from the Lemur.
• Create a new Interface with an object in it.
• Click the New button. The interface you just created is blown away.
• Click the Connect button. After choosing the desired Lemur and connecting, the
contents of the Lemur have returned to the JazzEditor.
In short, the technique for downloading what’s on your Lemur is to click New before
connecting. This causes the JazzEditor to believe (correctly) that the contents of the
Lemur are more valuable than nothing. Not hard a decision to make.
Summary
The two main principles about Projects you should keep in mind:
• You can edit Projects either while connected to the Lemur or while disconnected.
• If you make changes while disconnected—in other words, if you have new stuff
you’ve made in the JazzEditor—you can only connect to the Lemur if you overwrite
Page 47

47
the Lemur’s current contents with that content. However, if the JazzEditor is blank,
when you connect, you’ll get what’s currently on your Lemur (if anything).
Page 48

48
Using the Lemur with Open
Sound Control Applications
In this chapter, we’ll look at how you connect the Lemur to software compatible with the
Open Sound Control (OSC) protocol. The Open Sound Control protocol specifies the
transmission of messages between two devices. Rather than attach specific meanings to
these messages, as is done with MIDI, Open Sound Control allows you to define your
own system of messages. With the Lemur for example, the names of objects you create
are part of the “selectors” of OSC messages.
Because OSC is a point-to-point protocol, you have to address messages from the Lemur
to your computer with a specific IP address (called the Target IP). Similarly, if you want
to send OSC messages to a Lemur, you have to specify an IP address. In short, to use
OSC you have a few more things to keep in mind, but the flexibility of the system is your
reward for a small amount of advance setup work.
Here’s a brief outline of the setup process we’ll learn about in this chapter:
1. Use the Connect window in the JazzEditor to establish a connection between the
Lemur and your computer.
2. Use the Settings window in the JazzEditor to tell the Lemur the IP address of
your computer as well as the port number you will use for receiving data from the
Lemur.
3. Create an interface in the JazzEditor that the Lemur will use to transmit (and
possibly receive) OSC data.
4. Configure (or program) your application to receive (and possibly transmit) OSC
data.
Let’s get started!
Using the JazzEditor Settings Window
The purpose of the Settings window is to tell the Lemur the IP address and port on which
it should transmit OSC messages when you manipulate objects on its screen.
• Launch the JazzEditor application if it is not already running.
Page 49
49
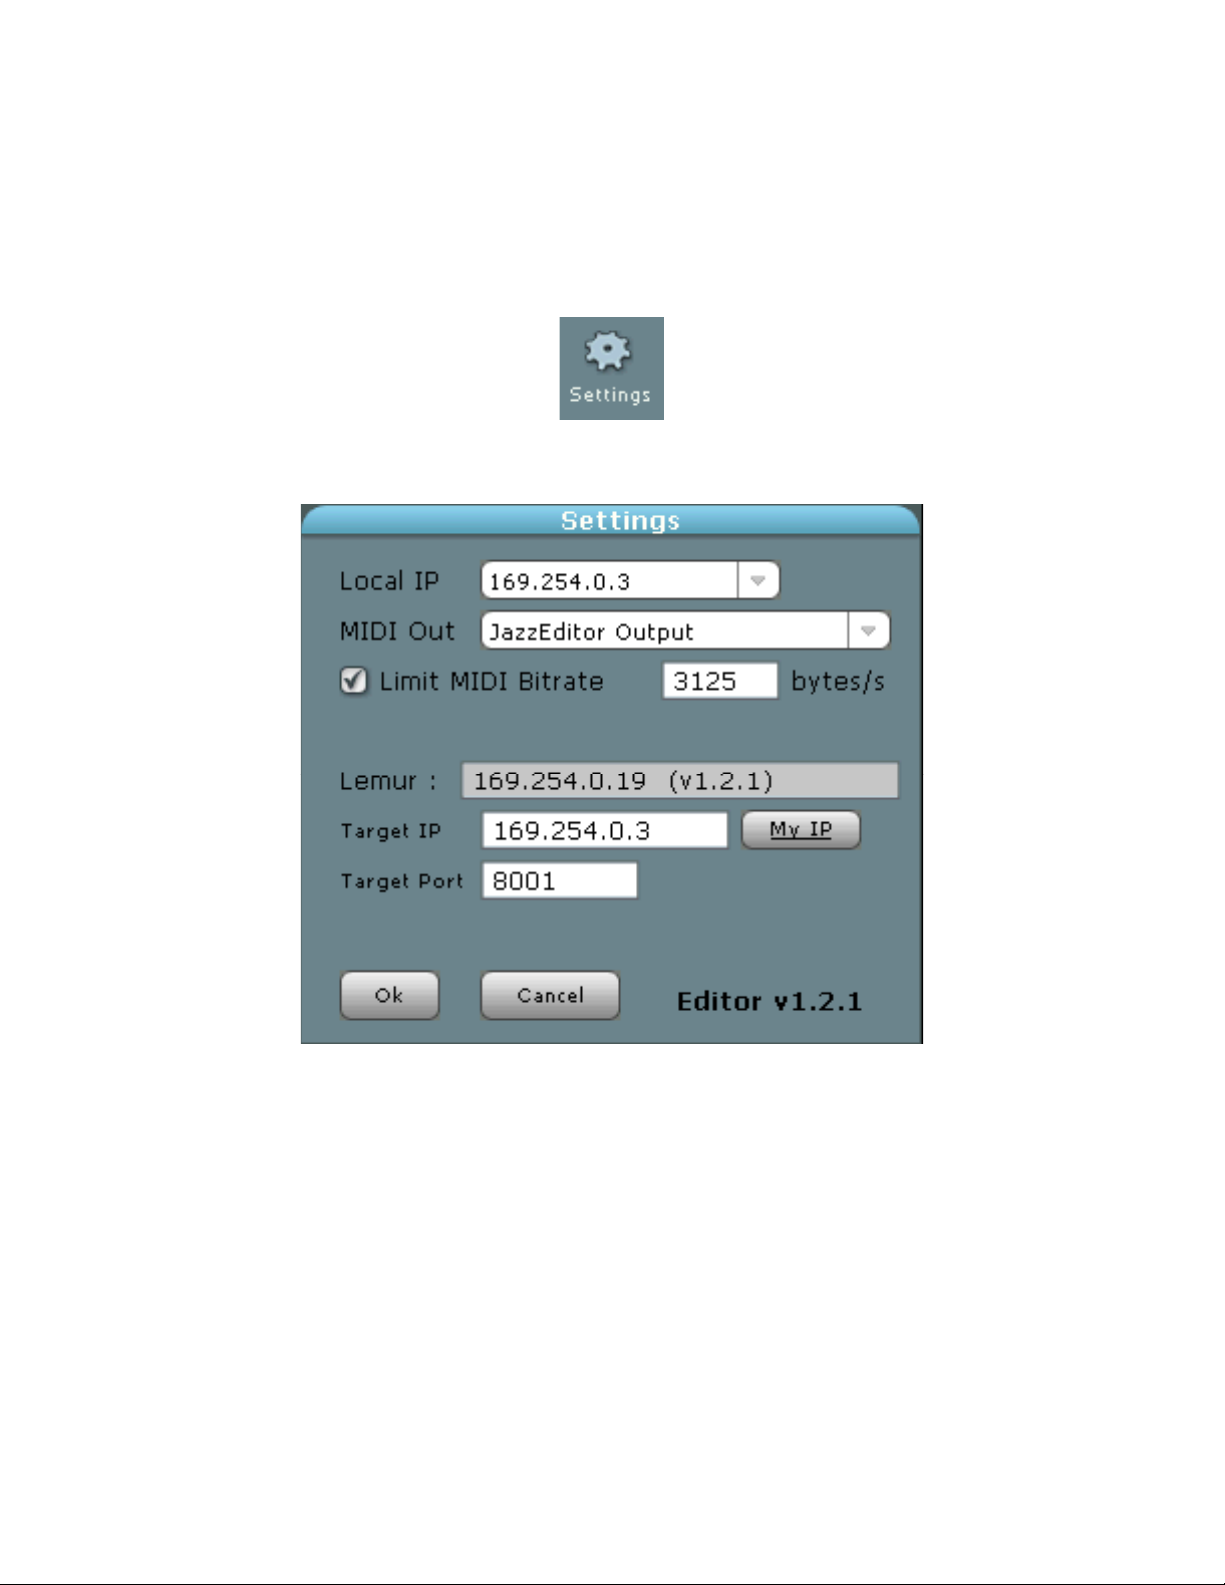
• You cannot change anything in the Settings window unless you are connected to a
Lemur. If you are not currently connected to a Lemur, click the Connect button and
select the desired Lemur.
• Click the Settings button.
The window shown below will appear.
The Local IP presents a menu of current IP addresses your computer is using. For
example, if you have both a wireless and a wired network connection, you’ll typically see
two different IP addresses in this menu. If this situation applies to you, choose the IP
that corresponds to the network where your Lemur is connected. The current setting is
typically correct.
We’ll ignore the MIDI settings in the window for now, since they don’t apply to OSC
applications. The terminology “Target IP” used in the Settings window may be confusing
at first. It helps to think of the Settings window from the perspective of the Lemur, not
your computer. You are telling the Lemur the target for its messages. If you plan to use
the Lemur to control your computer, the target will be your computer.
Page 50
50
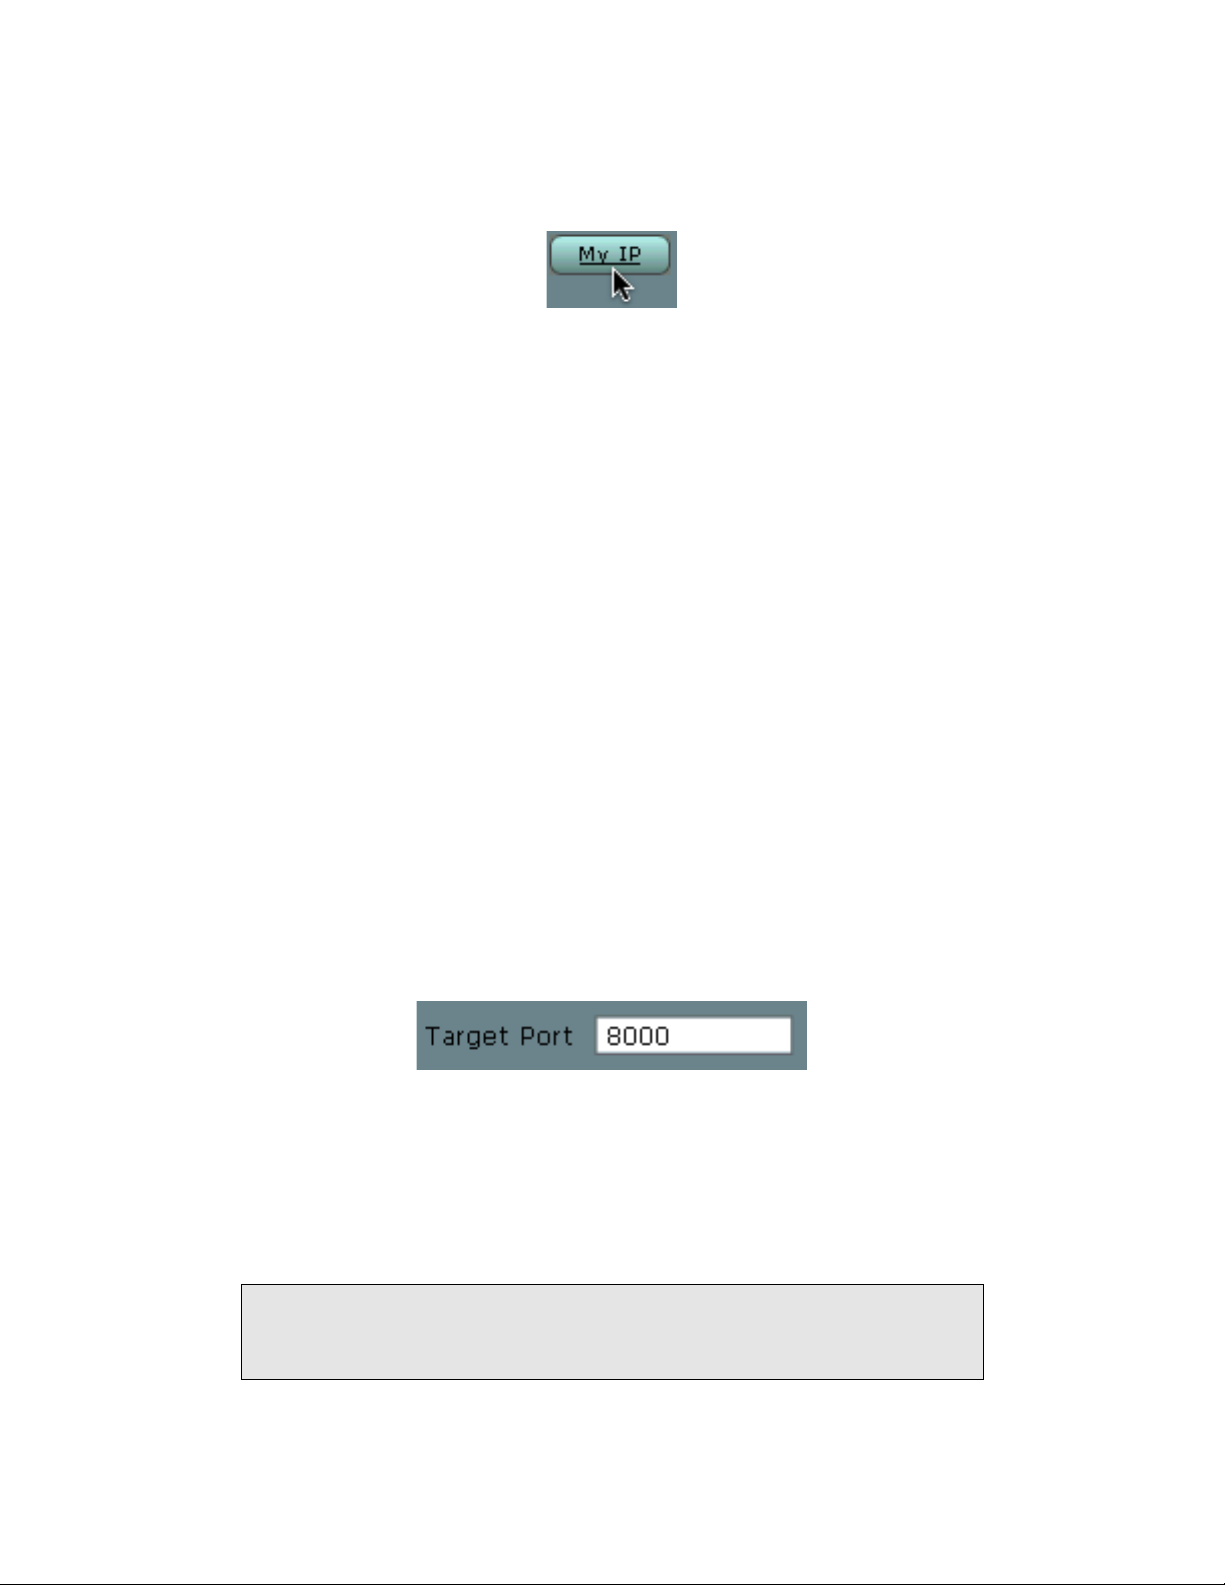
The Local IP you chose is the desired Target IP you want to use. To use it, just click the
My IP button, which copies the current Local IP into the Target IP field.
Assuming you want the Lemur to send data to your computer and not some other device
on the network, you’ll want to click the My IP button. It’s ty pical that Local IP will not
match the Target IP value when the Settings window first appears.
Next, we want to set the port on which the Lemur will transmit OSC data. Ports are
something like channel selectors that allow multiple applications to share the same IP
address and not get in each other’s way. The choice of port number is determined by
what software you are using.
• Port 8001 should not be used, because the JazzEditor uses this port to receive
information from the Lemur. If you try to use another application while the
JazzEditor is open, the application will not be able to access port 8001. Similarly, if
you launch the JazzEditor while another application is using port 8001, it will be
unable to connect properly to the Lemur. Unfortunately, port 8001 appears by
default in the Settings window, so you’ll need to change it.
• For Max/MSP, the port number can be anything, but 8000 is the typical value used.
• For Reaktor 5, the port number must over 10000.
• For other OSC-compatible software, consult the software’s documentation for the
port number.
• Click OK to close the Settings window. To verify that the Lemur has received your
Settings choices, press the Settings button on the Lemur front panel. The Target IP
and Port listed should match the IP address and port you specified.
Connecting the Lemur to Max/MSP
This section assumes you have a copy of Max/MSP installed on your
computer and that some familiarity with using the software. If you are not
going to use this software with your Lemur, you can skip this section.
Page 51
51
We’ve included a Max patch in the Lemur Extras folder on the Lemur CD called
SeeingMessages. This patch serves several purposes: first, it will let you verify that your
Lemur is properly talking to your computer using OSC. Secondly, it displays the names
of the objects and variables you touch on your interface, which lets you identify which
objects are sending data, and which ones may not be configured properly. Third, it
demonstrates one way to write a Max patch to receive data from your Lemur.
• This patch assumes you configured your Settings window in the JazzEditor to use
port 8000. If you used another port number, it’s not a problem. However, the patch
will generate an error message when it loads, and it will need to be modified before it
works properly.
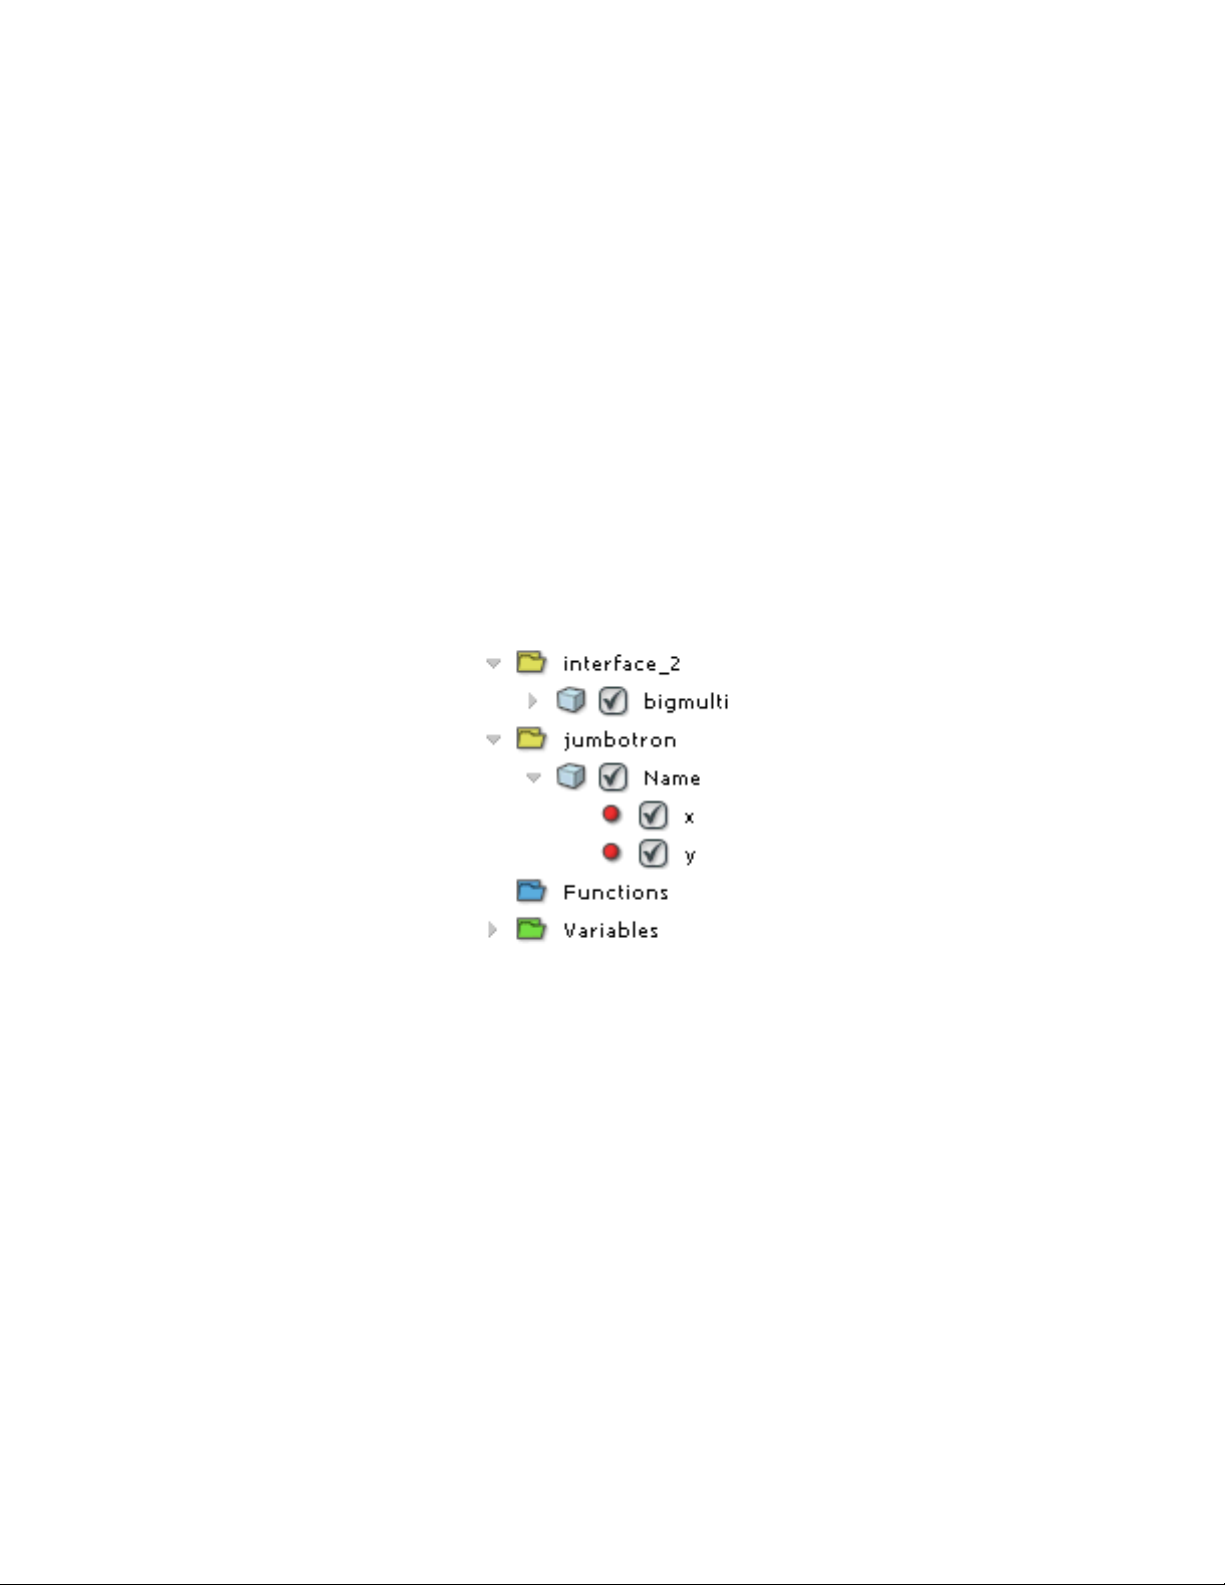
• Before starting up the patch, use the JazzEditor to place a couple of objects on your
Lemur if you do not have some already. Remember that in the Project Browser, both
the check box next to the object name and the check box next to the x, y, etc. variable
names must be checked in order for data to be transmitted when you touch the object.
• If you have not done so already, copy the Lemur Extras folder to your hard drive.
• Launch Max/MSP.
Page 52
52
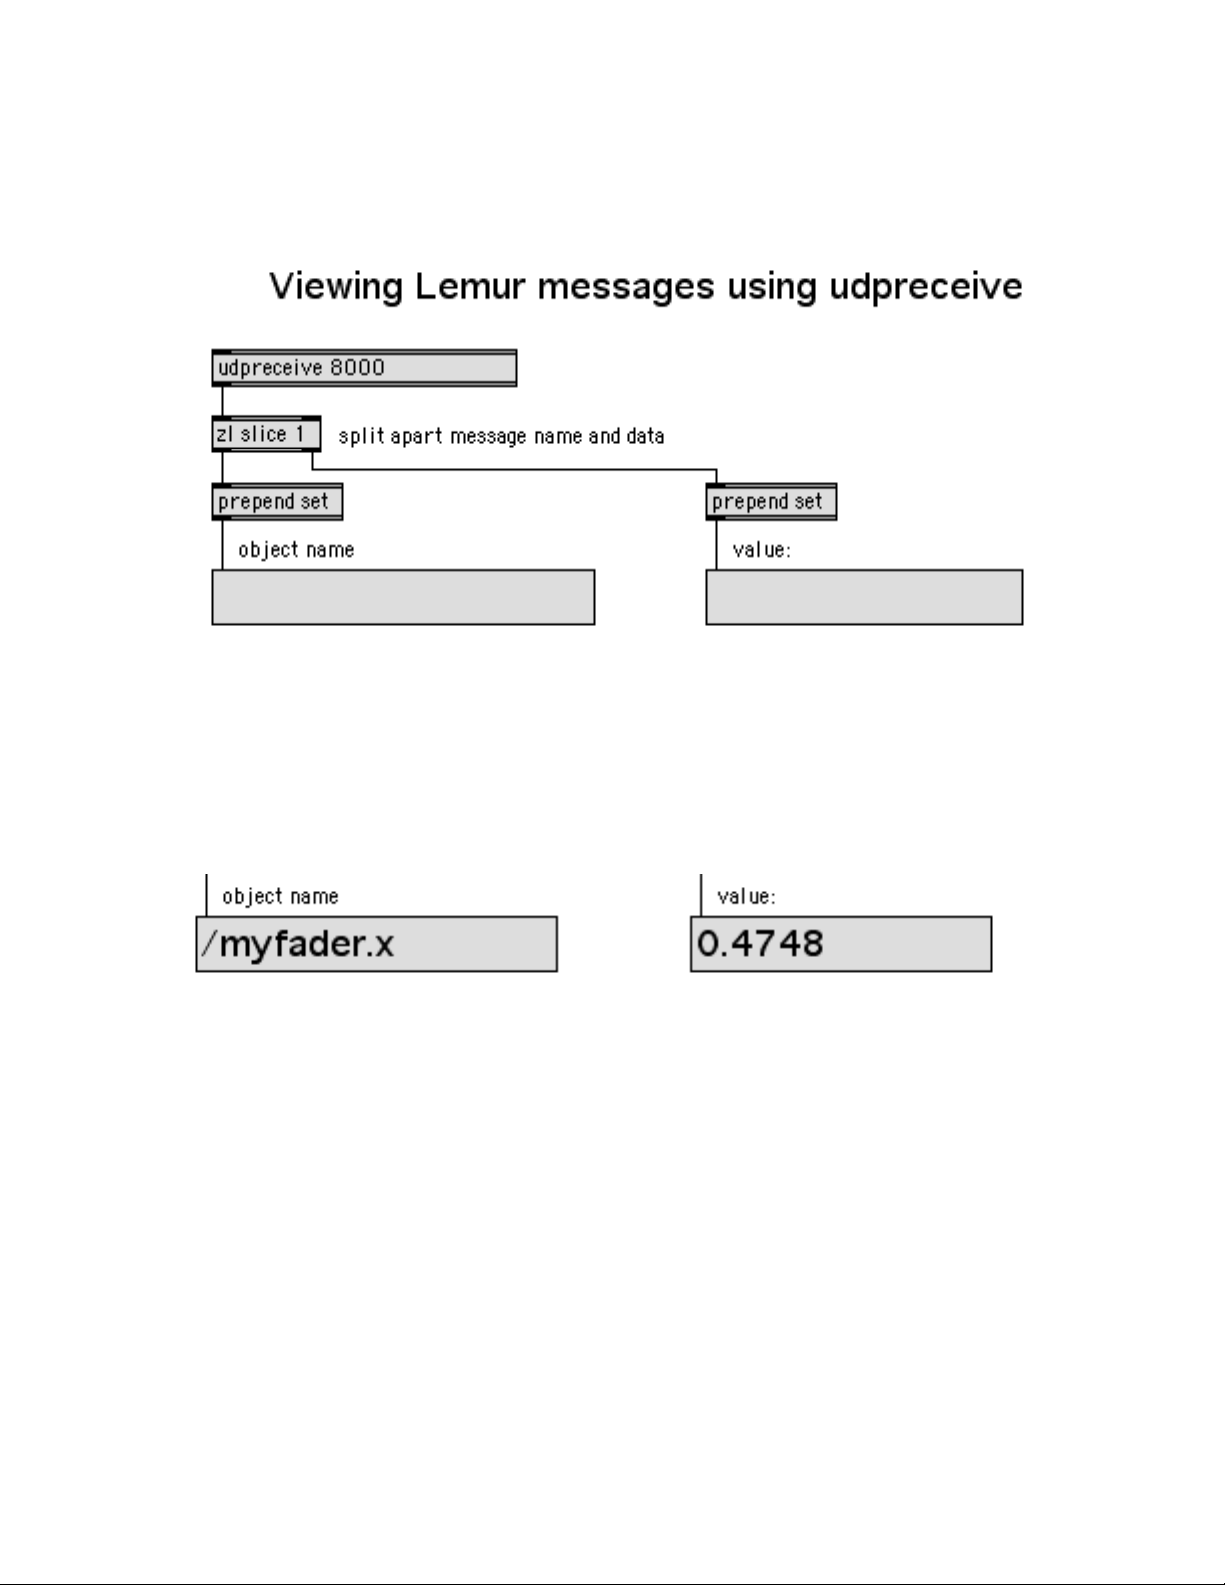
• From within Max/MSP, open the file called SeeingMessages.mxb in the Lemur Extras
folder. The patch is displayed (in reduced form) below.
Network packets are received by the udpreceive object at the top of the patch. The
udpreceive object understands the Open Sound Control protocol so it can handle
messages coming from the Lemur. It outputs a Max message consisting of the Open
Sound Control message name (the object plus variable name preceded by a slash) followed
by the message values. Here is the data processed by udpreceive for Lemur message sent
from a Fader object called myfader, which sends one value.
The zl split object separates the message name and values to be displayed by the two
message boxes.
• If you have an Interface on your Lemur, touch some of the objects. The button
beneath the udpreceive object should light up and you should see the message name
and the associated values transmitted by the Lemur. We’ll explain the format of the
message name in a moment.
• If you do not see the button light up or any data displayed, verify that the JazzEditor
shows the Lemur as connected, that the Target IP shown in the Settings window on
the Lemur (and JazzEditor) matches the IP address of your computer, and that the
object and variable name boxes are checked in the JazzEditor’s Project Browser for
the object you are touching.
Page 53

53
Understanding the Lemur’s Open Sound Control Messages
Open Sound Control messages sent by the Lemur consist of a message name followed by
one or more values. Message names begin with a forward slash. So, if you’ve set up an
object on the Lemur to be named Fred, the Lemur will transmit a message starting with
/Fred when you touch the object.
Some Lemur objects use variable names to identify different aspects of objects that you
are touching. For instance, an Area object tracks both horizontal and vertical finger
location. In OSC, these are sent as the variables x and y respectively. If Andy is an Area
object, moving the purple ball inside the Area will transmit two messages:
/Andy.x <value>
/Andy.y <value>
As we saw above, if a Lemur object has only a single value—such as the Fader—its value
is transmitted as x. In other words, a Fader named Fred will transmit /Fred.x followed by
a single value. However, it’s also possible that the x variable contain a list of numbers.
This is true of the MultiSlider, Pads, and Switches.
The Object Reference chapter lists the message format for each Lemur object. If you don’t
like to read manuals, use the SeeingMessages or LemurLog patches to figure what data
each object sends.
Controlling Max/MSP with the Lemur
Here are a couple of common strategies for using the Lemur to control what happens in a
patch in Max/MSP.
Page 54
54
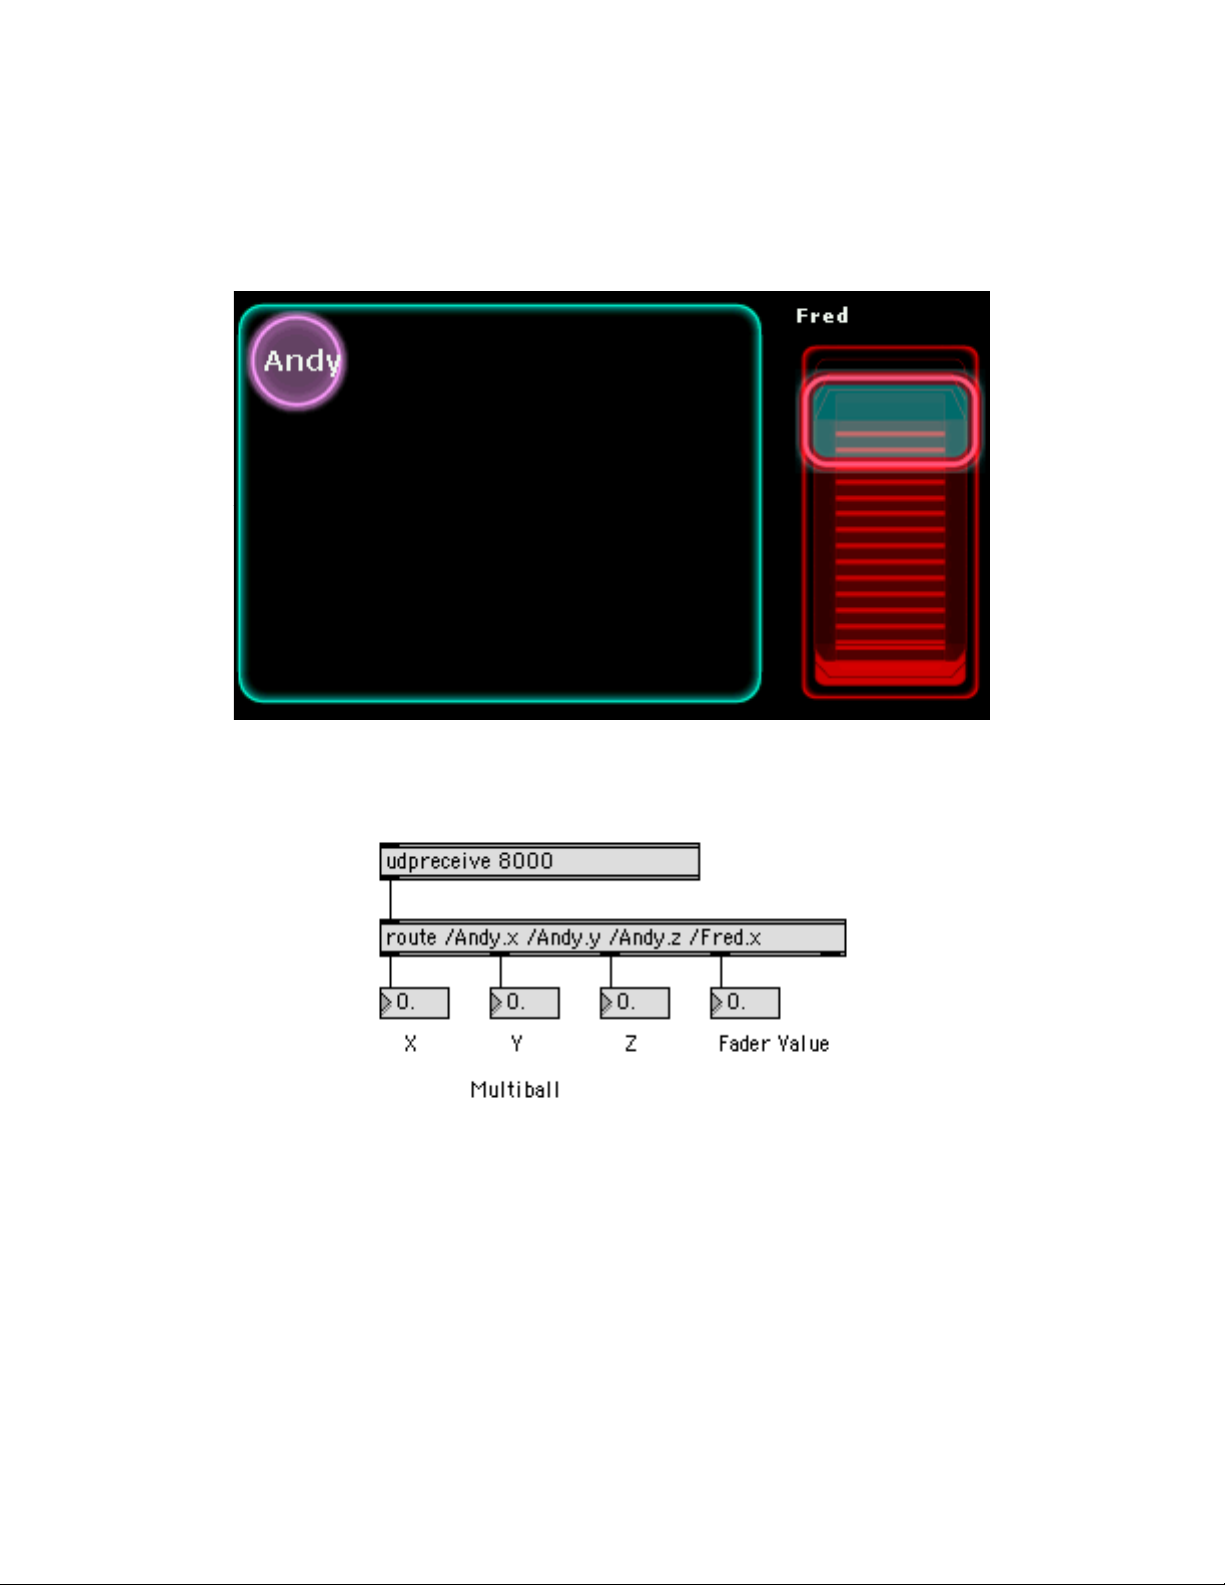
• The easiest thing you can do is hook up a route object to the outlet of udpreceive. The
arguments to the route object will be the names of the different object name / variable
combinations you want to receive from the Lemur. For example, suppose you had
this interface on the Lemur with an Multiball and a Fader.
You can get the values from the Fader’s x variable, plus the Multiball’s x, y, and z
variables, with this patch:
The route object strategy tends to be a bit awkward to maintain however. Every time you
add a new object, you have to change the arguments to the route.
Page 55
55
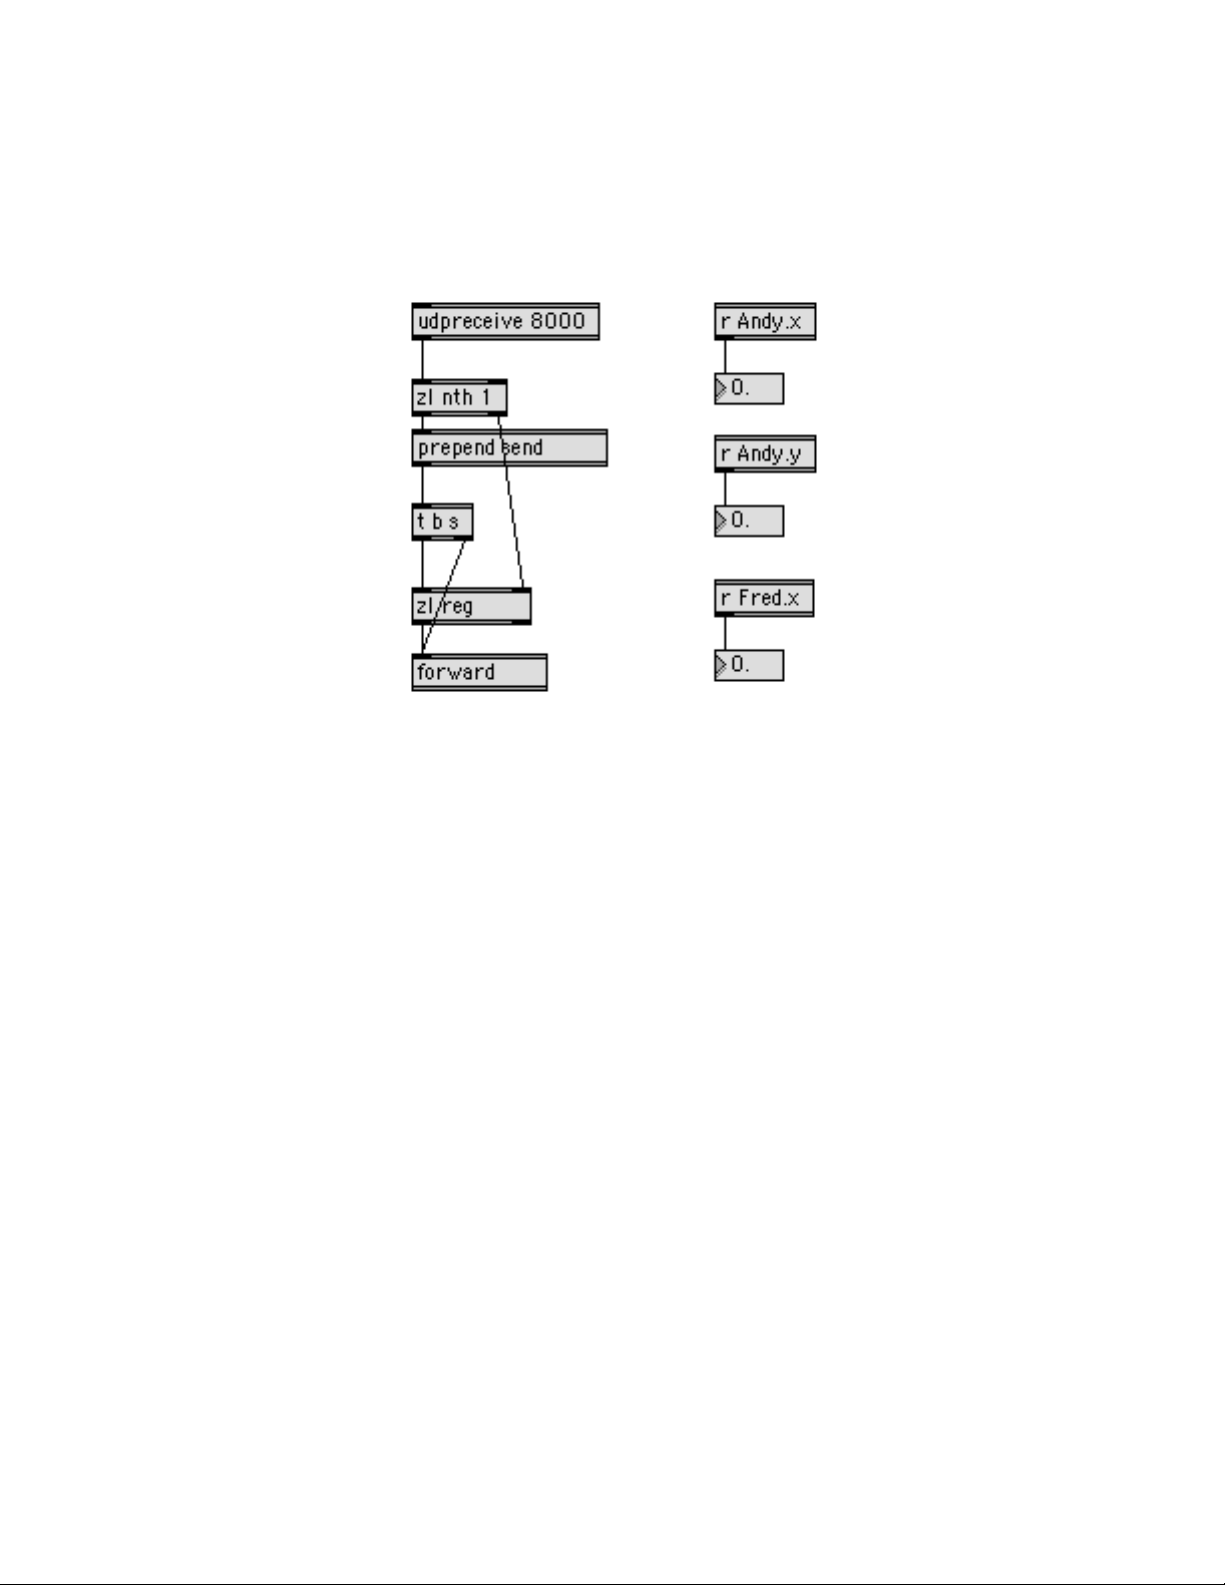
Another technique is to use the forward object in conjunction with a little fancy
footwork. This technique uses the forward object to send out OSC values to receive
objects whose arguments match the OSC message selector. Here is the the equivalent
patch to the route version shown previously that uses the forward object.
The advantage of this technique is that if we now add a new object to our Lemur
Interface, for instance, Paul the Pad (button), we can simply add a new receive object,
Paul.x, to our patch, and it will receive data from the Button object on the Lemur.
Controlling the Lemur from Max/MSP
In addition to receiving messages via OSC from the Lemur when someone touches the
objects on the surface, you can also change the values of the objects on the Lemur via
OSC. To do this, you use the udpsend object. The udpsend object transmits messages to
a specific IP address and port. (Indeed you could think of the Lemur as having a udpsend
built into it.)
The udpsend object accepts a message of the form
<OSC-message-selector> <value>
If the OSC message selector corresponds to the name of an object + variable name on the
Lemur, the object will update its display of the specified variable on the touch surface
screen.
Let’s give it a try.
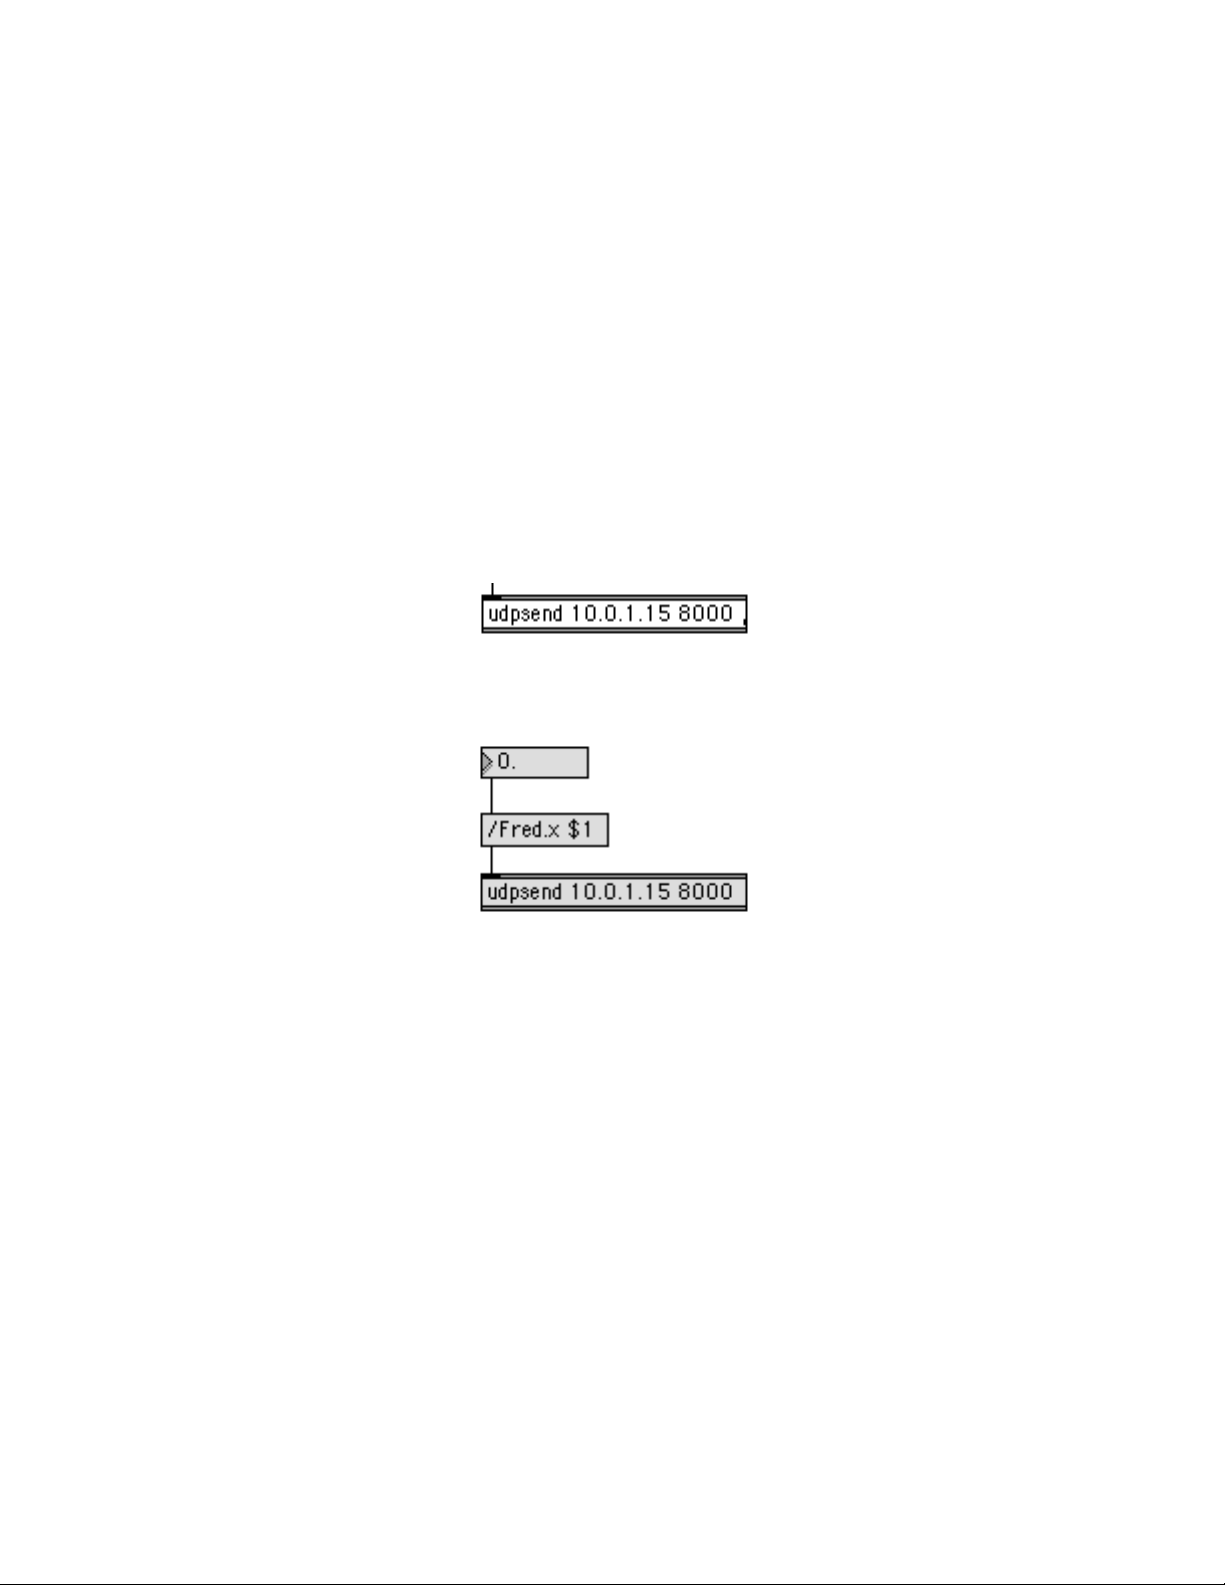
• Assuming you have a Fader named Fred on your Lemur, we will attempt to change its
value with a number box.
Page 56
56
• Create a new patcher.
• Press the Settings button on your Lemur to check its IP address. The IP address will
be in red.
Host name is ‘lemur’
My IP is 10.0.1.15 – Using DHCP
Gateway is 10.01.1
Net Mask is 255.255.255.0
• Create a new udpsend object in your patcher with two arguments: the IP address of
the Lemur and 8000 (the port the Lemur receives on). The example below
corresponds to the IP address shown above, 10.0.1.15.
The complete patch will look like this:
• Touch the OK button on the Lemur screen to close the Settings window on the Lemur
• Scroll the number box in the patch from 0 to 1. The Fader on the Lemur should be
changing its value.
All OSC messages understood by the Lemur start with the OSC message selector (the
forward slash followed immediately by the Lemur object name, followed by a dot,
followed by the variable name of the variable you want to change on the object).
Page 57

57
Lemur Object Reference
The Lemur contains seven objects you can use to build interfaces. This section explains
the features, options, and OSC message format of each of object. The object names
appear in the picker window you see when clicking the Object button at the bottom of
the JazzEditor window.
Guide to Object Reference Pages
Variables Lists the built-in variable names of the object and what they
represent. All built-in variables range from 0-1 unless otherwise
noted.
Dimensions Lists the default and minimum dimensions (height and width) of
the object in pixels
General Properties Describes the properties shown in the General tab of the
Properties inspector. Properties marked with a checkbox () are
on/off properties (typically check boxes). Otherwise, the
properties can accept constants, variables, or expressions. For
more information on Lemur variables and expressions, see the
Variables and Expressions chapter.
Behavior Properties Describes the behavior properties of the Object—generally these
are related to physical modelling features. Properties marked with a
checkbox () are on/off properties (typically check boxes).
Otherwise, the properties can accept constants, variables, or
expressions. For more information on Lemur variables and
expressions, see the Variables and Expressions chapter.
OSC Data Describes the format of the data the object receives and transmits.
Page 58
58
Fader
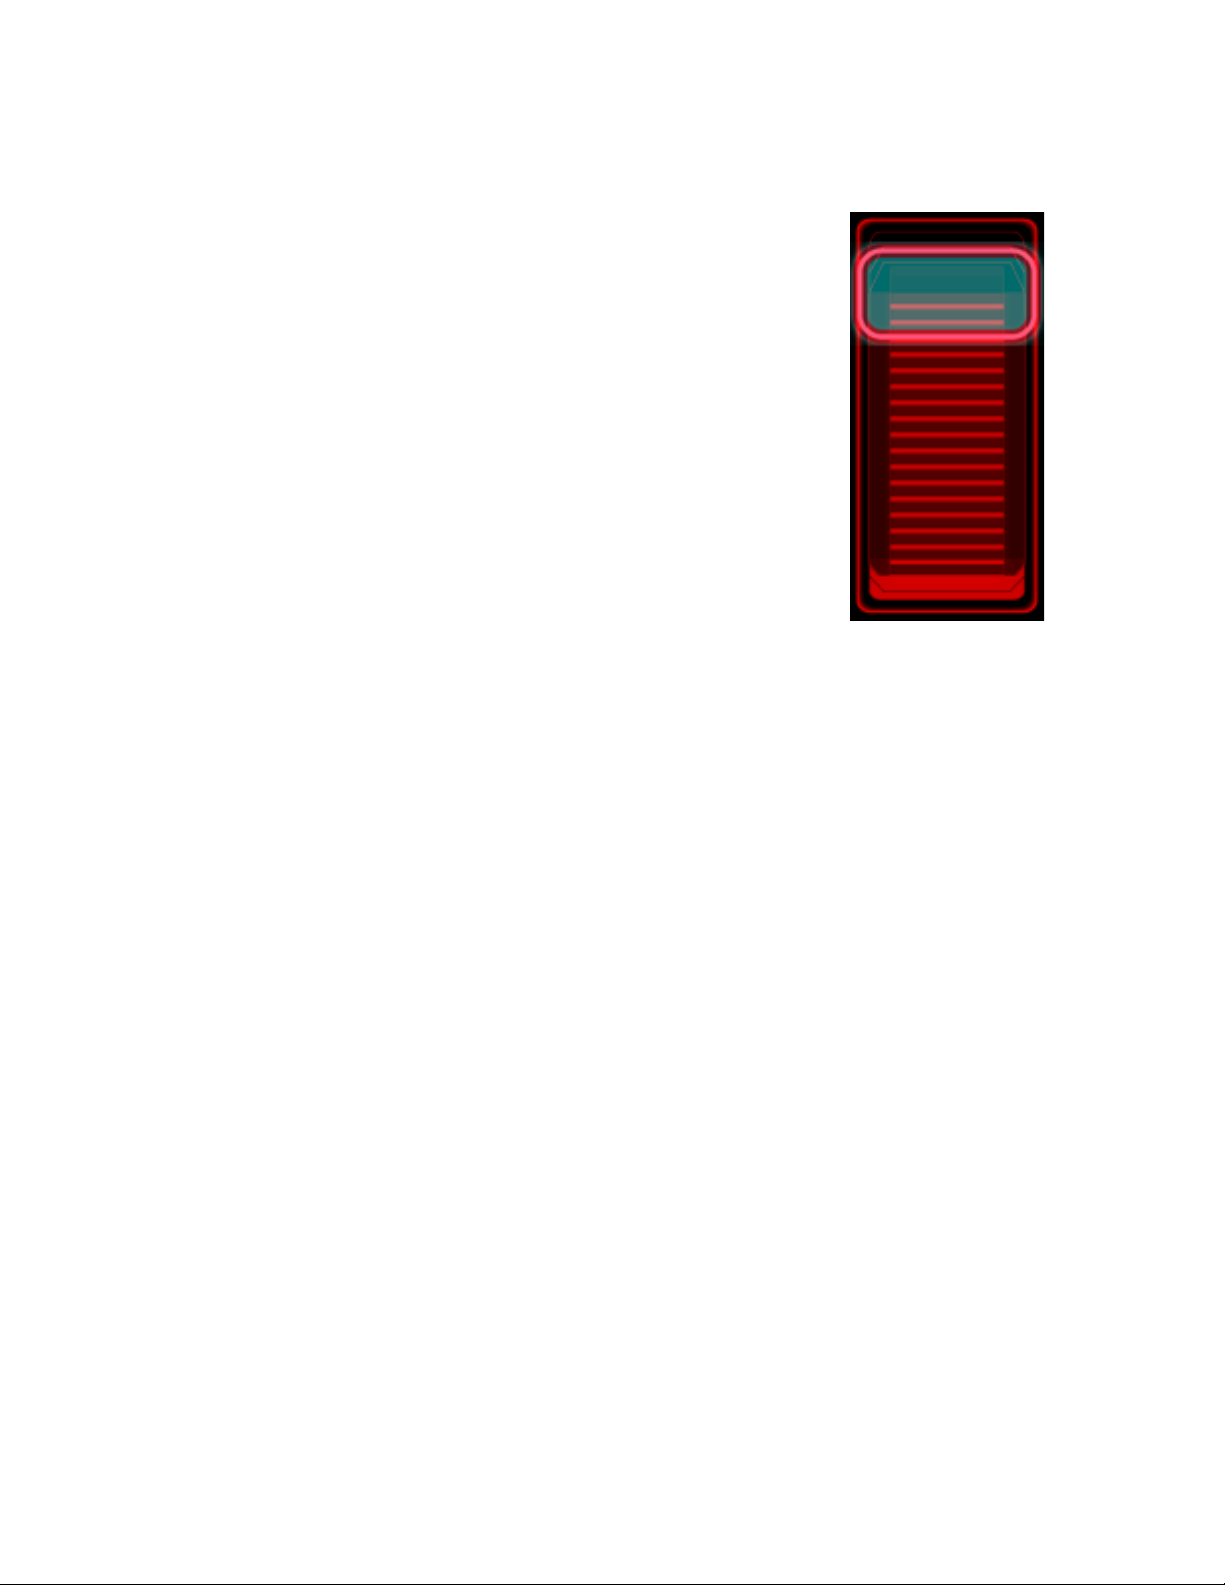
The Fader tracks your finger with a vertical oriented virtual “knob” and transmits one
value corresponding to the vertical position of the knob.
Variables
x The vertical location of the knob. When the knob is at the top of
the fader, the value is 1 by default. When it is at the bottom, the
value is 0.
Dimensions
Default 100 pixels wide by 200 pixels high
Minimum 48 pixels wide by 200 pixels high
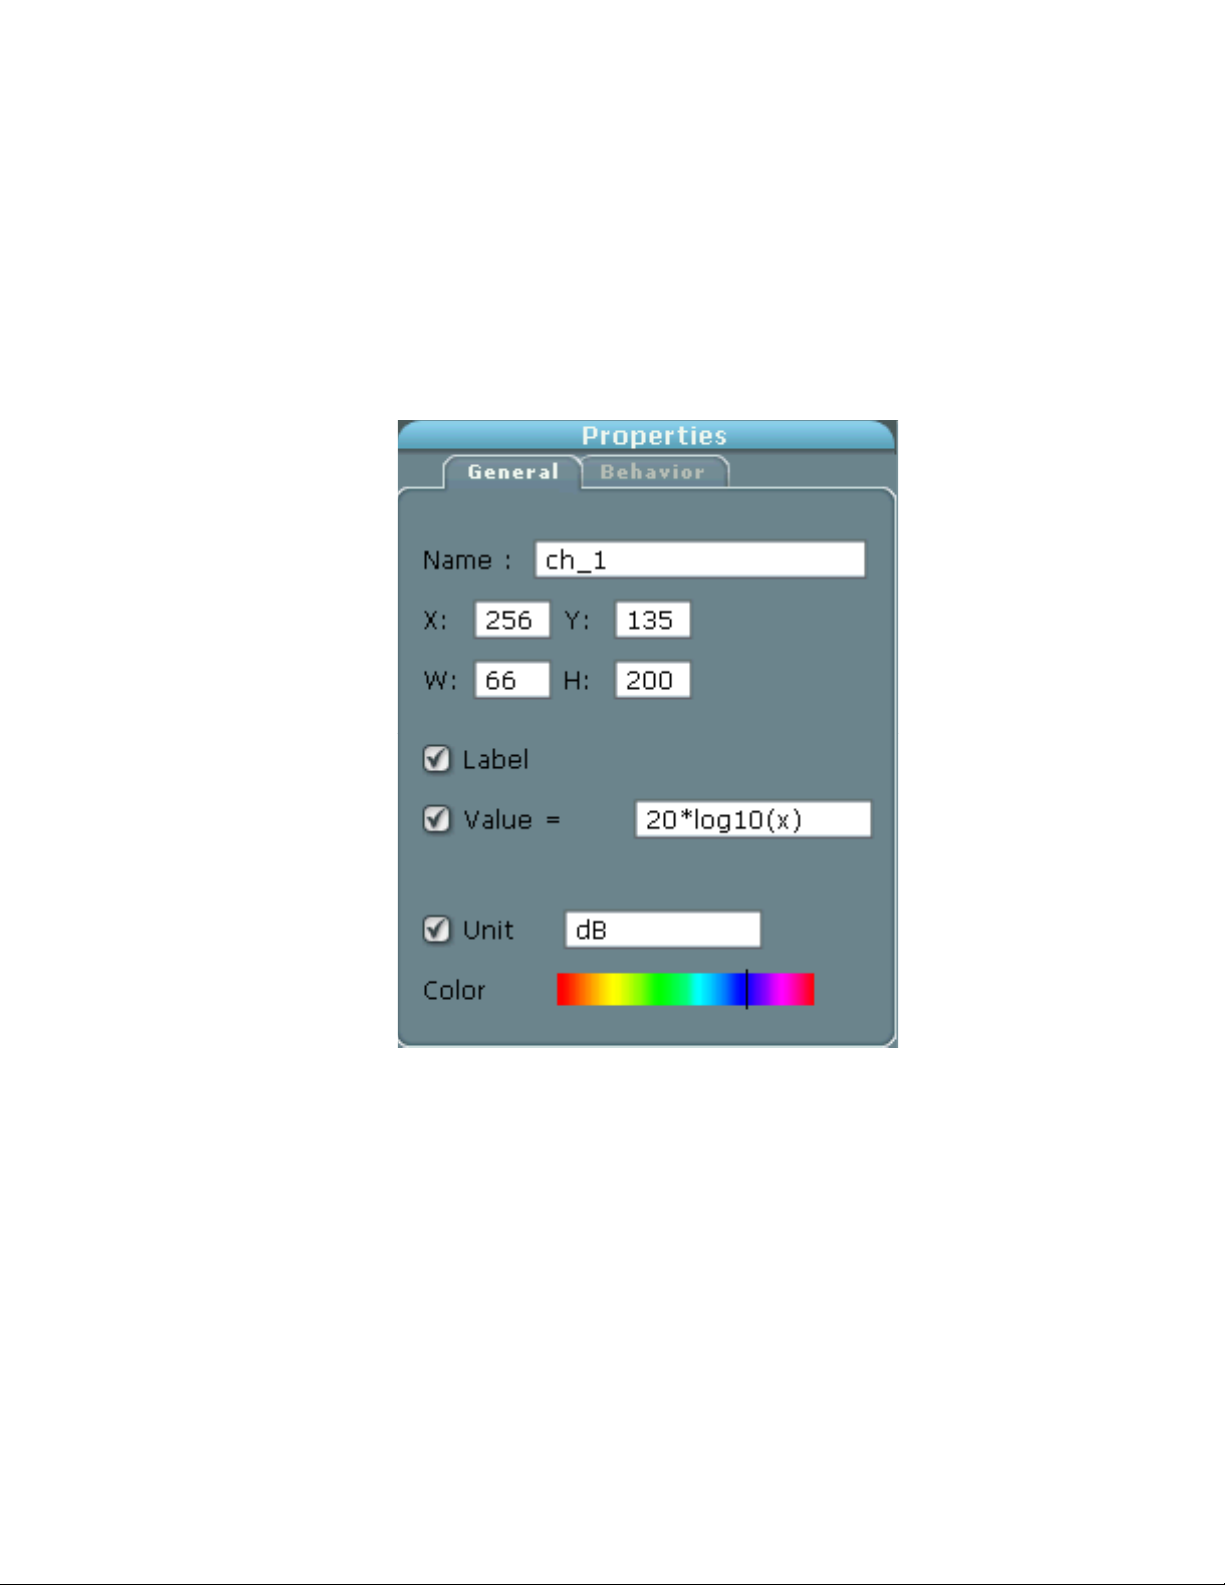
General Properties
Label If checked, the object’s name is displayed at the top of the fader as
shown in the dB example below.
Value If checked, the current value of the knob is displayed. In addition,
you can enter a formula for how the value is displayed. This does
not affect the actual value sent by the fader, which remains
between 0 and 1.
Unit If checked, appends fixed text to the end of the value display.
Page 59
59
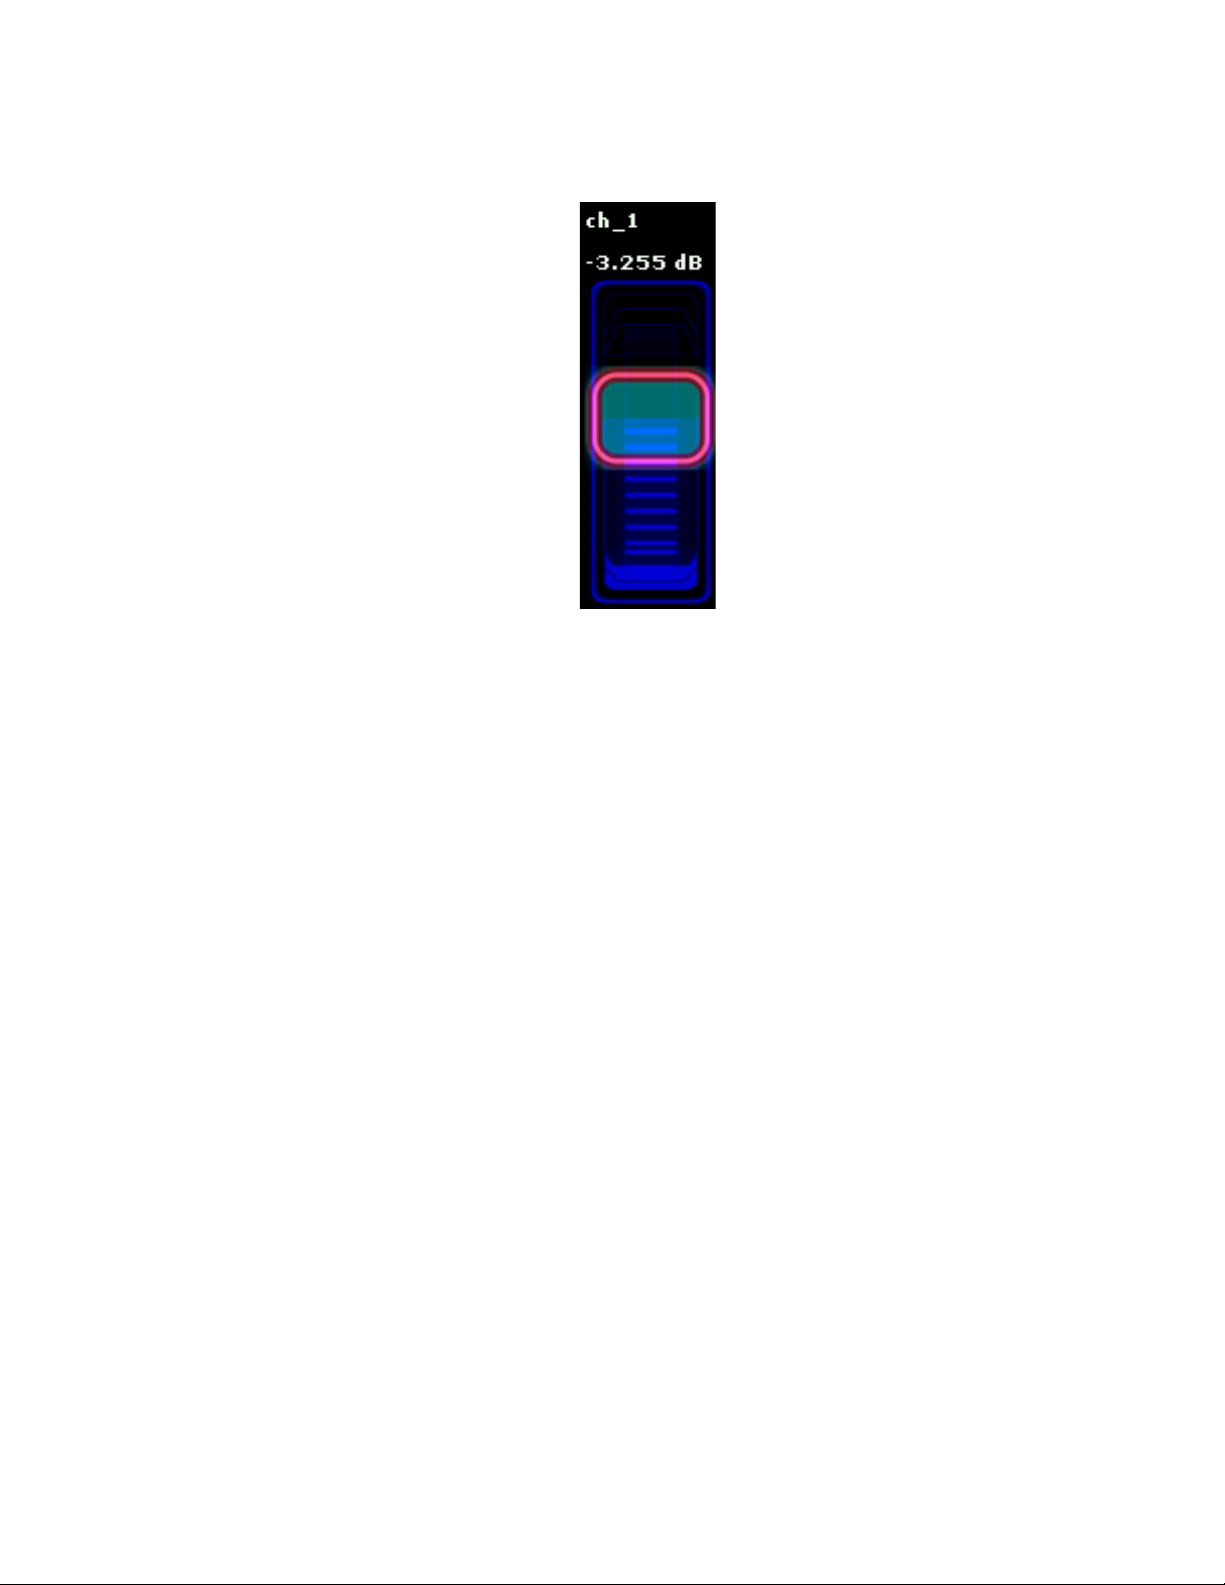
Color Drag the color bar to change the background color of the fader. The
knob remains a translucent green with pink outline.
Properties Example
This collection of General properties can be used to configure a
fader that displays values in decibels, where 0 dB is considered the
maximum.
Page 60
60
The resulting Fader object looks like this.
Behavior Properties
Physic A menu that can be one of three settings: None, Interpolate, or
Mass-Spring.
If Physic is set to None, the Fader knob tracks one finger
immediately. If other fingers touch the fader, they are ignored.
If Physic is set to Interpolate, the knob moves according to the
value of Attraction from its current location to the location of your
finger. Larger values for attraction (up to 1) cause the ball to move
to the new finger location more quickly. When Attraction is set to
0, the knob cannot be moved by your finger.
If Physic is set to Mass-Spring, Attraction and Friction are both
active. Friction ranges between 0 and 1. Lower values of friction
mean that if the ball is moving it will tend to keep moving. With a
value of 0, the knob will never stop moving. At a value of 1, the
knob follows your finger exactly. Values of 1 for Attraction and
Friction are essentially the same as if No Physic(s) was checked.
Another consideration is that with lower values of Attraction and
Friction when using Mass-Spring mode, the Lemur will send the
knob’s position constantly.
Attraction See Interpolation and Mass-Spring above.
Page 61

61
Friction See Mass-Spring above.
OSC Data
Lemur->Host The x variable is transmitted from the Lemur followed by one value
representing the knob’s position.
/ObjectName.x <value>
Host->Lemur The x variable can be received by the Lemur followed by one value
representing the knob’s position.
/ObjectName.x <value>
Page 62

62
Monitor
The Monitor sends no data when you touch it. Its purpose is to display information sent
to the Lemur by your computer.
Variables
value Represents the value of the Monitor to be displayed.
Dimensions
Minimum 50 pixels wide and 22 pixels high. The font size of the monitor is
adjusted as the object is resized.
General Properties
Label If checked, the object’s name is displayed above the value.
Value The checkbox is not functional. The text field next to Value
represents the monitor’s default value. Since any value can be sent
to the monitor, there is no 0-1 limitation.
Unit If checked, appends fixed text to the end of the value display.
Precision Number of floating-point digits that appear. A precision of 0
displays only the integer part of numbers the monitor receives.
Color Drag the color bar to change the color of the label text. The
numerical value display is always white.
Behavior Properties
None.
Page 63

63
OSC Data
Lemur->Host The value variable is transmitted when the Monitor’s value
changes.
/ObjectName.value <value>
Page 64
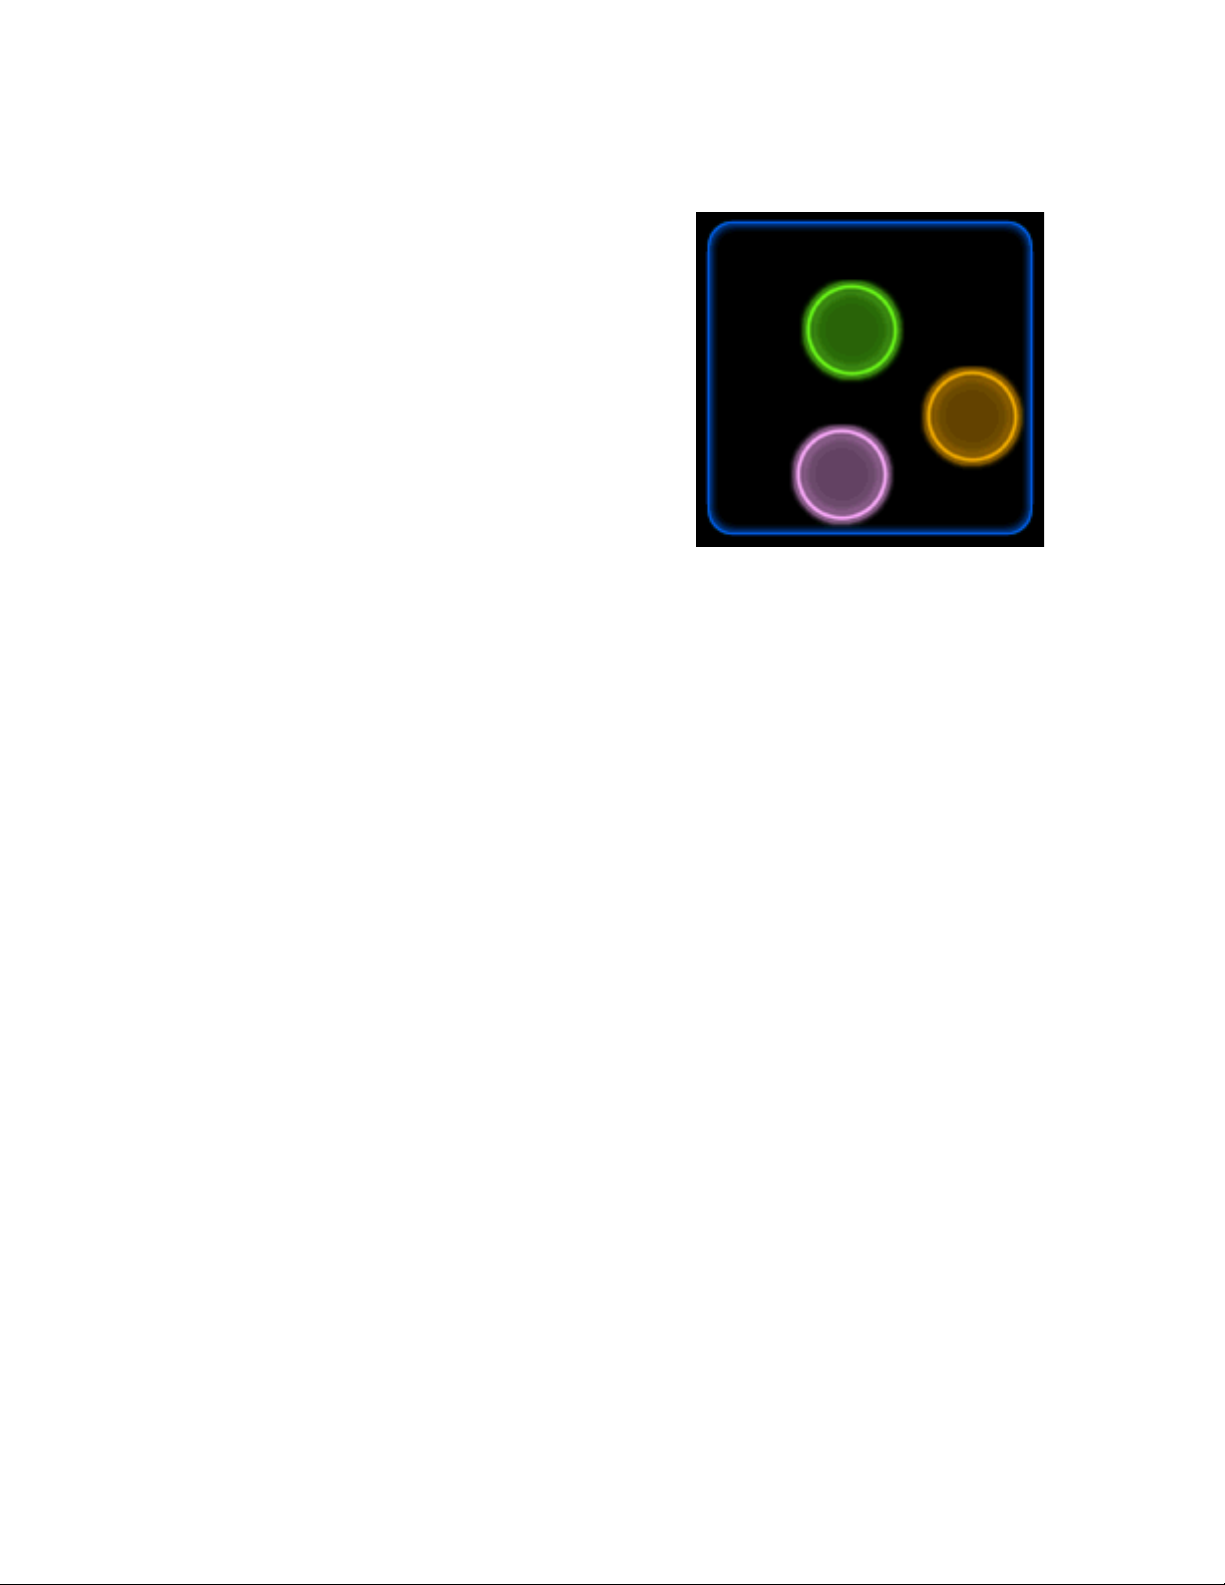
64
Multiball
The Multiball object assigns each finger to track one of a number of balls (up to 10) in a
rectangular space. Balls can either always be visible or only appear when you touch the
space; the latter is called ephemeral mode. The brightness of the balls is sent as the z
variable in the object.
Variables
x A list of the horizontal positions of all the balls.
y A list of the vertical positions of all the balls.
z A list of the brightness values of all the balls. Brightness values
change only when the Multiball object is in ephemeral mode.
Dimensions
Default 128 x 128 pixels
Minimum 128 x 128 pixels
General Properties
Label If checked, the object’s name is displayed above the balls.
Page 65

65
Color Drag the color bar to change the color of the outline around the
Multiball’s rectangular space. The colors of the balls are fixed as
follows:
1: faded purple
2: lime green
3: “lemur” yellow/orange (see screen shot above)
4: lemon yellow
5: red
6: teal blue
7: deep blue
8: sea green
9: intense purple
10: white/gray
Behavior Properties
Balls Number of balls (1 to 10)
Ephemeral If checked, the Multiball behaves in a mode where the balls
disappear until you touch with one or more fingers in the space.
The brightness of the balls becomes the value of the z variable of
the object, and the way the brightness changes over time is
controlled by an ADSR envelope (described below). When
Ephemeral is not checked, the balls are always visible and their z
values are constant at 1.
Physic Physic A menu that can be one of three settings: None, Interpolate,
or Mass-Spring.
If Physic is set to None, balls move to finger positions
immediately, and the settings of Attraction and Friction are
ignored.
If Physic is set to Interpolate, balls move toward finger positions
according to the value of Attraction. Larger values for attraction
(up to 1) cause a ball to move to a finger position more quickly. As
the Attraction value is lowered, the balls take longer to arrive at the
finger position. When Attraction is set to 0, balls cannot be moved
by your finger.
If Physic is set to Mass-Spring, Attraction and Friction are both
active. Attraction works as described above under Interpolation.
Page 66

66
Friction ranges between 0 and 1. Lower values of friction mean that
if a ball is moving it will tend to keep moving. With a value of 0,
the balls will essentially never stop moving. At a value of 1, a ball
will move only where you touch with your finger. Values of 1 for
Attraction and Friction are essentially the same as if No Physic(s)
was checked.
Attraction See the discussion of Interpolation and Mass-Spring modes under
Physic above.
Friction See the discussion of Mass-Spring mode under Physic above.
About the Multiball ADSR
The next four properties relate to the “brightness” or z variable envelope that can be used
in ephemeral mode. You specify time values for the Attack, Decay, and Release in
seconds as well as a Sustain level between 0 and 1. Unlike a keyboard ADSR, the
Multiball ADSR goes through its entire cycle when you touch the surface to trigger the
appearance of a ball. If the ball is still tracking your finger when it reaches the end of the
Decay portion of the envelope, the z value (brightness) will remain at the sustain level
until you lift your finger off the surface. At that point (or before, if your finger has
already left the surface), the Release portion of the envelope will be triggered, and the z
variable will return to 0.
Attack Applies only when using ephemeral mode. The Attack value
specifies the number of seconds over which the z variable
(brightness of a ball) increases from its initial value of 0 to a
maximum of 1 after you touch the screen. As an example, if the
Attack value is 0, the ball will be at full brightness the moment you
touch the screen.
Decay Applies only when using ephemeral mode. The Decay value
specifies the number of seconds over which the brightness will
decrease after the initial Attack portion of the envelope has
completed. During the Decay portion of the envelope, the z
variable (brightness of a ball) will decrease from 1 to the level set
by the Sustain value.
Sustain Applies only when using ephemeral mode. The sustain value is the
level (between 0 and 1) at which the brightness of the ball will
remain as long the Multiball object is tracking your finger within its
space. The Sustain level is reached after the Attack and Decay
portion of the envelope have completed. If your finger lifts up
Page 67

67
from the touch surface before the completion of the Attack and/or
Decay portion of the envelope, the Release portion of the envelope
is triggered immediately after the Decay portion completes, and the
brightness ultimately goes to 0.
Release Applies only when using ephemeral mode. The Release value
specifies the number of seconds over which the brightness of a ball
will decrease from its Sustain level to 0, starting at the moment that
you lift up (“release”) your finger from the touch surface.
OSC Data
Lemur->Host The x, y, and z variables are transmitted from the Lemur with a list
of values representing the positions of each of the balls. The
number of items in the list of values is equal to the number of balls
the object is using. The x variable is horizontal position, the y
variable is vertical position, and the z variable is brightness (which
only changes when using ephemeral mode).
/ObjectName.x <value-for-ball-1> <value-for-ball-2> etc.
/ObjectName.y <value-for-ball-1> <value-for-ball-2> etc.
/ObjectName.z <value-for-ball-1> <value-for-ball-2> etc.
Host->Lemur The x, y, and z variables can be set by sending the Lemur a list of
values representing the positions of each of the balls. The number
of items in the list of values should be equal to the number of balls
the object is using. The x variable is horizontal position, the y
variable is vertical position, and the z variable is brightness (which
only changes when using ephemeral mode).
/ObjectName.x <value-for-ball-1> <value-for-ball-2> etc.
/ObjectName.y <value-for-ball-1> <value-for-ball-2> etc.
/ObjectName.z <value-for-ball-1> <value-for-ball-2> etc.
Page 68

68
MultiSlider
The MultiSlider object tracks movement across an array of sliders. You can “wipe” all the
faders to a set value with one horizontal gesture. This is prett y hard to do with real—or
virtual—faders.
Variables
x A list of the vertical positions of all the individual sliders.
Dimensions
Default 100 x 100 pixels
Minimum 64 pixels wide x 40 pixels high
General Properties
Label If checked, the object’s name is displayed above the sliders in the
lower left-hand corner.
Color Drag the color bar to change the “thematic” color of the sliders. The
foreground uses a gradient based on this color, and the background
is a darker version of the color.
Behavior Properties
Slider Number of sliders (1 to 64)
Physic If checked, the MultiSlider emulates the physics of an object
similar to a plucked string anchored at the left and right sides of the
array of sliders. Your fingers “pluck” the string by lifting it up in
one or more places. The values of the sliders ramp up to meet your
fingers and track them as they move. Lifting your finger(s) from the
Page 69

69
surface releases the string, and its subsequent behavior is
determined by the Tension, Friction, and Height values.
Tension A value between 0 and 1 corresponding to the tension on a string.
As tension increases, the frequency of oscillation of the string
increases. Increasing the tension is something like turning the tuning
peg of a guitar to raise the pitch of a string.
Friction A value between 0 and 1 corresponding to the damping on a string.
As friction increases, the damping on the oscillation increases. With
large friction values, the string returns to its resting position
quickly. With smaller friction values, the string may oscillate for a
long time.
Height When Gravity mode is enabled, the height (0 to 1) is the value of
the initial and resting position of the string. When Gravity mode is
not enabled, the height is the initial value of the MultiSlider after it
is initialized.
OSC Data
Lemur->Host The x variable is transmitted by the Lemur as a list of numbers
representing the height of each slider.
/ObjectName.x <slider-value-1> <slider-value-2> etc.
Host->Lemur The x variable can be received by the Lemur as a list of numbers
representing the height of each slider.
/ObjectName.x <slider-value-1> <slider-value-2> etc.
Page 70
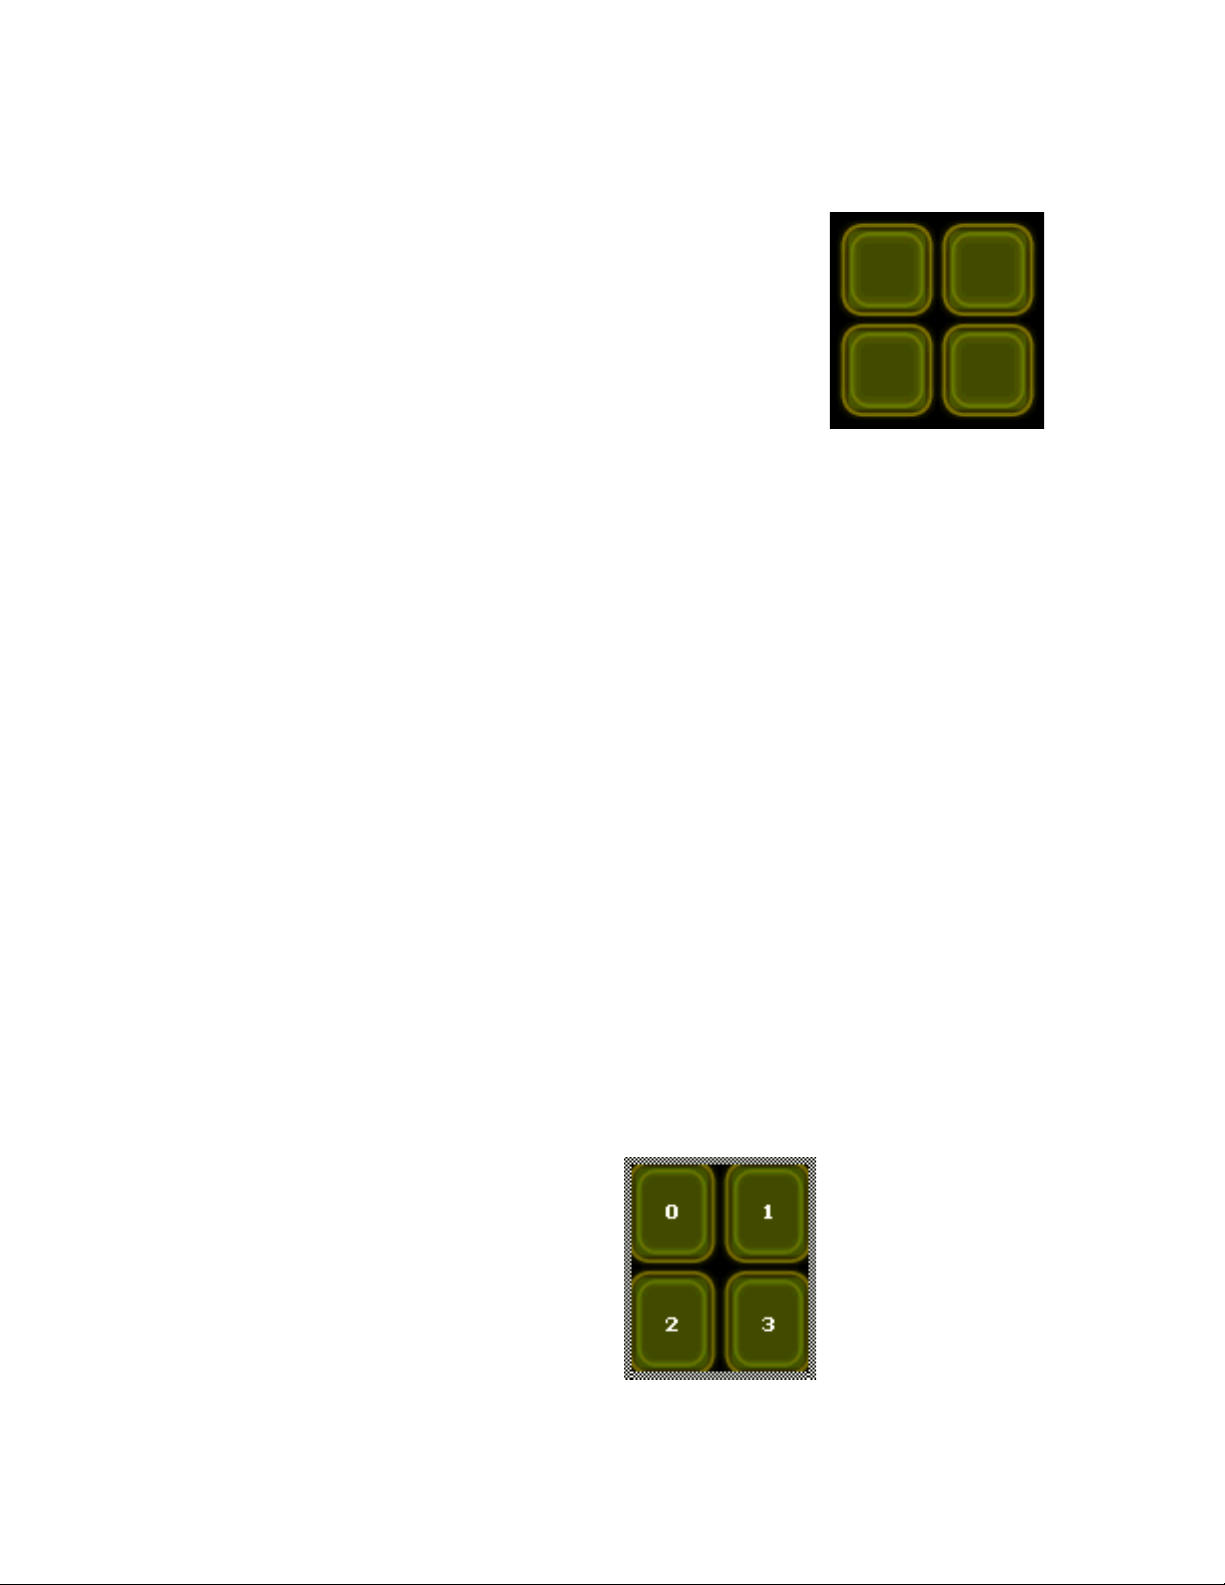
70
Pads
The Pads object is a two-dimensional array of buttons that are triggered by touch. They
are intended to trigger events instead of represent state, since they eventually return to an
“off” value after you touch them.
Variables
x A list of the envelope (brightness) values of the pads in the object.
Dimensions
Default 100 x 100 pixels
Minimum 32 x 32 pixels times the number of rows and columns
General Properties
Label If checked, the object’s name is displayed above the pads, which
are “squished” to accommodate the text.
Numbers If checked, each pad is labelled with a number corresponding to the
order in which its value is transmitted, starting with 0 as shown
below.
Page 71

71
Rows The number of rows of pads contained in the object. There does
not appear to be a maximum number of rows, but only 19 rows of
pads can be seen on the screen at once. The minimum height of a
pad is 32 pixels, and the object will be resized if necessary to
maintain the minimum pad height.
Columns The number of columns of pads contained in the object. There does
not appear to be a maximum number of columns, but only 25
columns of pads can be seen on the screen at once. The minimum
width of a pad is 32 pixels, and the object will be resized if
necessary to maintain the minimum pad height.
Behavior Properties
About the Pads ADSR
The four behavior properties of a Pads object relate to its “brightness” or x variable
envelope. You specify time values for the Attack, Decay, and Release in seconds as well
as a Sustain level between 0 and 1. Unlike a keyboard ADSR, the Pads ADSR goes
through its entire cycle when you touch the surface to trigger it. If your finger is still
down on a pad when the envelope reaches the end of its Decay portion, the x value
(brightness) will remain at the sustain level until you lift your finger off the surface. At
the release point (or before, if your finger has already left the surface), the Release portion
of the envelope will be triggered, and the x variable will return to 0.
To implement an immediate response trigger, set the Attack, Decay, and Release to 0, and
the Sustain to 1.
Attack The Attack value specifies the number of seconds over which the x
variable (pad brightness) increases from its initial value of 0 to a
maximum of 1 after you touch the screen. As an example, if the
Attack value is 0, the pad will be at full brightness the moment you
touch the screen. An attack value of 10 means the pad will take 10
seconds to reach the full value.
Decay The Decay value specifies the number of seconds over which the x
variable (pad brightness) will decrease after the initial Attack
portion of the envelope has completed. During the Decay portion
of the envelope, the x variable (pad brightness) will decrease from 1
to the level set by the Sustain value.
Sustain The Sustain value is the level (between 0 and 1) at which the x
variable (pad brightness) will remain as long your finger is touching
Page 72
72
the pad. The Sustain level is reached after the Attack and Decay
portion of the envelope have completed. If your finger lifts up
from the touch surface before the completion of the Attack and/or
Decay portion of the envelope, the Release portion of the envelope
is triggered immediately after the Decay portion completes, and the
brightness ultimately goes to 0.
Release The Release value specifies the number of seconds over which the x
variable (pad brightness) will decrease from its Sustain level to 0,
starting at the moment that you lift up (“release”) your finger from
the touch surface.
OSC Data
Lemur->Host The x variable is transmitted by the Lemur as a list of numbers
representing the brightness of each pad.
/ObjectName.x <pad-value-1> <pad-value-2> etc.
The pads are reported in the following order:
Host->Lemur The x variable is received by the Lemur as a list of numbers
representing the brightness of each pad.
/ObjectName.x <pad-value-1> <pad-value-2> etc.
Page 73

73
RingArea
The RingArea tracks your finger inside a circular space. It reports the X and Y
coordinates of a ball that can be programmed to have a variable degree of attraction toward
a central point. You can specify the location of the attraction point within the circular
space.
Variables
x The horizontal position of the ball.
y The vertical position of the ball.
Dimensions
Default 128 x 128 pixels
Minimum 128 x 128 pixels
General Properties
Label If checked, the object’s name is displayed above the circular space.
Color Drag the color bar to change the background color of the circular
space. The ball and attraction point are lighter variants of this
color.
Behavior Properties
Attraction A value from 0-1 representing the speed of the ball from its
attraction point to your finger when you touch the object, and from
your finger to the attraction point when you release your finger.
Page 74

74
Friction A value from 0-1 representing the stickiness of the movement to
either your finger or the attraction point. Lower values of friction
make the ball overshoot the attraction point when it approaches,
causing bouncing and/or oscillation.
Attractor X A value from 0-1 representing the horizontal location of the
attraction point within the object’s rectangle. A zero value of
Attractor X is at the left edge and a value of 1 is at the right edge.
Attractor Y A value from 0-1 representing the vertical location of the attraction
point within the object’s rectangle. A zero value of Attractor Y is
at the bottom edge and a value of 1 is at the top edge.
The exact position values transmitted by the Lemur when the ball arrives
at the attraction point is partially dependent on the size of the RingArea.
The ball never leaves the circular area, but as the object grows larger in
size, the attraction points can be located outside the circular area when
Attractor X and Attractor Y are given very large or very small values.
OSC Data
Lemur->Host The x variable is transmitted from the Lemur followed by one value
representing the horizontal position of the ball in the RingArea.
/ObjectName.x <value>
The y variable is transmitted from the Lemur followed by one
value representing the vertical position of the ball in the RingArea.
/ObjectName.y <value>
Host->Lemur The visual location of the ball can be set via messages from the
host. The horizontal and vertical position are set via separate
messages.
/ObjectName.x <value>
/ObjectName.y <value>
Note that the ball will remain fixed in a specific location after being
set via an OSC message from the host, whereas when moving the
ball with your finger, the ball will move toward the attraction
point.
Page 75

75
SignalScope
The SignalScope displays values of other objects and variables on your Lemur. The
“trace” shows a recent history of the value of what you are monitoring.
Variables
None
Dimensions
Default 100 x 100 pixels
Minimum 32 x 32 pixels
General Properties
Label If checked, the object’s name is displayed in the scope area.
Mode XY If checked, the signal scope shows both an X and Y value plotted
against each other. If unchecked, the X value is time, shifting Y
values to the left at a rate set by the Speed property (see below).
Samples The number of samples shown at one time in the display space.
The plot width will be thicker for smaller numbers of samples.
Behavior Properties
X = If Mode XY is enabled, X can be the value of a variable or a
constant, otherwise it is assigned to time against which the Y value
will be plotted.
Page 76
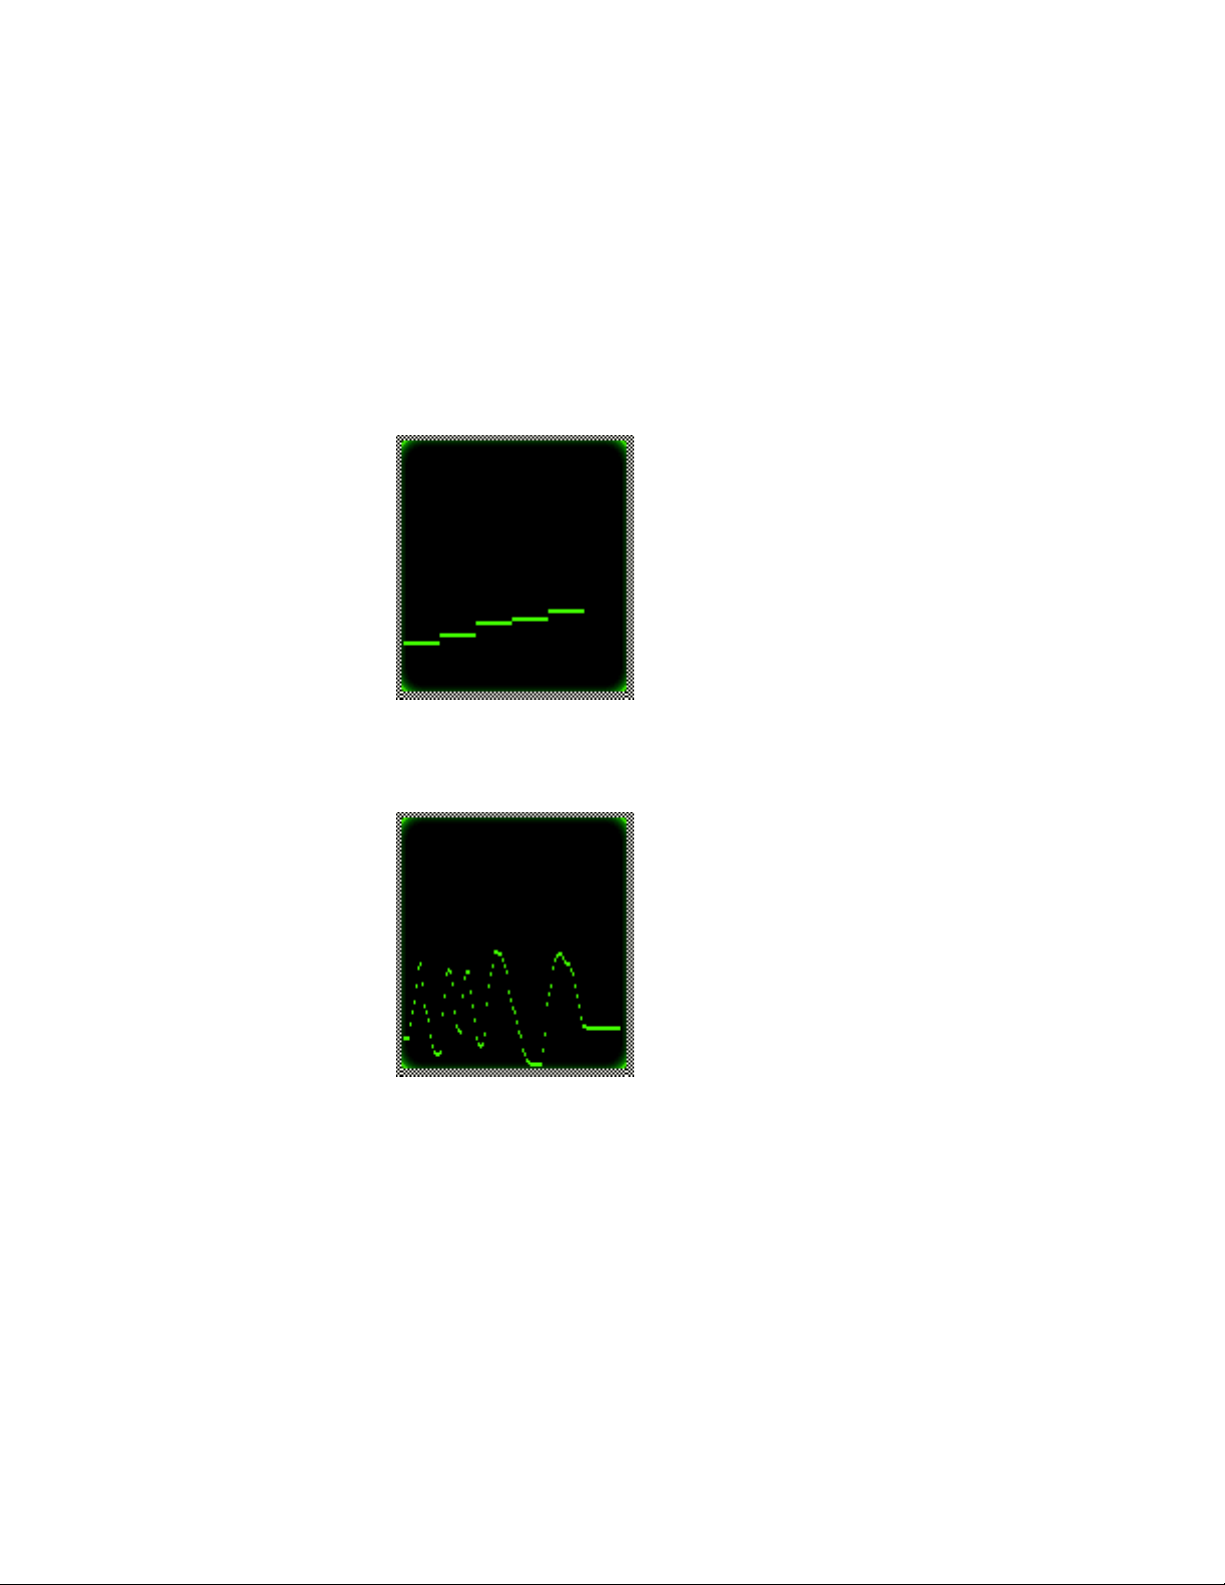
76
Y = A variable or constant expression that will be periodically
evaluated and plotted against X. For example, to plot the x variable
of a Fader object called chan1, enter chan1.x in the text field.
Time base = Corresponds to the length of time (in seconds) displayed on the
scope. As the Time base increases, individual elements of the graph
will decrease in width as more of the “past” is shown. Here is a
SignalScope showing a tenth of a second of history. It is set to time
base of 0.1:
And here is a SignalScope showing 2 seconds of history. Its time
base is set to 2.0.
Page 77
77
Switches
The Switches object is a two-dimensional array of toggle switches) whose values are
reversed when you touch them. Switches can be used to represent and transmit one or
more on-off states.
Variables
x A list of the on-off values of the switches in the object. The list
starts with the top-left corner, and traverses the first row before
starting at the beginning of the second row (see diagram under OSC
Data).
General Properties
Label If checked, the object’s name is displayed above all of the switches.
Numbers If checked, each switch is labelled with a number corresponding to
the order in which its value is transmitted, starting with 0 as shown
below.
Radio In Radio mode, only one switch can be turned on at any particular
time. Turning on any switch turns all the others off.
Rows The number of rows of switches contained in the object. There
does not appear to be a maximum number of rows, but only 19
Page 78
78
rows of pads can be seen on the screen at once. The minimum
height of a pad is 32 pixels, and the object will be resized if
necessary to maintain the minimum pad height.
Columns The number of columns of switches contained in the object. There
does not appear to be a maximum number of columns, but only 25
columns of pads can be seen on the screen at once. The minimum
width of a pad is 32 pixels, and the object will be resized if
necessary to maintain the minimum pad height.
Behavior Properties
None.
OSC Data
Lemur->Host The x variable is transmitted by the Lemur as a list of numbers
representing the state of each switch.
/ObjectName.x <switch-value-1> <switch-value-2> etc.
The switches are reported in the following order:
Host->Lemur The x variable is received by the Lemur as a list of numbers
representing the state of each switch.
/ObjectName.x <switch-value-1> <switch-value-2> etc.
Page 79

79
Variables and Expressions
This chapter includes a preliminary discussion of the powerful expression language
lurking inside the Lemur. Instead of a complete description of the feature, we’ll focus on
teach you how to do three things:
• How to make Lemur objects control each other’s behavior
• How to scale and transform the numerical output of Lemur objects to ranges
appropriate to what you want to do on your computer
• How to use Lemur objects and variables to receive data from your computer and
display it using the SignalScope and Monitor objects, which cannot receive data
directly from the computer. This will allow you to use these objects to report
information on the status of your computer, so you can stay far away from it when
performing.
To illustrate each topic, we’ve prepared example Lemur projects. For the last two topics,
we’ve also prepared Max patches. You’ll find everything in your Lemur Extras folder.
Using Objects to Control Behavior
First, we’re going to use a couple of Faders to control the Friction and Attraction for a
couple of Areas.
• Click the Open button in the JazzEditor and select the FrictionControl.xml Lemur
project file.
Page 80
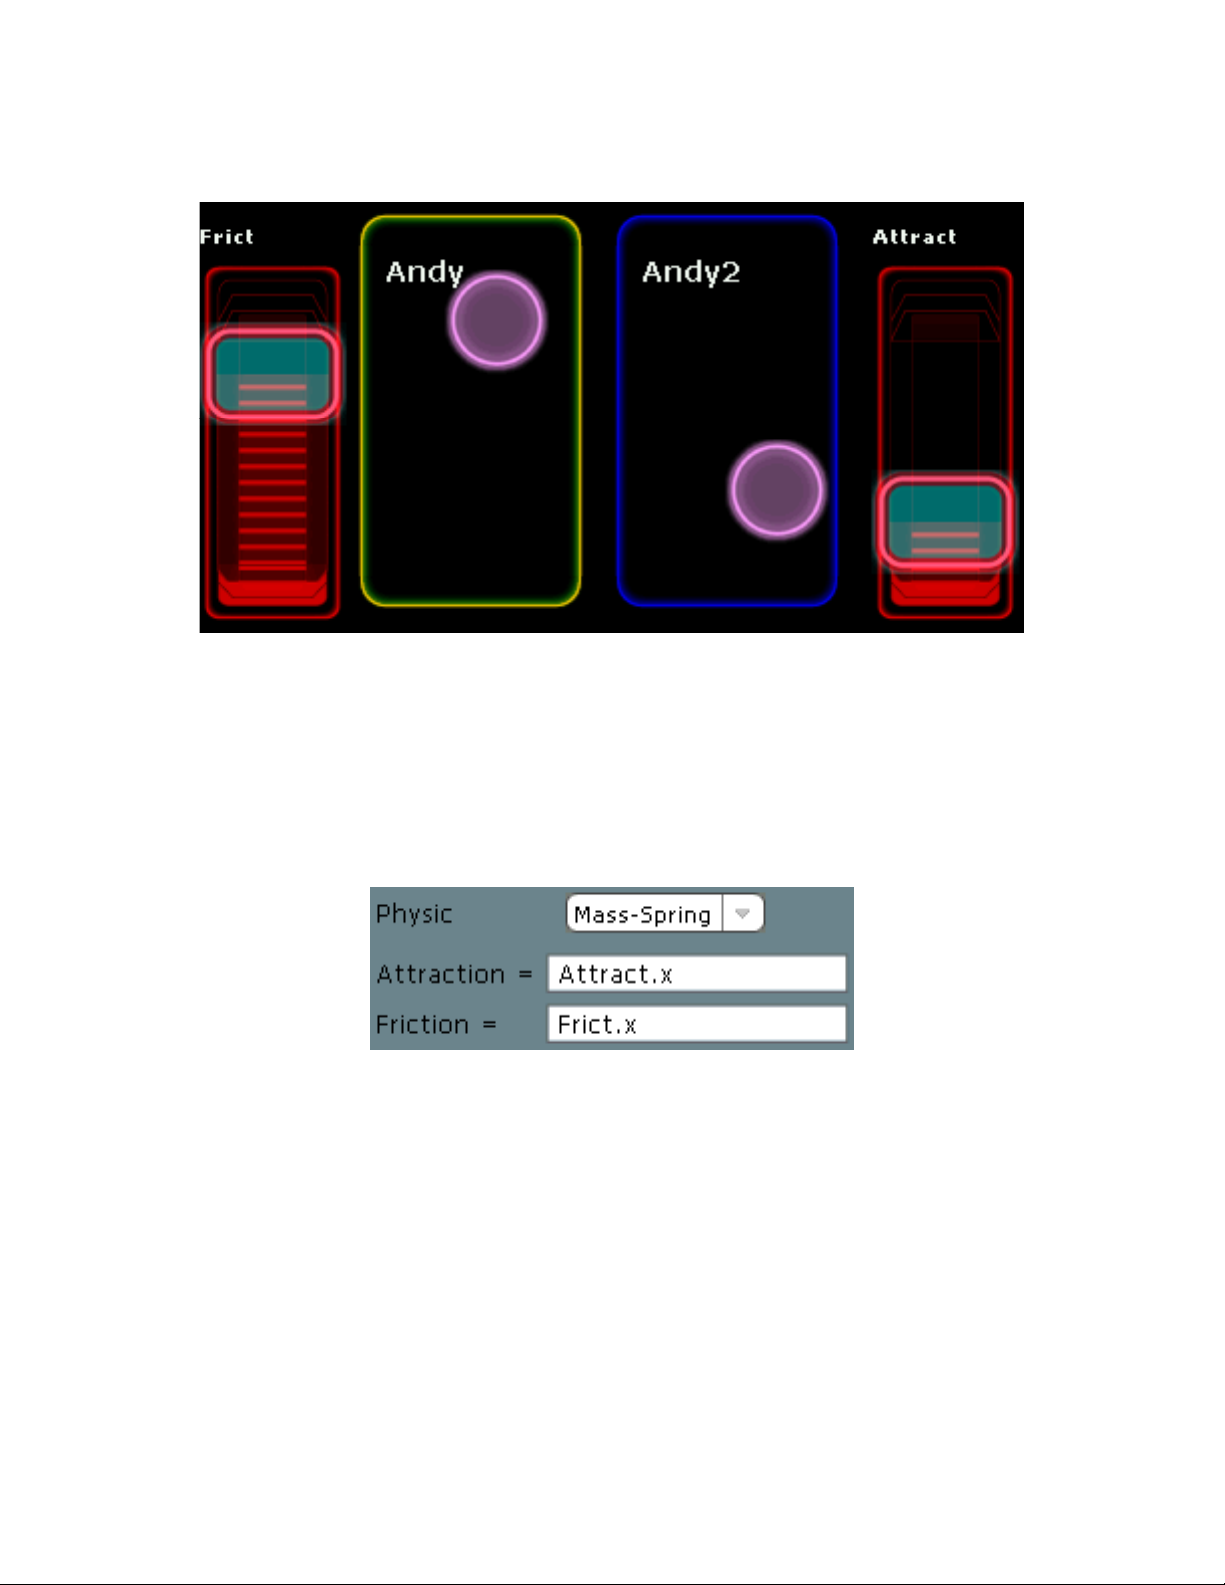
80
The interface should look like this:
• If you have not done so, Connect to your Lemur and test it out. As you change the
Faders, the physical modelling properties of the two Areas change.
Let’s examine how this Project works.
• Click on the Andy object in the JazzEditor to select it. Click the Behavior tab in the
Properties view.
Properties for the Area object named Andy
Instead of constant values for Friction and Attraction, this object uses the x variables of
the two Fader objects (named Frict and Attract). Thus, whenever you change a fader, the
behavior properties of the Multiball objects change.
Scaling Output with Expressions
In the next example, we’ll use some of the Lemur’s built-in mathematical functions to
produce values that will directly control some signal processing in a Max/MSP patch.
Now, it’s certainly true that we could do this scaling fairly easily in Max, but the Lemur
Page 81
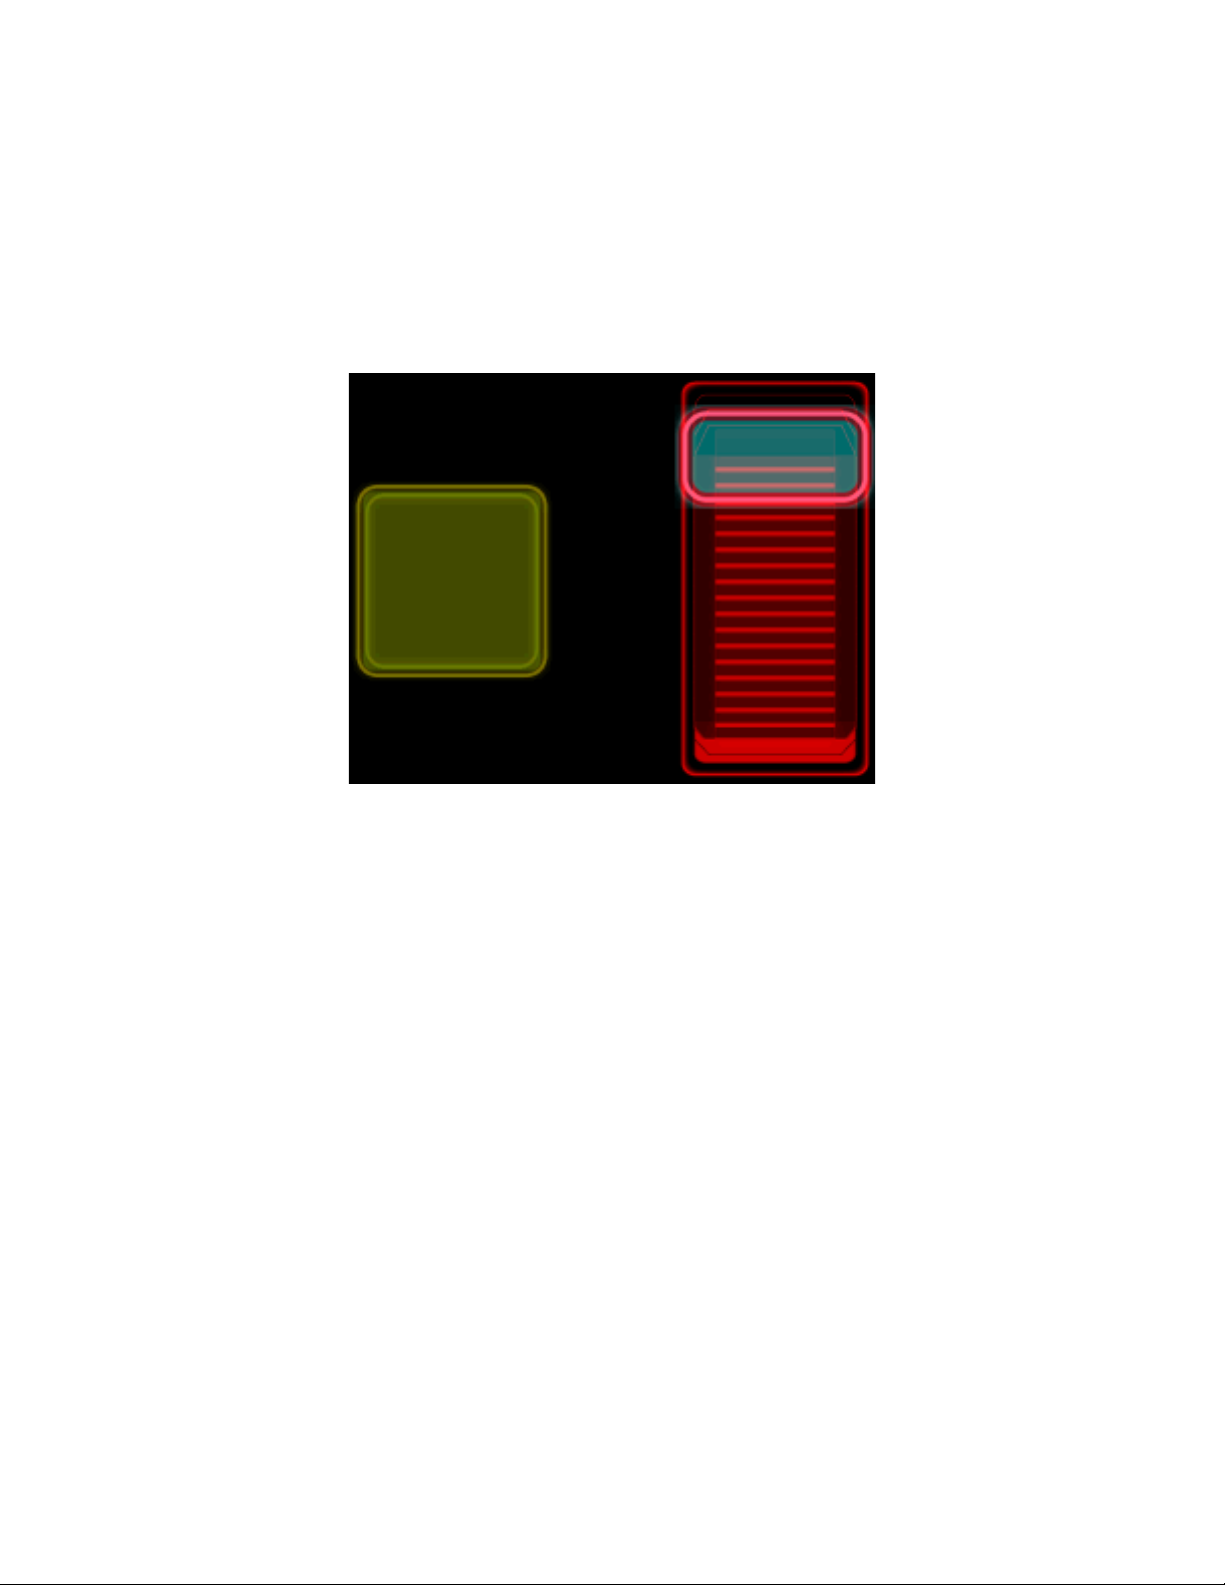
81
is capable of similar feats, so transforming control values into appropriate ranges no
longer requires a host computer.
• In the JazzEditor, open the Lemur Project file called WhooshVars.xml in your Lemur
Extras folder.
This project consists only of a fader and a single Pad trigger.
Page 82
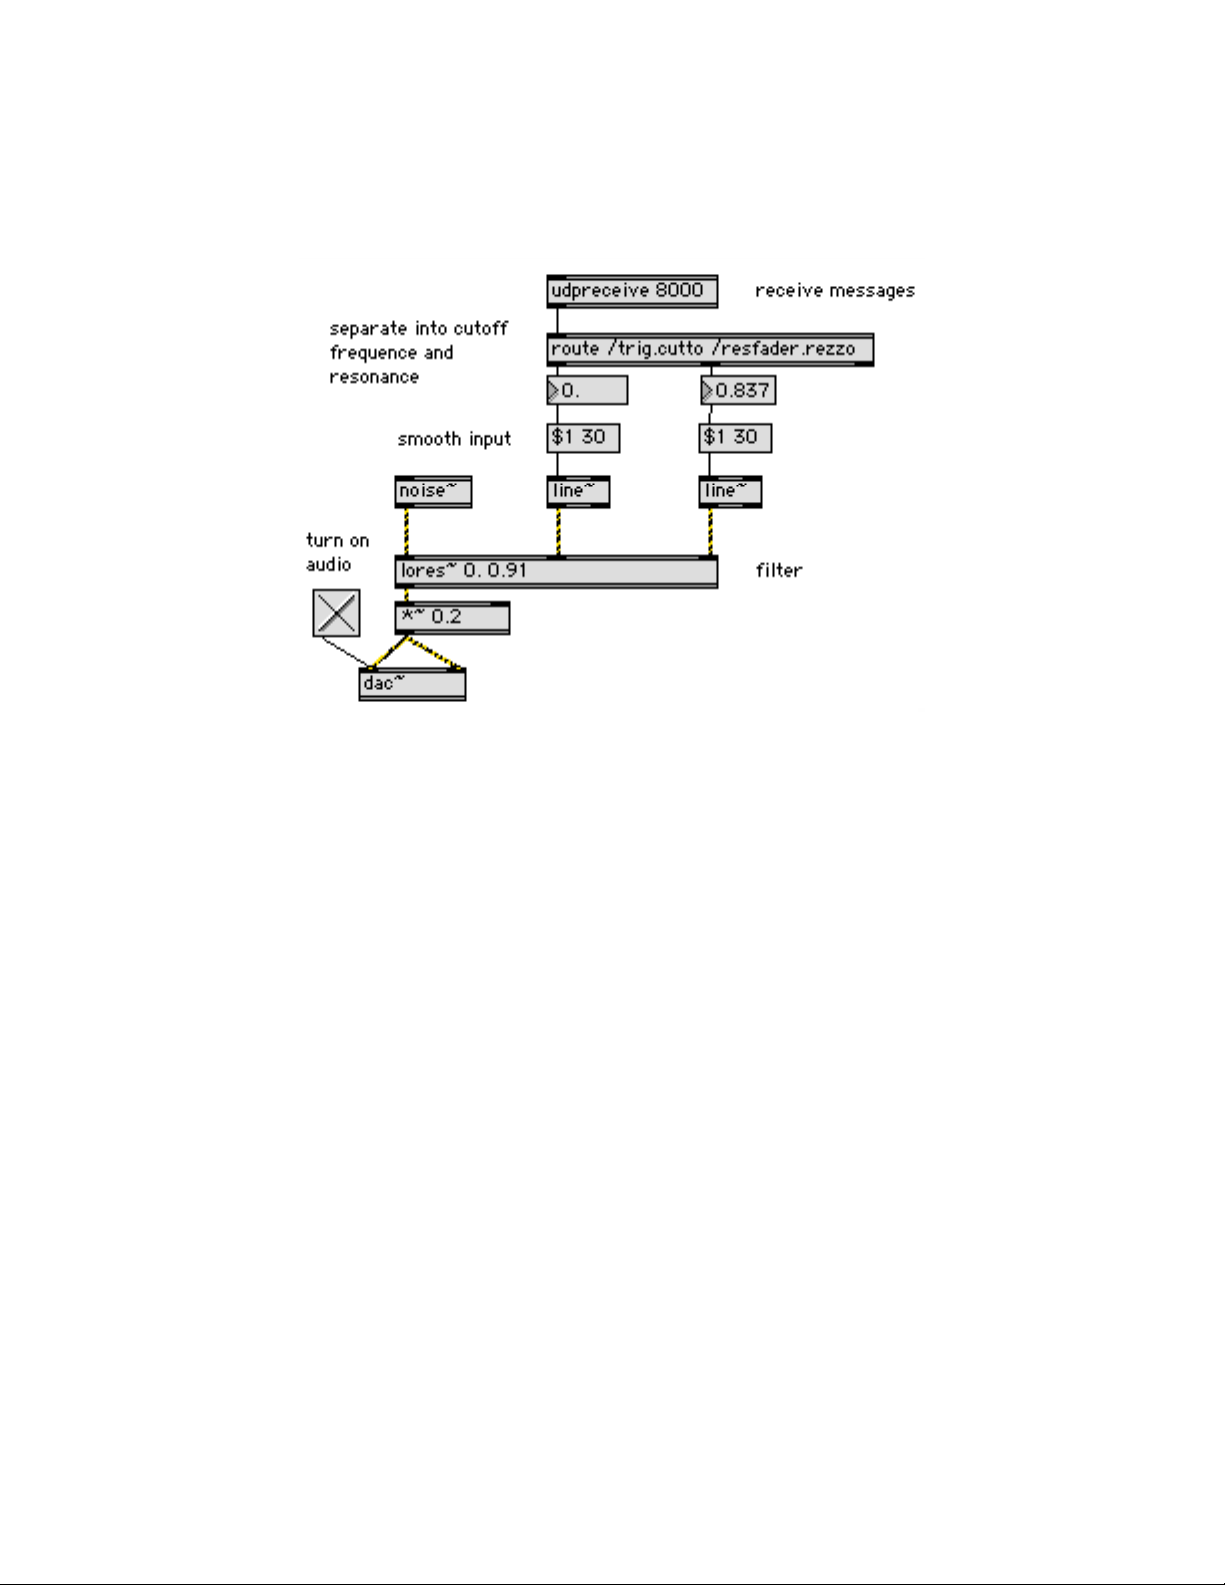
82
• In Max/MSP, close any patches you may have open, and then open this project’s
companion, a patch called Whoosh.mxb found in your Lemur Extras folder.
• Turn on the audio. Touch the Pad object on the Lemur. You should hear a filter sweep
the noise from 0 to 1000 Hz. The fader will change the amount of resonance.
Notice that in the patch above, there is no scaling of the input OSC messages from the
Lemur to transform the message coming from either the pad or the fader. The numbers are
fed directly into line~ objects that set the cutoff frequency and resonance of a low-pass
filter (the lores~ object).
Let’s examine how we do this. The technique will be familiar from the previous example,
but instead of using expressions to control the Lemur, we’ll use them to control an
application with OSC messages.
Page 83
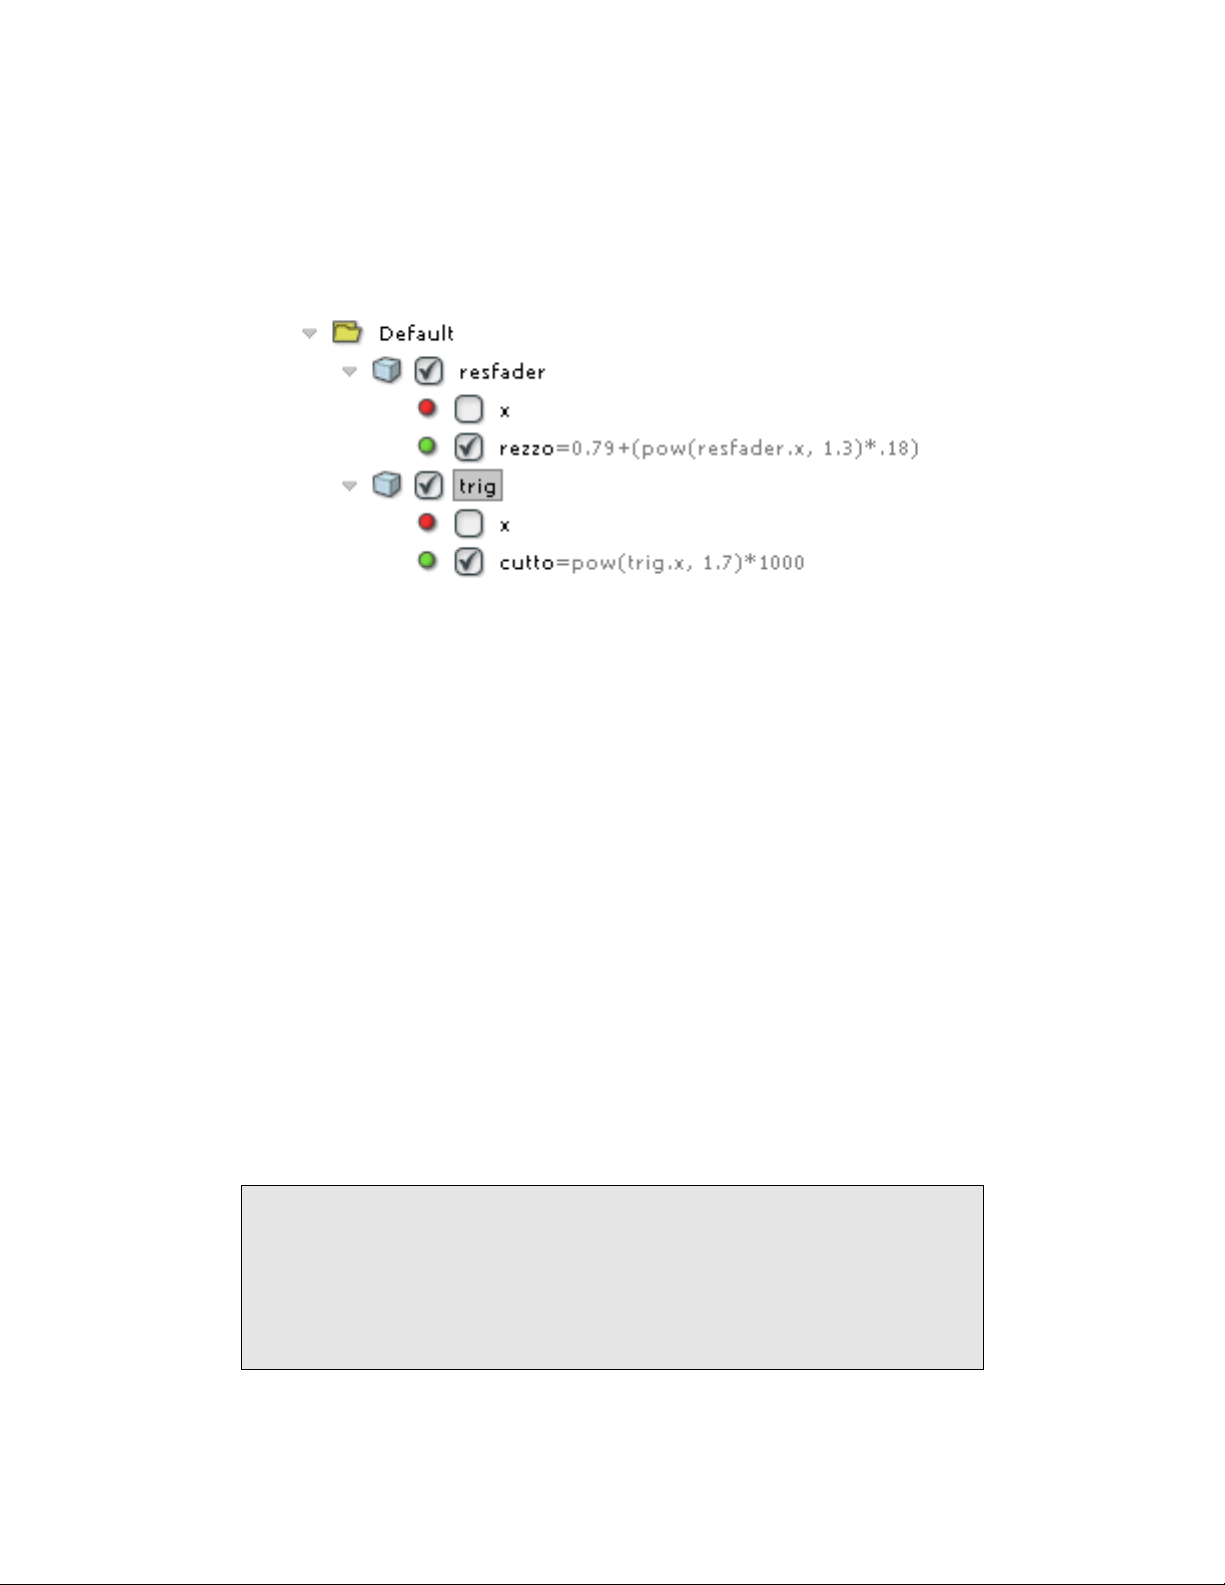
83
• Click the disclosure triangle on the Default interface in the JazzEditor Project Browser
to see the objects in the patch. Then click on the disclosure triangles of each of the
two objects resfader and trig to see what’s lurking inside of them. You may want to
expand the width of the Project Browser to see everything.
We’ve added a variable called rezzo to the resfader object. Rezzo has a checkbox next to
it, indicating that we transmit this variable to the computer when it changes. We do not
transmit the x variable of the fader (its 0 to 1 value), but as you can see, the rezzo variable
uses the value of x and transforms it:
rezzo = 0.79 + (pow(resfader.x, 1.3) * .18)
Using this technique, we can make a fader that transmits values in any range we want.
As you can see, rezzo also uses a math function called pow(). The pow() function takes
two arguments—the first is a base value and the second is an exponent. For example,
pow(2,3) is 2 raised to the third power, or 8.
In the rezzo case, we’re using pow() with an exponent between 1 and 2 to “non-linearize”
the resonance fader. The output value will still be between 0 and 1, but the values will
curve upward in a convex shape. That means that more of the fader will be devoted to
controlling the lower end of the variable’s range. As the exponent gets closer to 2, the
curve is more like a square in most all of the values are close to 0. An exponent closer to 1
is more linear.
Non-linear scaling is used everywhere in music synthesis—in many cases,
to create the perceptual illusion of aural “linearity.” For example, our
ability to distinguish numerical differences in frequency decreases as
frequency increases: the difference between 440 and 460 Hz is much more
obvious than the difference between 5000 and 5020 Hz, yet the two
frequencies are 20 Hz apart in both cases.
Page 84
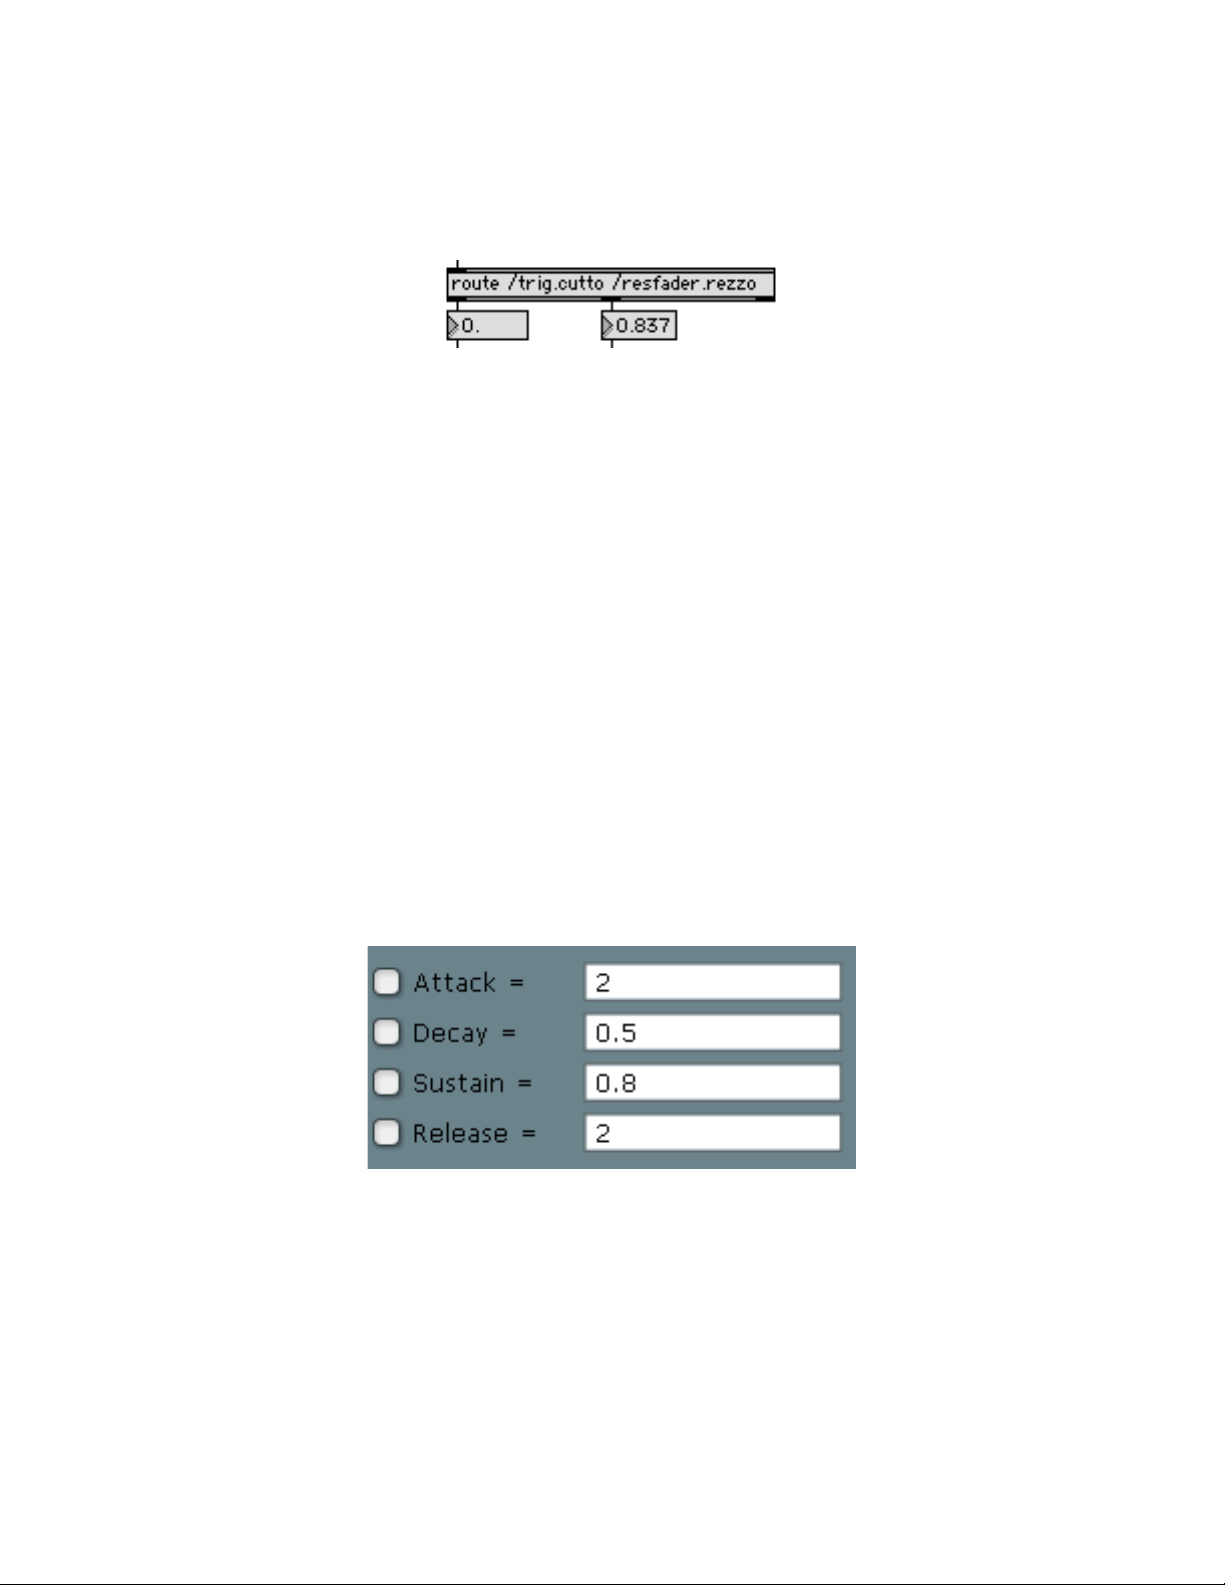
84
When the fader is moved, the OSC message /resfader.rezzo <value> is transmitted by the
Lemur. In the Max patch, a route object captures this value and uses it to adjust the filter
resonance.
The resonance parameter of the lores~ object actually goes from 0 to 1. But the interesting
range is between 0.8 and 1. Actually 1 is a little too interesting: the filter goes into selfoscillation. So, the effect of rezzo is to restrict the the resonance range between 0.79 and
0.97, and add some non-linear curvature.
We’re doing something similar with the cutto variable inside the trig object.
cutto = pow(trig.x, 1.7) * 1000
Again, we apply non-linearity and scaling, so the output of the pad is now from 0 to
1000 instead of 0 to 1. However, what you might not realize about this example is that
the Lemur itself is generating the filter envelope. The pad object’s ADSR envelope is
changing the x values continuously over time. But as you can see, we do not transmit the
raw 0-1 values from the pad, since the x variable checkbox is not checked. Instead, the 0-1
values are passed on to the cutto variable where they made non-linear in a way
appropriate for frequency, scaled, and finally transmitted to the computer.
Click on the trig Pad object in the JazzEditor, then click Behavior tab to see the values for
the envelope.
Using List Variables
We’re going to expand this example, and create controls for Attack, Decay, Sustain, and
Release. This will show how we can make use of list variables that consist of more than
one value. Lists are used by the MultiSlider, Multiball, Pads, and Switches objects.
Page 85
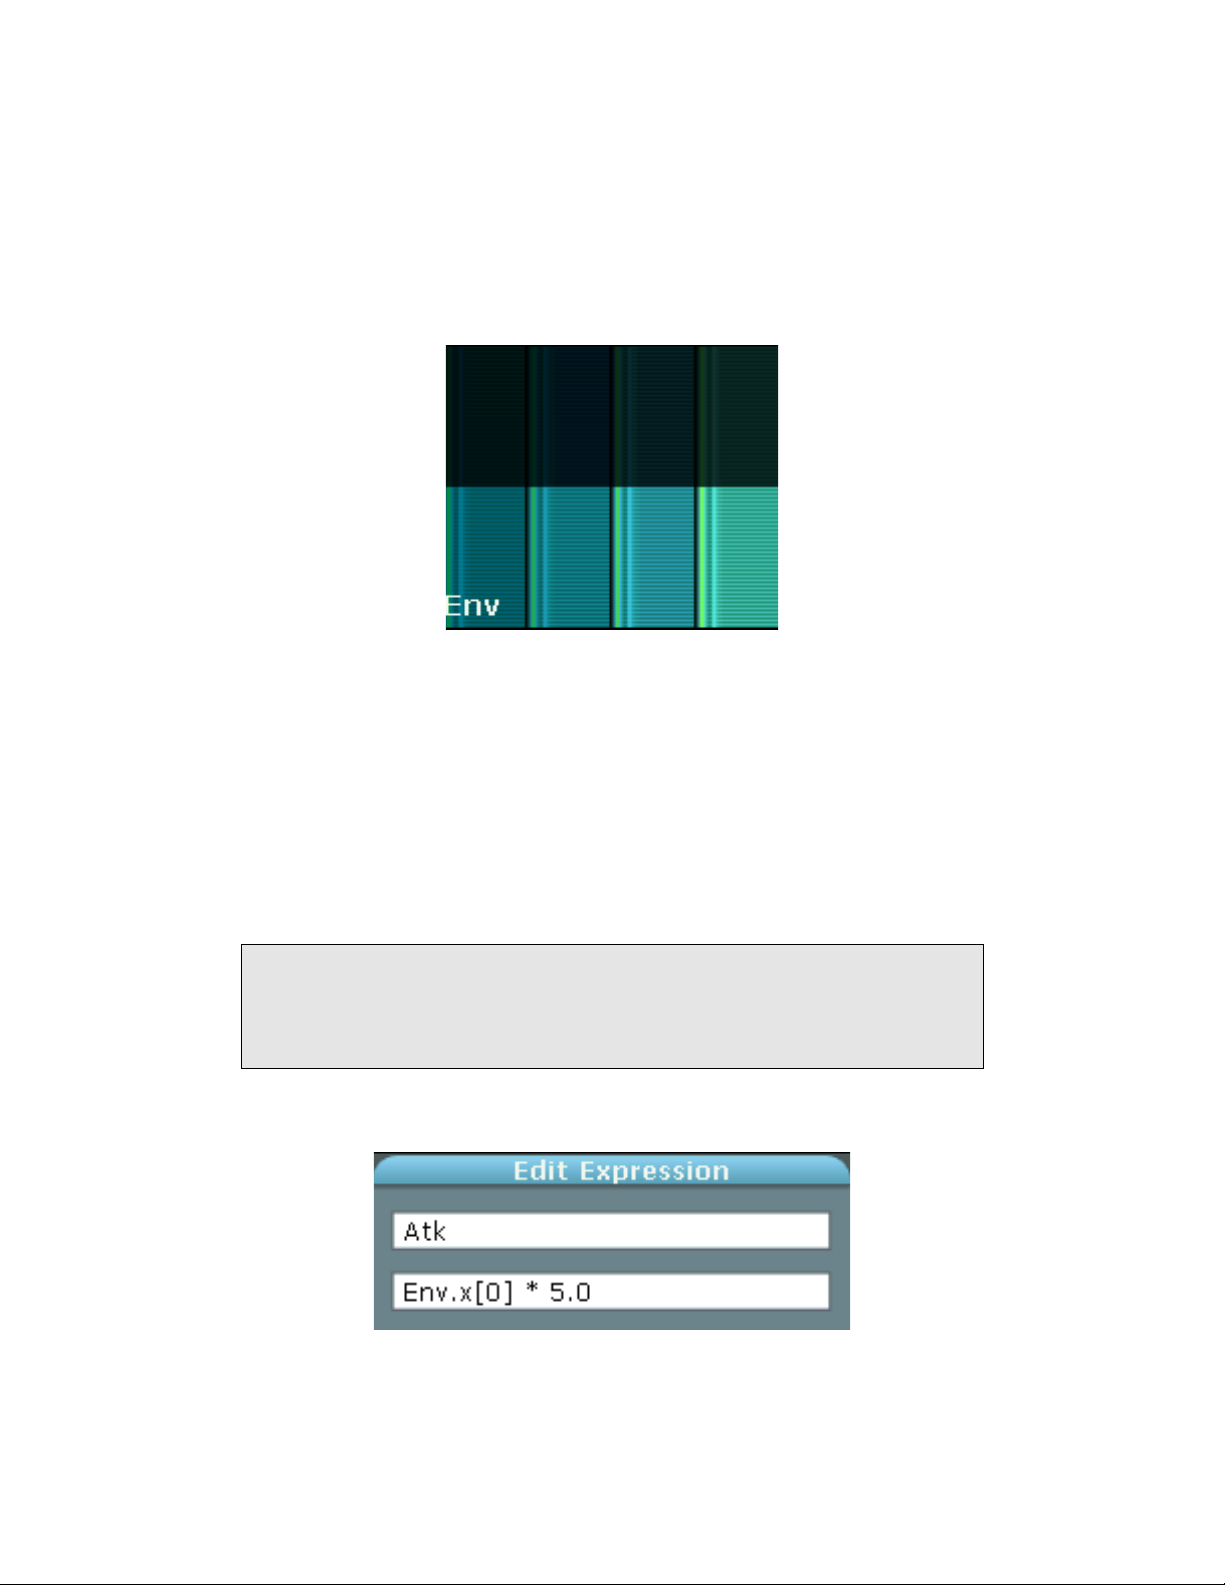
85
• Click the Object button, choose MultiSlider from the list of objects, name the object
Env, and click OK.
• Click the Behavior tab in the Properties view for the MultiSlider, and set the number
of sliders to 4. Move and resize the MultiSlider so you can control each slider easily.
Maybe something like this or a little bigger?
We’re going to use the first slider for Attack, the second for Decay, the third for Sustain,
and the fourth for Release. As with the x variables of all Lemur objects, the MultiSlider x
variable varies between 0 and 1. This is not really enough of a range for the time values of
our envelope, so we need to scale these values. We’ll need to create three Expressions,
one for each of the envelope’s time values.
• Click on the trig object in the Project Browser so that its name is selected.
Click the Expression button to create a new Expression.
If you don’t have the name of an object selected when clicking the
Expression button, a new global variable is created (it will go into the
Variables folder). For our purposes, adding variables to objects is a better
strategy, as they are transmitted more reliably.
Name the expression Atk, press return, then enter the expression shown below:
This means that the Atk variable will use the value of the first slider in that MultiSlider
we just created.
Page 86
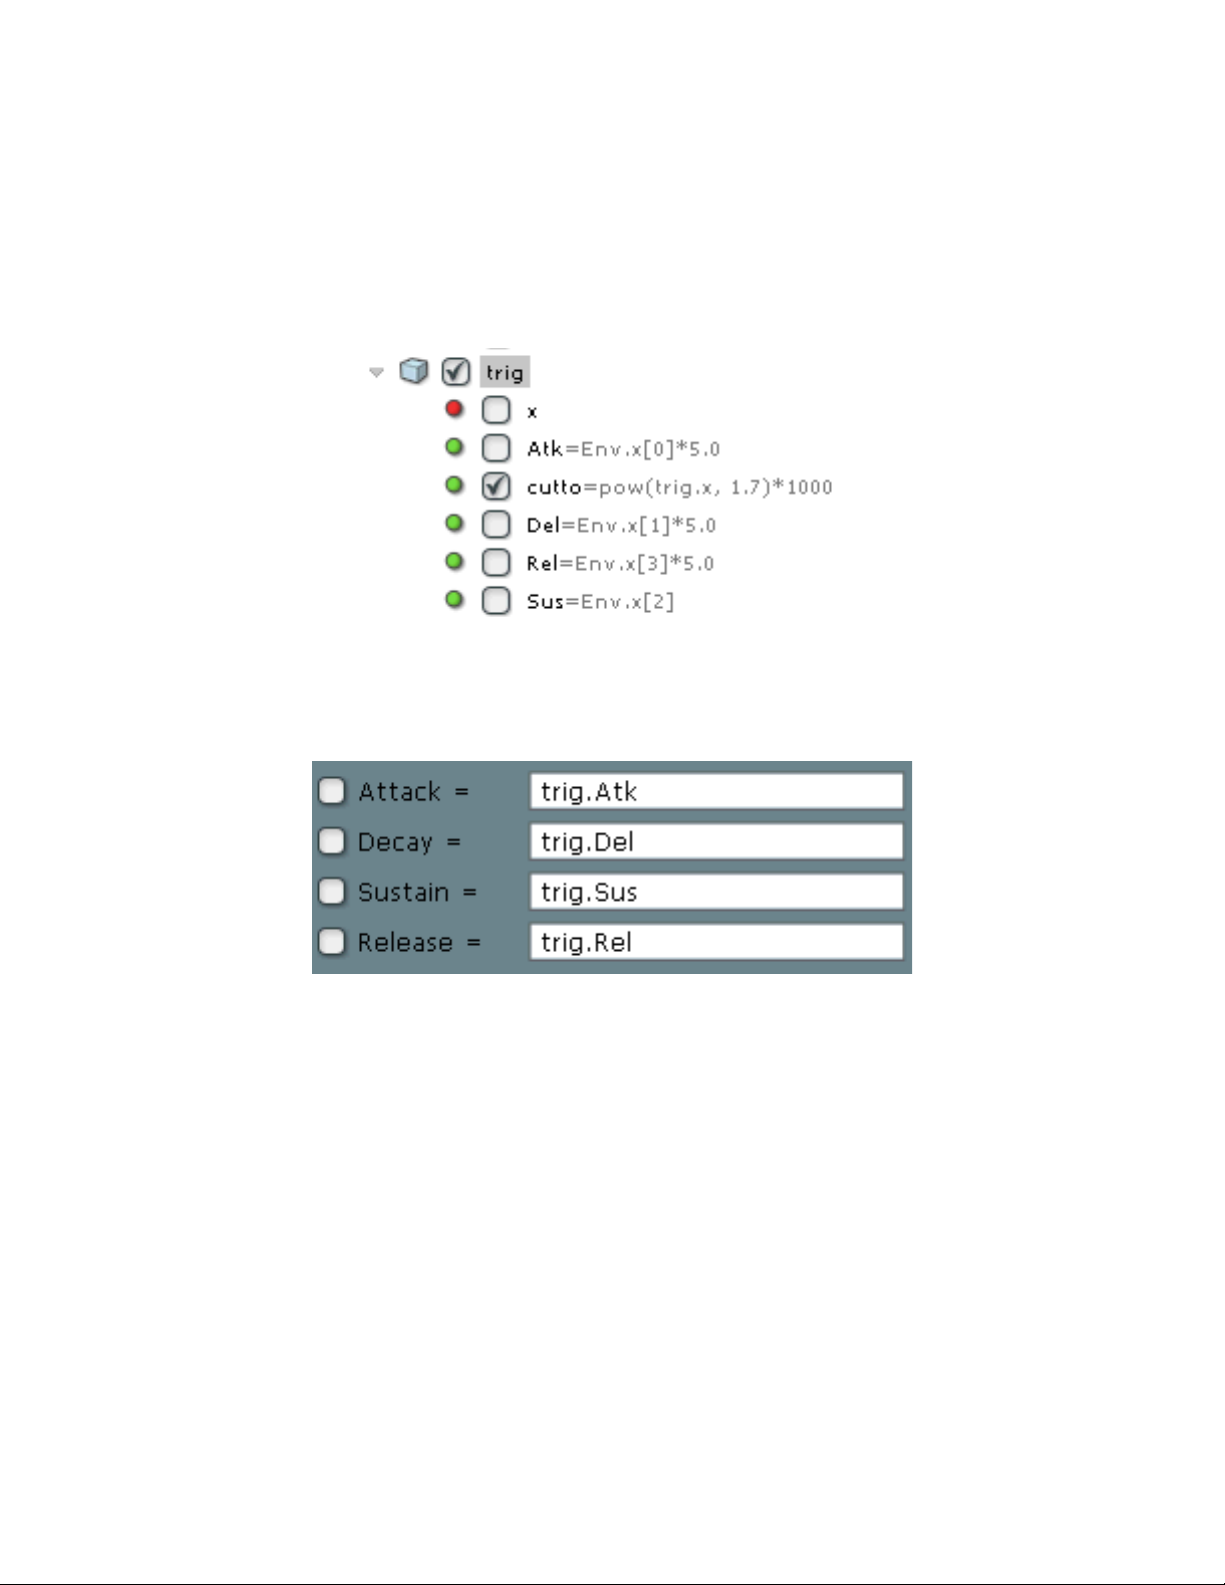
86
Create similar Expressions for Del (delay), which will use Env.x[1] * 5.0, Sus (sustain),
which will use Env.x[2], and Rel (release), which will use Env.x[3] * 5.0. Note that we do
not scale the value for Sustain, since this is just a value between 0 and 1. We will later
scale the envelope’s amplitude” with the cutto variable.
When you’re done, your trig object should look like this:
• The final step is to enter these variable names in the Behavior Properties of the trig
object. Enter trig.Atk for Attack, trig.Del for Decay, trig.Sus for Sustain, and trig.Rel
for Release as shown below.
• To test the example out, touch the Fader and Multislider objects and try different
envelope settings. The Sustain parameter is particularly interesting when you hold
your finger down on the Pad object. It’s not an amplitude level as in a typical
envelope: here it is being applied to filter frequency. Lower multislider values for
Sustain correspond to lower frequency values for the steady state of the envelope.
Page 87
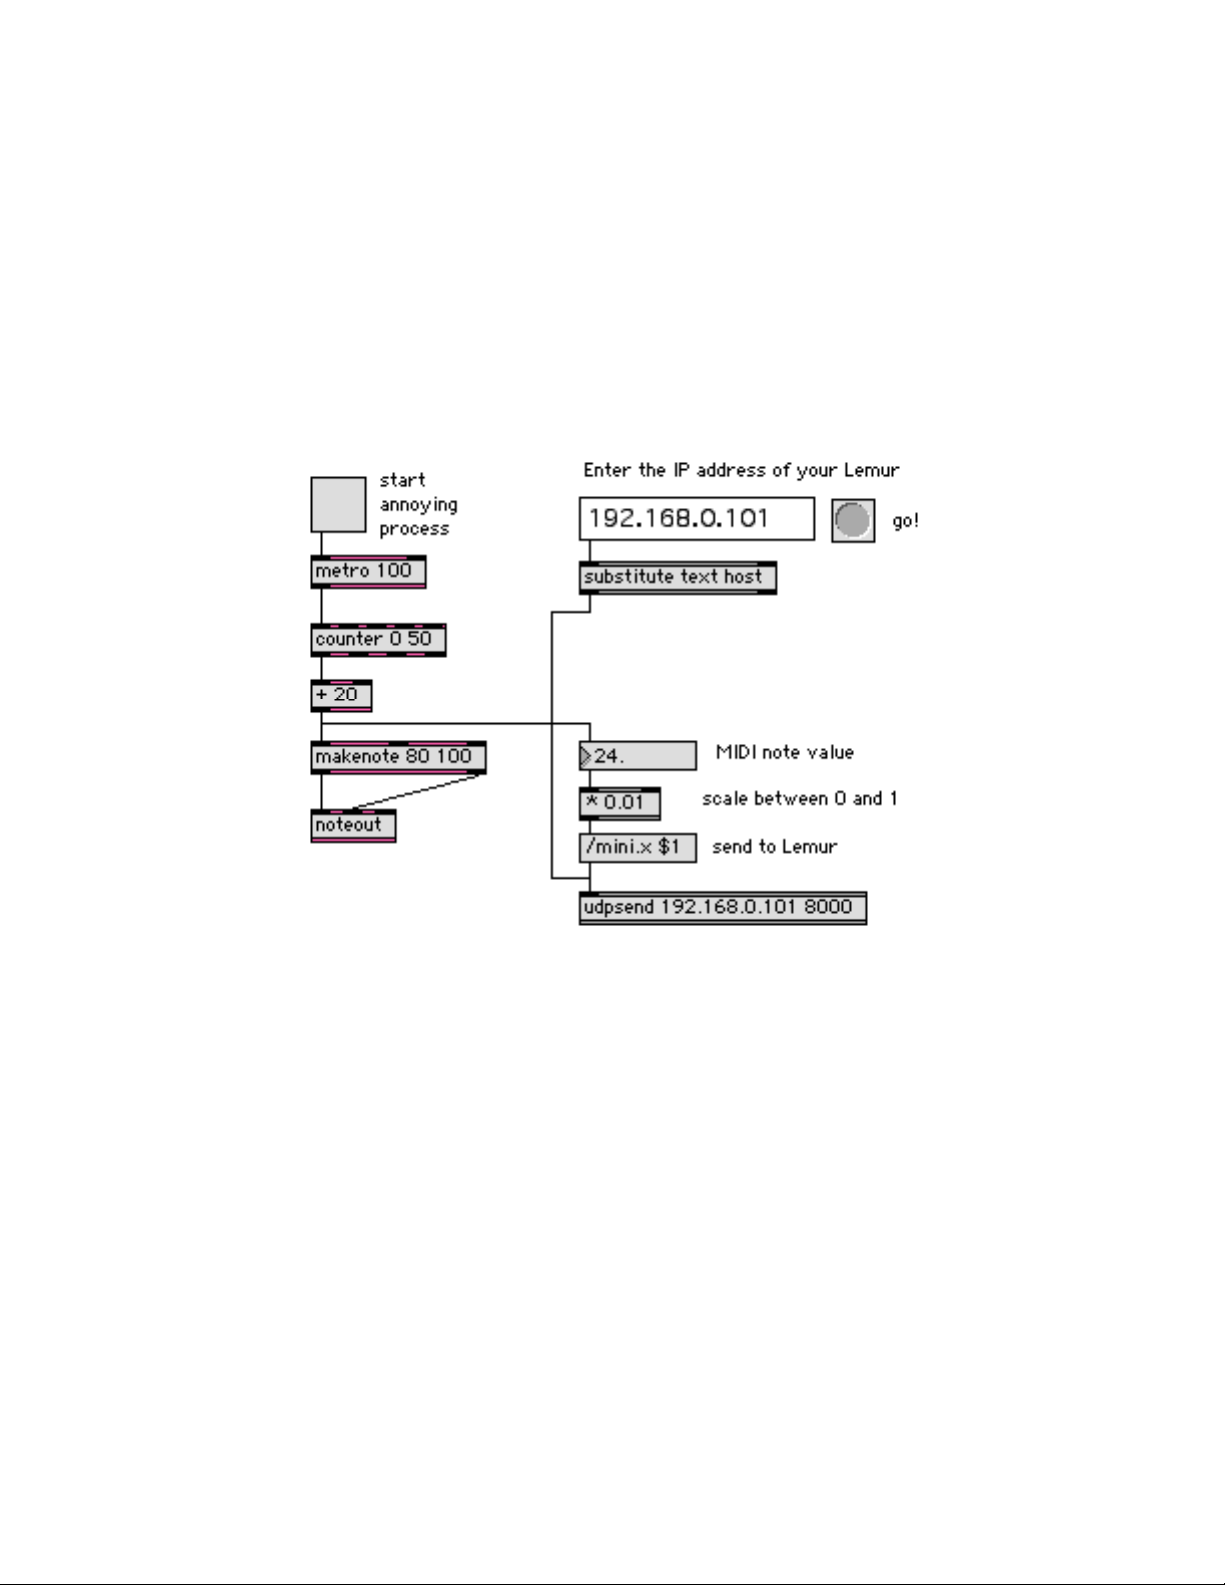
87
Using Variables and Expressions to Display Data
In this example, we’ll show how a Lemur object can receive OSC messages from the
computer and display values. We’re going to use the Lemur as a remote monitor on a
process happening on our computer.
• Open the Max patch entitled AnnoyingProcess.mxb. The patch is shown below.
• Click the toggle at the top left corner. You should hear a rapid repeating chromatic
scale from your computer’s built-in MIDI synth. Who comes up with these
examples? Click the toggle again to stop it.
The left side of the patch is a process that generates MIDI notes. The right side is used to
send information about the process to the Lemur. We’ll discuss how it works in a
moment. But first, we’re going to return to the JazzEditor and open a new Project.
Page 88
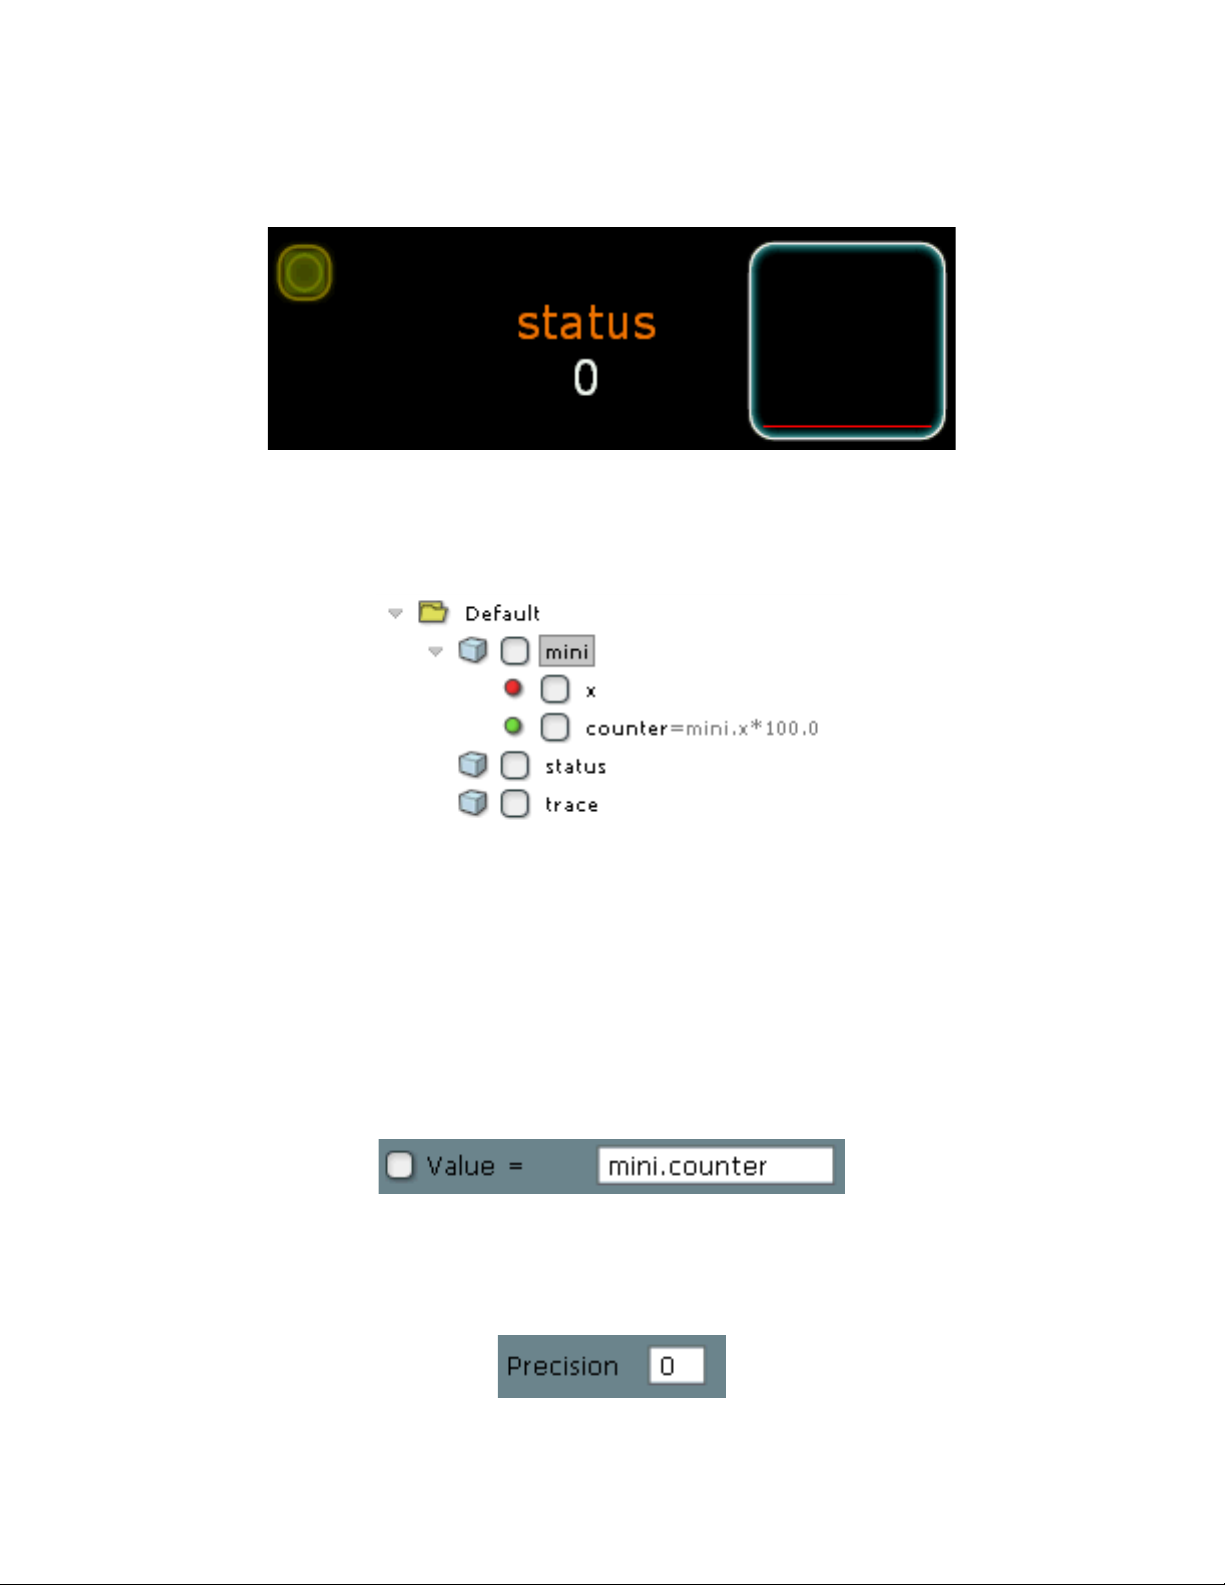
88
• Open the Lemur Project file ProcessMonitor.xml. The interface is shown below.
The Lemur project has a tiny Pad object, a Monitor, and a SignalScope. Let’s examine the
Project Browser view of what’s going on. Open up the Default interface and the object
called mini, which is the Pad in the upper-left-hand corner of the screen.
Notice that we’ve created a new variable inside the mini object called counter. It
multiplies the x variable of the mini object by 100.
The idea of this Project is that the computer will send an OSC message to the Pad object
named mini. The mini object will then use its counter variable to scale the value (which
was transmitted between 0 and 1) to a quantity appropriate for display.
• Click on the Monitor object called status, and examine its General Properties. The
Value property is shown below.
This shows that the Monitor is used to print out the value of mini.counter. Another point
is that since this is an integer value (it’s a MIDI note number), we’ve set the Precision for
the Monitor to 0, so it doesn’t display extraneous decimal info.
Page 89
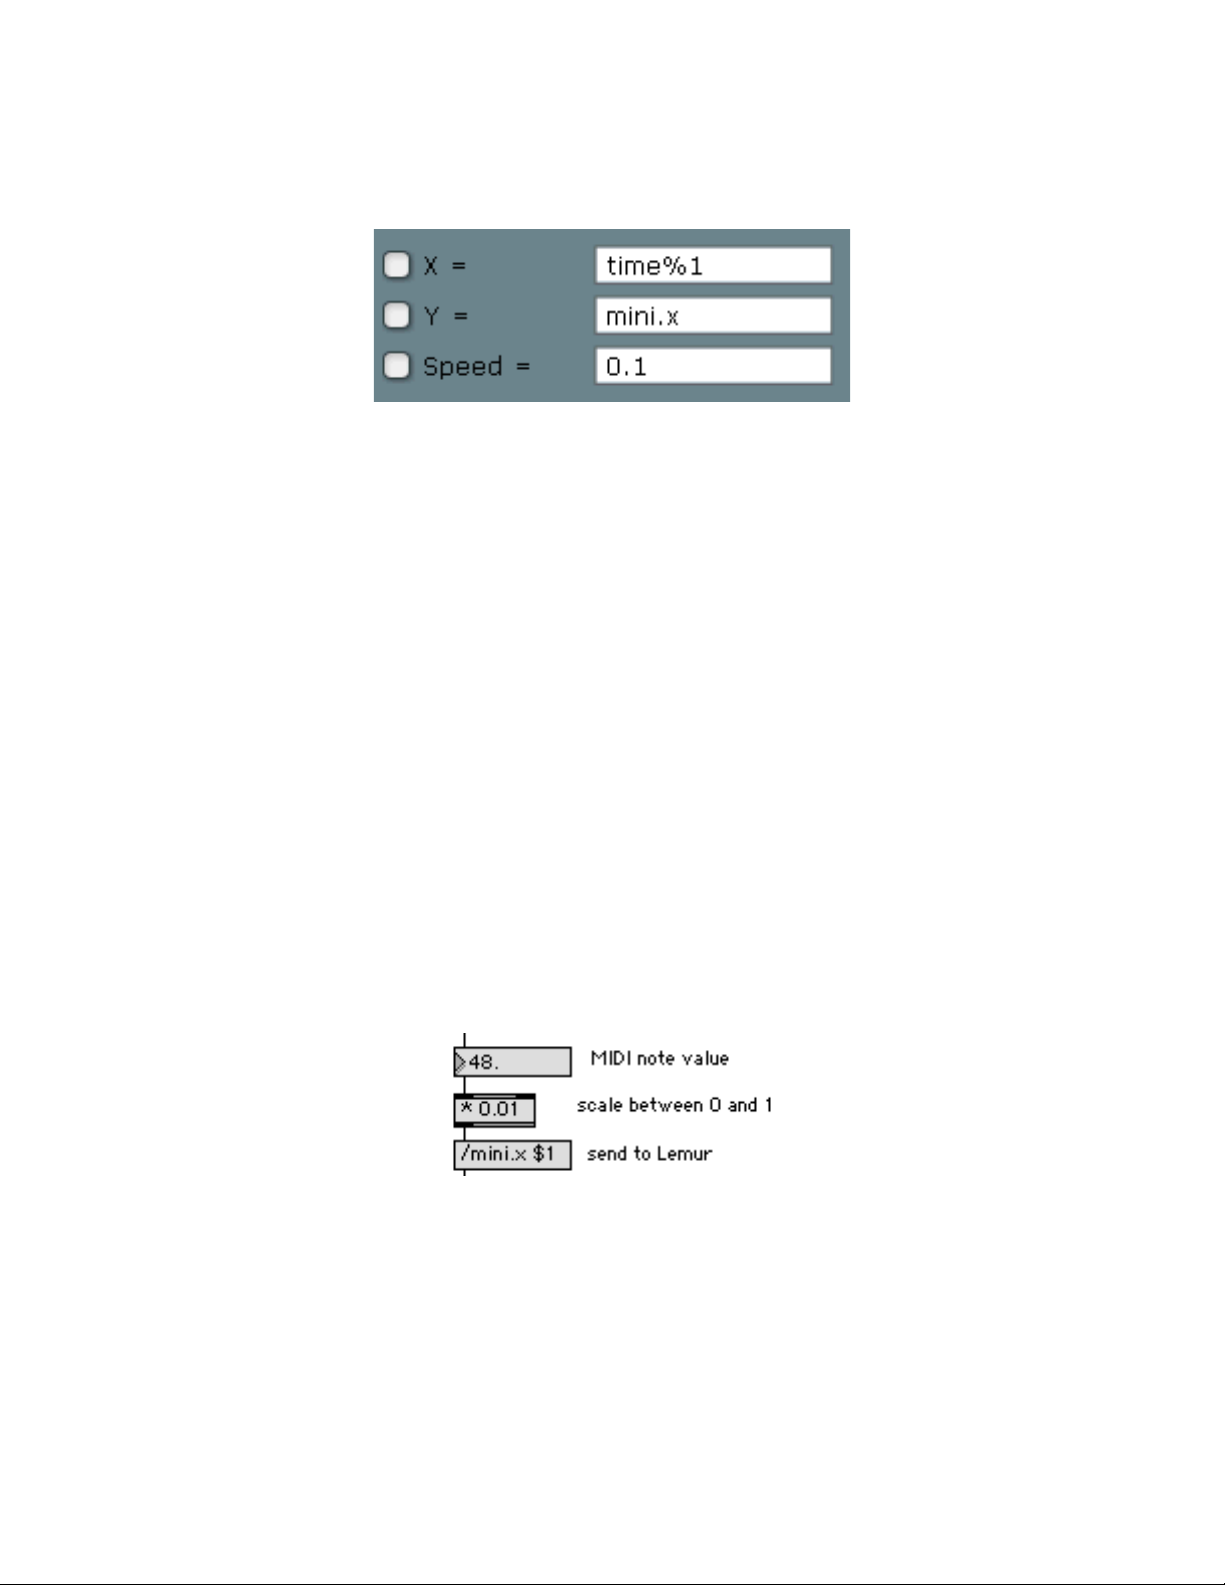
89
• Next, click on the SignalScope object called trace. Click on the Behavior tab to see its
Behavior Properties.
For the Y component of the scope, we are plotting the standard x variable of the mini
object, which ranges from 0 to 1, since there is no need to scale the value.
Now let’s take a look at how the Max patch sends data to the Lemur, and see if we can
get the Lemur to do some status monitoring.
At the top of the patch, there is a text entry field for entering the IP address of your
Lemur.
• If you do not know your Lemur’s IP address, press the Settings button on the Lemur
to see it displayed (it’s the IP address in red).
• Enter the address into the text entry field in the patch, then click the button labelled
Go! In the screen below we’ve entered 10.0.1.15 as an IP address.
Since the built-in variables of Lemur objects range from 0 to 1, we’ve scaled the value of
the MIDI note we’re playing by multiplying by 0.01. This is the same thing as diving the
value by 100, ensuring that if the highest note value played is 70, the transmitted value
will never exceed 1.0. We then send it to the Lemur using the OSC message selector
/mini.x. This routes it to the x variable of the Pad object in the corner of the screen.
• Click the toggle to turn on the process. The computer should now be sending data to
your Lemur. If the connection is working, you should see the number beneath the
word status increasing as well as a slow sawtooth wave on the signal scope.
The status number, originally a MIDI note number, was divided by 100 so it could be
transmitted to the Pad, then the Pad object’s counter variable (mini.counter) restores its
original value by multiplying it by 100.
Page 90

90
Advanced Expression Features
There are two types of expressions supported by the Lemur: Variables and Functions. In
previous chapters we defined variable expressions that belonged to Lemur objects. In this
chapter we introduce the concept of global variables as well as global user-defined
functions. These expressions can be accessed from any Lemur object. Finally, we look at
a special global variable built into the Lemur called time that you can use to create
automated and repetitive behaviors in your Lemur configurations.
Available Built-in Functions and Operators
When constructing an expression, you can make use of a number of built-in operators and
mathematical functions. Here is a list:
Syntax
Example
Description
+, -, *, /, pow, sqrt, round,
floor
a+b, b-a, a*b, pow(a,b)
Basic arithmetic operators
sin, cos, tan, log, log10, exp,
acos, asin, atan
sin(a), cos(a+b), etc.
Trigonometric operators
>, >=, ==, <, <=, !=
a>b, a<b, a!=b
Logical operators
&&, ||, |
a&&b, a||b
Bitwise operators
clamp, range
clamp (a, min, max), range
(a, min, max)
Change input value range
Local and Global Variables
Variables listed under a Lemur object are local variables. The MultiSlider object named
Env below has its built-in variable x followed by three expressions serving as local
variables, Dewey, Huey, and Louie.
Page 91
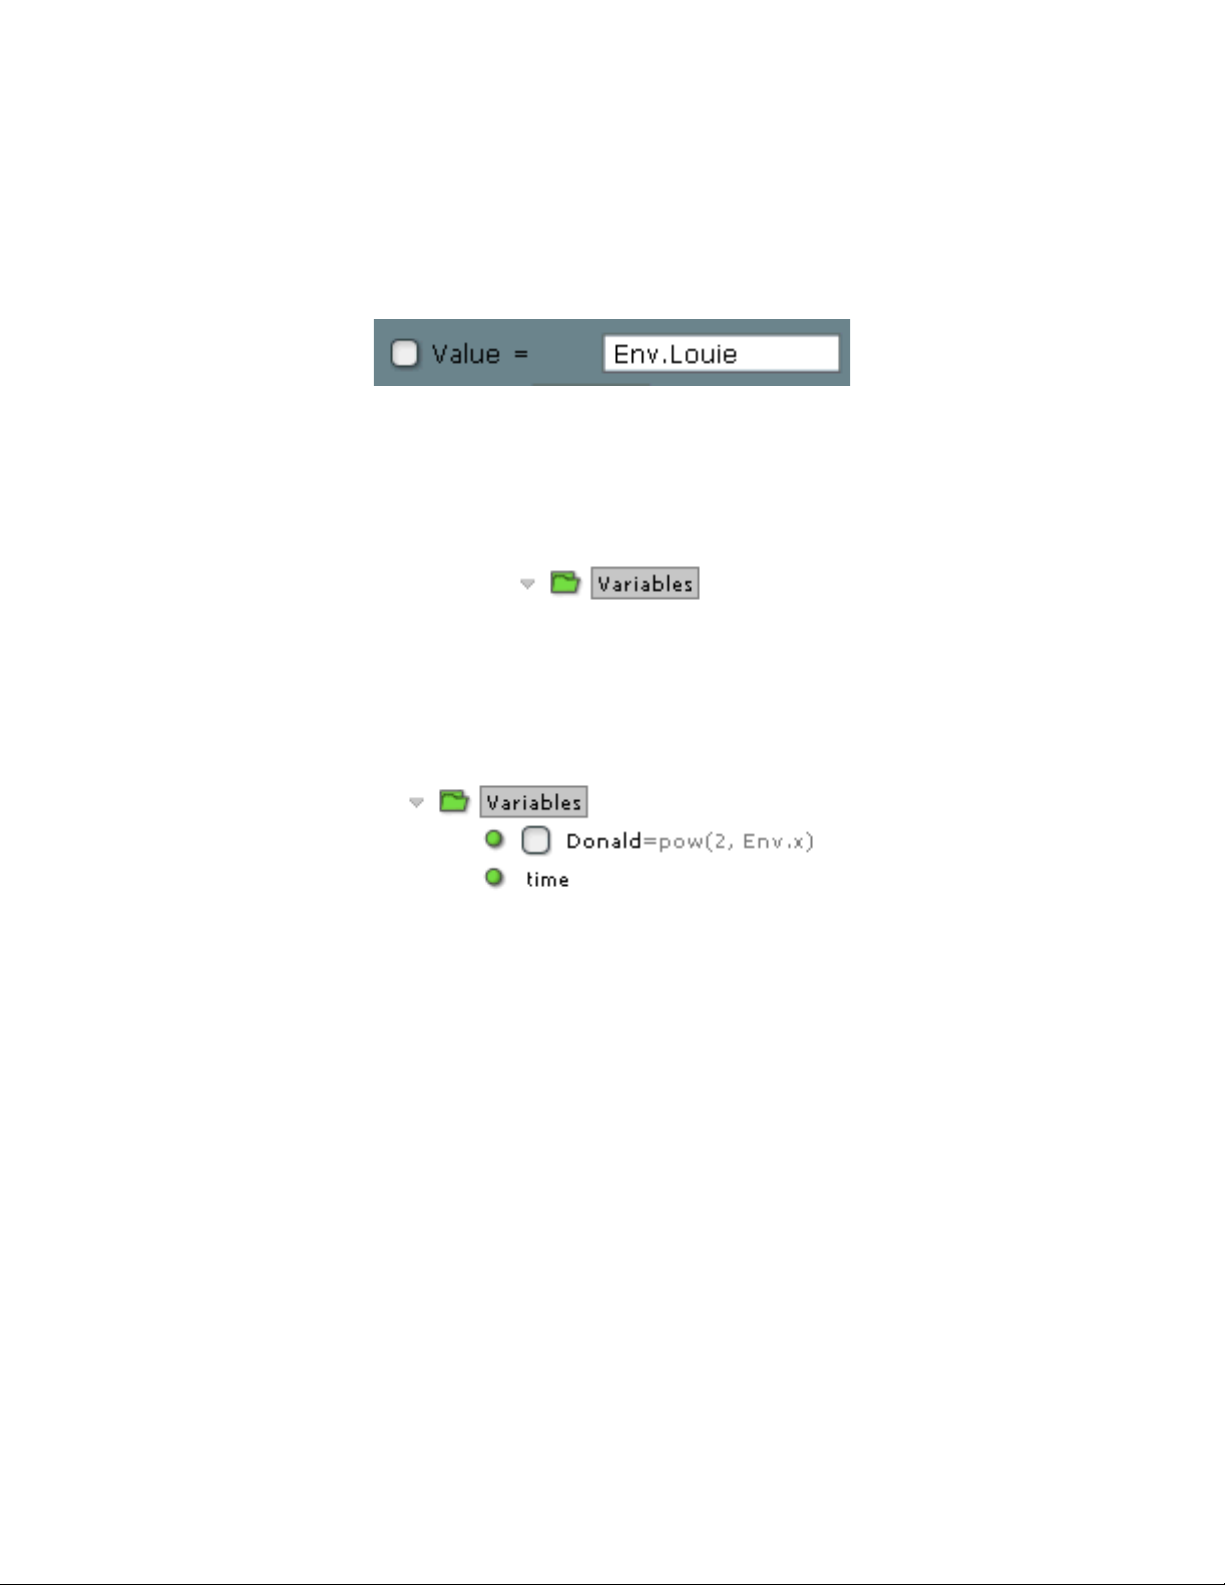
91
To create a local variable, first select the name of the object that will contain the variable,
then click the Expression button. Local variables are referenced using the name of the
object, then a dot, then the variable name. For instance, if we wanted to display the value
of the Env object’s Louie variable in a Monitor object, we would enter the following for
the Monitor’s value property:
You can also create global variables, which are not tied to specific objects.
• Click on the word Variables at the bottom of the Project Browser window to select it.
• Next, click the Expression button. Enter a name and an expression. Click OK to create
the expression and it will be listed in the Variables folder. Below, we’ve created an
expression called Donald that uses the pow function to raise 2 to the value of the
Env.x variable.
Donald can now be referenced by name in other expressions, whether local or global, or in
the properties of Lemur objects.
Defining and Using Functions
In addition to built-in functions and operators, you may define your own mathematical
functions to use in other Lemur variables and expressions. Here’s how to do it:
• Click the Expression button to create a new Expression. The Expression editor
window opens.
Page 92
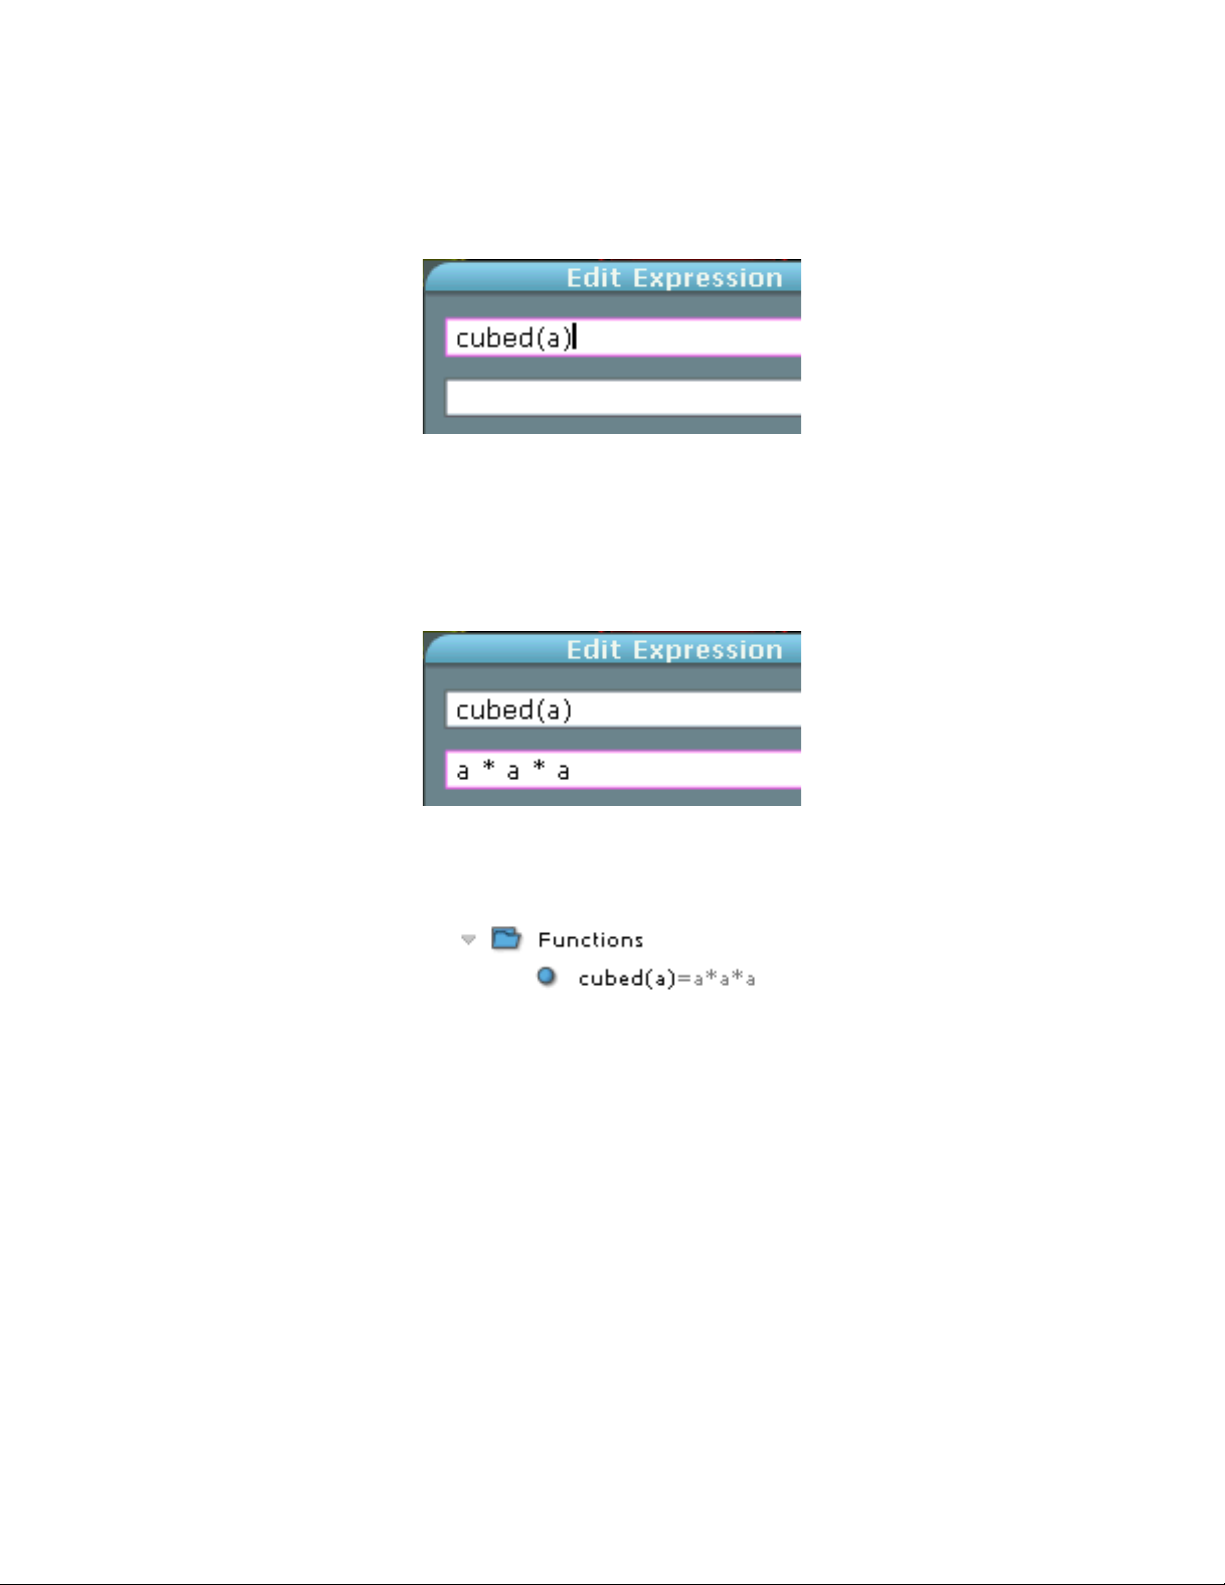
92
• In the upper text field of the Expression window, type the name of the function and
its arguments in parentheses. For example, to define a function named cubed that
takes one argument, you would type:
• Press the return / enter key to move to the lower text field in the Expression window.
• On the lower line, type in the definition of your function as an expression. You can
reference other variables if desired. The example below just multiplies the function
argument a by itself twice to raise the input to the third power.
• Click OK to save your new function. The function now appears in the Functions
folder in the Project Browser. Click the disclosure triangle next to Functions to see it.
Operating on Vectors
A vector (also known as an array or list), is a variable that holds more than one element
(number). The Lemur expression syntax allows operations on vectors and access to the
elements. You can access the data in certain Lemur objects (Multislider, Multiball, Pads,
Switches) as vectors. T ypically each “sub object” is an element of a vector. For example,
the x coordinates of the balls in a Multiball object are accessed as
myball.x[0]
myball.x[1]
etc.
Page 93

93
Let’s look at some of the operations you can perform on vectors. Assume we have a
Multislider object called moo and a Multiball object called bar. Below we have listed some
expressions involving vectors and the results they would produce. Assume moo.x
contains {0.2 0.3 0.6} and bar.x contains {0.25 0.5}
moo.x * 3 Multiply all elements of moo.x by 3, returns {0.6 0.9 1.8}
moo.x + 2 Add 2 to all elements of moo.x, returns {2.2 2.3 2.6}
moo.x>0.5 Return a vector consisting of 1 or 0 depending on
whether moo.x is greater than 0.5, returns {0. 0. 1.}
moo.x + bar.x Add all elements of two vectors. The size of the result
is the smaller of the two input vectors. Returns {0.45
0.8}
moo.x[0] The first (zeroth) element of moo.x, returns 0.2
bar.x[1] The second element of bar.x, return 0.5
moo.x[0.5] Interpolated value between bar.x[0] and bar.x[1],
returns 0.3
{moo.x, bar.x} Concatenates moo.x and bar.x, returns {0.2 0.3 0.6 0.25 0.5}
{moo.x[0],bar.x[1.5]}
Creates a new vector consiting of the first element of moo.x and the
average of the second and third elements of bar.x, returns {0.2
0.625}
Using the Time Variable
If you look at the Variables folder in the Project Browser, you will see a pre-defined
variable called time.
The time variable is a millisecond value you can use for creating time-varying behavior in
your Lemur. It represents the number of milliseconds since your Lemur was turned on,
although it resets to 0 every hour. The time value is intended to be manipulated by
mathematical operators, particularly multiplication (*), division (/), and the modulo
operator (%).
Page 94
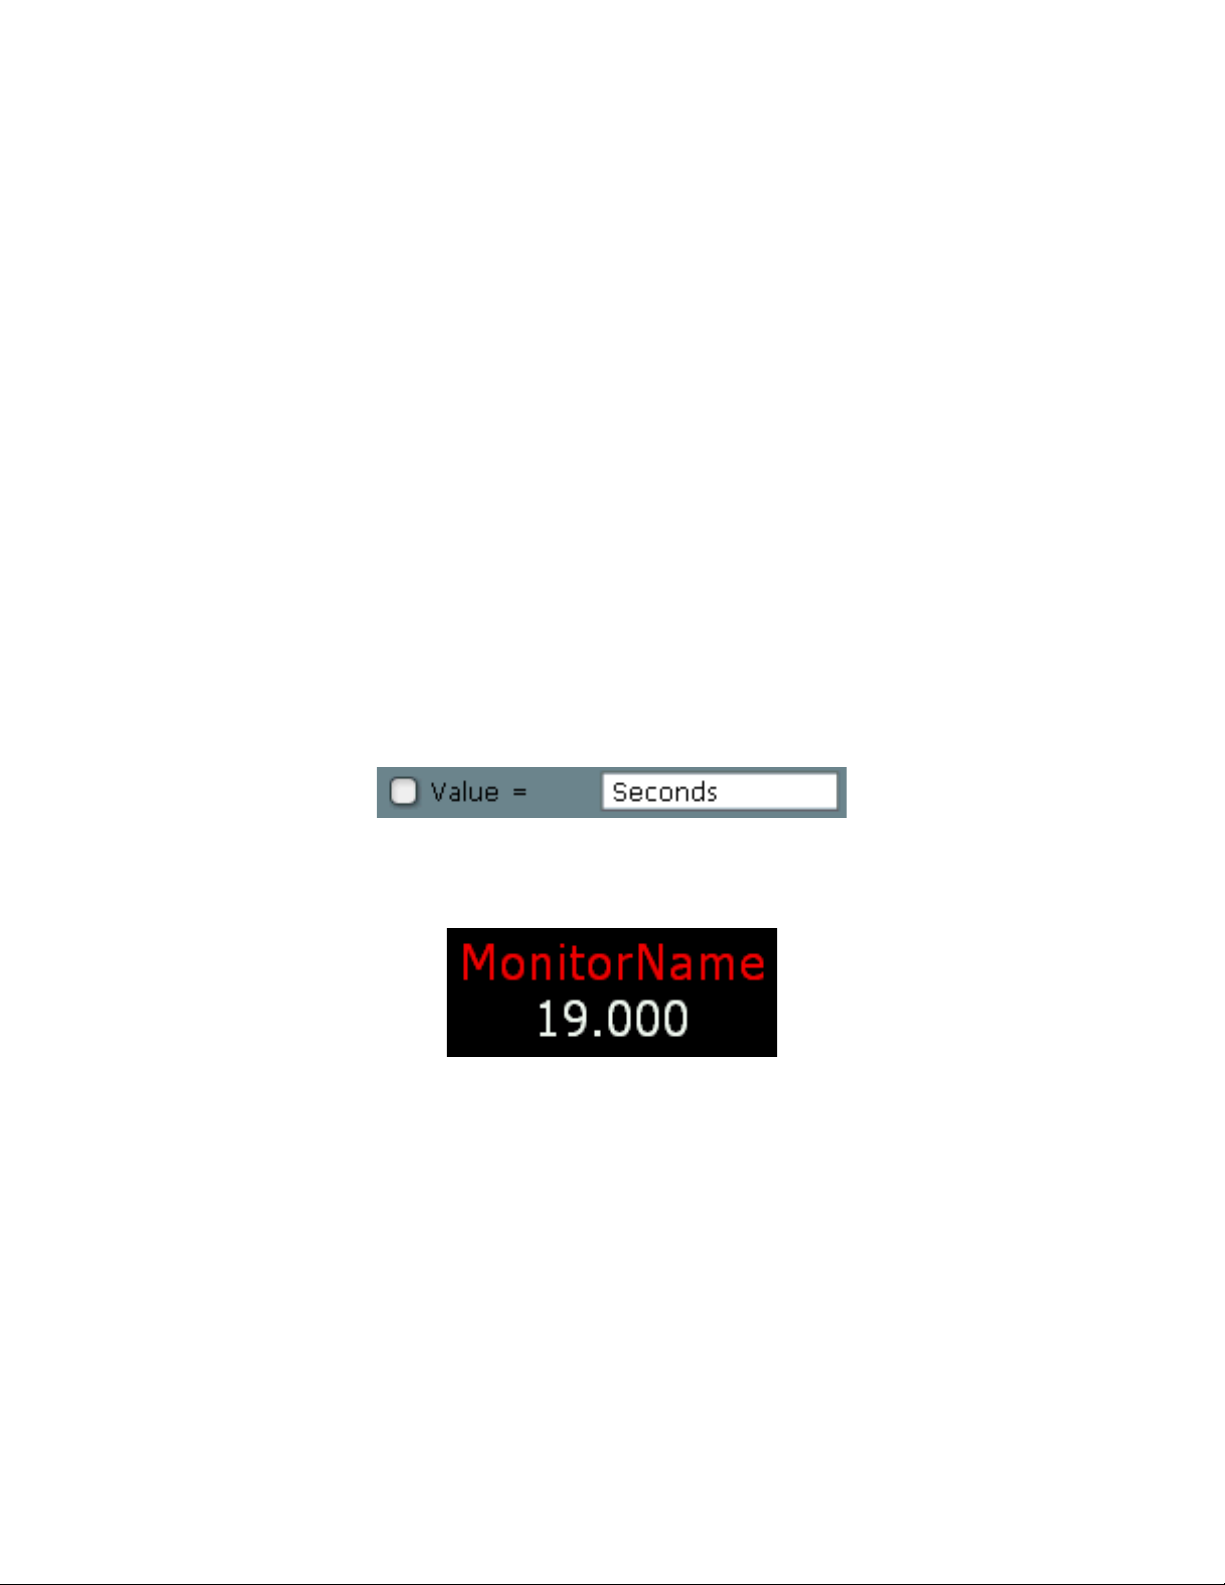
94
By multiplying time by a value greater than 1, you produce a sequence of values that
increase faster than clock time. By multiplying time by a value less than 1, you will
produce a sequence of values that increase more slowly than clock time. You can use the
modulo operator (%) creates a repeating sequence of values that resembles a sawtooth
wave. For example time % 1 produces a ramp from 0 to 999 that occurs over the course
of a second.
Here are some example expressions created using the time variable.
Time Code Example
Use Monitor objects to display the values of the following expressions:
Frames = (time % 0.25) * 100
Hours = floor(time/3600)
Minutes = floor(time/60) % 60
Seconds = floor(time % 60)
Create global variables for each of these expressions. Then you can use the variables in
other Lemur objects. For example, here is the Properties Browser view for a monitor
object that would display a global Seconds variable.
Even if you are not connected to a Lemur, the resulting Monitor object will begin changing
immediately after you enter a time-based variable.
Page 95
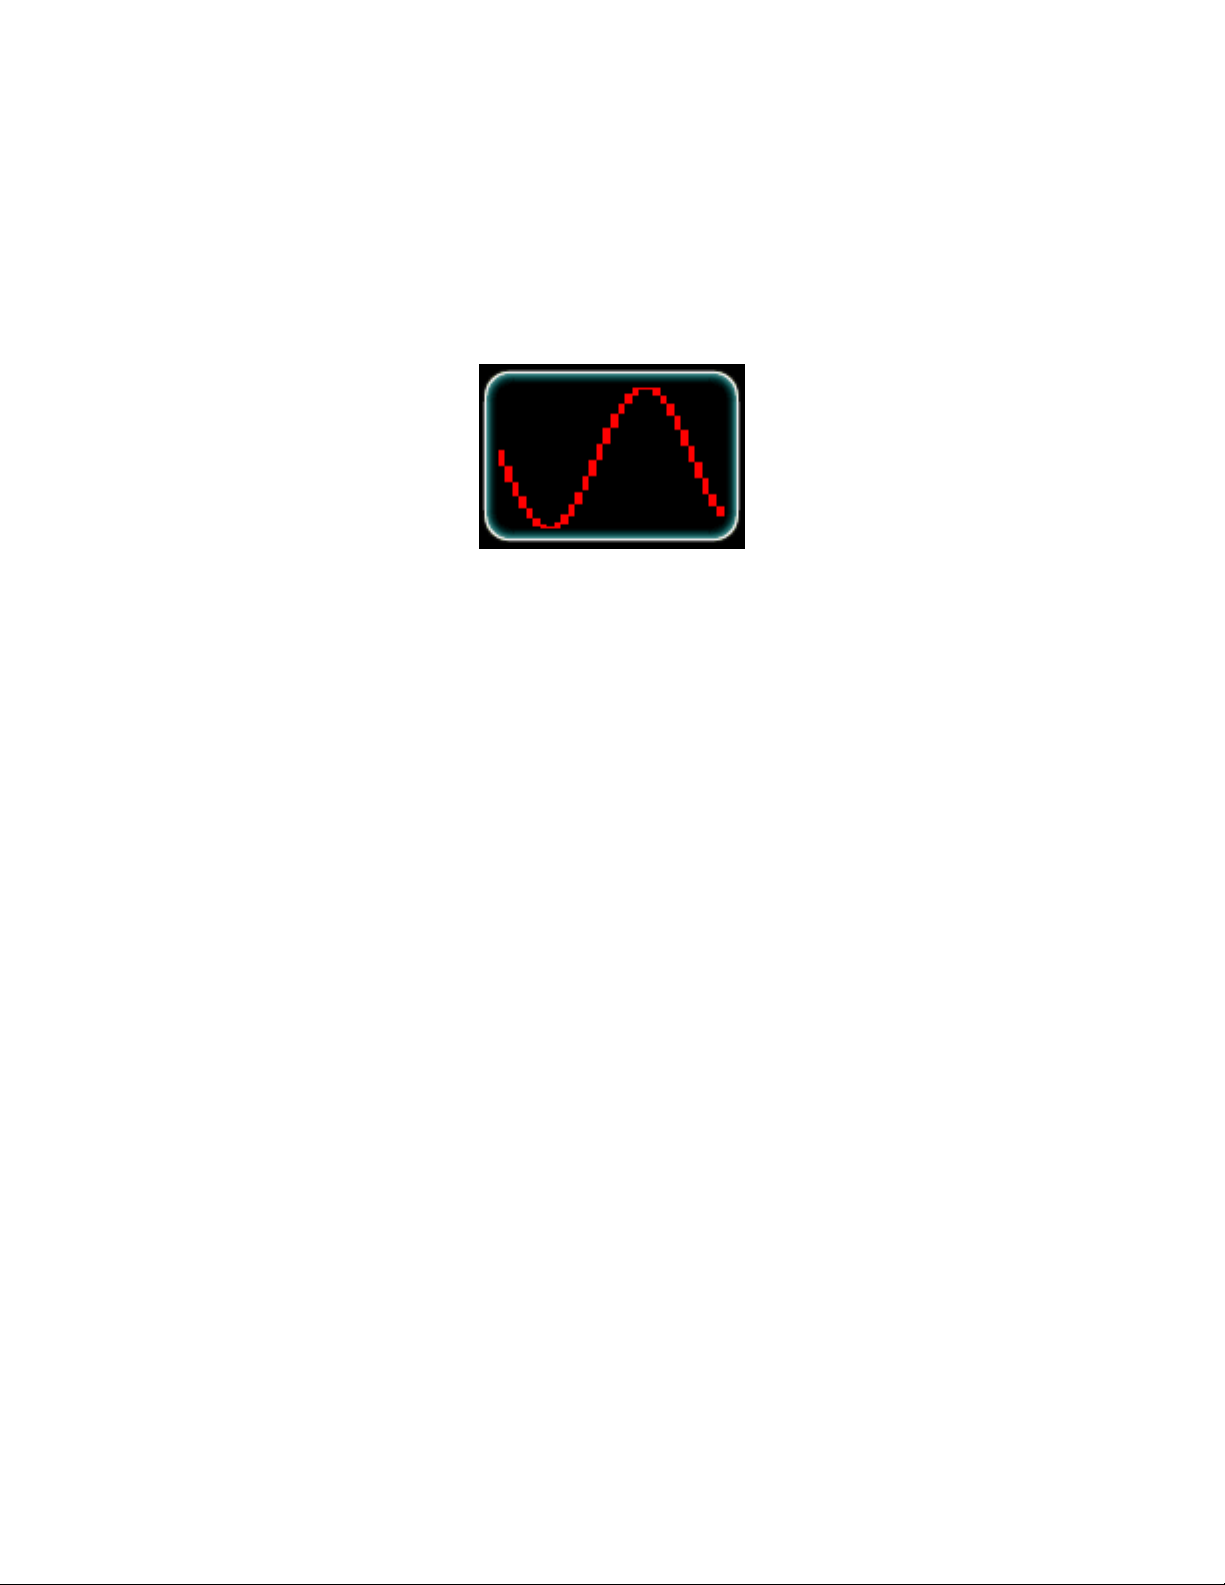
95
LFO Example
Here is an expression using the time variable that generates an LFO.
LFO = sin(time * 2) *0.5 + 0.5
You can display this in a SignalScope.
You can assign time-based variables to properties in Lemur objects (such as Friction or
the ADSR envelopes) to create objects that change over time. However, you can’t assign
the values of objects (other than the Monitor and SignalScope), so you can’t use the time
variable to “animate” the purple ball in an Area.
Page 96
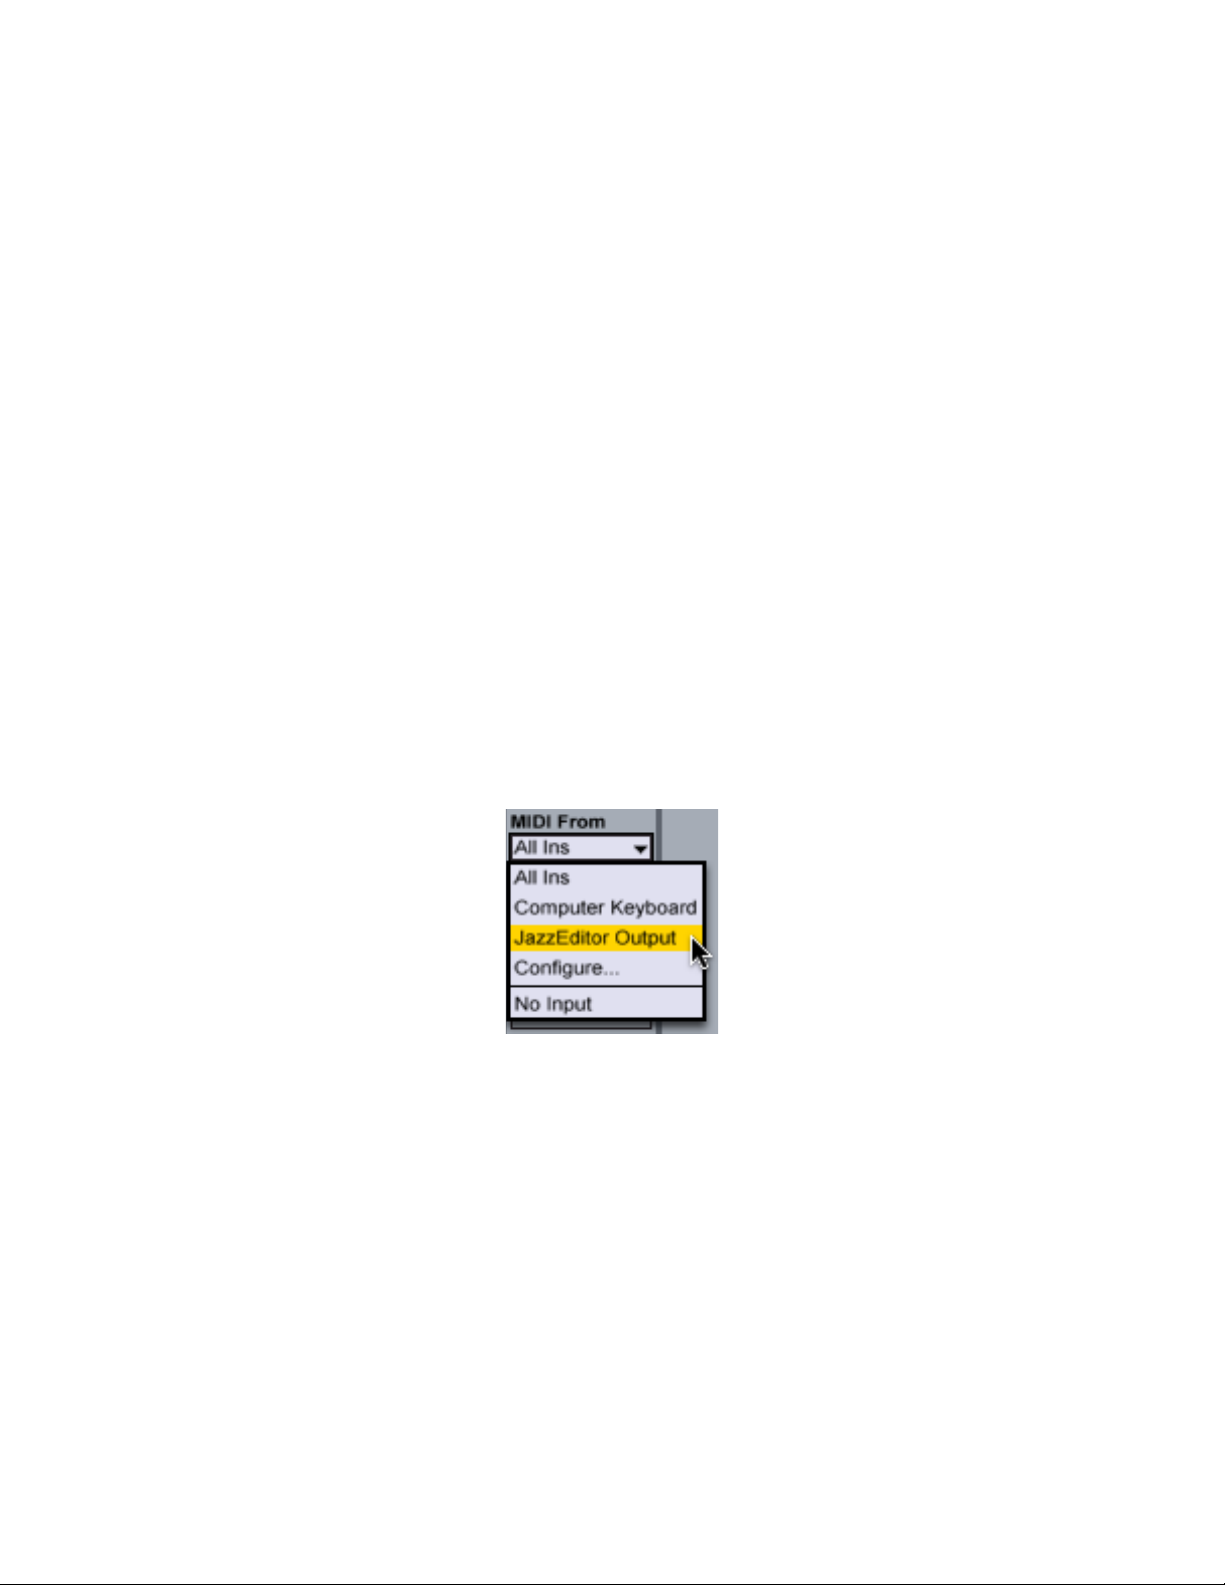
96
Using the Lemur with MIDI
Applications
The Lemur does not send MIDI messages directly; however, you can still use it with
MIDI-compatible software applications.
In this chapter, we’ll show you how to use the JazzEditor to map OSC messages
transmitted by the Lemur to MIDI messages (including notes, control and program
changes, and other data) that can be sent to other MIDI-compatible applications running
on your computer.
In order to work with MIDI, the JazzEditor application must be running, because it
handles the translation of OSC messages from the Lemur into MIDI messages.
Mac OS MIDI Setup
On the Mac, the JazzEditor creates a virtual MIDI source called JazzEditor Output you
can choose in the application you want to control. For example, here is the MIDI input
menu in Ableton Live.
Windows MIDI Setup
On Windows, you’ll need either a third-party software virtual MIDI interface, such as
LoopBe or MidiYoke, or you can route MIDI from the JazzEditor to a MIDI interface
and back into your computer.
In the software application you are using, choose the software or hardware MIDI port
whose input is connected to the JazzEditor’s MIDI output.
Page 97
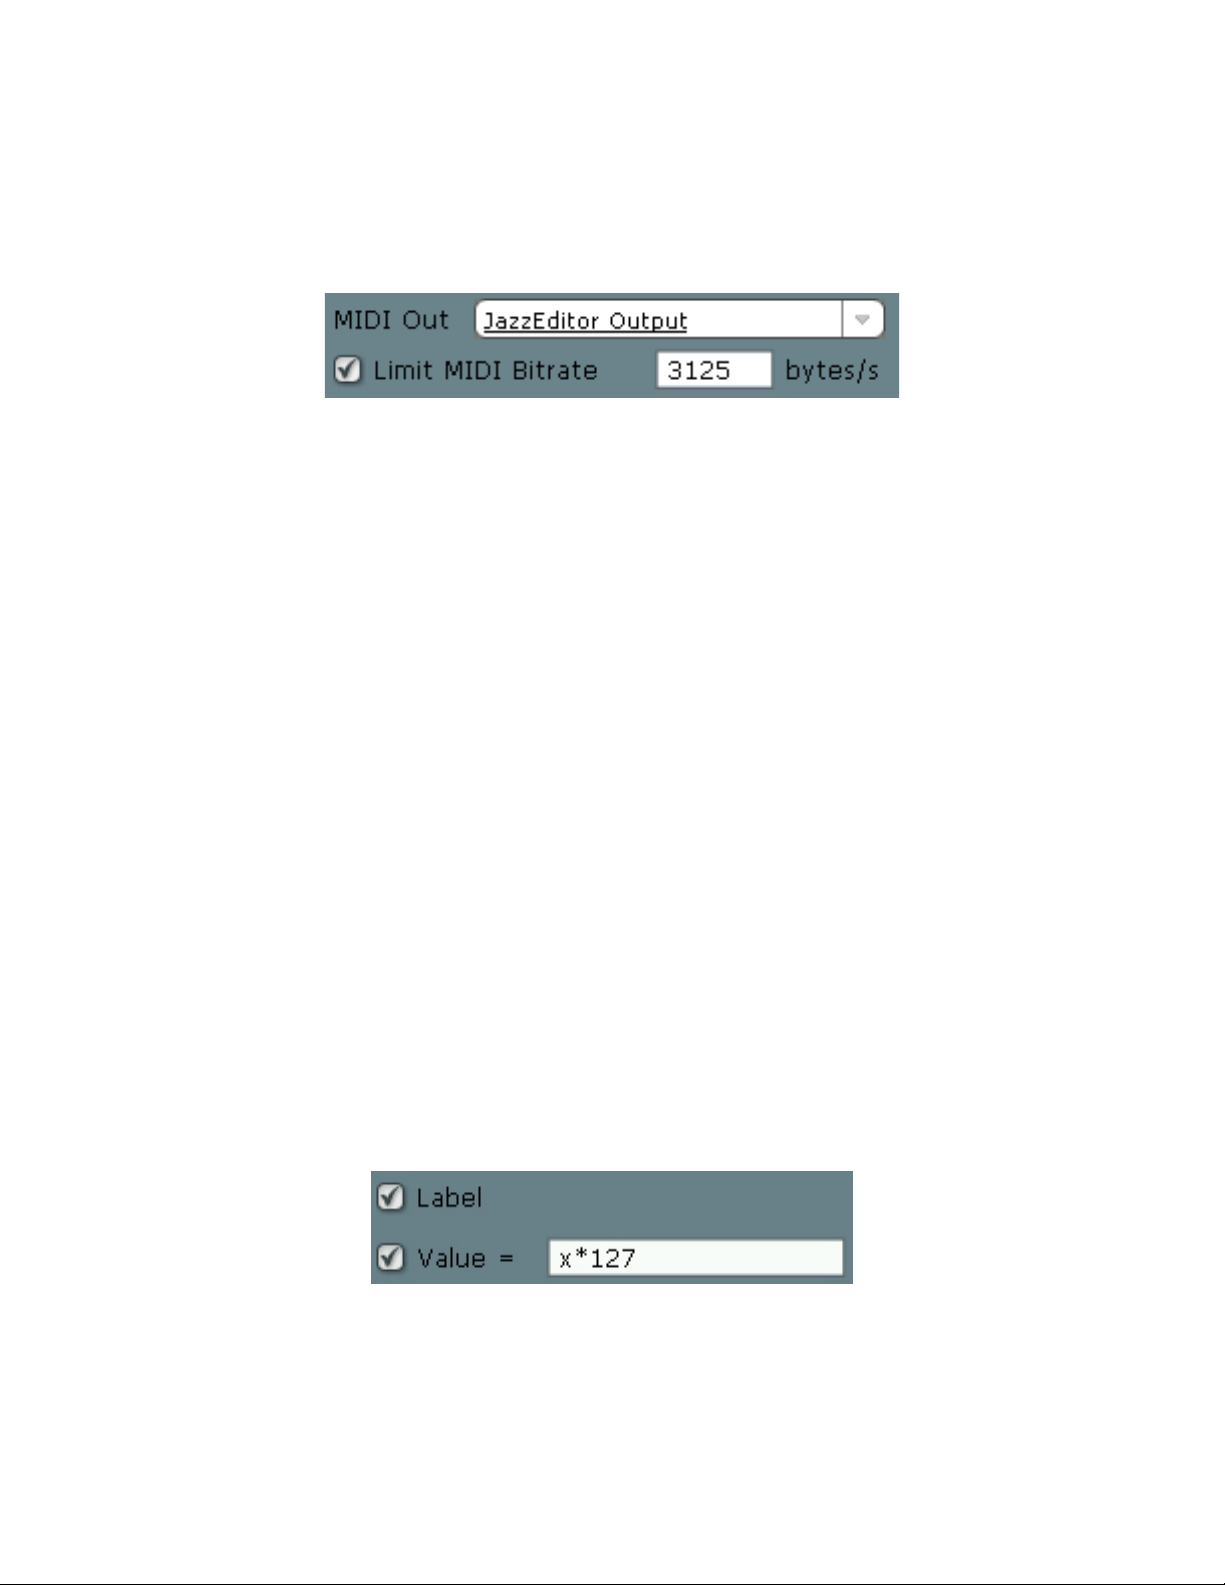
97
JazzEditor MIDI Settings
There are two MIDI-related settings in the JazzEditor settings window. Click the Settings
icon to see them.
The menu labelled MIDI Out shows all of the available MIDI sources on your computer
as well as the JazzEditor Output. We recommend using the JazzEditor Output since the
JazzEditor will not retain the name of an ap plication’s input the next time you launch if
that application is not running when you launch the JazzEditor.
When checked, Limit MIDI Bitrate allows you to send fewer MIDI messages when the
rate of OSC messages coming from the Lemur exceeds a certain rate. The Lemur can send
data over a network much faster than the traditional speed of MIDI. However, many
modern applications and operating systems are designed to work properly when MIDI is
transmitted faster than its traditional speed of 3125 bytes/sec, so you may not need to
enable this feature.
MIDI Mapping
In order to generate MIDI messages from the objects you touch on the Lemur, you have
to establish a mapping between the 0-1 values transmitted by the Lemur and MIDI
values, which are typically integers (whole numbers) between 0 and 127. Many different
mappings are possible, but we’ll start with a simple example.
• Create a Fader object in the JazzEditor called Fader. Set the Value display to be x
multiplied by 127 and check the box next to value as shown below. This will show the
MIDI value on the Lemur’s screen, but you don’t have to do this to scale the value to
the MIDI range. In a moment, you’ll see an AutoScale feature that does this for you
easily.
• To assign a MIDI message to this fader, click the MIDI button at the bottom of the
JazzEditor window.
Page 98
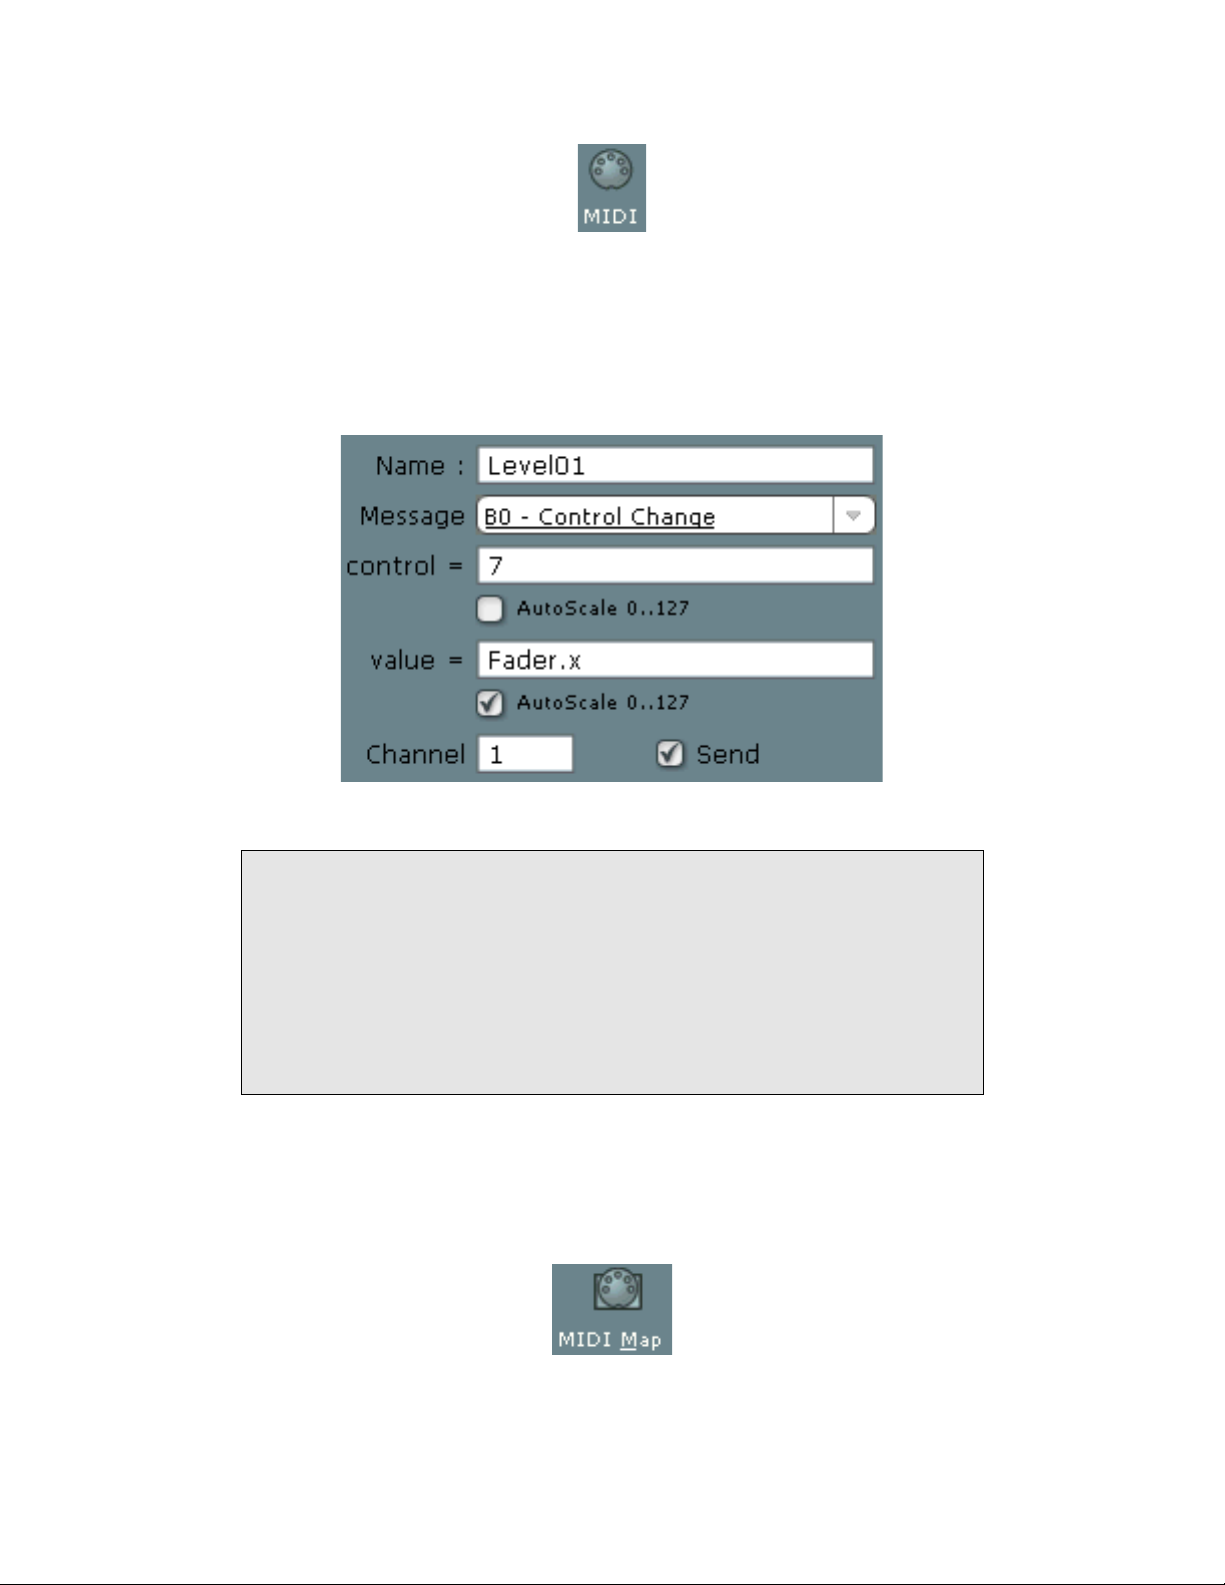
98
• An Edit MIDI assignment window will appear. Change the settings of the dialog to
those shown below (Name is Level01, Message is Control Change, control number is
7, and value is Fader.x). The AutoScale under value should be checked, as should the
Send checkbox at the bottom. These settings configure the Fader to transmit MIDI
controller 7 (volume) with the fader’s 0-1 floating-point values mapped to 0-127.
A MIDI mapping allows you to scale both numbers in MIDI messages
that contain them (notes, control changes, and poly aftertouch). For a
control change message, we can scale both the controller number and the
controller value. The upper AutoScale 0..127 checkbox refers to scaling the
controller number, which we don’t want to do in this case, since we
always want to send out control number 7. The lower Autoscale 0..127
checkbox scales the controller value, whose source is the Fader on the
Lemur. We do want to scale the Fader’s 0-1 value.
• Click OK to save this assignment and close the MIDI assignment editor window.
• Verify the MIDI assignment by clicking on the MIDI Map icon at the top of the
JazzEditor window.
The MIDI Mapping window will appear. It displays the assignment we just configured.
Page 99
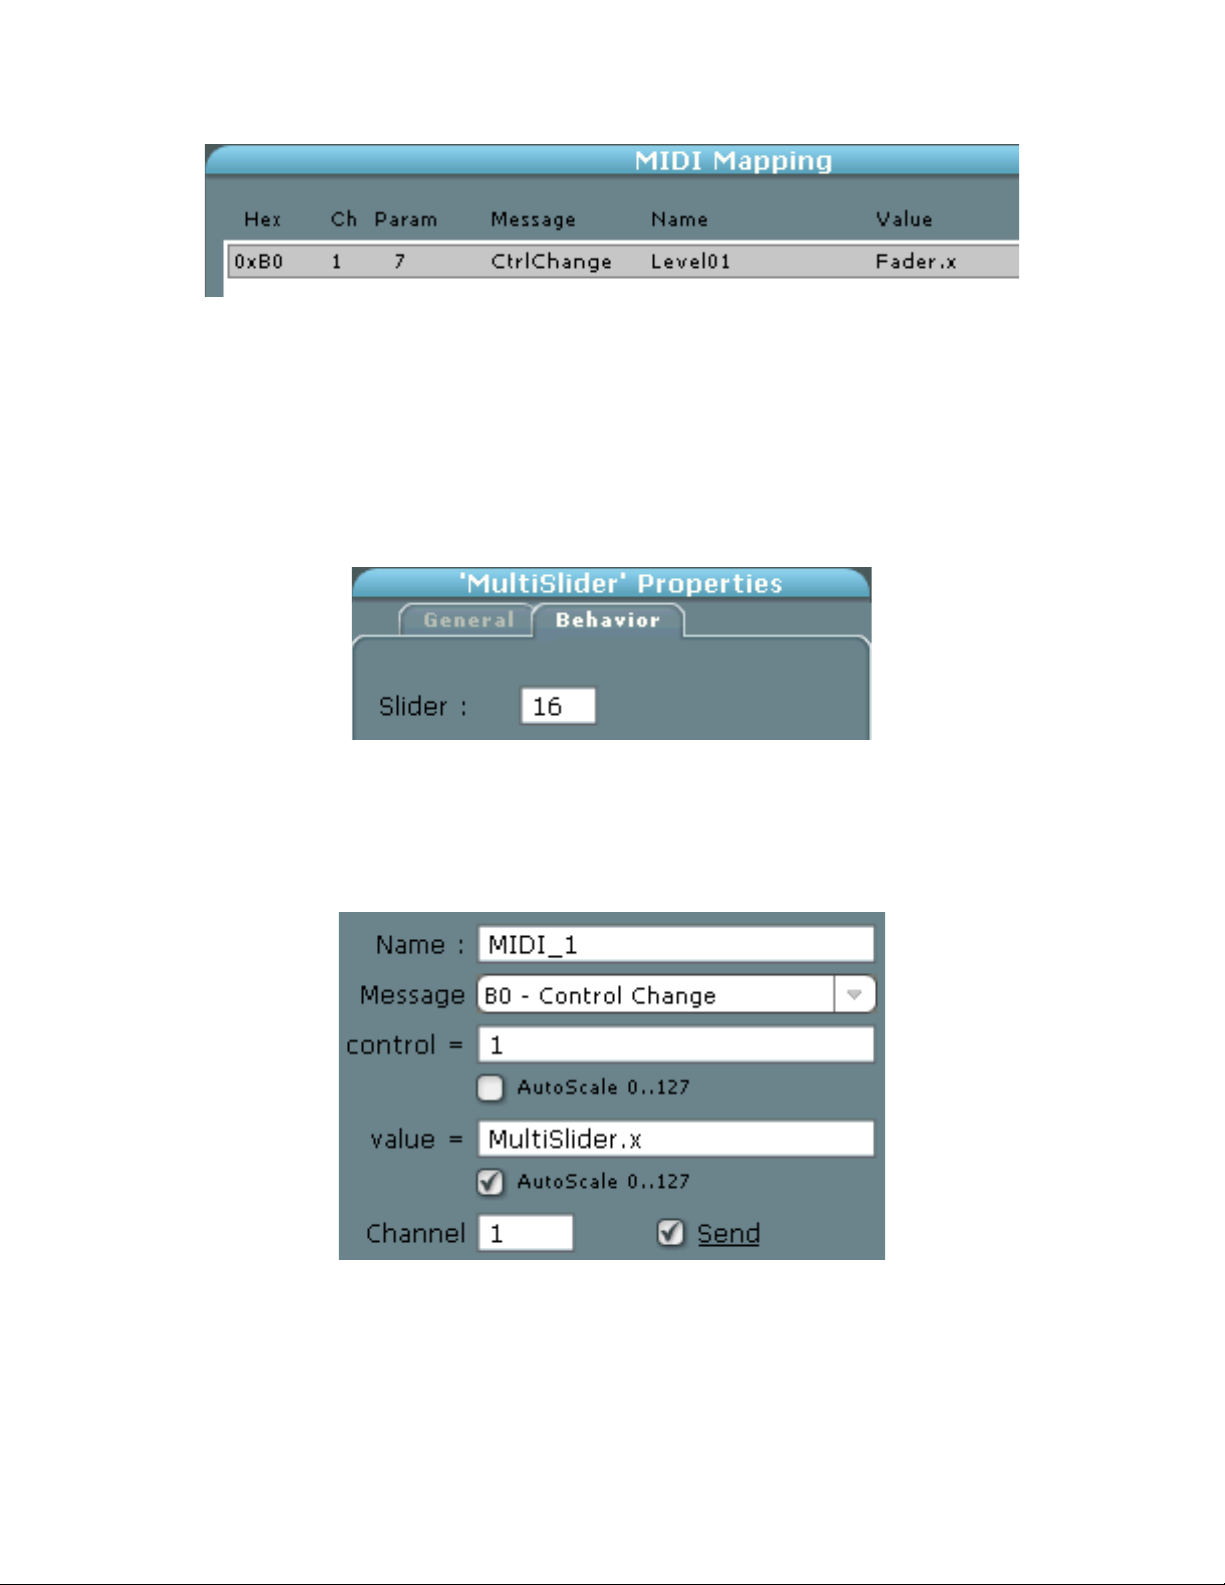
99
Multiple MIDI Controllers
In the next example, we’ll use a MultiSlider object and automatically assign different
control change messages for each slider.
• Create a MultiSlider object. Using the Behavior Properties tab, set the number of
sliders to 16.
• Click the MIDI icon at the bottom of the JazzEditor window to create a new MIDI
assignment. It should appear the same as the example shown below. The only changes
from the last MIDI assignment we created is that the Lemur value comes from
MultiSlider.x instead of Fader.x, and the control number starts at 1 instead of 7.
• Click OK to save this MIDI assignment.
Page 100
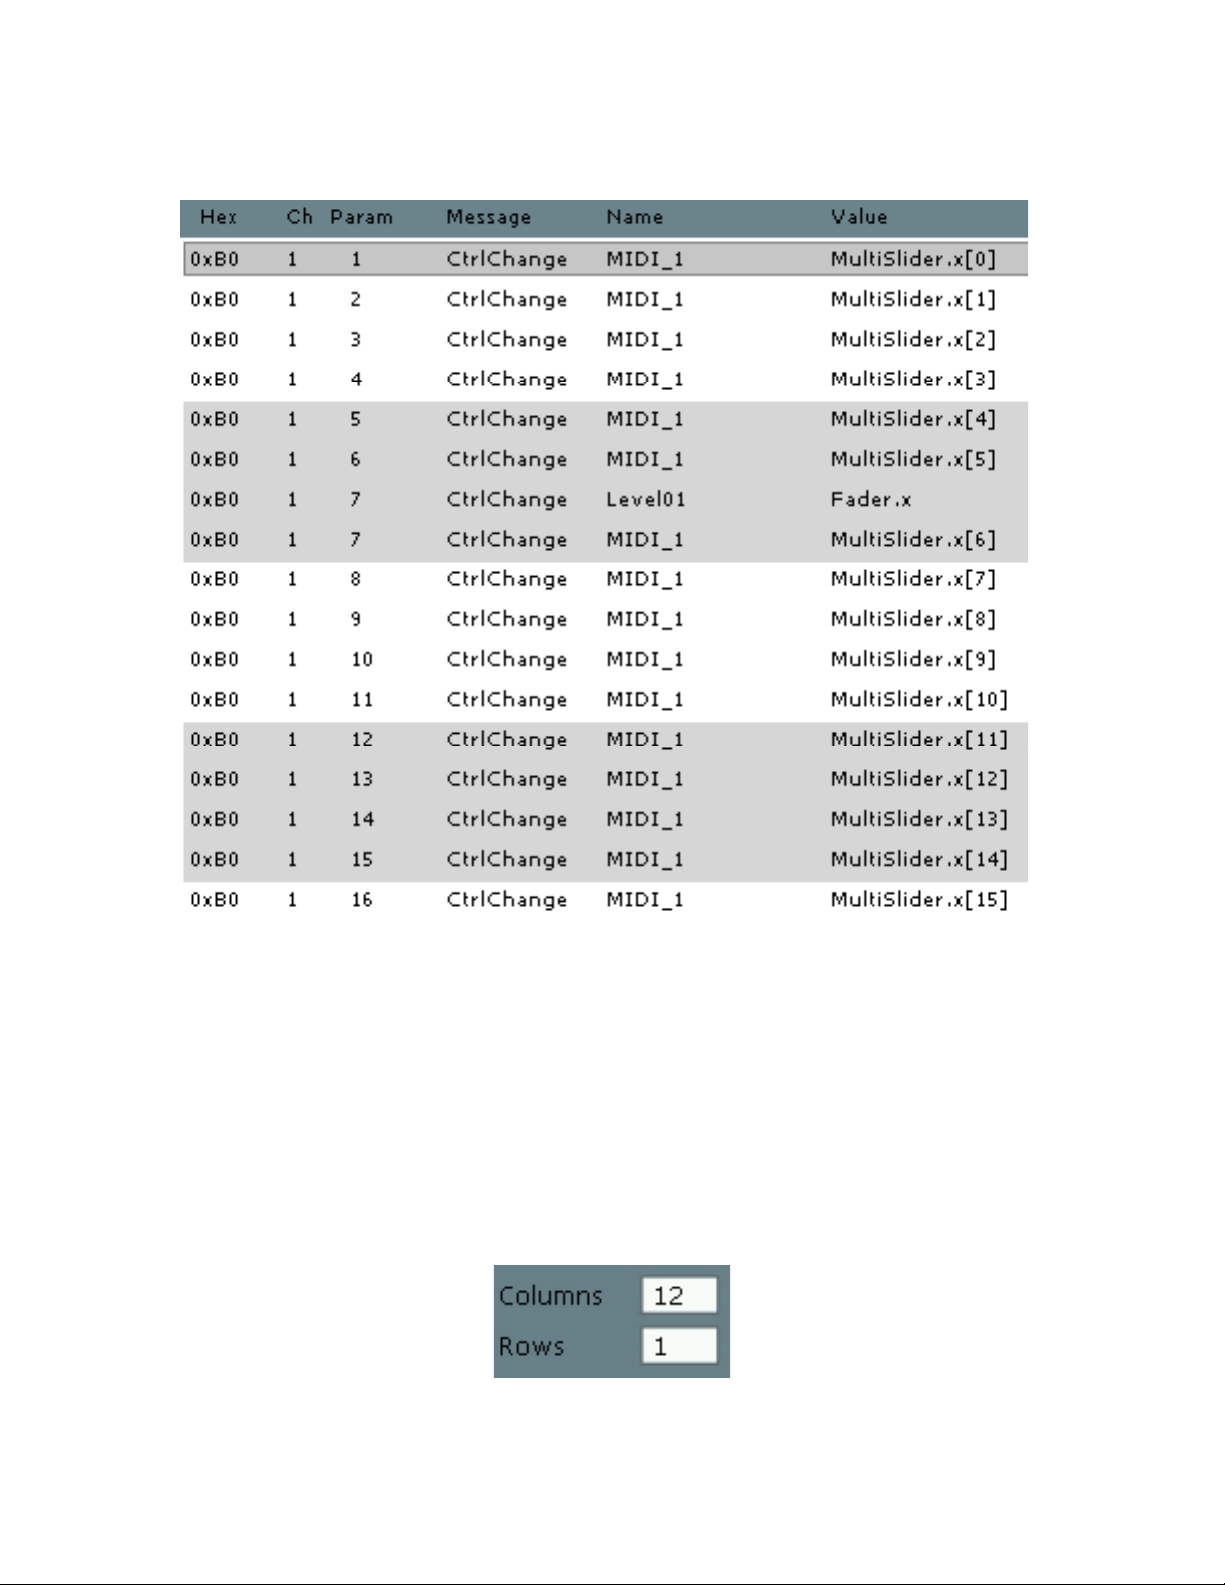
100
• Click the MIDI Map icon to open the MIDI Map window.
Since the MultiSlider has sixteen values instead of just one, the JazzEditor automatically
assigns each slider to successive MIDI controller values. The same thing happens for
other multi-value Lemur objects (such as Multiball).
Mapping MIDI Note Messages
The following example uses the same automatic mapping feature to create a chromatic
one-octave MIDI “pad” on your Lemur that will send MIDI note messages.
• Create a Pads object. Give it 12 columns and one row.
 Loading...