

Jazz DV140 User Manual
1
Video Recorder User’s Manual

2
DV140
FCC statement
This device complies with part 15 of FCC rules. Operation is subject to the following two
conditions: (1) this device may not cause harmful interference, and (2) this device must accept
any interference received, including interference that may cause undesired operation.
Caution: Changes or modifications to this unit not expressly approved by the party responsible
for compliance could void the user’s authority to operate the equipment.
NOTE: This equipment has been tested and found to comply with the limits for a Class B digital
device, pursuant to Part 15 of the FCC Rules. These limits are designed to provide
reasonable protection against harmful interference in a residential installation. This
equipment generates, uses, and can radiate radio frequency energy and, if not installed
and used in accordance with the instructions, may cause harmful interference to radio
communications. However, there is no guarantee that interference will not occur in a
particular installation. If this equipment does cause harmful interference to radio or
television reception, which can be determined by turning the equipment off and on, the
user is encouraged to try to correct the interference by one or more of the following
measures:

3
- Reorient or relocate the receiving antenna.
- Increase the separation between the equipment and receiver.
- Connect the equipment into an outlet on a circuit different from that to which the receiver
is connected
- Consult the dealer or an experienced radio TV technician for help.
Pertinent testing documentation is available for verification.
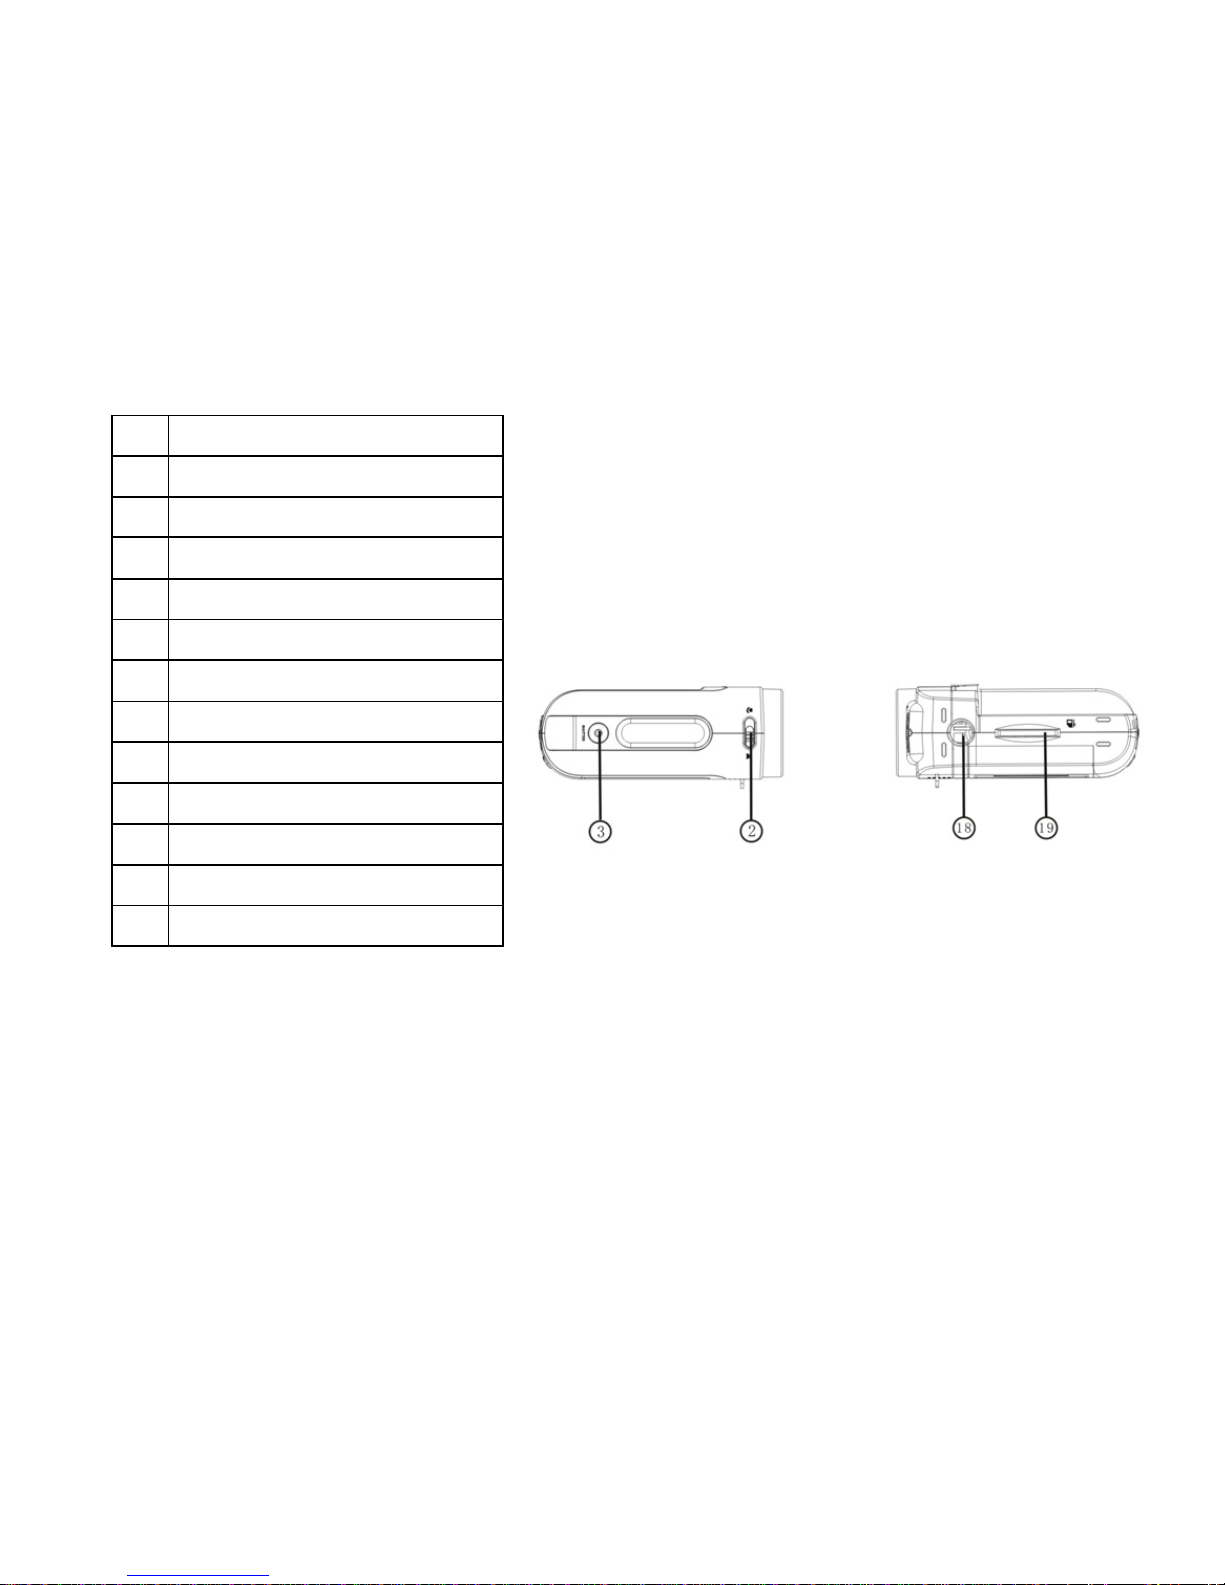
KKnnooww yyoouurr rreeccoorrddeerr
1
Lens
2
Macro
switch
3
Shutter key
4
Busy light
5
Power key
6
OK key
Direction
keys: Up Down
Righ
t/ LED s
witch
7 Le
ft/ Self t
imer
4
8
Mode key
9
Battery lid
10
Speaker
11
Wrist strap loop
12
Wrist strap hole
13
Zoom in key
14
Zoom out key
15
USB/TV out port
16
LED light
17
Self
time
r
light
(red LED)
18
Tripod
socket
19
SD card
slot
20
LCD Screen

5
SSttaarrtt ttoo uussee
NOTE: Please insert three fresh AAA batteries and SD/SDHC memory card to
operate the recorder
1. Installing Batteries
1. Open the battery lid
2. Insert three AAA alkaline batteries according to the terminals polarity location.
3. Insert the front end of the battery lid into the battery latch, press the back end of the
battery lid and then press the lid securely closing the battery compartment.
2. Using SD Card
You must insert and use SD/MMC memory card; recorder will store all recorded
images and video on the card. Max. card size is 8GB.
Note that the card has a tiny “LOCK” slider located on the side.
Set this slider to “non-LOCK” position before inserting and taking video or still images.
1. Push the SD card into the slot until it is completely inserted.
2. To remove / replace the card, lightly press inserted card and recorder will eject the
card.
3. The SD card has to be formatted first: Press OK key and then press Right Direction
key to enter Setup Menu. Press Up and Down Direction key to select ‘Format’ option.
6
Press Right Direction key and then press Up or Down Direction key to select ‘Yes’ option.
The memory card will be formatted automatically.
Please note that all the previous DATA in card will be deleted when formatted.
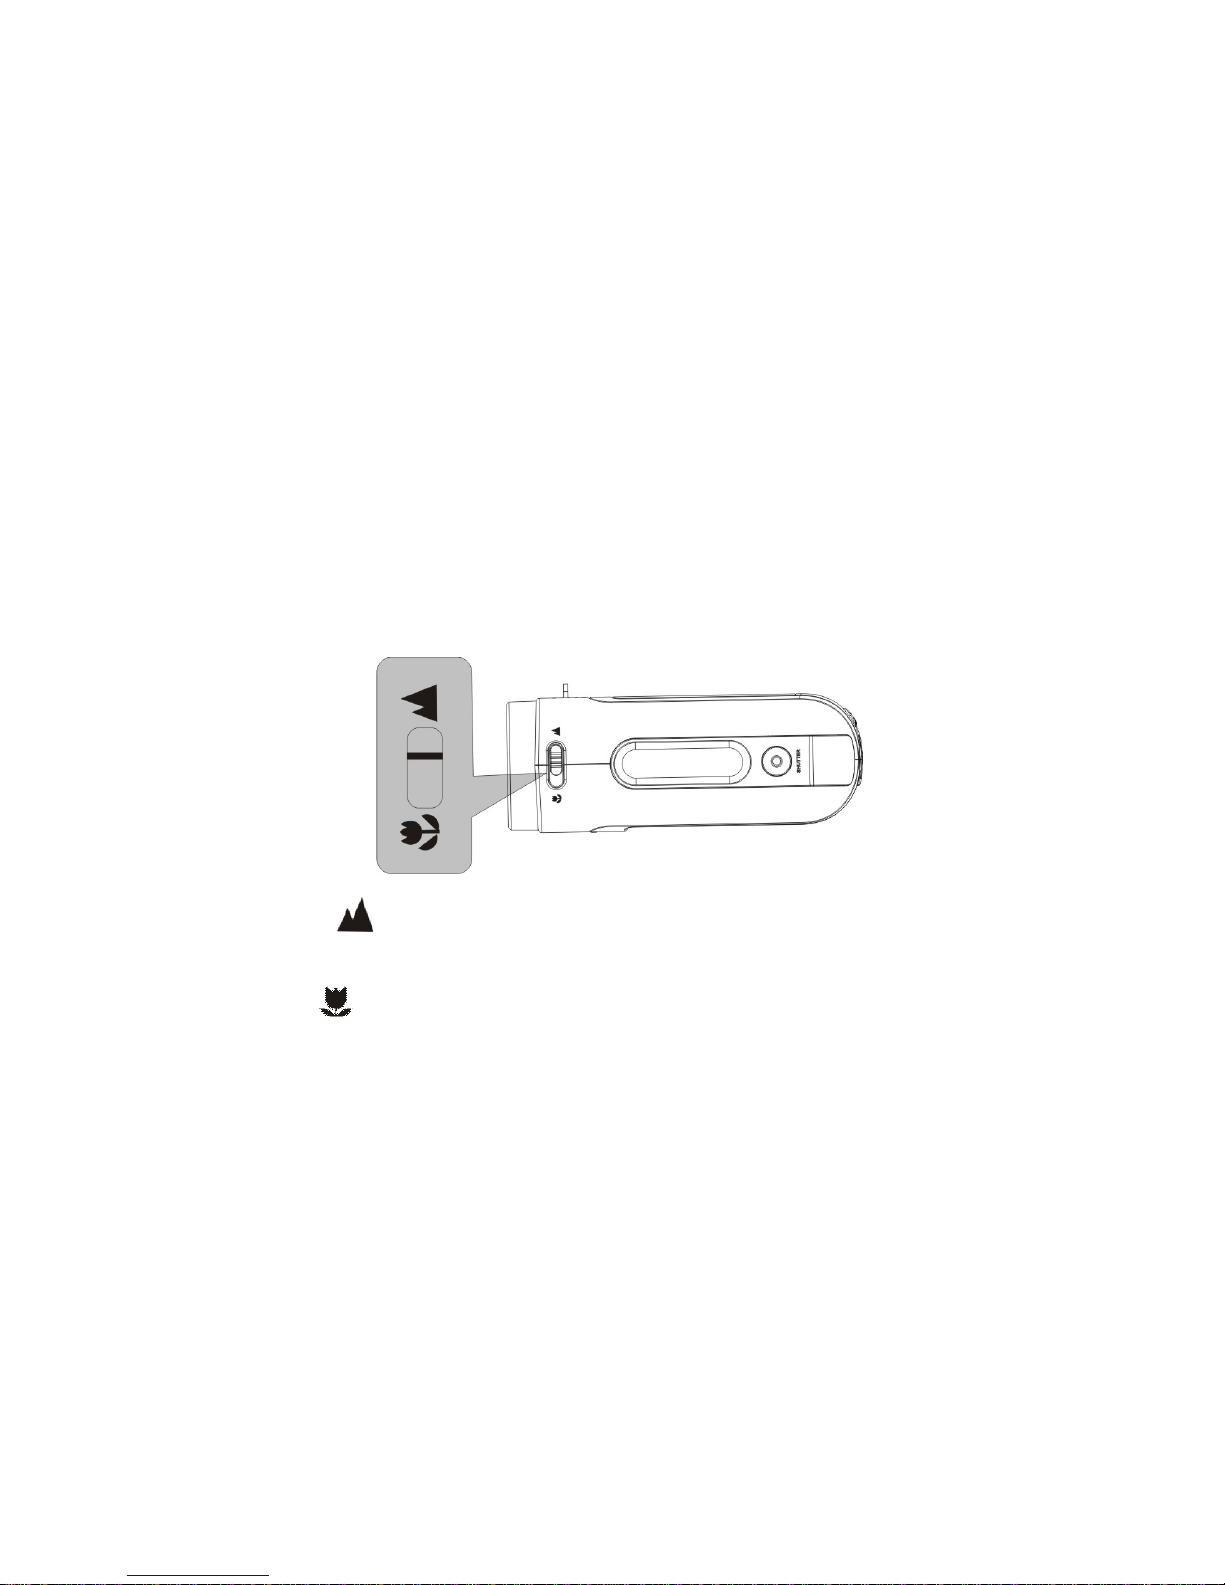
3. Selecting Lens Mode
Slide the Macro / Normal lens selector to set either Normal (for everyday use) or Macro
mode (only for close-up) depending on the distance of the main subject.
1. Normal setting is suitable for shooting subjects located 140cm or more away
from the recorder
2. Macro setting is suitable for shooting close-up subjects 2.5 -5cm away.
4. Power ON / OFF the recorder
1. Power ON: press the Power key for a second or two to turn the recorder ON.
2. Power OFF: press the Power key (when the recorder is active) to turn the power

7
OFF.
Auto Power OFF: When recorder has been left idle for 1 minute, the recorder will turn
OFF automatically. The automatic power OFF delay time can be set at 1, 3 or 5
minutes. Go to Setup Mode / Power Save and make adjustment if necessary (see
also Section 11 Setup the recorder).
3. Low power: When the batteries become exhausted, the LCD display will display low
battery icon and the Auto Power feature will turn the recorder OFF.
5. Selecting the MODE of the recorder
When activated, the recorder is set in the Video (recording) mode.
Press the MODE key to change or select desired mode:
Video (default mode) – recording video clips
Camera mode – taking still photos, images
Playback mode – playing back recorded video
or displaying still photos
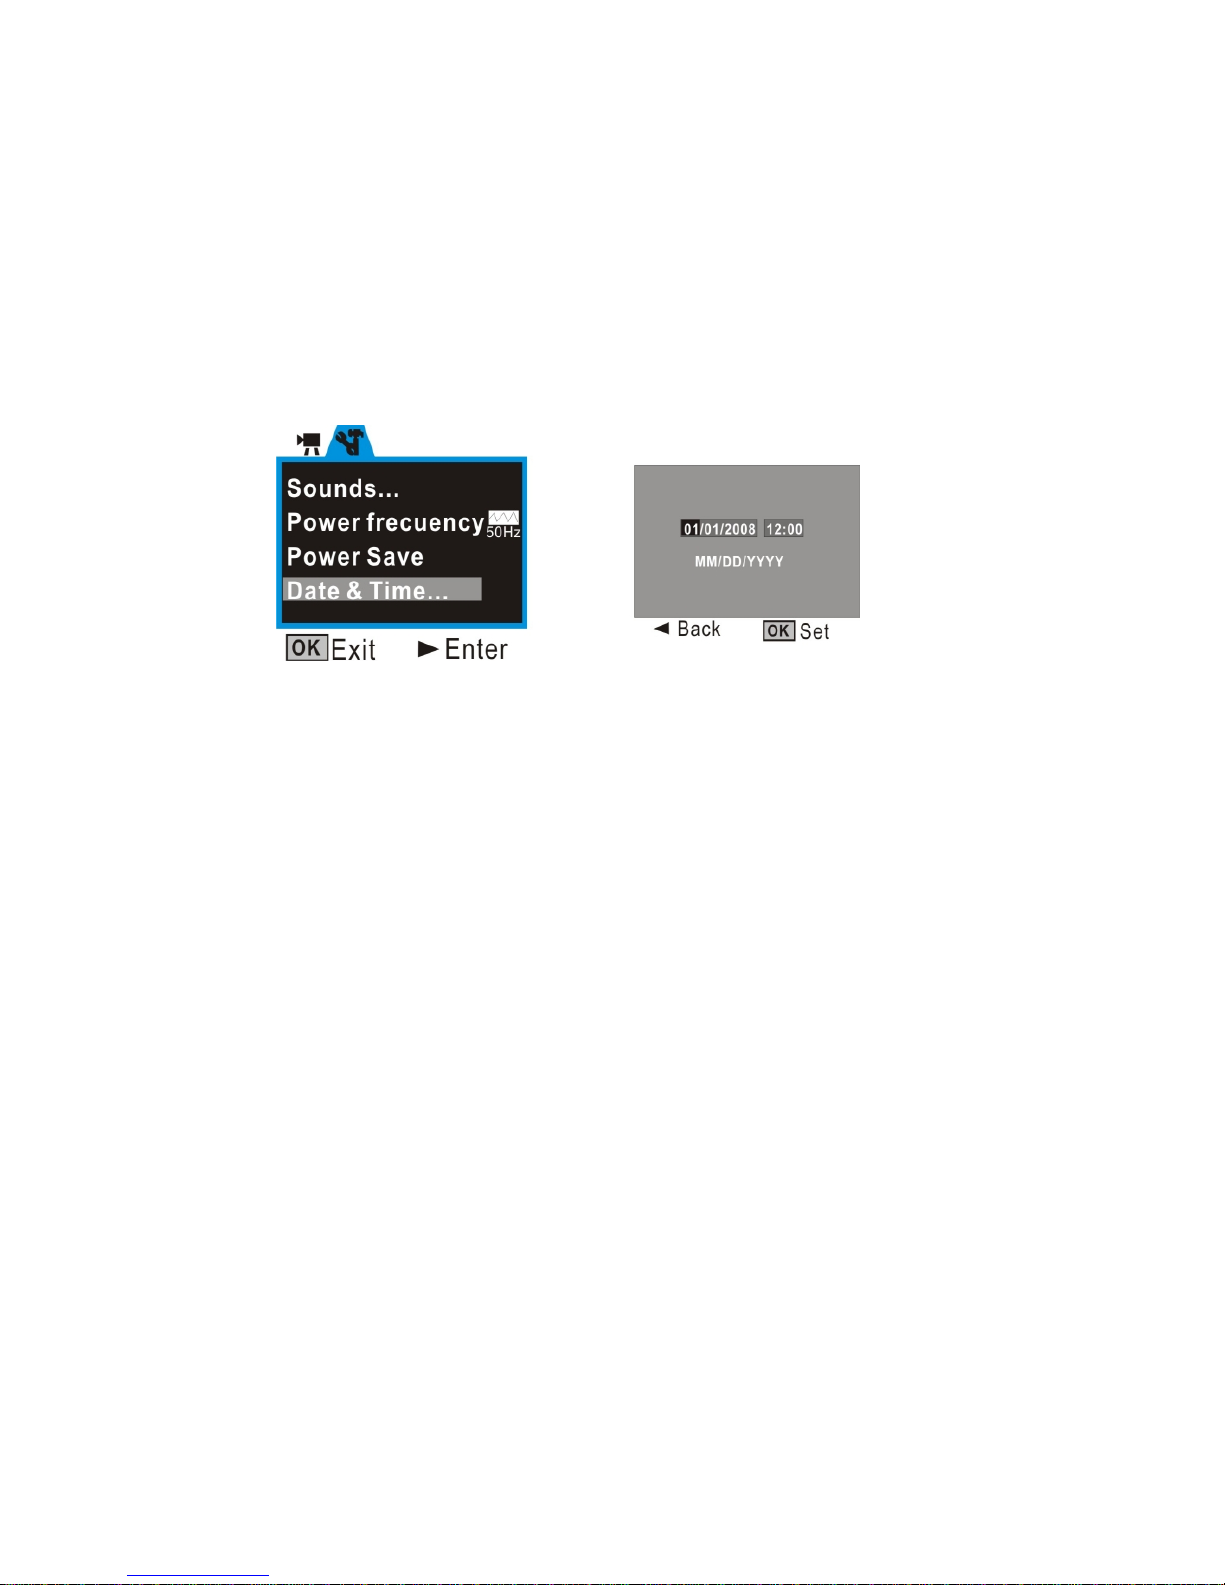
6. Setting Date and Time:
Press OK key. Then press Right Direction key to enter Setup Menu. Press Up and
Down Direction key to select ‘Date & Time’ option. Then press Right Direction key and the
current system date and time are displayed on the LCD screen.
8
To change the date and time, use the Direction key: Up or Down to adjust, Right key to
move the cursor, OK key to confirm, then OK key to Exit setup mode.
To leave the date and time unaltered, press Left key and then OK key to Exit setup mode.
7. Indicators / LED lights:
Busy light - the light will turn on when the recorder is busy recording video, capturing
photo, processing data, or being connected to computer.
LED light – this supporting light may be used when recording video/ pictures in dark
environment. Please note that this lamp is effective for short distances only.
Self Timer light – indicates that the recorder Self Timer has been activated.

9
8. Video mode:
Preview mode
Recording the Video clip
1. Open the LCD screen.
2. Press / hold the Power key and turn the recorder ON
3. Press the Shutter key to start recording video
4. To stop recording, press the Shutter key again.
Note that if the memory card is full, recorder will stop recording by itself.
5. Zoom IN or zoom OUT during recording by pressing Zoom keys; recorder has 4X
digital zoom range.
Video Recording Icon
SD card
icon; card inserted
Video resolution; it can be selected at 640x480 or 320x240
The remaining time for recorded
Video; ex 1 minute 8 seconds left
Battery icon
The LED Lamp is turned ON
Zoom ratio range
 Loading...