

Jaypro Sports PB-95 User Manual
Jaypro Sports
976 Hartford Turnpike
Waterford, CT 06385 USA
(800)243-0533
www.jaypro.com
(800)988-3363 Fax
MODEL NO.:
PRODUCT NAME:
EFFECTIVE DATE:
DRAWN BY: MT
1/24/2011
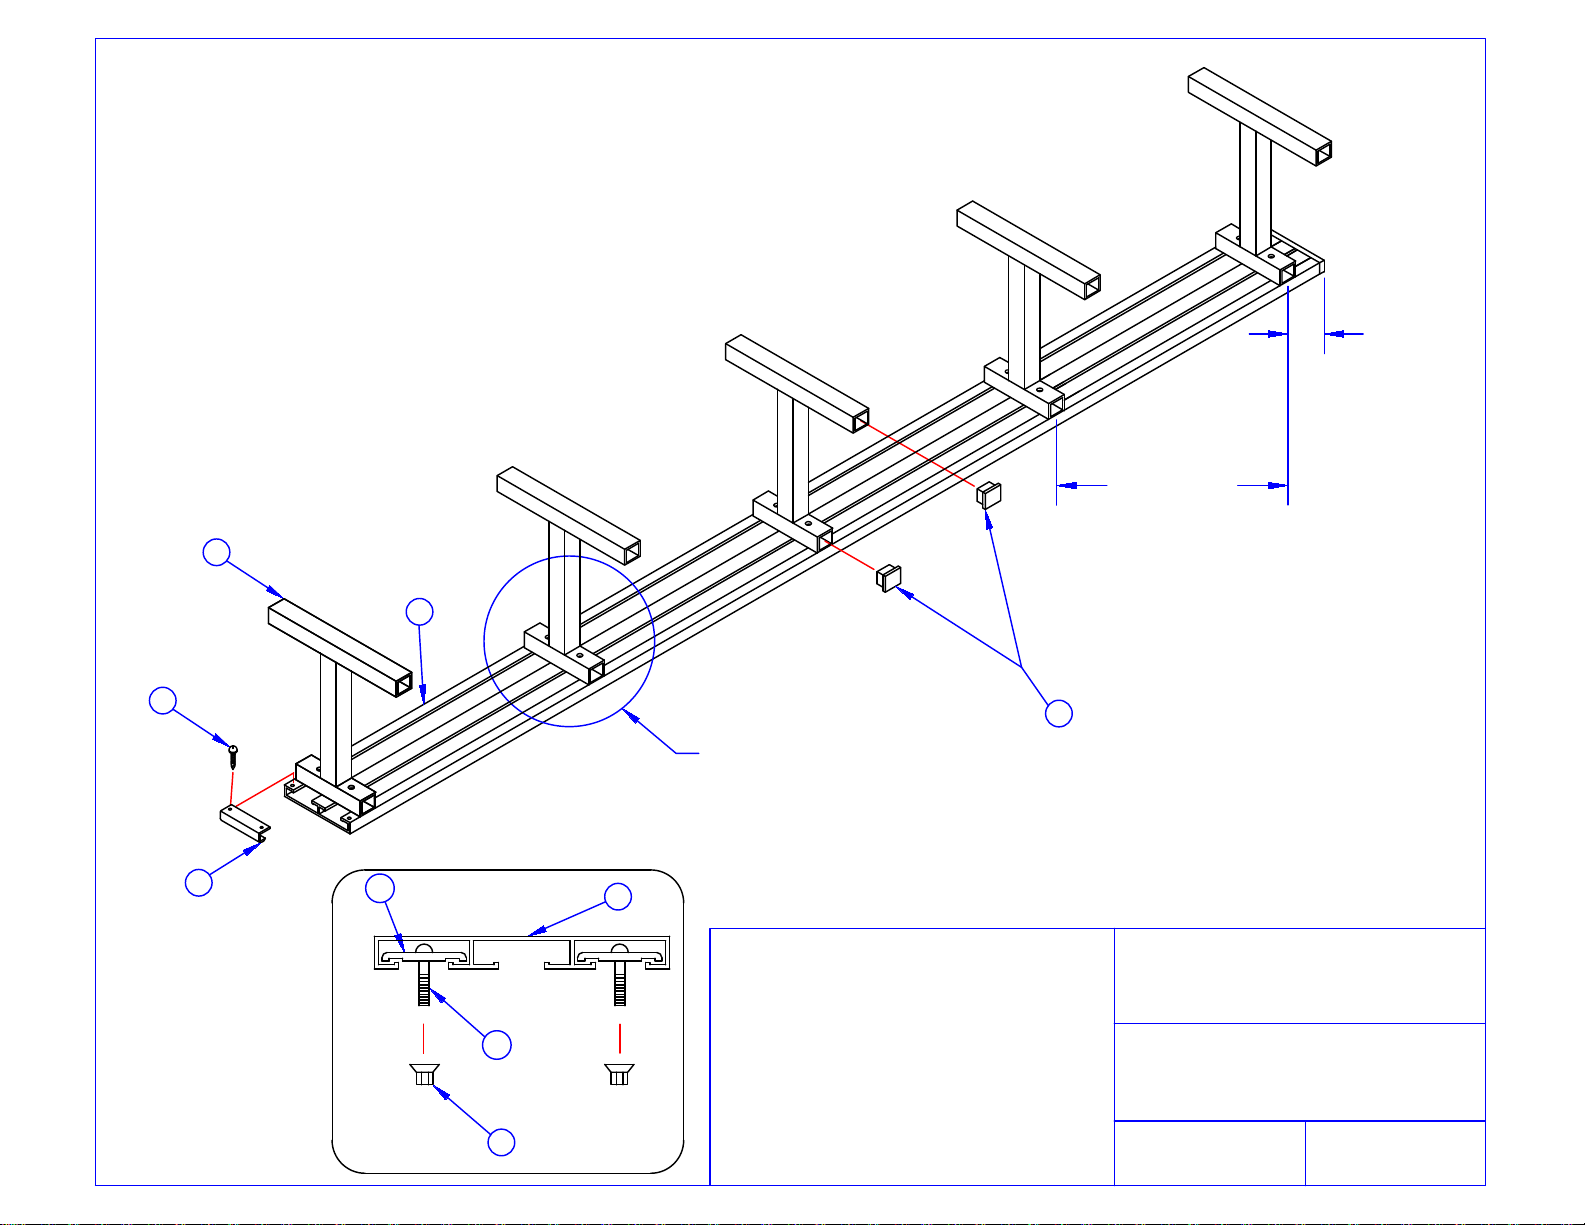
76 1/2"TYP
CTR TO CTR
SEE VIEW
A-A
4
8
1
2
7
VIEW A-A
7
6
5
3
REPLACEMENT, PLEASE CALL YOUR DEALER
MENT MAY BE HAZARDOUS. FOR REPAIR OR
3) ALTERATION OR MODIFICATION OF EQUIP-
INTENDED, MAY BE HAZARDOUS.
2) USE OF THIS EQUIPMENT OTHER THAN
PERFORMED BEFORE EACH USE
INSPECTION AND MAINTENANCE MUST BE
HIGH PERFORMANCE FROM THIS EQUIPMENT,
1) FOR SAFE OPERATION AND CONTINUED
PLEASE NOTE:
PB-95
27' PLAYERS BENCH
9"TYP
EACH END

JAYPRO SPORTS
27’ PLAYER’S BENCH, PB-95
LIST OF MATERIALS
PIECE # PART # DESCRIPTION QTY.
1 AR5111 SEAT PLANK 27’ 1
2 PB751 BENCH LEG 5
3 HN5046 5/16” FLANGE NUT 10
4 EP0018 2” x 2” END CAP 20
5 HB5030 5/16”-18 x 3” CARRIAGE BOLT 10
6 AR5044 HOLD DOWN CLIP 10
7 AR5045A END CAP 2
8 HS5035 #8 PAN HEAD SCREW x ½” 4
ASSEMBLY INSTRUCTIONS
TOOLS REQUIRED: PHILLIPS SCREWDRIVER BIT W/ ELECTRIC DRILL (1),
½” SOCKET WRENCH OR ADJUSTABLE WRENCH (1)
1) Slip the end caps (7) snugly onto each end of the plank (1). Using the electric
drill, assemble a self-drilling screw (8) through the cap and into the flange of
the plank. Two screws are required per end cap.
2) For easiest assembly, position seat plank (1) on a level raised surface such
as a desk top, bleacher seat or work bench. Place the carriage bolt (5) and
bolt clips (6) approximately into place within the slots of the plank. Note that
the legs should be no more than 8” from the plank edge or 9” from edge to
center leg.
3) Position the legs as shown and loosely assemble the hardware illustrated in
detail ‘a-a’. Do not fully tighten the hardware at this time. Level the bench
and make sure the legs are adequately spaced apart. Tighten all fasteners
fully.
REV- 5/9/2011
 Loading...