

Page 1

Quick
Start!
JAVELINTMJ310
Colour Card Printer
Before starting to work with your new JAVELIN
TM
card printer, please refer to this Quick Start guide.
For more complete information regarding all
aspects of your printer’s operation, please refer to
the printer user’s manual on the CD rom.
www.engenyus.com
Cleaning
In order to maintain printer performance, it is important that it is cleaned
regularly.
Refer to printer user’s manual chapter 4 for cleaning procedures.
Maintenance
It is very important to maintain your Javelin card printer properly according
to the instructions provided in the printer user’s manual.
If you have any difficulty with your new Javelin card printer and have not been
able to find a solution in the user’s manual, please contact your dealer or
visit our website: www.engenyus.com
How to return your printer
It is very important that all packing material is safely kept in case you need to
move or re-ship the printer. Be sure the complete packing material is stored
in a dust free environment.
Remove card cartridge, card output hopper and card cleaning cartridge
prior to packaging the printer for shipment and place them back in the
dedicated plastic bags and areas in the printer box.
Before returning the printer to your dealer or to engenyus, please refer to
page ii of the printer user’s manual.
Thank you for choosing the JAVELINTMcard printer!
J310 QS v.1.1
October 2002
Page 2
Setup
1. Unpack your JAVELIN
TM
card printer
After unpacking your Javelin card printer, make sure the following items are
included:
If any items are missing, please contact your dealer.
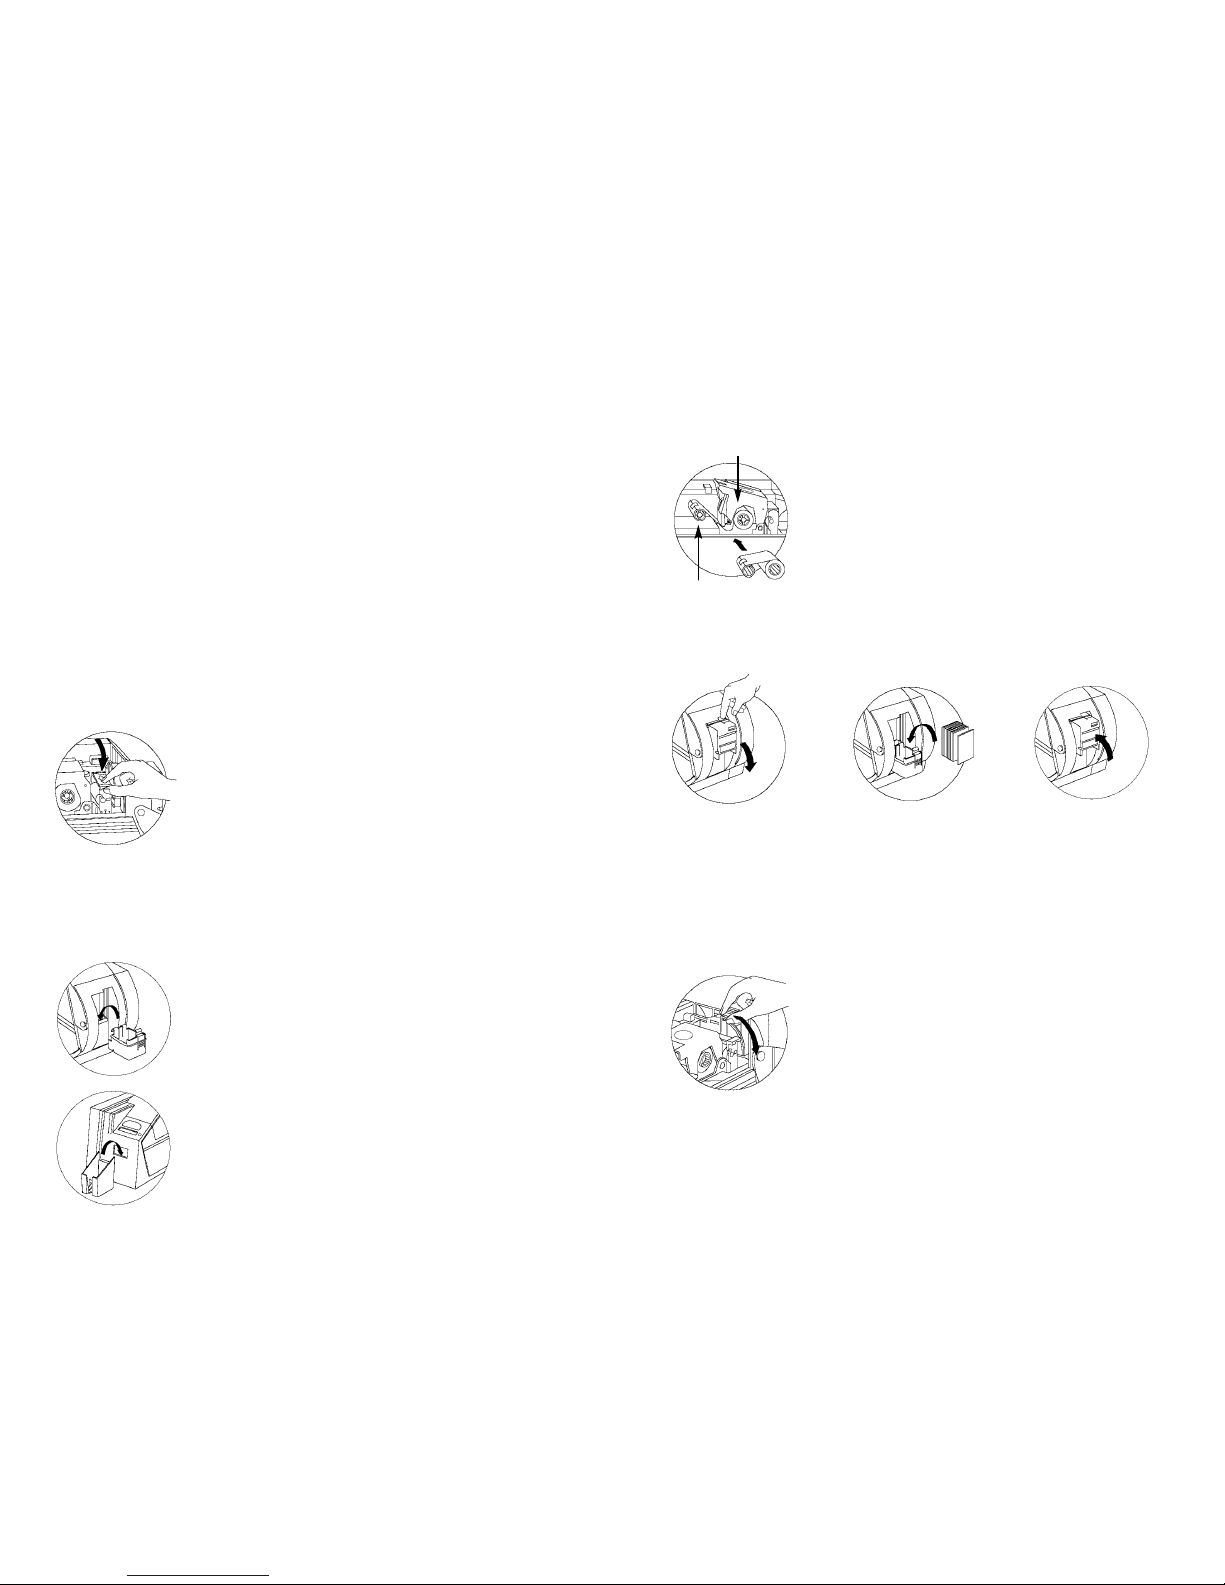
2. Install card cleaning cartridge
The card cleaning cartridge is packed separately from
the printer in a protective plastic bag. Remove
carefully and peel off tape from the cleaning roller
before installing it.
Refer to printer user’s manual chapter 2 for more
information about the cleaning cartridge.
3. Install card cartridge & card output hopper
This two items are delivered separately from the
printer in protective plastic bags.
Refer to printer user’s manual chapter 2 for more
information.
4. Loading ribbon
First, turn on the power to the printer and raise the
print head. Ribbon loading involves the placement of
the ribbon onto the supply and take-up spindles. As
soon as the ribbon is installed and the print head is
locked down, the spindles will automatically rotate to
take up any slack and to synchronize the ribbon to the
correct panel.
Refer to printer user’s manual chapter 2 for more
instructions.
5. Loading cards
First shuffle a stack of new cards to reduce any electrostatic charge.
Always handle cards by their edges.
Refer to printer user’s manual chapter 2 for more instructions.
6. Set card thickness control lever
This item can be operated by the user to set the card
thickness and to prevent more than one card feeding
into the printer at the same time and causing a jam.
Simply move the lever to adjust correct card
thickness position.
Refer to printer user’s manual chapter 2 for more
information.
7. Starting to print cards
First connect the interface cable and install the windows driver on your pc.
Refer to printer user’s manual chapter 3 for more instructions.
❏ Power cable
❏ Card cartridge
❏ CD rom
❏ Interface cable
❏ Cleaning kit
❏ Printer ribbon
❏ Card output hopper
❏ Cleaning cartridge
❏ Quick Start guide
(this document)
SUPPLY SPINDLE
TAKE-UP SPINDLE
Step 1 Step 2 Step 3
 Loading...