

Page 1
Digital Converter Box
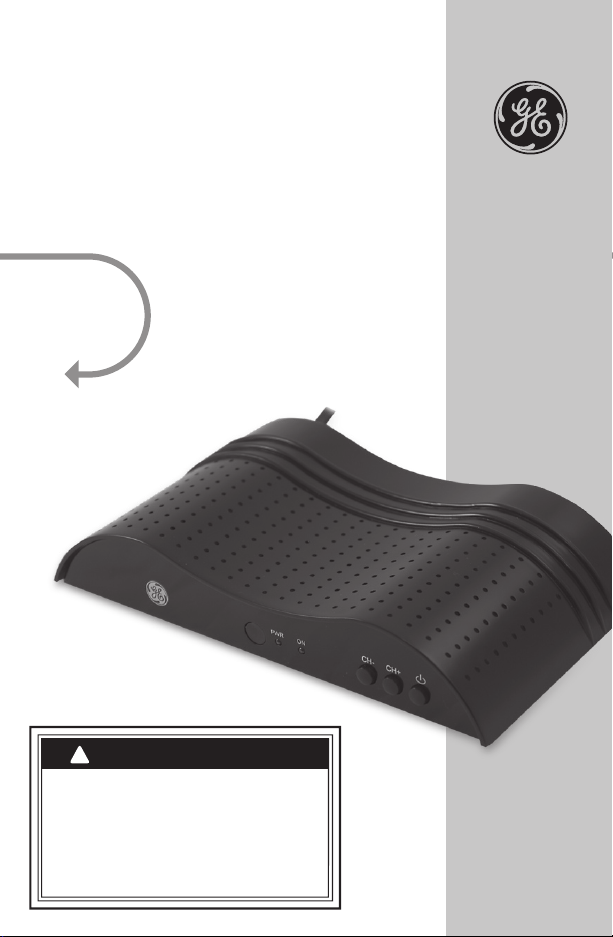
Digital Converter Box will
automatically shut off
- For energy savings the unit is shipped with
sleep mode enabled at four hours as
required by the governing agency. To adjust
the setting or turn sleep mode off. See pg 14
IMPORTANT NOTICE
!
See Back
Cover for
SPECIAL
OFFER!
User’s Manual
Page 2

Table of
Contents Introduction 3
Warnings/Safety 5-7
Getting Started 8
Battery Installation 8
Converter Box 9
Remote 10
Connection 11
Converter Box Installation 11
Setup 12
Navigating the Menu 13
Apps 13
Channels 14
Screen Format 15
Parental Control 15-16
Closed Caption 17
Time Zone 18
Factory Default 18
Features 19
Troubleshooting 20-21
FCC 22
Specifications 23
2
Warranty 23
Page 3

The Digital Transition
Congratulations you are now prepared for the
digital transition. When analog signals end,
you will not be left with a blank screen on the
TV. Instead, the GE Digital Converter Box will
receive the new digital signals and convert
them so you can continue to watch free
“over-the-air” broadcasts on your analog TV.
It is truly an exciting time in television
history. In the same way, the black & white
transformation to color dramatically improved
the TV. Digital Television will heighten your
TV experience.
Advantages digital television has to offer
include superior picture quality, improved
sound quality, electronic programming guide
and more channels. That’s right! Depending
on the broadcast area; you may receive two,
three, or even four more times the channels.
Thank you for choosing GE!
3
Page 4

Risk of electric shock
• Keep children away
• Do not use in wet locations
Risk of fire
• Do not exceed electrical
ratings
WARNING
To reduce the risk of
electric shock
• Do not take the cover off
• No part of the receiver can
be repaired by the user
• Please consult a qualified
technichian for any repairs
WARNING
Safety
CAUTION
RISK OF ELECTRIC SHOCK
DO NOT OPEN
CAUTION: TO REDUCE THE RISK OF ELECTRIC
SHOCK, DO NOT REMOVE SCREWS.
NO USER-SERVICEABLE PARTS INSIDE.
REFER SERVICING TO QUALIFIED
SERVICE PERSONNEL.
Precautions
The lightning flash with arrowhead symbol within an
equilateral triangle, is intended to alert the user to the
presence of uninsulated “dangerous voltage“ within the
product’s enclosure that may be of sufficient magnitude to
constitute a risk of electric shock to persons.
The exclamation point within an equilateral triangle is
intended to alert the user to the presence of important
operating and maintenance (servicing) instructions in the
literature accompanying the product.
WARNING:
To prevent fire or shock hazard, do not expose this device
to rain or moisture. Dangerous voltage is present inside the
product. Do not remove the product enclosure.
4
CAUTION:
Insert the power plug into the wall outlet with AC power of
120V/50-60HZ. The AC plug is polarized and will only go in
the socket one way. Contact a licensed electrician, if you
can not get the plug to fit securely in the socket.
Page 5

Important
Safety Notes
1. INSTRUCTIONS:
Read and follow all safety and operating
instructions before operating this product.
Heed all warnings on the product and all
warnings contained in the user’s manual.
Be sure to keep these instructions for
future reference.
2.
CLEANING:
Use a dry cloth only.
3. VENTILATION OPENINGS:
Never block the ventilation openings on the
enclosure of the product. Do not place anything
on top of the product. Avoid operating the Digital
Converter Box in enclosed areas like cabinets and
bookcases. Do not place the product on soft
surfaces such as a bed, sofa, carpet, rug, near
drapes, curtains, or walls.
4. OBJECT AND LIQUID ENTRY:
Never push objects of any kind into the ventilation
openings of this product. Doing so may result in
personal or property damage or injury, including
fire or electrical shock. Never spill liquid of any kind
on the product.
5. HEAT:
6. POLARIZED PLUG:
For safety reasons, this product is equipped with
a polarized alternating current line plug with one
blade wider than the other. It will only fit into the
AC wall socket one way. Do not attempt to defeat
the safety feature of the polarized plug. If you
have difficulty fully inserting the plug, contact a
licensed electrician for help.
7. POWER CORD PROTECTION:
The power cord of this product should be routed
to avoid being walked on or pinched at plugs,
receptacles and the point where exiting from
the Digital Converter Box.
8. ATTACHMENTS:
Install product away from any heat sources such
as radiators, heat registers, stoves, or other devices
that generates heat. Avoid placing the Digital
Converter Box on top of all potential heat sources
like amplifiers.
Only use attachments and accessories
recommended by the manufacturer.
5
Page 6

Important
Safety Notes
9. LIGHTNING:
Power surges that may occur due to lightning can
damage sensitive electronics. Unplug the product
from wall power and disconnect the antenna
from the Digital Converter Box during lightning
storms and when unused for long period of times.
10. SERVICING:
There are no user serviceable parts within
this product. This product should be serviced
by qualified personnel only. Do not attempt
to service this product yourself. Servicing is
required when the product has been damaged
in any way, such as power supply cord or plug
is damaged, liquid has been spilled or objects
have fallen into the Digital Converter Box, the
Digital Converter Box has been exposed to rain
or moisture, does not operate normally, or has
been dropped.
11. OVERLOADING:
Do not overload wall outlets, extension cords
or convenience receptacles as this can result
in a risk of personal or property damage or
injury, including fire or electric shock. Always
operate any electrical device in accordance with
applicable electrical codes.
12. WATER AND LIQUIDS:
Do not use this product near any sources of
water such as a bath tub, kitchen sink,
swimming pool, basement, washing machine.
Never expose the apparatus to dripping or
splashing or place items such as vases,
aquariums, any other item filled with liquid, or
candles on top of the Digital Converter Box.
6
Page 7

Important
Antenna Lead-In Wire
Ground Clamp
Electric Service
Equipment
Antenna Discharge Unit
(NEC Section 810-20)
Grounding Conductors
(NEC Section 810-21)
Grounding Clamps
Power Service Grounding
Electrode System
(NEC Art 250, Part H)
Safety Notes
13. ELECTRIC SHOCK:
Do not remove the enclosure of the product.
There are no user-serviceable components.
All service/repair should be carried out by
qualified personnel.
14. POWER SOURCE:
Use only the type of power source indicated in
the product specifications. If you are uncertain
about the power supplied to your home, consult
a certified electrician.
15. SMOKE:
If the device should emit smoke or unusual odor,
immediately disconnect the power cord from
the wall outlet. Have the Digital Converter Box
serviced by a licensed technician.
16. BATTERIES:
Spent or discharged batteries must be recycled
or disposed of properly in compliance with
all applicable laws. For detailed information,
contact your local county solid waste authority.
17. Keep a 4 inch minimum distance around the
Digital Converter Box for sufficient ventilation
18. Outdoor Antenna Grounding:
If the outside antenna is connected to the digital
Converter Box, make sure the antennas system
is grounded. This will provide some protection
against built-up static charges and voltage
surges. Article 810 of the National Electrical
Code, ANS/NFPA 70 provides information
with regard to proper grounding of the
mast and supporting structure, grounding of
the lead-in wire to an antenna-dicharge unit,
size of grounding conductors, location of
antenna-dicharge unit, connection to grounding
electrode, and requirements for the electrode.
7
Page 8

OK
1
2
9
8
7
65
4
3
0
-
100
ON/OFF
VOL+
CH+
VOL-
RECALL SIGNAL ZOOM MUTE
AUDIO INFO
EXIT MENU SUBTITLE EPG
CH-
Remote
Getting Started
PWR
ON
CH- CH+
Smart Digital Converter Box - 22729 or
Digital Converter Box - 22730
+-+
-
“AAA” batteries
RF Cable
Batteries may leak harmful
liquids or ignitable materials
or explode causing injury
and product damage.
• Do not mix old and new
or other battery types.
• Replace all batteries at
the same time.
• Replace fully discharged
batteries immediately.
CAUTION
AAAAAA
Push
Below are all the items that are included with
your Digital Converter Box
You can use a composite audio/video cable instead of the RF cable if
your TV is compatible. (Not Included)
Installing the Remote batteries
1. On the back of the remote, push up on the tab
and lift the cover off.
2. Match the batteries to the + and -
the battery case, then insert 2 “AAA”
Alkaline batteries.
3. Press the battery cover back
marks inside
into place.
8
Page 9

PWR ON
CH-
ANT IN ANT OUT CH3 CH4 R L VIDEO
AUDIO
CH+
Front
Back
Smart Antenna
100~120VAC
60Hz
Consumption : 10W MAX
Connection for a
Smart Antenna
(Not included in
some models)
Power light,
always on when
plugged in
Green light
on when
box is “ON”
Infared
sensor
Turns power
ON/OFF
Channel
Down
Channel
up
Plugs in to wallVideo Output
(Yellow)
Audio Lft
(White)
Audio Rt
(Stereo/Red)
Channel selection
(only needed if
ANT OUT is used)
Antenna Port
TV Port
Converter Box
Digital Converter Box will shut off automatically
For energy savings the Digital Converter Box is shipped
with sleep mode enabled at four hours as required by the
governing agency. To adjust the setting or turn sleep mode
off go to pg 14.
9
Page 10

OK
1
2
9
8
7
65
4
3
0
-
100
ON/OFF
VOL+
CH+
VOL-
RECALL SIGNAL ZOOM MUTE
AUDIO INFO
EXIT MENU SUBTITLE EPG
CH-
Channel numbers
Channel up
or down
Volume up
or down
Power ON/OFF
Menu Setup
Remote
Power ON/OFF
Control
AUDIO - Function not available on these models.
INFO - Program information of the selected channel.
EXIT - Returns to the previous Menu within the
larger menus.
MENU - Displays the main Menu on screen.
SUBTITLE - Displays closed caption text.
EPG - Use to display the Simple Guide.
- Turns the Smart Digital Converter
Box ON or OFF.
OK - Executes the selected option in
menu or enters the value in any input
mode or it displays the channel list while
watching a program.
VOL+/VOL - Increases or decreases the
volume out of the Digital Converter Box.
CH-/CH+ - Goes up or down through
the channel numbers.
Menu Setup
RECALL - Return to previous channel
SIGNAL - Check signal reception
strength of the channel you are
watching. Use to optimize placement of
the antenna.
ZOOM - Choose between three screens
settings letter box, full and center.
MUTE - Turns sound off.
10
Page 11

Connecting
ANT IN ANT OUT CH3 CH4 R L VIDEO
AUDIO
Back
Smart Antenna
100~120VAC
60Hz
Consumption : 10W MAX
Select Channel 3 or 4
ANT IN ANT OUT CH3 CH4 R L VIDEO
AUDIO
Back
Smart Antenna
100~120VAC
60Hz
Consumption : 10W MAX
Red
White
Yellow
Converter Box
1. Connect either a
standard antenna
into the ANT IN port
or a Smart Antenna
into both the Smart
Antenna port and
ANT IN port.
2.
Connect the TV
from the ANT OUT
port to TV’s.
3. Select channel 3 or
4 on the converter box
(choose the channel
not used in your area).
Turn your TV to the
same channel
4. Plug-in to AC
Connecting TV with RF Cable (included)
Smart Antenna
is a feature in
Model 22729
1. Connect either a
standard antenna
into the ANT IN port
or a Smart Antenna
into both the Smart
Antenna port and
ANT IN port.
2.
Connect from the
converter box to the
TV’s A\V inputs using
Composite Cables
(make sure that
the color matches
the port).
3. Set TV to
proper input
4. Plug-in to AC
Connecting TV with Composite Audio/Video Cables
(not included)
11
Page 12

Setting up
OK
1
2
9
8
7
65
4
3
0
-
100
ON/OFF
CH+
CH-
OK
1
2
9
8
7
65
4
3
0
-
100
ON/OFF
VOL+
CH+
VOL-
RECALL SIGNAL ZOOM MUTE
AUDIO INFO
EXIT MENU SUBTITLE EPG
CH-
the Converter
Box on Screen
Arrows let you
navigate through
the menu screens.
Setup
When first plugged-in the menu guide will
show up on the screen. First, you will need to
choose a “Quick” or “Custom” install. “Quick” is
recommended for most users .
1. Choose either “Quick” or “Custom” Install.
2. If you choose the Quick install hit the OK button.
Now that you are in the Scan screen
1. The initial scanning will take about three to four
minutes. While the Converter Box is scanning, it is
programming your new HD channels. When the
scanning is complete, press “EXIT” to start viewing
your TV.
12
Digital Converter Box will shut off automatically
For energy savings the Digital Converter Box is shipped
with sleep mode enabled at four hours as required by the
governing agency. To adjust the setting or turn sleep mode
off go to pg 14.
Page 13

Navigating
the Menus
1. Press the “MENU” button on the remote. The screen
below will appear.
2. Use the “Up/Down” arrow buttons to select either
Channel, Setup, or Info. Press “OK” on the remote.
Use the “Up/Down” arrow buttons to navigate to
3.
the desired option. Press “OK” on the remote.
Once the desired setting has been selected using
4.
the arrow button, press the “EXIT” key to return to
the settings menu or press menu key to return to
normal operation. Settings will automatically be
stored in memory.
Menu Options
Menu : Apps : Simple Guide
1. This feature displays programming information for
current channel.
Menu : Apps : Full Guide
2. This feature displays programming information
for current and different channels. When
broadcasted, up to 8 days of programming
information may be viewed.
13
Page 14

OK
1
2
9
8
7
65
4
3
0
-
100
ON/OFF
CH+
CH-
Menu Options
Channel
3 Screen Formats
Menu : Channel : Auto
1. Use this feature to scan for all available channels.
This feature is used during the setup process and
typically does not need to be repeated.
Menu : Channel : Manual
2. Use this feature to scan for a specific channel.
Digital channels maybe broadcasted at a different
frequency then the old analog channel. This means,
for example, channel 5 maybe broadcasted where
channel 32 used to be. The automatic scan feature
is recommended for most users.
Menu Options
Menu : Setup : Screen Setting : Screen Format
1. Choose the format you prefer for your TV. There
are three sizes, Letter box, Full, or Center.
Note: Use “EXIT” on your remote to return to
previous menu screen.
14
Page 15

Menu Options
OK
1
2
9
8
7
65
4
3
0
-
100
ON/OFF
CH+
CH-
Screen Format
Each of the rating
setting pages are
easy to maneuver
thru, use the
arrow key to
your selection.
Press “OK” when
you would like
to choose your
selection.
Menu : Setup : System Setting : OSD Language
Language: English, Spanish, or French
Select the language of the Converter Box text.
Menu : Setup : System Setting : Audio Languages
Audio Languages:
Displays the audio language chosen in either English,
Spanish, or French.
Menu : Setup : System Setting : Auto Sleep
Auto Sleep:
Default setting is 4 hours, you can adjust it to your
needs or turn it off.
Menu Option
Menu : Setup : Parental Control
1. This is a great feature for parents that want to
control what their children view. You will need to put
in a password to access this function. The factory
setting is “1234”.
The rating control allows you to pick what parental
advisories that will be off limits to the kids. You will
get up to 3 different rating scales to choose from:
TV Rating: (FV, V, S, L, D)
- (FV) - Fantasy Violence
- (V) – Violence
- (S) – Sexual Situations
- (L) – Coarse Language
- (D) – Suggestive Dialogue
MPAA Rating: (G, PG, PG-13, R, NC-17, X, NR)
Digital Rating: (7+, 10+, 13+, 16+)
The Parental controls allows you to lock certain
channels, block specific movies or programs based
on different ratings that are available.
15
Page 16

Menu Option
OK
1
2
9
8
7
65
4
3
0
-
100
ON/OFF
VOL+
CH+
VOL-
RECALL SIGNAL ZOOM MUTE
AUDIO INFO
EXIT MENU SUBTITLE EPG
CH-
Parental Control
16
Setting up Parental Control:
A. Enter your pass code and turn on “Lock System”
B. Select either “TV Rating or MPAA Rating”, and
press “OK” on the remote.
C. Using the arrow left and right, you can arrow
over until “Allow All” is highlighted and arrow
down to select “Block All”.
D. Icons of locks will appear in all the blue squares
to indicate those channels and ratings have
been blocked.
E. Or use the up and down arrows to select the level
of rating. Use the left and right arrow to highlight
the blue box that you want to lock out; press
“OK”
and an icon of a lock will appear in the box.
Repeat this step to continue to block out
other ratings.
F. Press the “EXIT” button on the remote to return
to the settings menu or press menu key to return
to normal operation. Settings will automatically
be stored in memory.
Menu : Setup : Parental Control : Change Password
1. To change your password from the default
“1234”. Use the arrow keys up/down to select.
The change password box will pop up, use your
number keys to change the password. Re-enter
your new password to confirm.
Menu : Setup : Closed Caption
Closed caption formats types:
1. Analog mode (NTSC-CC)
Types of analog closed captions are TT1, TT2, TT3, TT4,
CC1, CC2, CC3, and CC4
2. Digital Mode (ATSC-CC)
Types of digital closed caption are Service 1-5
Page 17

Menu Option
Closed Caption
One of the benefits to Digital Closed Caption is
the display of captioning can be customized to the
viewers needs.
Caption Size
Captions can be displayed in different
Font sizes, options are:
Small, Standard or Large.
Foreground Color
Captions can be displayed in different Font color:
Red, Green, Blue, Yellow, Magenta,
Cyan, Black and White.
Foreground Opacity
Opacity will allow different shades of opaqueness
of the text. Options for Text opacity are;
Full、High、Half、Low、Zero.
Background Color
Caption can be displayed in different Font colors:
Red, Green, Blue, Yellow, Magenta,
Cyan, Black and White.
17
Page 18

Menu Option
Time Zone
Menu : Setup : Time Zone
Time Zone:
This function lets you choose which time zone that you are
located in. Hawaii, Alaska, Pacific, Mountain, Central,
or Eastern. Press the “EXIT” key to return to the settings
menu or press menu key to return to normal operation.
Settings will automatically be stored in memory.
Daylight Savings Time:
Auto daylight savings time function provides daylight
savings time in summer, and automatically switches back
to the normal timings in Winter. This option only works for
areas that support daylight savings.
18
Menu : Setup : Factory Default
1. Resets all settings back to factory default.
Page 19

Features
OK
1
2
9
8
7
65
4
3
0
-
100
ON/OFF
VOL+
CH+
VOL-
RECALL SIGNAL ZOOM MUTE
AUDIO INFO
CH-
Features
Antenna strength Indicator
Press the “SIGNAL” button on the remote. A screen
will appear and give you the details of the signal
quality and signal strength of the current channel.
Use this feature to optimize the antenna placement.
19
Page 20

Trouble
Shooting
Picture breaks up and freezes frequently.
- This indicates poor antenna reception.
- Use the signal indicator feature to determine
optimum position of receiving antenna.
- A better antenna may be required.
- Some channels may not have sufficient
signal in your area.
Message box : No signal
- Signal is not strong enough to view.
- Adjust the antenna
Poor sound quality or no sound
- Make sure TV volume is turned up to a
reasonable level.
- Make sure volume on converter box is at
medium level.
- Adjust the levels of TV volume and Digital
Converter Box volume to find optimum
combination of volumes to eliminate any noise.
- If using composite outputs, verify connections of
left and right composite inputs are hooked
up correctly.
- Make sure mute button is not enabled on TV or
Digital Converter Box.
Remote control does not work
- Install new batteries in the remote.
- Ensure batteries are aligned correctly, refer
to instructions (pg 8).
20
The Digital Converter Box box does not go to
the channel entered on the remote.
- With digital broadcasting each channel can
now have sub-channels. This requires the use
of the “DASH” button when selecting a channel.
For example, to watch channel 5, enter 5-1
on the remote.
Digital Converter Box box will not turn on
- Push the power button and wait 5 seconds.
Page 21

Trouble
Shooting
Digital Converter Box requires a short amount of
time to turn-on.
- Verify the Digital Converter Box is plugged
into AC power.
- Make sure remote has fresh batteries.
Does not receive specific channel anymore
- Use the signal indicator to optimize placement
of the antenna
- A better antenna may be required.
- Some channels may not have sufficient
signal in your area.
Digital Converter Box shuts off automatically
- For energy savings the Digital Converter Box is
shipped with sleep mode enabled at four hours
as required by the governing agency. To adjust the
setting or turn sleep mode off go to pg 14.
Error message reads no TV channels
- Make sure you have an antenna connected
to the Digital Converter Box.
- Adjust your antenna and re-scan for channels.
- Try a different/better antenna and re-scan
for channels.
It takes several seconds for a picture to
appear when I change channels
- This is normal.
- Digital signals have to be decoded unlike the old
analog signals.
If you press a command on the remote and
the converter performs a previous command
- The Digital Converter Box didn’t see the full
command. Release the button, make sure the
remote is pointed at the Digital Converter Box.
Re-press the command again. You may need to
reposition the Converter Box to be facing you.
Additional assistance can
be found at www.jascoproducts.com
21
Page 22

FCC WARNING
Any unauthorized changes or modifications to the
equipment would void the user’s warranty and may conflict
with both state and federal laws. The GE Digital Converter
Box complies with part 15 of the FCC rules. Operation is
subject to the following conditions:
1) The GE Digital Converter Box may not cause
harmful interference.
2) The GE Digital Converter Box may accept any interference
received including interference that may cause
undesired operation.
NOTE: This equipment has been tested and found to
comply with the limits for a Class B digital device, pursuant
to Part 15 of the FCC Rules. These limits are designed to
provide reasonable protection against harmful interference
in a residential installation. This equipment generates, uses
and can radiate radio frequency energy and, if not installed
and used in accordance with the instructions, may cause
harmful interference to radio communications. However,
there is no guarantee that interference will not occur in a
particular installation. If this equipment does cause harmful
interference to radio or television reception, which can be
determined by turning the equipment off and on, the user
is encouraged to try to correct the interference by one or
more of the following measures:
– Reorient or relocate the receiving antenna.
– Increase the separation between the equipment
and receiver.
– Connect the equipment into an outlet on a circuit
different from that to which the receiver
is connected.
– Consult the dealer or an
experienced radio/TV technician for help
22
Page 23

Specifications
Specifications
BROADCAST SIGNAL CONVERSION ATSC input/
NTSC output
DEMODULATION METHOD 8-VSB
VIDEO OUTPUT RF Output
(Coax)
Composite
Video
ANTENNA INPUT 75 ohm
F-connector
POWER REQUIREMENT AC 120V,
50/60Hz
POWER CONSUMPTION 10 watts, max/
Standby Mode:
2 watts max
DIGITAL CONVERTER 8.27 X 5.12 x
BOX DIMENSIONS 1.77 inches
21 x 13 x 4.5 cm
WEIGHT 2.2 lbs/1Kg
is a trademark of the General Electric Company and
is used under license to Jasco Products Company LLC,
10 E. Memorial Road, Oklahoma City, OK 73114.
This Jasco product comes with a 1 year limited warranty.
Visit www.jascoproducts.com for details.
22729-3
22730-3
23
 Loading...