

Page 1

Key 3
Key 2
Key 1
www.janitza.com
Doc no. 1.020.009.m
Serie II
Prog
Janitza electronics GmbH
Vor dem Polstück 6
D-35633 Lahnau
Support Tel. +49 6441 9642-22
Fax +49 6441 9642-30
e-mail: info@janitza.com
Internet: http://www.janitza.com
w
Reactive Power Controller
Operating instructions
Brief instructions see last page
Peak value
Fix stages
Password
Capacitive
Required capacitive
power
Cosinus ϕ
Inductive
Automatic mode
Harmonics
Manual mode
Target cos(phi1)
Target cos(phi2)
Lowest value
Capacitive stage active
Alarm output active
Expanded programming
Number of stages
Stage ratio
Power of 1st stage
Learning of configuration
CT ratio
cap
cos
ϕϕ
ϕϕ
ϕ Qc
ind
1 2 3 4 5 6 7 8 9 10 11 12 Error
ϕϕ
ϕϕ
ϕ1
ϕϕ
ϕϕ
ϕ2 learn 1:1... Prog
Article no. 33.03.027
Page 2

Page 2
Reactive Power Controller
= Key 1 = Key 2 = Key 3
Expanded programming 25
Fix stages 25
Discharge time 26
Disconnection pause 26
Power station service 27
Stage power 28
Choke degree 28
Voltage transformer ratio 29
Harmonic thresholds 30
Switching frequency 31
Alarm output 32
Alarm call 32
Give a receipt for alarms 32
Lower voltage (1) 33
Overvoltage (2) 33
Underscoring of the measurement current (3) 33
Exceeding of measuring current (4) 33
Insuff icient capacitor output (5) 33
Supply of real power (6) 33
Harmonic thresholds (7) 33
Overtemperature (8) 33
Averaging time for the mean value cos(phi) 34
Averaging time of reactive power 34
Ventilator control 35
Ventilation control 35
Upper temperature limit 35
Lower temperature limit 35
Switching output 35
Overtemperature disconnection 37
Upper temperature limit 37
Lower temperature limit 37
Pause time 37
Indication in manual mode 38
Password 39
Program password 39
Enter password 39
Change password 39
Contrast 40
Reset programming 41
Connection conf iguration 42
Correction angle 42
Software release 43
Serial number 43
Serial interface (Option) 44
Device address 44
Transmission protocol 44
Baud rate 45
Modbus RTU 45
Profibus DP V0 45
Table Modbus 46
Table Profibus 47
Contents
Receipt Control 4
Meaning of the symbols 4
Hints for usage 4
Product description 5
Intended use 5
Data protection 5
Hints for maintenance 5
Repairing and calibration 5
Front foil 5
Waste management 5
Funktional description 6
Measurement 6
Switching of capacitor stages 6
Switching outputs 6
Net return 6
Hints for installation 8
Mounting place 8
Measurement and supply voltage 8
Sum current measurement 9
Current measurement 9
Installation and putting into service 10
Measurement and supply voltage 10
Current measurement 11
Real power 11
Switching outputs 12
Transistor outputs 12
Target-cos(phi) changeover 13
Alarm output 13
Check alarm output 13
RS485 Interface (Option) 14
Transmission protocols 14
Bus structure 14
Shielding 14
Cable length 14
Terminal resistors 14
Removal of errors 15
Service 16
Display and use 17
Automatic mode 17
Manual mode 17
Key functions 18
Standard programming 19
Target cos(phi) 19
Current transformer ratio 20
Learning of the configuration 21
Stage power 22
Stage ratio 22
Switching outputs 23
Delete peak and lowest values 24
Page 3

Page 3
Reactive Power Controller
= Key 1 = Key 2 = Key 3
Display overview 48
Measured value indications 48
Display in standard programming 50
Display in expanded programming 51
Configuration data 53
Setting range 53
Manufacturer's presetting 53
Technical data 54
Ambient conditions 54
Inputs and outputs 54
Measurement 54
Measurement accuracy 54
Back Side 55
Side view 55
Short manual 56
All rights reserved. No part of this manual may be reproduced or duplicated without the written permission
of the author. Any contraventions are punishable and
will be prosecuted with all legal means.
No liability can be taken for the faultless condition of
the manual or damage caused by the use of it. As failures cannot be avoided completely, we shall be very
grateful for any advice. We will try to remove any failures as soon as possible. The mentioned software and
hardware descriptions are registered trademarks in the
most cases and are subjected to the regulations by law.
All registered trademarks are property of the corresponding companies and are fully recognized by us.
Page 4

Page 4
Reactive Power Controller
= Key 1 = Key 2 = Key 3
Receipt Control
In order to ensure a perfect and safe use of the device, a
proper transport, expert storage, erection and mounting
and careful usage and maintenance are required. When
it may be supposed, that a safe operation is no longer
possible, the device has to be put out of service and be
protected against unintentional putting into service.
A safe operation can no longer be assumed, when the
device
• shows visible damage,
does not work in spite of intact net supply,
has been exposed to disadvantageous conditions for a
longer time (e.g. storage out of the allowed climate
without adaption to the room climate, dew etc.) or transport use (e.g. falling from great height, even without
visible damage).
Please test the contents of delivery for completion, before starting the installation of the device. All delivered
options are listed on the delivery papers.
In the attached description doc. no.: 1.020.030.x all delivery types and options for the reactive power controller Prophi are listed.
Hints for usage
Safe and failure free operation can only be granted,
when the device is operated according to this manual!
This device may be put into service and used by qualified personnel according to the safety regulations and
instructions only. Please mind the additional legal and
safety regulations for the respective application.
Qualified personnel are persons, familiar with erection, mounting,
putting into service and usage of the product and having the qualifications such as:
education or instruction / entitlement to switch, release, ground or characterize current circuits and devices according to the standards of safety techniques.
education or instruction in the care and usage of suitable safety equipment according to the standards of
safety techniques.
Warning of dangerous electrical voltage.
This symbol shall warn you of possible dangers, which can occur during maintenance, putting into service
and while usage.
Protective wire connection
c
m
Meaning of the symbols
Attention!
This manual also describes options and
types, which were not delivered and therefore, do not belong to the contents of delivery.
m
Page 5

Page 5
Reactive Power Controller
= Key 1 = Key 2 = Key 3
Product description
Intended use
The reactive power controller Prophi together with external capacitor stages, serves for step by step controlling of the phase shift angle cos(phi) in 50/60Hz low
voltage networks. Depending on the type of the reactive power controllers Prophi, contactors or semi conductor switches can be controlled directly.
Additionally, the following electrical quantities are measured and indicated:
- Voltage L2-L3,
- Current in L1,
- Frequency,
- Sum real power (Consumption/supply),
- Sum reactive power (ind./cap.),
- uneven current harmonic waves 1. - 19. in %,
- uneven voltage harmonic waves 1. - 19. in %.
The harmonic contents are related to the rated voltage
or rated current.
The connection is carried out on the back side via touch
proof spring power terminals.
Measurement and supply voltage are taken from the
measurement voltage and must be connected to the
building installation via a separation (switch or power
switch) and an overcurrent protection (6,3A).
The current measurement is carried out via a ../5A or
../1A current transformer in one outer conductor.
The relay outputs are suitable for contactor control, the
transistor outputs are provided for the control of fast
switching thyristor modules, switching at zero crossing.
Hints for maintenance
Before delivery the device is tested in various safety
checks and marked with a seal. If the device is opened,
these checks must be repeated.
There is no guarantee for devices, which are opened
out of the manufacturing works.
Repairing and calibration
Repairing and calibration work can be carried out in the
manufacturing works only.
Front foil
The cleaning of the front foil must be done with a soft
cloth using a common cleansing agent. Acid or acidic
agents may not be used for cleaning.
Waste management
The device can be disposed as electronical waste according to the legal regulations and recycled.
Data protection
The data protection is carried out in a none volatile
memory (EEPROM).
Changed programming data are saved immediately.
Page 6

Page 6
Reactive Power Controller
= Key 1 = Key 2 = Key 3
Switching of capacitor stages
Prophi calculates the required reactive power to reach
the set target-cos(phi) from the current from one outer
conductor and the voltage between two outer conductors. If the cos(phi) deviates from target cos(phi), external capacitor stages or transistor outputs are switched
on or off.
In automatic mode the capacitor stages are switched in
or off, when the required reactive power is higher or
equal to the smallest stage power.
If the power of the first capacitor stage is three times as
high as the measured real power, all capacitor stages
are switched off.
Switching outputs
Depending on the variety of Prophi, relay or transistor
outputs serve as switching outputs.
The relay outputs are suitable for controlling contactors
and the transistor outputs can switch thyristor modules,
that switch in zero crossing of voltage.
For relay outputs the time between two connections or
disconnections is set to two seconds. Transistor outputs
have no limitation of the switching period.
Net return
After net return, the set discharge time runs for the
relay outputs. The transistor outputs do not mention the
discharge time.
Funktional description
Measurement
The measurement is suited for 3 phase systems with or
without neutral conductor for frequencies of 50Hz or
60Hz. The electronical measurement system records and
digitalizes the effective values of voltage between L2
and L3 (L-N Option) and the current in L1.
In each second several snap check measurements are
carried out. As the current is only measured in one
outer conductor, and the voltage only between two outer
conductors, the measured values, which are related to
all three outer conductors, are exact for equal loaded
outer conductors only.
The following electrical quantities are calculated:
Current and current harmonics
Voltage and voltage harmonics
Real power, sum
Apparent power,sum
Reactive power, sum
Reactive power for each stage
Reactive current for each stage
Cos(phi),
Net frequency.
The following information can be indicated:
Number of switchings of each stage,
total connection time of each stage and
the inner temperature.
Prophi measures the frequency of the measurement and
supply voltage and shows the average over 10 seconds.
Page 7

Page 7
Reactive Power Controller
= Key 1 = Key 2 = Key 3
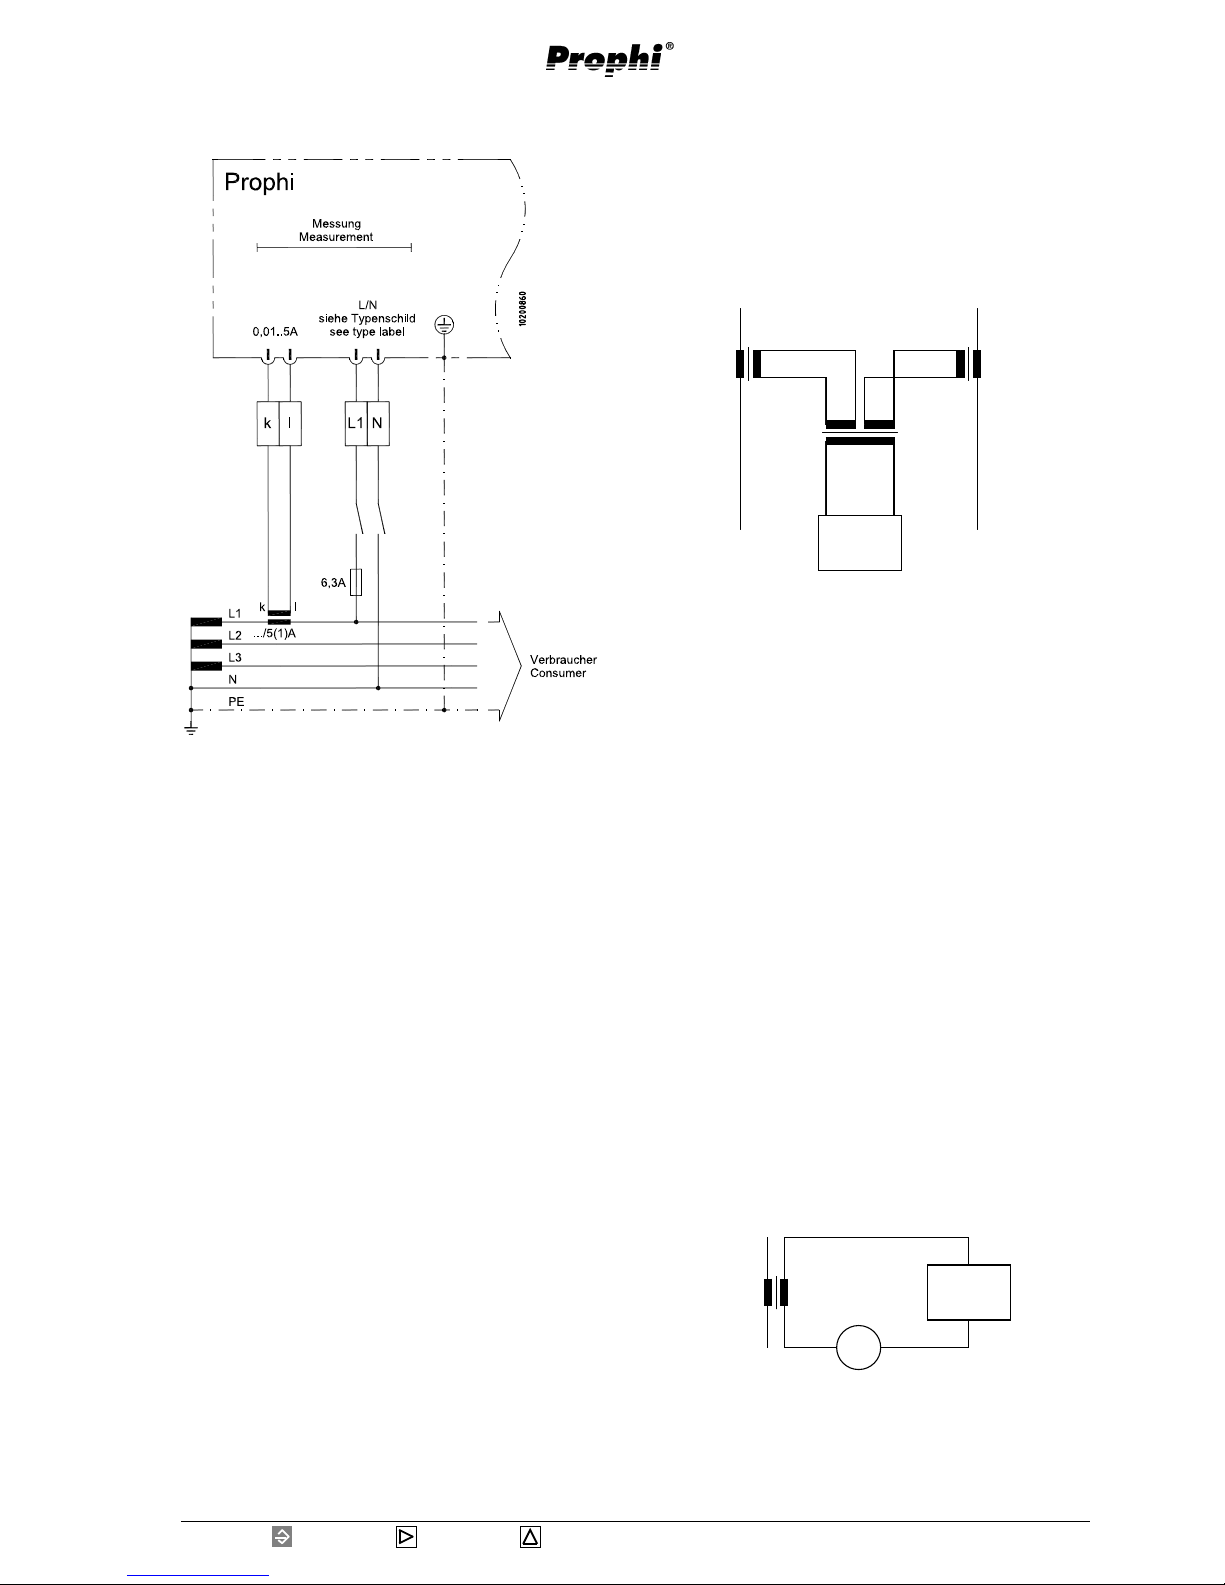
Diagr.: Connection example, power factor controller with measurement and supply voltage L2-L3,12 relais outputs,
target cos(phi) changeover and alarm output.
Prophi
Diagr.: Connection example, power factor controller with measurement and supply voltage L-N,12 relais outputs,
target cos(phi) changeover and alarm output.
Page 8

Page 8
Reactive Power Controller
= Key 1 = Key 2 = Key 3
Hints for installation
Mounting place
The reactive power controller Prophi is suited for mounting and operation in reactive power compensation systems.
The connection is carried out on the back side via touch
proof spring power terminals.
Measurement and supply voltage
The measurement is suited for 3 phase systems with or
without neutral conductor. Measurement and supply
voltage are taken from the measurement voltage and
must be connected to the building installation via a
separation (switch or power switch) and an overcurrent
protection (2A...10A).
The reactive power controller measures and supervises
the voltage between two outer conductors. If one of
those two fails, the reactive power controller gets no
more measurement and operating voltage, and switches
on the capacitive stages after net return according to
the programmed times.
If the third outer conductor is missing, this will not be
recognized by the reactive power controller. If the contactors are supplied by this outer conductor, the contactors can attract simultaneously and without consideration of the discharge time after net return.
Falsch
False
Einspeisung
Supply
Verbraucher
Consumer
EVUMessung
ElectricityMeter
Prophi
Einspeisung
Supply
Verbraucher
Consumer
EVUMessung
ElectricityMeter
Prophi
Falsch
False
Einspeisung
Supply
EVUMessung
ElectricityMeter
Prophi
Falsch
False
Verbraucher
Consumer
Richtig
Correct
Einspeisung
Supply
Verbraucher
Consumer
EVUMessung
ElectricityMeter
Prophi
Attention!
The operating voltage for the contactors
should be taken from an outer conductor connected to the reactive power controller.
m
Abb.: Anschluss der Mess- und Hilfsspannung zwischen
L2-L3 und der Strommessung über Stromwandlers.
Prophi
Messung
Measurement
0,01 .. 5A
L/L
siehe Typenschild
see type label
../5(1)A
L1
L2
L3
PE
k l
2 .. 10A
Verbraucher
Consumer
kl L2L3
Page 9
Page 9
Reactive Power Controller
= Key 1 = Key 2 = Key 3
Diagr. Measurement with Amperemeter in series
Diagr. Measurement via sum current transformers
Current measurement
The current measurement is carried out via ../5A or ../
1A current transformers.
If the current must be measured with an Amperemeter
additionally to Prophi, it must be connected in series.
Sum current measurement
If Prophi is connected to a sum current transformer, the
total transformation ratio must be programmed.
Attention!
For unequal load of the outer conductors, the
current should be measured in the outer conductor, which is loaded most heavily.
Verbraucher 1
Consumer 1
Verbraucher 2
Consumer 2
Einspeisung 1
Supply 1
Einspeisung 2
Supply 2
Prophi
L l
k K
l L
K k
AK AL BK BL
kl
kl
Verbraucher
Consumer
Prophi
Einspeisung
Supply
L l
K k
A
k
l
m
Abb.: Anschluss der Mess- und Hilfsspannung zwischen
L1-N und der Strommessung über Stromwandlers.
Page 10
Page 10
Reactive Power Controller
= Key 1 = Key 2 = Key 3
Installation and putting into service
Measurement and supply voltage
The controller Prophi can be delivered in two connection varieties for the measurement and supply voltage.
In the version measurement L-L, the measurement and
supply voltage must be taken from two outer conductors. In version measurement L-N, the measurement
and supply voltage must be taken between outer conductor L and neutral N.
Before connection, please ensure, that the local net conditions match the data on type plate. The range of the
measurement and supply voltage is given by the type
plate and is connected via a fuse (2…10A, time lag type)
Diagr.: Connection of measurement and supply voltage
(L2-L3) and current transformer.
c
c
Prophi
Messung
Measurement
0,01 .. 5A
L/L
siehe Typenschild
see type label
../5(1)A
L1
L2
L3
PE
k l
2 .. 10A
Verbraucher
Consumer
kl L2L3
Diagr.: Connection of measurement and supply voltage
(L1-N) and current transformer.
If the measurement and supply voltage is within the
allowed range, Prophi indicates the voltage on the terminal.
While measuring via voltage transformers, the voltage
transformer ratio must be programmed.
Attention!
The measurement and supply voltage must
come from the low voltage net, which is supervised.
The connected measurement and supply voltage may
not exceed the voltage, mentioned on type plate for
more than 10% or underscore for more than 15%.
To ensure, that the connected measurement and supply
voltage is within the allowed range, please check the
voltage at the terminal with a voltmeter.
Attention!
Voltage, which is out of the indicated range
on type plate can destroy the instrument.
c
Attention!
The operating voltage for the contactors should
be received from an outer conductor connected
to the controller.
Page 11

Page 11
Reactive Power Controller
= Key 1 = Key 2 = Key 3
Current measurement
The current transformer is connected to the clamps k
and l (/5A or /1A) from the outer conductor L1.
Please ensure during the installation of the current transformer, that the current transformer is passed by the
consumer current but not by the compensation current.
The current can be measured by an Amperemeter to
compare it with the current indicated by Prophi to check.
Please note, that the factory's presettings of the current
transformer ratio is set to 10 and must be adapted to the
existing current transformer.
If you should short-circuit the current transformer, the
indicated value on Prophi must decrease to 0A.
Examples for the setting of the current transformer
Example 1
Current transformer 200A/5A
Set Prophi to 40
Example 2
Current transformer 500A/1A
Set Prophi to 500
Example 3
Sum current transformer 1000A+1000A/1A
Set Prophi to 2000
Attention!
For unequal load of the outer conductors, the
current should be measured in the outer conductor, which is loaded most heavily.
Real power
If current and voltage are connected to Prophi according to the connection diagram, a positive real power is
displayed in case of real power consumption. Real power
with a negative sign in the indication points to the supply of real power or an error of connection.
Possible error:
- Voltage and current are measured in the wrong outer
conductor.
- The current transformer clamps (k-l) are exchanged.
m
m
Attention!
None earthed current transformer clamps can
be live.
Page 12
Page 12
Reactive Power Controller
= Key 1 = Key 2 = Key 3
Switching outputs
The reactive power controller Prophi can be equipped
with up to 12 switching outputs. The switching outputs
can be equipped either with relay or transistor outputs.
If a device is equipped with relay or transistor outputs
it is not shown on display. The equipment can be seen
in the connection diagram on the back of Prophi.
Relay outputs
Capacitor contactors can be connected to the relay outputs according to the connection example "Relay outputs".
Transistor outputs
Semi conductor switches, switching at zero crossing,
must be connected to the transistor outputs of the reactive power controller.
The transistor outputs switch the voltage of an external
d.c. net supply to the semiconductor switches.
Check switching outputs
Please switch in the capacitor stages in manual mode:
The inductive reactive power is decreased by the power
of the respective capacitor stage.
Please switch off the capacitor stages in manual mode:
The inductive reactive power is increased by the power
of the respective capacitor stage.
Possibility of errors:
The outputs do not switch
- Relay output defective.
- Transistor output defective.
The change of the reactive power is faulty
- The current is measured incorrectly.
- A wrong current transformer ratio is set.
- The current is measured in the wrong outer
conductor.
- The voltage is measured in the wrong outer
conductors.
- The current transformer clamps k-l are exchanged.
The reactive power does not change
- The current transformer is installed at the wrong
place.
- Switching outputs faulty.
- The wrong control voltage is connected to the
switching outputs.
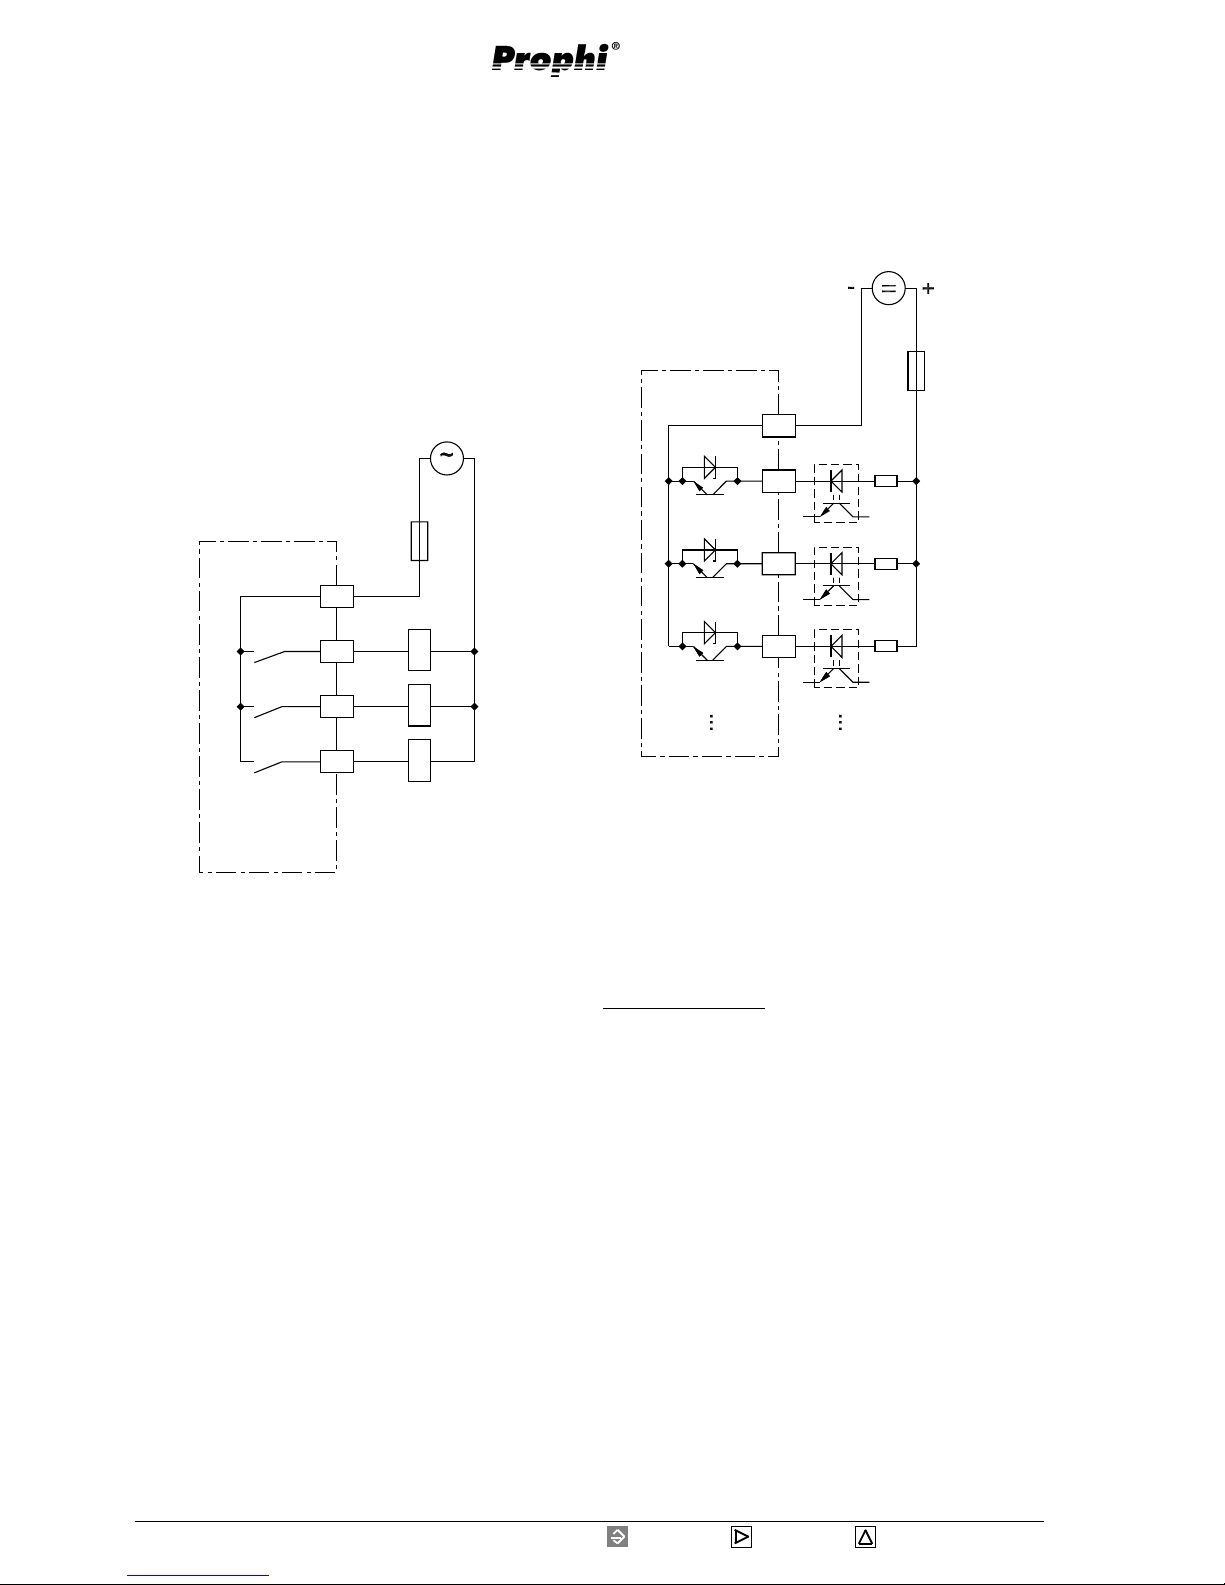
Diagr.: Connection example "Transistor outputs"
Attention !
For devices with relay or transistor outputs,
there are different control voltages applied
to the switching outputs.
15-30VDC
F0,2A
Prophi
1
2
3
C1
Diagr.:Connection example "Relay outputs"
Attention!
The relai and transistor outputs are live.
c
m
Prophi
C1
1
2..10A
max. 250V
2
3
Attention!
If a switching frequency of 50Hz is programmed
for the transistor outputs, the serial interface
does not work!
m
Page 13
Page 13
Reactive Power Controller
= Key 1 = Key 2 = Key 3
Target-cos(phi) changeover
Via the input target-cos(phi) changeover it can be
changed over between target-cos(phi1) and target-
cos(phi2).
If there is no voltage at the input, the target-cos(phi1)
is active. If there is a 85 bis 265V AC connected to the
input, the target-cos(phi2) is active.
In the standard display (please see example), apart from
the active channels and the actual cos(phi) also the active target-cos(phi) is indicated.
Target-cos(phi1) is active.
cos
ϕϕ
ϕϕ
ϕ
ind
1 2 3
ϕ1ϕ1
ϕ1ϕ1
ϕ1
Actual cos(phi) mean
value
Target-cos(phi2) is active.
cos
ϕϕ
ϕϕ
ϕ
ind
1 2 3
ϕ2ϕ2
ϕ2ϕ2
ϕ2
Actual cos(phi) mean
value
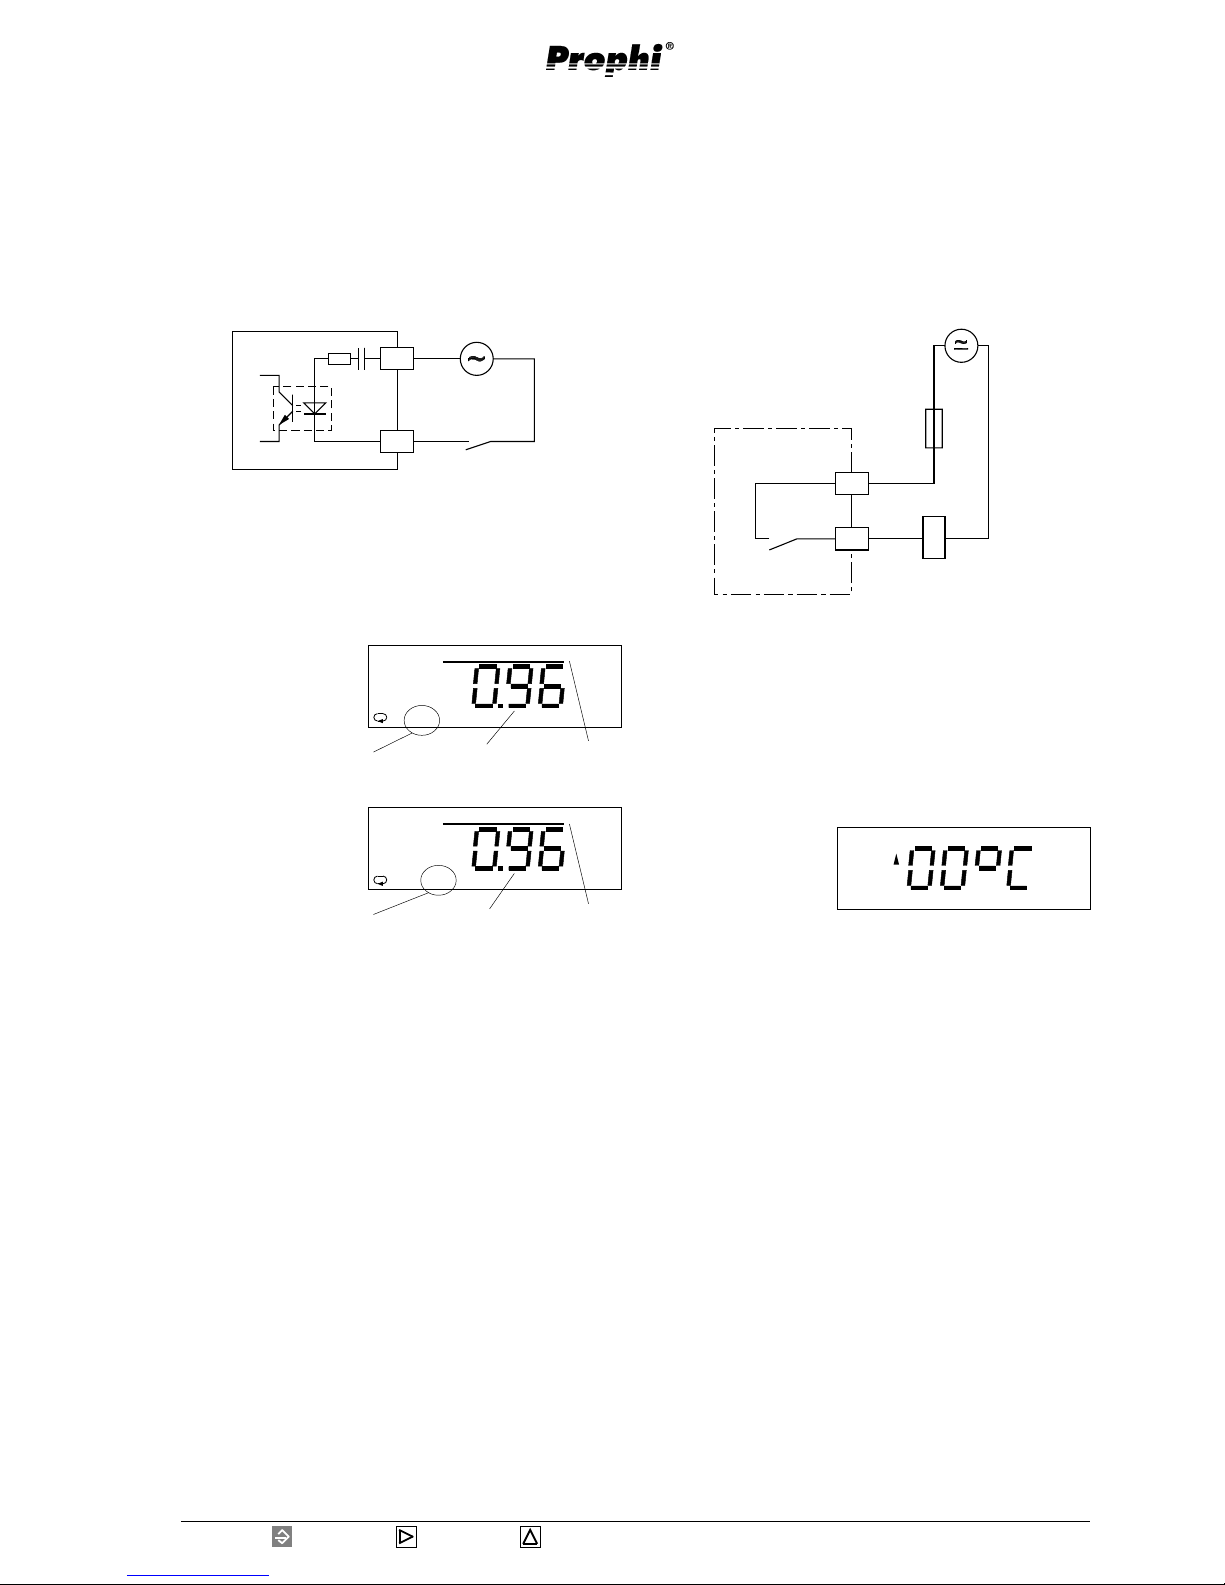
Diagr.: Connection diagram target-cos(phi) changeover
85 - 250V AC
15
16
ϕ1
ϕ2
Prophi
Alarm output
The alarm relay attracts in undisturbed operation, and
the contact of the alarm output is closed. If a disturbance occurs, the alarm relay releases and the contact is
opened. Various events can be assigned to the alarm
output via OR-logic interconnections. Each event is assigned to an alarm number, an alarm delay and alarm
duration.
Check alarm output
If there is no alarm, the alarm relay attracts immediately. In order to trigger off an alarm, the threshold for
overtemperature can be set to zero, for instance, and
the alarm relay releases immediately.
Diagr.: Connection diagram alarm output
13
14
T6,3A
max. 250V
Error
Prog
Page 14

Page 14
Reactive Power Controller
= Key 1 = Key 2 = Key 3
RS485 Interface (Option)
Transmission protocols
Two tran smiss ion pr otoco ls are availa ble fo r the c onnec tion to an existing field bus system:
0 - Modbus RTU (Slave) and
1 - Profibus DP V0 (Slave) .
Wi th Mod bus pro tocol you can have ac cess t o the da ta of
table 1, and with Profibus protocol you can have access
to the data of table 2.
Bus structure
All devices are connected in bus structure (line). In one
segment up to 32 participiants can be assembled. At the
end and the beginning of each segment, the cable must
be terminated by resistors. In
Prophi
you can activate
these resistors with two plug-ins.
For more than 32 participiants you must use a repeater
(line amplifier) to connect the single segments.
Shielding
For connections via RS485 interface, you need a protected and twisted cable. To achieve a sufficient protection result, the shielding must be connected at both ends
extensively to the housing or parts of the cabinet.
Cable specifications
The maximum cable length depends on cable type and
transmission speed. We recommend cable type A.
Cable parameter Type A Typ B
Impedance 135-165Ohm 100-130Ohm
(f = 3-20MHz) (f > 100kHz)
Capacity < 30pF/m < 60pF/m
Resistance < 110 Ohm/km Diameter >= 0,34mm2 >= 0,22mm2
(AWG22) (AWG24)
Cable length
The following table shows the maximum cable length in
meters (m) for various transmission speed
.
Baud rate (kbit/s)
Cable type 9.6 19.2 93.75 187.5 500 1500
Type A 1200 1200 1200 1000 400 200
Type B 1200 1200 1200 600 200 70
Terminal resistors
If
Prophi
is connected to the end of the bus cable, the
bus cable must be terminated at this point with resistors.
The required resistors are integrated within the
Prophi
and are activated in position ON.
Diagr. Connection RS485 interface
1
0200740
392R 221R 392R
23
22
21
A
B
+5V
OFFON
GND
GND
Termination
Prophi
Page 15

Page 15
Reactive Power Controller
= Key 1 = Key 2 = Key 3
Removal of errors
Possible cause
- Wrong measurement and supply voltage
connected.
- Prefuse (10A time-lag type) has triggered.
- Current measurement in the wrong outer
conductor.
- Wrong current transformer ratio.
- Current out of measuring range.
- Current transformer clamps are bridged.
- One current transformer line is interrupted.
- A current measuring device is connected
parallely.
- Wrong voltage transformer ratio.
- Uneven load of the outer conductors.
- Wrong voltage transformer ratio.
- Voltage and/or current are measured incorrectly.
- Voltage and current are measured in the
wrong outer conductors.
- Voltage and/or current are measured incorrectly.
- The current transformer connection (k-l) is
exchanged.
The measuring current is smaller but 10mA.
The measuring voltage is interrupted.
The current transformer clamps are bridged.
- Voltage is measured incorrectly.
- Current is measured incorrectly.
- Real power is measured incorrectly.
The current transformer is installed after the
measurement of the energy supplier.
Current and voltage are connected in-correctly.
The capacitor current is not detected by the
current transformer.
Capacitive stages are faulty.
The measurement and operating voltage is
exceeded by more than 10%.
Current measurement in wrong phase.
L1 and L3 are exchanged.
The device is defective.
Remedy
Please check measurement and supply voltage.
Please check current measurement.
Please check voltage measurement.
Please check current and voltage
measurement.
Please check current and voltage
measurement.
Please check current measurement.
Please check current and voltage
measurement.
Check and correct connection.
(Please see hints for installation)
Check and correct connection.
(Please see hints for installation)
Check and correct mounting position of the current transformer.
Check capacitive stages.
Check measurement and operating
voltage.
Check measurement and operating
voltage.
Send the device to the manufacturer
with an exact description of the error.
Description of the error
No indication.
Current
too little / too high.
Voltage
L2-L3 too little / too high.
Real power
too little / too high.
Real power supply/consumption exchanged.
Cos(phi) = 0.00
Cos(phi)
too high / too little.
Cos(phi) does not change,
although all capacitor
stages were switched in.
Cos(phi) is indicated capacitive on Prophi, but,
nevertheless, the reactive
power meter measures reactive power.
Prophi only connects
stages, but does not disconnect.
The outputs can only be
disconnected.
Prophi shows a cos(phi) of
0,2 - 0,4 capacitive.
It does not work.
Page 16

Page 16
Reactive Power Controller
= Key 1 = Key 2 = Key 3
Service
If certain questions appear, which are not mentioned in
this handbook, please call us directly.
To be able to support you, we require the following
information:
- Device description (see type plate),
- Serial number (see type plate),
- Software Release,
- Measurement and supply voltage and
- Exact description of the error.
You can reach us:
Monday to Thursday from 07:00 to 15:00
and on Friday from 07:00 to 12:00
Janitza electronics GmbH
Vor dem Polstück 1
D-35633 Lahnau
Support:
Tel. (0 64 41) 9642-22
Fax (0 64 41) 9642-30
e-mail: info@janitza.de
Page 17
Page 17
Reactive Power Controller
= Key 1 = Key 2 = Key 3
ϕ1 ϕ2ϕ1 ϕ2
ϕ1 ϕ2ϕ1 ϕ2
ϕ1 ϕ2 learn 1:1... Prog
Display and use
In the front side of Prophi there is a digital indication
and three keys, with which you can question data and
program the device.
If you are in automatical mode, you can change between the operating modes using key 1:
automatic mode,
manual mode,
standard programming and
expanded programming
automatic mode
manual mode
standard programming
expanded programming
In standard programming often needed settings are carried out such as current transformer ratio or the number
of stages.
In expanded programming those settings are carried out,
which are used not as often, such as discharge time or
choke degree.
To reach the expanded programming from automatic
mode, leaf through the standard programming using key
1 until the symbol "Prog" appears. Confirm selection
with key 2, and you are in expanded programming.
Automatic mode
Automatic mode is marked by the symbol .
In automatic mode, there is:
- the switching condition of capacitive stages,
- the actual value of cos(phi) indicated,
- Connection and disconnection of capacitive stages,
- all 15 minutes saving of
peak and lowest values,
number of switchings of the capacitor stages and
the switching times of capacitor stages.
- Indication of measured values using key 2 and 3.
There are three possibilities to reach automatic mode:
- after net return,
- pressing key 1 for about 2 seconds,
- pressing no key in programming mode for
1 minute.
Automatic mode
cos
ϕϕ
ϕϕ
ϕ
ind
1 2 3
ϕ1ϕ1
ϕ1ϕ1
ϕ1
Actual value cos(phi)
Manual mode
In manual mode, you can switch in capacitor stages
using key 3, and switch off capacitor stages using key
2. The time between two switchings is only limited by
the programmed discharge time. If one stage shall be
connected in manual mode and a discharge time is running, the number and capacitor stage is flashing.
If no capacitors are switched in manual mode, an
automatical jumpback to automatical mode is carried
out after 15 minutes.
Manual mode
Reactive power
Connected stages
k VAr
ind
1 2 3 4 5
Page 18
Page 18
Reactive Power Controller
= Key 1 = Key 2 = Key 3
Change mode
LeafProgramming
Expanded programming
Automatic mode
Manual mode
Standard programming
Password
Meas. values
Meas. values
Meas. values
Meas. values
Programming
Menue
2 seconds
short long
long short
short
Programming
Menue
Programming
Menue
Programming
Menue
Confirm selection
Select number Select number
short value *10
long value /10
short number +1
long number -1
short number +1
long number -1
short value *10
long value /10
Programming
Menue
short
Key functions
Prog
Programming
Menue
Programming
Menue
short long
Programming
Menue
Prog Prog
2 seconds
Page 19

Page 19
Reactive Power Controller
= Key 1 = Key 2 = Key 3
ϕ1 ϕ2ϕ1 ϕ2
ϕ1 ϕ2ϕ1 ϕ2
ϕ1 ϕ2
learn 1:1... Prog
Target cos(phi)
In automatic mode
Prophi tries to reach
the set target power
factor by switching in
or off the capacitor
stages.
It is possible to set a target-cos(phi1) and a targetcos(phi2). Devices without target-cos(phi) changeover
always use the target-cos(phi1). Devices with an input
for target-cos(phi) changeover switch to target-cos(phi2),
whenever the input is active.
Range 0.80cap. - 1.00 - 0.80ind.
The active target-cos(phi) is indicated in the measured
value indication for the actual-cos(phi).
Example:
cos
ϕϕ
ϕϕ
ϕ
ind
ϕ1ϕ1
ϕ1ϕ1
ϕ1
cos
ϕ
ϕ
ϕϕ
ϕ
ind
ϕ1ϕ1
ϕ1ϕ1
ϕ1
Programming
Press key 1 for about
2 seconds to select automatic mode.
Press key 1 to leaf to
manual mode until indication target cos
(phi).
Select the number to be
changed using key 2.
The selected number
flashes.
Change the selected
number by pressing
key 3.
Target-cos(phi1) is active.
ϕ1ϕ1
ϕ1ϕ1
ϕ1
Standard programming
In the standard programming, the settings needed frequently are carried out, such as:
- target-cos(phi1),
- target-cos(phi2),
- current transformer ratio,
- learning of configuration,
- power of the first capacitive stage,
- stage ratio,
- number of stages,
- delete peak values (no indication).
Standard-Programming
Automatic mode
cos
ϕϕ
ϕϕ
ϕ
ind
1 2 3
ϕ1ϕ1
ϕ1ϕ1
ϕ1
Automatic mode
Manual mode
Ta rget cos(p hi1 )
Press key 1 for about 2 seconds. You return to automatic mode, and the changes are saved immediately.
In delivery condition no password is programmed. The
change from automatic mode into standard programming is carried out without password protection.
If a password is programmed by the user, the change
from automatic mode to standard programming is carried out only after password clearance.
Change from automatic mode to standard programming
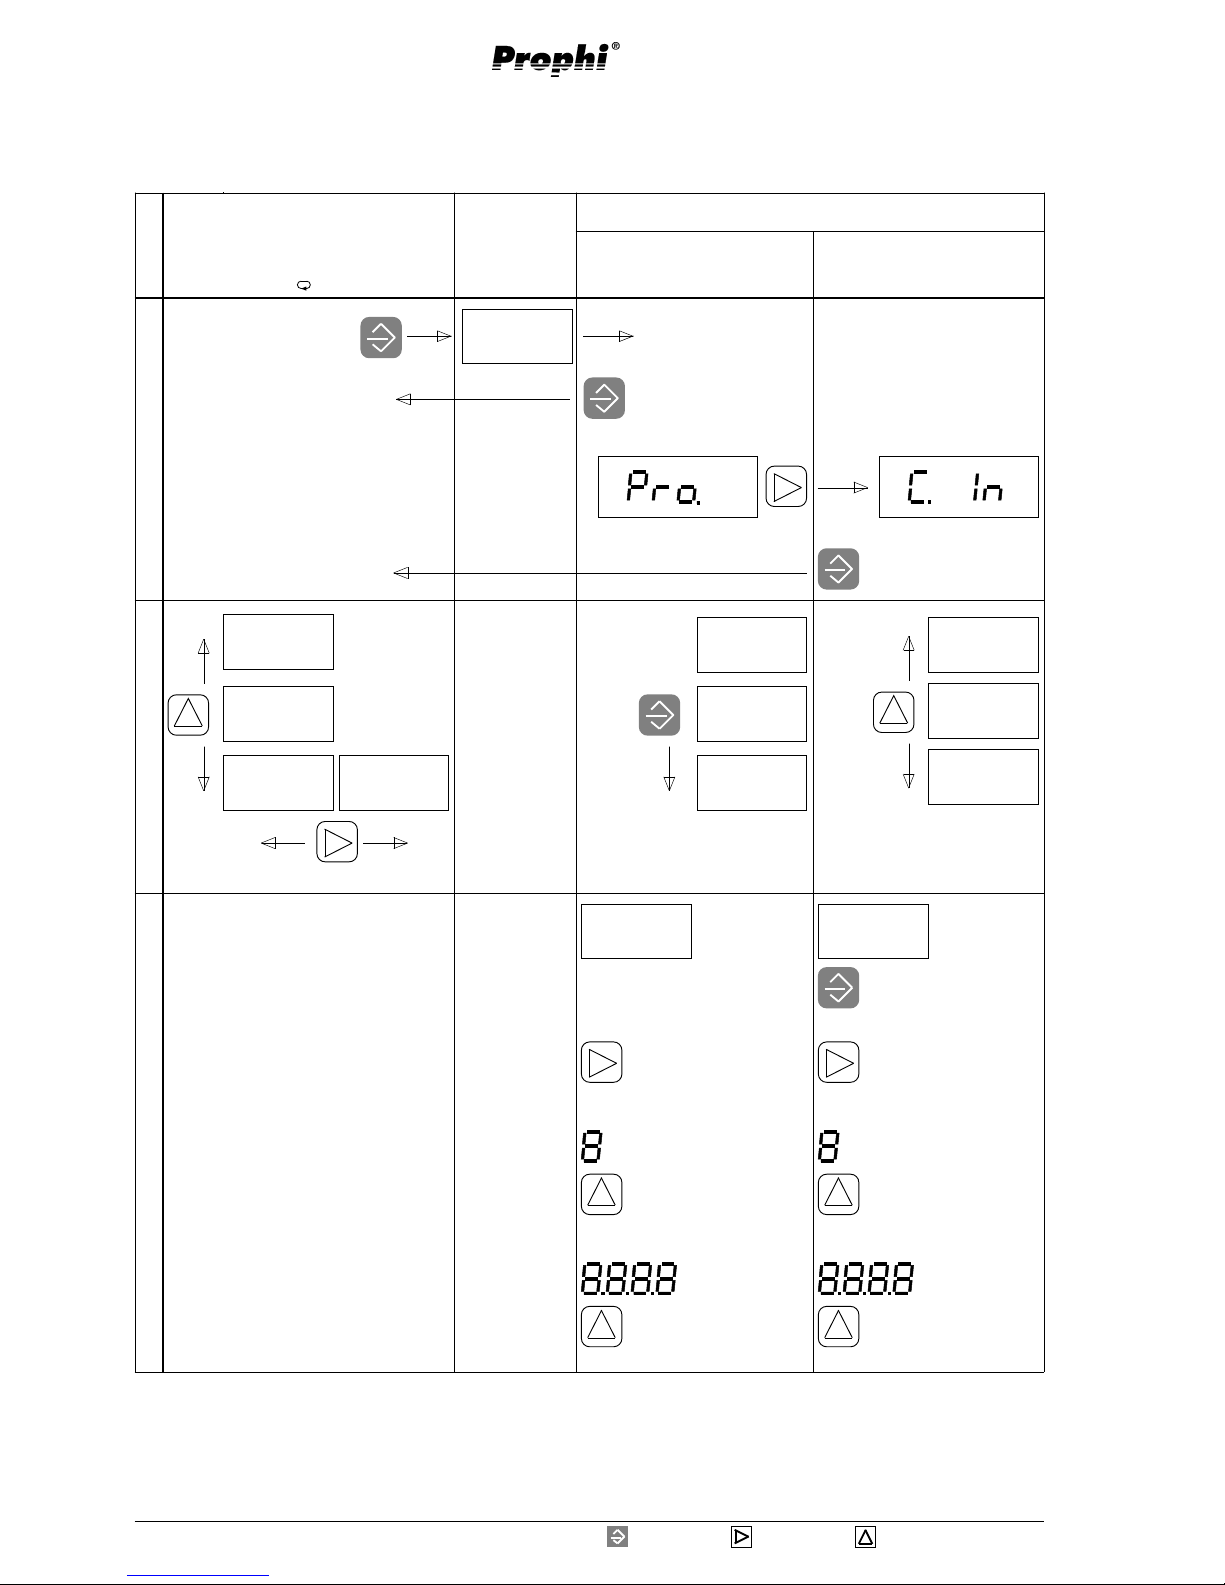
and back:
Password
2 seconds
short
Standard
Programming
Automatic mode
cos
ϕϕ
ϕ
ϕ
ϕ
ind
1 2 3
Page 20

Page 20
Reactive Power Controller
= Key 1 = Key 2 = Key 3
ϕϕ
ϕϕ
ϕ1
ϕϕ
ϕϕ
ϕ2 learn 1:1... Prog
Current transformer ratio
At the measuring input of the current
measure-ment either /
5A or /1A current
transformers can be
connected. In order to get a correct current and power
indication, the current transformer ratio of the connected
current transformer must be set to Prophi. If the current
is measured via a sum current transformer, the total
current transformer ratio must be set.
Example 1: Current transformer 500A/5A
The current transformer ratio is now calculated to
500A : 5A = 100
A ratio of 100 must be set on the device.
Example 2: Current transformer 200A/1A
The current transformer ratio is calculated to
200A : 1A = 200
A ratio of 200 must be set on the device.
Example 3: Sum current transformer
Transformer 1 200/5A
Transformer 2 400/5A
Sum current transformer 5+5/5A
The current transformer ratio is calculated to
(200A + 400A) : 5A
600A : 5A = 120
CT ratio
Automatic mode
Programming
Example: Current transformer ratio 1000
Select indication for
current transformer ratio using key 1.
The automatic symbol
disappears.
Select the digit to be
changed. The selected
digit is flashing.
Change the selected
digit pressing key 3.
Current transformer ratios of more but 1000 are indicated with a decimal point automatically.
Example: Current transformer ratio = 1200 = 1.200k
Indication on display "1.200k"
k
Page 21

Page 21
Reactive Power Controller
= Key 1 = Key 2 = Key 3
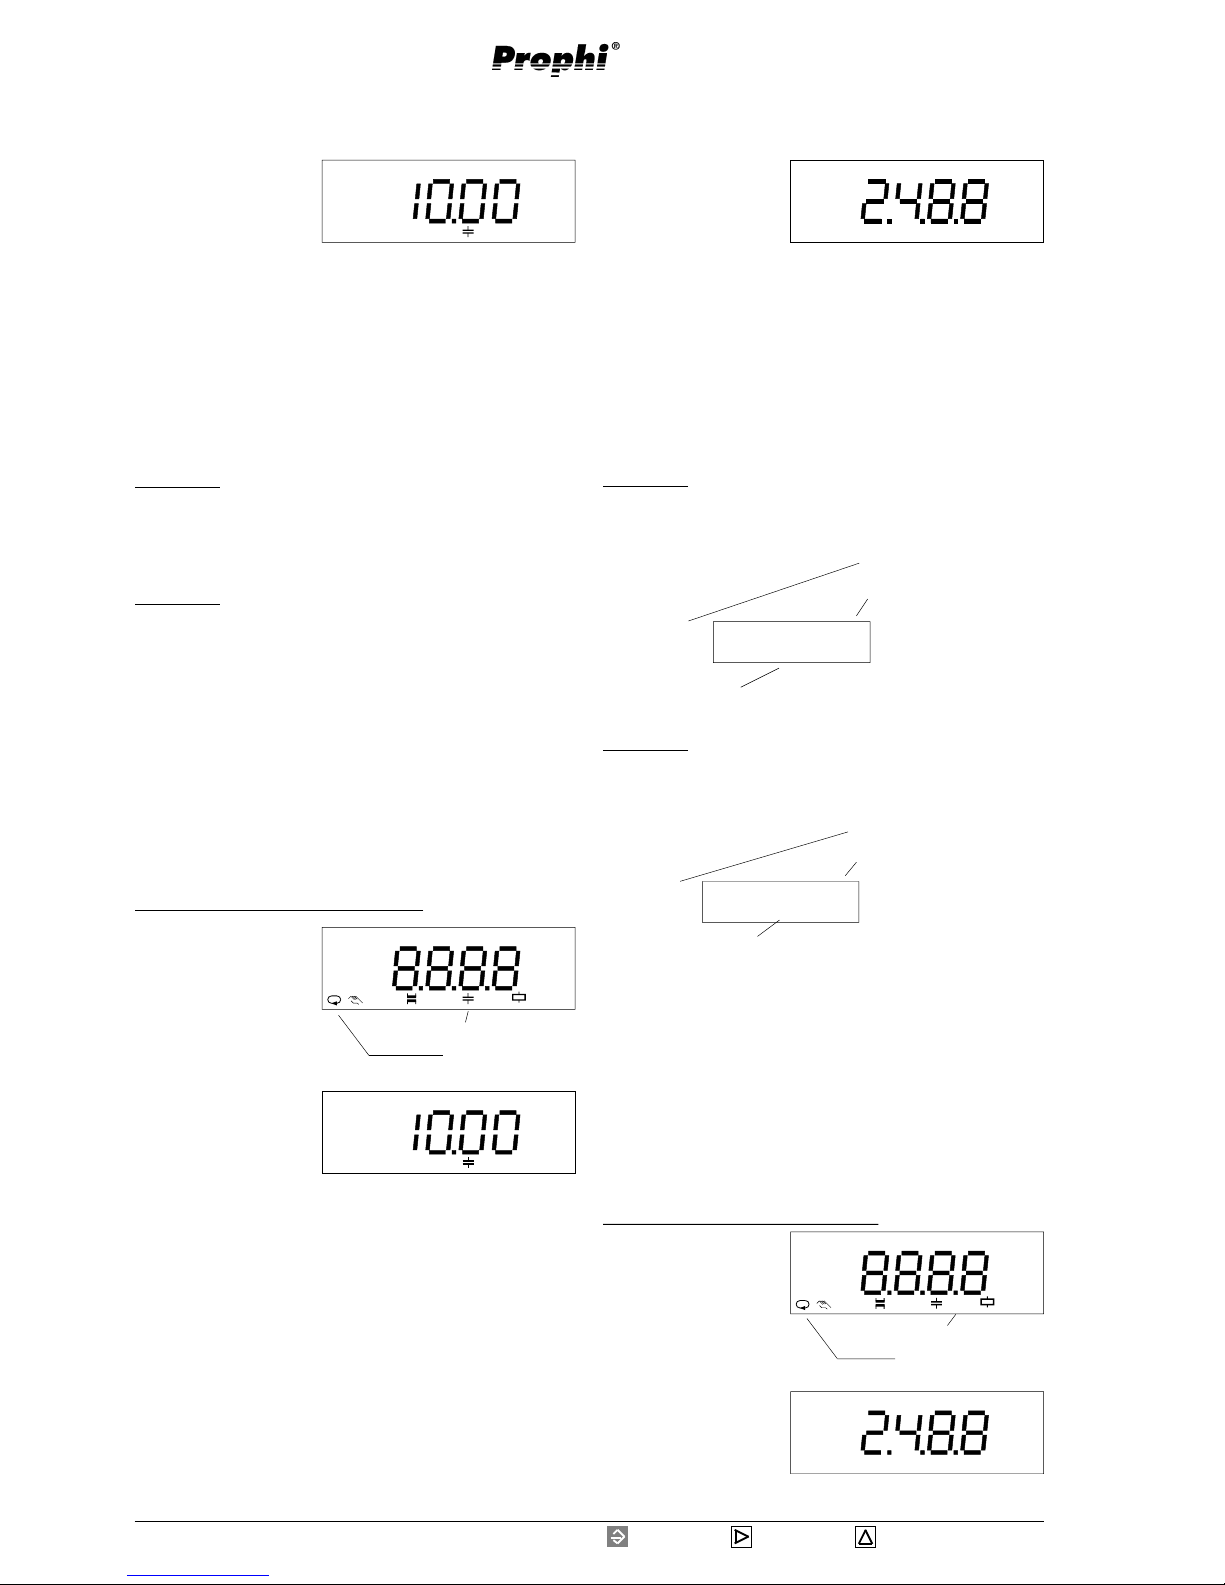
Learning of the configuration
After installation of the
controller there is the
possibility to learn and
save the configuration
with the function
"learn".
Important requirements are:
- The discharge time for capacitors is set to 60 seconds,
when the device is delivered. For capacitors with longer
discharge times, the discharge time must be checked
and changed before using the "learn" function.
- The current transformer must be flown through by
consumer and compensation current.
- The measurement and supply voltage may not be taken
from phase to N.
- The compensation system must be ready for operation.
The learning function of the controller is devided into
two steps:
Step 1 - Learning of the connection configuration
Here the correction angle between current transformer
and measurement and supply voltage is detected.
Step 2 - Learning of the capacitor stages
Here the number of outputs and the stage power of
each stage is detected.
The following requirements are neccessary:
- The switching of a capacitor stage must cause a change
of current of at least 50mA at current input.
- The stage power of the stage to be learned must be
bigger than 1% of the measuring range of the controller.
Attention!
After learning, the saved configurations must be checked,
if they are plausible.
The following actions can be carried out:
oFF - No learning.
1 - Step 1, learning of the connection configuration.
2 - Step 2, learning of capacitor stages.
3 - Step 1 + 2, learning of the connection
configuration and capacitor stages.
learn
Prog
Start learning
Go to symbol learn using key 1. Select action
(oFF, 1, 2, 3) with key
3. Start learning with
key 1.
The symbol learn flashes. The controller learns.
During the learning the capacitor stages are switched
for several times. The learning can only be interrupted
by switching off the power factor controller.
The duration of the learning procedure depends on the
net conditions, the number of capacitor stages and the
set discharge time for the capacitors.
When the learning
procedure is finished,
the detected correction
angle, in the example
270°, is indicated.
The learned characteristics are saved.
After 60 seconds the controller changes to automatic
mode. Pressing key 1 for 2 seconds, you reach automatic mode at once.
learn
Page 22
Page 22
Reactive Power Controller
= Key 1 = Key 2 = Key 3
ϕ1 ϕ2ϕ1 ϕ2
ϕ1 ϕ2ϕ1 ϕ2
ϕ1 ϕ2 learn 1:1... Prog
ϕ1 ϕ2ϕ1 ϕ2
ϕ1 ϕ2ϕ1 ϕ2
ϕ1 ϕ2 learn 1:1... Prog
Stage ratio
The stage ratio states
the ratio of the stage
power of the various
capacitor stages. The
power of the first capacitor stage serves as a reference. The stage ratio is
programmable for each stage up to the fifth stage.
Setting range : 0 - 9
In the display only the stage ratio for the capacitor
stages 2, 3, 4 and 5 are indicated. The stage ratio for
the first capacitor stage is always 1.
Example 2
The stage ratio is programmed to 1:2:0:2:2:2.... In the
4-digit display only the part "2:0:2:2" is indicated.
Example 1
The stage ratio is programmed to 1:2:4:8:8:8..., and in
the four digit-display, only the part "2:4:8:8" is indicated.
Stage power
The stage power is the
power of a capacitor
stage. In the standard
programming the stage
power can only be programmed for the first stage. In the expanded programming you can set the stage power for each capacitor
stage. If you only enter the stage power for the first
capacitor stage, the other stages are fixed by the stage
ratio. The stage power of each capacitor stage can be
calculated from the first stage and the corresponding
stage ratio.
Ratio 0var - 9999kvar
Example 1
Power of the first capacitor stage = 10kvar
Stage ratio = 1:1:1:1:1....
All following stages have the power: 10kvar
Example 2
Power of the first capacitor stage = 20kvar
Stage ratio = 1:2:4:8:8....
The stages have the power:
1. Stage = 20kvar
2. Stage = 40kvar
3. Stage = 80kvar
4. Stage = 160kvar
5. Stage = 160kvar
etc.
1:1...
Please select the indication for stage power
using key 1.
The automatic symbol
disappears.
Select the digit to be
changed using key 2.
The selected digit is
flashing.
Change the digit by
pressing key 3.
Example: Programming stage power
Stage power
Automatic
k VAr
If all numbers are flashing, the decimal point of the set
number is moved.
Please select the indication of the stage ratio using key 1.
The automatic symbol
disappears.
Please select the digit
to be changed using
key 2. The selected
digit is flashing.
Change the selected
digit by pressing key 3.
Example: Programming stage ratio
1:1...
Stage ratio
Automatic
If the first capacitor stage has a power of 10kvar, the
following stages have the power:
1. Stage = 10kvar
2. Stage = 20kvar
3. Stage = 0kvar
4. Stage = 20kvar
5. Stage = 20kvar
etc.
1 . 2 . 4 . 8 . 8 . 8....
Indicated on display.
1. capacitor stage
5. capacitor stage
1 . 2 . 0 . 2 . 2 . 2....
Indicated on display.
1. capacitor stage
5. capacitor stage
k VAr
Page 23

Page 23
Reactive Power Controller
= Key 1 = Key 2 = Key 3
ϕ1 ϕ2ϕ1 ϕ2
ϕ1 ϕ2ϕ1 ϕ2
ϕ1 ϕ2 learn 1:1... Prog
ϕ1 ϕ2ϕ1 ϕ2
ϕ1 ϕ2ϕ1 ϕ2
ϕ1 ϕ2 learn 1:1... Prog
The switching outputs can be equipped with either relay or transistor outputs.
If a device is equipped with relay or transistor outputs
it cannot be read on display. The equipment can only
be seen on the back side of Prophi in the connection
example.
Example 2: Prophi with 3 transistor outputs
Please check, if 3 transistor outputs are programmed.
The programming and indication of the switching outputs is carried out in the menu standard programming.
Please go to the indication of the number of
stages.
The automatic symbol
disappears.
Only two stages are
programmed!
Select the digit to be
changed using key 2.
The selected digit is
flashing.
Change the selected
digit using key 3.
Prophi is available in three varieties regarding the
switching outputs.
1. Only relay outputs
2. Only transistor outputs
3. Relay and transistor outputs mixed
In the menus of the standard programming, only the
variations 1 and 2 can be programmed.
In mixed operation the switching outputs with smaller
numbers are always the relay outputs.
The relay outputs in mixed operation are programmed
in the menu of standard programming, and the transistor outputs are programmed in the menu of expanded
programming. The programming of the transistor outputs is carried out indirectly via the stage power of the
switching outputs. For transistor outputs, to which no
semiconductor switch is connected, a capacitor power
of 0kvar is set.
Please select the indication of the switching
outputs using key 1.
The automatic symbol
disappears.
Please select the digit
to be changed using
key 2. The selected
digit is flashing.
Change the selected
digit by pressing key 3.
Example 1: Prophi with 12 relay outputs
10 of the 12 existing outputs shall be engaged.
The programming and indication of the switching outputs is carried out in the menu standard programming.
Switching outputs
Automatic
Switching outputs
Automatic
Switching outputs
Variety 1 2 3 4 5 6 7 8 9 10 11 12
3R R R R
3T T T T
6R R R R R R R
6T T T T T T T
6R6T R R R R R R T T T T T T
12R R R R R R R R R R R R R
12T T T T T T T T T T T T T
T= Transistor outputs
R= Relay outputs
Diagr. Varieties of the switching outputs
Switching outputs
The reactive power
controller Prophi can
be equipped with up to
12 switching outputs.
Switching outputs
Page 24

Page 24
Reactive Power Controller
= Key 1 = Key 2 = Key 3
Prog
Example 3: Prophi 6R6T with 6 transistor outputs and
6 relay outputs
Two transistor outputs and 6 relay outputs shall be programmed.
The programming of the relay outputs is carried out in
the menu standard programming, and the programming
of the transistor outputs is carried out in the menu expanded programming.
1. step: Programming of the relay outputs.
In standard programming you move to the
indication of the
number of stages using
key 1. 6 stages are programmed, so no change is required.
2. step: Programming of the transistor outputs.
The programming of the transistor outputs is carried
out in the expanded
programming.
Please move to the expanded programming
using key 1. Now press
key 2.
In the expanded programming appears the
menu point "Fix
stages".
Prog
Prog
Using key 3, you reach
the indication stage
power.
Here the stage (7) is selected by pressing key
2. Please confirm with
key1. One digit for the
stage power is flashing.
k VAr
1
Prog
If this stage is engaged, the required stage power must
be programmed by pressing the keys 2 and 3.
Select the digit to be changed using key 2. The selected
digit is flashing. Now change the digit using key 3.
If all ciphers are flashing, the shown digit can be multiplied by 10 using key 3. Also the dimension of the unit
can be changed.
Delete peak and lowest values
Peak and lowest values
of various measured
values are saved every
15 minutes.
The peak values and
lowest values can only be deleted altogether.
The following values are not deleted:
Peak temperature value,
Switching time of the capacitor stages and
Number of switchings per stage.
Example: Delete peak values
Move to indication for
peak and lowest values
by pressing key 1.
The automatic symbol
disappears.
Select delete with key 3.
Text "on" is flashing.
With key 1 you move
to the expanded programming and activate
deletion.
VAr
7
flashing
Automatic
Page 25

Page 25
Reactive Power Controller
= Key 1 = Key 2 = Key 3
Prog
Fix stages
The first three capacitor stages can be fixed
switched in alternatively. Fix stages are
marked by a line below the number of the capacitor stage.
Fix stages cannot be included in the controlling. Nevertheless they are considered in the stage ratio, so that in
the stage ratio in the most disadvantageous case (three
fix stages) in the standard programming only two stage
ratios are available. To get a better solution of the stage
power, the capacitor power must be set for every single
stage in the expanded programming .
Prog
1. capacitor stage (Fix stage)
2. capacitor stage (Fix stage)
3. capacitor stage (Fix stage)
controllable capacitor stages
Example 1: Indication of stage ratio
Example: Programming of fix stages
Please select the fix
stages by using key 1.
The first three stage
numbers are flashing.
1 2 3
Prog
cos
ϕϕ
ϕϕ
ϕ
ind
1 2 3 5 6 12
ϕ2 ϕ2
ϕ2 ϕ2
ϕ2
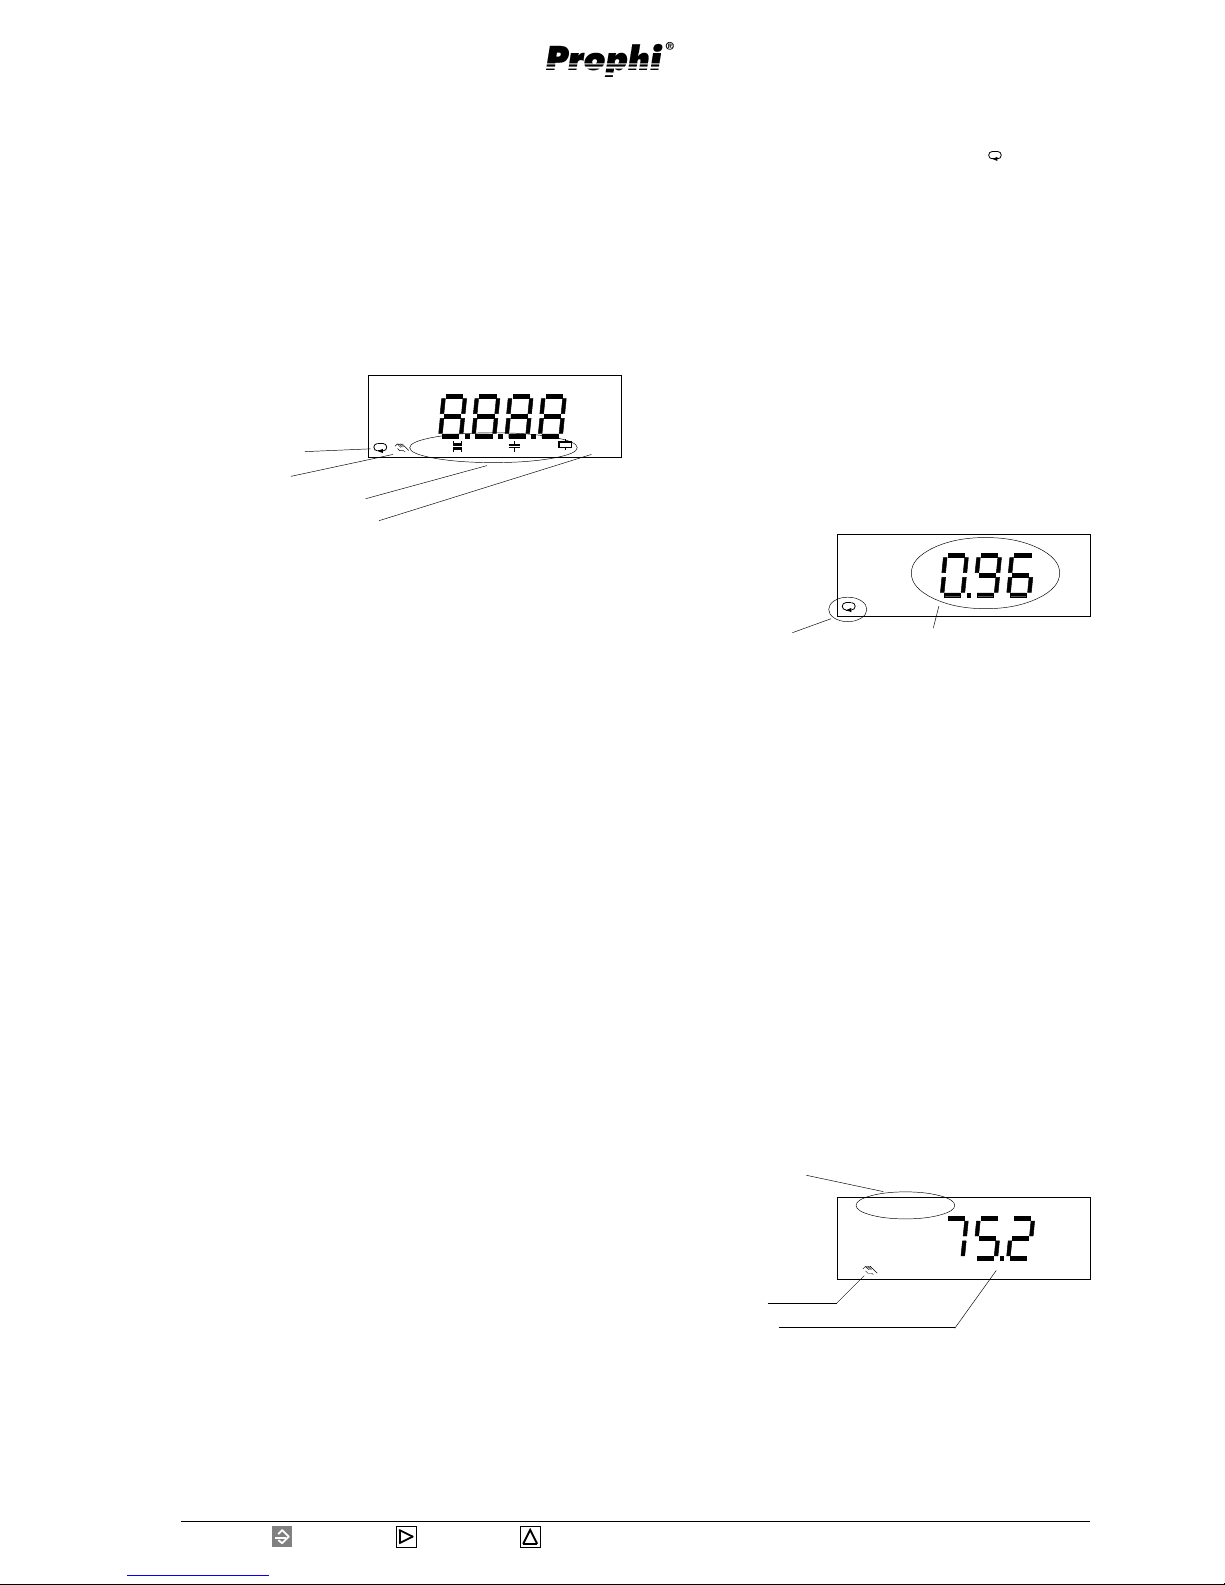
The fix stages 1, 2 and
3 are switched in
Target-cos(phi2) is active.
Capacitor stages 5,6 and 12
are switched in
The actual mean cos
(phi) is 0.96ind.
Example 2:Indication of fix stages in automatic mode
Indicated on display
Expanded programming
In the expanded programming those settings are carried out,
which are required
very rarely.
With key 3 you can change between the indications.
With key 1 the selected indication can be chosen for
changing.
The following settings and readings can be carried out in
expanded programming:
Fix stages,
Discharge time,
Disconnection pause of relay stages,
Power station service,
Stage power, 1. - 2. stage,
Choke degree,
Voltage transformer ratio,
Harmonic table,
Switching frequency of transistor stages,
Alarm calls,
Averaging time for reactive power,
Averaging time of the mean value cos(phi),
Fan control,
Overtemperature disconnection,
Indication in manual mode,
Password,
Contrast,
Reset of programming,
Connection configuration,
Software release and
Serial number.Power station service,
Stage power, 1. - 2. stage,
Choke degree,
Voltage transformer ratio,
Harmonic table,
Switching frequency of transistor stages,
Alarm calls,
Averaging time for reactive power,
Averaging time of the mean value cos(phi),
Fan control,
Overtemperature disconnection,
Indication in manual mode,
Password,
Contrast,
Reset of programming,
Connection configuration,
Software release,
Serial number and
RS485 interface.
1 : 2 : 4 : 8 : 8 : 8....
All three fix stages
are switched on.
1 2 3
Prog
With key 3 you switch
in the fix stages.
With key 2 you disconnect the fix stages.
Confirm selection with
key 1 and continue with expanded programming using
key3.
Page 26

Page 26
Reactive Power Controller
= Key 1 = Key 2 = Key 3
Discharge time
The discharge time
means the time, which
each capacitor stage
has got for discharge.
Setting range : 0 - 1200 seconds
The discharge time will be started after a net return and
after switching off a capacitor stage.
Capacitor stages controlled by transistor outputs must
not consider the discharge time, as the therewith controlled semiconductor switches in the zero crossing of
voltage.
Example: Programming discharge time
With key 3 you can leaf to the discharge time in the
expanded programming. With key 1 you get into programming mode. In this example a discharge time of
60 seconds is indicated.
Select the digit to be
changed using key 2.
The selected digit is
flashing.
Change digit using key
3.
Pressing key 1 you leave the programming mode and
with key 3 you can continue leafing through the expanded programming.
Disconnection pause
The disconnection
pause means the time
after the connection of
a capacitor stage, in
which it is forbidden to
disconnect the next stage.
Setting range : 0 - 1200 seconds
The disconnection pause is not valid for capacitor stages,
switched via transistor outputs.
Example: Programming of disconnection pause
With key 3 you leaf to the disconnection pause in expanded programming. Please press key 1. In this example a disconnection pause of 15 seconds is indicated.
Select the digit to be changed by using key 2. The
selected digit is flashing.
Change the selected
digit using key 3.
Pressing key 1 you leave the programming mode and
with key 3 you can continue leafing through the expanded programming.
s
Prog
s
Prog
Prog
s
Prog
s
Page 27

Page 27
Reactive Power Controller
= Key 1 = Key 2 = Key 3
Confirm selection with
key 1.
Text "on" flashes.
Set function "power
station service" to "oFF" using key 2 and to "on" using
key 3.
Confirm with key 1 and continue with expanded programming pressing key 3.
Power station service
By setting "power station service" the reaction of the controller at
small currents is controlled.
Presetting: Power station service = "oFF"
Power station service= "oFF"
If no or a very small current is flowing through the
current transformer, all connected capacitor stages are
switched off one after the other.
Power station service = "on"
If delivery (power station service) and consumption is
possible, connected stages must remain connected to
the net, even if no current is measured.
Programming
Example: Power station service
Go to power station service in expanded programming
using key 3.
If real power is generated in a certain application, the
following situations can arise:
Case a.
The generated real power is smaller than the demand.
Additionally real power is delivered by the energy supplier.
Case b.
The generated real power is bigger than the demand.
Real power is supplied.
Case c.
The generated real power corresponds to the demand.
In all cases the required reactive power is supplied by
the energy supplier, or even better, by a compensation
system.
The following situation can come into being. The needed
real power is completely generated (case c.) by the generator, and the reactive power is completely supplied
by a compensation system.
There is no current flowing through the current transformer. If the power station service, by mistake, is on
"oFF", the capacitor stages are disconnected. Then a
reactive current is flowing again through the current
transformer. The controller detects a need for compensation, and connectes the stages again. The reactive current is compensated. Again, no current is flowing.
The problem is, that the number of switchings is increased.
For power station service, especially in case c, the power
station service should be set to "on".
Diagr.: Connection example power station service
reactive power
Blindleistung
real power
Wirkleistung
L1
Prophi
MG
reactive power compensation system
Blindleistungs-Kompensationsanlage
consumer
Verbraucher
generator
Generator
L2
L3
k l
10200610
Prog
Prog
Page 28
Page 28
Reactive Power Controller
= Key 1 = Key 2 = Key 3
Choke degree
The choke degree must
be set for choked or
combined choked compensation systems. The
choke degree is needed
for the exact determination of the capacitor current.
With the choke degree you lay down the switching order in combined choked compensation systems. Capacitor stages with a high choke degree and low choke
degree are switched alternatingly. Capacitor stages with
a high choke degree are switched in first.
If more but two different choke degrees are set, the
capacitor stages with the middle choke degrees are
switched as unchoked capacitor stages.
Attention!
To reduce the programming expenditure, the programming of the first capacitor stage is taken over for all the
following capacitor stages. Nevertheless, the choke degree can be changed for the following capacitor stages
afterwards.
The choke degree is given for each capacitor stage in
percent.
Setting range : 0 - 15%
Stage power
The stage power is the
capacitive reactive
power of a capacitor
stage. The stage power
can be set in the expanded programming for each stage. In the standard
programming, the stage ratio 0:0:0:0 is indicated.
Setting range 0 var - 9999kvar
Example: Programming stage power
With key 3 you can leaf to the stage ratio in expanded
programming. Please press key 1 to confirm. In this
example, a stage power of 10kvar is indicated for the
first capacitor stage.
Select the digit to be
changed using key 2.
The selected digit is
flashing.
Change the selected digit using key 3.
Pressing key 1 you leave the programming mode and
with key 3 you can continue leafing through the expanded programming.
Example: Programming choke degree
Please leaf to the choke degree in the expanded programming using key 3. In this example, for the first
stage a choke degree of 5,7% is needed. For the programming, 6% was selected.
Pressing key 1 you leave the programming mode and
with key 3 you can continue leafing through the expanded programming.
%
1
Prog
Select the digit to be
changed using key 2.
The selected digit is
flashing.
Change the selected
digit by pressing key
3.
If the choke degree for the second capacitive stage must
be programmed, you leaf to the desired capacitor stage
pressing key 2.
The selected capacitor stage is confirmed by pressing
key 1.
%
2
Prog
2. capacitor stage
k VAr
1
Prog
k VAr
1
Prog
1
Prog
%
Page 29

Page 29
Reactive Power Controller
= Key 1 = Key 2 = Key 3
Voltage transformer ratio
If the measurement and operating voltage for Prophi is
taken from a voltage transformer, the voltage transformer ratio can be set. This ratio is build by number 1
and number 2 .
Programming number 1
Leaf to number 1 for voltage transformer ratio in expanded programming using key 3. Confirm with key 1.
In this example,
number 1 = 1.
Select the digit to be
changed by pressing
key 2. The selected digit is flashing.
Change the selected digit using key 3.
With key 1 you can leave programming mode and with
key 3 you continue expanded programming.
number 1
Voltage transformer ratio =
number 2
Attention! If a wrong voltage transformer ratio is set,
all voltage as power is indicated incorrectly.
The setting ranges for the numbers 1 and 2 are:
number 1 : 1 - 9.999k
number 2 : 1, 10, 100, 110, 200, 230, 400
In this example, the
presettings are indicated with
number 1 = 1 and
number 2 = 1.
Programming number 2
Leaf to number 1 for voltage transformer ratio in expanded programming using key 3. Change to number 2
with key 2. In this example a value of 1 is
indicated for number 2.
Confirm selection with
key 1.
The value flashes.
With key 2 and key 3
the needed value can
be selected for number
2 from a list of values
(1, 10, 100, 110, 200,
230, 400).
Confirm selection with key 1. The selected value does
not flash anymore.
Continue expanded programming with key 3.
Number 1
Number 1 is indicated with a decimal point automati-
cally, when the value gets bigger than 1000.
Example: Voltage transformer ratio = 1200
1200 = 1.200k
Indication "1.200kV"
Example: Programming voltage transformer ratio
A voltage transformer has a primary of 20000V and a
secondary of 100V.
The result is a ratio of
20000V
= 200
100V
The measurement and supply voltage mentioned on type
plate of Prophi must be 100V.
To set the ratio of 200, several combinations of number
1 and number 2 are possible.
e.g. number 1 200
= = 200
number 2 1
or number 1 2000
= = 200
number 2 10
kV
Prog
V
Prog
Number 2
V
Prog
V
Prog
Prog
V
V
Prog
Page 30

Page 30
Reactive Power Controller
= Key 1 = Key 2 = Key 3
Harmonic thresholds
In order to avoid resonance in the net and to
protect capacitors from
overload, a threshold
row should be selected
from the threshold table. If a harmonic threshold is
exceeded, capacitive stages are switched off for the duration of the discharge time.
Setting range 0 - 10
In order to avoid too much switchings of capacitor
stages, the capacitor stages are only switched on, when
the harmonic threshold of a lower threshold row is exceeded.
If the threshold row is selected for 0, no capacitor
stages are switched off. The thresholds of threshold
row 0 are only taken as the lower threshold row for
threshold row 1.
Harmonic thresholds in % of nominal voltage
Threshold row number
1 2 3 4 5 6 7 8 9 10
3. 3.5 4.0 4.5 5.0 5.5 6.0 6.5 7.0 7.5 8.0
5. 4.5 5.0 5.5 6.0 6.5 7.0 7.5 8.0 8.5 9.0
7. 3.5 4.0 4.5 5.0 5.5 6.0 6.5 7.0 7.5 8.0
9. 1.2 1.2 1.5 1.5 2.0 4.0 4.5 5.0 5.5 6.0
11. 2.5 3.0 3.0 3.5 4.0 5.0 5.5 6.0 6.5 7.0
13. 2.0 2.1 2.5 3.0 4.0 5.0 5.5 6.0 6.5 7.0
15. 1.0 1.2 1.5 1.5 1.8 2.0 2.2 2.5 2.0 2.3
17. 1.5 1.5 2.0 2.0 2.3 2.0 2.5 3.0 3.5 4.0
19. 1.0 1.2 1.5 1.5 1.8 2.0 2.2 2.5 3.0 3.5
Harmonic number
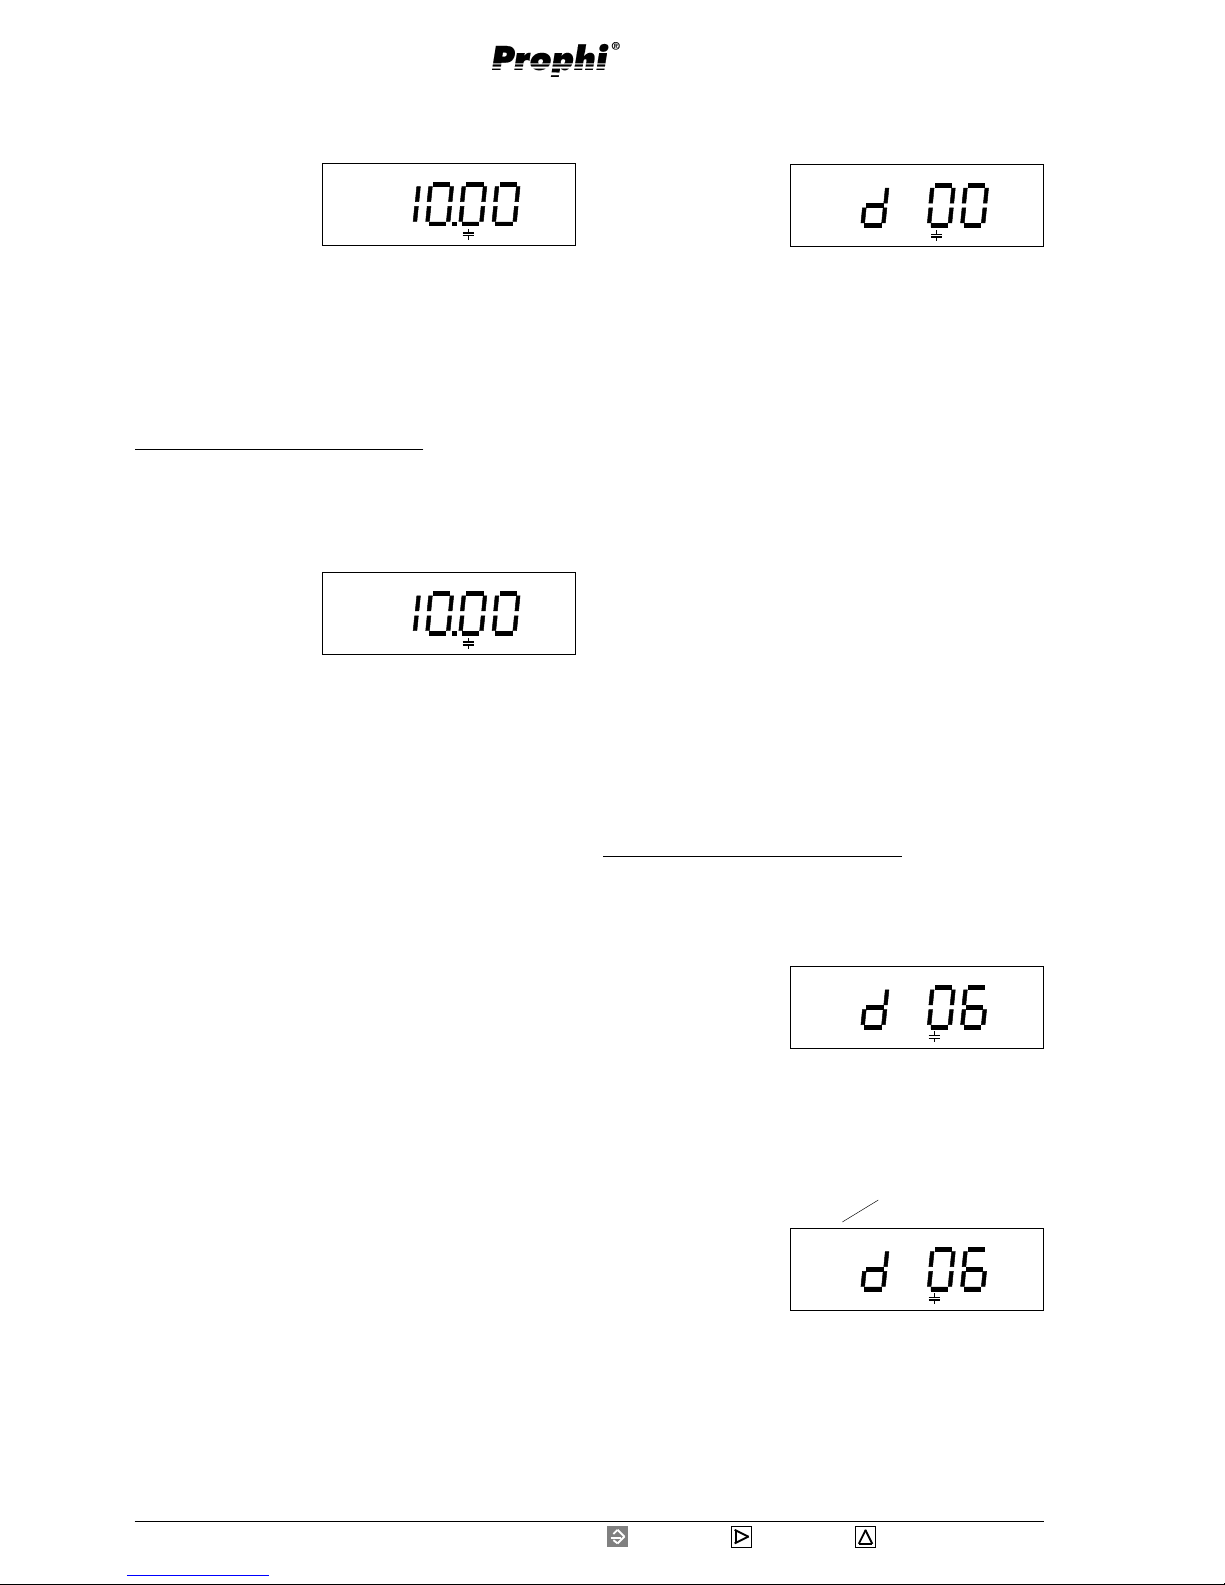
Example: Programming threshold row
Leaf to the harmonic table in the expanded programming using key 3. Confirm with key 1. In this example
the threshold row 1 is indicated.
Select the digit to be
changed by pressing
key 2. The selected
digit is flashing.
Change the selected
digit by pressing key 3.
Pressing key 1 you leave the programming mode and
with key 3 you can continue leafing through the expanded programming.
V
Prog
V
%
Prog
Page 31

Page 31
Reactive Power Controller
= Key 1 = Key 2 = Key 3
Switching frequency
The switching frequency determines,
how often per second
a transistor output may
be switched at maximum.
Possible switching frequencies are:
0,1Hz, (preset)
0,2Hz,
0,5Hz,
1,0Hz,
10,0Hz and
50,0Hz.
The delay time between two switchings of transistor
outputs is fixed to a minimum of 70ms, except for
"50.0Hz".
Switching frequency 0,1Hz
If a switching frequency of 0,1Hz is set, a transistor
output is switched in and off within 10 seconds one
time at maximum.
Switching frequency 10Hz
If a switching frequency of 10Hz is set, a transistor
output is switched in and off 10 times per second at
maximum.
Switching frequency 50,0Hz
The time from a change in signal frequency till a
switching of a transistor output takes a maximum of 20
ms. The time between two switching’s takes a maximum
of 50 ms. If a switching frequency of 50 Hz is adjusted
then the serial interface is out of operation
Example: Programming switching frequency
Go to the switching frequency using key 3 in expanded
programming. Change to programming mode with key
1. In this example, a switching frequency of 10,0 Hz is
indicated.
The set frequency is
flashing.
Now select the needed
frequency with key 2
and 3.
Pressing key 1 you leave the programming mode and
with key 3 you can continue leafing through the expanded programming.
Attention!
If a switching frequency of 50Hz is programmed
for th e transistor outp uts, the serial interf ace d oes
not work!
m
Hz
Prog
Hz
Prog
Page 32

Page 32
Reactive Power Controller
= Key 1 = Key 2 = Key 3
Alarm output
In undisturbed ope-ration, the alarm relay attracts, and the contact
of the alarm output is
closed. In case of a disturbance, the alarm relay releases and the contact is
opened. Various events can be assigned to the alarm
output via or-conjunctions. One alarm number, one
alarm delay and one alarm duration are assigned to
each event. The alarm call can be activated or
deactivated for each event.
"on"/number = Alarm call is activated.
"oFF" = Alarm call is deactivated.
The following events can be assigned to the alarm output:
Alarm call
If one or more alarms occur, Prophi changes to an alarm
indication. In the alarm indication, the errors are shown
by their number. In the following example, the errors
"lower voltage" and "compensation power" occurred.
The time and dimension of the error is not saved.
Give a receipt for alarms
If you confirm the alarm message with key 3, you reach
the last measured value indication. The error symbol
"Error" remains within the measured value indications
until the errors are not valid anymore.
1 5 Error
Low voltage Compensation power
If other error messages appear after the confirmation of
an error message, the alarm indication appears again
with new error messages. Older errors, which are not
valid anymore, are flashing.
Example: Programming compensation power
Leaf to the first alarm in the expanded programming
with key 3. Please leaf to compensation power (5) with
key 2 and confirm with key 1.
Pressing key 1 you leave the programming mode and
with key 3 you can continue leafing through the expanded programming.
With key 3 the alarm "compensation power" is activated (on), with key 2 the alarm "compensation power"
is deactivated (oFF).
Alarmnumber Event Condition
1 Lower voltage oFF/number
2 Overvoltage oFF/number
3 Underscoring of meas.current oFF/number
4 Exceeding of meas. current oFF/number
5 Insufficient capacitor output off/on
6 Supply of real power off/on
7 Harmonic thresholds oFF/number
8 Overtemperature oFF/number
Example: Alarm message
VAr
5 Error
Prog
V
%
1 Error
Prog
cos
ϕϕ
ϕϕ
ϕ
ind
2 3 Error
ϕ1ϕ1
ϕ1ϕ1
ϕ1
Error symbol
Page 33

Page 33
Reactive Power Controller
= Key 1 = Key 2 = Key 3
Lower voltage (1)
A lower voltage is recognized, when the measurement
and supply voltage is smaller or equal to the rated voltage given on type plate.
If lower voltage occurs, it is recognized after 100ms
latest, and the alarm output is active for at least 1 minute.
The threshold for lower voltage is programmable in 1%
steps in the range of 85% and 99%.
Example
Selected threshold : 85%
85% of the rated voltage of 400V make 340V.
If the voltage of 340V is underscored, the alarm relay
releases.
Attention!
If the measurement and operating voltage falls below
85% of the rated voltage, all capacitor stages are
switched off after about 20ms.
Overvoltage (2)
Overvoltage is recognized, when the measurement and
supply voltage is higher or equal to the rated voltage
given on type plate.
If overvoltage occurs, this will be recognized after
100ms latest. The alarm output will drop out for at least
1 minute and connected capacitor stages will be
disconnected in steps of 10 seconds.
The threshold for overvoltage can be programmed in
the range of 96% up to 110% of the rated voltage in
1% steps.
Example
Selected threshold : 110%
110% of the rated voltage of 400V make 440V.
If the voltage of 440V is exceeded, the alarm relay
releases.
Underscoring of the measurement current (3)
The rated current of a measuring input is 5A. If the
selected threshold for the measurement current is underscored, after 100ms maximum the alarm relay releases for at least 1 minute.
The threshold for underscoring the measuring current
can be programmed in the range of 0% up to 28% of
the rated current in 2% steps.
Example
Selected threshold : 10%
10% of the rated current of 5A make 0.5A.
If the current of 0.5A is underscored and the alarm
relay releases.
Exceeding of measuring current (4)
The current of current measurement input is 5A. The
rated current of the current measuring input is 5A. If
the preset threshold for the measurement current is exceeded, the alarm relay releases after 100ms latest for
at least 1 minute.
The threshold for exceeding the measurement current
can be set in the range of 50% up to 120% of the rated
current in 5% steps.
Example 1
Selected threshold : 95%
95% of the rated current 5A make 4.75A.
If the current of 4.75A is exceeded, the alarm relay
releases.
Insufficient capacitor output (5)
If the required compensation power is not reached for
one hour, the alarm relay releases for at least one minute.
Supply of real power (6)
If more real power is supplied than consumed (power
station service), the alarm relay releases after 100ms
latest for at least 1 minute.
Harmonic thresholds (7)
If a value in the selected harmonic threshold table is
exceeded, the alarm relay releases after 100ms latest
for at least 1 minute.
Overtemperature (8)
The reactive power controller is laid out for the operating temperature range between -10°C and +55°C. The
inner temperature of the reactive power controller is
about 2°C higher than the temperature within the cabinet.
If the programmable threshold for the controller inner
temperature is exceeded, the alarm relay releases after
100ms latest for at least 1 minute.
Setting range for the temperature : 0..99°C
Attention!
For inner temperatures of more than 70°C the
alarm will always be raised.
m
Page 34

Page 34
Reactive Power Controller
= Key 1 = Key 2 = Key 3
Averaging time for the mean value cos(phi)
Prophi measures real
and reactive work
within the averaging
time and calculates the
mean value cos(phi).
Setting range: 0.25h
0.50h
1.00h
2.00h
12.00h
24.00h (presetting)
Example: Programming of the averaging time for the
mean value cos(phi).
Go to averaging time for the mean value cos(phi) in
expanded programming with key 3.
Confirm selection with key 1.
In this example, an averaging time of one
hour is indicated and
flashes.
With key 2 and 3 the
desired averaging time can be selected.
Press key 1 for confirmation and with key 3 you can
continue leafing through the expanded programming.
Averaging time of reactive power
The measured reactive
power is summarized
within the averaging
time and the mean
value of reactive power
is calculated.
Setting range: 0,1 Sec.
0,5 Sec.
1,0 Sec.
5,0 Sec.
10,0 Sec.
30,0 Sec.
60,0 Sec. (Presetting)
VAr
s
Prog
VAr
h
Prog
VAr
h
Prog
Example: Programming of the averaging time for reactive power.
Go to averaging time for the mean value reactive power
in expanded programming with key 3.
Confirm selection with
key 1.
In this example an averaging time of 5 seconds is indicated and flashing.
Now the desired averaging time can be selected with
key 2 and key 3.
Press key 1 for confirmation and with key 3 you can
continue leafing through the expanded programming.
VAr
s
P
rog
Page 35

Page 35
Reactive Power Controller
= Key 1 = Key 2 = Key 3
Ventilator control
With the temperature
feeler, inserted in
Prophi, and a ventilator, a simple ventilator
control can be established.
Therefore, an
upper temperature limit, a
lower temperature limit and a
switching output
must be fixed.
Please note, that the inner temperature of the Prophi is
about 2°C over the outer temperature.
A relay output or the alarm output (option) serves as
ventilator output.
If the switching output 0 is assigned to the ventilator
control, the ventilator control is not active.
An upper and lower temperature limit can be set. The
temperature limits can be set in the range of 0°C and
98°C in 1° steps. While programming, you can only set
an upper limit, when it is at least 1°C over the lower
limit.
Attention! If an output is programmed for ventilator
control, and if it is also programmed for a fix stage or
alarm output, the ventilator control has higher priority.
Prog
Obere Grenztemperatur
Attention!
If one output has been programmed for ventilation control, and additionally, it is programmed
as a fix stage or alarm output, the ventilation
control has priority.
m
Prog
Upper temperature limit
(Ventilation control)
Prog
Upper temperature limit
(Ventilation control)
Lower temperature limit
If temperature is below
the lower limit, the
ventilation is switched
off.
Switching output
One of the relay outputs or the alarm output can be used as
switching output of
Prophi.
If output 0 is assigned
to the ventilation control, the ventilation control is inactivated.
Prog
Lower temperature limit
(ventilation control)
Upper temperature limit
If the upper limit is exceeded, the ventilation
is switched on.
Ventilation control
Using the temperature
sensor, which is inserted within Prophi, a
simple ventilation control can be built.
To reach this goal, an
Upper temperature limit, a
Lower temperature limit and
A switching output
must be determined.
While programming of temperature limits, please mind,
that the inner temperature of Prophi is about 2°C above
the outer temperature.
The temperature limits can be set in the range of 0°C
and 98°C in1°C steps.
While programming, it is only possible to set the upper
temperature limit, when it is at least 1°C above the
lower limit.
Prog
No output selected
Page 36

Page 36
Reactive Power Controller
= Key 1 = Key 2 = Key 3
Prog
Upper temperature limit
Prog
Lower temperature limit
Example: Assign one output to ventilator control
Go to upper temperature limit in expanded programming
using key 3.
Move to selection of
the output using key 2.
Output number 13 means the alarm output. Confirm
selection with key 1. The first digit is flashing.
Select the digit to be changed with key 2 and change
with key 3.
Confirm selection with key 1. No digit is flashing.
Carry on in expanded programming with key 3.
Example: Programming of the lower temperature limit
Go to upper temperature limit in expanded programming
using key 3.
Go to lower limit using key 2.
Confirm selection with
key 1. The first number
is flashing.
Select number with key
two and change with key 3.
Confirm selection with key 1. No digit is flashing.
Carry on in expanded programming with key 3.
Diagr.: Connection example, reactive power controller with connected ventilator motor
motor of
ventilator
Prog
No output selected
Page 37

Page 37
Reactive Power Controller
= Key 1 = Key 2 = Key 3
Example: Programming of the upper temperature limit
Go to upper temperature limit in expanded
programming using
key 3.
Confirm selection with
key 1. The first digit is flashing.
Select number with key 2 and change with key 3.
Confirm selection with key 1. No digit is flashing.
Carry on in expanded programming with key 3.
Example: Programming of the lower temperature limit
Go to upper temperature limit in expanded programming using key 3.
Then move to lower limit with key 2.
Confirm selection with
key 1. The first digit is
flashing.
Select number with key
2 and change with key
3.
Confirm selection with key 1. No digit is flashing.
Carry on in expanded programming with key 3.
Example: Programming of the pause time
Go to upper temperature limit in expanded programming using key 3.
Go to pause time with
key 2.
Confirm selection with
key 1. The first digit is
flashing.
Select number with key 2 and change with key 3.
Confirm selection with key 1. No digit is flashing.
Carry on in expanded programming with key 3.
Overtemperature disconnection
In cabinets there might
be an exceeding of the
inner cabinet temperature, effected by
power dissipation of
con-nected capacitor stages or too high outer temperature.
In that case, also the Prophi controller is heated up, and
the inner temperature feeler detects this rise of temperature with a little delay. With the overtemperature
disconnection, connected stages can be disconnected in
order to decrease the inner temperature and to protect
the capacitors from damage.
The following values can be set:
- upper temperature limit,
- lower temperature limit and
- pause time.
Upper temperature limit
Lower temperature limit
Disconnection of capacitors
temperature
t
t
Diagr.: Overtemperature disconnection with hysteresis
m
Attention!
If the upper temperature limit is set below the
lower temperature limit while editing, the lower
limit is decreased automatically.
Upper temperature limit
If the upper temperature limit is exceeded, connected
capacitors are disconnected.
Lower temperature limit
If the lower temperature limit is exceeded, no more
stages are connected anymore.
Pause time
If the lower temperature limit is exceeded, one capacitor stage will be disconnected, and the pause time is
started. After the pause time is over, the next capacitor
stage can be disconnected.
Attention! The overtemperature disconnection
also disconnects programmed fix stages.
m
s
Prog
Prog
Prog
Page 38

Page 38
Reactive Power Controller
= Key 1 = Key 2 = Key 3
Indication in manual mode
While switching capacitor stages in
manual mode, either
the actual cos(phi) or
actual real power can
be indicated.
CAr = Indication of reactive power
CoS =Indication of cos(phi)
Prog
Prog
Example: Selection of indication in manual mode
Move to selection of the indication in manual mode
with key 3.
Confirm with key 1.
The last selected value,
CoS or CAr, is flashing.
With key 3 can be
changed over to CoS and with key 2 to CAr.
Confirm selection with key1.
The selected text is no longer flashing.
Carry on expanded programming using key 3.
Page 39

Page 39
Reactive Power Controller
= Key 1 = Key 2 = Key 3
Password
The settings of Prophi
can be protected
against unintentional
change by a four digit
user password. This
denies the access to the menus:
- manual mode
- standard programming and
- expanded programming.
Prophi works in automatic mode and only the measured
values can be seen.
In delivery condition, no password (“0000”) is pro-
grammed, the user has full access to all menus.
After programming a password, it is always requested
before accessing one of the locked menus. The password can be changed within the expanded programming. If (“0000”) is entered as a password, the user has
full access to all menus.
If a changed password is not known anymore,
the device has to be sent back to the manufacturing work.
Program password
If no password was programmed so far, please proceed
as follows:
Scroll to expanded programming by pressing
key 1. The symbol
“Prog” is flashing.
Confirm selection with
key 2.
The menu for programming the fix stages appears.
Scroll to menu password by pressing key
3. Confirm selection
with key 1.
The first number of the
password is flashing.
Select the digit, which shall be changed, with key 2.
The selected number is flashing.
Change number with key 3.
If the password has been completed, confirm password
with key 1.
No digit is flashing now.
The new password is active.
Prog
Prog
m
Enter password
If the programming is protected by a password, you
must enter this password to have access to the locked
menus.
Press key 1. The first
digit is flashing.
Select the number,
which should be
changed with key 2.
The selected number flashes.
Change number with key 3.
If the password is completed, end input with key 2.
If the password was invalid, the request for a password
appears again.
If the password was
correct, you are in
menu “manual mode”
of the standard programming.
Scroll to the required programming menus with key 1.
The programming menus are locked again automatically, when no key was pressed over 60 seconds.
Change password
To enter a new password, please change to expanded
programming by using the old password, which has to
be entered first.
Confirm with key 1.
The first digit of the
password is flashing.
Now enter the old password.
Select the number to be changed by key 2, the selected
number is flashing.
Change the selected number with key 3.
If the password is completed, confirm with key 2.
If the password was invalid, the request for the password appears again.
If the password was correct, you are in menu “manual
mode” of the standard
programming.
Now you can overwrite
the password as described under “program password”.
m
Entering the password “0000” releases the lock
of the programming menus.
Prog
Prog
Prog
Prog
Page 40

Page 40
Reactive Power Controller
= Key 1 = Key 2 = Key 3
Contrast
The preferred view of
the indication is "from
below", which means,
that the display can be
read best in this view.
The contrast between
the characters and the background is the highest.
Little changes of the view can be evened out by the
contrast setting. The contrast of the indication can be
changed by the user.
Setting range 1 - 12
To get an optimal contrast for the whole temperature
range, the contrast of the indication is self adjusting for
changes of the ambient temperature. This correction is
not indicated in the contrast setting.
Prog
6
Example: Programming contrast
Pressing key 1 you leave the programming mode and
with key 3 you can continue leafing through the expanded programming.
Prog
6
Contrast = 6
Go to the next higher
digit using key 2.
Go to the next smaller
digit using key 3.
Prog
7
Move to contrast in the
expanded programming using key 3.
Confirm with key 1.
The text "Cont" is
flashing.
Prog
5
Contrast = 7
Contrast = 5
Page 41
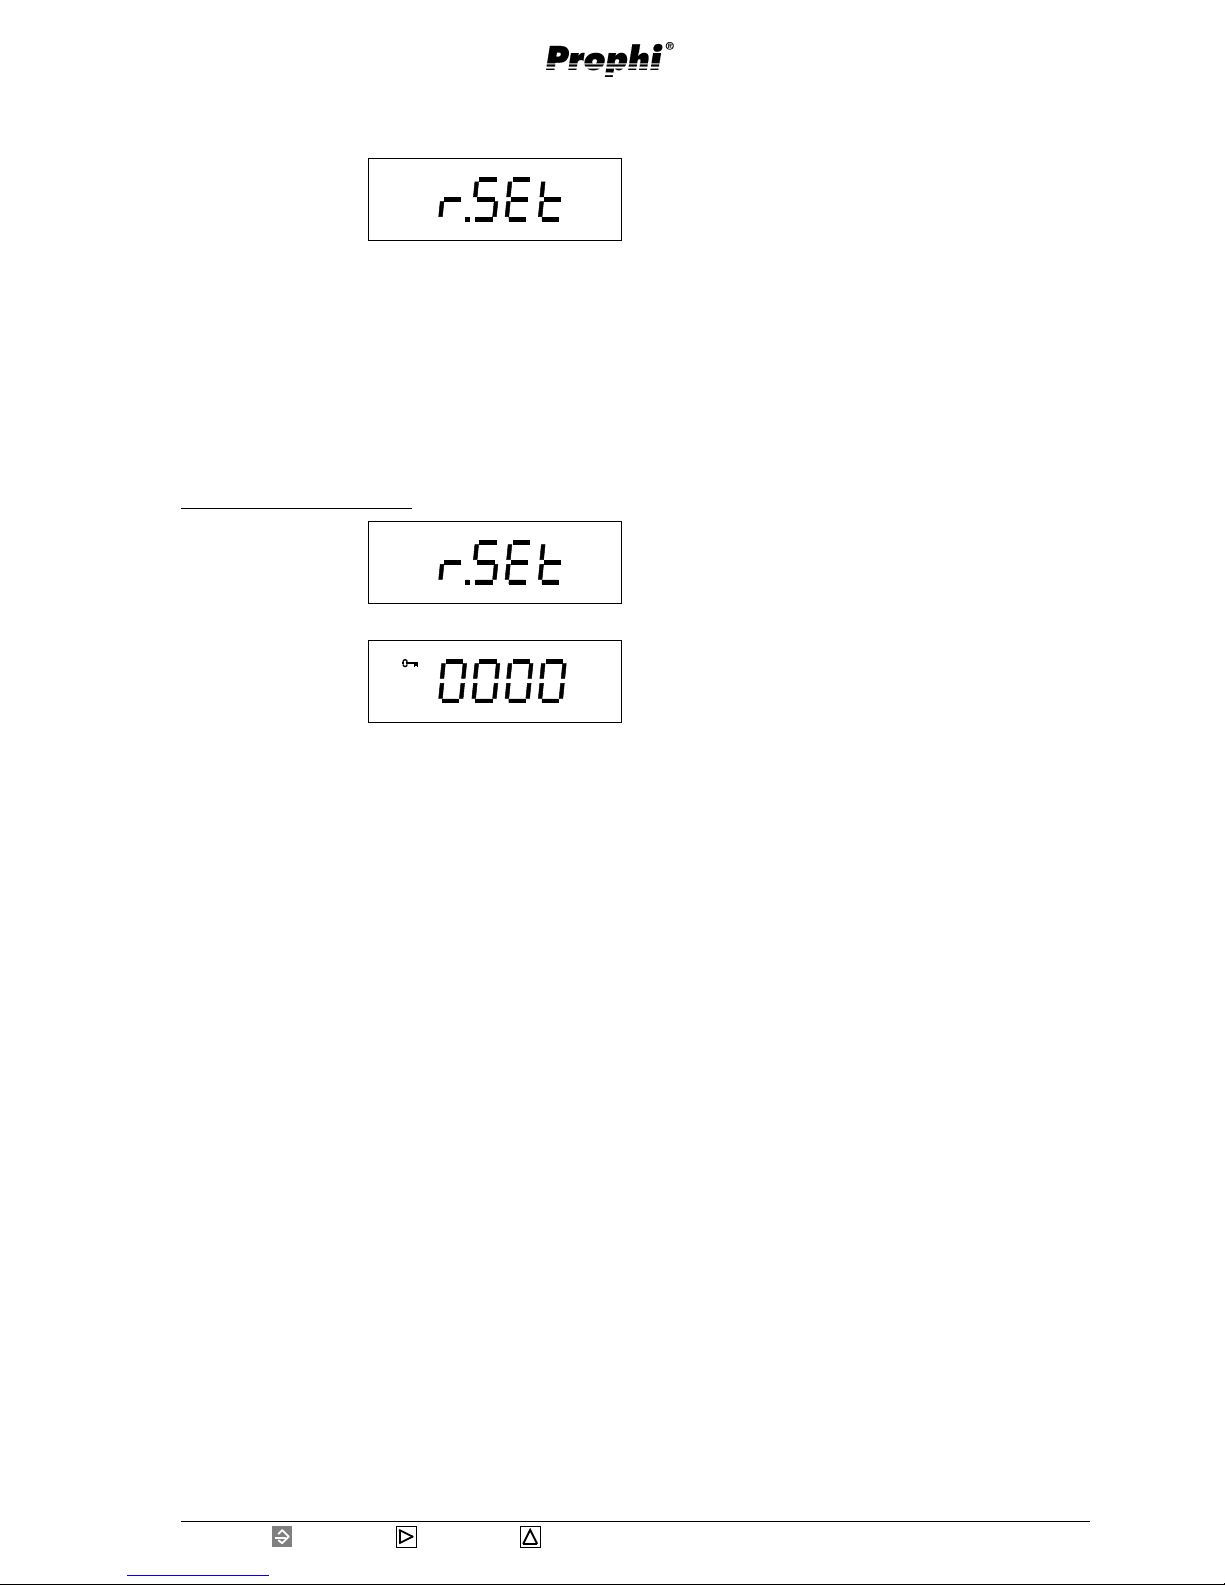
Page 41
Reactive Power Controller
= Key 1 = Key 2 = Key 3
Reset programming
Prog
Prog
Example: Programming reset
Go to reset in the expanded programming
using key 3.
Confirm with key 1.
The password indication appears.
Enter password.
Select the digit to be
changed using key 2.
The selected digit is
flashing
Change the selected
digit by pressing key 3.
If all ciphers are programmed correctly, all ciphers disappear in the indication, and the manufacturer's programming is loaded. Prophi keeps working in automatic
mode.
With the function "Reset programming" the
programming carried
out are deleted and
overwritten by the
manufacturer's programming. The programming is now
in the same condition as delivered.
To avoid unintentional deleting, the four digit reset password must be entered additionally. The reset password
can be requested in the manufacturing work.
Prog
Page 42

Page 42
Reactive Power Controller
= Key 1 = Key 2 = Key 3
Prog
Voltage between
Current in L1-L2 L2-L1 L2-L3 L3-L2L3-L1 L1-L3
L1 k-l 240° 60° 0° 180° 120° 300°
l-k 60° 240° 180° 0° 300° 120°
L2 k-l 120° 300° 240° 60° 0° 180°
l-k 300° 120° 60° 240° 180° 0°
L3 k-l 0° 180° 120° 300° 240° 60°
l-k 180° 0° 300° 120° 60° 240°
Table 2: Correction angle, measurement L-L
Example : Programming of the correction angle
The current transformer is installed in L2. "k-l" is not
exchanged. The voltage measurement is done according to connection diagram between L2-L3.
In that case you can read the angle of 240° in the table
"correction angle".
Voltage between
Current in L1-L2 L2-L1 L2-L3 L3-L2L3-L1 L1-L3
L1 k-l 240° 60° 0° 180° 120° 300°
l-k 60° 240° 180° 0° 300° 120°
L2 k-l 120° 300° 240° 60° 0° 180°
l-k 300° 120° 60° 240° 180° 0°
L3 k-l 0° 180° 120° 300° 240° 60°
l-k 180° 0° 300° 120° 60° 240°
Table: Correction angle
Confirm selection with
key 1. One digit is
flashing.
Change the selected
digit using key 2. The
selected digit is flashing. Change the selected digit using key 3.
Leave programming mode with key 1. No digit is flashing anymore.
With key 3 you continue moving through the expanded
programming.
Prog
Voltage between
Current in L3-N N-L3 L1-N N-L1 L2-N N-L2
L1 k-l 240° 60° 0° 180° 120° 300°
l-k 60° 240° 180° 0° 300° 120°
L2 k-l 120° 300° 240° 60° 0° 180°
l-k 300° 120° 60° 240° 180° 0°
L3 k-l 0° 180° 120° 300° 240° 60°
l-k 180° 0° 300° 120° 60° 240°
Table 1: Correction angle, measurement L-N
Connection configuration
Prophi can be delivered
in two connection varieties for the measurement and supply voltage.
In the version measurement L-L, the measurement and
supply voltage must be taken from two outer conductors. In version measurement L-N, the measurement
and supply voltage must be taken between outer conductor L and neutral N.
Correction angle
The controller Prophi indicates the power factor, real
and reactive power correctly, if current and voltage were
connected according to the type plate and connection
diagram. The phase shift between voltage and current
must not be corrected, and the correction angle is 0°.
The correction angle can be selected in the range of 0°
- 359° in one degree steps.
If the user cannot connect Prophi according to the
connection diagram, this can be corrected according to
the correction values of table 1 or 2.
Devices for version L-N can be corrected with the correction angles of table 1.
Devices for version L-L can be corrected with the correction angles of table 2.
If the connection fault is not known, the correction angle can be determined automatically by using the “learn”
function.
Page 43

Page 43
Reactive Power Controller
= Key 1 = Key 2 = Key 3
Software release
The software for
Prophi is improved and
ex-panded continuously. The software release of the device is
given by a number, the software release. The software
release cannot be changed by the user.
Serial number
Each device has its own unchangeable 8 digit serial
number. The serial number is laid down in two pictures.
Prog
Serial number, part 2
Prog
If you are in the indication of the software
release, please call the
first and second part of
the serial number by
pressing key 2.
Serial number, part 1
Prog
Page 44
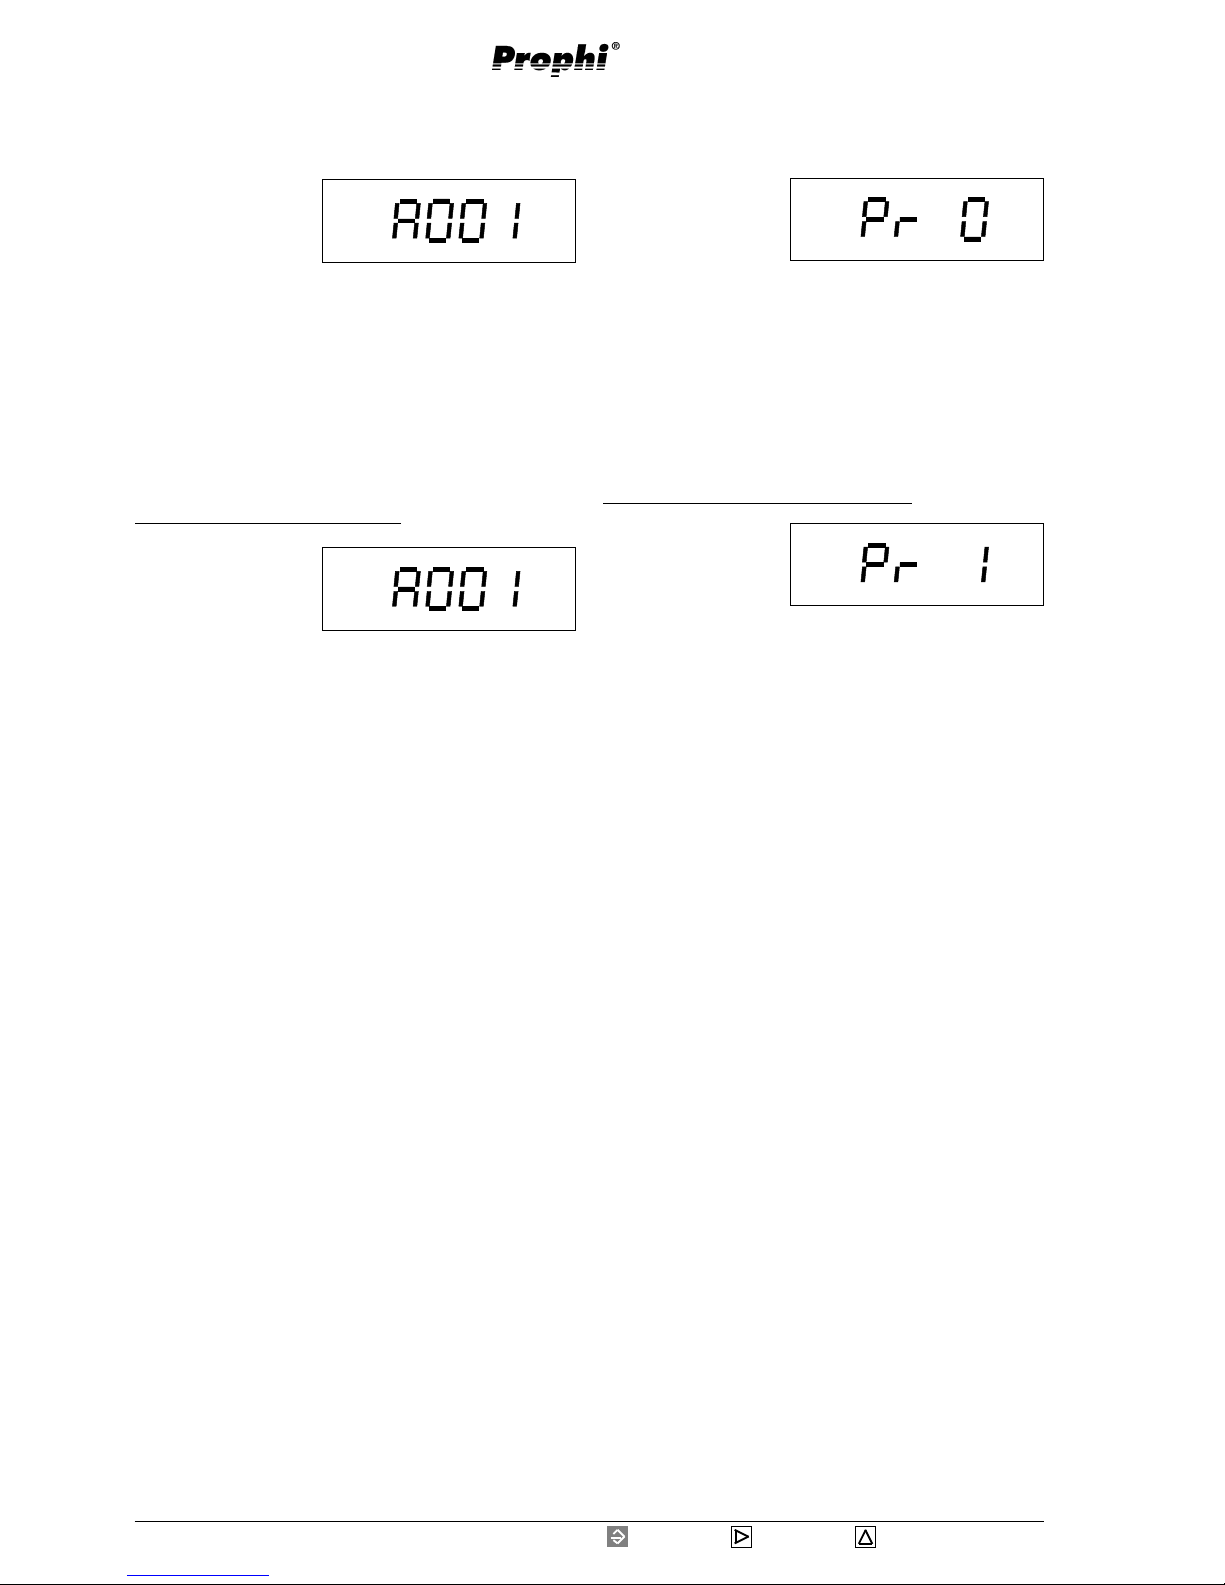
Page 44
Reactive Power Controller
= Key 1 = Key 2 = Key 3
Serial interface (Option)
Device address
If several devices are
connected via RS485,
a master (PC/PLC) can
tell the difference between them by their device addresses. Within one network, each
Prophi
must
have its own device address.
If Profibus protocol has been chosen, the address can be
given between 0 and 126. If Modbus protocol has been
chosen, the address can be given between 0 and 255.
The device address can be requested and changed in
menu "advanced programming".
Example: Change device address.
With key 3 you can
move to device address
in expanded programming.
Confirm selection with
key 1.
In this example the device address is indicated as 1.
Select the number to be changed by using key 2.
The selected digit is flashing.
Change digit with key 3.
Confirming key 1 for about 2 seconds, the changes are
saved and
Prophi
keeps working in automatic mode.
Transmission protocol
For the connection of
Prophi to an existing
fi eld b us sy stem are t wo
transmission protocols
available:
0 - Modbus RTU (Slave) and
1 - Profibus DP V0 (Slave) .
With Modbus protocol you have access to the data from
table 1 and with Profibus protocol you have access to the
data of table 2.
Example: Select transmission protocol.
Please move to device
address in expanded
pr ogra mmin g us ing k ey
3. Now press key 2 for
transmission protocol.
Confirm selection with key 1.
In this example the transmission protocol is protocol
1=Profibus DP. Digit 1 is flashing.
Please chan ge ov er between prot ocol 1 and 2 by pressi ng
key 3.
Confirming key 1 for about 2 seconds, the changes are
saved and
Prophi
keeps working in automatic mode.
Attention!
If a switching frequency of 50Hz is programmed
for the transistor outputs, the serial interface does
not work!
m
Page 45

Page 45
Reactive Power Controller
= Key 1 = Key 2 = Key 3
Modbus RTU
Transmission mode
RTU-Mode with CRC-Check
Transmission parameters
Baud rate : 9.6, 19.2, 38.4, 57.6, 115.2kbps
Data bits : 8
Parity : none
Stop bits : 2
Realised functions
Read Holding Register, Function 03
Preset Single Register, Function 06
Preset Multiple Register, Function 16
Data formats
char : 1 Byte (0 .. 255)
word : 2 Byte (-32768 .. +32767)
long : 4 Byte (-2 147 483 648 .. +2 147 483 647)
The sequence of bytes is highbyte before lowbyte.
Profibus DP V0
The
Prophi
is a slave device and corresponds to the
fieldbus directive PROFIBUS DP V0, DIN E 19245 part
3. The PROFIBUS user organization has listed
Prophi
with the following entries:
Device description : Prophi
Ident-Number : 04B9 HEX
GSD : PROF04B9.GSD
The GSD file is specific for the device. Here the transmission parameters and the kind of measured data are
determined. The GSD file for
Prophi
with option "Interface" belongs to the contents of delivery.
While creating the program for the PLC (master), the
GSD file is implemented into PLC program.
Baud rate
The setting of the baud
rate is valid for Modbus
RTU only.
For Profibus DP V0 protocol the set baud rate is not
used, but will be determined by the master (e.g. PLC)
and transmitted to
Prophi
.
Example: Select baud rate.
Please move to device
address in expanded
programming using key
3.
Now go to baud rate
using key 2.
Confirm with key 1.
In this example, the baudrate 4= 115.2kbps is indicated,
the number is flashing.
Select baud rate with key 3 (0, 1, 2, 3 or 4).
Confirming key 1 for about 2 seconds, the changes are
saved and
Prophi
keeps working in automatic mode.
Number Baud rate for Modbus RTU
09.6kbps
119.2kbps
238.4kbps
357.6kbps
4115.2kbps
Page 46

Page 46
Reactive Power Controller
= Key 1 = Key 2 = Key 3
Table Modbus
Description Address r/w Format Unit Comment
Current 1000 r word mA
Voltage L-L 1002 r word V Urated +10% -15%
Reactive power 1004 r word Var + = cap, - = ind
Cos(phi) 1006 r word + = cap, - = ind
Outputs 1008 r word Bit 0 K1 (1=On, 0=Off)
Bit 1 K2
Bit 2 K3
.. ..
Bit 11 K12
Bit 12 Alarm output
Alarm calls 1010 r word Bit 0 Low voltage
Bit 1 Overvoltage
Bit 2 Current too low
Bit 3 Current too high
Bit 4 Insufficient capacitor power
Bit 5 Supply of real power
Bit 6 Harmonic limits exceeded
Bit 7 Overtemperature
Switchings, K1 1012 r unsigned long Number of switchings per capacitor stage
Switchings, K2 1016 r unsigned long (0 .. 4 200 000 000)
...
Switchings, K12 1056 r unsigned long
Connect. time, K1 1060 r unsigned long Total connection time per capacitor stage in
Connect. time, K2 1064 r unsigned long seconds. (0 .. 4 200 000 000)
...
Connect. time, K12 1104 r unsigned long
Outputs, remote 2000 w word Bit 0 K1 (1=On, 0=Off)
Bit 1 K2
Bit 2 K3
.. ..
Bit 11 K12
Bit 12 free
Bit 13 Tariff
Bit 14 Remote Tarif
Bit 15 Remote Outputs
1. Harmonic, I 1108 r word mA 16 Bit, 0..5000mA
3. Harmonic, I 1110 r word mA 16 Bit, 0..5000mA
...
19. Harmonic, I 1126 r word mA 16 Bit, 0..5000mA
1. Harmonic, U 1128 r word 0,1V 16 Bit, Unit 0.1Volt
3. Harmonic, U 1130 r word 0,1V 16 Bit, Unit 0.1Volt
...
19. Harmonic, U 1146 r word 0,1V 16 Bit, Unit 0.1Volt
Current transformer ratio 1148 r word 16Bit
Voltage transformer
Primary 1150 r word 16Bit
Attention!
The current and voltage transformer ratios have not been respected at the statements for the measured values.
m
Page 47

Page 47
Reactive Power Controller
= Key 1 = Key 2 = Key 3
Table Profibus
Description PEW PAW Format unit Comment
Current 0 word mA
Voltage L-L 2 word V Urated +10% -15%
Reactive power 4 word Var + = cap, - = ind
Cos(phi) 6 word + = cap, - = ind
Outputs 8 word Bit 0 K1 (1=On, 0=Off)
Bit 1 K2
Bit 2 K3
.. ..
Bit 11 K12
Bit 12 Alarm output
Alarm outputs 10 word Bit 0 Low voltage
Bit 1 Over voltage
Bit 2 Current too low
Bit 3 Current too high
Bit 4 Insufficient capacitor power
Bit 5 Supply of real power
Bit 6 Harmonic limits exceeded
Bit 7 Over temperature
Outputs, remote 0 word Bit 0 K1 (1=On, 0=Off)
Bit 1 K2
Bit 2 K3
.. ..
Bit 11 K12
Bit 12 free
Bit 13 Tariff
Bit 14 Remote Tarif
Bit 15 Remote Outputs
Attention!
The Current and voltage transformer ratios are not mentioned for measured values.
m
Page 48

Page 48
Reactive Power Controller
= Key 1 = Key 2 = Key 3
Display overview
Measured value indications
Diagr.: Measured value indications, part 1 of 2
Target-cos(phi1)
A
%
Har monic co ntent
Har monic co ntent
V
%
n
2
Hz
Net frequency, lowest value
Reactive power, peak value, inductive
k VAr
i
nd
n
1
1.capacitor stage, switchings
Apparent power, sum
k VA
2.capacitor stage, switchings
12. capacitor stage, switchings
n
12
A
Peak value
Peak value
Real power, peak value
V
Net frequency, peak value
kW
k VAr
cap
Qc
Requir ed com pensation power
A
1
1. capacitor stage, current
2.capacitor stage, current
A
2
12. capacitor stage, current
A
12
Actual-cos(phi), actual value
Inner temperature, peak value
Hz
kW
V
k VAr
1
k VAr
2
Hz
Apparent current
A
cos
ϕ
ϕ
ϕϕ
ϕ
1 2
ϕ1ϕ1
ϕ
1ϕ1
ϕ1
Actual-cos(phi), mean value
Voltage L2-L3
Real power, sum
Reactive power, sum
1.Capacitor stage, reactive power
2. Capacitor stage, reactive power
Inner temperature, Prophi
Net frequency
Error indication
k VAr
ind
k VAr
12
12. capacitor stage, reactive power
Error
cos
ϕ
ϕ
ϕϕ
ϕ
1 2
ϕ1ϕ1
ϕ
1ϕ1
ϕ1
cos
ϕ
ϕ
ϕϕ
ϕ
ind
ϕ1ϕ1
ϕ
1ϕ1
ϕ1
Page 49

Page 49
Reactive Power Controller
= Key 1 = Key 2 = Key 3
Target-cos(phi2)
cos
ϕϕ
ϕ
ϕ
ϕ
ind
ϕ2 ϕ2
ϕ2 ϕ2
ϕ2
Peak value of the mean value
A
%
Harmonic content, peak value
A
%
1. Harmonic (fundamental)
cos
ϕϕ
ϕ
ϕ
ϕ
Harmonic content, peak value 1.Harmonic (fundamental)
V
%
V
%
Reactive power, peak value, capacitive
k VAr
cap
1.Capacitor stage, tot. connection time
Apparent power, peak value
k VA
2.Capacitor stage, tot. connection time
h
1
12. Capacitor st ag e, tot. conn ec ti on time
h
12
h
2
Diagr.: Measured value indications, part 2 of 2
3. 5%
Lowest value of actual value
A
%
3. Harmonic, peak value .....
cos
ϕϕ
ϕϕ
ϕ
ind
ϕ2 ϕ2
ϕ2 ϕ2
ϕ2
3. Harmonic, peak value .....
V
%
Peak value of the actual value
A
%
1. Harmonic, peak value
cap
cos
ϕϕ
ϕϕ
ϕ
1. Harmonic, peak value
V
%
Lowest value of the mean value
A
%
3. Harmonic ......
cos
ϕϕ
ϕ
ϕ
ϕ
3. Harmonic ......
V
%
1. 110%
Page 50

Page 50
Reactive Power Controller
= Key 1 = Key 2 = Key 3
Display in standard programming
Diagr.: Standard programming
Target-cos(phi1)
Target-cos(phi2)
Current transformer ratio
k
Stage power of the first stage
k VAr
Stage ratio
Number of switching outputs
Prog
Delete peak values
Expanded programming
cos
ϕϕ
ϕ
ϕ
ϕ
ind
ϕ1ϕ1
ϕ1ϕ1
ϕ1
cos
ϕϕ
ϕϕ
ϕ
ind
ϕ2 ϕ2
ϕ2 ϕ2
ϕ2
1:1...
Learning of connection configuration
learn
Page 51

Page 51
Reactive Power Controller
= Key 1 = Key 2 = Key 3
Display in expanded programming
Diagr.: Expanded programming, Part 1 of 2
Voltage transformer ratio
Harmonic table
V
Prog
Alarm message, lower voltage
V
%
Error
Prog
V
Prog
k VAr
2
Prog
Stage power
k VAr
3
Prog
Stage power
Alarm message, over voltage
V
%
Error
Prog
A
%
Error
Prog
Alarm message, min. measured current
Error
Prog
Alarm message, compensation power
W
Error
Prog
Alarm message, supply of real power
A
%
Error
Prog
Alarm message, max. measured current
Choke degree, 3. capacitor stage
3
Prog
Choke degree, 2. capacitor stage
2
Prog
Stage power
k VAr
1
Prog
Disconnection pause for relay stages
Choke degree
1
Prog
Error
Prog
Alarm message, harmonic table
Fix stages
Prog
s
Prog
Discharge time
Alarm message, overtemperature
Error
Prog
Power station service
Prog
Switching frequency
Hz
Prog
Prog
s
Page 52

Page 52
Reactive Power Controller
= Key 1 = Key 2 = Key 3
Software Release
Prog
Serial number, part 1
Prog
Serial number, part 2
Prog
Diagr.: Expanded programming, part 2 of 2
Reset programming
Prog
Contrast
Prog
6
Prog
Co nnec tio n con figu rati on
Prog
Display in manual mode
Prog
Ventilator control, upper temperature
limit
VAr
h
Prog
Averaging time for mean value cos(phi)
VAr
s
Prog
Averaging time for reactive power
Prog
Ventilator control, output
Prog
Fan control, lower temperature limit
Overtemperature disconnection, upper
limit
Overtemperature disconnection, pause
time
O v e r t e m p e r a t u r e d i s c o n n e c t i o n , l o w e r l i m i t
Prog
Prog
s
Prog
Password
Prog
Baud rate
Protocol
Address
Page 53

Page 53
Reactive Power Controller
= Key 1 = Key 2 = Key 3
Target-cos(phi1) 0.80cap. .. 1.00 .. 0.80ind. 0.96ind
Target-cos(phi2) 0.80cap. .. 1.00 .. 0.80ind. 0.90ind
CT ratio 1 .. 9999 10
Learning of configuration oN, oFF oFF
Stage power of 1. stage 0var .. 9999kvar 10kvar
Stage ratio 0 .. 9 1:1:1:1
Switching outputs 1 .. 12 all stages
Fix stages 0 .. 3 0 = no fix stages
Discharge time 0 .. 1200 seconds 60 Sec.
Disconnection pause for relay stages 0 .. 1200 seconds 40 Sec.
Switching frequency for semic. stages 0.1, 0.2, 0.5, 1.0, 10.0, 50.0Hz
1)
1.0 Hz
Power station service on, oFF oFF
Stage power, 1. - 12. capacitor stages 0var .. 9999kvar 10kvar
Choke degree 0 .. 15% 0 %
VT ratio
Number 1 (Primary) 1 .. 9.999k 1
Number 2 (Secondary) 1, 10, 100, 110, 200, 230, 400 1
Harmonic table number 0 .. 10 0
Alarm calls
Low voltage on/1, oFF oFF
Overvoltage on/2, oFF oFF
Current too low on/3, oFF oFF
Current too high on/4, oFF oFF
Insufficient capacitor power on/5, oFF oFF
Supply of real work on/6, oFF oFF
Harmonic limits exceeded on/7, oFF oFF
Overtemperature on/8, oFF oFF
2)
Averaging time of reactive power 0.1, 0.5, 1.0, 5.0, 10.0, 30.0, 60.0Sek. 60.00 Sec.
Averaging time for mean value cos(phi) 0.25, 0.50, 1.00, 2.00, 12.00, 24.00h 24.00 h
Ventilator control
Upper temperature limit 0 .. 99°C 0°C
Lower temperature limit 0 .. 98°C 0°C
Output number 0 .. 13 (13 = alarm output) 0 = no ventilator control
Overtemperature disconnection
Upper limit 0 .. 99°C 55°C
Lower limit 0 .. 98°C 50°C
Pause time 0 .. 1200 seconds 600 seconds
Indication in manual mode CoS = cos(phi), CAr = react. power CAr = react. power
Password 0 .. 9999 000 0 = n o pa ssw ord
Contrast 1 .. 12 6
Reset programming
Connection configuration 0° .. 359° 000°
Software Release x.xxx actual version
Serial number part 1 xxxx depending on device
Serial number part 2 xxxx depending on device
Serial interface
Device address 0 .. 126 001
Protocol 0 .. 1 0
Baud rate
Modbus RTU 0=9.6, 1=19.2, 2=38.4, 3=57.6, 4=115.2 0 ( = 9.6kbps)
Profibus DP V0 Automatical adaption up to 1.5Mbps at maximum
Configuration data
Manufacturer's presetting
Setting rangeDescription
Standard programmingExpanded programming
1)
For inner temperatures of over 70°C an alarm is always raised.
2)
If a switching frequency of 50Hz is programmed for the transistor outputs, the serial interface does not work!
Page 54

Page 54
Reactive Power Controller
= Key 1 = Key 2 = Key 3
Technical data
Weight : 1kg
Combustion value :ca. 700J (190Wh)
Ambient conditions
Overvoltage class : III
Pollution degree : 2
Operating temperature : -10°C .. +55°C
Storing temperature : -20°C .. +60°C
Spurious radiation (residential areas):
DIN EN61326-1:2006, class B
IEC61326-1:2005
Sensibility to disturb. (industrial areas) :
DIN EN61326-1:2006, class A
IEC61326-1:2005
Sensibility to disturb. (industrial areas) :
DIN EN61326-1:2006, table 2
IEC61326-1:2005
Safety guidelines :EN61010-1 08.2002
IEC61010-1:2001
Mounting position : any
Operating height : 0 .. 2000m over NN
Humidity class : 15% to 95% without dew
Protection class : I =Device with protective wire
Protection class
Front : IP65 according to IEC60529
Back : IP20 according to IEC60529
Inputs and outputs
Tariff changeover
Current consumption : about 2,5mA .. 10mA
Switching outputs
Testvoltage against ground : 2200V AC
Relay outputs
Switching voltage : max. 250VAC
Switching power : max. 1000W
Max. switching frequency : 0,25Hz
Mechanical life expectancy : >30x106 switchings
Electrical life expectancy : >7x10⁶ switchings
(Load = 200VA, cosphi=0,4)
transistor outputs
Switching voltage : 15 .. 30VDC
Switching current : max. 50mA
Max. switching frequency : 10Hz
Measurement
Measurement and supply voltage U: see type plate
Range for U : +10% , -15%
Prefuse : 2A .. 10 A
Power consumption : max. 7VA
Rated pulse voltage : 4kV
Tested voltage against ground : 2200V AC
Frequency of fundamental : 45Hz .. 65Hz
Current measurement
Signal frequency : 45Hz .. 1200Hz
Power consumption : about 0,2 VA
Rated current at../5A (/1A) : 5A (1A)
Minimum working current : 10mA
Maximum current : 5,3A (sinus shape)
Overload : 180A for 2 Sec.
Measuring rate : 30(50) Measurement/Sec.
Actualization of indication : 1 / second
Zero voltage release : < 15ms
Measurement accuracy
Voltage : +- 0,5% omr
Current : +- 0,5% omr
cos(phi) : +- 1,0% omv
1)2)
Power : +- 1,0% omr
Frequency : +- 0,5% omv
2)
Those specifications presuppose a yearly calibration and a preheating
of 10 minutes.
omr = of measuring range
omv = of measured value
1)
Valid for current inputs >0.2A and in cos(phi) range 0,85 up to 1,00.
2)
In the range of -10..18°C and 28..55°C an additional inaccuracy of +-0,2‰ of measured value per K must be respected.
3)
Devices with option "RS485 interface" are only suitable for an ambient temperature of -10°C .. +50°C.
Page 55

Page 55
Reactive Power Controller
= Key 1 = Key 2 = Key 3
Back Side Side view
144 x 144
136 x 136
10200220
494
158
1
0200220
144 x 144
136 x 136
10200730a
494
158
10200730b
Dimension sketch for devices with option "RS485 interface"
Page 56

Page 56
Reactive Power Controller
= Key 1 = Key 2 = Key 3
Short manual
Learning of configuration
or
Programming of configuration
Targ et-cos(phi1)
cos
ϕϕ
ϕϕ
ϕ
ind
ϕ1ϕ1
ϕ1ϕ1
ϕ
1
Current transformer ratio
Select automatic mode
Select current transformer ratio
Select digit
Change digit
Save and go to automatic mode
2 Sec.
2 x
2 Sec.
Select automatic mode
Select target-cos(phi1)
Select digit
Change digit
Save and go to automatic mode
2 Sec.
4 x
2 Sec.
learn
Learning
Select automatic mode
Select learn
Select no. 3
Start learning procedure
2 Sec.
5 x
k VAr
Stage power
Stage ratio
1:1...
Number of stages
Select automatic mode
Select stage ratio
Select digit
Change digit
Save and go to automatic mode
Select automatic mode
Select number of stages
Select digit
Change digit
Save and go to automatic mode
Select automatic mode
Select stage ratio
Select digit
Change digit
Save and go to automatic mode
2 Sec.
6 x
2 Sec.
2 Sec.
7 x
2 Sec.
2 Sec.
8 x
2 Sec.
Targ et-cos(phi1)
cos
ϕϕ
ϕϕ
ϕ
ind
ϕ1ϕ1
ϕ1ϕ1
ϕ1
Current transformer ratio
Select automatic mode
Select current transformer ratio
Select digit
Change digit
Save and go to automatic mode
2 Sec.
2 x
2 Sec.
Select automatic mode
Select target-cos(phi1)
Select digit
Change digit
Save and go to automatic mode
2 Sec.
4 x
2 Sec.
 Loading...