

Page 1
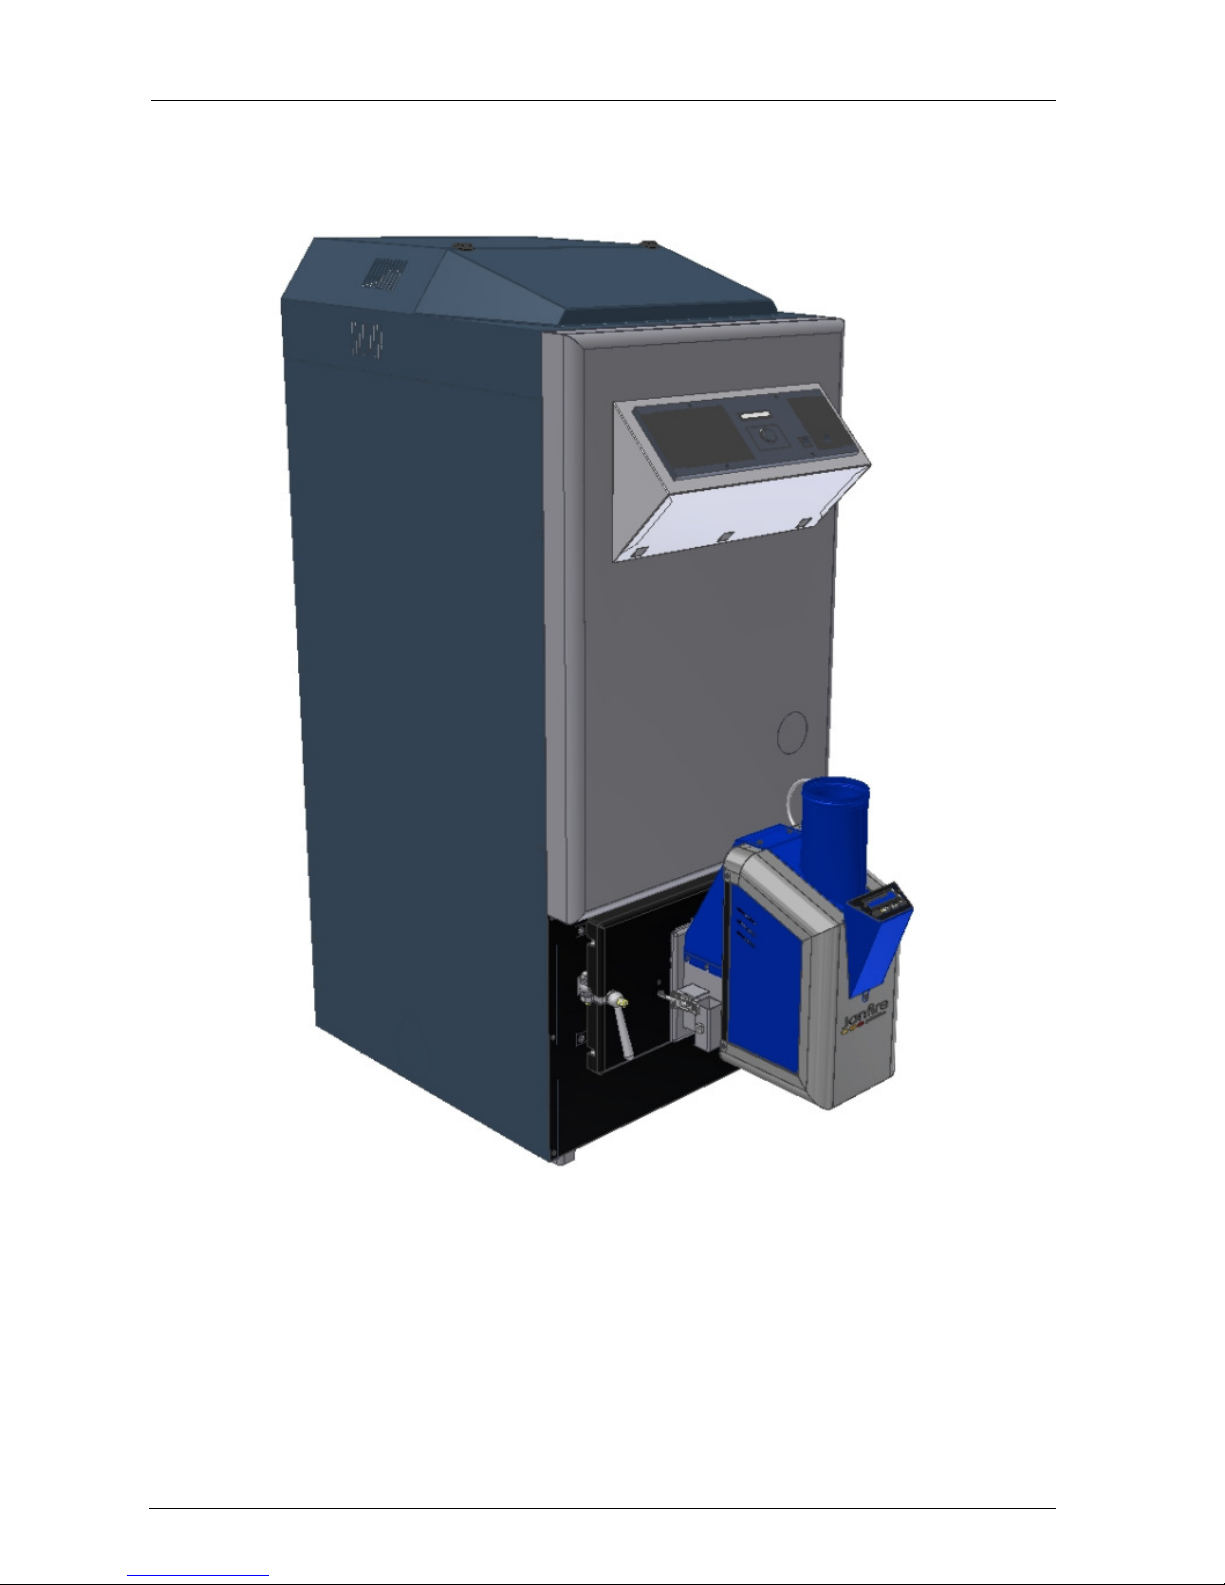
Installation Instructions Janfire Pellet Boiler Integral Typ 25
IA 32580002 EN_Ver5
Janfire 2014
1(25)
Page 2

Installation Instructions Janfire Pellet Boiler Integral Typ 25
IA 32580002 EN_Ver5
Janfire 2014
2(25)
Due to the continuous development in methods, design and manufacture, the contents of this document may
change at any time and without prior notice.
Janfire AB do not accept any responsibility for errors or damage of any kind that be attributed to this
publication.
Page 3

Installation Instructions Janfire Pellet Boiler Integral Typ 25
IA 32580002 EN_Ver5
Janfire 2014
3(25)
Contents
Safety Information ......................................................................................................... 4
1.1 General ......................................................................................................... 4
1.2 Conventions ................................................................................................... 4
1.3 Safety Instructions for Installation and Service ............................................... 4
1.4 CE declaration ............................................................................................... 5
2 Technical Data .............................................................................................. 6
3 General ....................................................................................................... 10
4 Installation .................................................................................................. 11
4.1 Delivery Contents ......................................................................................... 11
4.2 Flue ....................................................................................................... 12
4.3 Boiler ....................................................................................................... 14
4.4 Burner ....................................................................................................... 15
4.5 Filling with Water .......................................................................................... 15
4.6 Ash Removal and Sweeping ........................................................................ 16
4.7 Using the Automatic Sweeping ..................................................................... 17
5 Control Panel Boiler ................................................................................... 18
5.1 Location of sensors. ..................................................................................... 18
5.2 Ash Timer .................................................................................................... 19
6.0 Electrical Connection Plan ........................................................................ 21
7.0 Commissioning Report .............................................................................. 22
8 Exploded views .......................................................................................... 23
8.1 Automatic ash outflow ............................................................................... 23
8.2 Exhaust fan ................................................................................................. 24
8.3 Automatic sweeping .................................................................................. 25
Page 4
Installation Instructions Janfire Pellet Boiler Integral Typ 25
IA 32580002 EN_Ver5
Janfire 2014
4(25)
Safety Information
1.1 General
The safety information is based on a risk analysis that has been undertaken in accordance with the directions
in relevant EU directives in order to meet the European
CE marking standards.
In practice, the pellet boiler does not carry any risks during operation.
Read through the safety instructions before commencing installation. Always follow the safety instructions
when you carry out installation and maintenance work. Follow the safety instructions on the warning labels!
Installation, operation, service and other procedures must only be carried out by trained and qualified
personnel and in accordance with applicable standards.
Note Always follow these instructions during installation, operation and maintenance.
Note For reasons of personal and operational safety: Use only spare parts that are manufactured
and approved by Janfire AB.
1.2 Conventions
The following conventions are used in these instructions:
• DANGER!
The text DANGER! is used when there is a risk of personal injury or death.
• WARNING!
The text WARNING! is used when there is a risk of damage to the product, the equipment, the control panel
etc.
• CAUTION!
The text CAUTION! is used when there is a risk of system failure, interruption to operation, disruption etc.
The above warning texts are used in a hierarchical order. The text DANGER! also includes the possibility of
the occurrence of incidents that are represented by WARNING! or CAUTION!
1.3 Safety Instructions for Installation and Service
All electrical installation and servicing must be carried out by qualified personnel in accordance with
applicable standards and regulations.
All heating, ventilation and sanitation installation and servicing must be carried out by qualified personnel in
accordance with applicable standards and regulations.
All sweeping must be carried out by qualified personnel in accordance with applicable standards and
regulations.
DANGER
HighVoltage
inside
thisequipment
Page 5

Installation Instructions Janfire Pellet Boiler Integral Typ 25
IA 32580002 EN_Ver5
Janfire 2014
5(25)
DANGER
Riskofburns
Note The free space around the Janfire pellet boiler should be in accordance with local regulations
(council planning department).
The boiler room should meet the requirements of the fire authorities. Contact a qualified local chimney
sweeping contractor.
The burner is equipped with a safety cut-out that prevents operation of the burner with the burner
desmounted. The boiler door is locked with a sturdy nut and cannot be open without tools. Always
disassamble the burner before the boiler door opening to prevent the burner to start involintary on the outside
boiler.
The temperature limited, valve and safety valve 9 bar should always be installed.
1.4 CE declaration
If the unit is used in combinations other than those tested, then Janfire AB can not guarantee conformity with
the EU directive.
Page 6

Installation Instructions Janfire Pellet Boiler Integral Typ 25
IA 32580002 EN_Ver5
Janfire 2014
6(25)
2 Technical Data
Janfire Pellet Boiler
Power 230 V AC ± 10 %, 50 Hz
Load 3 VA
Measurement accuracy of water
temperature sensor
0– 100°C ± 1°C
Min Return Water temperature 55 ° C
Output 23 kW
Boiler class according to EN 303-5 4.4.2 Class 5
Relay output 5 A 250 V AC
Fuse 5A T
Water tank volume 180 litres
Water resistance 10K/20K 25,3/14,1 mbar
Max operating pressure 3 bar
Water resistance at 10 K difference
between flow and return line
25,3 mbar
Water resistance at 20 K difference
between flow and return line
14,1 mbar
Ash/fire box 100 litres
Weight 280 kg
Boiler type Nor condensing, negative pressure controlled
Hot water High efficiency heat exchange coil C22 mm
L=11m OBS Option
Flue connection Backwards Ø 150 mm
Convection part Vertical tubes
Operation thermostat Adjustable intervals up to 15 °C
Flue gas thermometer Option
Sweeping handle Automatic controlled
Shunt Option Mounted on Hot Water Flange
Control panel With buttons
Safety cut-out Mounted on the top of the door
Required Draft in furnace -10 pascal
Exhaust Temperature Nominal/min load 145/73° C
Combustion period Cleaning manual after use of 6 ton pellets
Fuel Wood pellets EN 14961-2 Class A1 Ø 6-12 mm
Noise emission 61 db
Page 7

Installation Instructions Janfire Pellet Boiler Integral Typ 25
IA 32580002 EN_Ver5
Janfire 2014
7(25)
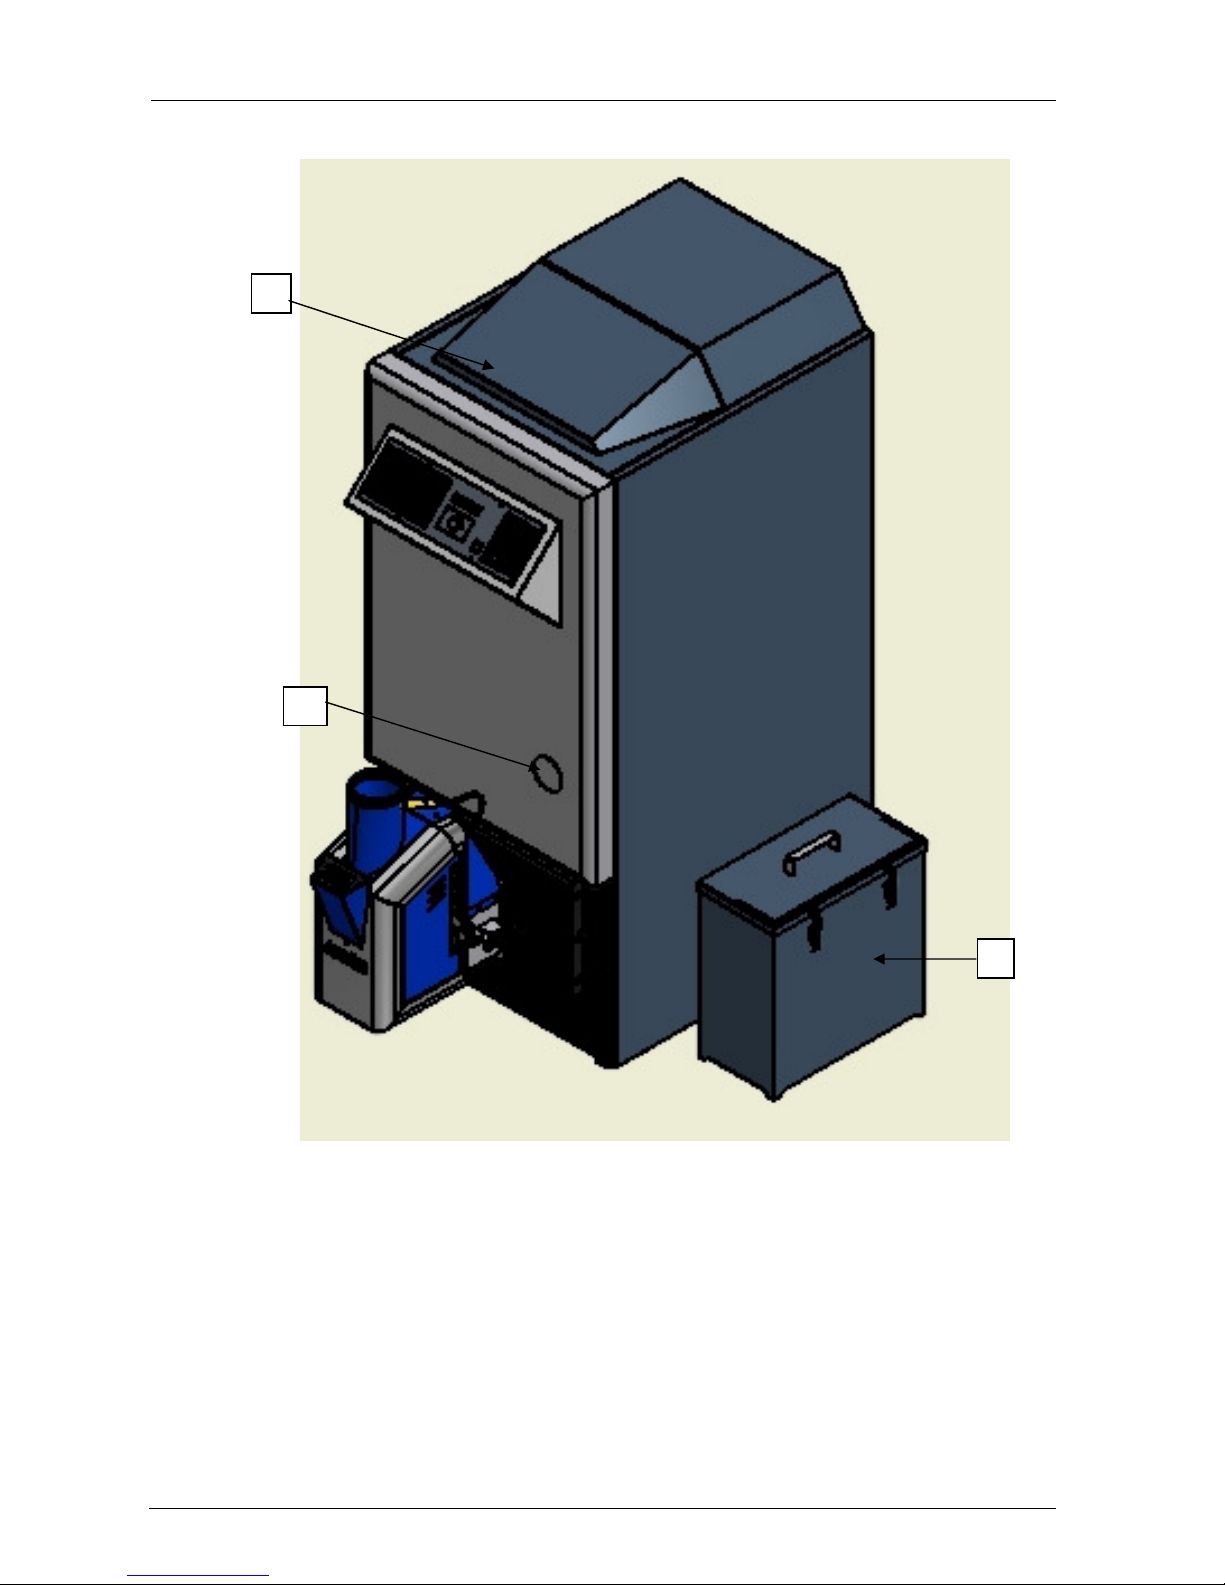
Accessories
A Automatic sweeping Periodic controlled.
Placed on the left side.
B Automatic ash outflow
Placed on the left or the right side.
C Electric heater Location for electric coil
Page 8
Installation Instructions Janfire Pellet Boiler Integral Typ 25
IA 32580002 EN_Ver5
Janfire 2014
8(25)
Figure 1 Automatic sweeping, -ash outflow
A
B
C
Page 9

Installation Instructions Janfire Pellet Boiler Integral Typ 25
IA 32580002 EN_Ver5
Janfire 2014
9(25)
Figure 2 Janfire Pellet Boiler dimensions
Page 10

Installation Instructions Janfire Pellet Boiler Integral Typ 25
IA 32580002 EN_Ver5
Janfire 2014
10(25)
3 General
The Janfire pellet boiler is designed to burn pellets in a safe, easy-to-use and environmentally friendly way.
The boiler has ten vertical tubes which effectively cool down the flue gases. The tubes are also equipped with
turbulators. The boiler is equipped with a large door. The door has a prepared hole suitable for installation of
the burner. When the door is opened the burner remains on the door. This makes it very easy to clean the
combustion chamber and burner. The door is also equipped with a safety cut-out which stops the burner
when the door is opened.
Recommended boiler temperature:
Winter: 85 ˚C +/- 3 ˚C
Summer: 83 ˚C +/- 3 ˚C
Note Pellet quality EN 14961-2 Class A1 is recommended.
Figure 31 Overview
Inbuilt Exhaust fan
House, Fan Option
Domestic Water Coil,
Option
Ash bottom auger screw
Bottom auger Drive
Soot sweeping mechanism
Hatch for access to the tubes
Water mixer valve with
drive
Operator panel
Location for Electric
Coil, Option
Pellets Burner
Page 11

Installation Instructions Janfire Pellet Boiler Integral Typ 25
IA 32580002 EN_Ver5
Janfire 2014
11(25)
4 Installation
4.1 Delivery Contents
The delivery of the Janfire pellet boiler should include the following:
• Ready-assembled Janfire pellet boiler (without burner).
• Sweeping brush
• Plug and socket for 230 VAC power connection.
• Plug and socket for circulation pump.
• Plug and socket for connecting the burner.
Page 12

Installation Instructions Janfire Pellet Boiler Integral Typ 25
IA 32580002 EN_Ver5
Janfire 2014
12(25)
Figure 4 Boiler Connections
4.2 Flue
The flue should be connected at the same level as the boiler outlet is placed.
You may pull the tube straight up from the boiler.
WARNING
Productdamage
Note Never pull the flue downwards.
Flue gas outlet
R1”
Storage Tank
return water
connection
point
Location of
Electric
connections.
R1”
Connection
Store Tank
supply water
Water mixer
heating
Domestic
hot water
connection
Page 13

Installation Instructions Janfire Pellet Boiler Integral Typ 25
IA 32580002 EN_Ver5
Janfire 2014
13(25)
If a previous boiler had a lower flue connection, then seal up the old hole and make a new hole at the right
level. The Janfire pellet boiler flue is shaped like a T-tube. The T-tube allows the boiler to be connected from
the sides or straight backwards. Assemble the draught limiter in the free hole, which gives the boiler a stable
draught and prevents condensation.
Page 14

Installation Instructions Janfire Pellet Boiler Integral Typ 25
IA 32580002 EN_Ver5
Janfire 2014
14(25)
4.3 Boiler
The Janfire pellet boiler can be supplied ready-assembled with a shunt as option. The boiler has a large
water volume (180 litres) and does not need to be connected to a storage tank.
In other cases where the storage tank shall be used, connect it with the connections on the backside.
Plug and socket for connecting to power, circulation pump and burner are supplied.
The soot sweeping mechanism is mounted under the cladding on the left side.
Installation example with heat exchanger in Boiler
A Thermostat mixer H Cirkulation pump
B Domestic Hot water supply J Valve
C Inlet cold water K Mixing valve
D Expansion vessel L Return radiator
E Radiator M Supply radiator
F Adjustment valve N Drain valve
G Non-Return valve
Page 15

Installation Instructions Janfire Pellet Boiler Integral Typ 25
IA 32580002 EN_Ver5
Janfire 2014
15(25)
Installation example with store tank
A Thermostat mixer temperature limiter H Circulation pump
B Domestic hot water supply
C Inlet cold water K Mixing Valve
D Expansion vessel L Return radiator
E Radiator O Thermo valve
Note Before starting the boiler ensure that the system is filled with water, that electrical
connections are correct and that pumps are functioning.
Note The tube system should be rinsed out before the boiler is connected in order to avoid
damage from contamination to pumps and valves.
4.4 Burner
To install the burner see the burner’s installation instructions below.
4.5 Filling with Water
Filling with water should be done using a fixed connection to expansion connections or with the help of a pipe
in the drain valve.
A
C
D
E K
H
L
O
Page 16

Installation Instructions Janfire Pellet Boiler Integral Typ 25
IA 32580002 EN_Ver5
Janfire 2014
16(25)
Start the circulation pump when the system is completely filled with water.
4.6 Ash Removal and Sweeping
During normal use (6-8 ton per year) of pellets of EN Plus class 1 the maximum interval for ash check and
cleaning is 10-12 months.
1. Stop the burner, see burner instructions.
2. Wait for approximately 30 minutes until all the pellets are no longer glowing.
3. Open the door of the combustion chamber. Remove the baffle plate (see Figures)
DANGER
Riskofburns
Note The boiler and burner can still be hot.
4. Clean out the ash. The Janfire ash can makes the job easier.
5. Open the upper hatch (see Figure) above the tubes and take out the spirals.
Page 17

Installation Instructions Janfire Pellet Boiler Integral Typ 25
IA 32580002 EN_Ver5
Janfire 2014
17(25)
6. Use the sweeping brush to clean the ten tubes.
7. Reassemble the spirals and screw down the upper hatch.
CAUTION
Breakdown
Note Do not forget to clean the boiler flue so that ash does not prevent the smoke from going out
into the chimney.
4.7 Using the Automatic Sweeping
Cleaning mechanism starts automatically after a selectable time intervals.
If the boiler is not equipped with automatic handle sweeping then you should manually use the sweeping
handle (OBS Option) at least once a week. Pull the handle quickly 3-5 times on each occasion.
Page 18

Installation Instructions Janfire Pellet Boiler Integral Typ 25
IA 32580002 EN_Ver5
Janfire 2014
18(25)
5 Control Panel Boiler
Control panel settings control the boiler pump and burner.
During operation the following can be read on the display of the control panel:
• Water temperature
Figure 2 Control Panel
Figure 5 Temperature limiter
5.1 Location of sensors.
The locationof the sensorsto temperature limiter and temperature controller are fitted on the right side behind
the boiler controller.
P 1
P2
Thermostat
P3
Page 19

Installation Instructions Janfire Pellet Boiler Integral Typ 25
IA 32580002 EN_Ver5
Janfire 2014
19(25)
Figure 6 Location av sensors
Figure 7 Ash timer
5.2 Ash Timer
Page 20

Installation Instructions Janfire Pellet Boiler Integral Typ 25
IA 32580002 EN_Ver5
Janfire 2014
20(25)
Figure 8 Ash time relay
Ash On time 1-10 min
Select on time is
variable between 1-10
min, default 1 min
Ash Off time 6-60 min
Select Off time variable between 660 min, default 60min
Page 21

Installation Instructions Janfire Pellet Boiler Integral Typ 25
IA 32580002 EN_Ver5
Janfire 2014
21(25)
6.0 Electrical Connection Plan
Page 22

Installation Instructions Janfire Pellet Boiler Integral Typ 25
IA 32580002 EN_Ver5
Janfire 2014
22(25)
7.0 Commissioning Report
Customer details
Service Technican
Name:
Address:
Postcode:
Telephone:
Janfire Pellet boiler
Integral Typ 25
Date of Installation: Date of site visit:
Maximum thermal output kW
Estimated Annual Energy Yield kWh/annum
Percentage to be met by boiler %
Fuel Displaced (if more than one,
state the main one only)
Natural Gas □
Oil □
Coal □
Electricity □
Note:
Pellets boiler check list
( Y/N )
Operator / User Training
( Y/N )
Operators manual is present, including warranty
& chimney certificate
Customer has received explanation of
stove / boiler functions / characteristics
Cleaning tools are available
Adjustment possibilities with respect to
controls / operating instructions
Pellet conforms to CENT, DIN Plus or ONORM
Cleaning / Servicing procedures have been
discussed with user
Flue building consent has been granted
A maintenance contract has been agreed
Single flue in use (diameter ) Number of
Bends? ( )
Ignition starts correctly during start phase
Sufficient access / clearance for cleaning
Observe combustion during all heating
output levels, manual & automatic
Electric connection to switched spur Combustion air calibrated on emission test
with extern gas analyser.
Page 23

Installation Instructions Janfire Pellet Boiler Integral Typ 25
IA 32580002 EN_Ver5
Janfire 2014
23(25)
Thermostat / time control connected Chimney draft measured ( pa)
External combustion air inlet corresponds to
manufacturers & building control advice
Emission test other parameters changed?
# 23 calibrated?
Room free air vent size (L W ) Pellets stored properly and dry
Additional Boiler Inspection:
Flow & return pipes connected correctly
HT switch tested
Expansion vessel fitted to system (cap: ltr)
Heating system purged correctly
Buffer tank fitted to system (cap: ltr)
Heating system set to 1.5 to 2 bar
Return flow regulation is functioning
Heat is flowing after 20 min
Hearth to building control advice Clearance from walls (L W ) related to
cleaning
Customer: (confirm of successful start up) Service Technician:
Sign / Date:
Sign / Date:
8 Exploded views
8.1 Automatic ash outflow
Page 24

Installation Instructions Janfire Pellet Boiler Integral Typ 25
IA 32580002 EN_Ver5
Janfire 2014
24(25)
8.2 Exhaust fan
Page 25

Installation Instructions Janfire Pellet Boiler Integral Typ 25
IA 32580002 EN_Ver5
Janfire 2014
25(25)
8.3 Automatic sweeping
 Loading...