

Page 1
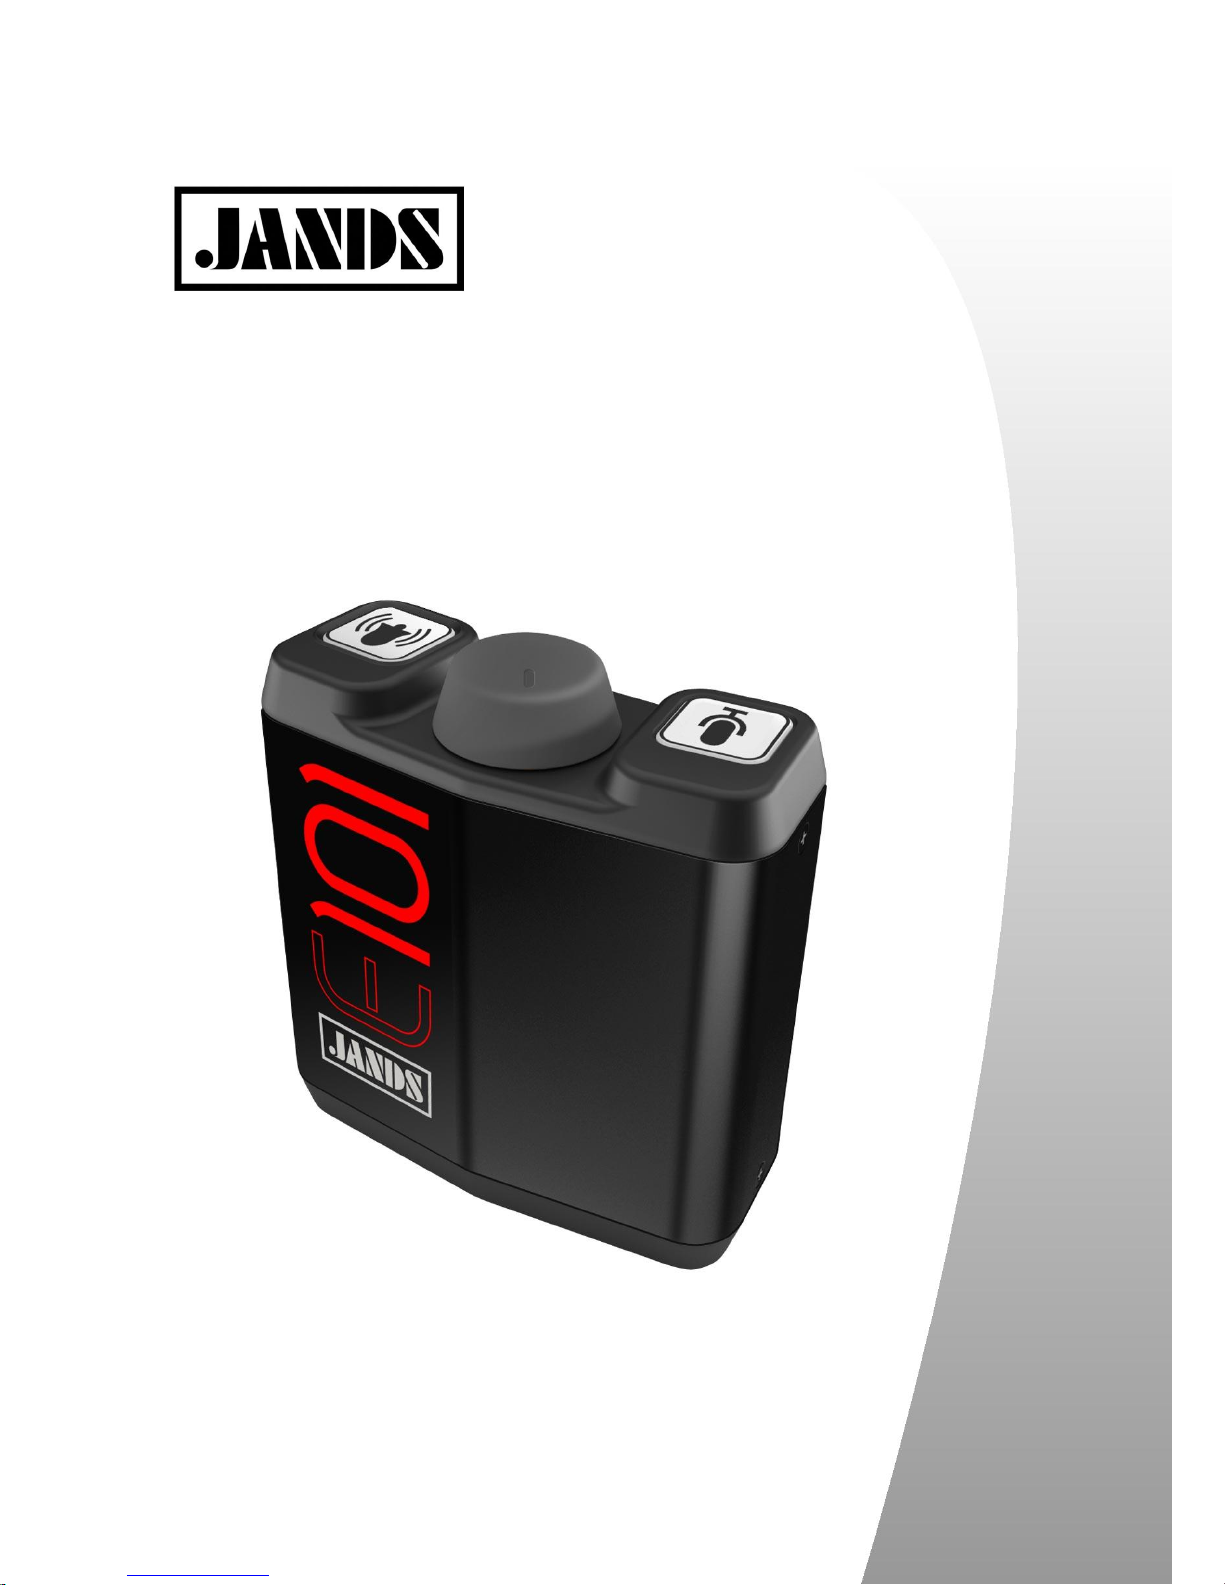
Ezicom E101
Communications Belt Pack
USER GUIDE
Page 2
2
COMPLIANCE
This product is approved for use in Australia/New Zealand and conforms to the following
standards:
Standards
IEC55103-1 (Emission)
IEC55103-2 (Immunity)
IEC60065 (Safety)
To ensure continued compliance with EMC Directive 89/336 and the Australian Radiocommunications Act 1992, use only high quality data cables with continuous shield, and
connectors with conductive back shells.
This device complies with part 15 of the FCC Rules. Operation is subject to the following
two conditions: (1) This device may not cause harmful interference, and (2) this device
must accept any interference received, including interference that may cause undesired
operation. Changes or modifications not expressly approved by the manufacturer could
void the user's authority to operate the equipment.
DISCLAIMER
Information contained in this manual is subject to change without notice and does not
represent a commitment on the part of the vendor. JANDS Pty Ltd shall not be liable
for any loss or damage whatsoever arising from the use of information or any error
contained in this manual.
It is recommended that all service and repairs on this product be carried out by JANDS
Pty Ltd or its authorised service agents.
JANDS products must only be used for the purpose they were intended by the manufacturer and in conjunction with this operating manual.
JANDS Pty Ltd cannot accept any liability whatsoever for any loss or damage caused
by service, maintenance or repair by unauthorised personnel, or by use other than that
intended by the manufacturer.
Designed in Australia
JANDS PTY LTD
ACN 001 187 837
40 Kent Rd
Mascot NSW 2020
Sydney Australia
Locked Bag 15
MASCOT NSW 1460
Sydney Australia
P: +61-2-9582-0909
F: +61-2-9582-0999
E: info@jands.com.au
W: www.jands.com.au
JANDS PTY LTD 2010
All rights reserved
Revision 1.1
06 May 2011
Page 3
3
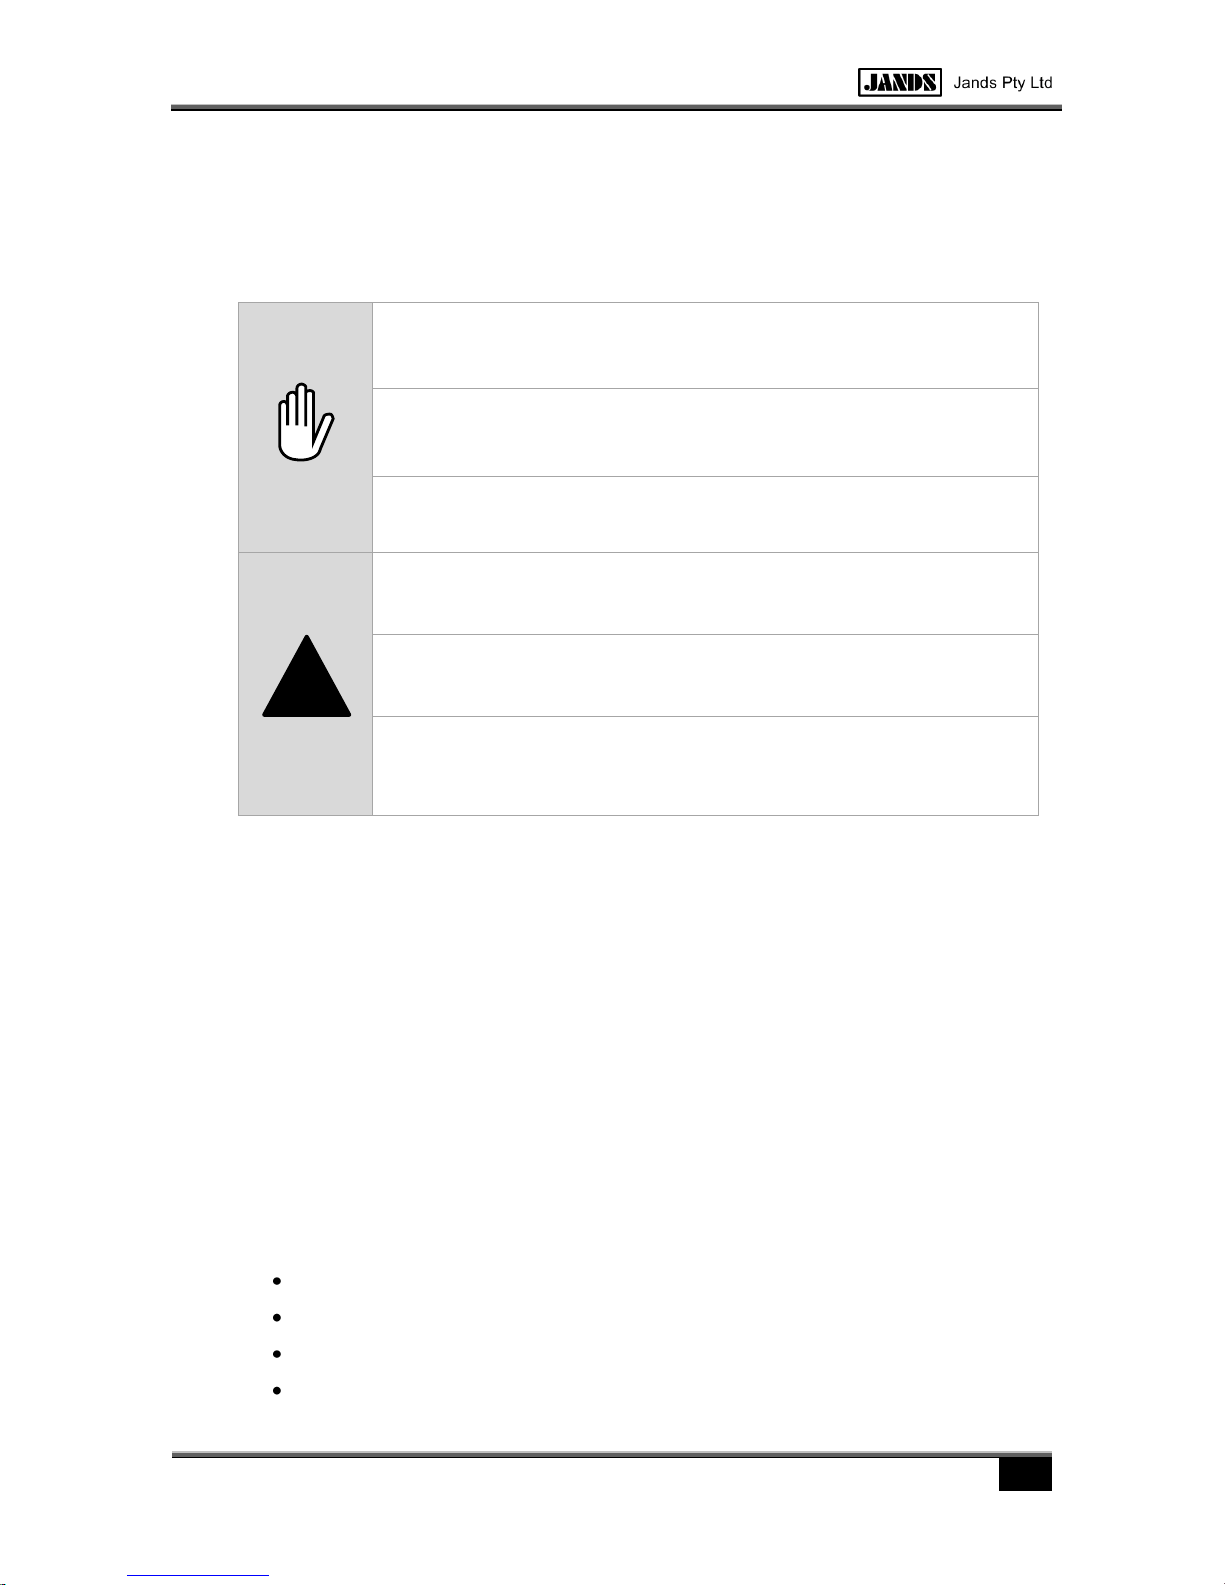
SAFETY PRECAUTIONS
The following information is for your Personal Safety. Please read carefully.
DO NOT modify the E101.
DO NOT connect the E101 with non-approved headsets or Control
Stations.
DO NOT use the E101 in the rain or in damp situations.
DO NOT use the E101 at high sound levels for long periods of time.
TURN DOWN the volume before plugging the headset in or placing
the headset over your ears
DO NOT operate heavy machinery while wearing the headset.
1 INTRODUCTION
The Jands Ezicom is a closed circuit headset intercom system which provides clear twoway communications even in high noise environments. A basic Ezicom system consists
of one E401 master station connected to a number of remote E101 belt packs.
Ezicom components are interconnected with standard two-conductor shielded microphone cable fitted with three-pin XLR style connectors. One wire in the cable caries DC
power from the master station to the remote belt packs; the other wire carries audio sig-
nals and superimposed “call” signals for visual signalling. The cable shield acts as the
common ground-return.
The Ezicom cable transmission system is fully compatible with industry-standard head-
set intercom systems, allowing master stations and belt packs to be freely interchanged
with other brand components without degrading performance.
1.1 Features
High durability extruded aluminium case with custom moulded end caps;
Bridge-mode amplifier for high output power;
Large backlit buttons are easily identified in dark or low light situations;
Remote Mic disable compatible.
!
Page 4

4
2 EQUIPMENT DESCRIPTION
1. Microphone Button
Press this button to activate and deactivate the local headset microphone. This button
glows green when the microphone is active.
2. Call Button
Press to signal other people on the system that may not be wearing their headsets. This
button also flashes red when another user on the system presses their call button.
3. Volume Control
Adjust this control to set the level of the sound in the local headset.
4. Link Connectors
The 3 pin connectors are used to link this E101 to other equipment in the communications system.
5. Headset Connector
The 4 pin connector is where the headset is plugged in.
6. Belt Clip
Use the clip provided to secure the E101 to your person.
1 3 2
4, 5 (at rear)
6
Page 5

5
3 CONNECTIONS
The Ezicom and compatible communications systems use 3 pin shielded microphone
cables for all interconnecting links. Only one power source (usually a Master) should be
used in a system.
Ensure all plugs are firmly seated in their sockets with the latches engaged. If possible
make all connections before switching the power to the master station on - making connections while the power is on may disrupt other users and/or create clicks, pops, buzz,
or other extraneous sounds.
4 OPERATION
Once the system has been plugged in and switched on, both the Call and Microphone
switches will glow blue indicating power is available. Turn the volume control to minimum
(fully anticlockwise) before putting the headset on.
Slowly increase volume by turning the control clockwise. If there is signal present, for
example there is program signal or a conversation is taking place, adjust the control until
a comfortable level is achieved. If there is no signal present, turn the volume control
back down, press the microphone switch to turn the headset mic on, then speak normally as the volume level is increased until a comfortable level is achieved. Turn off the
microphone.
The volume level may require adjustment over time as more users come on line or the
ambient noise level changes. Excessive headphone level should be avoided.
The Ezicom system is a party line system, which means all users in the system can hear
the input from all open mics. For this reason:
Leave the microphone switched off unless required.
Ensure the microphone is turned off when the headset is taken off or the E101 is
unplugged from the system.
Press the call switch to attract the attention of other users in the system who may not
have their headphones on.
5 DISCONNECTING THE UNIT
Turn off the microphone before disconnecting the E101. If possible switch power off to
the system master station before making any disconnections.
Firmly press the release buttons to remove plugs from sockets.
Page 6

6
6 FAULT FINDING TABLE
SYMPTOM
CAUSE
REMEDY
E101 totally dead eg
switches do not illuminate, no sound in
the headsets, and
no response to button presses
System power off
Check Master power
switch
Mains power failure, power
turned off at wall socket or
disconnected
Check connections of
Master
Disconnection/not plugged
in
Check connections between Master and beltpack
Faulty cable or other
equipment in the system
Disconnect stations from
master until the system
works
Faulty Master
Repair/replace
Faulty E101
Repair/replace
E101 mic keeps
switching off
Faulty cable or Master
Repair/replace
Operator at Master pressing
“Remote mic disable” switch
Liaise with operator of
Master
No sound in headset
Volume turned down
Turn up volume
No one talking
Nothing to fix here
Faulty headset
Swap with another set
Faulty cable
Repair/replace
Distorted sound
Volume too high
Turn volume down
Faulty headset
Replace headset. Avoid
single-ear headsets
Ambient noise level too high
Turn unused mics off
Relocate operator posi-
tion
Users talking too loudly
Liaise with other users
Table 7.1 – Fault Finding Table
7 CLEANING AND MAINTENANCE
To keep the E101 clean use a mild detergent and water with a soft cloth or paper towel,
taking care to avoid water entering the units.
There are no user-serviceable parts inside.
Page 7

7
8 TECHNICAL DATA AND SPECIFICATIONS
8.1 Mechanical
PARAMETER
VALUE
Dimensions
200mm (W) x 110mm (H) x 55mm (D)
Material
Aluminium + ABS poly.
Weight
330g
Table 8.1 – Mechanical Specifications
8.2 Electrical
PARAMETER
VALUE
Supply
24-32VDC, 100mA max
Line Signal Level
1mA/V
Microphone type
Dynamic
Headphone Impedance
32-400 ohms
Headphone Output Power
1.0W/32ohms, 650mW/200ohms
Compatibility
Clearcom RS series
Table 8.2 – Electrical Specifications
PIN
FUNCTION
1
Shield/Ground
2
Power
3
Audio/Call
Table 8.3 – Link Connector
PIN
FUNCTION
1
Mic Cold/Shield
2
Mic Hot
3
Phones -
4
Phones +
Table 8.4 – Headset Connector
 Loading...