

Page 1
Vertiga
Montagehandleiding - Instructions de montage
Montagehinweis - Mounting instructions
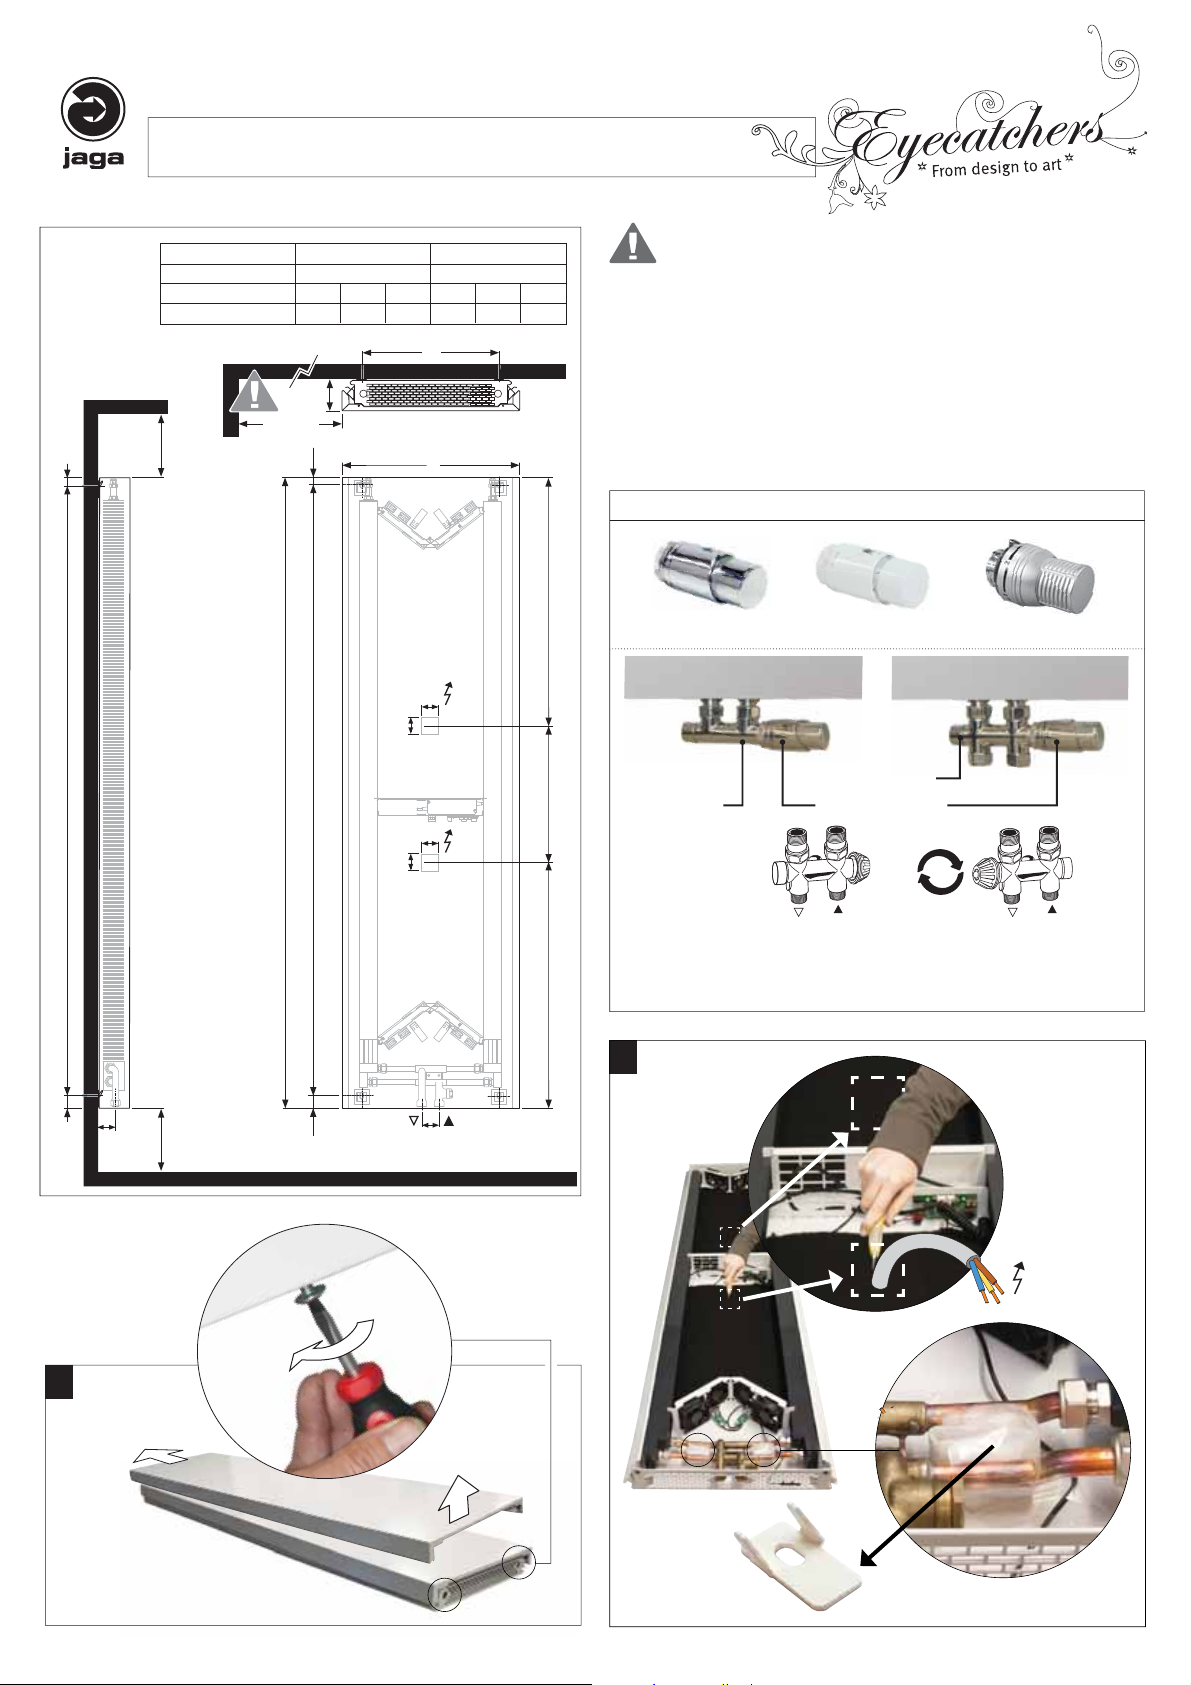
Primo
Glow - Kirei - Dunes D = 15.8
min. 50
D = 9.2 D = 13.2
D = 11.5
L41 52 65 53 70 90
C 20.6 31.6 44.6 27.8 44.8 64.8
C
D
L
80
Pour des raisons de sécurité, les chevilles ne sont pas fournies. Contactez
votre magasin spécialisé pour le bon type de cheville. L’installation du Vertiga
doit être effectuée conforme aux normes d’installationnationale.
Aus Sicherheitsgründen sind kein Dübel mitgeliefert. Kontaktieren Sie Ihren
Baustoffhandel für die richtigen Dübel. Vertiga muss gemäß der geltenden
Landesnorm installiert werden.
For safety reasons wall plugs aren’t delivered. Contact your specialist store for
the right type. Install Vertiga according to the national installation standards.
Om veiligheidsredenen zijn geen muurpluggen meegeleverd. Contacteer uw speciaalzaak voor het juiste type. Vertiga dient geïnstalleerd te worden volgens de geldende nationale norm.
OPTIE - OPTION
Code 5090.1150Code 5090.1151 Code 5090.1119
H - 6.3
3.4 2.9
5.2
min. 12 min. 12
193.7
H = 200
3.4 2.9
5
5
5
5
5
G1/2"
M M
230
VAC
230
VAC
40
80
Code 5094.425
Code 5094.427
Code 5090.1151
Standaard
Standard
Klemkoppelingen voor ventielen: zie Jaga prijslijst.
Raccords bicônes pour vannes: voir liste des prix Jaga.
Klemmringverschraubungen für Ventile: siehe Jaga Preisliste.
Sleeve couplings for valves: see Jaga price list.
2
1
230 VAC
Class I
A
C
B
x 4
www.jaga.be
Page 2
A
N
W
E
N
D
E
N
¥
U
S
E
¥
T
E
F
L
O
N
¥
G
E
B
R
U
I
K
¥
U
S
E
R
¥
A
N
W
E
N
D
E
N
¥
U
S
E
¥
T
E
F
L
O
N
¥
G
E
B
R
U
I
K
¥
U
S
E
R
¥
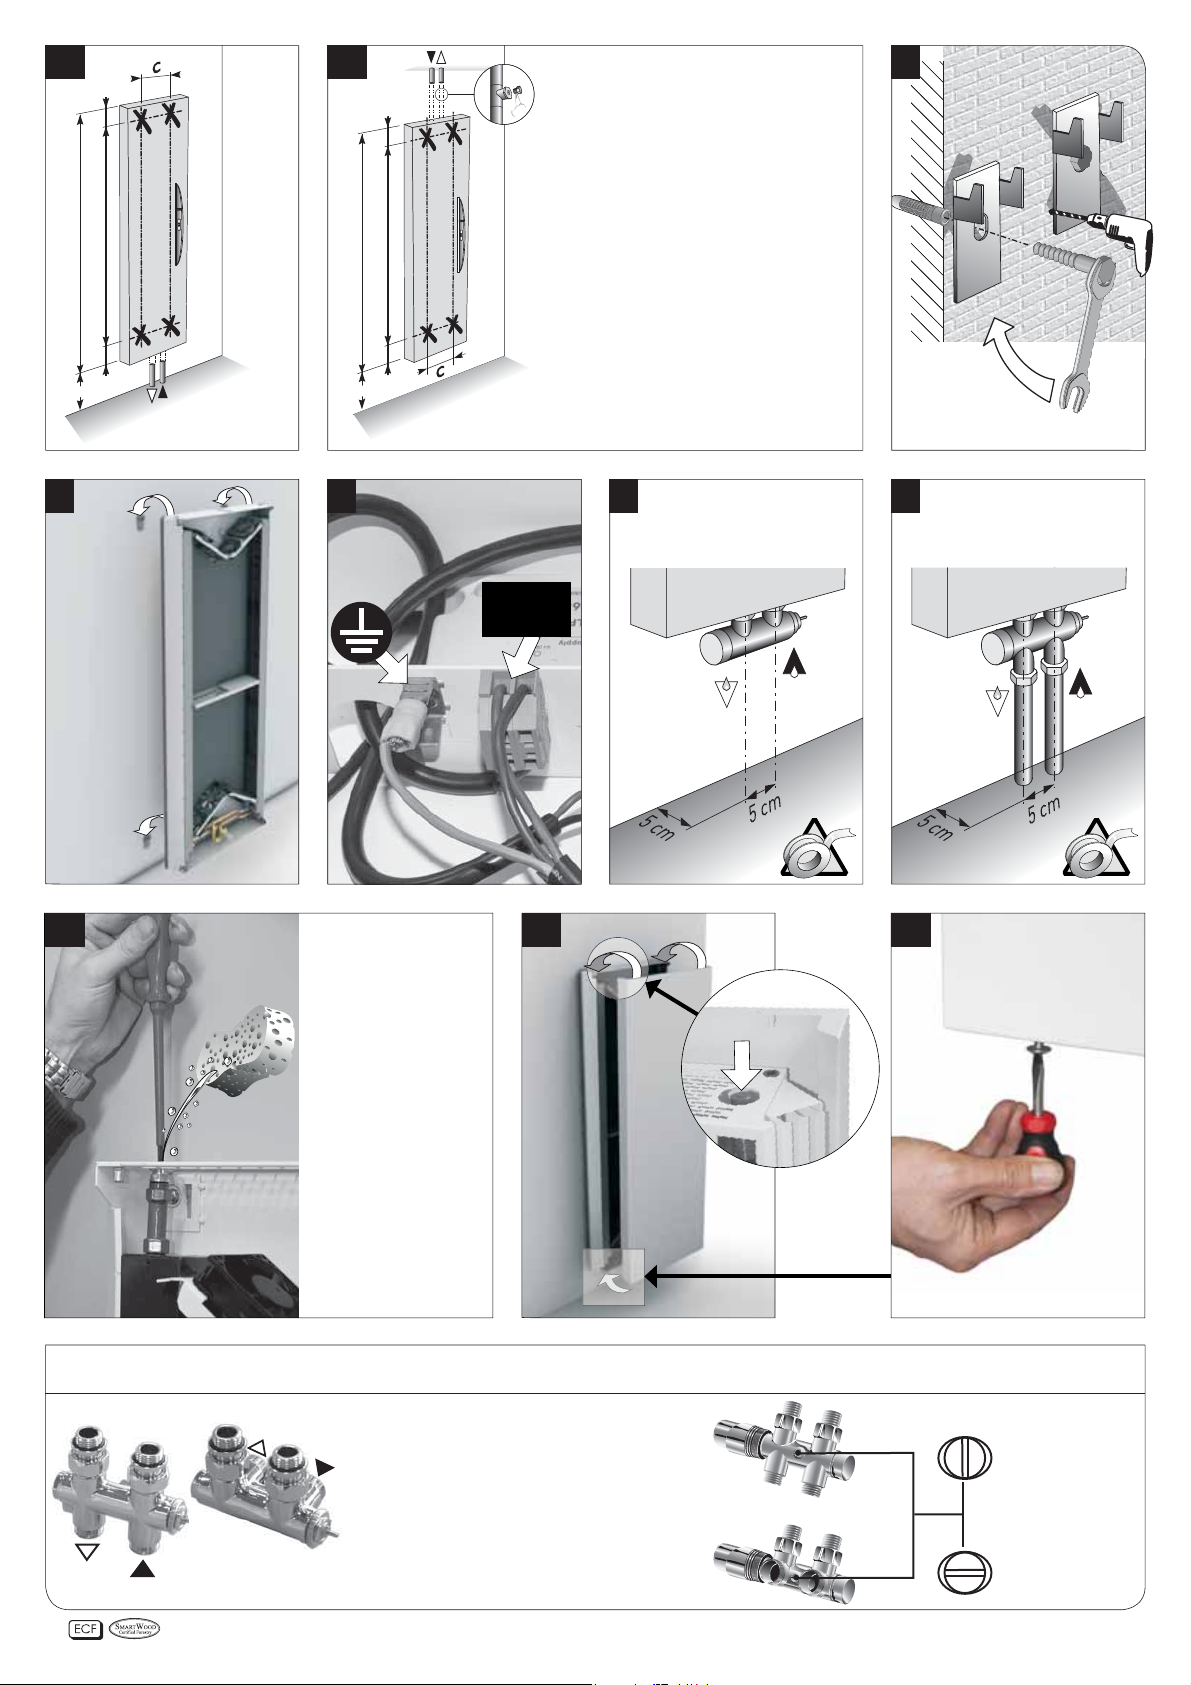
3a 3b 4
Plaatsing CV-leidingen bovenaansluiting 4-5
T oestel omkeerbaar . Ontluchter op de CV-leiding
voorzien. De 2 automatische ontluchters vervangen
2.9
2.9
door 2aftapstoppen 1/8” (niet meegeleverd).
Positionnement
des
tuyaux de CC raccordement 4-5
Appareil convertible . Prévoir un purgeur sur la
tuyauterie . Remplacer les 2 purgeurs automatiques
par 2 bouchons de vidange 1/8’’ (pas inclus).
200
193.7
200
193.7
Positionierung ZH-Leitungen Obennschluss 4-5
Heizkörper umkehrbar. Einen Entlüfter an die
Zentralheizung montieren . Beide automatischen
Entlüfter durch je einen Blindstopfen 1/8” (nicht im
Lieferumfang enthalten) ersetzen.
Placement of CH-tubes top connection 4-5
T he radiator is symmetrical and can be mounted
either way up . Provide an air vent on the central
heating pipework above the radiator . Replace the
Min. 12 cm
3.4
3.4
Min. 12 cm
2automatic air vents with two 1/8” drain plugs (not
Plaatsing CV-leidingen aansluiting 1-8
Positionnement des tuyaux de CC raccordement 1-8
Positionierung ZH-Leitungen Anschluß 1-8
Placement of CH tubes connection 1-8
5 6 7 8
included).
Aansluiting naar de wand
Raccordement vers le mur
Anschluß zur Wand
Connection to the wall
230 VAC
50Hz
Aansluiting naar de vloer
Raccordement vers le sol
Anschluß zum Boden
Connection to the floor
Vang d.m.v. een doekje of
spons het spuiwater van de
ontluchter op bij de eerste
maximale opwarming!
Lors du premier rechauffage maximal, récoltez l’eau
d’écoulement du purgeur à
l’aide d’un morceau de tissu
ou une éponge!
Bei der ersten Totalaufwärmung das Ablasswasser
vom Entlüfter mit einem
Tuch oder Schwamm
auffangen!
Collect the waste water of
the air vent by means of a
cloth or sponge when the
apparatus is fully heated for
the first time.
Eenpijp-tweepijpaansluiting - Raccordement monotube-bitube
Einrohr-Zweirohranschluß - One pipe-two pipe connection
Positie thermostaatkop en aanvoer warm
CV water altijd rechts.
La position de la tête de vanne thermostatique
et l’arrivée de l’eau chaude CC toujours à droite.
Position des Thermostatkopfes oder Vorlauf
Heizwasser ZH immer rechts.
Position of the thermostatic head and warm
CH water always right.
10 119
A
B
standaard tweepijp
bitube standard
standard Zweirohr
standard two pipe
eenpijp
monotube
Einrohr
one pipe
27200.24500001 - 161018 - JAGA N.V.
 Loading...