

Page 1
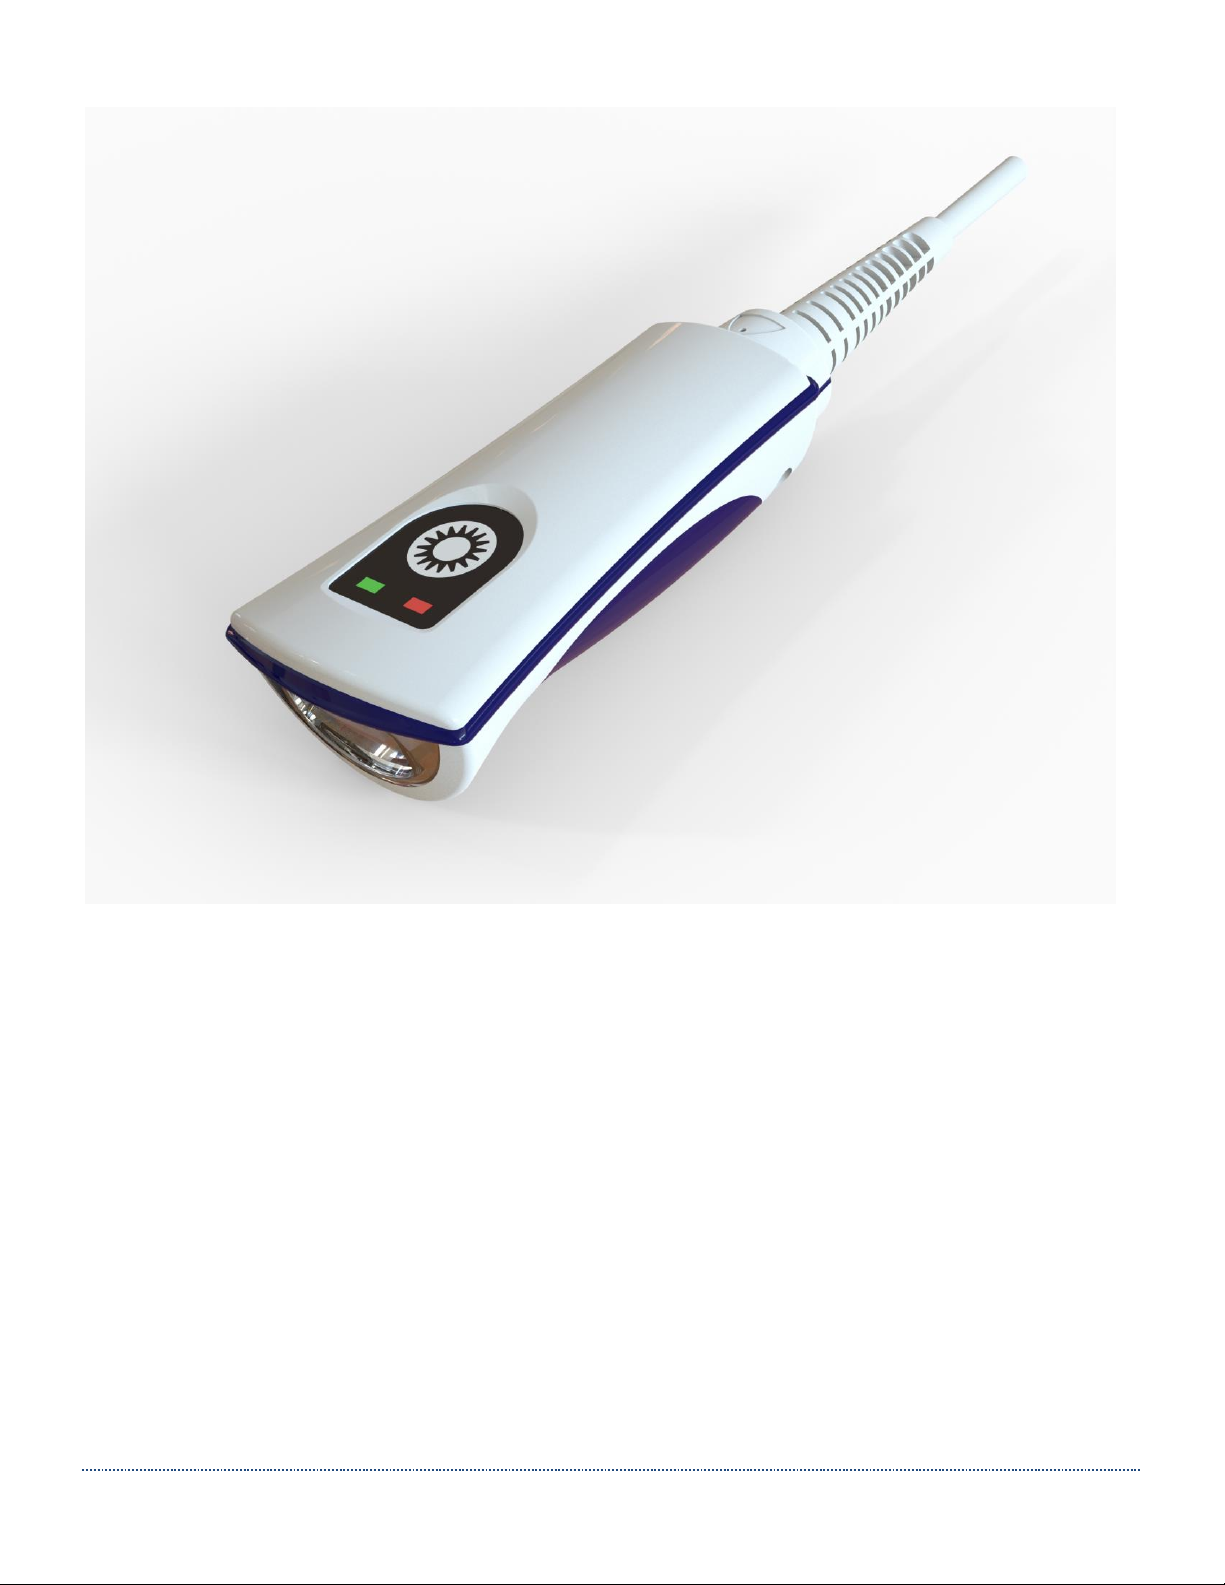
HS-1RL User’s Manual Page i
HS-1RL User Guide
Page 2

HS-1RL User’s Manual Page ii
COPYRIGHT INFORMATION
© Copyright 2019 Novanta Corporation. All rights reserved.
Version 05302019
This product or document is protected by copyright and distributed under licenses restricting its use, copying,
distribution, and de-compilation. No part of this product or document may be reproduced in any form by any means
without prior written authorization of Novanta Corporation and its licensors, if any.
TECHNICAL SUPPORT AND CONTACT INFORMATION
Telephone: 315.701.0678
www.JADAKtech.com
Email: [email protected]
Page 3

HS-1RL User’s Manual Page iii
Revision History
DATE
Version
Description
05/30/2019
Initial Release
Original HS-1RL manual.
Page 4

HS-1RL User’s Manual Page iv
Table of Contents
1 - Introduction
2 – Hardware Overview ........................................................................................................... 12
JADAK® HS-1RL Imager Identification .................................................................................... 12
Reading Techniques ................................................................................................................ 13
Interface Settings
Connecting the HS-1RL with USB Port .................................................................................... 14
Interface Options ..................................................................................................................... 15
USB COM Port Emulation .................................................................................................. 15
USB HID Keyboard Emulation ............................................................................................ 15
Keyboard Country Layout ................................................................................................... 16
HID Keyboard Rate ............................................................................................................ 17
Default Options ........................................................................................................................ 19
Default Settings .................................................................................................................. 19
Input/Output Settings
Good Read Indicators .............................................................................................................. 19
Beeper Volume - Good Read ............................................................................................. 19
No Reads............................................................................................................................ 20
Vibration ............................................................................................................................. 20
Trigger Modes.......................................................................................................................... 20
Manual Trigger (level) ......................................................................................................... 20
Presentation Mode ............................................................................................................. 21
Trigger Time Out ...................................................................................................................... 22
Good Read Delay .................................................................................................................... 22
Re-read Delay.......................................................................................................................... 23
3 – Firmware Overview (Utilities)
Page 5

HS-1RL User’s Manual Page v
Show Software Revision ..................................................................................................... 24
Show Revision Time ........................................................................................................... 24
Show Device Serial Number ................................................................ ................................ .... 24
5 - Data Editing
Data Editing Overview ............................................................................................................. 25
Transmit AIM ID Character (Not Supported in Current FW Release) ...................................... 25
Barcode Prefix ......................................................................................................................... 26
Barcode Prefixes On/Off ..................................................................................................... 26
Barcode Prefix Block String ................................................................................................ 26
Barcode Suffix ......................................................................................................................... 27
Barcode Suffix On/Off ......................................................................................................... 27
Barcode Suffix Block String ................................................................................................ 27
6 - RFID
RFID Overview ........................................................................................................................ 28
RFID Mode On/Off ................................................................................................................... 28
RFID Reading .......................................................................................................................... 28
RFID Tag Type ........................................................................................................................ 28
RFID Prefix .............................................................................................................................. 31
RFID Prefixes On/Off .......................................................................................................... 31
RFID Prefix Block String ................................ ................................ ................................ ..... 31
RFID Suffix .............................................................................................................................. 32
RFID Suffix On/Off .............................................................................................................. 32
RFID Suffix Block String ..................................................................................................... 32
RFID Presentation Mode Switching ......................................................................................... 33
Beeper Sounds ........................................................................................................................ 33
LED Indicators ......................................................................................................................... 33
Page 6

HS-1RL User’s Manual Page vi
Vibration Indicator .................................................................................................................... 33
7 - Imaging
Imaging Overview .................................................................................................................... 35
Illumination Brightness ....................................................................................................... 35
Auto Exposure ......................................................................................................................... 36
Maximum Exposure ................................................................................................................. 36
Target White Value .................................................................................................................. 36
Decode Window (Not Supported in Current Firmware) ...................................................... 37
Decode Window Top/Bottom .............................................................................................. 37
Decode Window Left/Right ................................................................................................. 37
8 - Symbologies
All Symbologies (Not Supported in Current Firmware) ............................................................ 39
Linear Symbologies ................................................................................................................. 40
Codabar ................................................................................................................................... 40
Codabar Defaults ................................................................................................................ 40
Codabar On/Off .................................................................................................................. 40
Codabar Minimum and Maximum Length ................................ ................................ ........... 40
Code 11 ................................................................................................................................... 41
Code 11 Defaults ................................................................................................................ 41
Code 11 On/Off .................................................................................................................. 41
Code 11 Minimum and Maximum Length ........................................................................... 41
Code 11 Check Digit ........................................................................................................... 42
Code 128 ................................................................................................................................. 43
Code 128 Defaults .............................................................................................................. 43
Code 128 On/Off ................................................................................................................ 43
Code 128 Minimum and Maximum Length ......................................................................... 43
Page 7

HS-1RL User’s Manual Page vii
ISBT 128 On/Off ................................................................................................................. 43
Code 39 ................................................................................................................................... 44
Code 39 Defaults ................................................................................................................ 44
Code 39 On/Off .................................................................................................................. 44
Code 39 Minimum and Maximum Length ........................................................................... 44
Code 39 Full ASCII Conversion .......................................................................................... 44
Code 39 Check Digit ........................................................................................................... 45
Code 39 Convert to Code 32 / Pharmacode ....................................................................... 45
Trioptic Code 39 ................................................................................................................. 45
Code 93 ................................................................................................................................... 46
Code 93 Defaults ................................................................................................................ 46
Code 93 On/Off .................................................................................................................. 46
Code 93 Minimum and Maximum Length ........................................................................... 46
Composite Code ...................................................................................................................... 47
GS 1 Composite Code ........................................................................................................ 47
Composite Code Minimum and Maximum Length .............................................................. 47
EAN-8/JAN 8 ........................................................................................................................... 48
EAN-8/JAN 8 Defaults ........................................................................................................ 48
EAN-8/JAN 8 On/Off ........................................................................................................... 48
EAN-13/JAN 13 ....................................................................................................................... 48
EAN-13/JAN 13 Defaults .................................................................................................... 48
EAN-13/JAN 13 On/Off ....................................................................................................... 48
GS1 DataBar (Formerly RSS-14) ............................................................................................ 49
GS1 DataBar Limited (Formerly RSS-Limited) ........................................................................ 49
GS1 DataBar Expanded (Formerly RSS-Expanded) .............................................................. 49
Interleaved 2 of 5 ..................................................................................................................... 50
Page 8

HS-1RL User’s Manual Page viii
Interleaved 2 of 5 Defaults .................................................................................................. 50
Interleaved 2 of 5 On/Off .................................................................................................... 50
Interleaved 2 of 5 Minimum and Maximum Length ............................................................. 50
Interleaved 2 of 5 Check Digit ............................................................................................. 51
Matrix 2 of 5 ................................ ................................................................ ............................. 51
Matrix 2 of 5 Defaults .......................................................................................................... 51
Matrix 2 of 5 On/Off ............................................................................................................ 51
Matrix 2 of 5 Minimum and Maximum Length ..................................................................... 52
MSI .......................................................................................................................................... 52
MSI Defaults ....................................................................................................................... 52
MSI On/Off .......................................................................................................................... 52
MSI Minimum and Maximum Length .................................................................................. 52
MSI Check Digits ................................................................................................................ 53
UPC-A ..................................................................................................................................... 54
UPC-A Defaults (Not Supported in Current Firmware) ....................................................... 54
UPC-A On/Off ..................................................................................................................... 54
UPC-A Check Digit ............................................................................................................. 54
UPC-E(0) ................................................................................................................................. 54
UPC-E(0) Defaults .............................................................................................................. 54
UPC-E On/Off ..................................................................................................................... 55
UPC-E(0) Check Digit ......................................................................................................... 55
UPC-E(0) Expanded ModeOn/Off ...................................................................................... 55
UPC-E1 ................................................................................................................................... 56
1D Stacked Symbologies ......................................................................................................... 56
PDF417 ................................................................................................................................... 56
PDF417 Defaults ................................................................................................................ 56
Page 9

HS-1RL User’s Manual Page ix
PDF417 On/Off ................................................................................................................... 56
MicroPDF417 ........................................................................................................................... 56
MicroPDF417 Defaults ....................................................................................................... 56
MicroPDF417 On/Off .......................................................................................................... 57
2D Matrix Symbologies ............................................................................................................ 58
Aztec Code .............................................................................................................................. 58
Aztec Code Defaults ........................................................................................................... 58
Aztec Code On/Off ............................................................................................................. 58
Data Matrix .............................................................................................................................. 58
Data Matrix Defaults ........................................................................................................... 58
Data Matrix On/Off .............................................................................................................. 58
2D Matrix Symbologies ............................................................................................................ 59
Maxi Code ............................................................................................................................... 59
Maxi Code Defaults ............................................................................................................ 59
Maxi Code On/Off ............................................................................................................... 59
QR Code .................................................................................................................................. 59
QR Code Defaults .............................................................................................................. 59
QR Code On/Off ................................................................................................................. 59
9 - Product Specifications
10 - Maintenance
Repairs .................................................................................................................................... 61
Maintenance ............................................................................................................................ 61
Interface Cable ........................................................................................................................ 62
Replacing the Interface Cable ............................................................................................ 62
11 - Customer Support
Obtaining Technical Assistance or Factory Service ................................................................. 63
Page 10

HS-1RL User’s Manual Page x
Limited Warranty ...................................................................................................................... 64
Compliance and IP Notices ..................................................................................................... 65
Statement of Agency Compliance ............................................................................................ 65
Federal Communication Commission (FCC) and Industrie Canada (IC) Compliance Information
Statement ................................................................................................................................ 65
Appendices
Appendix A - Command Format .............................................................................................. 68
Appendix A1-2 Command List and Standard Default Parameters ........................................... 71
Appendix A1-2 RFID Command List and Standard Default Parameters .................................. 74
Appendix B - AIM IDs .............................................................................................................. 75
Appendix C - Sample Bar Codes ............................................................................................. 78
Appendix D - ASCII Conversion Chart ..................................................................................... 79
Page 11

HS-1RL User’s Manual Page 11
1 - Introduction
JADAK’s HS-1RL is a hand-held barcode and Radio Frequency Identification (RFID) reader
that utilizes area imaging technology to read popular linear (1D), stacked linear, and matrix
(2D) barcodes, combined with reading Low Frequency (LF or 125 kHz) RFID tags in close
distance (10 to 40mm).
With a small ergonomic shape, the HS-1RL can be used in a wide variety of applications but is
specifically designed for healthcare applications and environments. The HS-1RL has a sealed
housing that protects it from day to day debris and spills and is built with medical grade plastics
that are compatible with popular medical cleansers and disinfectants.
This User’s Guide provides installation and programming instructions for the HS-1RL. Product
specifications, dimensions, warranty, and customer support information are also included.
JADAK’s barcode imagers are factory programmed for the most common terminal and
communications settings. If you need to change these settings, programming is accomplished
by scanning the bar codes in this guide or sending the relevant commands serially.
Note: An asterisk (*) next to an option indicates the default setting.
Page 12
HS-1RL User’s Manual Page 12
2 – Hardware Overview
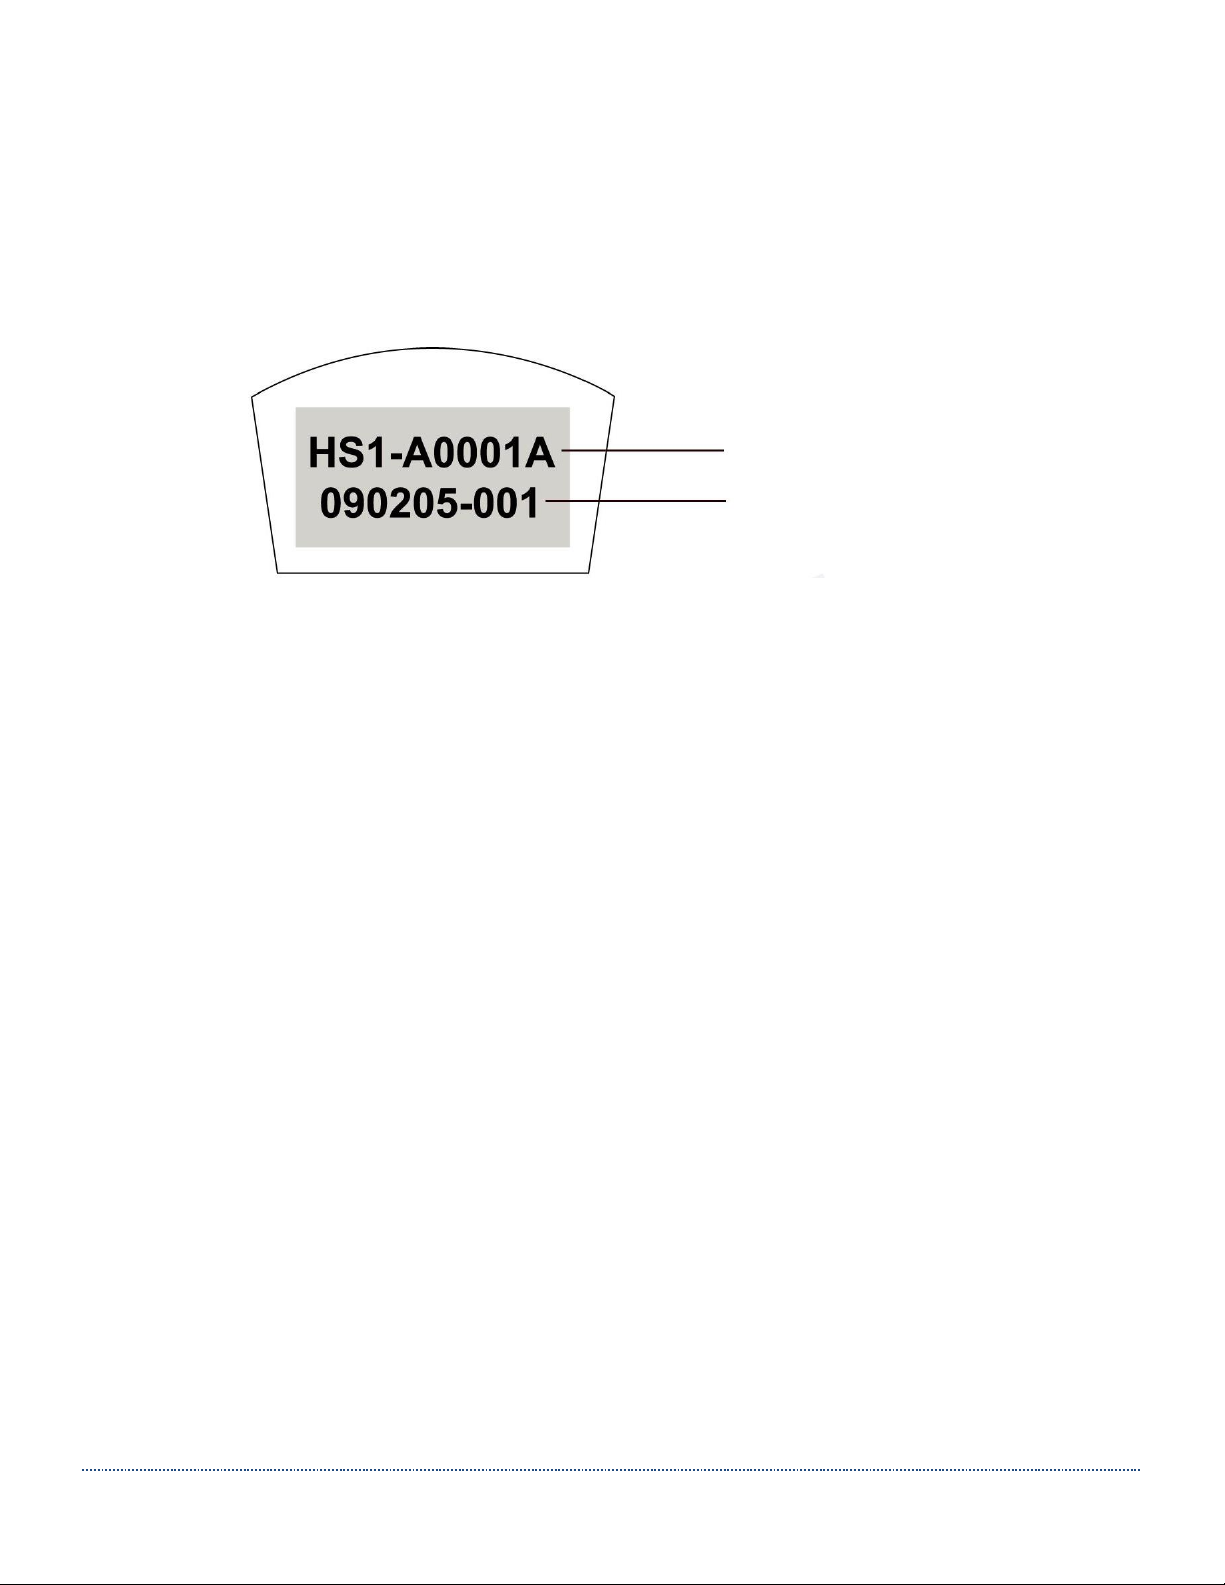
JADAK® HS-1RL Imager Identification
On the bottom of your scanner you will see a label as shown below:
Part Number Example
Serial Number
Serial Number:
The serial number format is as follows: YYMMDD-NNN
Where:
YY = Year
MM = Month
DD = Day
NNN = Unit Number
Page 13
HS-1RL User’s Manual Page 13
Reading Techniques
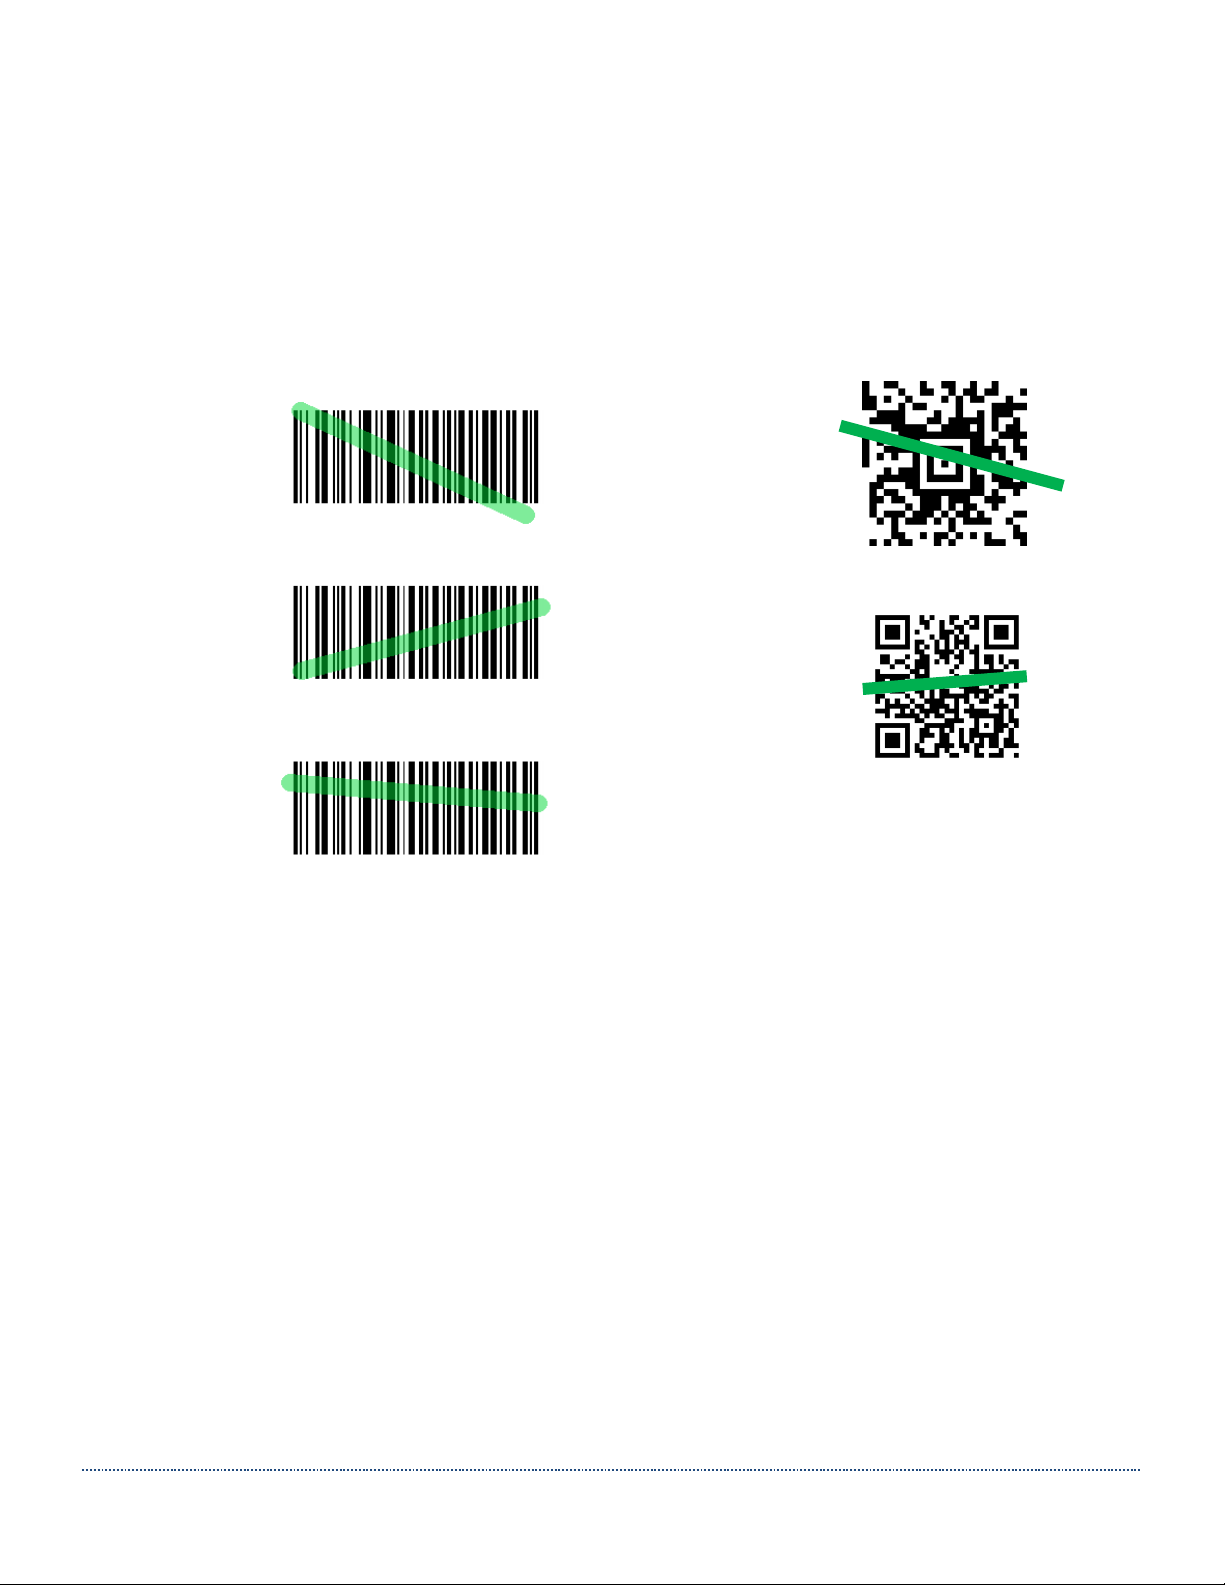
The imager has a view finder or aimer that projects a green beam, which corresponds to the
imager’s horizontal/vertical field of view. The aimer should be centered over the bar code, but it
can be positioned in any direction for a good read.
Linear bar code 2D Matrix symbol
The aiming beam is smaller when the imager is closer to the code and larger when it is farther
from the code.
Symbologies with smaller bars or elements (lower mil size) should be read closer to the unit.
Symbologies with larger bars or elements (higher mil size) should be read farther from the unit.
To read single or multiple symbols (on a page or on an object), hold the imager at an
appropriate distance from the target, pull the trigger, and center the aiming beam on the symbol.
If the code being scanned is highly reflective (e.g., laminated), it may be necessary to tilt the
code up 15° to 18° to prevent unwanted reflection.
Page 14
HS-1RL User’s Manual Page 14
Interface Settings
Connecting the HS-1RL with USB Port
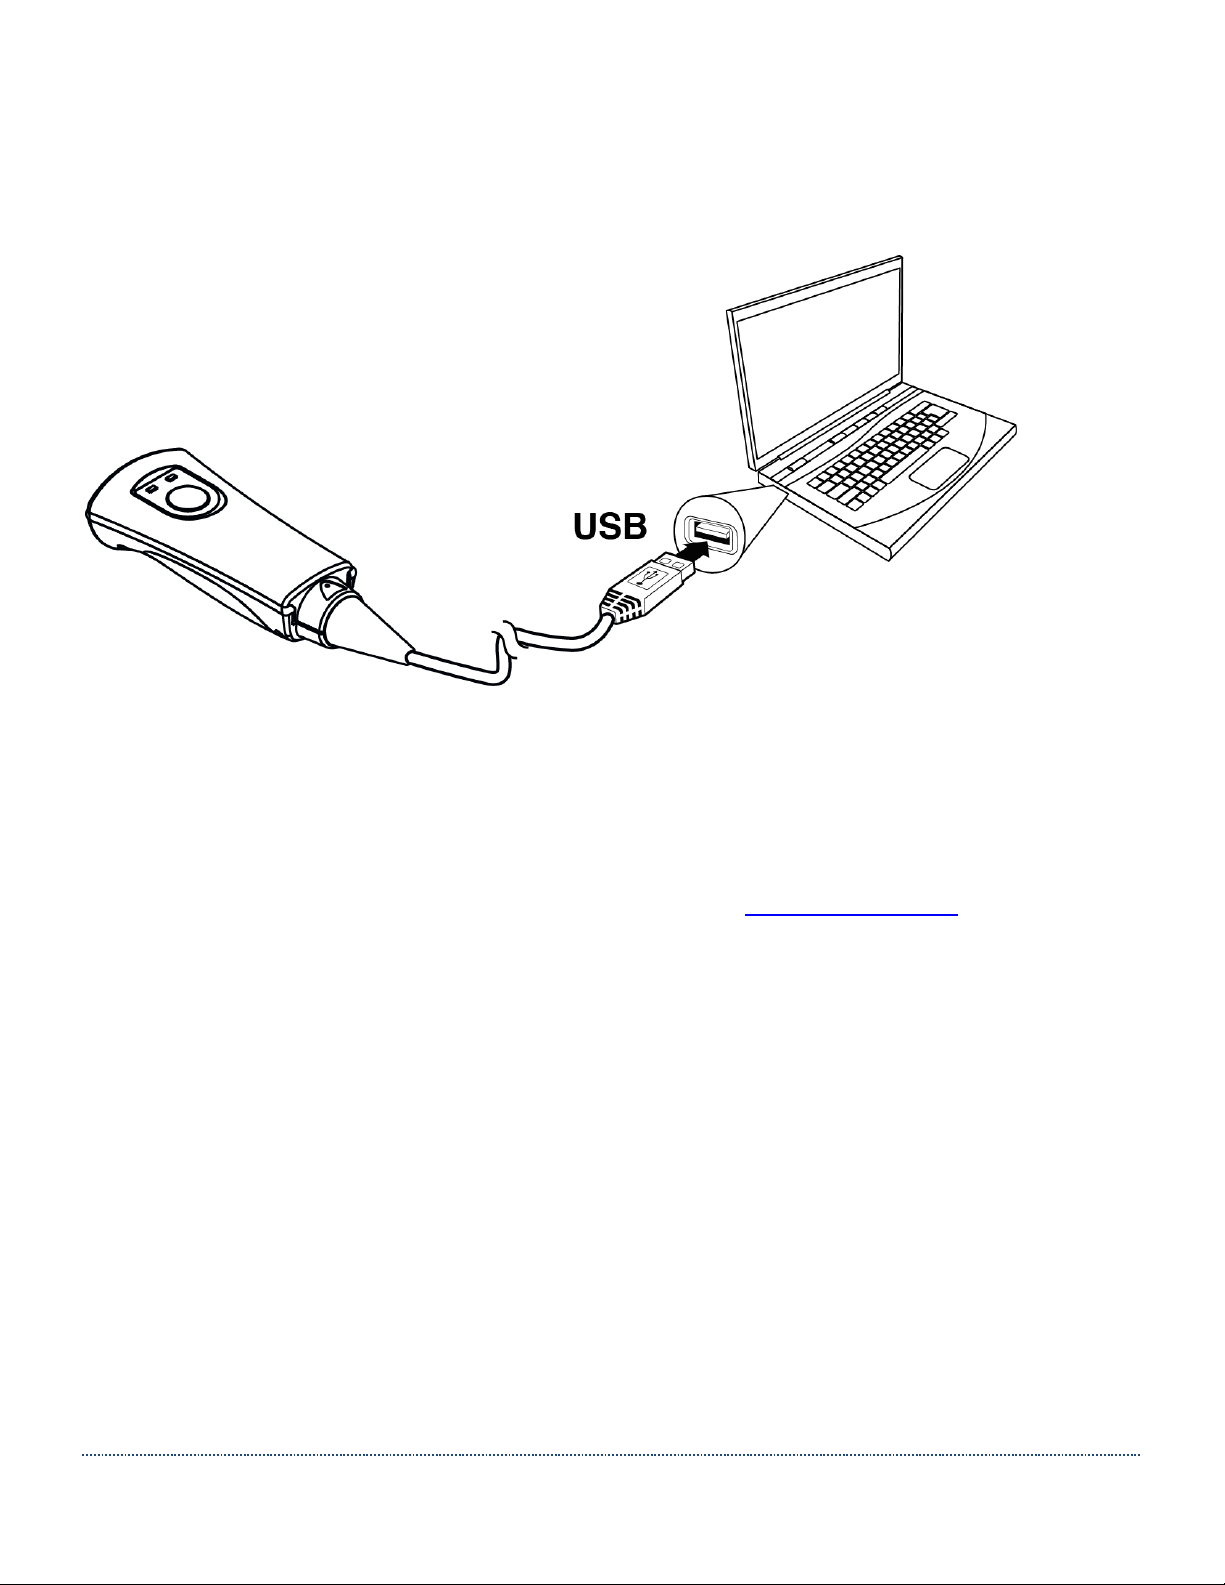
By default, the HS-1RL is configured to communicate in USB HID Keyboard mode. For Windows
10 and Linux operating systems, no additional driver is required when using the device in the
default mode. USB devices are automatically detected after plugging in the device. If the
automatic detection fails, or for Windows 7 operating systems, follow these steps:
1. Download the driver from the HS-1RL support page on www.jadaktech.com and extract
the files to a chosen folder.
2. Turn off the power to the device/computer.
3. Plug the HS-1RL USB cable into your device/computer and then power up the
device/computer.
4. Open Device Manager and find “HS1RX” in the device listing with a yellow exclamation
mark in the lower left corner. Right click and select Properties.
5. Click Update Driver.
6. Click Browse My Computer for Driver Software.
7. Click Let me pick from list of device drivers on my computer.
8. Scroll down the window and select “Ports (COM & LPT)”.
9. Click Next, then Have Disk, then Browse.
10. Navigate to the previously chosen folder, where the driver .inf file is located. Select the
JADAK driver .inf file. Click Open, then OK.
11. Select HS1Rx, then click Next. Click Yes or Proceed to any warnings that may appear.
12. Windows should now display that the driver has been successfully updated.
Page 15
HS-1RL User’s Manual Page 15
Interface Options
USB COM Port Emulation
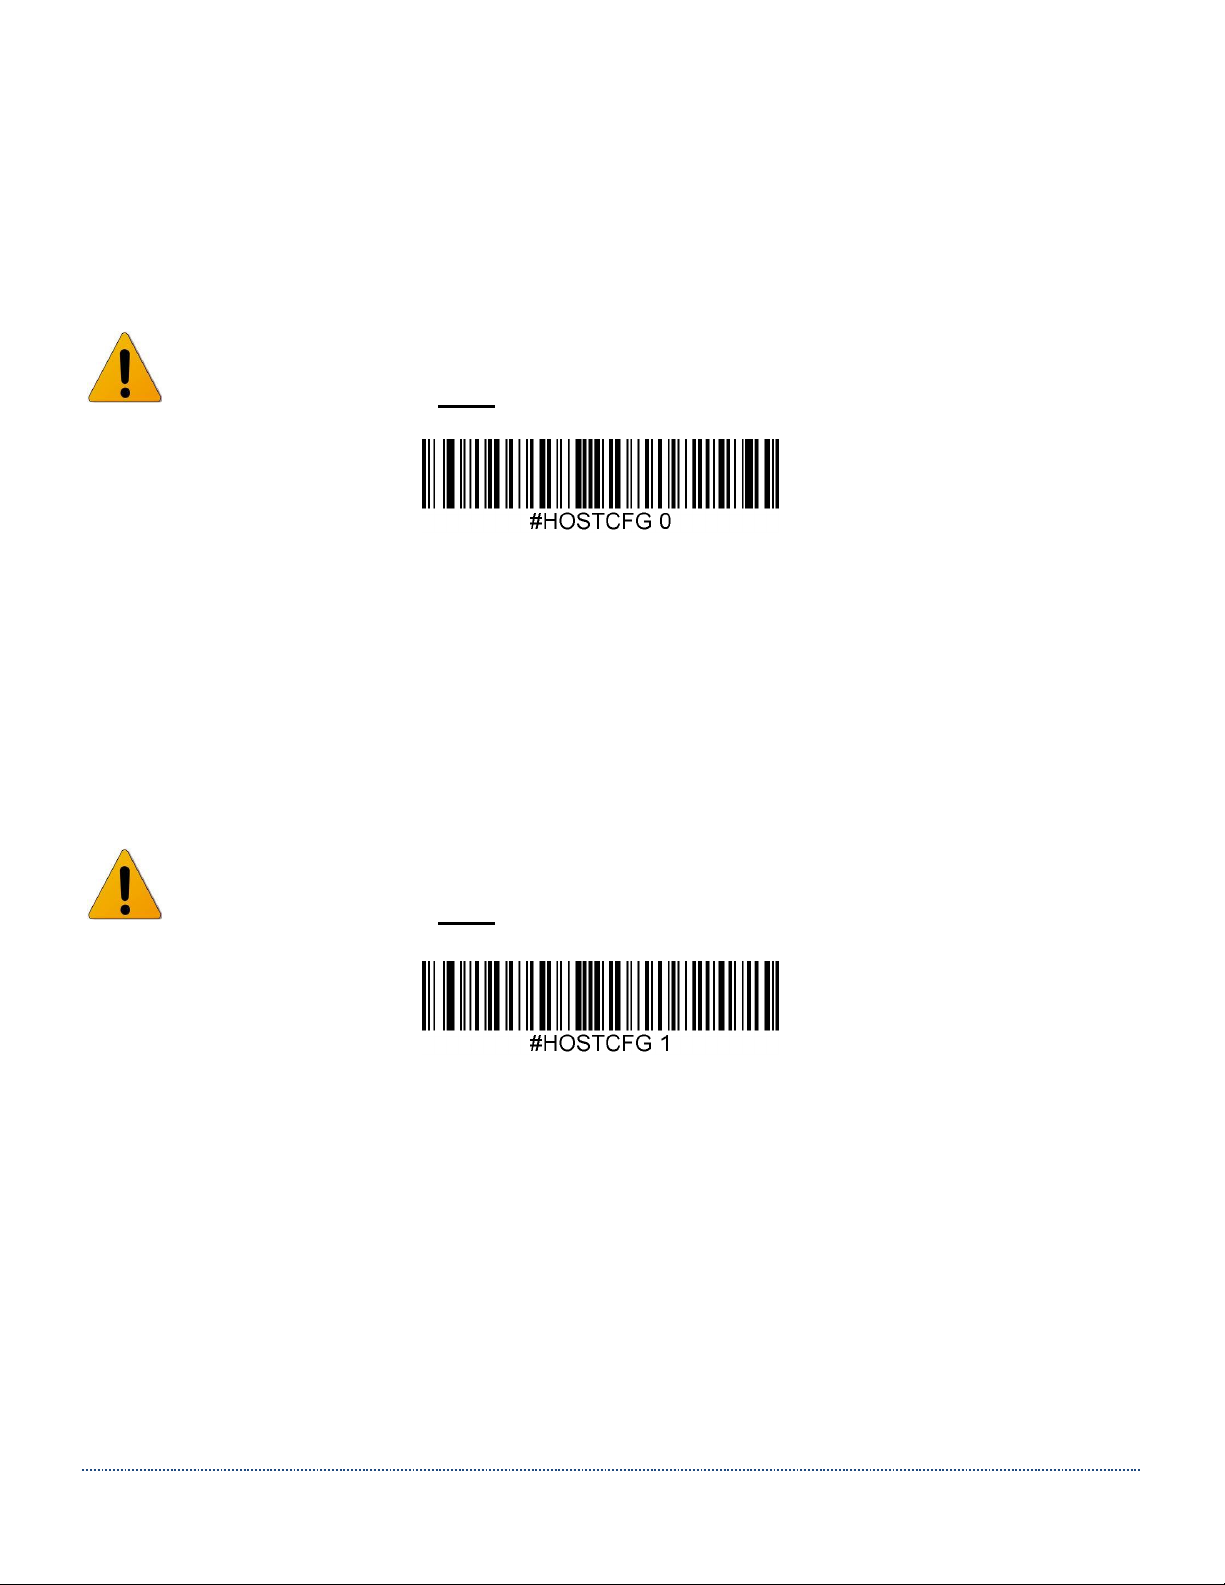
Scan the following code to program the HS-1RL to emulate an RS-232-based COM port.
Note: The HS-1RL must be power cycled after programming this interface!
USB COM Emulation
USB HID Keyboard Emulation
HID Keyboard Emulation is the default mode for HS-1RL. If the setting has been changed,
scan the following code to program the HS-1RL for USB HID Keyboard mode.
Note: The HS-1RL must be power cycled after programming this interface!
USB HID Keyboard
Page 16
HS-1RL User’s Manual Page 16
Keyboard Country Layout
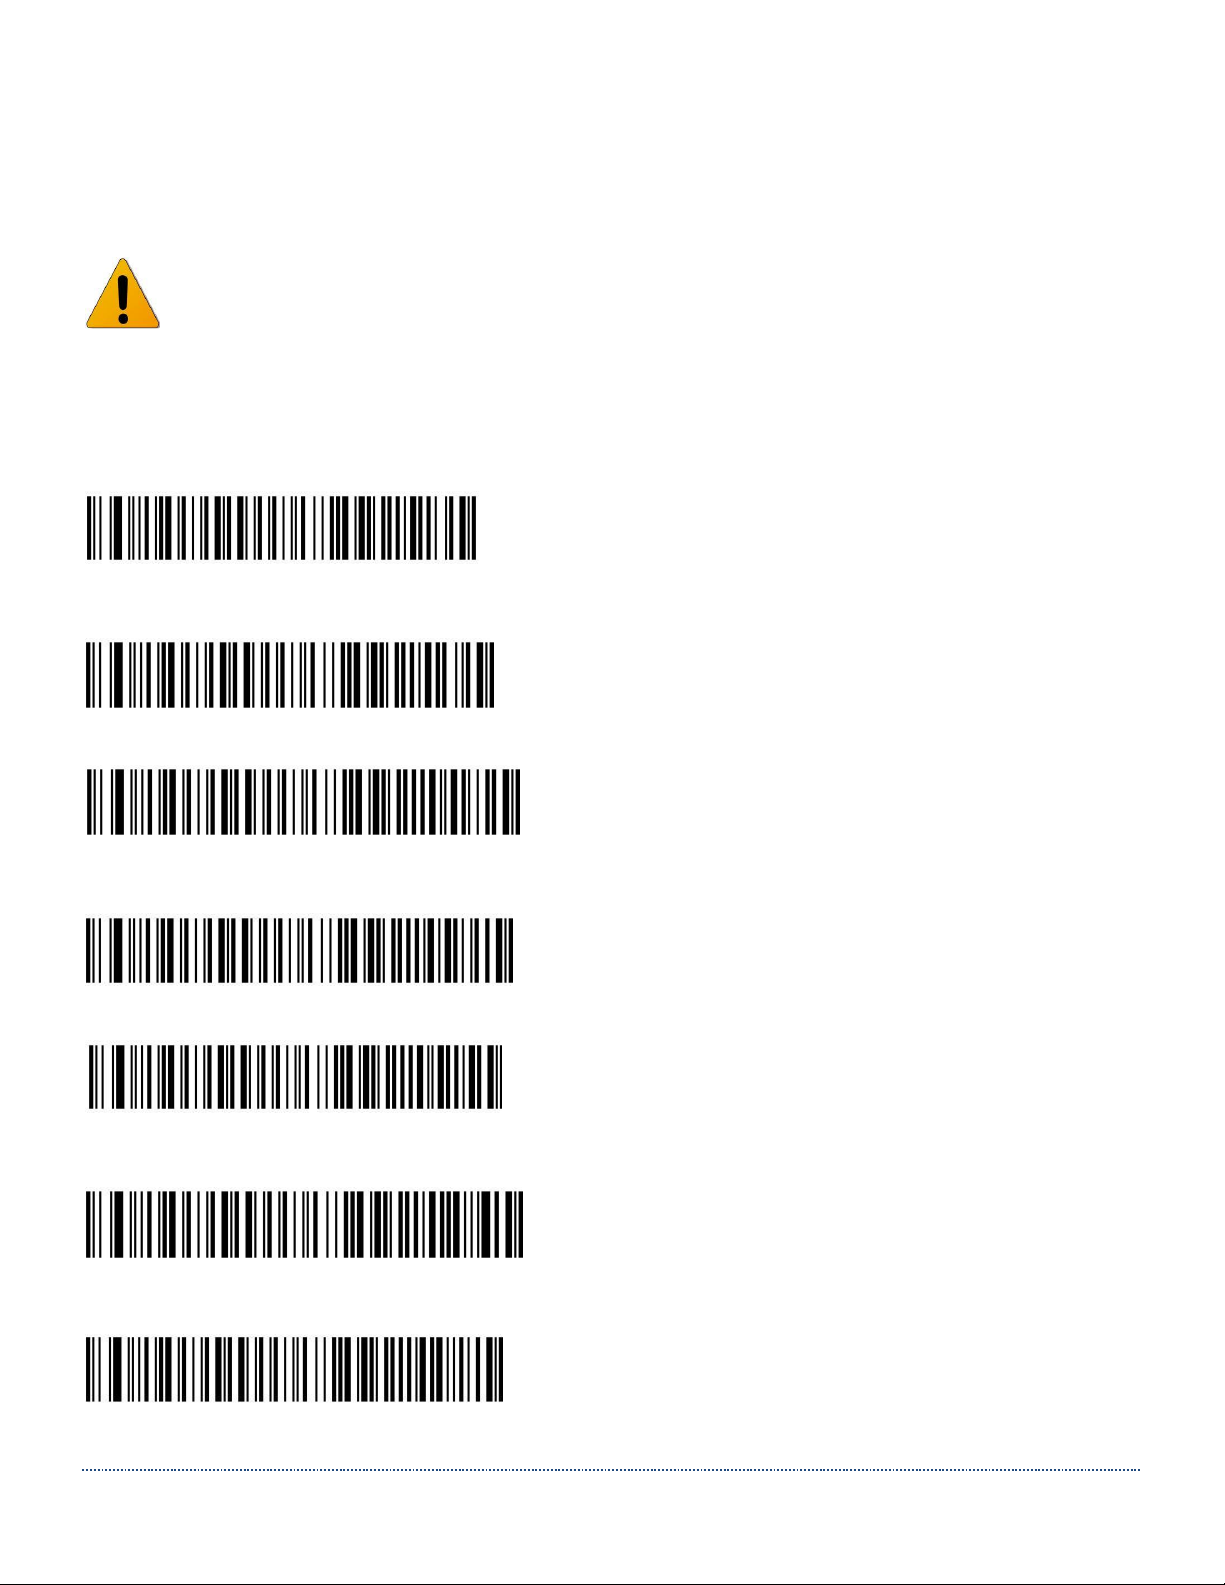
When the HS-1RL is set to USB HID Keyboard Emulation, the following commands may be used
for programming barcodes to set the specific Keyboard layout for your language.
Note: Initially only the United States keyboard layout is supported, please contact
technical support before configuring any other keyboard layout options.
Default = United States.
* United States:
#KBD_CTY 0
United Kingdom:
#KBD_CTY 1
Belgium:
#KBD_CTY 21
Denmark:
#KBD_CTY 30
France:
#KBD_CTY 20
Germany:
#KBD_CTY 15
Italy:
#KBD_CTY 35
Page 17
HS-1RL User’s Manual Page 17
Netherlands:
#KBD_CTY 31
Norway:
#KBD_CTY 28
Portugal:
#KBD_CTY 33
Spain:
#KBD_CTY 36
Sweden / Finland:
#KBD_CTY 26
HID Keyboard Rate
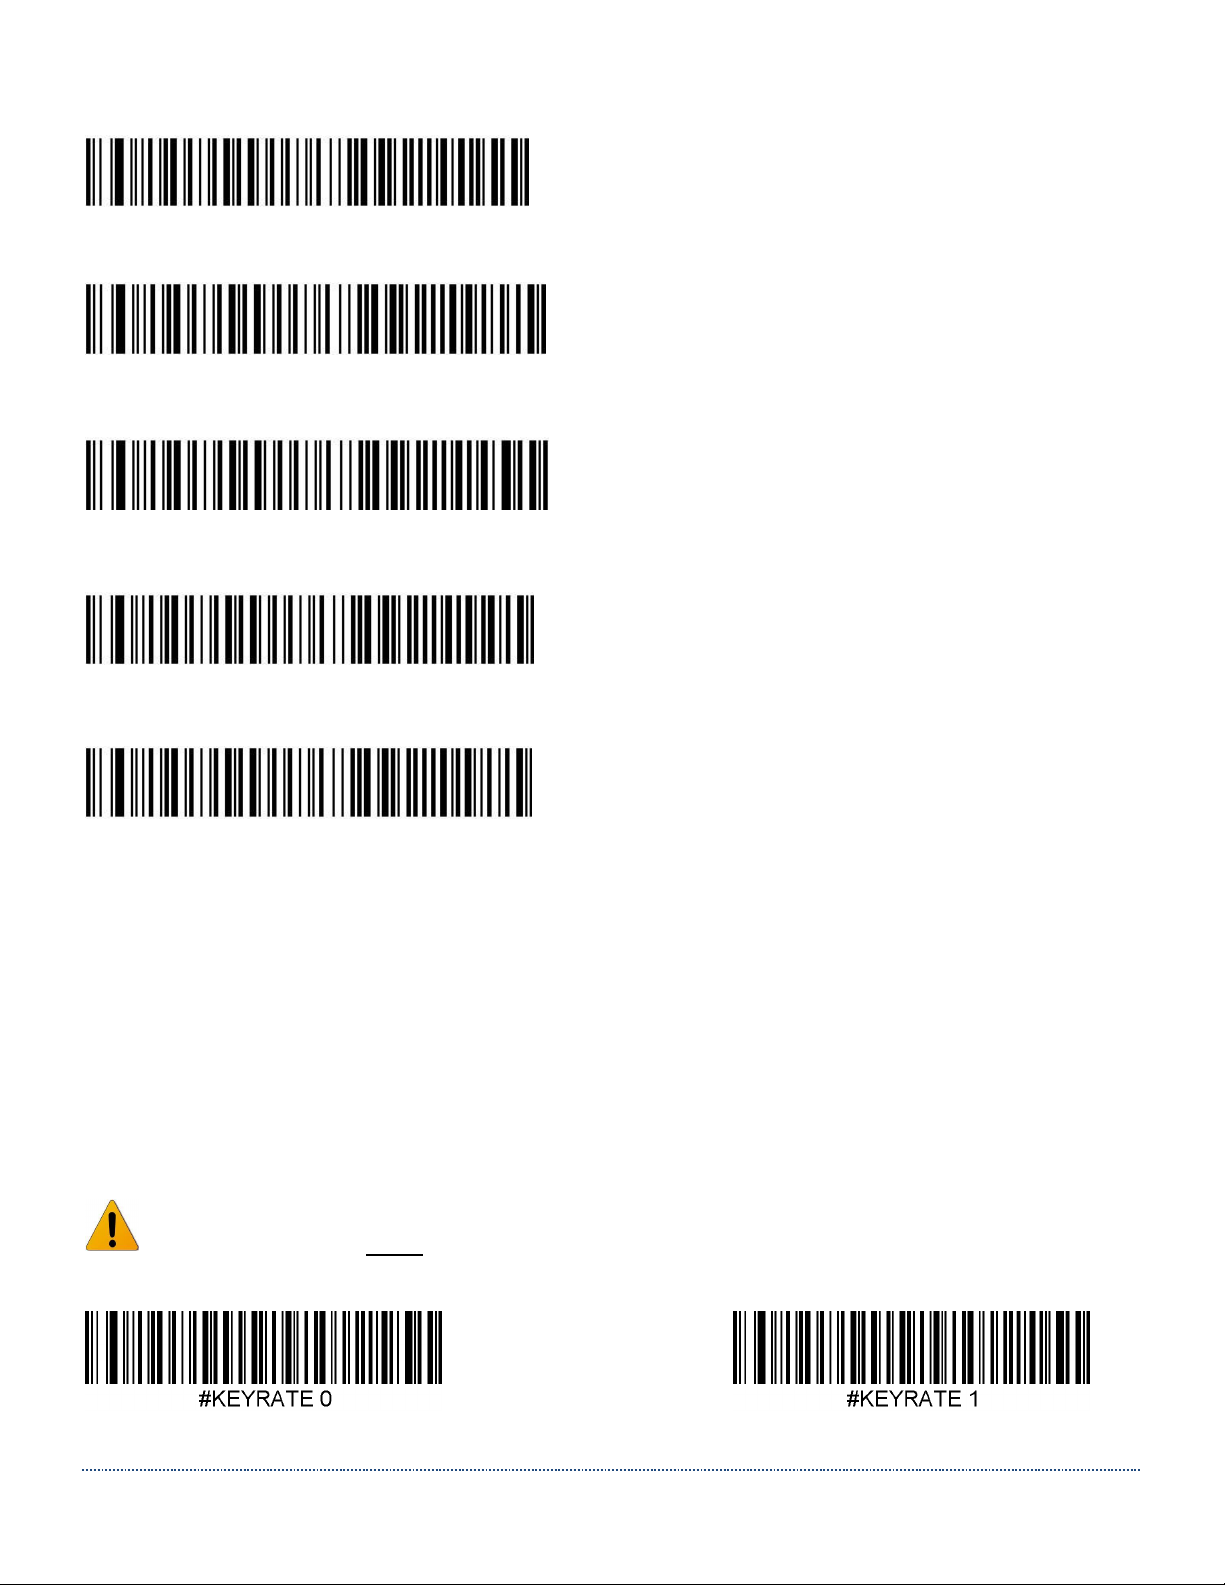
If you use the HS-1RL in USB HID Keyboard mode, it’s possible to change the speed of the data
output when an RFID tag or barcode is read, akin to someone typing the data faster or slower on
a keyboard. Faster settings may lead to data loss when large amounts of data are transmitted.
Note: This setting has no impact when using the HS-1RL in USB COM Emulation mode.
Scan one of the codes below to change the Keyboard Rate setting. Default = Keyrate 3.
Note: The HS-1RL must be power cycled after changing the Keyboard rate!
Keyrate Slow Keyrate Medium
Page 18

HS-1RL User’s Manual Page 18
Keyrate Fast * Keyrate Fastest
Page 19
HS-1RL User’s Manual Page 19
Default Options
Default Settings
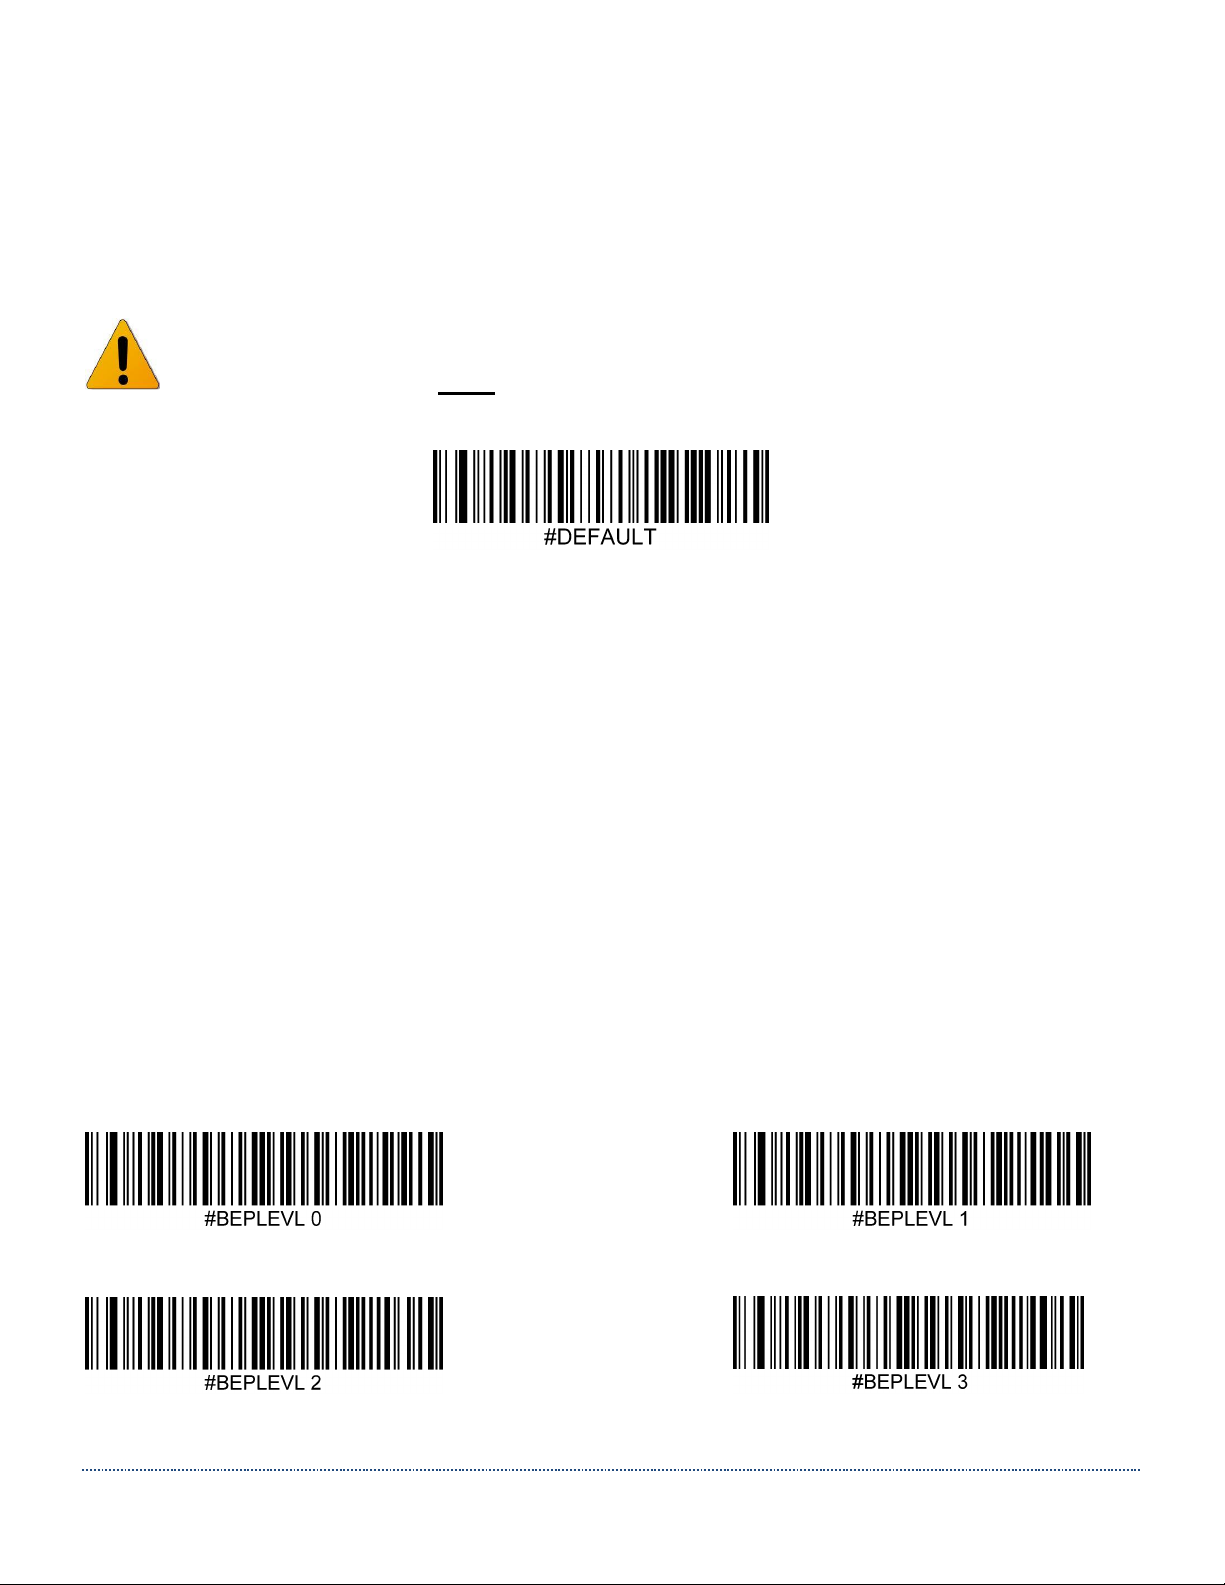
Scan the following code to revert the unit to its default settings.
Note: The HS-1RL must be power cycled after programming this command!
Please contact JADAK to program the HS-1RL with unique default settings for your
application.
Input/Output Settings
Good Read Indicators
Beeper Volume - Good Read
The beeper volume codes modify the volume of the beep the imager emits on a good read.
Default = High.
Off Low
Medium * High
Page 20
HS-1RL User’s Manual Page 20
No Reads
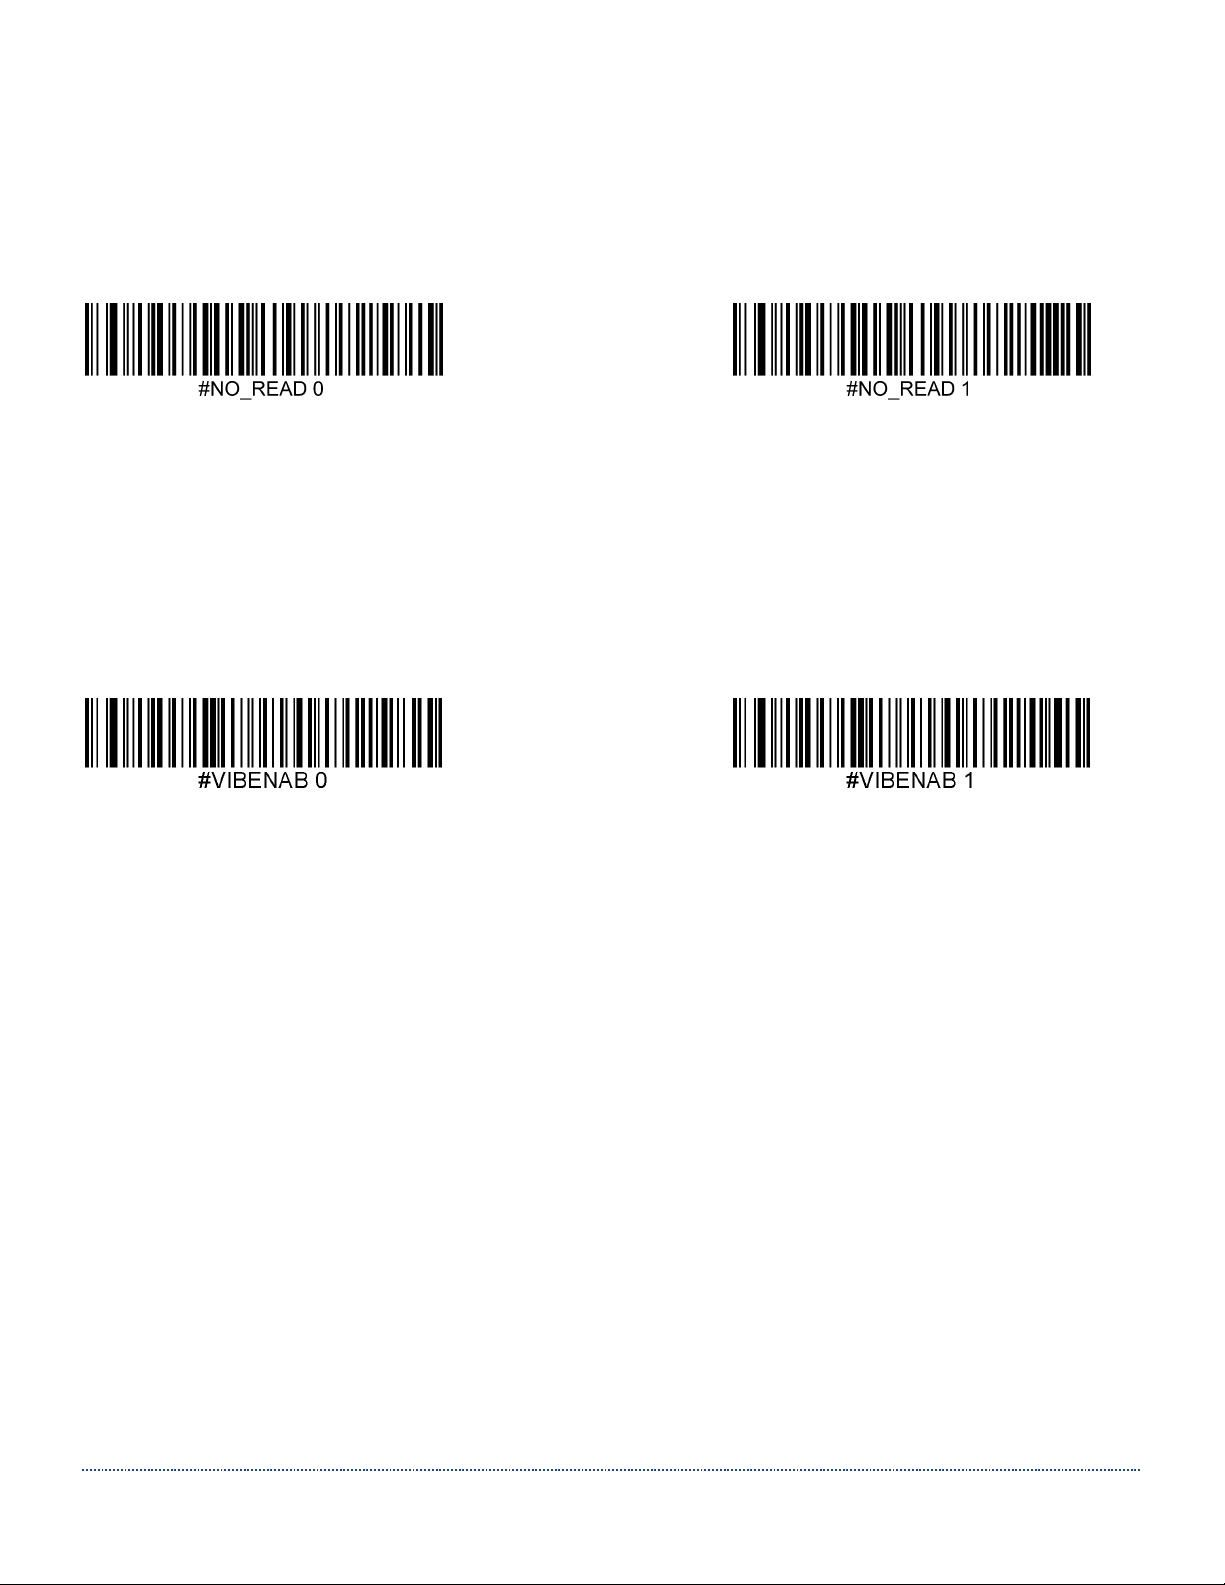
Not every trigger event will result in a successful barcode read. When there is no code read the
HS-1RL may return a no read signer in the form of the characters NR.
Default = Disable No Read.
* Disable No Read Enable No Read
Vibration
The HS-1RL has an optional internal Vibration function that can be turned on for good reads
(both RFID and barcodes). This can be very helpful in an environment where an audible beep
would be unwanted; for instance, in a patient ward at night in a hospital, where patients are
sleeping.
Default = Enabled
Don’t Vibrate * Vibrate on Good Read
Trigger Modes
In order to scan barcodes, you need to ‘trigger’ the HS-1RL.
This can be done in various ways. You can activate the HS-1RL by sending the trigger command
TRGON serially or by pressing the trigger button on the scanner itself.
Several supporting commands are provided to set the allowed trigger time-out (e.g. the
maximum time that the scanner will take to keep looking for a barcode.)
#TRGON This command turns the trigger ON.
#TRGOFF This command turns the trigger OFF.
Manual Trigger (level)
You can activate the imager by pressing the trigger or sending the serial trigger command
TRGON. When in manual trigger mode, the HS-1RL scans until a bar code is read, until
the trigger is released, a TRGOFF command is sent, or a time-out occurs.
Use the command below to enable Manual Trigger Mode.
Page 21

HS-1RL User’s Manual Page 21
* Manual (level) Trigger
Presentation Mode
Presentation mode is a hands-free mode of operation in which the imager will
automatically trigger on when an object is moved into the field of view.
The HS-1RL will not enter low power mode while in Presentation Mode.
Use the command below to enable Presentation Mode.
Presentation Mode
Note: Enabling Presentation Mode will automatically disable RFID reading.
Page 22
HS-1RL User’s Manual Page 22
Trigger Time Out
This sets the maximum time how trigger procession continues during a scan attempt.
This command is not valid in Presentation Trigger Mode.
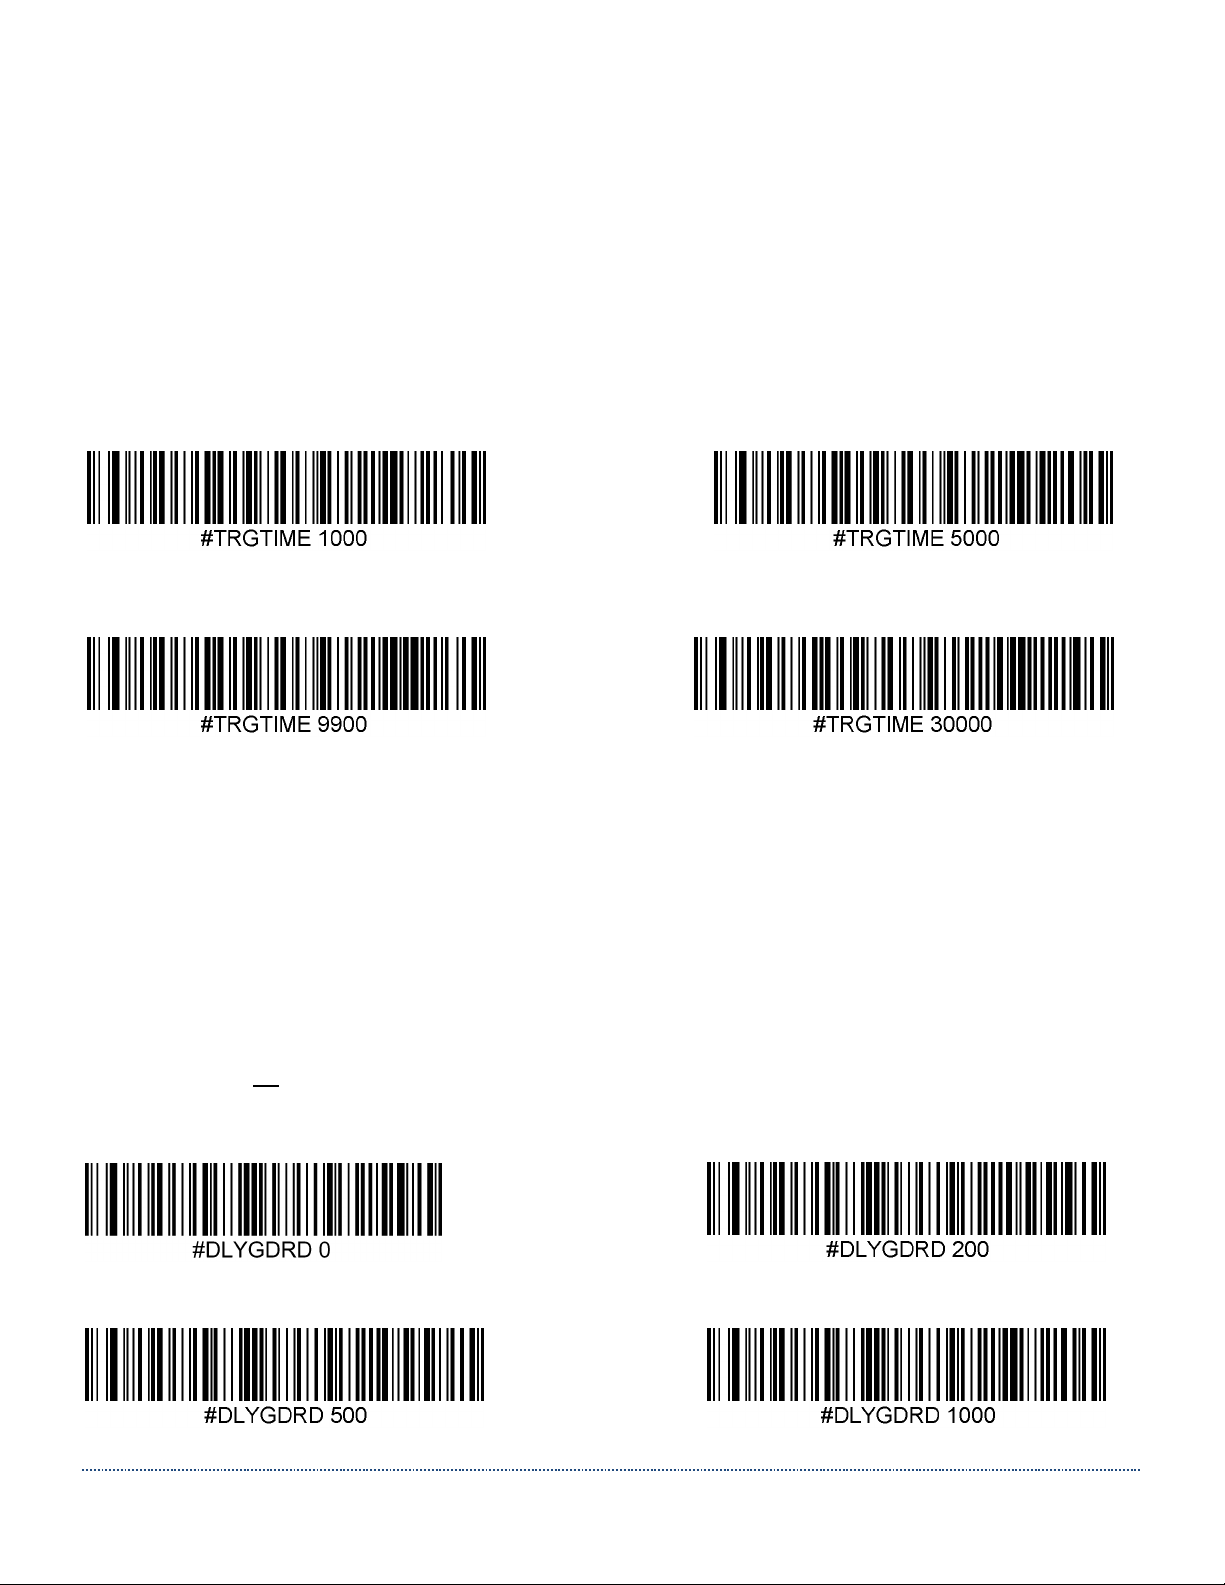
Use the command TRGTIME x (where ‘x’ is a value between 0 and 300,000 in 1ms steps), to set
the time between 1ms and 300 seconds.
Default = 9900 (9.9 Seconds).
Note: TRGTIME 0 = infinite trigger time out.
Setting examples:
Trigger Time Out 1.0 seconds Trigger Time Out 5.0 seconds
* Trigger Time Out 9.9 seconds Trigger Time Out 30.0 seconds
Good Read Delay
This sets the time period before the scanner can read another bar code.
Use the command DLYGDRD x (where ‘x’ is a value between 0 and 30.000 milliseconds), to set
the time between 0 (no delay) and 30.000 (=30 sec).
Default time = 0 Seconds.
Note: Good Read Delay is most effective when in Presentation Mode or when Multiple Symbol
Mode is turned on in combination with the other Trigger Modes.
Setting examples:
* No Good Read delay Good Read delay 0.2 seconds
Good Read delay 0.5 seconds Good Read delay 1.0 seconds
Page 23
HS-1RL User’s Manual Page 23
Re-read Delay
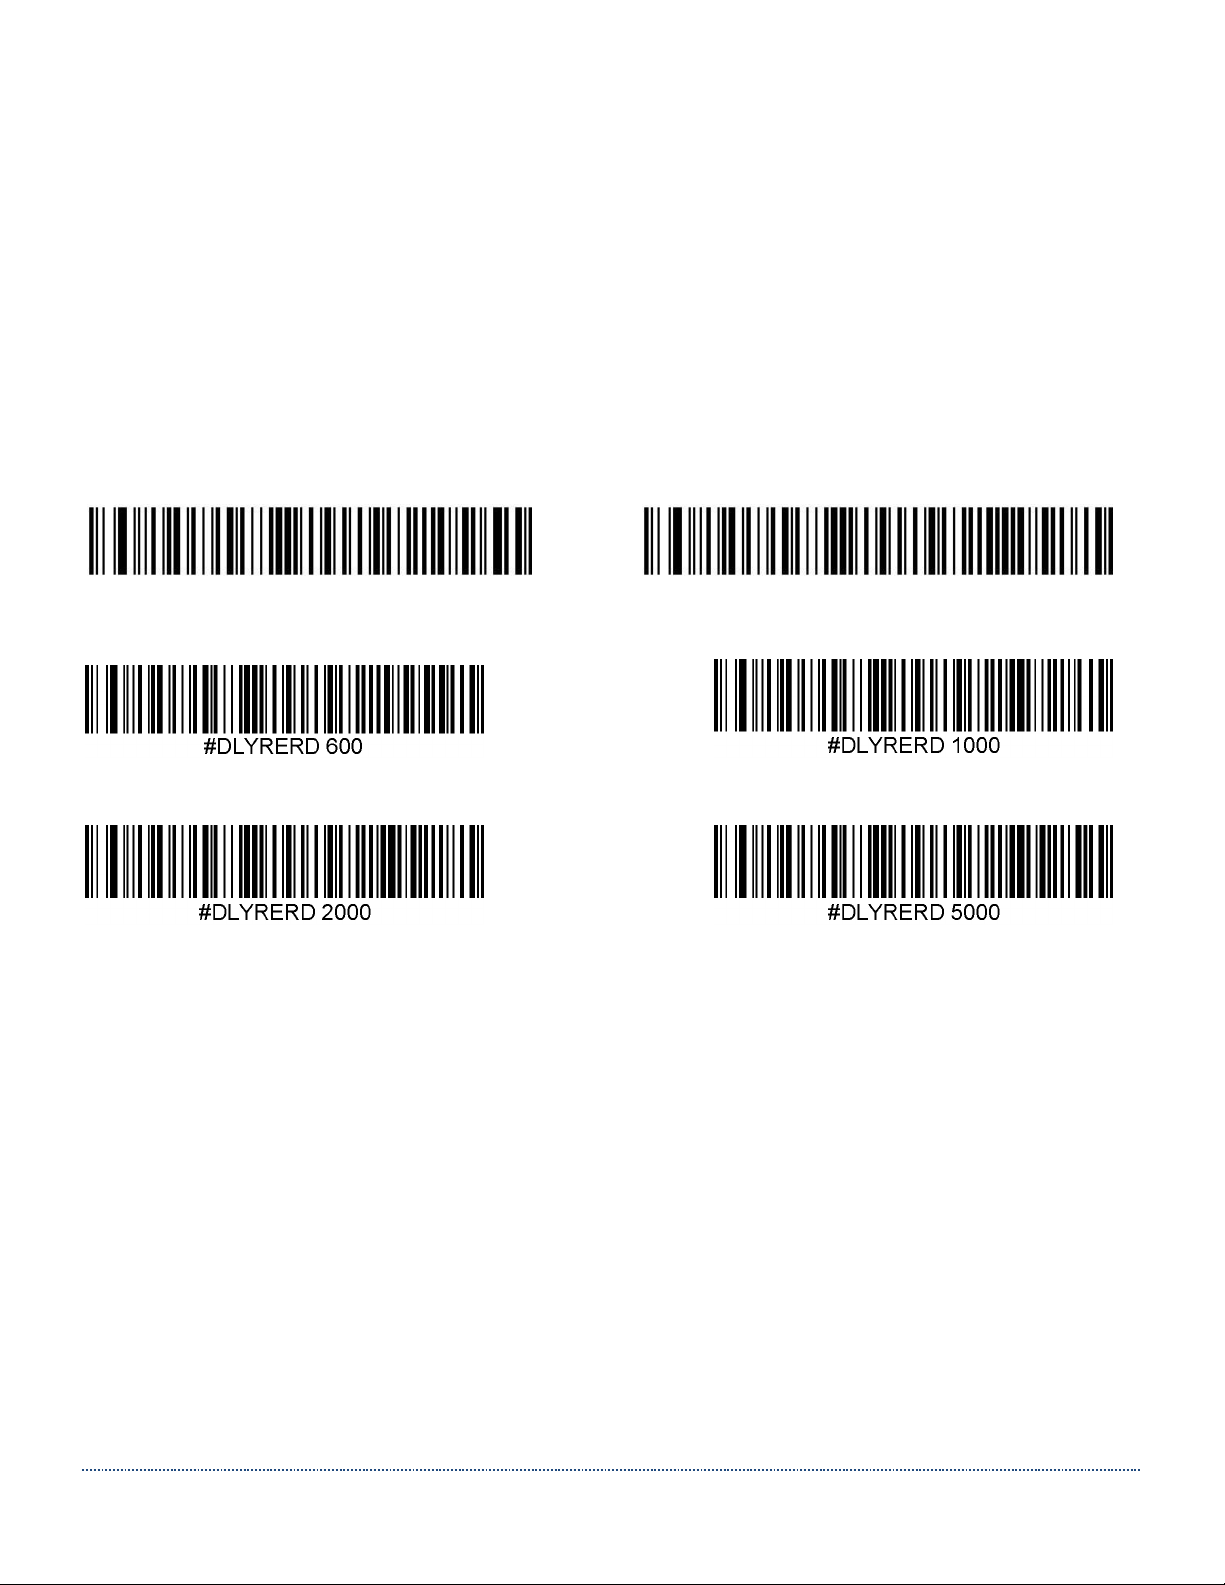
This sets the time period before the imager can read the same bar code a second time. Setting a
proper re-read delay time protects against accidental re-reads of the same bar code. Use shorter
delays in applications where repetitive bar code scanning is required.
Several commonly used re-read delay menu command barcodes are included below. Use the
command DLYRERD x (where ‘x’ is a value between 50 and 30.000 in milliseconds), or by
building a menu command barcode that includes such a value.
Default time = 0.75 seconds.
Note: Re-read Delay only works when in Presentation Mode.
#DLYRERD 50 #DLYRERD 750
Re-read delay 0.05 seconds * Re-read delay 0.75 seconds
Re-read delay 0.6 seconds Re-read delay 1.0 seconds
Re-read delay 2.0 seconds Re-read delay 5.0 seconds
Page 24
HS-1RL User’s Manual Page 24
3 – Firmware Overview (Utilities)
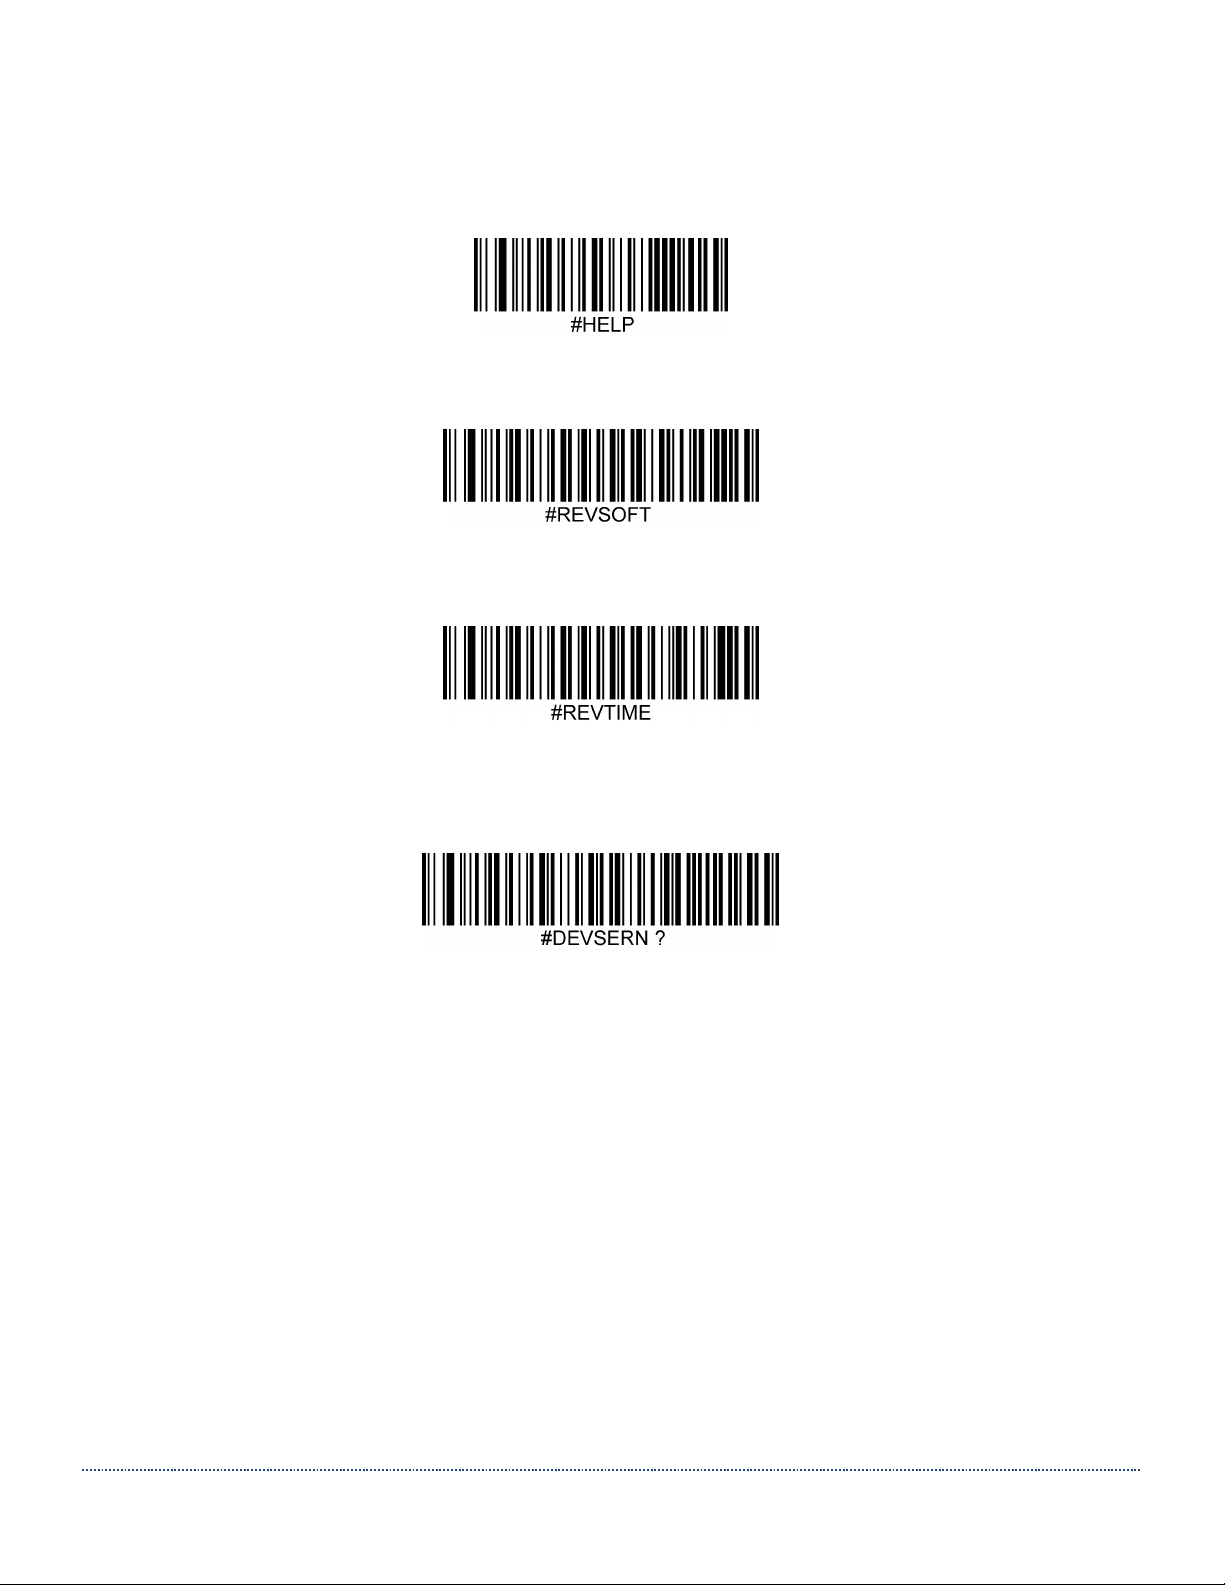
The following commands can tell more about certain aspects of the HS-1RL hand scanner.
Show Software Revision
Show Revision Time
Show Device Serial Number
Page 25
HS-1RL User’s Manual Page 25
5 - Data Editing
Data Editing Overview
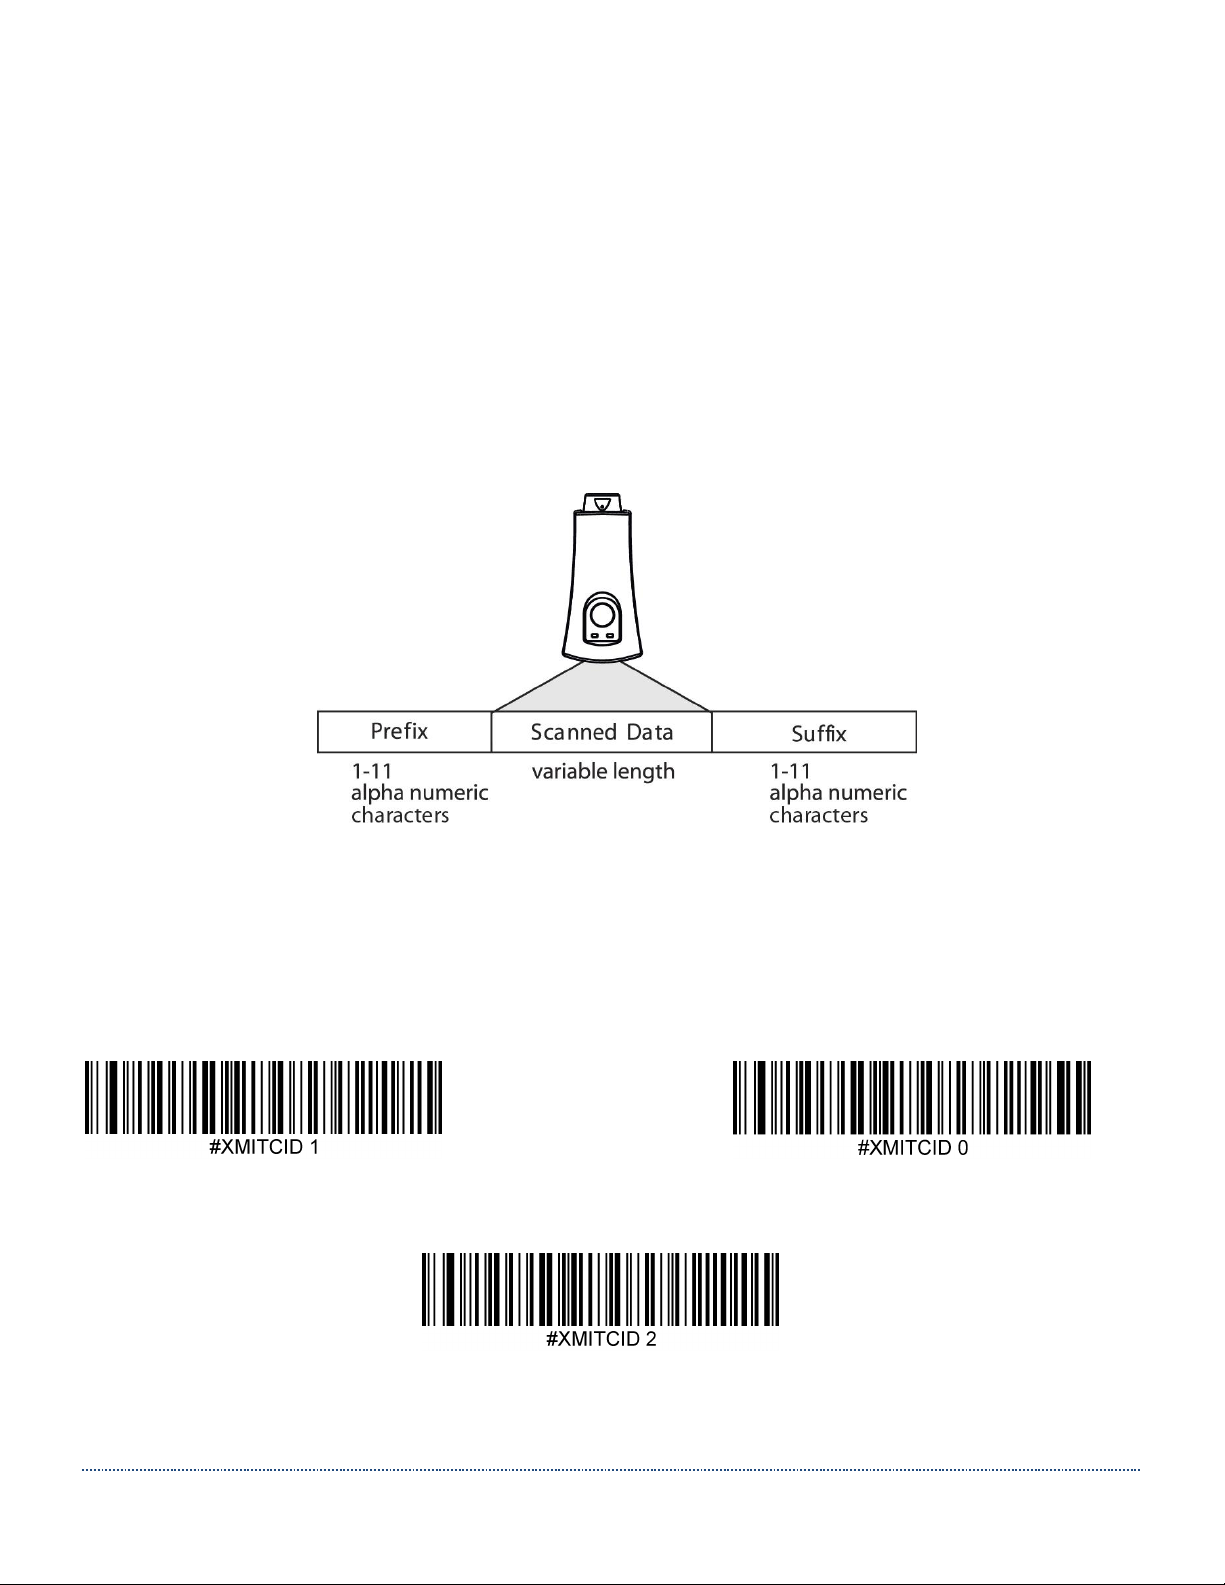
When a barcode is scanned, additional information is sent to the host computer along with the
barcode data. This group of barcode data and additional user-defined data is called a “message
string.” The selections in this section are used to build the user-defined data into the message
string.
The following illustration shows the breakdown of a message string:
Transmit AIM ID Character (Not Supported in Current Firmware)
Use the following codes to transmit an AIM ID character or a Symbol ID Character.
See Appendix B for a chart of all supported barcodes and their corresponding AIM ID characters.
Default = Don’t Transmit AIM ID.
Transmit AIM ID * Don’t Transmit AIM ID
Transmit Symbol ID
Page 26
HS-1RL User’s Manual Page 26
Barcode Prefix
Prefix characters are user-definable data characters that can be sent before scanned data.
It’s possible for the HS-1RL to enable and set a specific prefix for all scanned barcode data only.
This can help to discern barcode data from RFID data when both are output alternately.
Note: This Barcode Prefix will be separate from any set RFID prefixes.
Barcode Prefixes On/Off
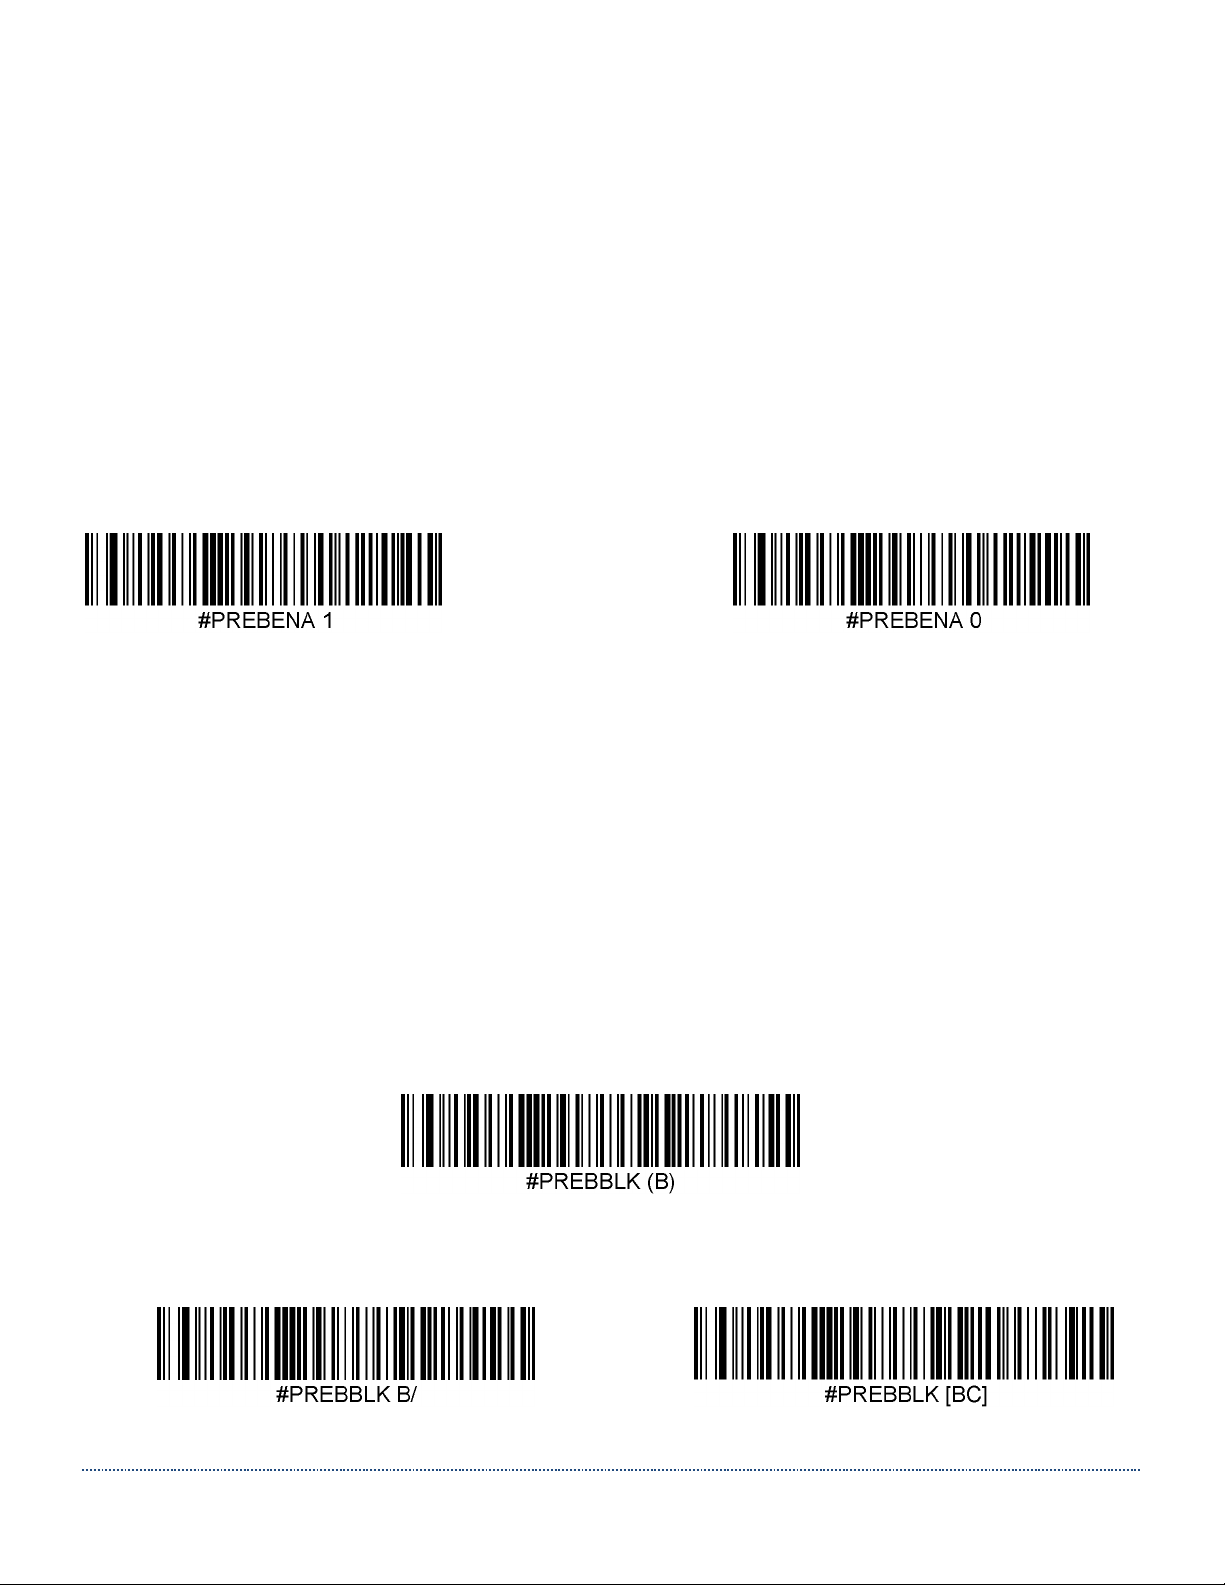
To enable or disable barcode prefixes, scan the appropriate code below.
Default = disabled.
Enable * Disable
Barcode Prefix Block String
Use the command PREBBLK in combination with ASCII or hex characters to set the
specific Barcode Prefix string. See Appendix D for ASCII/hex conversion help.
Note: Hex characters must be preceded by \x and it’s not possible to interject a Carriage
Return in the middle of the block string.
For instance, if you want the prefix to be [BC-data], send: PREBBLK [BC-data].
Please contact JADAK if you need further help.
The default Barcode Prefix Block string is: (B)
* Barcode Prefix Block (B)
Example codes:
Barcode Prefix Block B/ Barcode Prefix Block [BC]
Page 27
HS-1RL User’s Manual Page 27
Barcode Suffix
Suffix characters are user-definable data characters that can be sent after scanned data.
It’s possible for the HS-1RL to enable and set a specific suffix for all scanned barcode data only.
Note: This Barcode Suffix will be separate from any set RFID suffixes or general suffixes.
Barcode Suffix On/Off
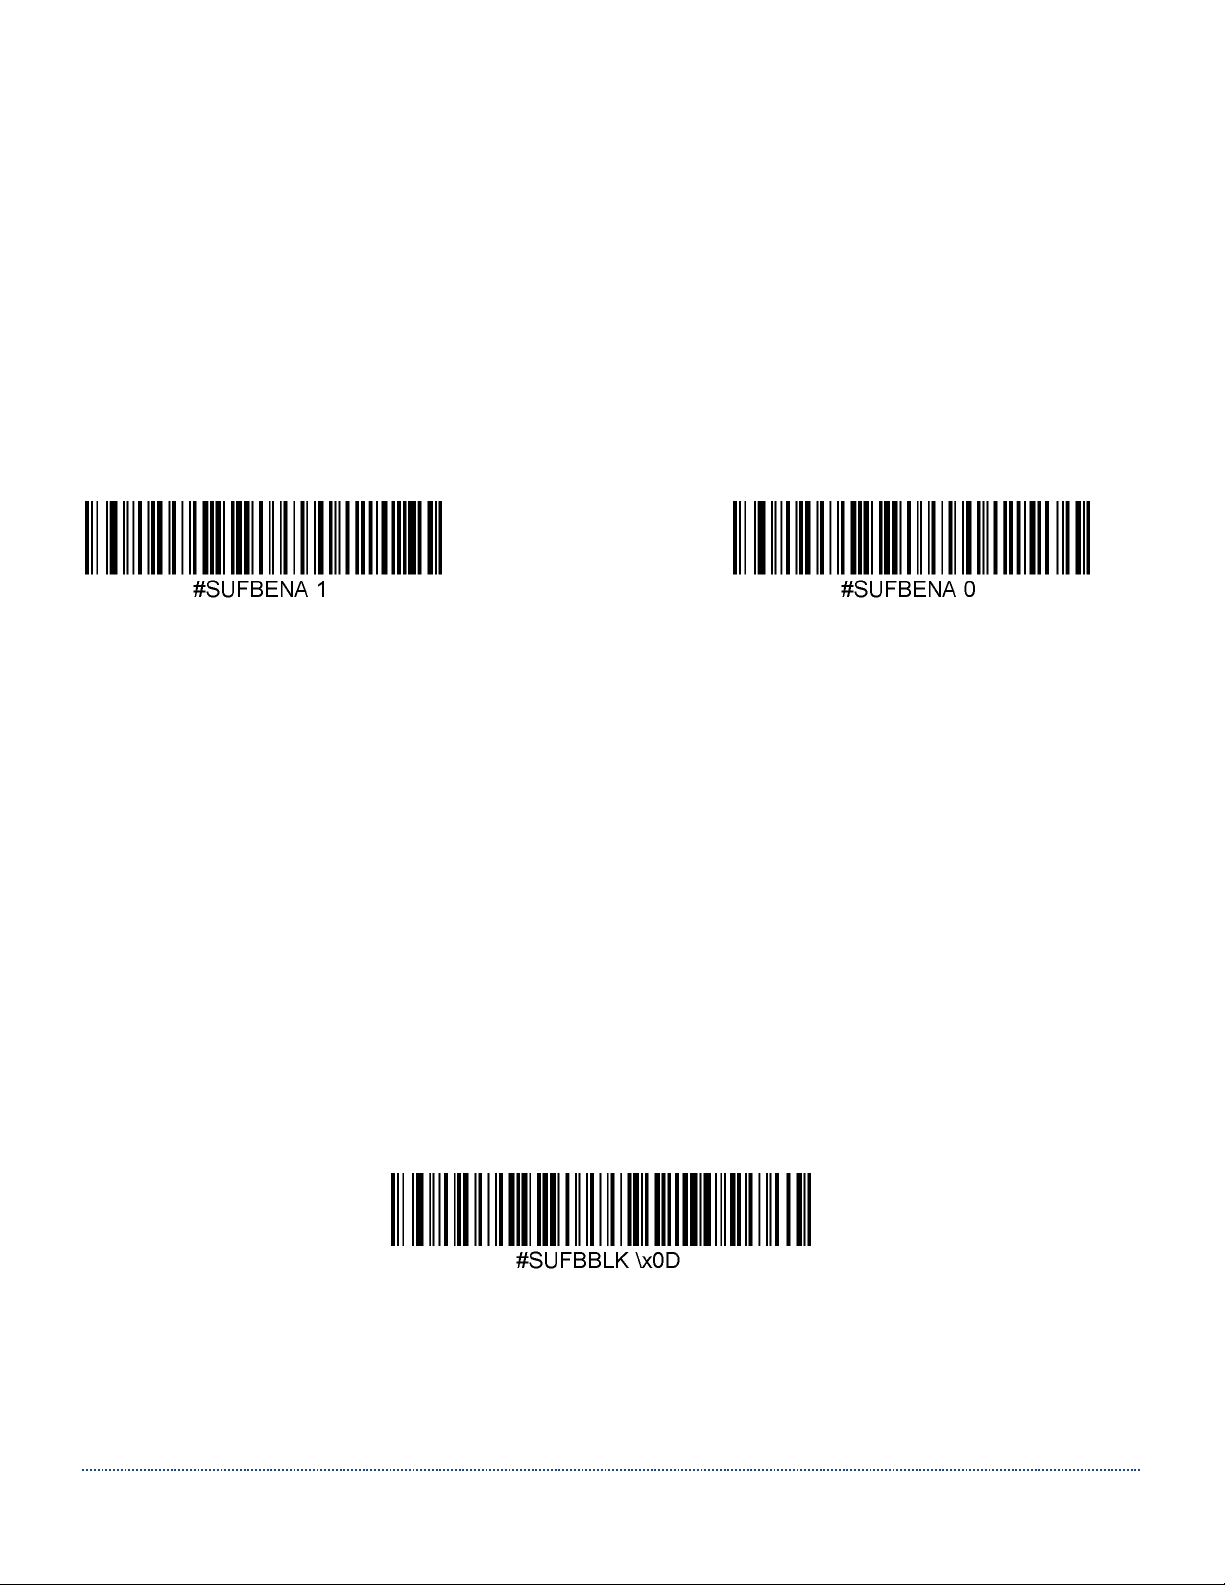
To enable or disable the barcode suffix, scan the appropriate code below.
Default = disabled.
Enable * Disable
Barcode Suffix Block String
Use the command SUFBBLK in combination with ASCII or hex characters to set the
specific Barcode Suffix string. See Appendix D for ASCII/hex conversion help.
Note: Hex characters must be preceded by \x to be recognized as hex instead of
ASCII and it’s not possible to interject a Carriage Return in the middle of the block string.
For instance, it’s possible to program a Suffix that starts with 123 (regular ASCII text),
then a Tab symbol (as hex 09) and then ABC (ASCII characters again), send the
following: SUFBBLK 123\x09ABC
Please contact JADAK if you need further help.
The default Barcode Suffix Block string is a Carriage Return (hex ‘0D’).
* Barcode Suffix Block \x0D
Page 28
HS-1RL User’s Manual Page 28
6 - RFID
RFID Overview
Besides being able to scan 1D and 2D barcodes, the HS-1RL can also read RFID tags, using LF
RFID technology at 125 kHz.
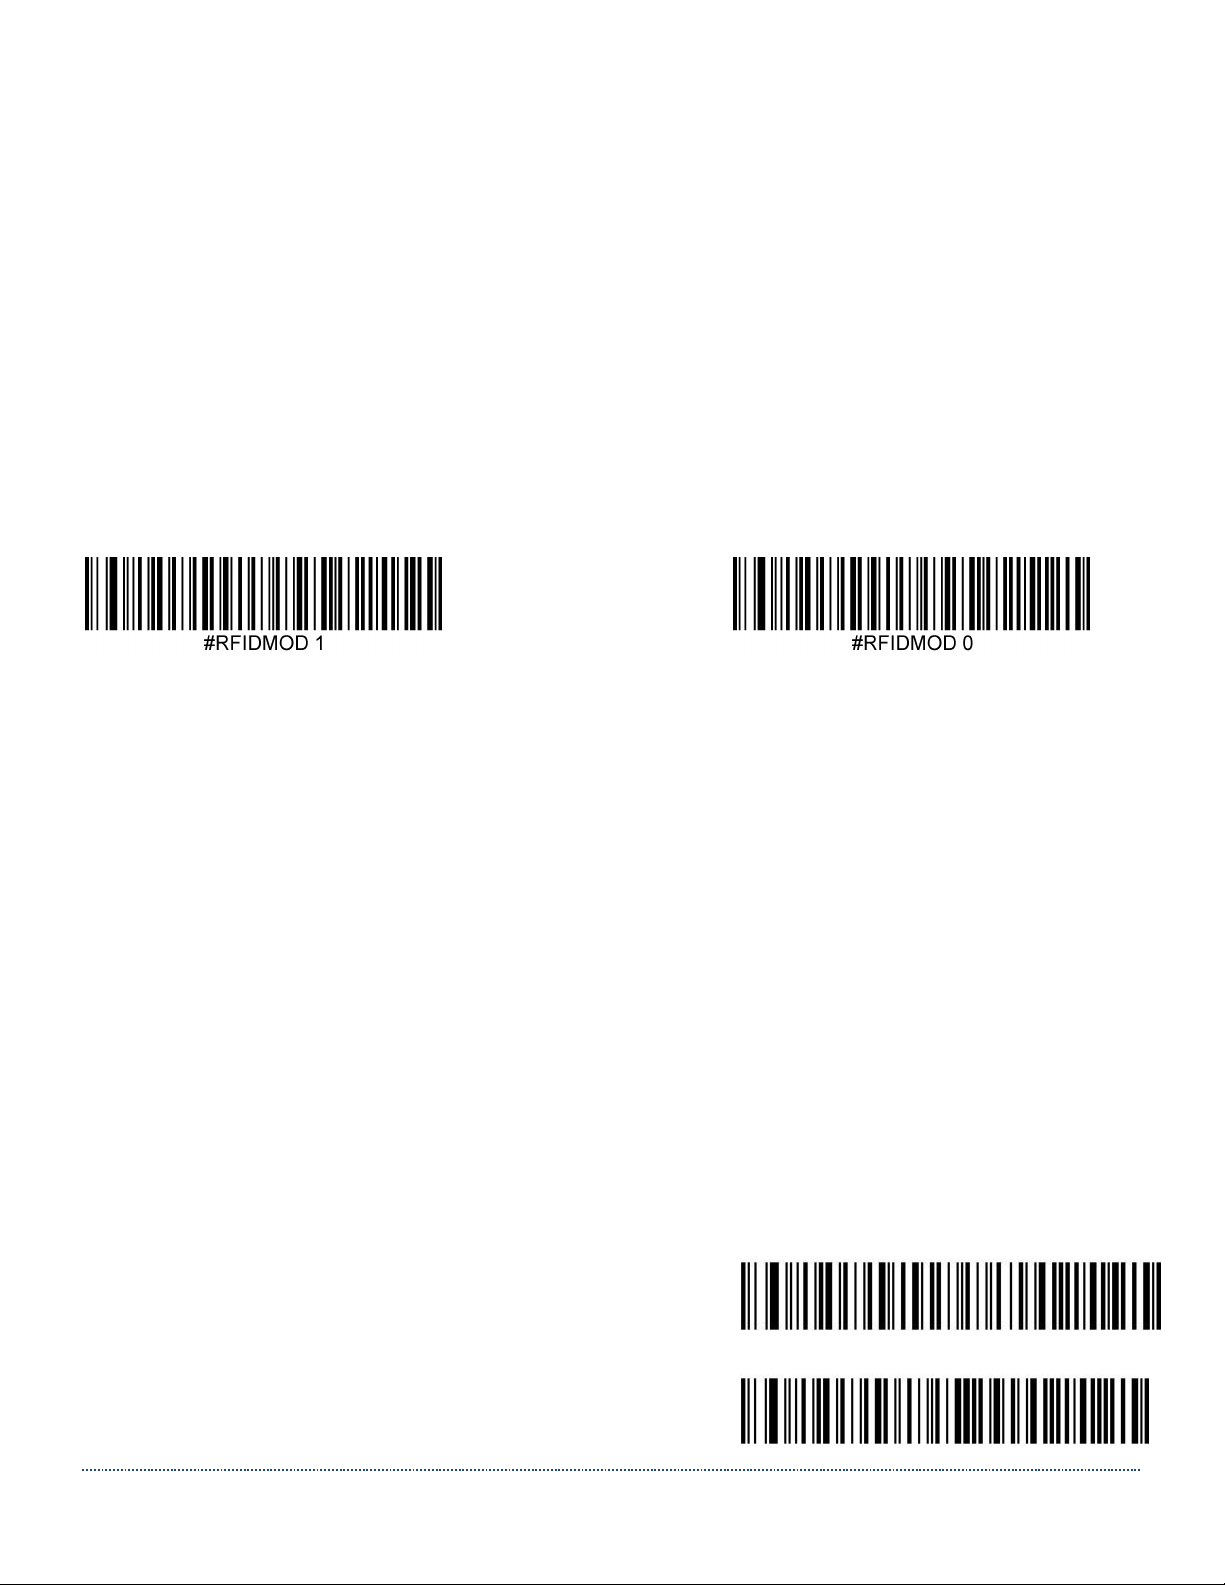
RFID Mode On/Off
It’s possible to enable or disable the RFID functionality in the HS-1RL.
Scan one of the codes below to enable or disable RFID reading.
Default = Enabled.
* RFID Enabled RFID Disabled
RFID Reading
When presenting a RFID tag to the HS-1RL, depending on the settings for PRERENA, it can
automatically present the data in the following format: [Prefix] [Tag UID]
RFID Tag Type
The HS-1RL can read a wide variety of Low Frequency tag/transponder types. You can enable
all the various tag types that are present in your usage environment. Note that a higher number
of enabled tag types increases the time it takes to read the RFID tag. The following list of
supported tag/transponder types can be enabled for read operation:
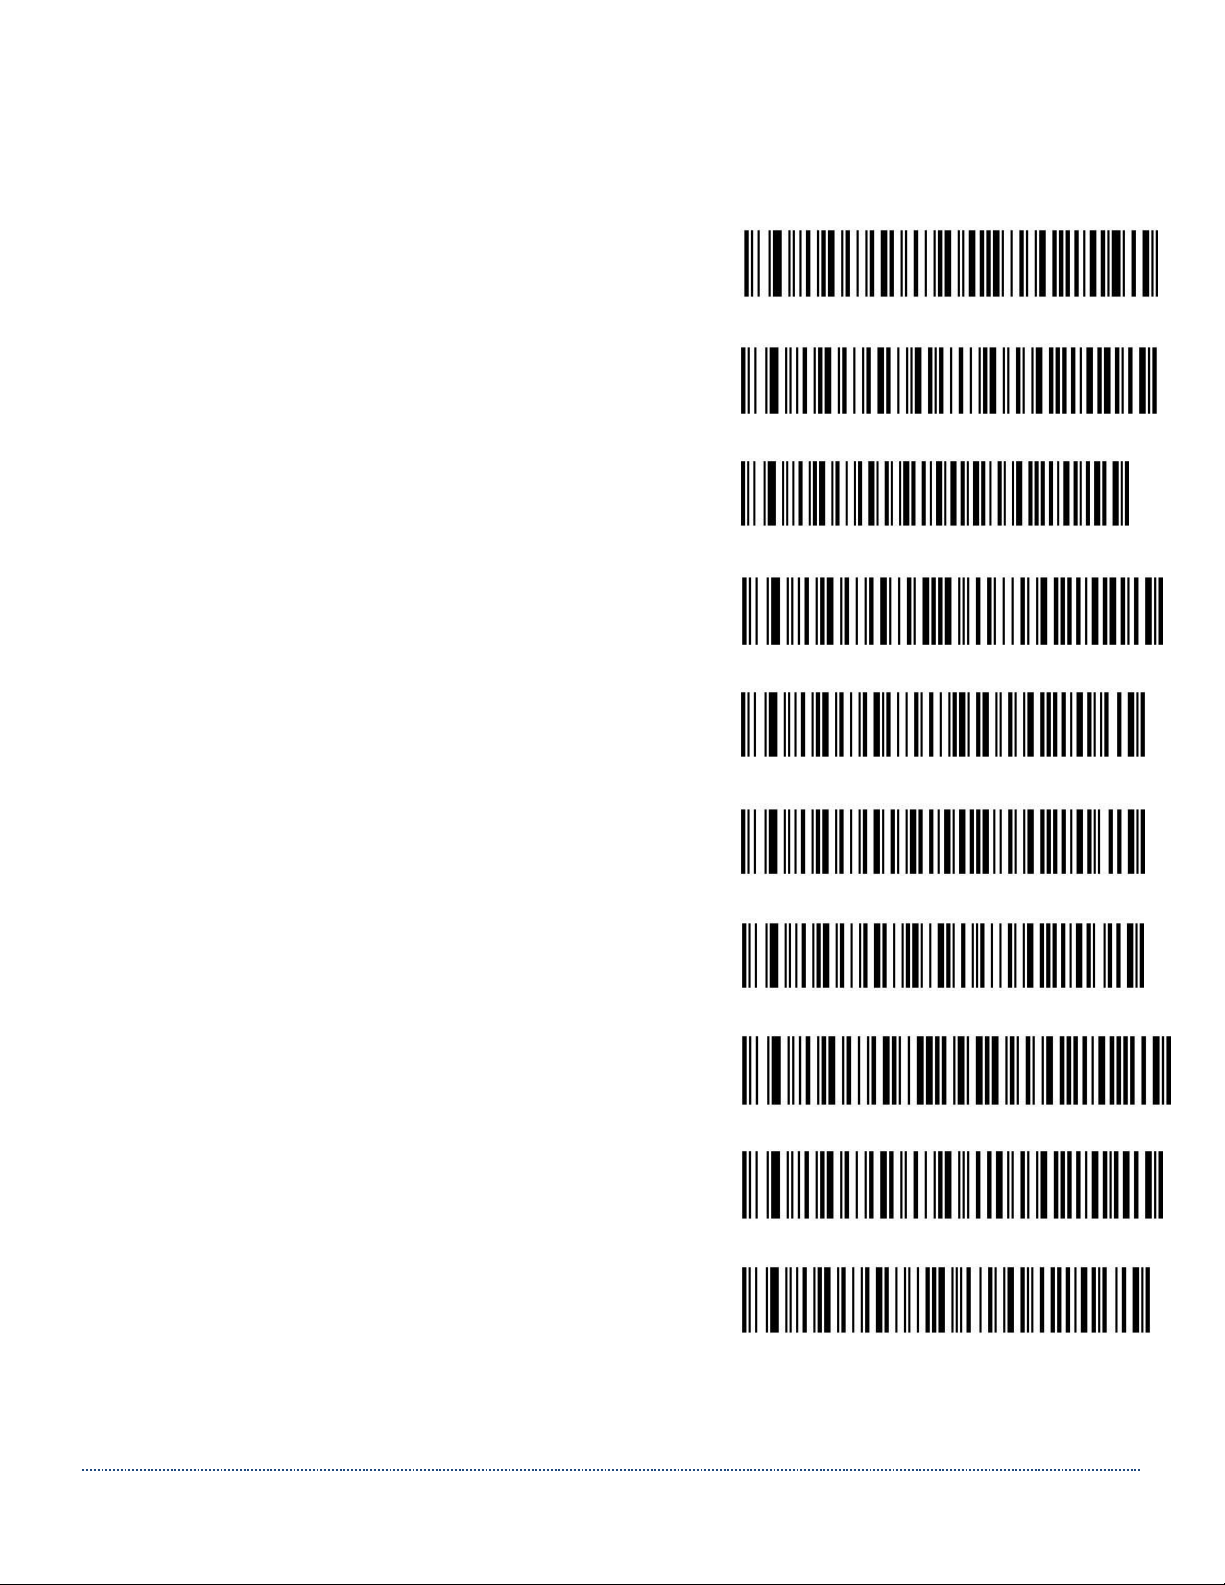
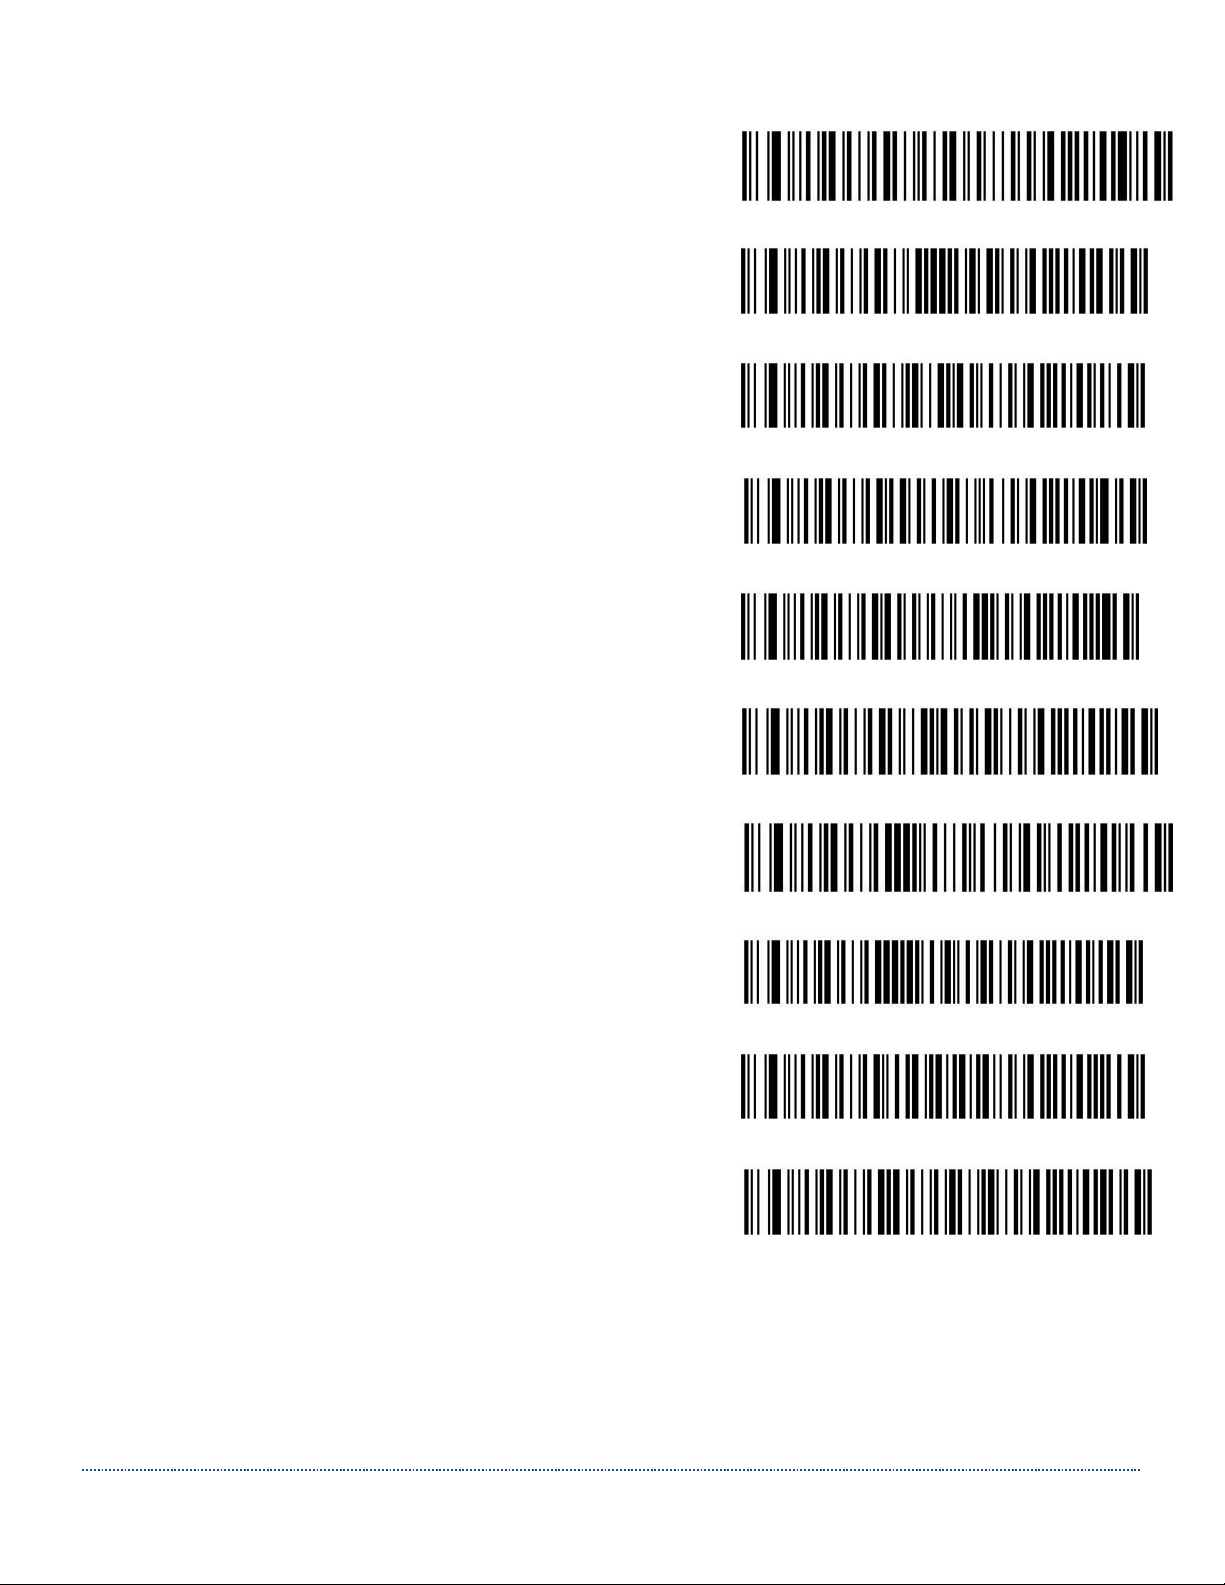
RFID Tag Type
Enable Command
Configuration Barcode
* AWID
#AWID_EN 1
* HID Prox, HID Prox II (1326) HID
DuoProx II (1336), HID ISOProx II
#HIDPREN 1
Page 29
HS-1RL User’s Manual Page 29
(1386), HID MicroProx (1391), HID
ProxKey III (1346)
* HITAG 1, S
#HIT1SEN 1
* Indala
#INDITEN 1
CASI-RUSCO, EM4100, 4102, 4200,
UNIQUE, ZODIAC
#EM410EN 1
Cotag
#COTAGEN 1
Deister
#DEISTEN 1
EM4050, 4150, 4450, 4550, TITAN
(EM4050)
#EM415EN 1
FDX-B, EM4105
#ISOFDEN 1
G-Prox
#GPROXEN 1
HITAG 2, Miro
#HITA2EN 1
ICT
#ICT_ENA 1
Page 30
HS-1RL User’s Manual Page 30
IDTECK
#IDTECEN 1
ioProx
#IOPROEN 1
ISONAS
#ISONAEN 1
Keri
#KERI_EN 1
Nedap
#NEDAPEN 1
Nexwatch
#HONEYEN 1
PAC
#PAC_ENA 1
Pyramid
#PYRAMEN 1
Q5
#AT555EN 1
TIRIS/HDX
#TIRISEN 1
Page 31
HS-1RL User’s Manual Page 31
RFID Prefix
Prefix characters are user-definable data characters that can be sent before scanned data. It’s
possible to enable and set a specific prefix for all scanned RFID data only.
Note: This RFID Prefix will be separate from any set Barcode prefixes or general prefixes.
RFID Prefixes On/Off
To enable or disable RFID prefixes, scan the appropriate code below.
Default = disabled.
Enable * Disable
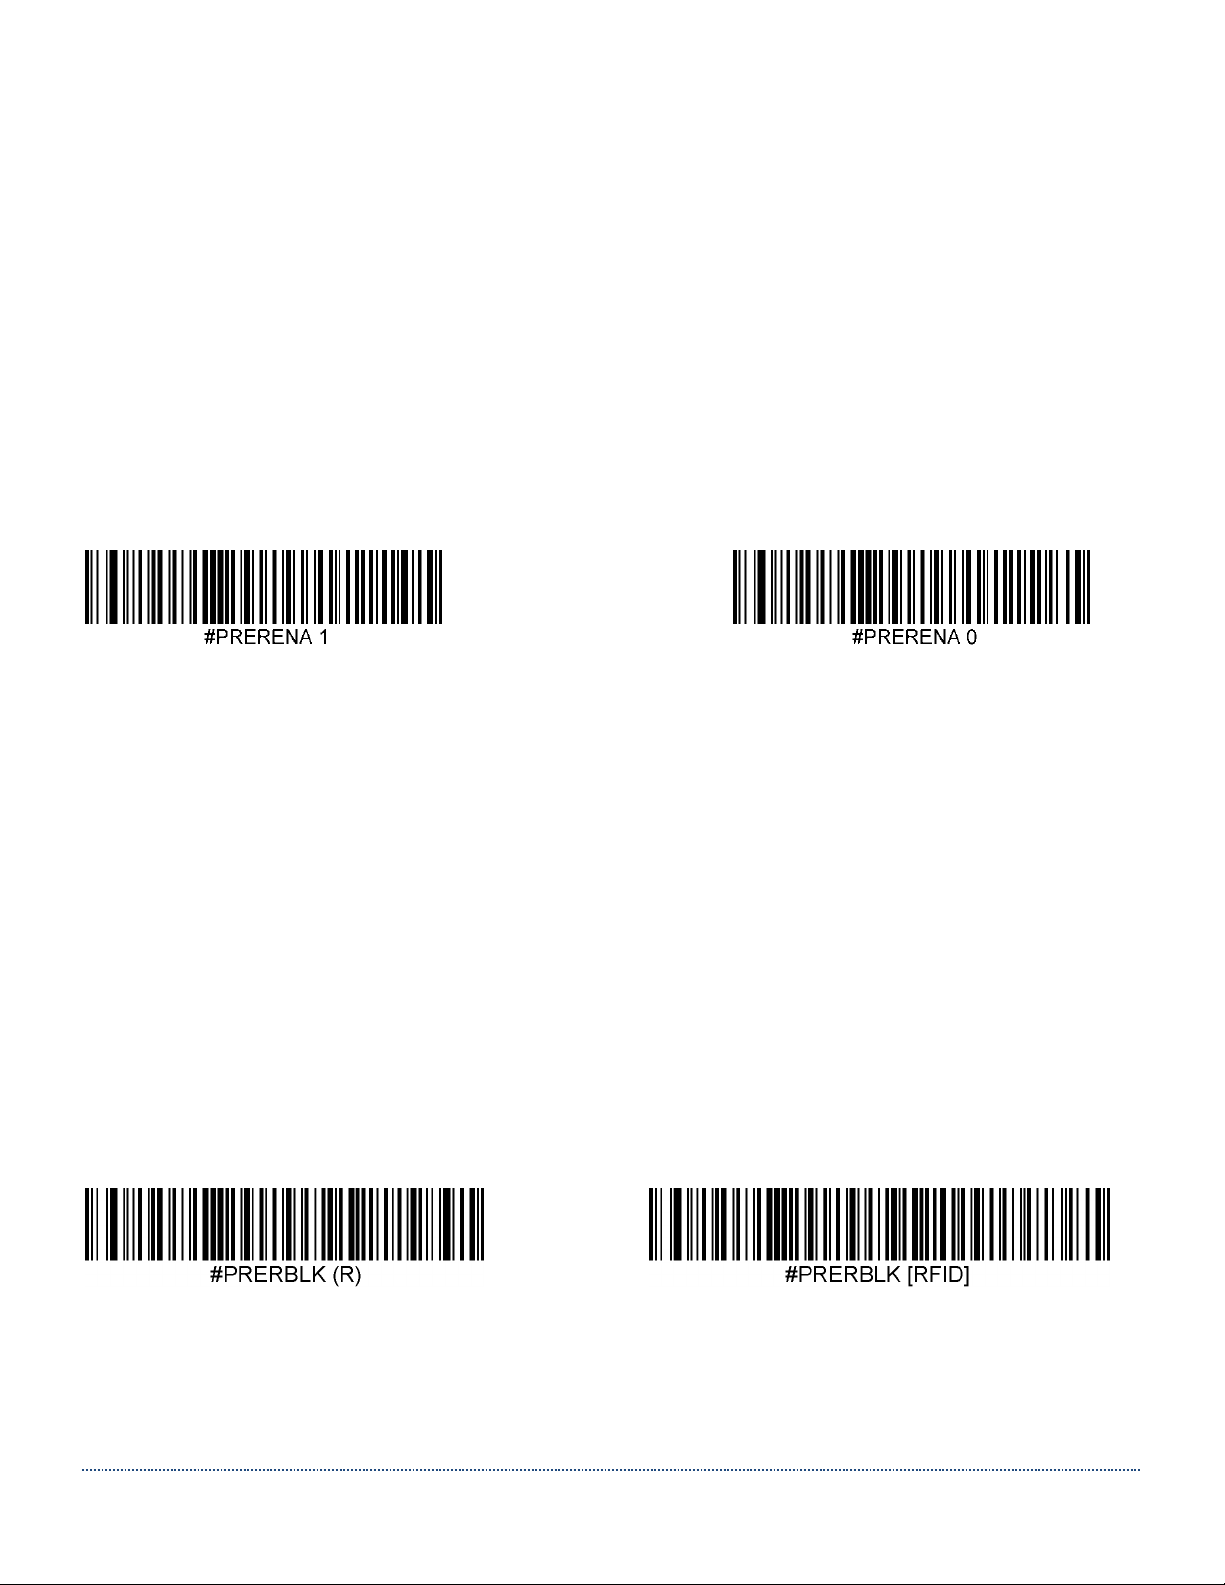
RFID Prefix Block String
Use the command PRERBLK in combination with ASCII or hex characters to set the
specific RFID Prefix string. See Appendix D for ASCII/hex conversion help.
Note: Hex characters must be preceded by \x to be recognized as hex instead of
ASCII and it’s not possible to interject a Carriage Return in the middle of the block string.
For instance, if you want the prefix to be [RFID], send: PRERBLK [RFID].
Default RFID Prefix Block string is: (R)
Example codes:
* RFID Prefix Block (R) RFID Prefix Block [RFID]
Page 32
HS-1RL User’s Manual Page 32
RFID Suffix
Suffix characters are user-definable data characters that can be sent after scanned data.
It’s possible to enable and set a specific suffix for all scanned RFID data only.
Note: This RFID Suffix will be separate from any set Barcode suffixes or general suffixes.
RFID Suffix On/Off
To enable or disable the RFID suffix, scan the appropriate code below. Default = enabled.
* Enable Disable
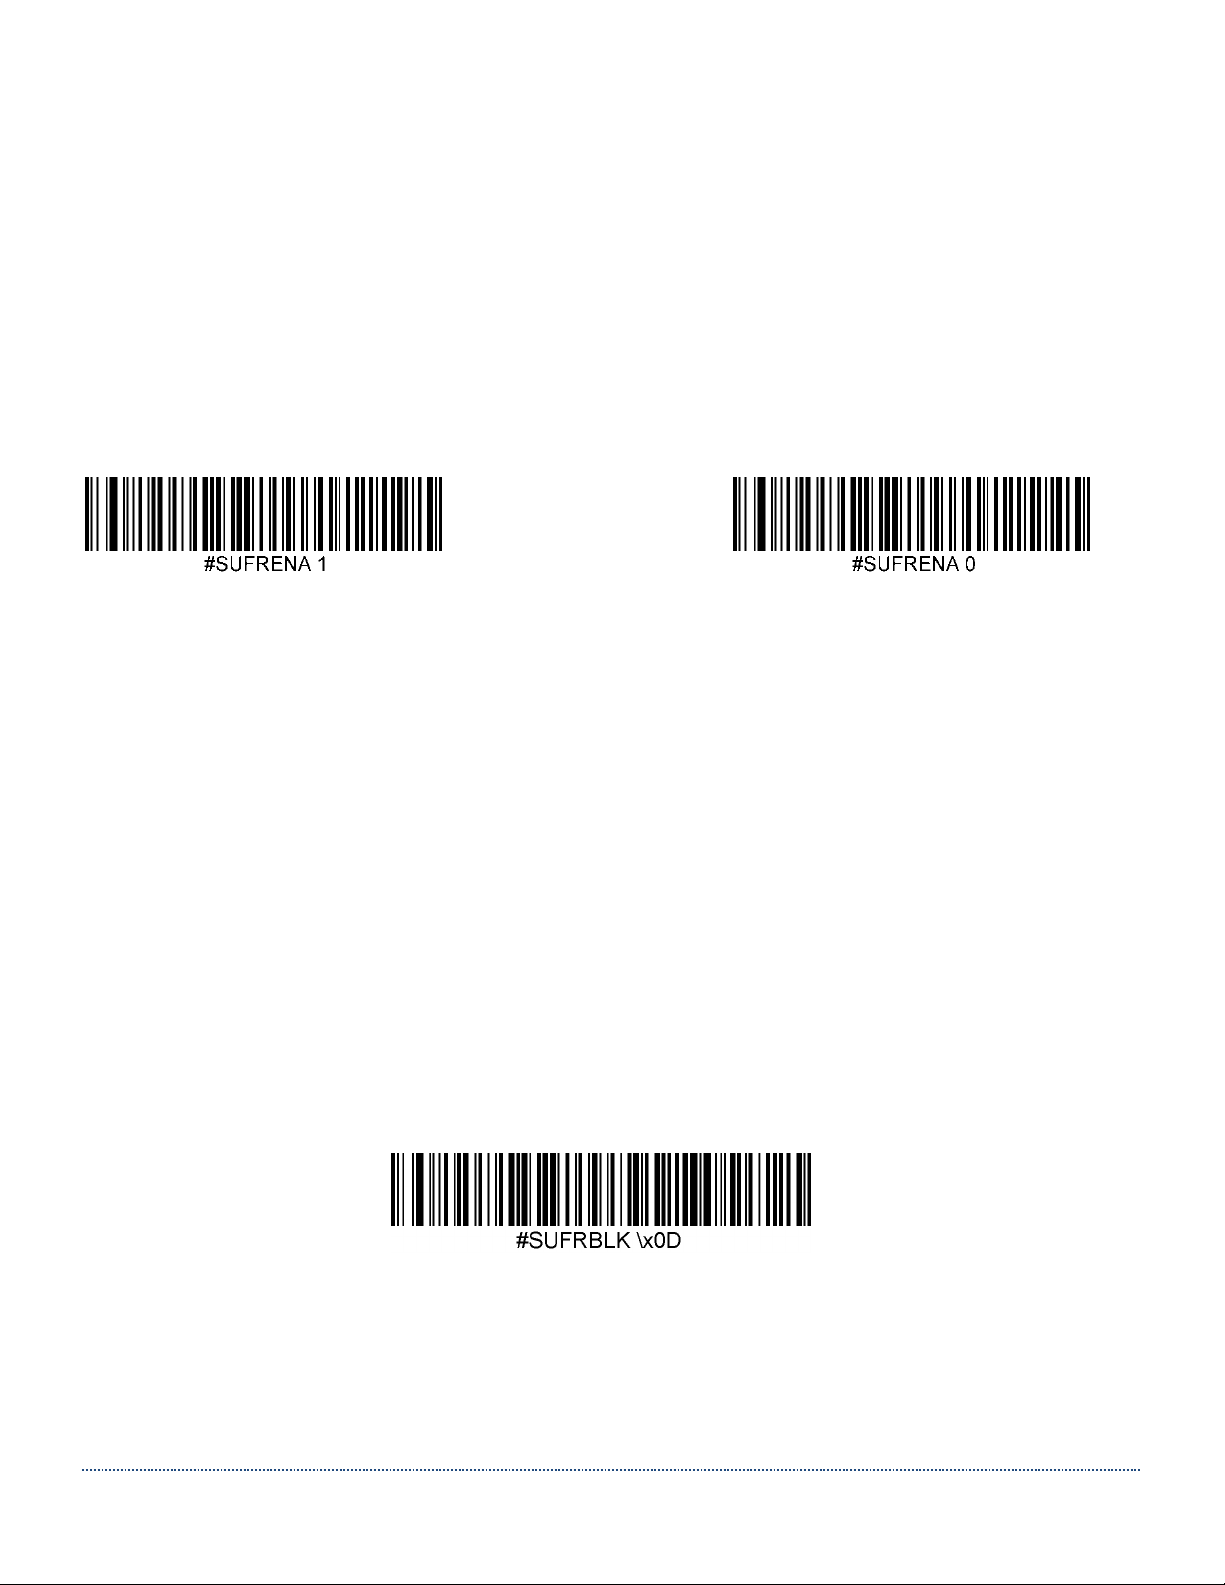
RFID Suffix Block String
Use the following command in combination with ASCII or hex characters to set the
specific RFID Suffix string. See Appendix D for ASCII/hex conversion help.
Note: Hex characters must be preceded by \x to be recognized as hex instead of
ASCII and it’s not possible to interject a Carriage Return in the middle of the block string.
For instance, it’s possible to program a Suffix that starts with 123 (regular ASCII text),
then a Tab symbol (as hex 09) and then ABC (ASCII characters again), send the
following: SUFRBLK 123\x09ABC
The default RFID Suffix Block string is a Carriage Return (hex ‘0D’).
* RFID Suffix Block \x0D
Page 33
HS-1RL User’s Manual Page 33
RFID Presentation Mode Switching
When you place the HS-1RL in a presentation cradle, it will automatically switch to Barcode
Presentation mode. By pressing the trigger button, you can toggle between Barcode and RFID
Presentation mode.
Beeper Sounds
The HS-1RL has the option to have its beeper controlled externally by a host.
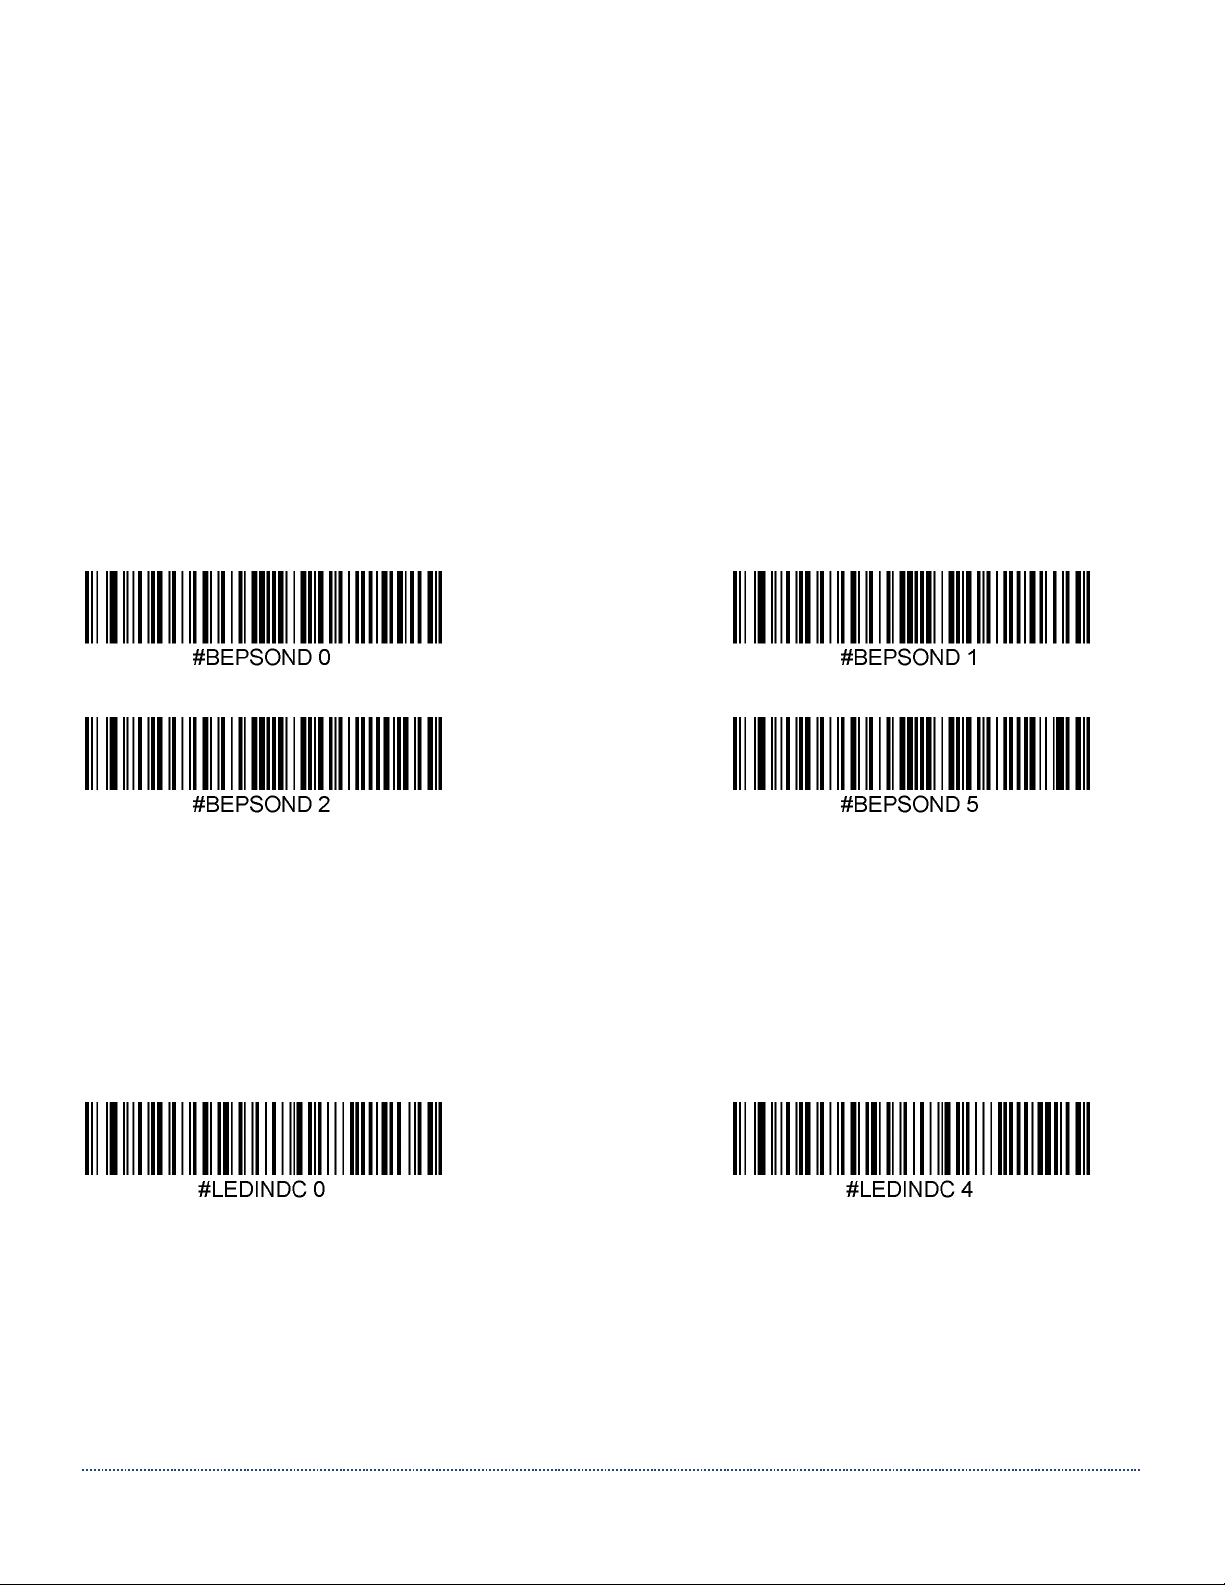
This can be useful for certain notifications. Eight different beeper tones are available in the HS1RL. Use the command BEPSOND x (where ‘x’ is a value between 0 and 7), to have the HS1RL sound one of the 8 different beeper tones. *Beeper must be enabled.
Example codes:
LED Indicators
The HS-1RL also has the option to have its green and red LED controlled externally by a host.
This can be useful for certain notifications. Five different indicator variations are available in the
HS-1RL. Use the command LEDINDC x (where ‘x’ is a value between 0 and 5), to have the HS1RL light up one of its LED Indicators in various ways.
Example codes:
Vibration Indicator
The HS-1RL furthermore has the option to have its vibration engine controlled externally by a
host. This can be useful for certain notifications. Three different vibration variations are available
in the HS-1RL. Use the command VIBRATE x (where ‘x’ is a value between 0 and 2), to have
the HS-1RL vibrate in various ways.
Note: For this command to work, Vibration must be enabled (VIBENAB 1).
Page 34

HS-1RL User’s Manual Page 34
Example codes:
Page 35
HS-1RL User’s Manual Page 35
7 - Imaging
Imaging Overview
The HS-1RL cannot be used to take images with. While this could be very helpful in applications
such as patient identity verification, signature capturing, or any other situation where you need to
take an image, the internal structure of the HS-1RL doesn’t allow for such transmissions.
However, there are several options to configure the HS-1RL for improved barcode finding and
decoding that are related to image processing. This chapter describes these options.
Illumination Brightness
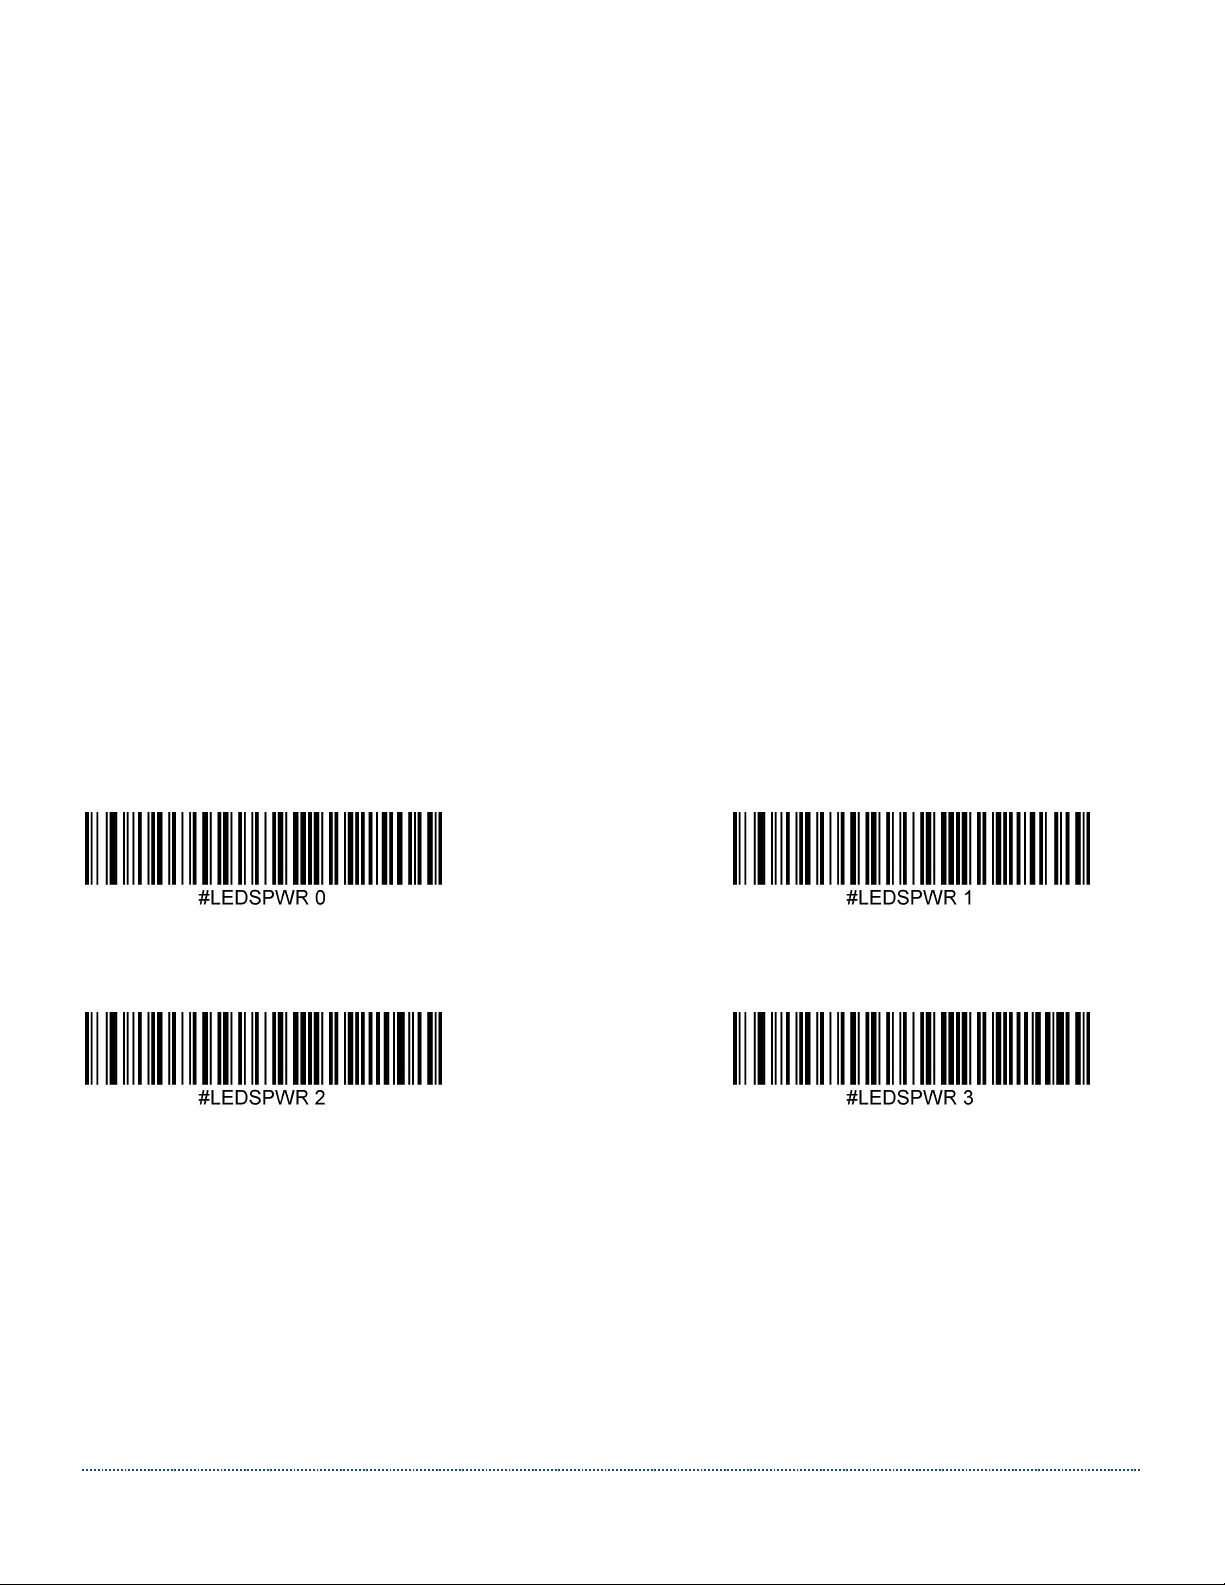
Use the command LEDSPWR to set the Illumination (LEDs Power) between ‘Off’ and 100% with
a value between 0 (=Off) and 3 (=100%).
Note: this setting only takes effect when EXPMODE is set to 0 (fixed exposure).
All illumination brightness menu command barcodes are included below.
Illumination Off Illumination Brightness Low
Illumination Brightness Medium * Illumination Brightness High
Page 36
HS-1RL User’s Manual Page 36
Auto Exposure
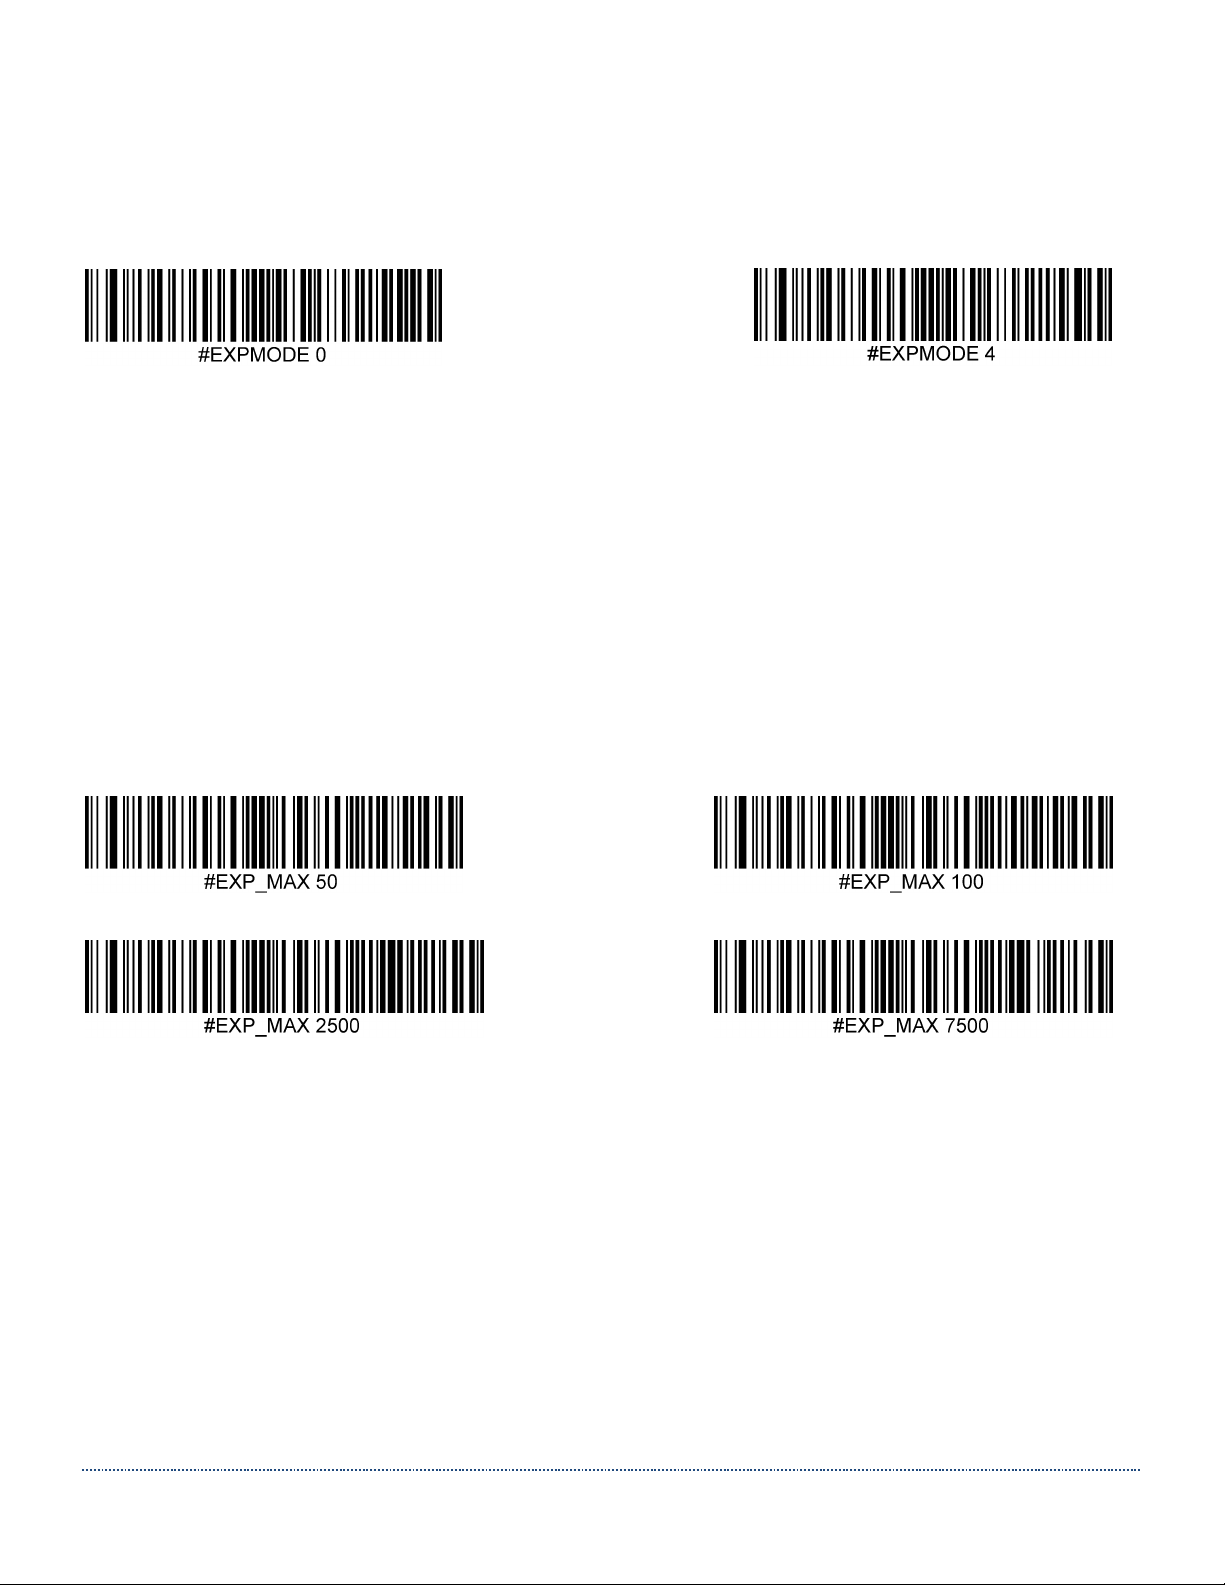
Allow the imager to control gain and exposure settings automatically.
Default = Enabled.
Disable * Enable
Maximum Exposure
Set the maximum allowable exposure for the unit between 1 and 7874.
Several commonly used Max Exposure menu command barcodes are included below. If a
different value other than those provided is needed, it can be set either by sending the serial
command EXP_MAX x (where ‘x’ is a value between 1 and 7874), or by building a menu
command barcode.
Default value = 100.
Setting examples:
Target White Value
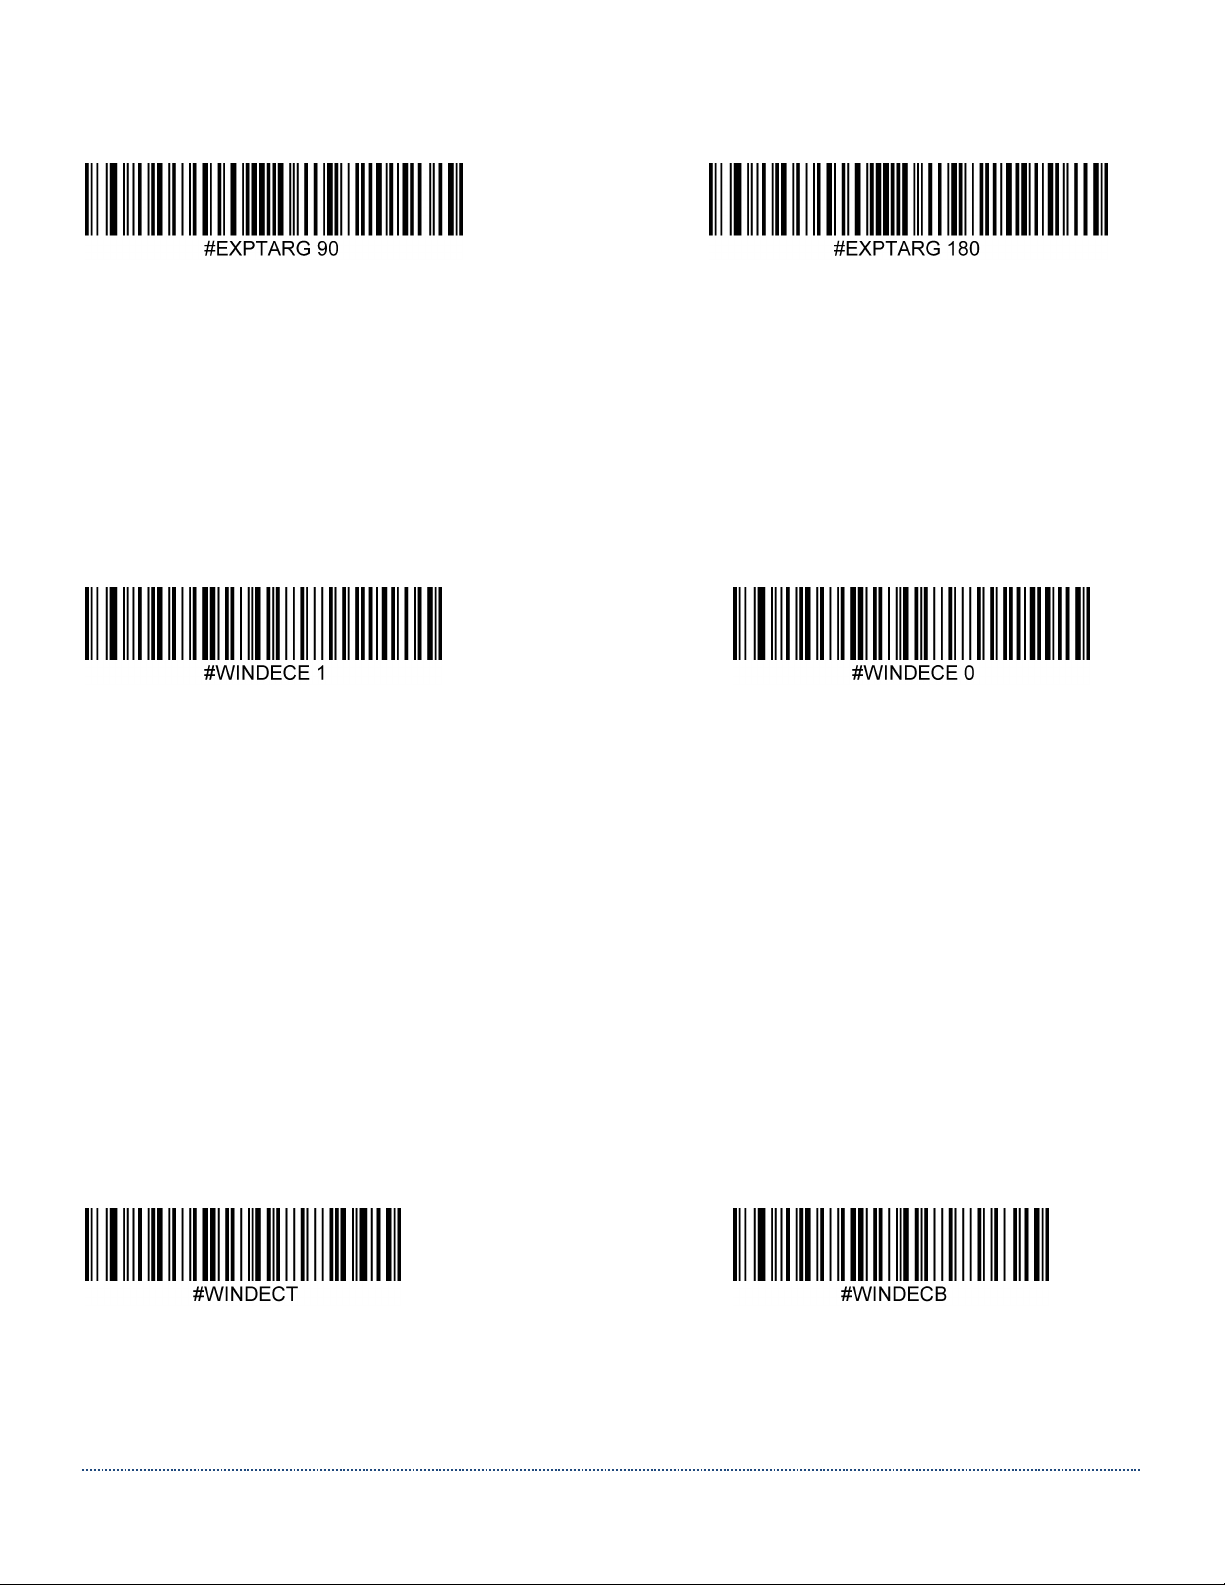
Set the Target White Value within a range of 48 to 212.
Some menu command barcodes are included below. If a different value other than those
provided is needed, it can be set either by sending the serial command EXPTARG x (where ‘x’ is
a value between 48 and 212), or by building a menu command barcode.
Default value = 120.
Page 37
HS-1RL User’s Manual Page 37
Setting examples:
Decode Window (Not Supported in Current Firmware)
Decode Windowing is about defining a limited area within the scanner’s Field of View, where to
look for a barcode, to improve performance. As long as the barcode or barcodes are within the
boundaries of the Decode Window, they can be decoded, when Decode Windowing is enabled.
If the barcode is outside the Decode Window, it will not be decoded.
Default = Disabled.
Enable Decode Windowing * Disable Decode Windowing
To define the Decode Window, one needs to set the boundaries for Top, Bottom, Left and Right.
These boundaries are defined by pixel values within the full frame (e.g. 844 x 640 pixels).
Note: There are automated restrictions to prohibit a ‘negative’ Decode Window size. This means
that the Bottom value cannot be ‘above’ Top and likewise for the values for Left and Right.
Decode Window Top/Bottom
The Top and Bottom boundaries for the decode window can be set either by sending the
serial command shown under the barcodes below with a value between 0 and 639, or by
building a menu command barcode.
Default Top boundary = 256. Default Bottom boundary = 384.
Decode Window Left/Right
The Left and Right boundaries for the decode window can be set either by sending the
serial command shown under the barcodes below with a value between 0 and 843, or by
Page 38
HS-1RL User’s Manual Page 38
building a menu command barcode.
Default Left boundary = 338. Default Right boundary = 506.
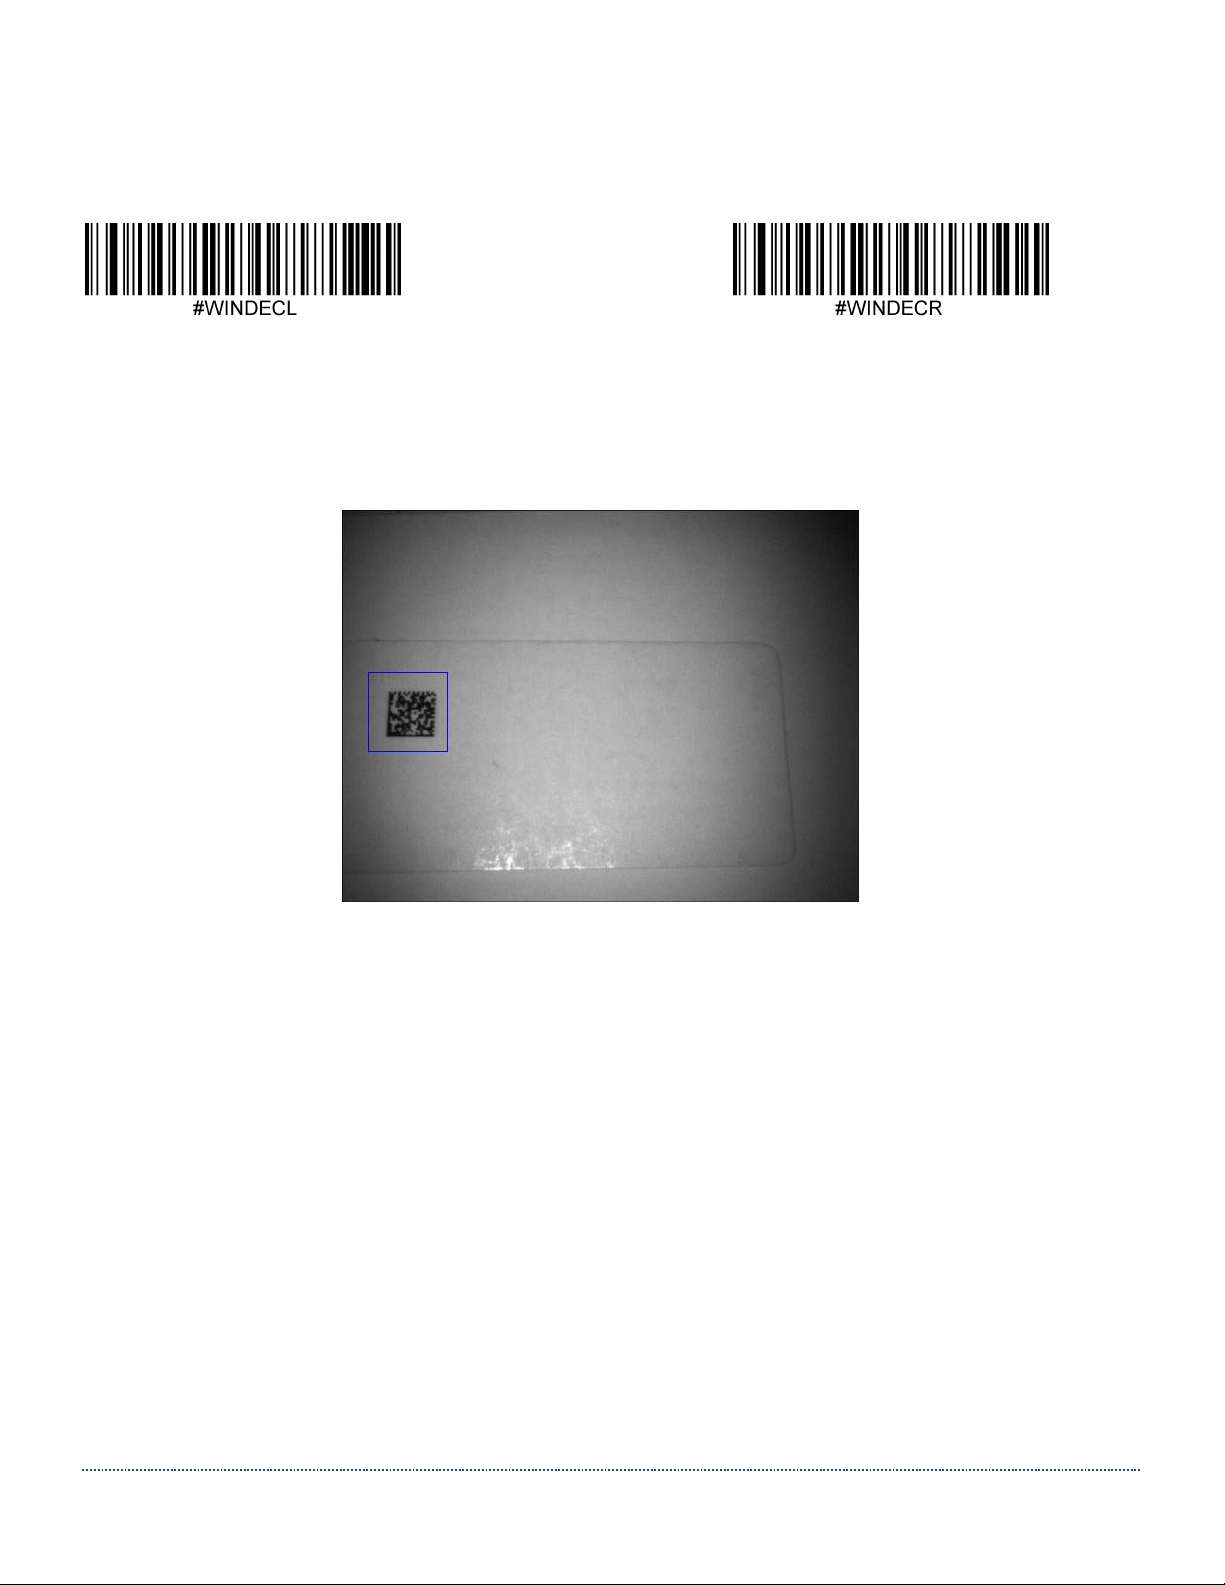
This is a screenshot of an example where a Decode Window with T=260, B=390, L=40, R=170
was used to speed up decoding a Data Matrix code that was offset to the left in the Field of View.
Note: This image was taken and transmitted using a regular HS-1 Scanner (non-RFID model).
Page 39
HS-1RL User’s Manual Page 39
8 - Symbologies
This programming section contains menu selections for the following symbologies.
• Aztec Code • GS-1 Databar Limited (RSS Limited)
• Codabar • GS-1 Databar Expanded (RSS Expanded)
• Code 11 • Interleaved 2 of 5
• Code 128 • Matrix 2 of 5
• Code 39 • Maxi Code
• Code 93 • MicroPDF417
• Composite Code • MSI
• Data Matrix • PDF417
• EAN/JAN-13 • QR Code
• EAN/JAN-8 • UPC-A
• GS1-128 • UPC-E
• GS-1 Databar (RSS-14) • UPC-E1
All Symbologies (Not Supported in Current Firmware)
If you want to be able to decode all the symbologies allowable for your imager, scan the All
Symbologies On code (Enable All).
If on the other hand, you want to decode only a particular symbology, scan All Symbologies Off
(Disable All) followed by the On/Enable symbol for that particular symbology.
Disable All Enable All
Page 40
HS-1RL User’s Manual Page 40
Linear Symbologies
Codabar
Codabar Defaults
Set all Codabar settings to their default configuration with this code.
Codabar On/Off
Scan one of the codes below to enable or disable Codabar. Default = Enabled.
* Enable Disable
Codabar Minimum and Maximum Length
Use the following commands in combination with numerical values to set the minimum
and maximum length. Default minimum length = 4. Default maximum length = 55.
The minimum and maximum length for this barcode can be set either by sending the serial
command shown under the barcodes below with a value between 2 and 55, or by building
a menu command barcode.
Codabar Minimum Length Codabar Maximum Length
Page 41
HS-1RL User’s Manual Page 41
Code 11
Code 11 Defaults
Set all Code 11 settings to their default configuration with this code/command.
Code 11 On/Off
Scan one of the codes below to enable or disable Code 11. Default = Disabled.
Enable * Disable
Code 11 Minimum and Maximum Length
Use the following commands in combination with numerical values to set the minimum
and maximum length. Default minimum length = 4. Default maximum length = 55.
The minimum and maximum length for this barcode can be set either by sending the serial
command shown under the barcodes below with a value between 1 and 55, or by building
a menu command barcode.
Code 11 Minimum Length Code 11 Maximum Length
Page 42
HS-1RL User’s Manual Page 42
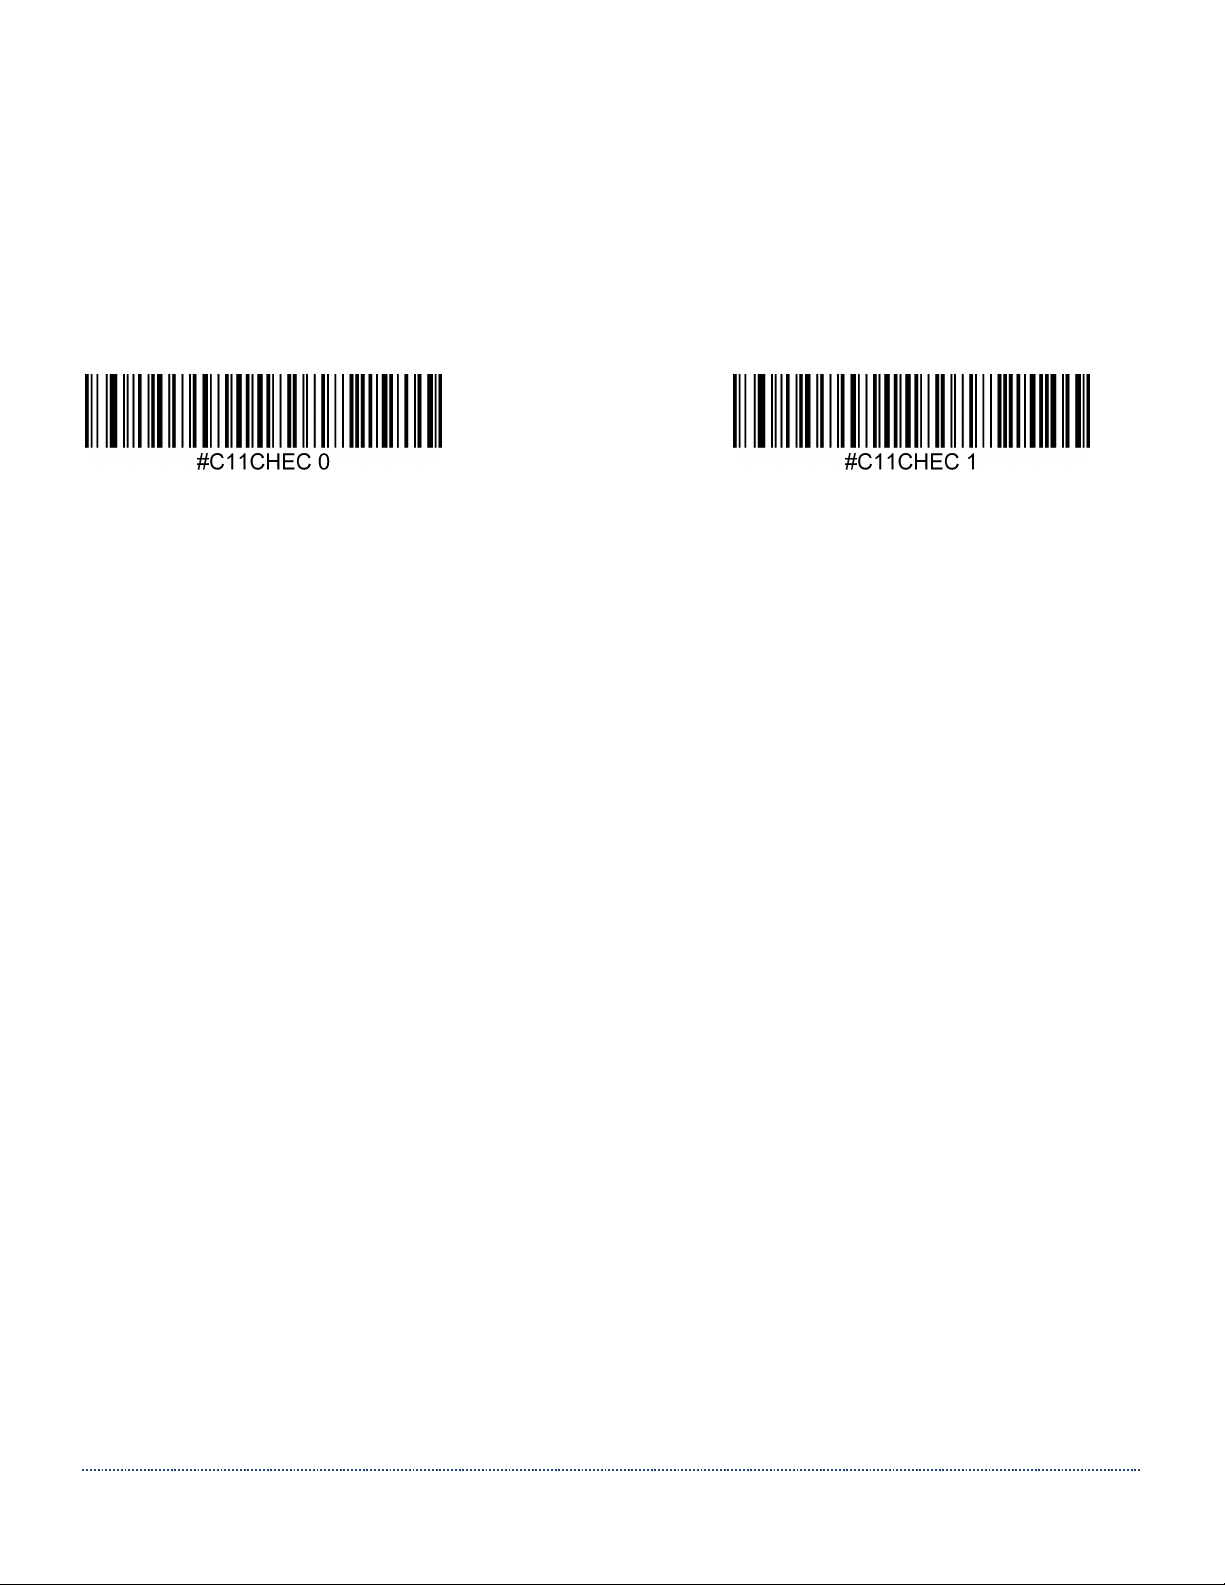
Code 11 Check Digit
The HS-1RL may look for a check digit to decide if the code is valid.
Code 11 usually has 1 check digit and some codes have 2 check digits. Either option can
be chosen to be validated.
Default = 1 Check Digit Validate.
* 1 Check Digit Validate 2 Check Digits Validate
Page 43
HS-1RL User’s Manual Page 43
Code 128
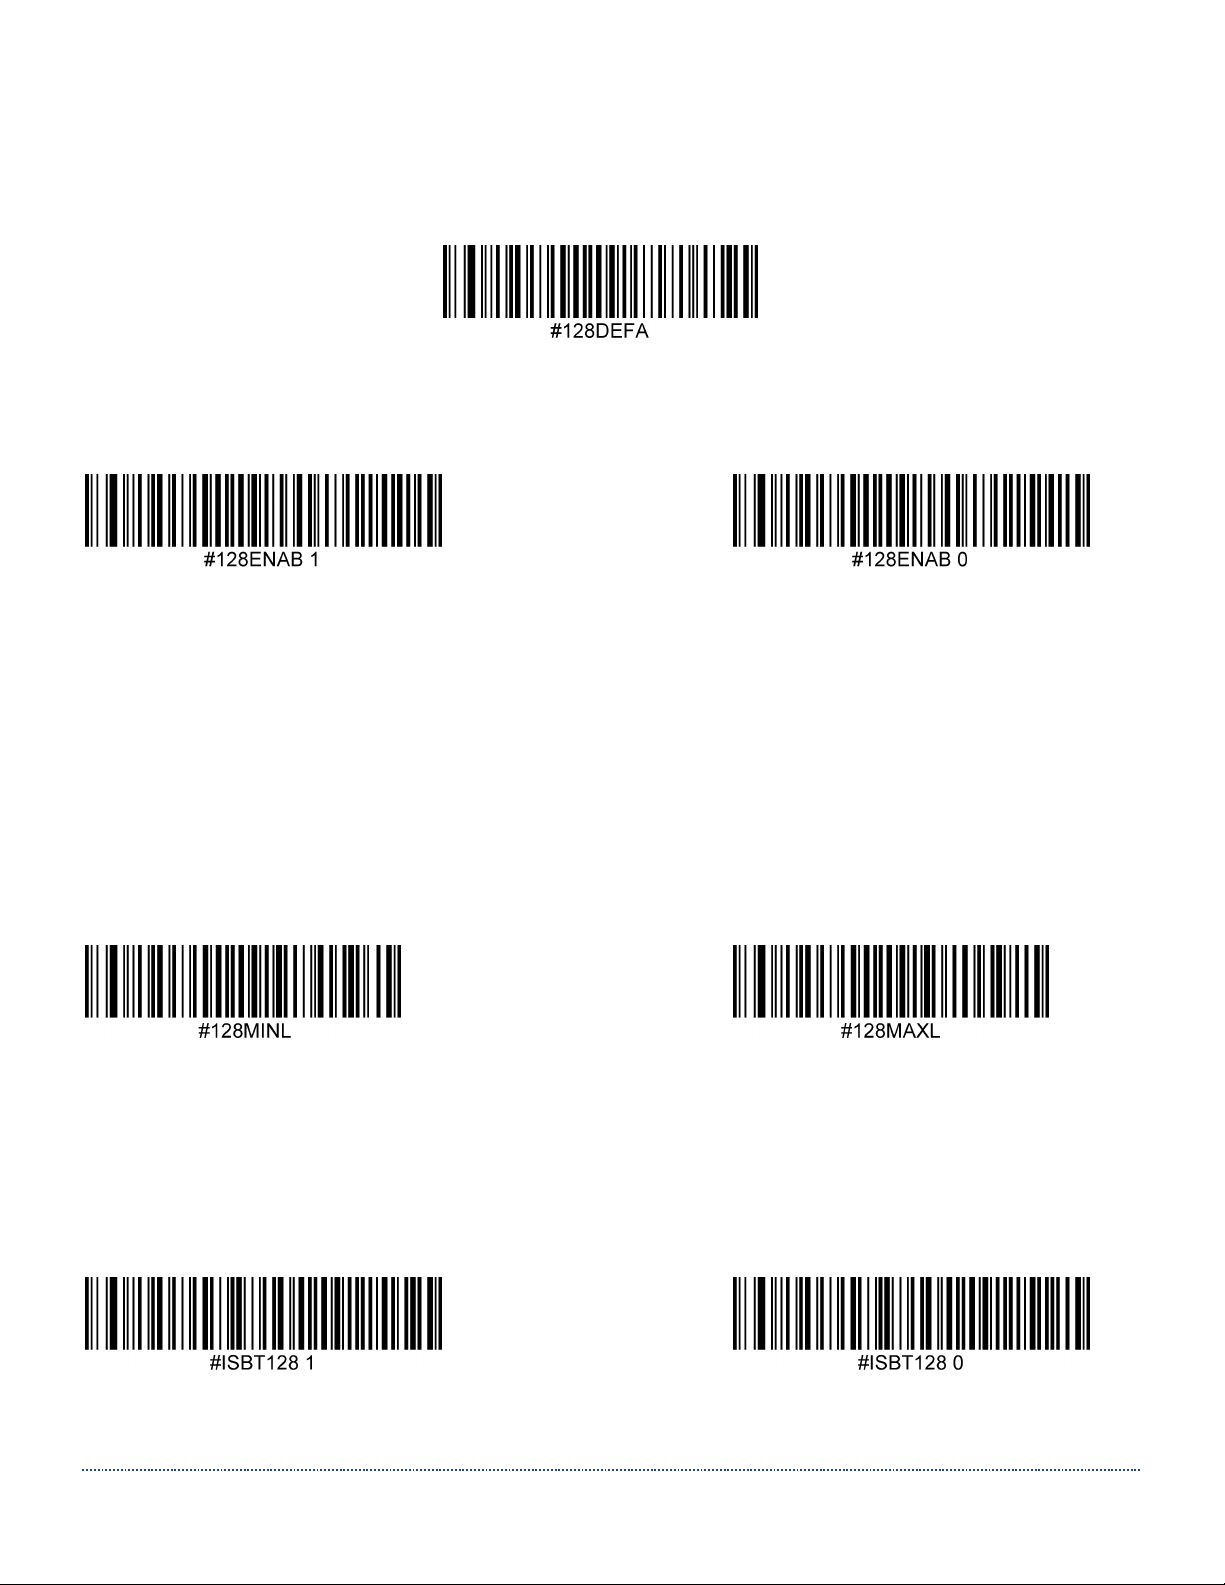
Code 128 Defaults
Code 128 On/Off
Scan one of the codes below to enable or disable Code 128. Default = Enabled.
* Enable Disable
Code 128 Minimum and Maximum Length
Use the following commands in combination with numerical values to set the minimum
and maximum length. Default minimum length = 0. Default maximum length = 55.
The minimum and maximum length for this barcode can be set either by sending the serial
command shown under the barcodes below with a value between 0 and 55, or by building
a menu command barcode.
Code 128 Minimum Length Code 128 Maximum Length
ISBT 128 On/Off
ISBT 128 is a variant of Code 128 used in the blood bank industry. Scan the appropriate
bar code below to enable or disable ISBT 128. Default = Disabled
Enable * Disable
Page 44
HS-1RL User’s Manual Page 44
Code 39
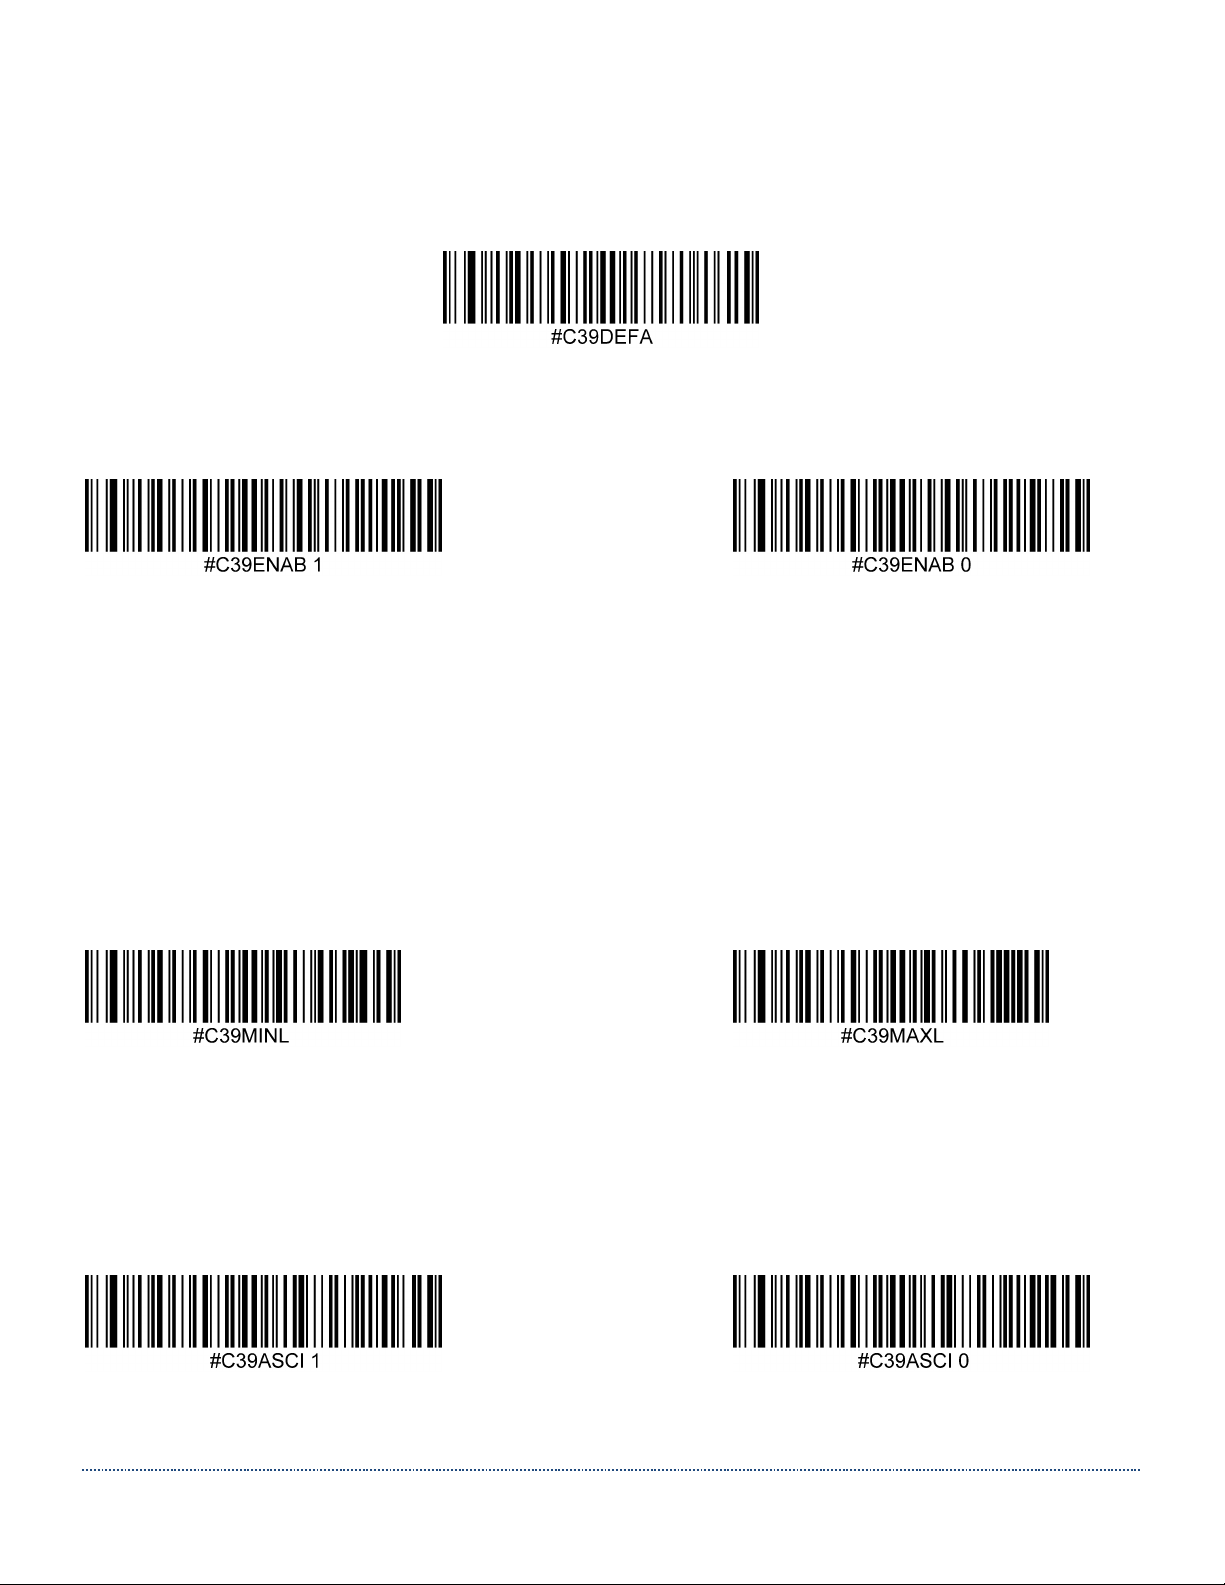
Code 39 Defaults
Code 39 On/Off
Scan one of the codes below to enable or disable Code 39. Default = Enabled.
* Enable Disable
Code 39 Minimum and Maximum Length
Use the following commands in combination with numerical values to set the minimum
and maximum length. Default minimum length = 0. Default maximum length = 48.
The minimum and maximum length for this barcode can be set either by sending the serial
command shown under the barcodes below with a value between 0 and 48, or by building
a menu command bar code.
Code 39 Minimum Length Code 39 Maximum Length
Code 39 Full ASCII Conversion
Code 39 Full ASCII is a variant of Code 39 that pairs certain characters so it can include
the entire ASCII set. Default = Disabled.
Enable * Disable
Page 45
HS-1RL User’s Manual Page 45
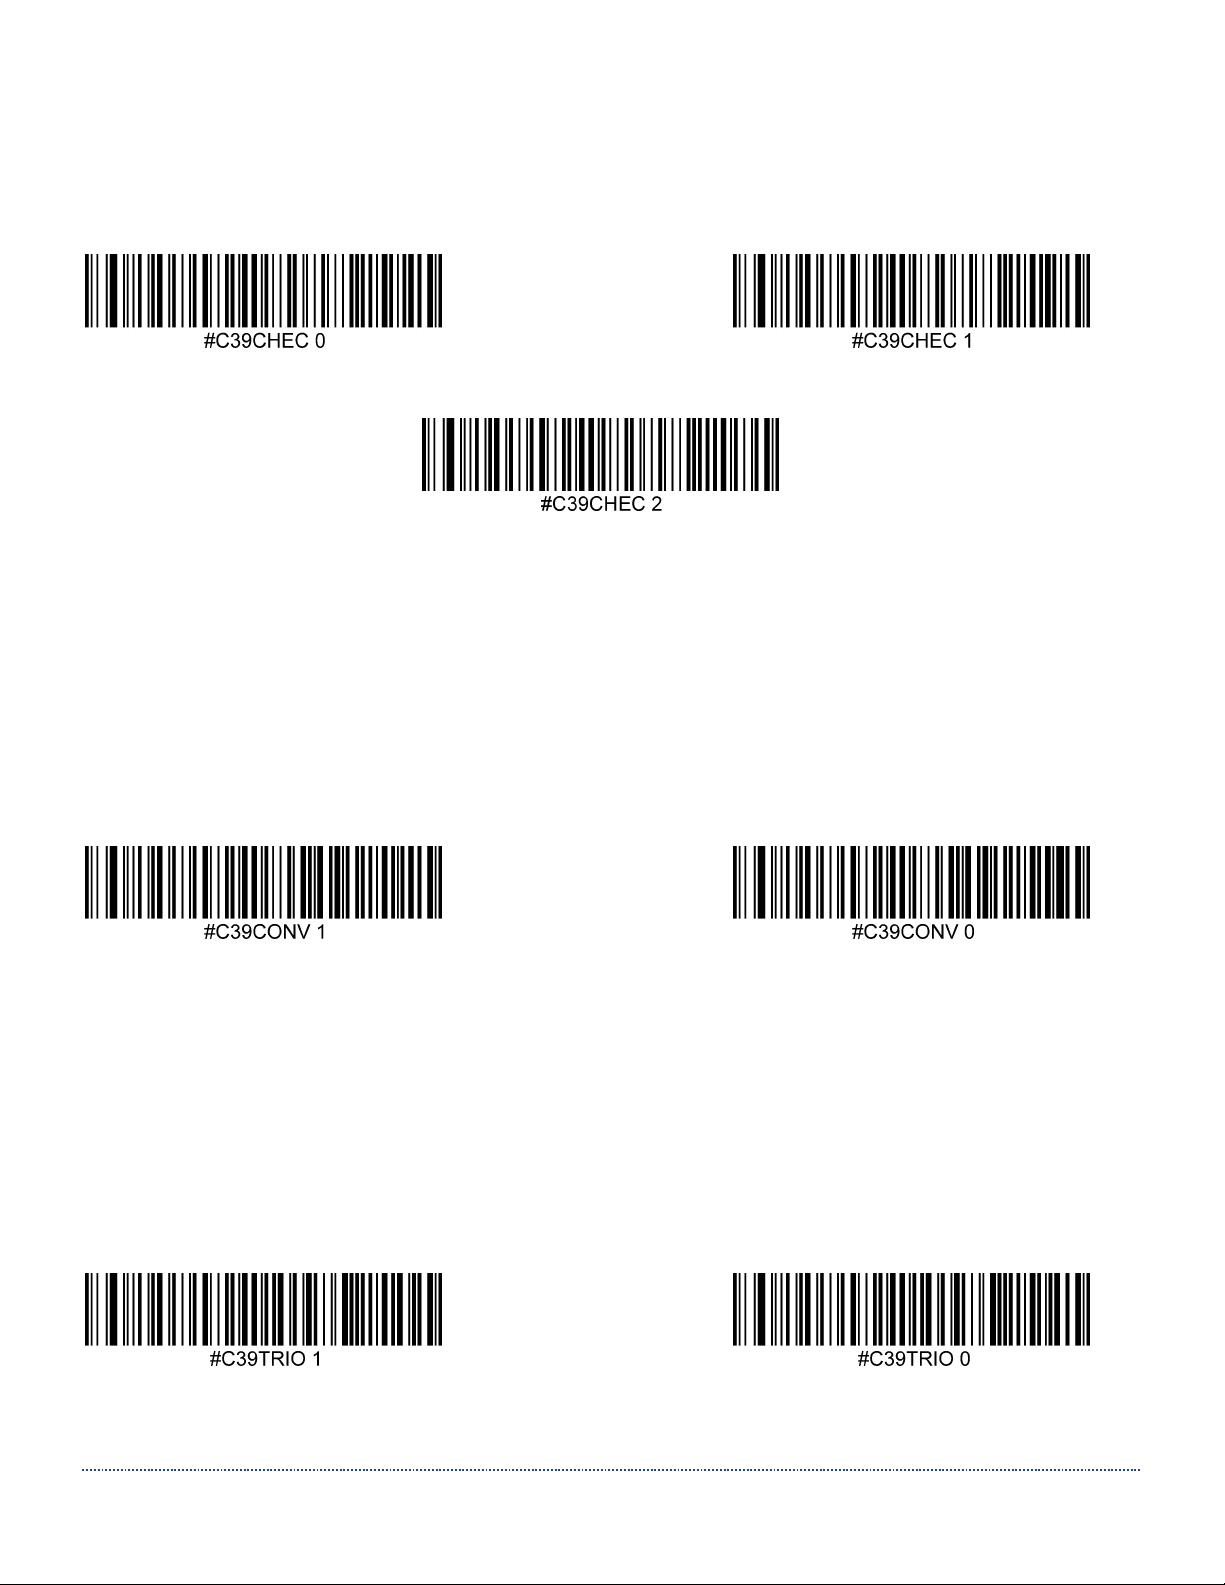
Code 39 Check Digit
Use the following commands to allow scanning of all Code 39’s (No Check Digits) or only
allow codes with a Check Digit. Default = No Check Digits.
* Disable C39 Check Digit Validate, but don’t Transmit
Validate and Transmit
Code 39 Convert to Code 32 / Pharmacode
Code 32 is a variant of Code 39 used by the Italian pharmaceutical industry. Scan the
appropriate bar code below to enable or disable converting Code 39 to Code 32.
Default = Disabled.
Note: In order for this parameter to work, Code 39 must be enabled.
Enable * Disable
Trioptic Code 39
Trioptic Code 39 is a variant of Code 39 used in the marking of computer tape
cartridges. Trioptic Code 39 symbols always contain six characters. To enable or disable
Trioptic Code 39, scan the appropriate bar code below. Default = Disabled.
Note: You should NOT enable Trioptic Code 39 and Code 39 Full ASCII simultaneously.
Enable * Disable
Page 46
HS-1RL User’s Manual Page 46
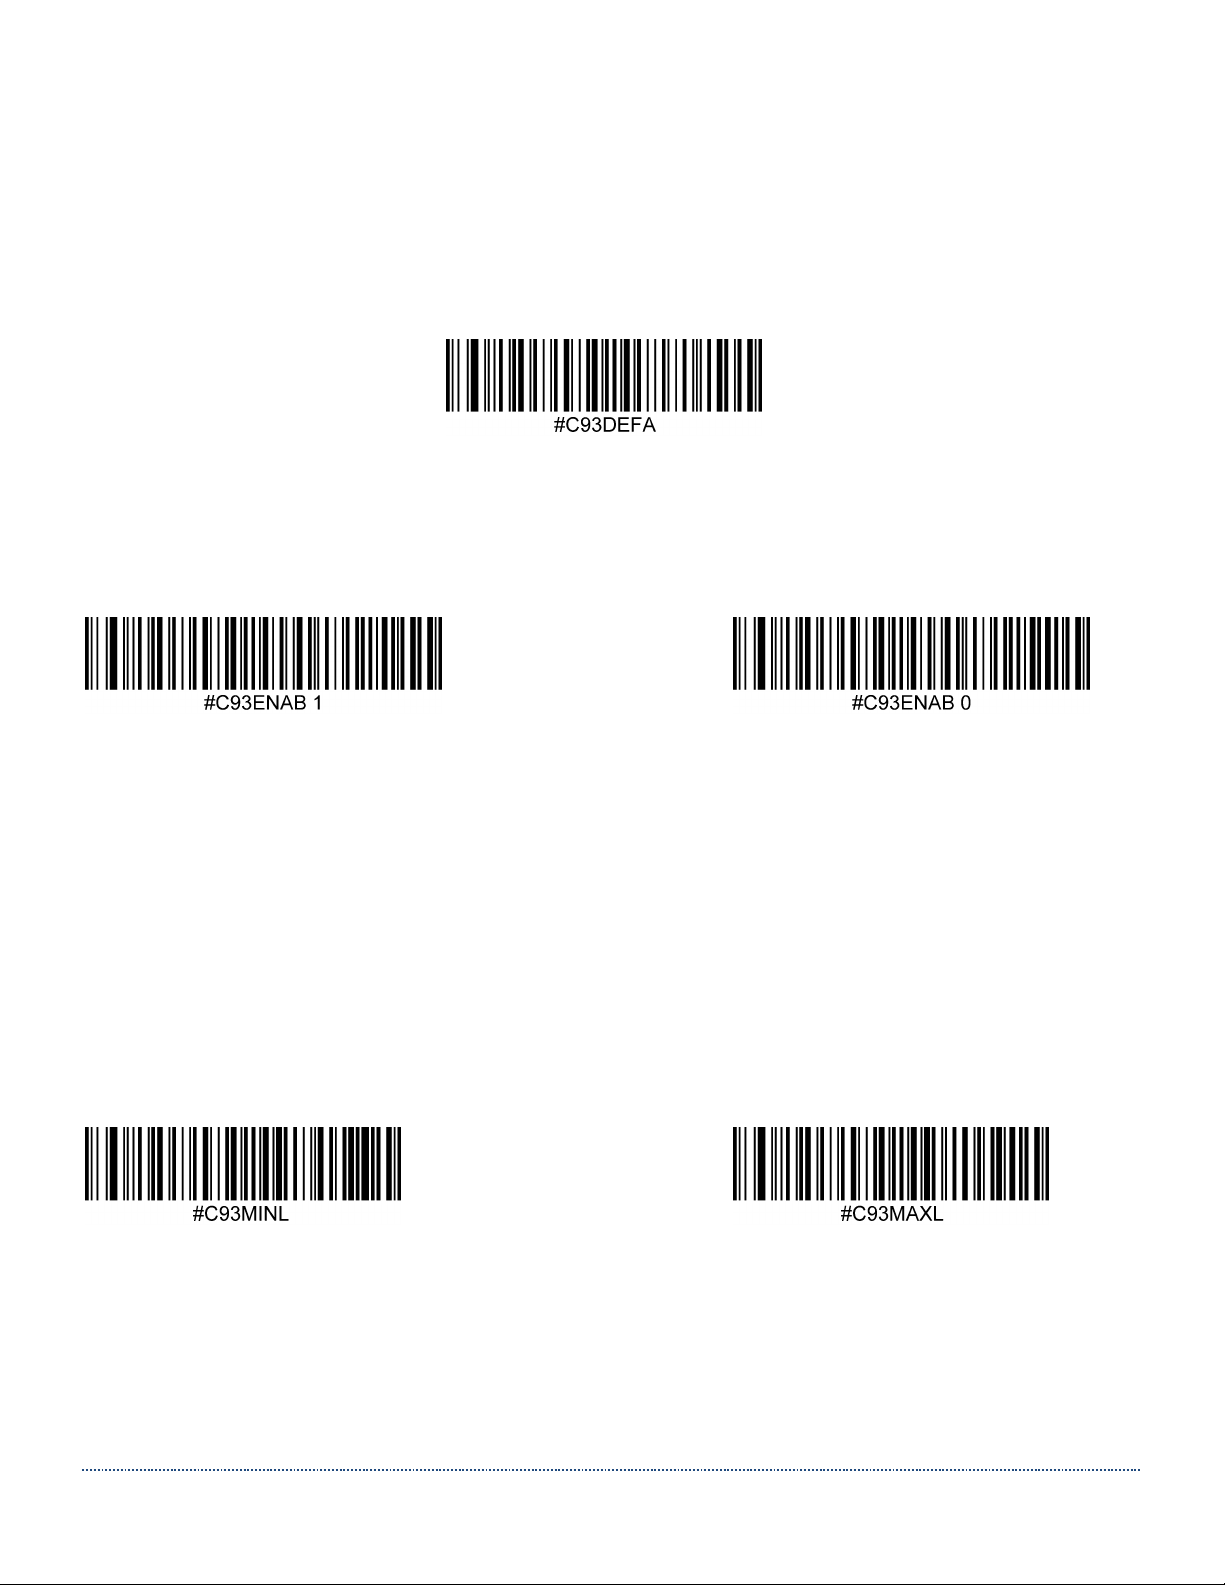
Code 93
Code 93 Defaults
Set all Code 93 settings to their default configuration with this code.
Code 93 On/Off
Scan one of the codes below to enable or disable Code 93. Default = Enabled.
* Enable Disable
Code 93 Minimum and Maximum Length
Use the following commands in combination with numerical values to set the minimum
and maximum length. Default minimum length = 0. Default maximum length = 55.
The minimum and maximum length for this barcode can be set either by sending the serial
command shown under the barcodes below with a value between 0 and 55, or by building
a menu command barcode.
Code 93 Minimum Length Code 93 Maximum Length
Page 47
HS-1RL User’s Manual Page 47
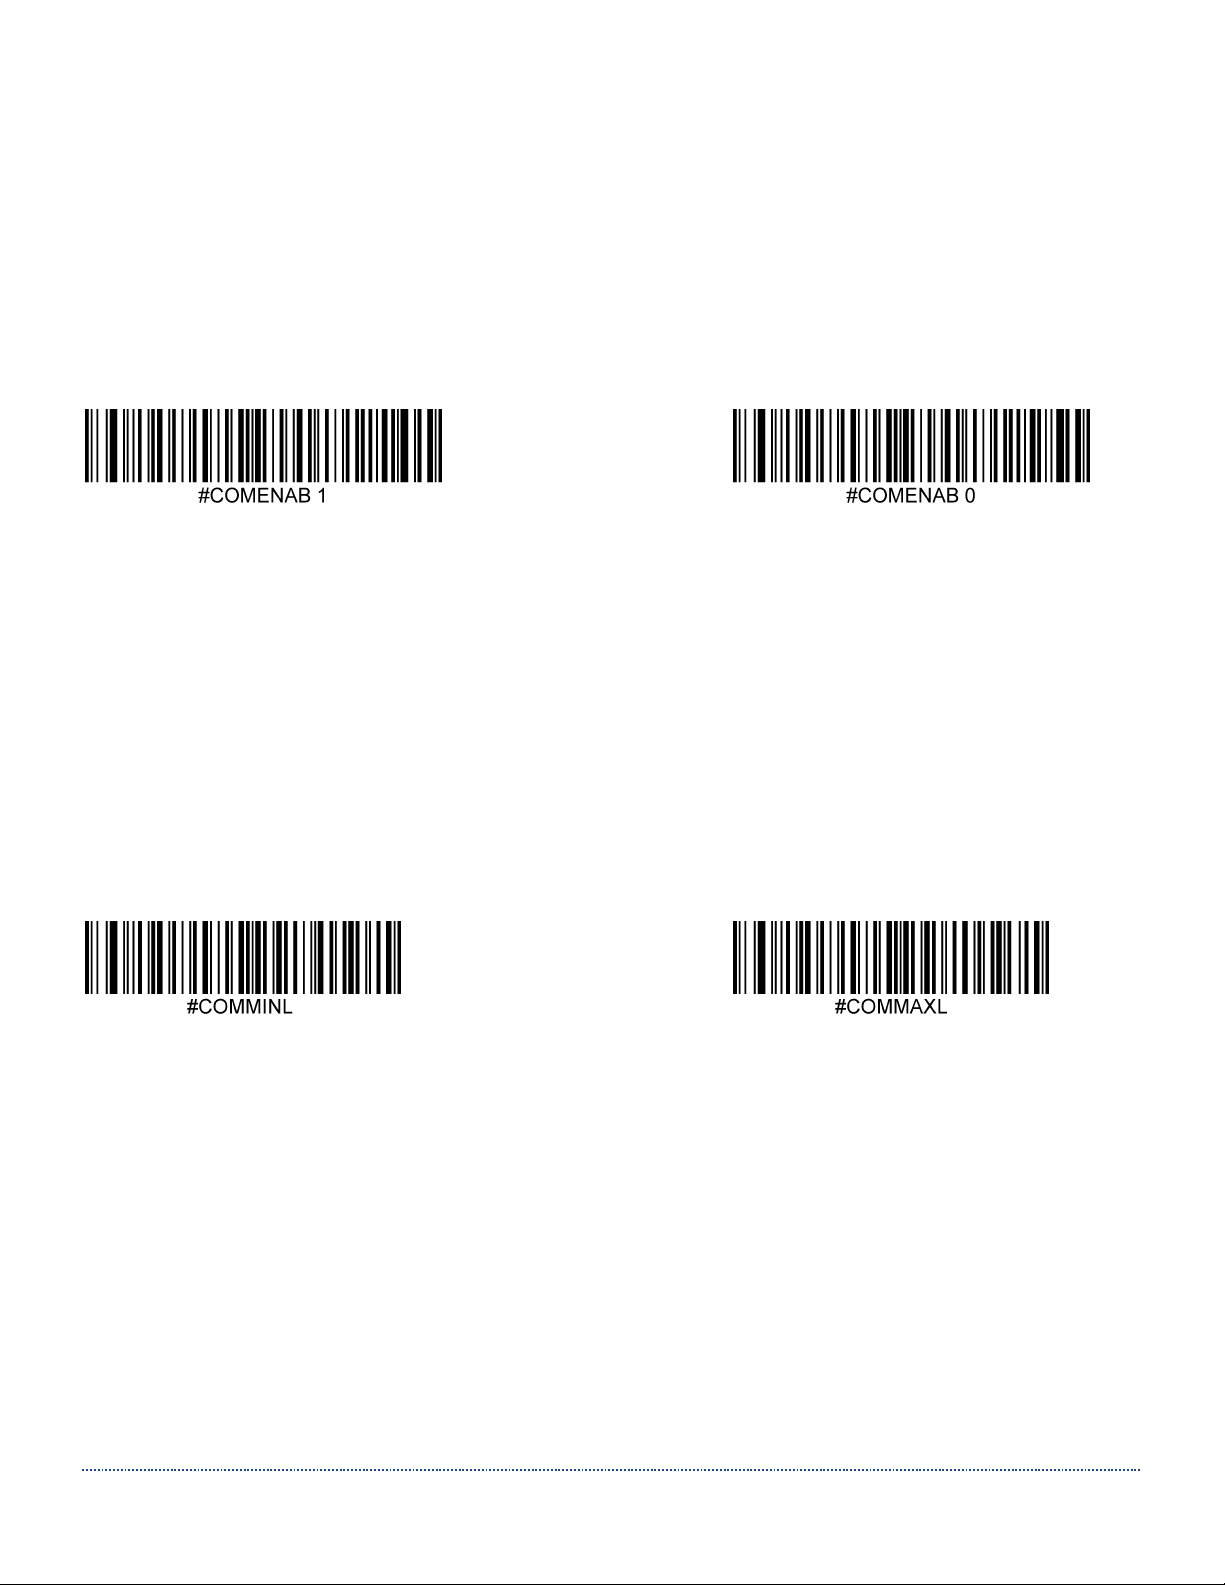
Composite Code
GS 1 Composite Code
Linear codes are combined with a unique 2D composite component to form a new class
called GS1 Composite symbology. GS1 Composite symbologies allow for the co existence of symbologies already in use.
Default = Disabled.
Enable * Disable
Composite Code Minimum and Maximum Length
Use the following commands in combination with numerical values to set the minimum
and maximum length.
The minimum and maximum length for this barcode can be set either by sending the serial
command shown under the barcodes below with a value between 1 and 2435, or by
building a menu command barcode.
Default minimum length = 1. Default maximum length = 2435.
Composite Code Minimum Length Composite Code Maximum Length
Page 48
HS-1RL User’s Manual Page 48
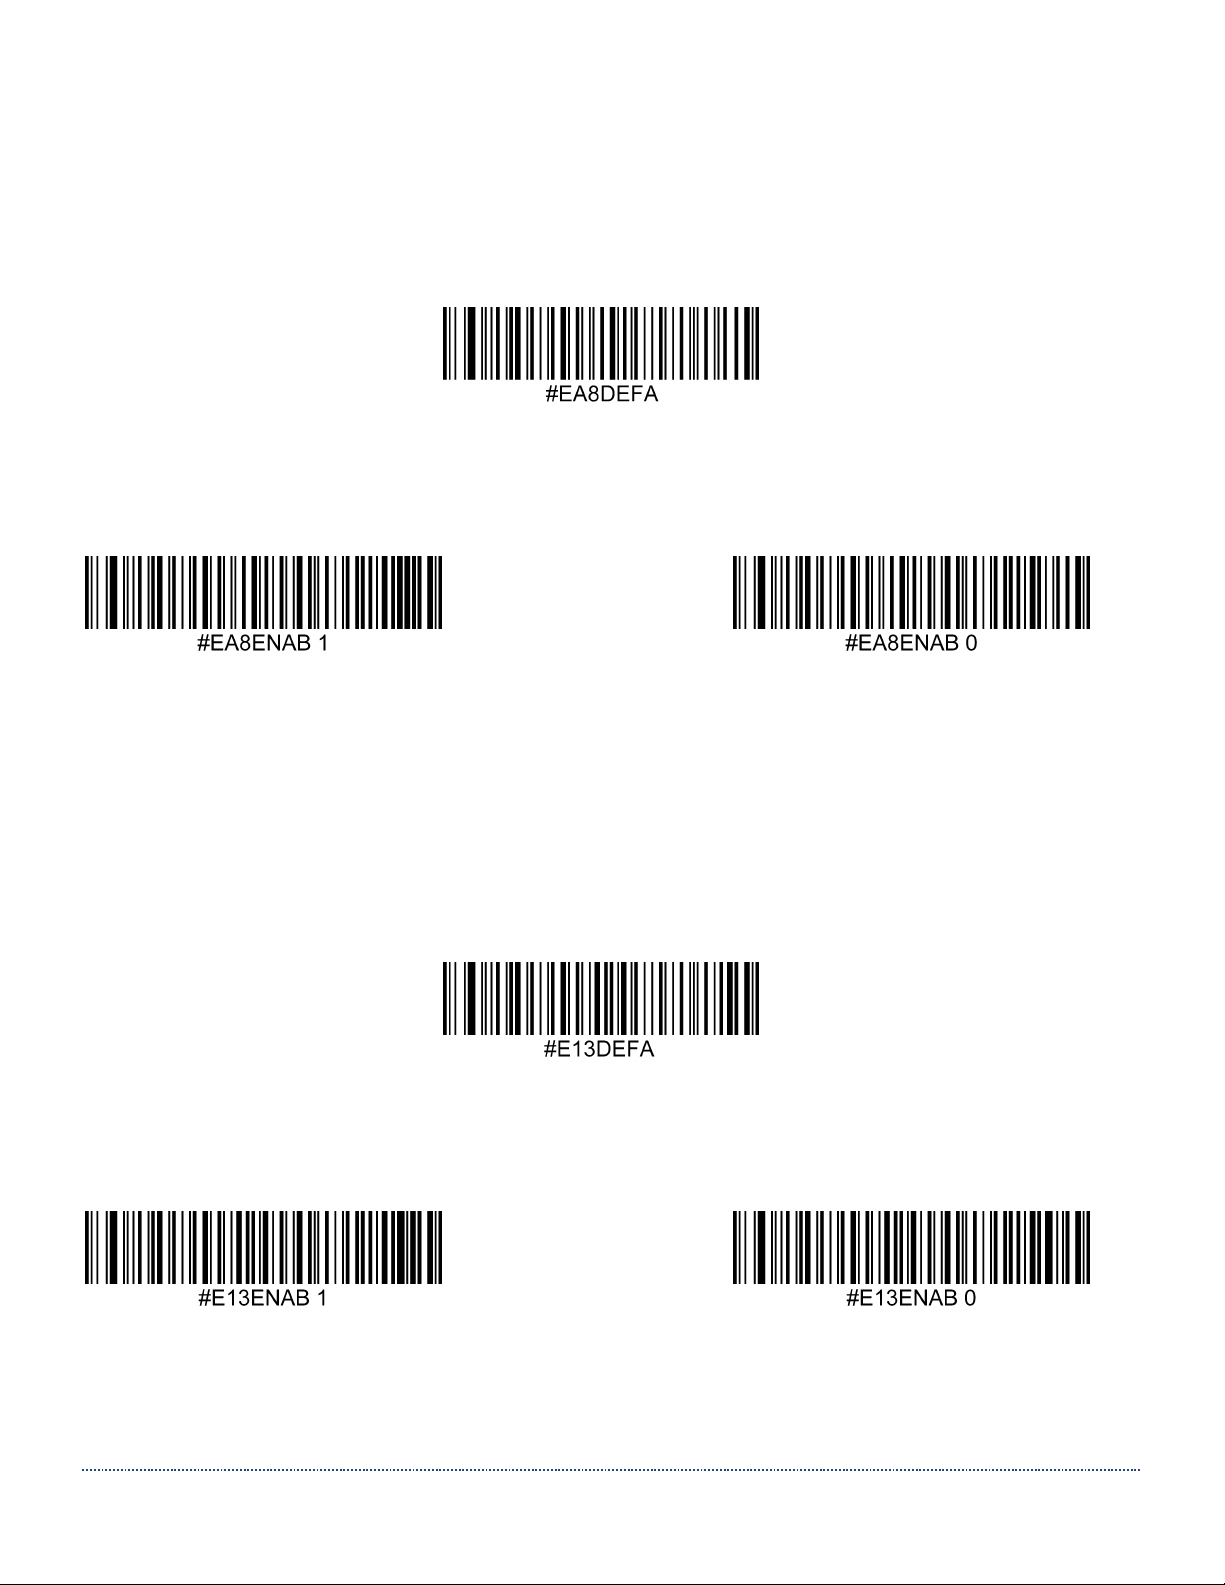
EAN-8/JAN 8
EAN-8/JAN 8 Defaults
Set the EAN-8 settings to their default configuration with this code.
EAN-8/JAN 8 On/Off
Scan one of the codes below to enable or disable EAN-8. Default = Enabled.
* Enable Disable
EAN-13/JAN 13
EAN-13/JAN 13 Defaults
Set the EAN-13 settings to their default configuration with this code.
EAN-13/JAN 13 On/Off
Scan one of the codes below to enable or disable EAN-13. Default = Enabled.
* Enable Disable
Page 49
HS-1RL User’s Manual Page 49
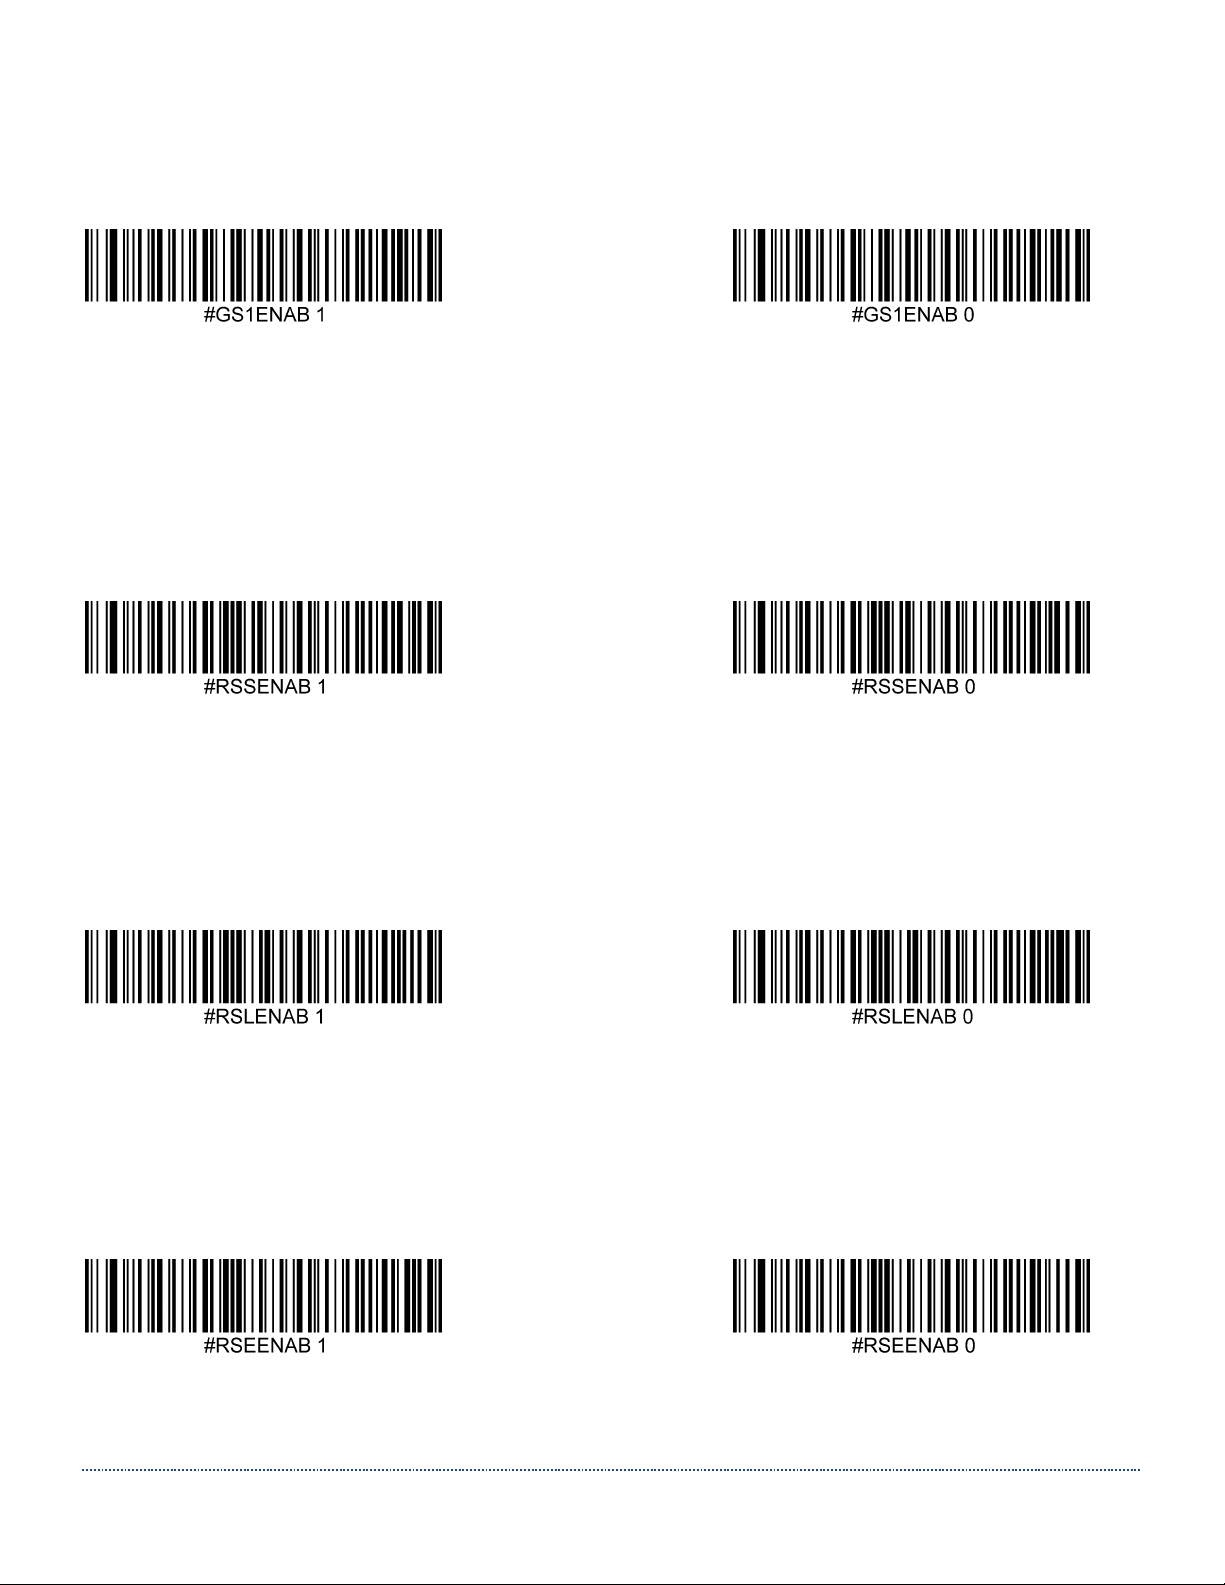
GS1-128 (Formerly UCC-EAN128)
Scan one of the codes below to enable or disable GS1-128. Default = Enabled.
* Enable Disable
GS1 DataBar (Formerly RSS-14)
Scan one of the codes below to enable or disable GS1 DataBar. Default = Enabled.
* Enable Disable
GS1 DataBar Limited (Formerly RSS-Limited)
Scan one of the codes below to enable or disable GS1 DataBar Limited. Default = Enabled.
* Enable Disable
GS1 DataBar Expanded (Formerly RSS-Expanded)
Scan one of the codes below to enable or disable GS1 DataBar Expanded. Default = Enabled.
* Enable Disable
Page 50
HS-1RL User’s Manual Page 50
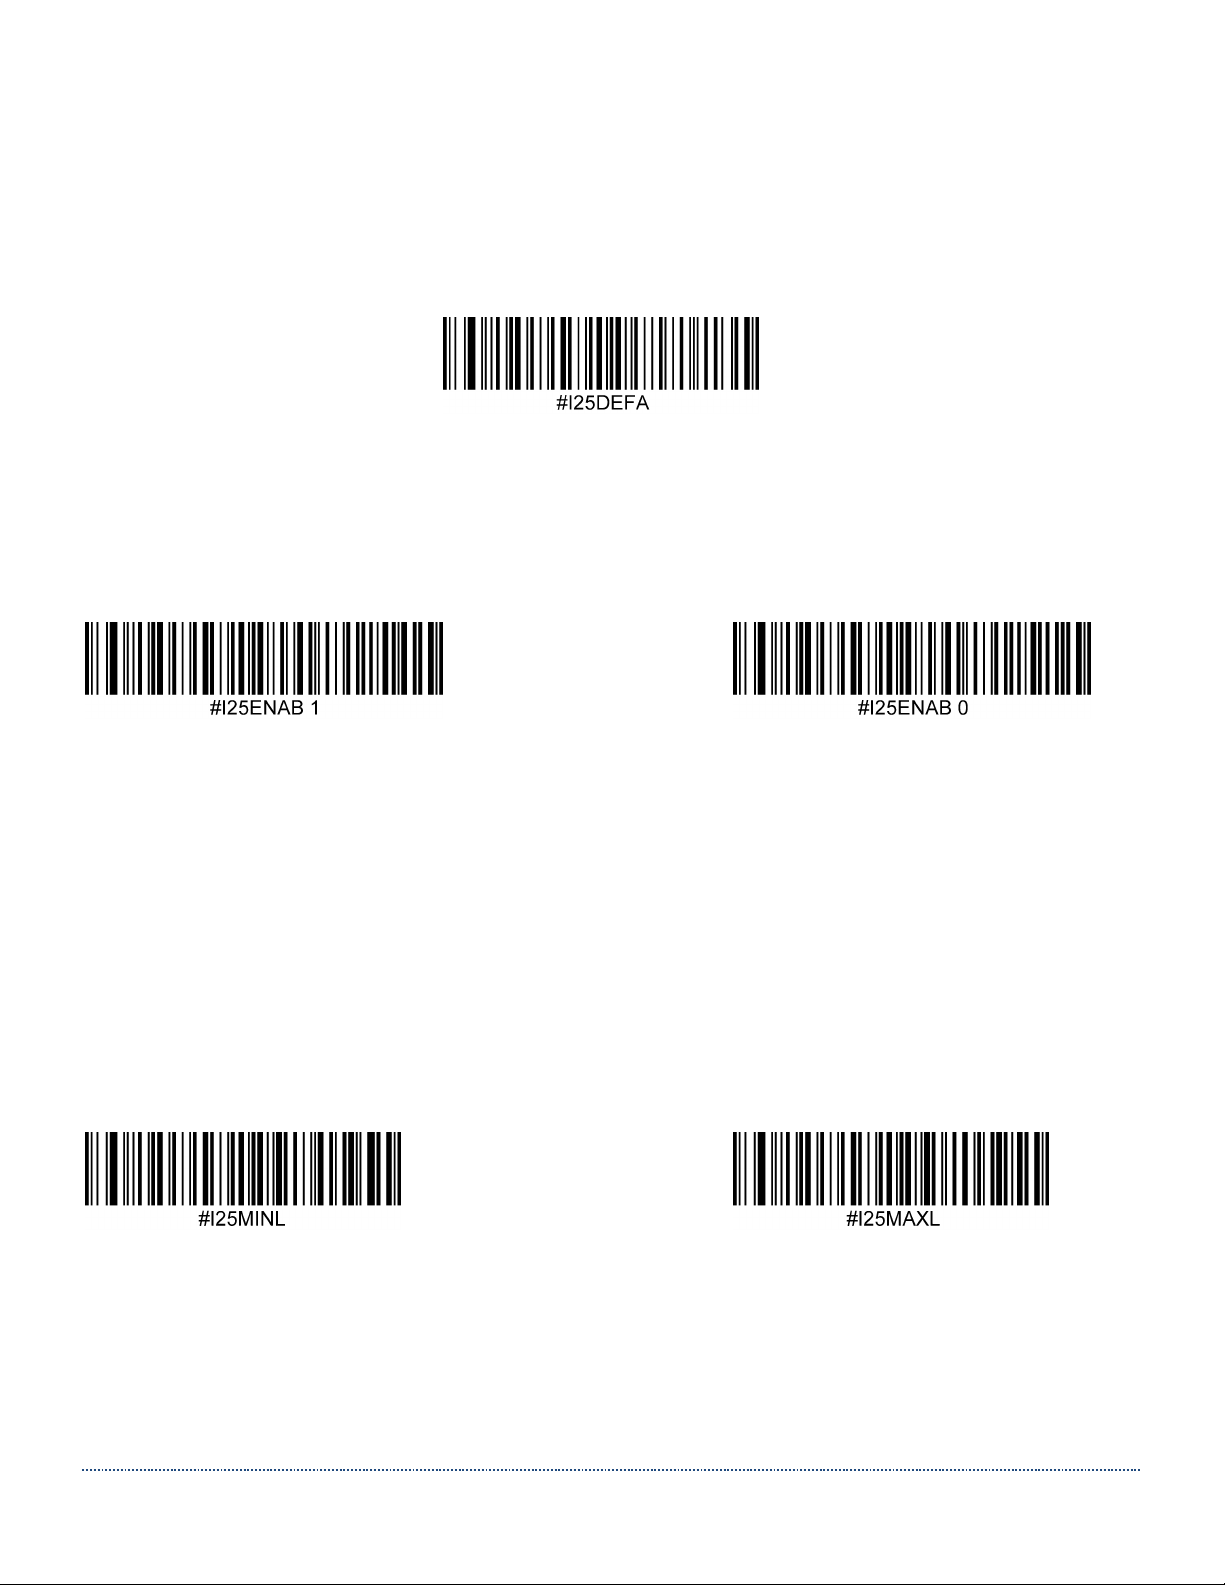
Interleaved 2 of 5
Interleaved 2 of 5 Defaults
Set all Interleaved 2 of 5 settings to their default configuration with this code.
Interleaved 2 of 5 On/Off
Scan one of the codes below to enable or disable Interleaved 2 of 5. Default = Enabled.
* Enable Disable
Interleaved 2 of 5 Minimum and Maximum Length
Use the following commands in combination with numerical values to set the minimum
and maximum length. Default minimum length = 6. Default maximum length = 30.
The minimum and maximum length for this barcode can be set either by sending the serial
command shown under the barcodes below with a value between 2 and 55, or by building
a menu command barcode.
Interleaved 2 of 5 Minimum Length Interleaved 2 of 5 Maximum Length
Page 51
HS-1RL User’s Manual Page 51
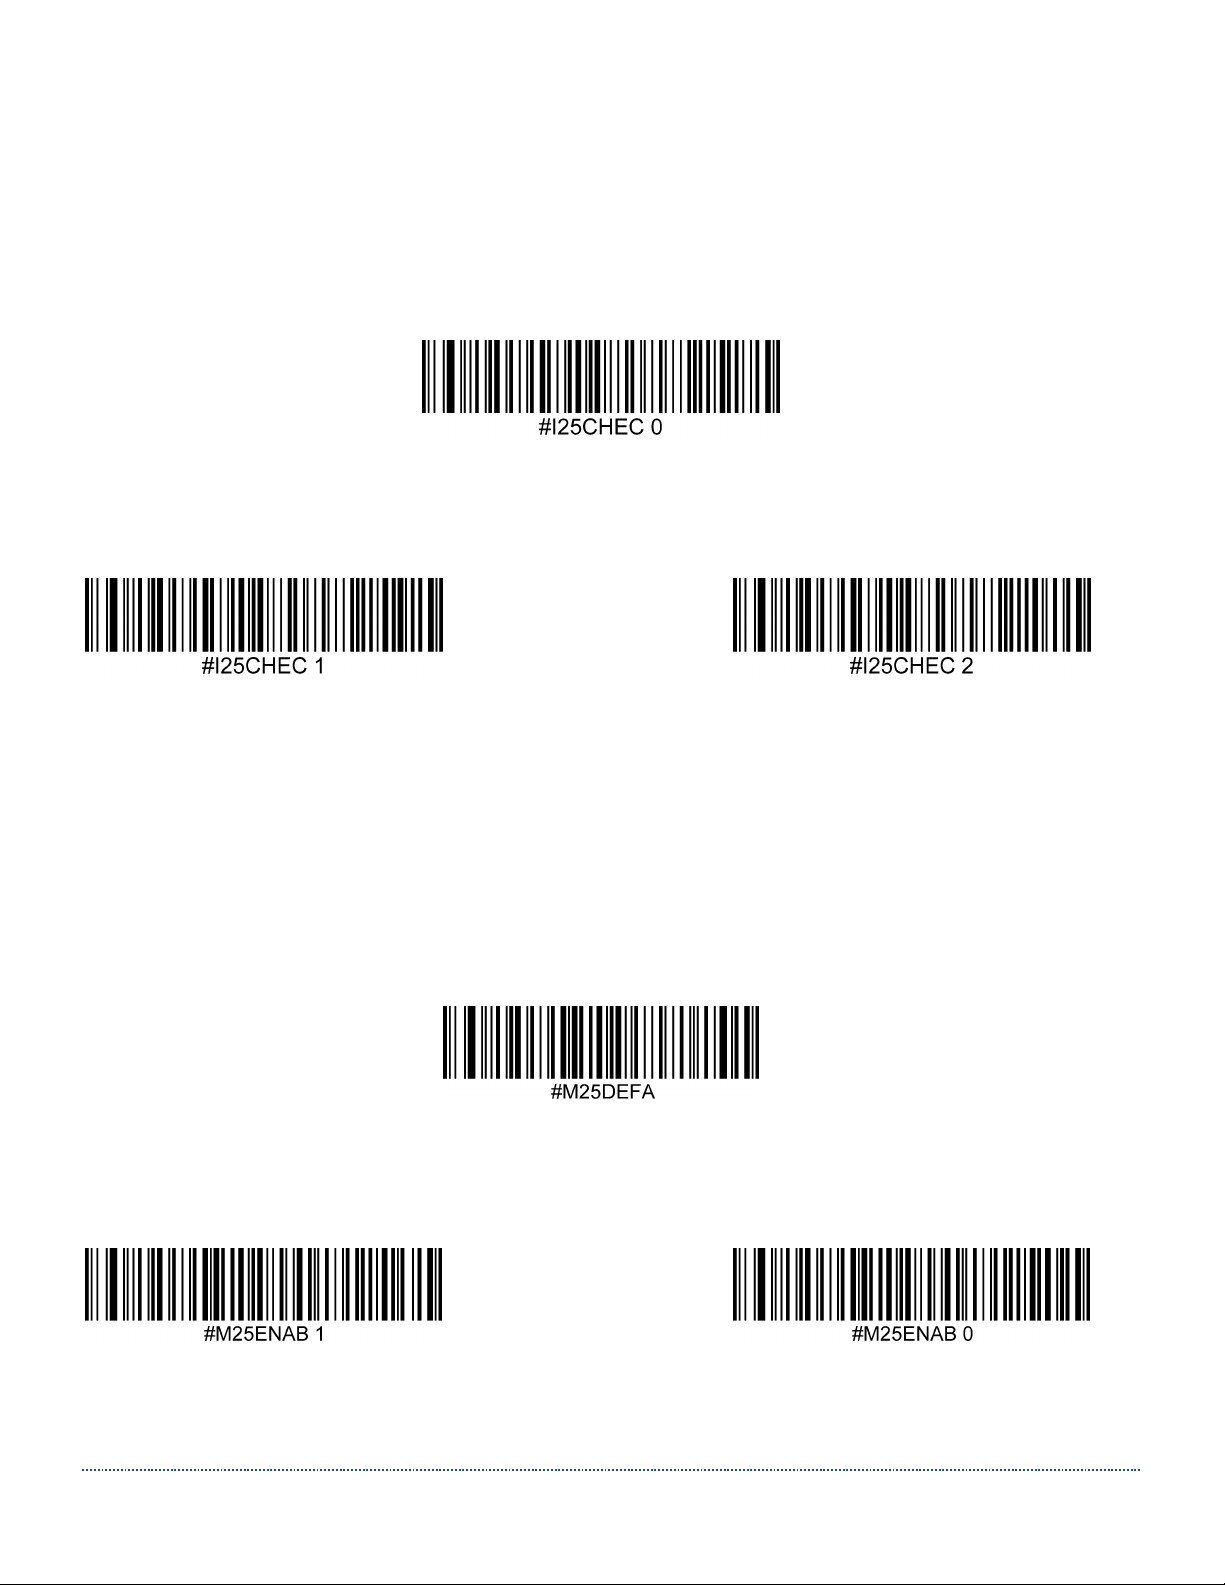
Interleaved 2 of 5 Check Digit
The scanner may look for a check digit to decide if the code is valid.
Interleaved 2 of 5’s USS (Uniform Symbology Specification) Check digit can be validated
and if desired, transmitted too.
Default = Disabled.
* Disable I 2 of 5 Check Digits
USS Check Validate USS Check Validate & Transmit
Matrix 2 of 5
Matrix 2 of 5 Defaults
Set all Matrix 2 of 5 settings to their default configuration with this code.
Matrix 2 of 5 On/Off
Scan one of the codes below to enable or disable Matrix 2 of 5. Default = Disabled.
Enable * Disable
Page 52
HS-1RL User’s Manual Page 52
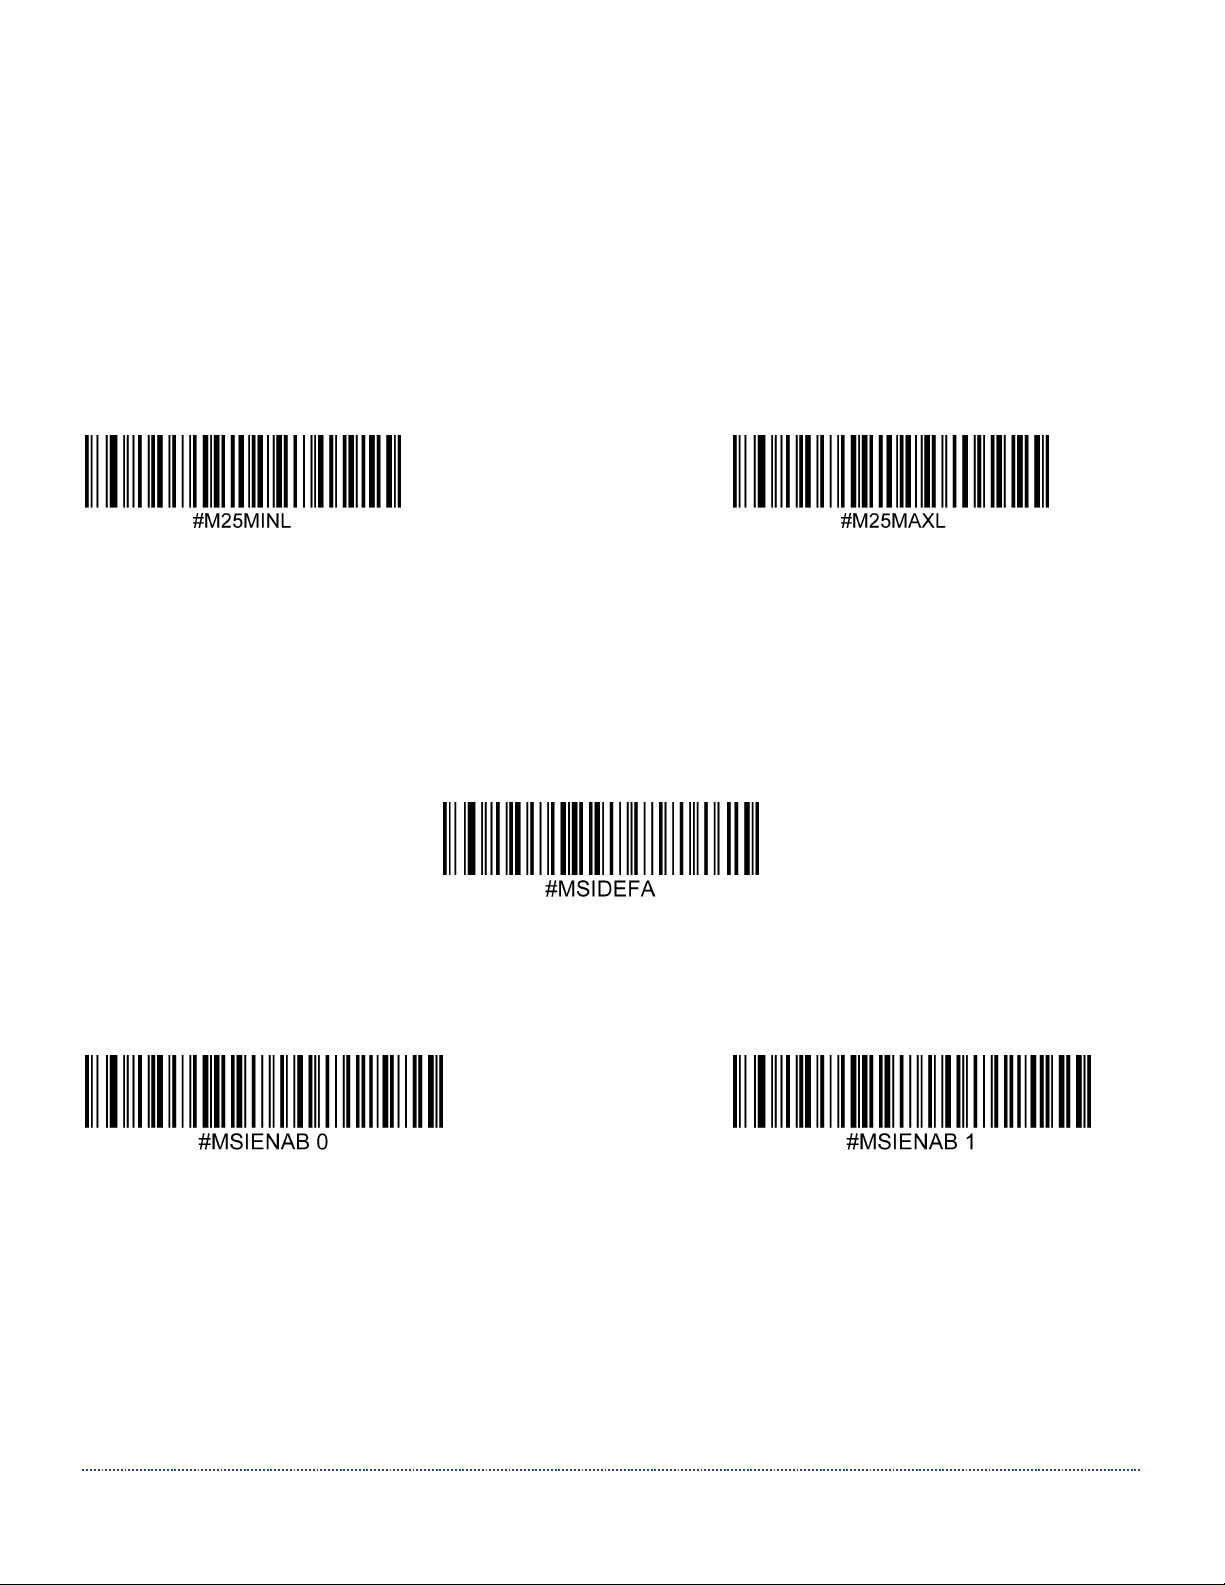
Matrix 2 of 5 Minimum and Maximum Length
Use the following commands in combination with numerical values to set the minimum
and maximum length.
The minimum and maximum length for this barcode can be set either by sending the serial
command shown under the barcodes below with a value between 1 and 55, or by building
a menu command barcode.
Default minimum length = 4. Default maximum length = 55.
Matrix 2 of 5 Minimum Length Matrix 2 of 5 Maximum Length
MSI
MSI Defaults
Set all MSI settings to their default configuration with this code.
MSI On/Off
Scan one of the codes below to enable or disable MSI. Default = Disabled.
* Disable Enable
MSI Minimum and Maximum Length
Use the following commands in combination with numerical values to set the minimum
and maximum length.
The minimum and maximum length for this barcode can be set either by sending the serial
command shown under the barcodes below with a value between 4 and 48, or by building
Page 53
HS-1RL User’s Manual Page 53
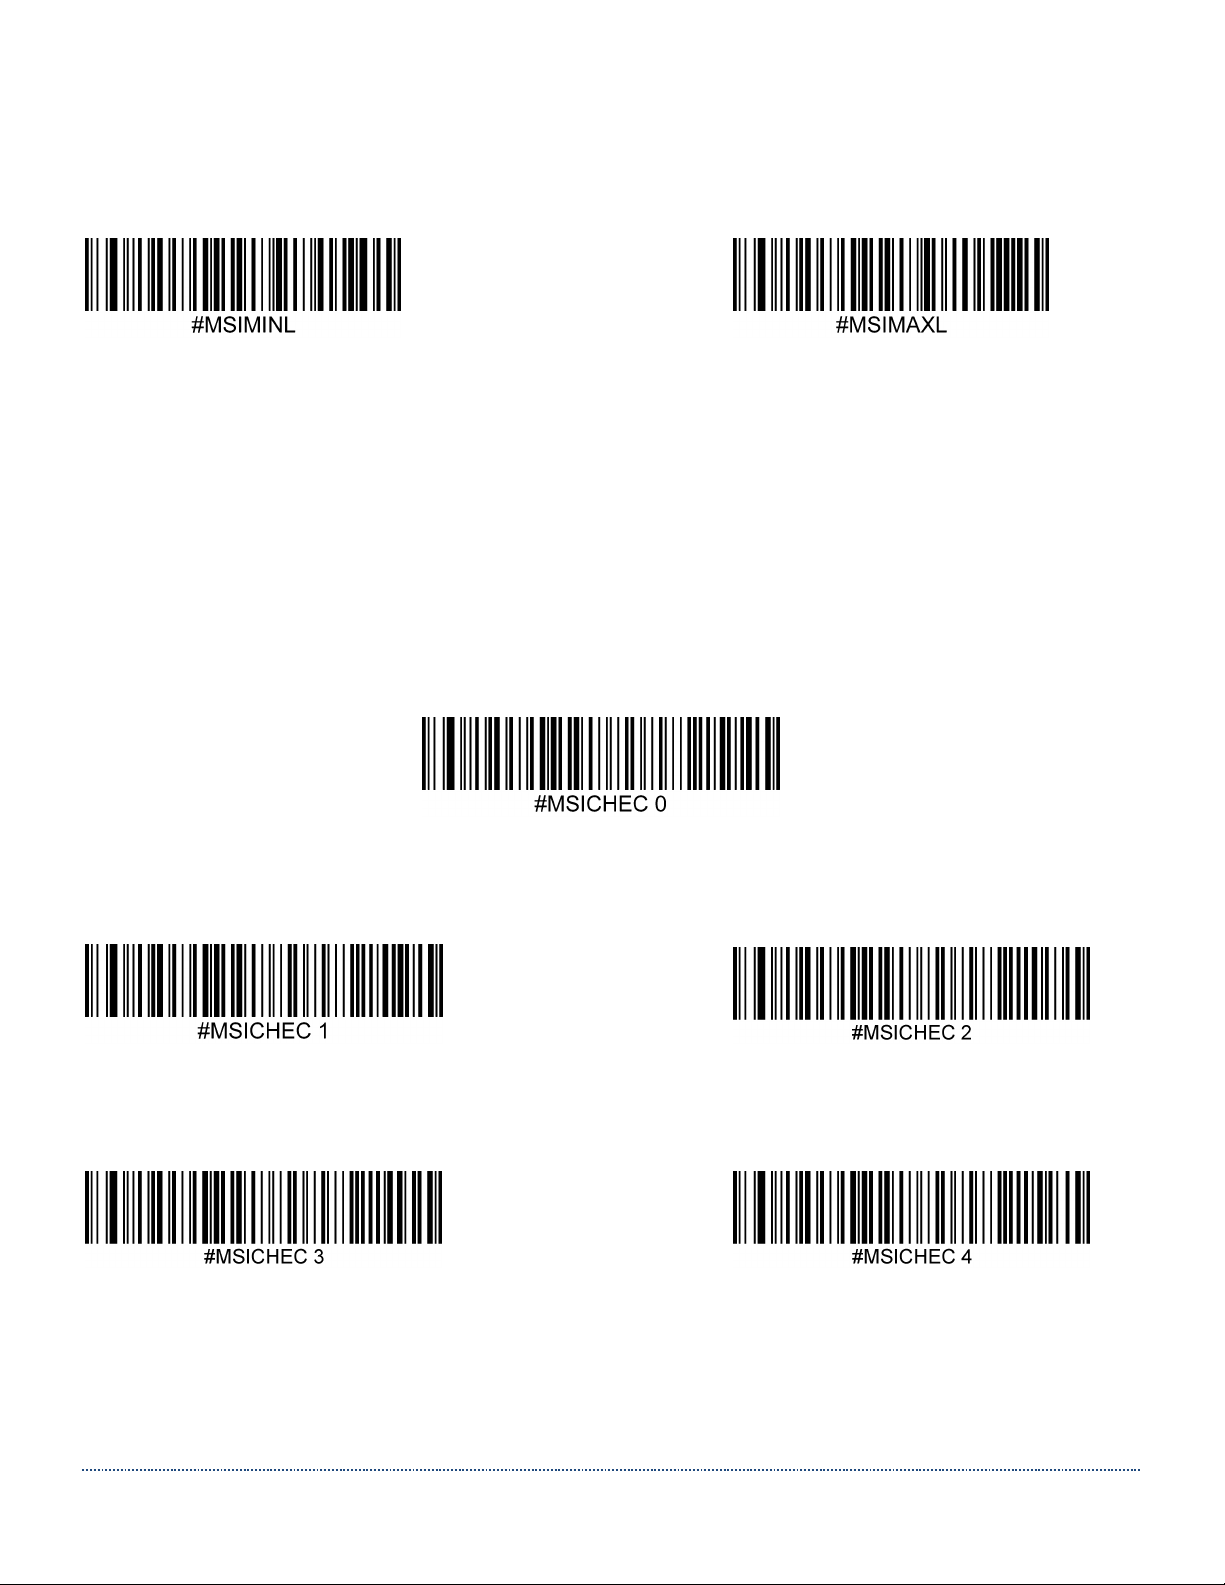
a menu command barcode.
Default minimum length = 4. Default maximum length = 48.
MSI Minimum Length MSI Maximum Length
MSI Check Digits
With MSI symbols, one check digit is mandatory and always verified by the reader. The
second check digit is optional.
If the MSI codes include two check digits, scan the Two MSI Check Digits bar code to
enable verification of the second check digit.
Default = Enable One Check Digit, but don’t transmit.
Disable MSI Check Digits
* Enable One Check Digit, but don’t Transmit Enable One Check Digit and Transmit
Enable Two Check Digits, but don’t Transmit Enable Two Check Digits and Transmit
Page 54
HS-1RL User’s Manual Page 54
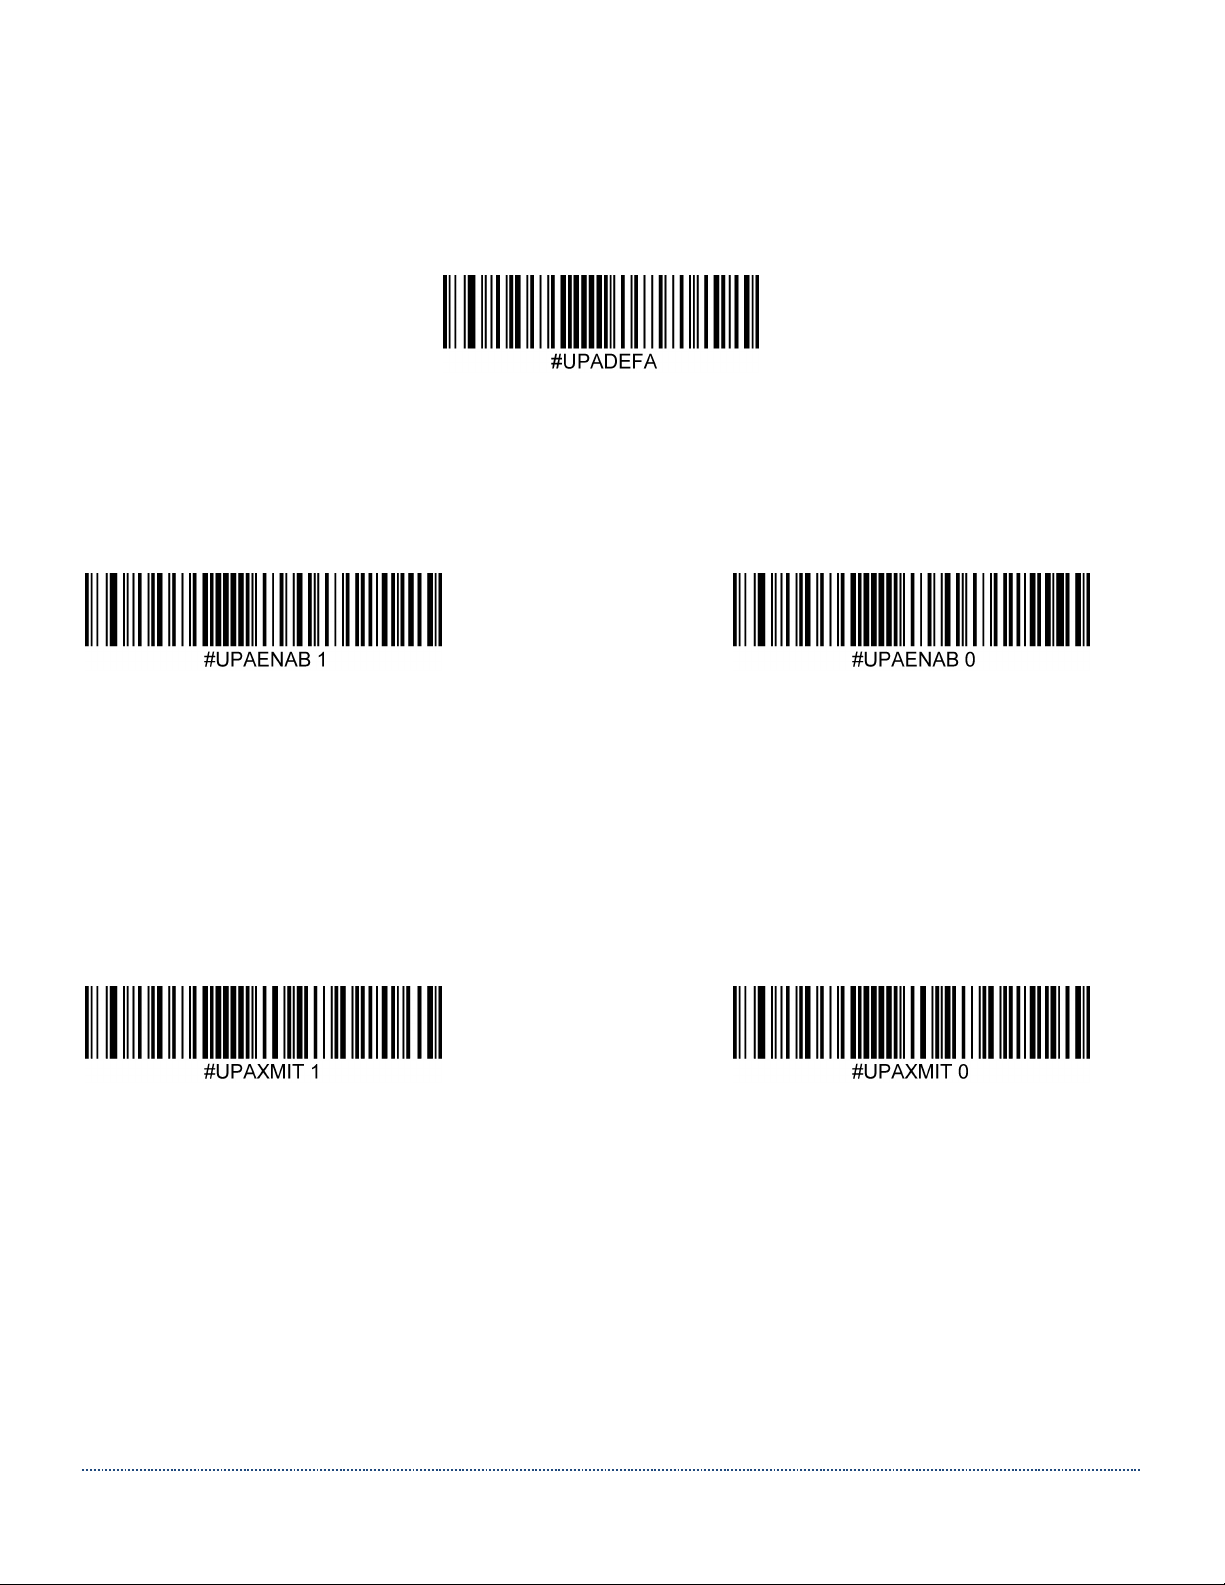
UPC-A
UPC-A Defaults (Not Supported in Current Firmware)
Set the UPC-A settings to their default configuration with this code.
UPC-A On/Off
Scan one of the codes below to enable or disable UPC-A.
Default = Enabled.
* Enable Disable
UPC-A Check Digit
The check digit is the last character and is used to verify data integrity. This digit is always
checked but it may be chosen whether to transmit it.
Default=Transmit
* Transmit UPC-A Check Do Not Transmit UPC-A Check
UPC-E(0)
UPC-E(0) Defaults
Set the UPC-E(0) settings to their default configuration with this code.
Page 55
HS-1RL User’s Manual Page 55
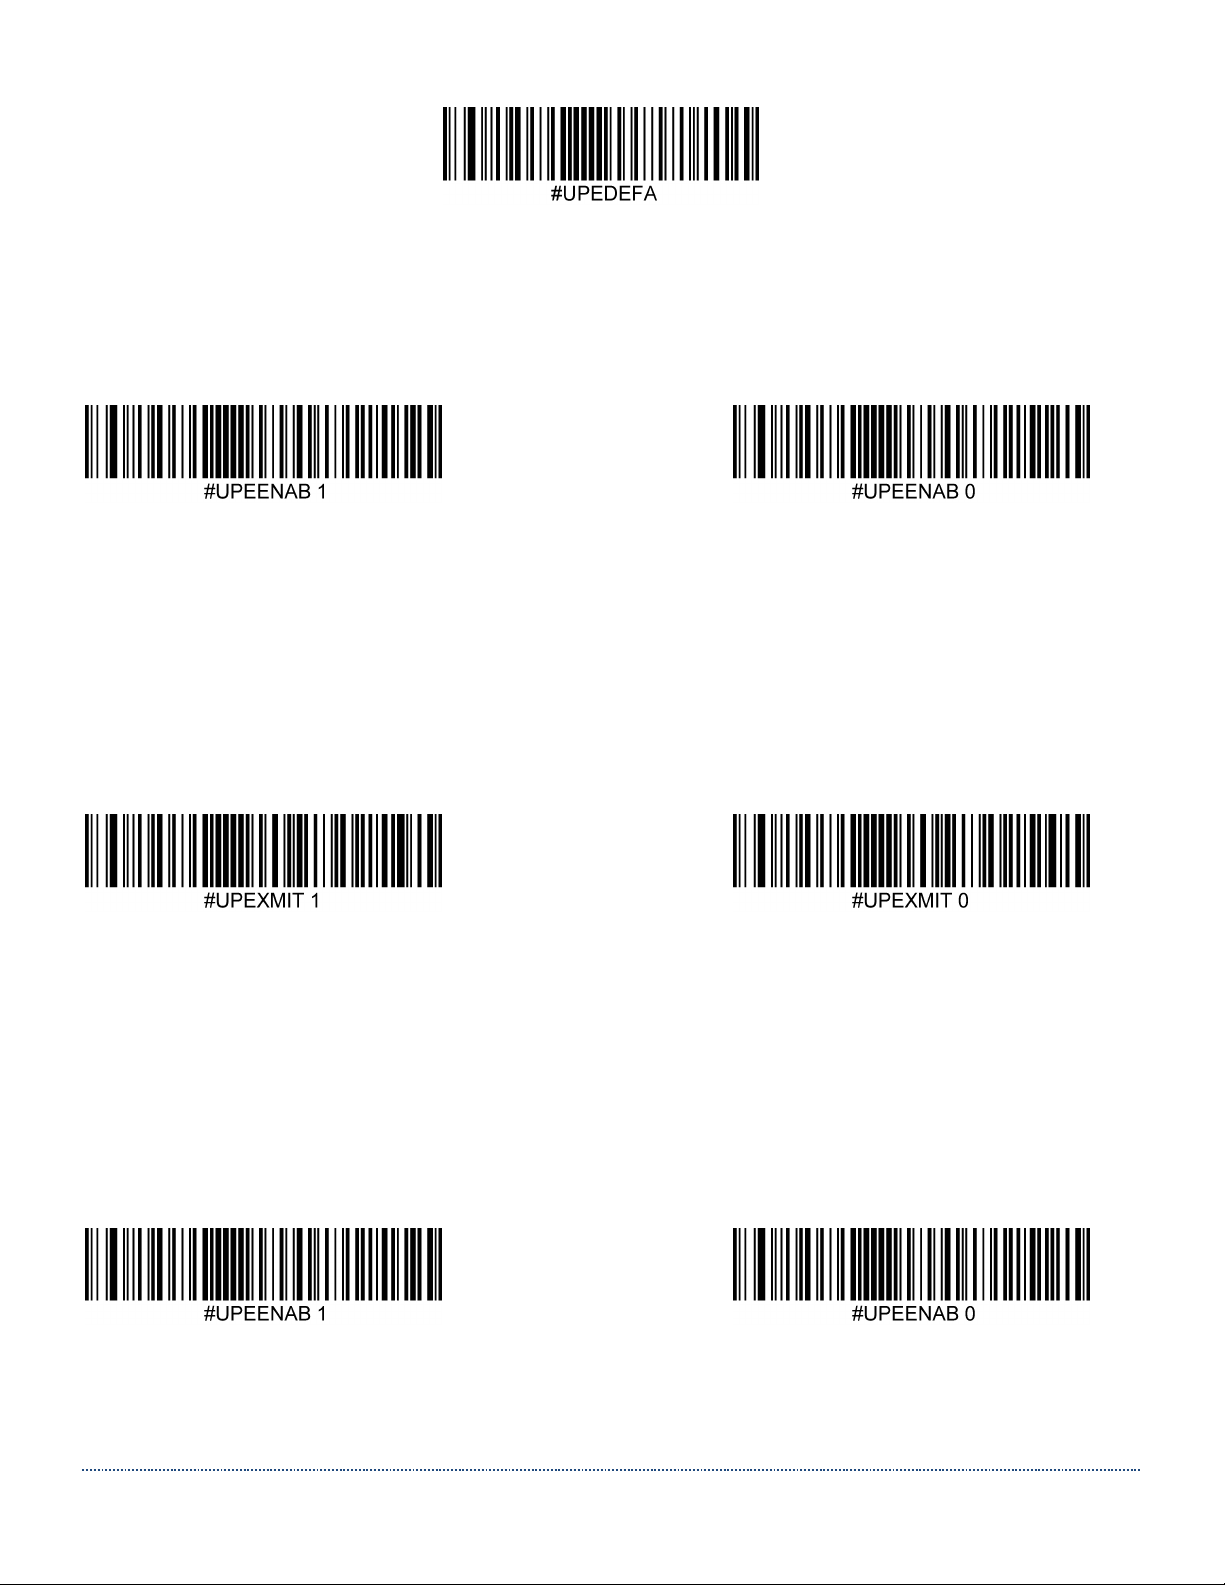
UPC-E On/Off
Scan one of the codes below to enable or disable UPC-E(0).
Default = Enabled.
* Enable Disable
UPC-E(0) Check Digit
The check digit is the last character and is used to verify data integrity. This digit is always
checked but it may be chosen whether or not to transmit it.
Default=Transmit
* Transmit UPC-E Check Do Not Transmit UPC-E Check
UPC-E(0) Expanded ModeOn/Off
UPC-E(0) Expanded Mode expands the UPC-E(0) code to the 12 digit, UPC-A format. Scan one
of the codes below to enable or disable UPC-E(0) Expanded Mode.
Default = Disabled.
Enable * Disable
Page 56
HS-1RL User’s Manual Page 56
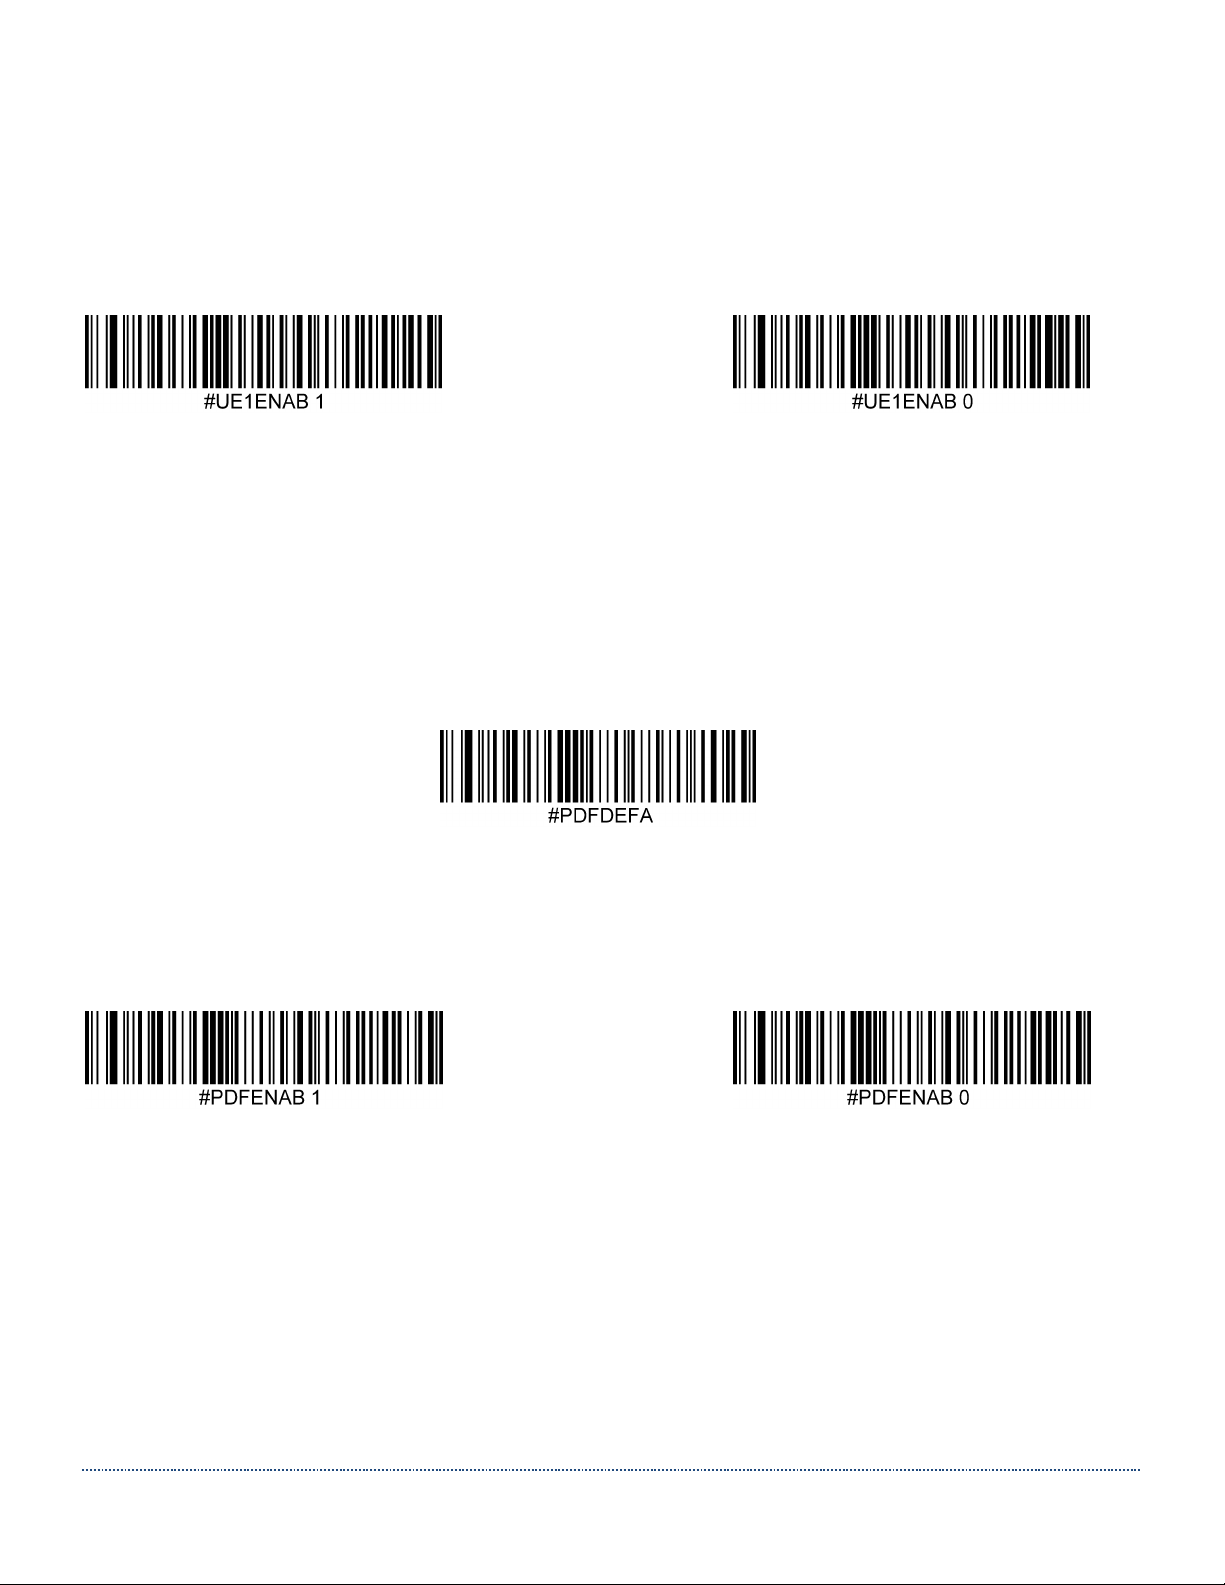
UPC-E1
Scan one of the codes below to enable or disable UPC-E(1).
Default = Disabled.
Enable * Disable
1D Stacked Symbologies
PDF417
PDF417 Defaults
To set the default values for PDF417, scan this code:
PDF417 On/Off
Scan one of the codes below to enable or disable PDF417.
Default = Enabled.
* Enable Disable
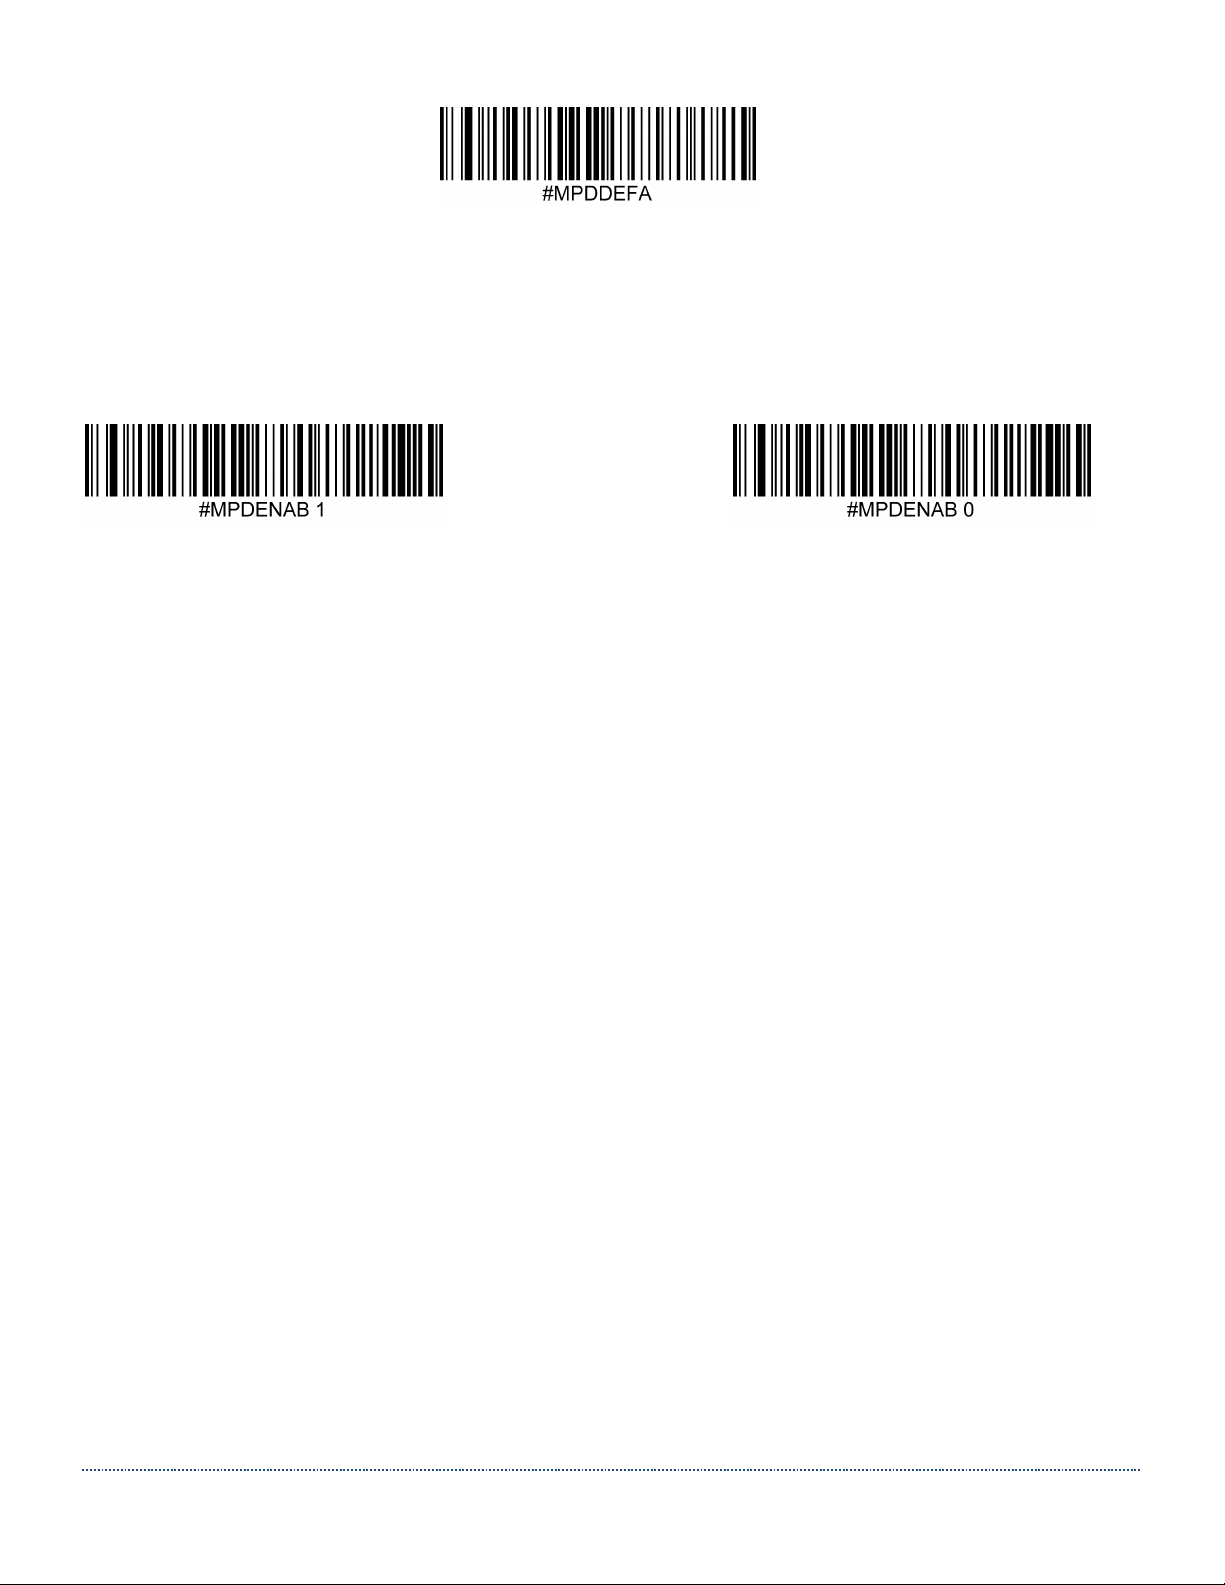
MicroPDF417
MicroPDF417 Defaults
To set the default values for Micro PDF417, scan this code:
Page 57
HS-1RL User’s Manual Page 57
MicroPDF417 On/Off
Scan one of the codes below to enable or disable Micro PDF417.
Default = Disabled.
Enable * Disable
Page 58
HS-1RL User’s Manual Page 58
2D Matrix Symbologies
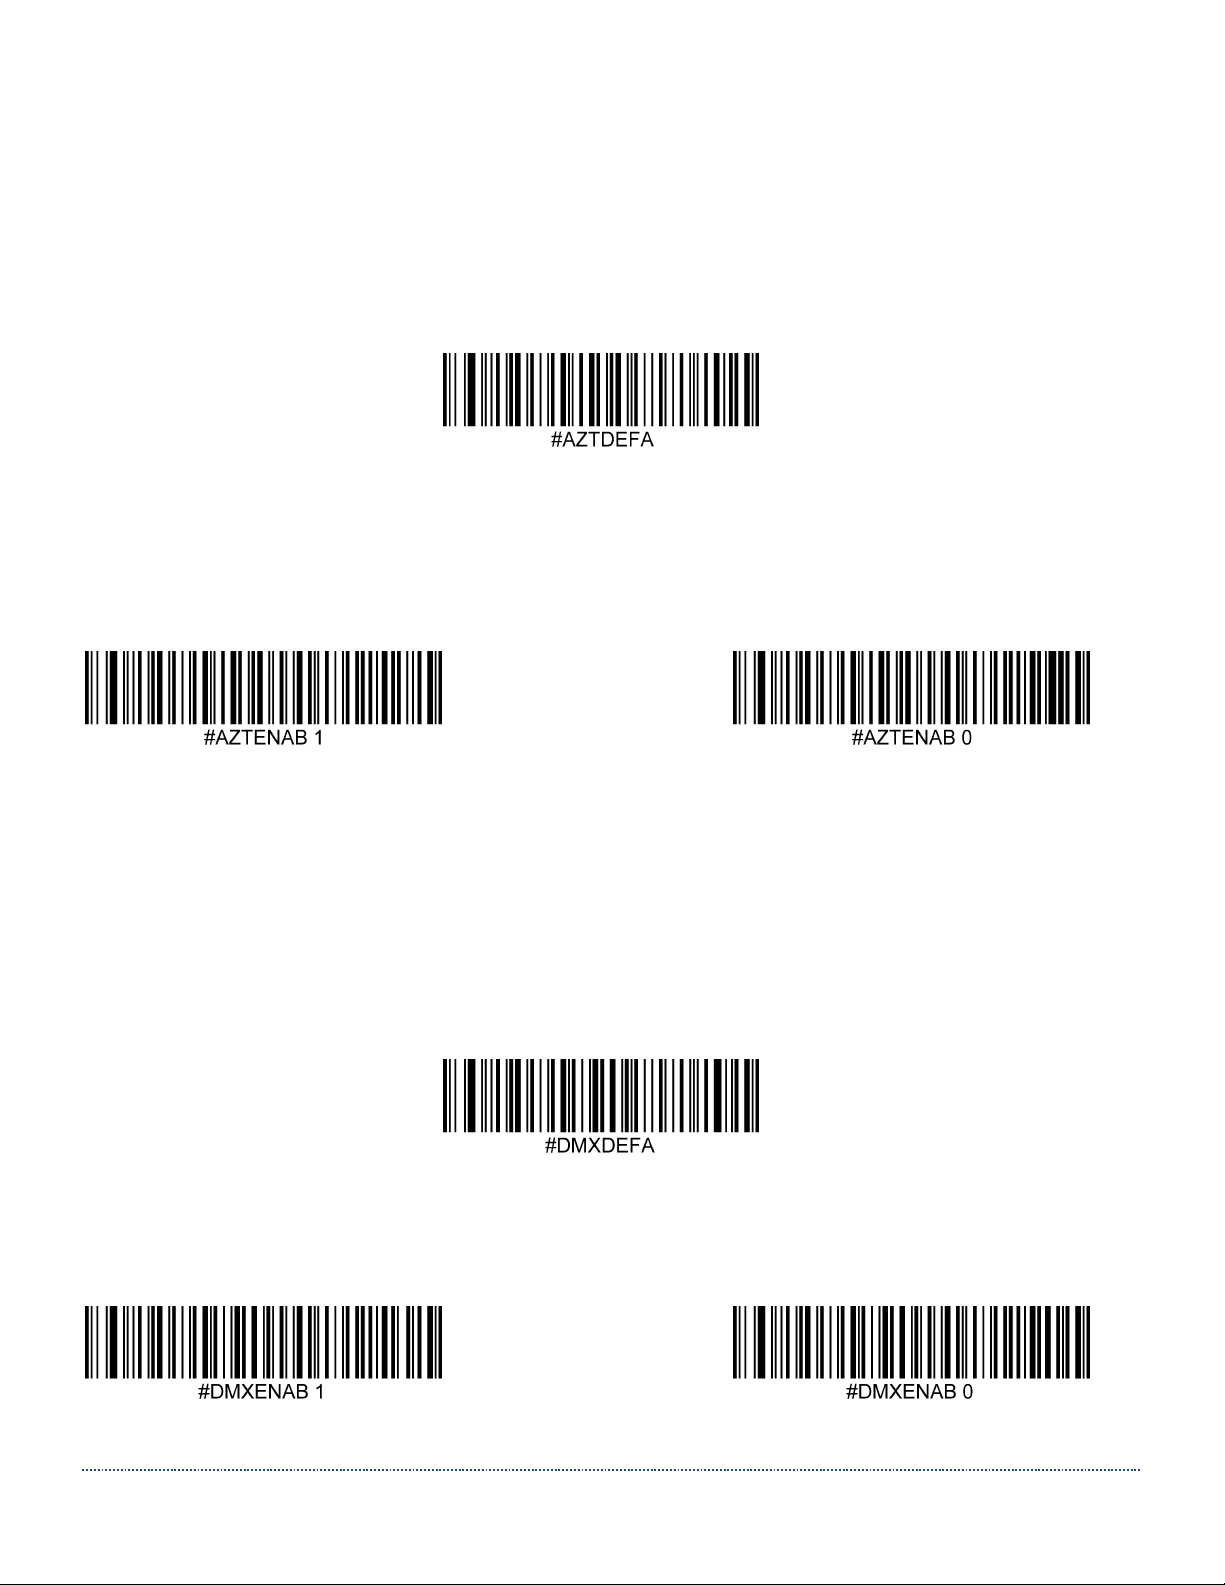
Aztec Code
Aztec Code Defaults
To set the default values for Aztec Code, scan this code:
Aztec Code On/Off
Scan one of the codes below to enable or disable Aztec Code.
Default = Enabled.
* Enable Disable
Data Matrix
Data Matrix Defaults
To set the default values for Data Matrix, scan this code:
Data Matrix On/Off
Scan one of the codes below to enable or disable Data Matrix. Default = Enabled.
* Enable Disable
Page 59
HS-1RL User’s Manual Page 59
2D Matrix Symbologies
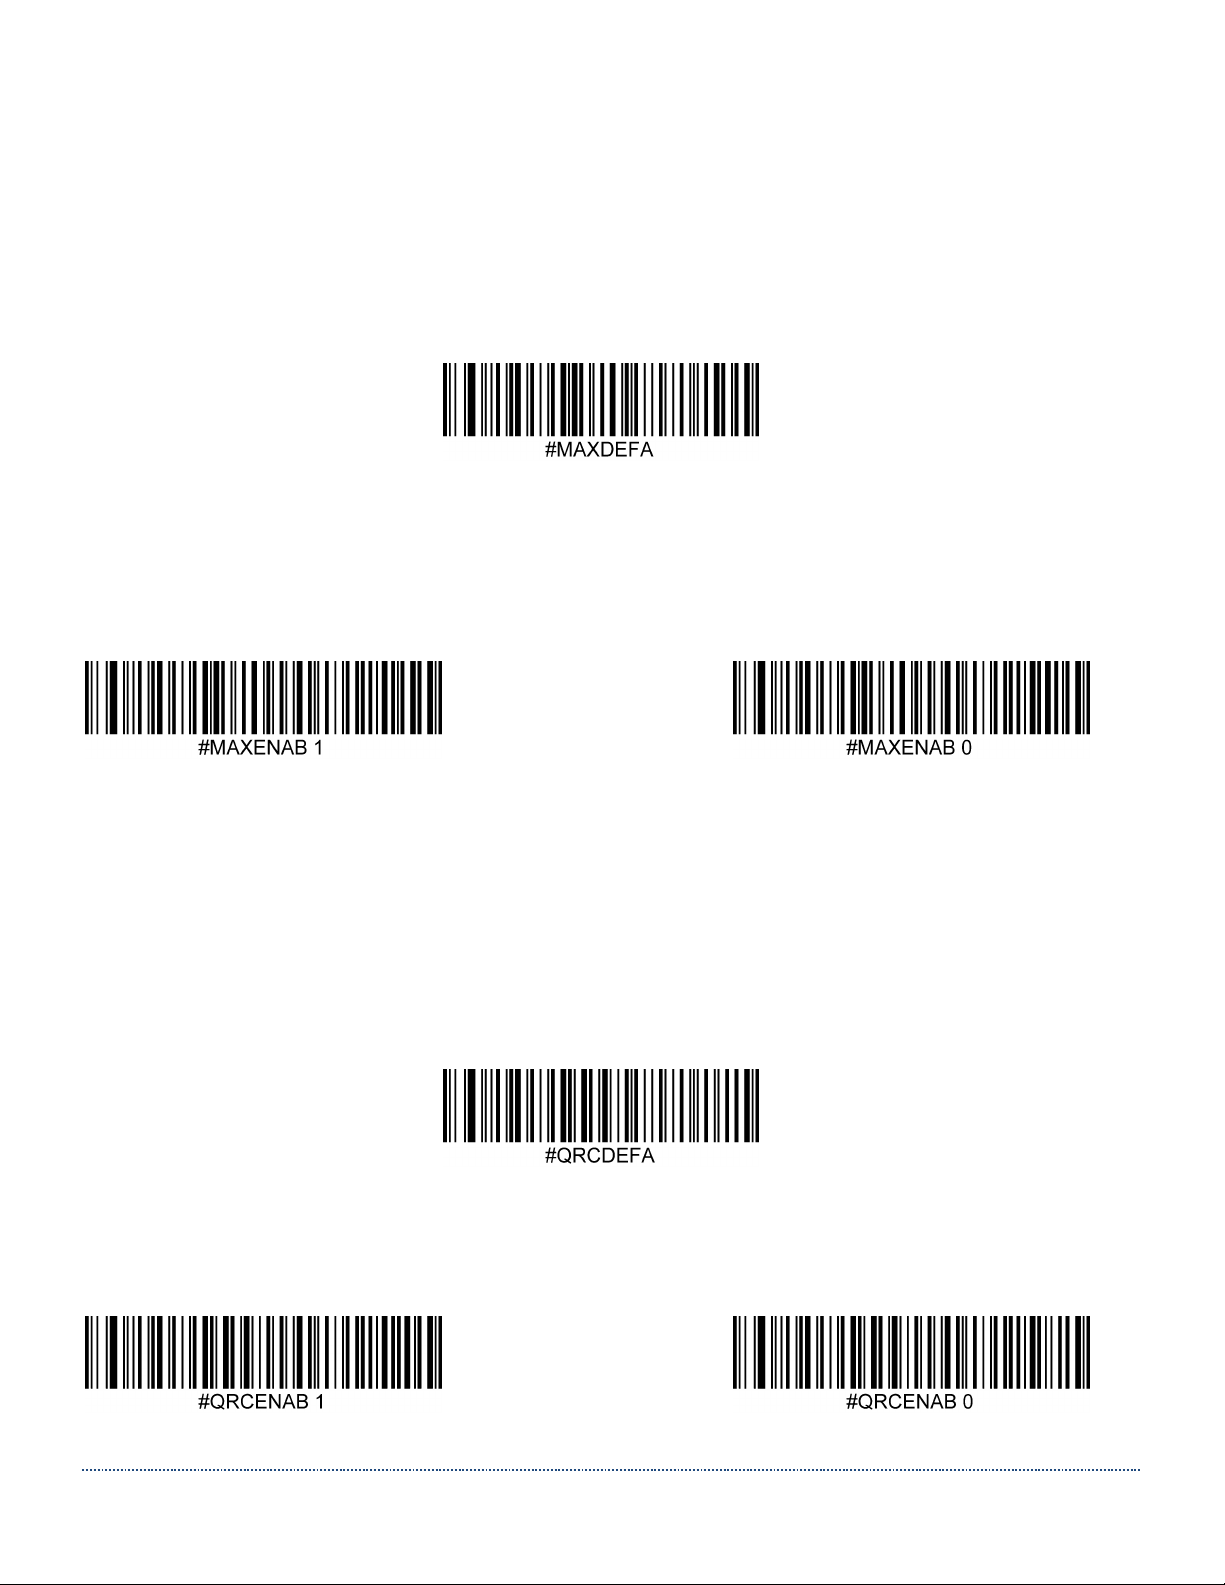
Maxi Code
Maxi Code Defaults
To set the default values for Maxi Code, scan this code:
Maxi Code On/Off
Scan one of the codes below to enable or disable Maxi Code.
Default = Disabled.
Enable * Disable
QR Code
QR Code Defaults
To set the default values for QR Code, scan this code:
QR Code On/Off
Scan one of the codes below to enable or disable QR Code. Default = Enabled.
* Enable Disable
Page 60
HS-1RL User’s Manual Page 60
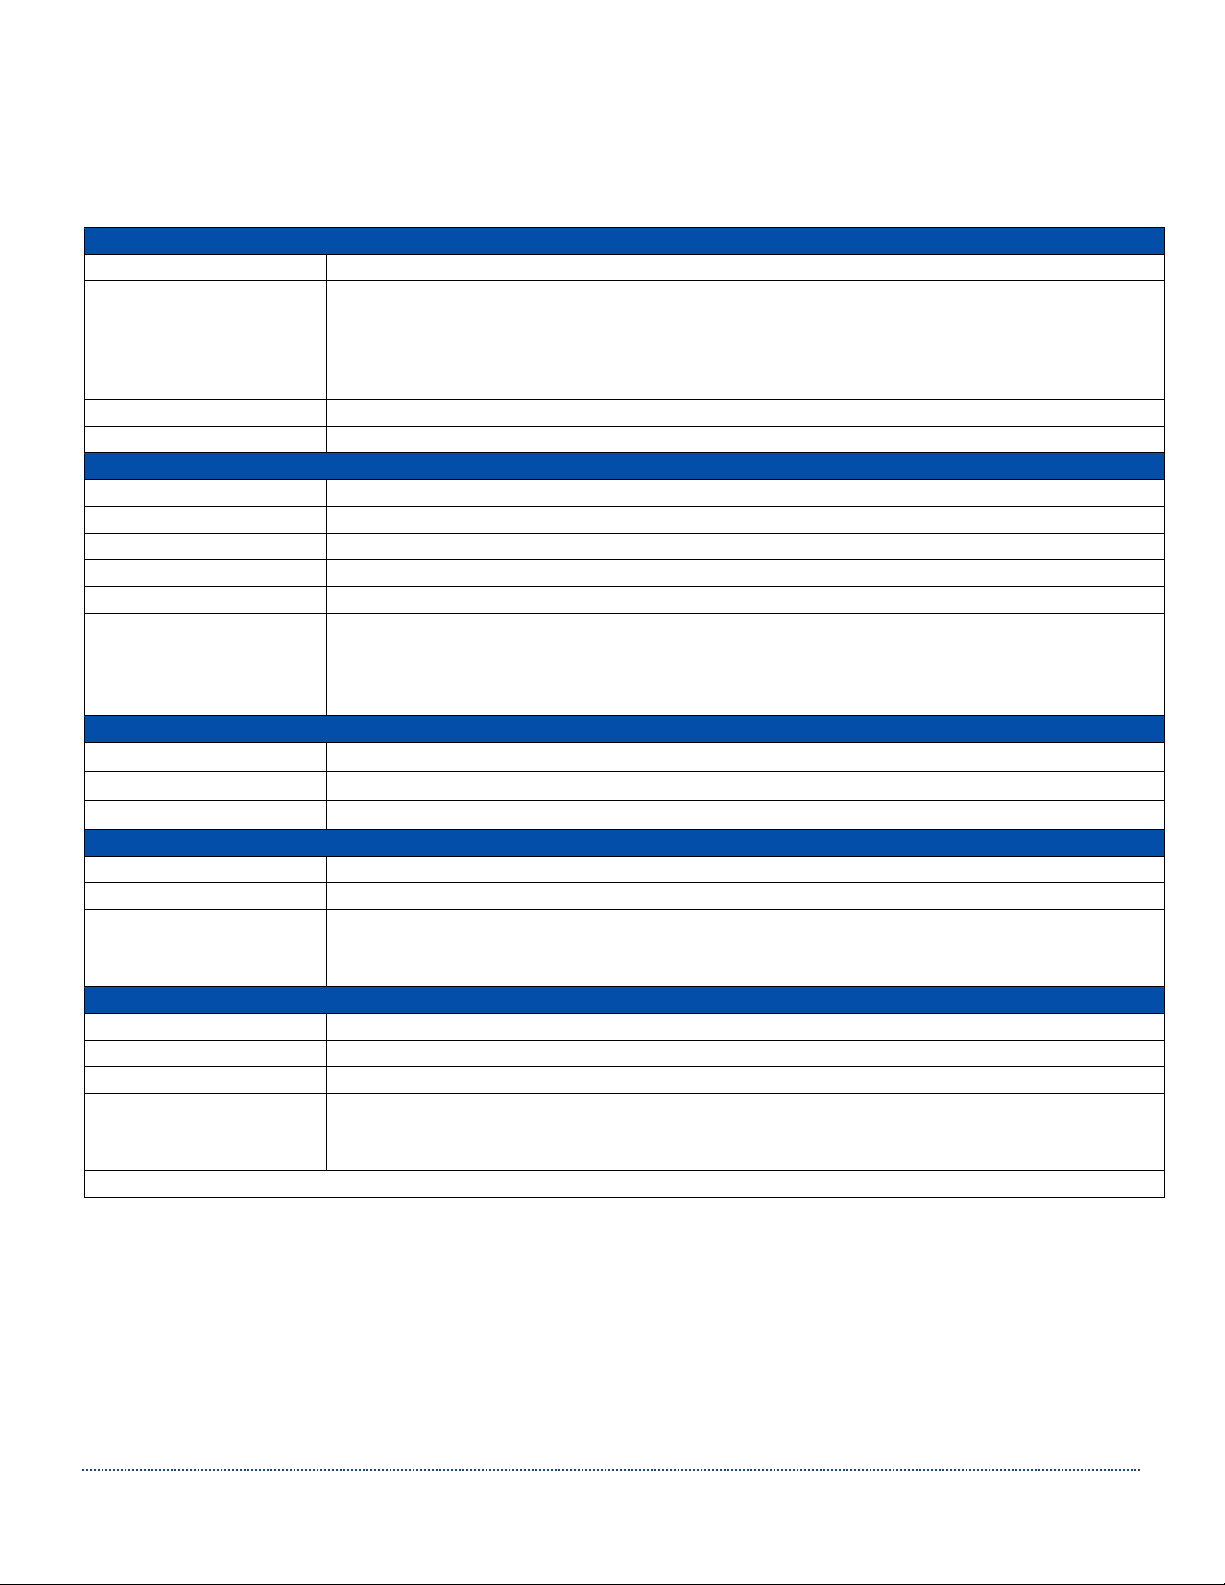
9 - Product Specifications
RFID
RF Frequency:
125 kHz (LF)
Supported
Transponders:
Cotag, G-Prox (hash value only), HID Prox, Honeywell NexWatch, Indala, ioProx,
EM4100, 4102, 4200 (UID only), AWID, CASI-RUSCO, HITAG 1 (no encryption), HITAG
2 (no encryption), HITAG S (no encryption), Keri, Miro, Pyramid, TIRIS/HDX, UNIQUE,
FDX-B, Q5, TITAN (4x50), T55x7, ZOODIAC
Antenna:
Internal
Read Range:
Contact to 1.0”+ (Tag dependent)
Barcode Scanning
Light Source:
White LED illumination, Green LED line aimer
Rotational Sensitivity:
360o
Min X Dimension:
Linear codes: 5 mil, 2D Codes: 10 mil
Reading Distance:
2.0” to 15” (barcode dependent)
Ambient:
0-100,000 lux (complete darkness to full sunlight)
Symbologies:
2D: PDF417, MicroPDF417, Maxicode, Data Matrix, QR Code, Aztec, GS-1
Composite
Linear: Code 39, Code 128, Codabar, UPC, EAN, Interleaved 2 of 5, GS-1 Databar,
Code 93
User Interface and Software
Control/Data Interface:
USB (Keyboard or COM Port), RS-232 (available upon request)
OS Compatibility:
Windows 10, Windows 7, Linux Ubuntu, other OS available upon request
User Indicators:
2 LEDs, adjustable audio signal, and optional vibration motor
Electrical
Power Supply:
5VDC +/- 5%
Current:
500mA max. while scanning; 100mA while idle
Safety, Regulatory and
Environmental
Compliance:
FCC Class B, Industrie Canada (IC), ETSI EN 300 330 V2.1.1, RED 2014/53/EU,
CE, IEC/EN60601 4th edition compatible for ESD, UL testing per IEC/EN60950 2nd
edition, 2005, Amendment 2:2013, ROHS, REACH, WEEE
Environmental
Operating Temp.:
32° F to 122° F (0° to 50°C)
Relative Humidity:
95% RH non-condensing, at +50°C
Environmental Sealing:
IP54 Sealed Housing
Recommended
Cleaning Solutions:
Sani-Cloth® HB, Sani-Cloth® Plus, Super Sani-Cloth®, Isopropyl Alcohol Wipes
(70%), Cavi-Wipes, Betadine®, 409®, Windex® Blue, Hydrogen Peroxide (3%),
Clorox® Bleach, gentle dish soap and water
All specifications subject to change without notice.
Page 61

HS-1RL User’s Manual Page 61
10 - Maintenance
Repairs
Repairs and/or upgrades are not to be performed on this product. These services are to be
performed by JADAK only. Please contact JADAK for your service needs.
Maintenance
The HS-1RL provides reliable and efficient operation with a minimum of care. Although specific
maintenance is not required, the following periodic checks ensure dependable product operation:
Cleaning the Scanning Window
Reading performance may degrade if the scanner’s window is not clean. If the window is
visibly dirty, or if the scanner isn’t operating well, clean the window with a soft cloth or lens
tissue dampened with water (or a mild detergent- water solution). If a detergent solution is
used, rinse with a clean lens tissue dampened with water only.
Cleaning the Scanner Housing
The HS-1RL is IP54 rated when the cable is attached. This means that liquids and dusts will
not penetrate into the housing, however, the scanner should not be submerged in water or
other liquids. It is also good practice to dampen the cleansing cloth vs. spraying the scanner
directly.
The HS-1RL housing is compatible with the following medical grade cleaners:
Sani-Cloth® HB
Sani-Cloth® Plus
Hydrogen Peroxide
CaviWipes™
409® Glass and Surface Cleaner
Windex® Blue
Clorox® Bleach (100%)
Isopropyl Alcohol
Gentle dish soap and water
Caution!
Do not submerge the imager in water.
Do not use abrasive wipes or tissues on the imager’s window –
abrasive wipes may scratch the window.
Never use solvents (e.g., acetone, benzene, ether,
or phenol-based agents) on the housing or window –
solvents may damage the finish or the window.
Page 62

HS-1RL User’s Manual Page 62
Interface Cable
Inspect the imager’s interface cable and connector for wear or other signs of damage. A badly
worn cable or damaged connector may interfere with scanner operation.
Should the cable be damaged, the cable can be replaced in the field.
Note: The use of non-JADAK cables voids the warranty, only a JADAK cable can be used to
keep the IP54 rating.
Replacing the Interface Cable
To Replace the JADAK HS-1RL Interface Cable:
1. Turn the power to the host system OFF.
2. Disconnect the imager’s cable from the terminal or computer.
3. Locate the small hole underneath a triangular label on the bottom side of the hand scanner
near the cable connection point. This is the cable release.
4. Straighten one end of a paper clip.
5. Insert the straight end of the paper clip into the small hole and press in. This depresses the
retention tab, releasing the connector. Pull the connector out while maintaining pressure on the
paper clip. When the connector is free, remove the paper clip.
6. Replace with the new cable. Insert the connector into the opening and press firmly. The
connector is keyed to go in only one way and will click into place.
Page 63

HS-1RL User’s Manual Page 63
11 - Customer Support
Obtaining Technical Assistance or Factory Service
JADAK provides assistance and service for all its products. To obtain warranty or non-warranty
service, return the unit to JADAK (postage paid) with a copy of the dated purchase record
attached. Contact the appropriate location below to obtain a Return Material Authorization
number (RMA #) before returning the product.
If you need assistance installing or troubleshooting your scanner, please contact the JADAK
office in your area.
North America
Telephone: +1 315.701.0678
E-mail: [email protected]
Europe
Telephone +49 89 31 707 100
Fax: +31 (0)76-522-4747
E-mail: [email protected]
Asia Pacific
Telephone +86 512.6283.7080
E-mail: [email protected]
Page 64

HS-1RL User’s Manual Page 64
Limited Warranty
JADAK LLC (“JADAK”) warrants the HS-1RL to be free from defects in materials and workmanship and
to conform to JADAK’s published specifications applicable to the products purchased at the time of
shipment. This warranty does not cover the interface cable and does not include any JADAK product
which is (i) improperly installed or used; (ii) damaged by accident or negligence, including failure to
follow the proper maintenance, service, and cleaning schedule; or (iii) damaged as a result of: (A)
Modification or alteration by the purchaser or other party, (B) Excessive voltage or current supplied to or
drawn from the interface connections, (C) Static electricity or electro-static discharge, (D) Operation
under conditions beyond the specified operating parameters, or (E) Repair or service of the product by
anyone other than JADAK or its authorized representatives.
This warranty shall extend from the time of shipment for the duration published by JADAK for the
product at the time of purchase (“Warranty Period”). Any defective product must be returned (at
purchaser’s expense) during the Warranty Period to JADAK factory for inspection. No product will be
accepted by JADAK without a Return Materials Authorization, which may be obtained by contacting
JADAK. In the event that the product is returned to JADAK within the Warranty Period and JADAK
determines to its satisfaction that the product is defective due to defects in materials or workmanship,
JADAK, at its sole option, will either repair or replace the product without charge, except for return
shipping to JADAK.
EXCEPT AS MAY BE OTHERWISE PROVIDED BY APPLICABLE LAW, THE FOREGOING
WARRANTY IS IN LIEU OF ALL OTHER COVENANTS OR WARRANTIES, EITHER EXPRESSED OR
IMPLIED, ORAL OR WRITTEN, INCLUDING, WITHOUT LIMITATION, ANY IMPLIED WARRANTIES OF
MERCHANTABILITY OR FITNESS FOR A PARTICULAR PURPOSE.
JADAK’S RESPONSIBILITY AND PURCHASER’S EXCLUSIVE REMEDY UNDER THIS WARRANTY IS
LIMITED TO THE REPAIR OR REPLACEMENT OF THE DEFECTIVE PRODUCT WITH NEW OR
REFURBISHED PARTS. IN NO EVENT SHALL JADAK BE LIABLE FOR INDIRECT, INCIDENTAL, OR
CONSEQUENTIAL DAMAGES, AND, IN NO EVENT, SHALL ANY LIABILITY OF JADAK ARISING IN
CONNECTION WITH ANY PRODUCT SOLD HEREUNDER (WHETHER SUCH LIABILITY ARISES
FROM A CLAIM BASED ON CONTRACT, WARRANTY, TORT, OR OTHERWISE) EXCEED THE
ACTUAL AMOUNT PAID TO JADAK FOR THE PRODUCT. THESE LIMITATIONS ON LIABILITY SHALL
REMAIN IN FULL FORCE AND EFFECT EVEN WHEN JADAK MAY HAVE BEEN ADVISED OF THE
POSSIBILITY OF SUCH INJURIES, LOSSES, OR DAMAGES. SOME STATES, PROVINCES, OR
COUNTRIES DO NOT ALLOW THE EXCLUSION OR LIMITATIONS OF INCIDENTAL OR
CONSEQUENTIAL DAMAGES, SO THE ABOVE LIMITATION OR EXCLUSION MAY NOT APPLY TO
YOU.
All provisions of this Limited Warranty are separate and severable, which means that if any provision is
held invalid and unenforceable, such determination shall not affect the validity of enforceability of the
other provisions hereof. Use of any peripherals not provided by the manufacturer may result in damage
not covered by this warranty. This includes but is not limited to: cables, power supplies, cradles, and
docking stations. JADAK extends these warranties only to the first end users of the products. These
warranties are non-transferable. The duration of the limited warranty for the HS-1RL is for one (1) year.
Page 65

HS-1RL User’s Manual Page 65
Compliance and IP Notices
Statement of Agency Compliance
Model Number: HS-1RL
FCC ID: QV5HS1RL
IC: 5407A-HS1RL
EU: CE
The product is designed to support the following regulatory and safety standards as a standalone
unit. The end user will need to verify general EMC compliance as implemented in their host
system.
Federal Communication Commission (FCC) and Industrie Canada
(IC) Compliance Information Statement
This device complies with FCC Rules Part 15 and with Industry Canada license-exempt RSS
standard(s). Operation is subject to two conditions: (1) This device may not cause harmful
interference, and (2) this device must accept any interference that may be received or that may
cause undesired operation.
Le présent appareil est conforme aux CNR d’Industrie Canada applicables aux appareils radio
exempts de licence. L’exploitation est autorisée aux deux conditions suivantes: (1) l’appareil ne
doit pas produire de brouillage, et (2) l’utilisateur de l’appareil doit accepter tout brouillage
radioélectrique subi, même si le brouillage est susceptible d’en compromettre le fonctionnement.
This equipment has been tested and found to comply with the limits for a Class B digital device,
pursuant to part 15 of the FCC Rules. These limits are designed to provide reasonable protection
against harmful interference in a residential installation. This equipment generates, uses and can
radiate radio frequency energy and, if not installed and used in accordance with the instructions,
may cause harmful interference to radio communications. However, there is no guarantee that
interference will not occur in a particular installation. If this equipment does cause harmful
interference to radio or television reception, which can be determined by turning the equipment
off and on, the user is encouraged to try to correct the interference by one or more of the
following measures:
• Reorient or relocate the receiving antenna.
• Increase the separation between the equipment and receiver.
• Connect the equipment into an outlet on a circuit different from that to which the
receiver is connected.
• Consult the dealer or an experienced radio/TV technician for help.
This Class B digital apparatus complies with Canadian ICES-003.
Cet appareil numerique de la classe B est conforme a la norme NMB-003 du Canada.
Changes or modifications to this equipment not expressly approved by the party responsible for
compliance could void the user’s authority to operate the equipment.
Page 66

HS-1RL User’s Manual Page 66
To comply with FCC and IC RF exposure compliance requirements, the entire device outer
surface may be contacted by operators during normal operation; the device housing provides
sufficient spacing for safety. The device must not be co-located or operated in conjunction with
any other antenna or transmitter.
Pour se conformer aux exigences de conformité de la FCC et de l'IC en matière d'exposition aux
radiofréquences, les utilisateurs peuvent entrer en contact avec toute la surface extérieure du
dispositif au cours de son fonctionnement normal. le boîtier de l'appareil offre un espacement
suffisant pour la sécurité. L'appareil ne doit pas être co-localisé ou utilisé en conjonction avec
une autre antenne ou un autre émetteur.
Responsible Party: Novanta
Address: 125 Middlesex Turnpike, Bedford, MA 01730, USA
Internet Contact Information: www.novanta.com
Page 67

HS-1RL User’s Manual Page 67
Page 68

HS-1RL User’s Manual Page 68
Appendices
Appendix A - Command Format
The HS-1RL accepts a wide range of configuration commands. Commands can be sent to the
imager wither by scanning menu bar symbol or via Serial commands sent from the host machine.
The HS-1RL command format is.
Send Command: #<parameter><space><argument><specifier>
Where:
Parameter: Command
Argument: Value to be set, if applicable
Specifier: Character to designate action to be taken.
Specifier
Action
!
Save value to RAM
.
Save value to ROM
@
Save all current settings to custom
defaults
?
Query current value
*
Query range
All available commands are listed on the following pages as well as a brief description of what
the parameter choices mean. Some commands require further elaboration that can be found in
the relevant sections in the guide.
For example, the command to enable reading of Code 128 barcode symbols is
“128ENAB 1”. The full command to apply this setting to ROM is:
#128ENAB 1.
Throughout this manual, the serial command for each setting is shown directly below the
corresponding barcode menu symbol. Additionally, all commands are shown in table A1-2.
Upon reception of the special command “#HELP”, the imager will output all its commands serially
to the host computer, in the format shown in table A1-1. This is a very helpful way to see what
commands are supported by the firmware version that you are using, and to archive the imager
configuration.
Page 69

HS-1RL User’s Manual Page 69
Query Commands
This section will describe in more detail how to use the query commands.
Several special characters can be used to query the device about its settings:
^ What is the default value for the setting?
? What is the device’s current ROM value for the setting?
% What is the device’s current RAM value for the setting?
* What is the range of possible values for the setting?
Examples:
In the following examples, a bracketed notation [ ] depicts a non-displayable response.
Query Goal: What is the range of possible values for the Code 128 Max Length?
Send: #128MAXL *[CR]
Response: #0-55[CR]
Query Goal: What is the default value for the Code 128 Max Length?
Send: #128MAXL ^[CR]
Response: #55[CR]
Page 70

HS-1RL User’s Manual Page 70
Table A1-1: Example Output part from the “HELP” command
#Cmds Description RAM ROM Default Range
#-----------------------------------------------------------------------------------------#HELP Display command list N/A N/A N/A N/A
#DEFAULT Restore All Settings To Custom Defaults N/A N/A N/A N/A
#DEFFACT Restore All Settings To Factory Defaults N/A N/A N/A N/A
#DNLDAPP Download a firmware (*.moc) file via XModem N/A N/A N/A N/A
#REVSOFT Request Firmware revision information N/A N/A N/A N/A
#REVTIME Request Time and Date of build information N/A N/A N/A N/A
#ALLENAB Enable all Symbologies N/A N/A N/A N/A
#COMENAB Enable Composite Code 0 0 0 0-1
#COMMAXL Composite Code Max Symbol Length 2435 2435 2435 1-2435
#COMMINL Composite Code Min Symbol Length 1 1 1 1-2435
#128DEFA Default Code 128 Parameters N/A N/A N/A N/A
#128ENAB Enable Decoding Code 128 1 1 1 0-1
#128MAXL Max Code 128 Symbol Length 55 55 55 0-55
#128MINL Min Code 128 Symbol Length 0 0 0 0-55
#ISBT128 Enable ISBT-128 0 0 0 0-1
#C39DEFA Default Code 39 Parameters N/A N/A N/A N/A
#C39ASCI Code 39 Full ASCII Mode 0 0 0 0-1
#C39CHEC Code 39 Check Digit 0=none 1=req 2=req+xmit 0 0 0 0|1|2
#C39ENAB Enable Code 39 Decoding 1 1 1 0-1
#C39MAXL Max Code 39 Symbol Length 48 48 48 0-48
#C39MINL Min Code 39 Symbol Length 0 0 0 0-48
#C39CONV convert C39 to C32 Pharmacode 0 0 0 0-1
#C39TRIO Code 39 Trioptic 0 0 0 0-1
#CBRDEFA Default Codabar Parameters N/A N/A N/A N/A
#CBRENAB Enable Decoding Codabar 1 1 1 0-1
#CBRMAXL Max Codabar Symbol Length 55 55 55 2-55
#CBRMINL Min Codabar Symbol Length 5 5 5 2-55
#I25DEFA Default I25 Parameters N/A N/A N/A N/A
#I25CHEC I25 Check Digit 0=none 1=req 2=req+xmit 0 0 0 0|1|2
#I25ENAB Enable Decoding I25 1 1 1 0-1
#I25MAXL Max I25 Symbol Length 30 30 30 2-55
#I25MINL Min I25 Symbol Length 6 6 6 2-55
#C11DEFA Default Code 11 Parameters N/A N/A N/A N/A
#C11CHEC Code 11 2-Char Check Digit 0 0 0 0-1
#C11ENAB Enable Decoding Code 11 0 0 0 0-1
#C11MAXL Code 11 Max Symbol Length 55 55 55 1-55
#C11MINL Code 11 Min Symbol Length 4 4 4 1-55
#C93DEFA Default Code 93 Parameters N/A N/A N/A N/A
#C93ENAB Enable Decoding Code 93 1 1 1 0-1
#C93MAXL Max Code 93 Symbol Length 55 55 55 0-55
#C93MINL Min Code 93 Symbol Length 0 0 0 0-55
Page 71

HS-1RL User’s Manual Page 71
Appendix A1-2 Command List and Standard Default Parameters
Command
Range (if applicable)
Default Value
Description
128DEFA
Default Code 128 parameters
128ENAB
0 to 1
1
Enable Decoding Code 128
128MAXL
0 to 55
55
Max Code 128 symbol length
128MINL
0 to 55
0
Min Code 128 symbol length
ALLENAB
0 to 1
1
Enable All Symbologies
AZTDEFA
Default Aztec parameters
AZTENAB
0 to 1
1
Enable Aztec Decoding
BEPLEVL
0 to 3
3
Set Beeper Level
C11CHEC
0 to 1
0
Enable Code 11 2-digit Check digit
C11DEFA
Default Code 11 parameters
C11ENAB
0 to 1
0
Enable Decoding Code 11
C11MAXL
1 to 55
55
Max Code 11 symbol length
C11MINL
1 to 55
4
Min Code 11 symbol length
C39ASCI
0 to 1
0
Enable Code 39 full ASCII mode
C39CHEC
0 to 1
0
Enable Code 39 Check digit
C39CONV
0 to 1
0
Enable conversion C39 to C32 Pharma
C39DEFA
Default Code 39 parameters
C39ENAB
0 to 1
1
Enable Code 39 Decoding
C39MAXL
0 to 48
48
Max Code 39 symbol length
C39MINL
0 to 48
0
Min Code 39 symbol length
C39TRIO
0 to 1
0
Enable Trioptic C39
C93DEFA
Default Code 93 parameters
C93ENAB
0 to 1
0
Enable Decoding Code 93
C93MAXL
0 to 55
55
Max Code 93 symbol length
C93MINL
0 to 55
0
Min Code 93 symbol length
CBRDEFA
Default Codabar Parameters
CBRENAB
0 to 1
0
Enable Codabar Decoding
CBRMAXL
2 to 55
55
Max Codabar symbol length
CBRMINL
2 to 55
5
Min Codabar symbol length
COMENAB
0 to 1
0
Enable Composite Code
COMMAXL
1 to 2435
2435
Composite Code Max Symbol Length
COMMINL
1 to 2435
1
Composite Code Min Symbol Length
DEFFACT
Restore All Settings To Factory Defaults
DEFAULT
Restore All Settings To Custom Defaults
DEVSERN
Show Device Serial Number
DLYGDRD
0 to 30000
0
Good Read Delay (in milliseconds)
DLYRERD
0 to 30000
600
Re-read Delay (in milliseconds)
DMXDEFA
Default Data Matrix Parameters
Page 72

HS-1RL User’s Manual Page 72
Command
Range (if applicable)
Default Value
Description
DMXENAB
0 to 1
1
Enable Data Matrix Decoding
DNLDAPP
Download a firmware file via XModem
E13DEFA
Default EAN13 parameters
E13ENAB
0 to 1
1
Enable Decoding EAN13
EA8DEFA
Default EAN8 Parameters
EA8ENAB
0 to 1
1
Enable EAN8 Decoding
ELEDDUR
0 to 1000
1
Error LED duration in milliseconds
EXP_MAX
1 to 7874
100
Max Exposure
EXPMODE
0, 2
0
Exposure Mode
EXPTARG
48 to 212
120
Target White Value
GS1ENAB
0 to 1
1
Enable/Disable GS1 Formatting
GS1EMUL
0 to 1
0
Enable Emulation from GS1 (0=Off, 1=128)
HELP
Show command list and settings
HOSTCFG
0 to 1
0
0 = CDC (COM Emulation),1 = HID Keyboard
I25CHEC
0 to 2
0
Enable I2of5 Check digit
I25DEFA
Default I2of5 parameters
I25ENAB
0 to 1
1
Enable I2of5 Decoding
I25MAXL
0 to 55
30
Max I2of5 Symbol Length
I25MINL
0 to 55
6
Min I2of5 Symbol Length
IMGMAXX
844
Get Image Width
IMGMAXY
640
Get Image Height
ISBT128
0 to 1
0
Enable ISBT-128 Concatenation
KBD_CTY
12 options
0
Keyboard Country Setting
LEDSPWR
0 to 3
3
Set illumination brightness
M25DEFA
Default Matrix 2 of 5 Parameters
M25ENAB
0 to 1
0
Enable Decoding Matrix 2 of 5
M25MAXL
1 to 55
55
Max Matrix 2 of 5 symbol length
M25MINL
1 to 55
4
Min Matrix 2 of 5 symbol length
MAXDEFA
Default MaxiCode parameters
MAXENAB
0 to 1
0
Enable MaxiCode
MPDDEFA
Default Micro PDF parameters
MPDENAB
0 to 1
0
Enable Micro PDF417 Decoding
MSICHEC
0 to 4
0
MSI Check Digit (0-4)
MSIDEFA
Default MSI Parameters
MSIENAB
0 to 1
0
Enable Decoding MSI
MSIMAXL
4 to 48
48
Max MSI Symbol Length
MSIMINL
4 to 48
4
Min MSI Symbol Length
MULTSYM
0 to 1
0
Multiple Symbol mode
NO_READ
0 to 1
0
Enable No Read message
PDFDEFA
Default PDF417 parameters
PDFENAB
0 to 1
1
Enable Decoding PDF417
Page 73

HS-1RL User’s Manual Page 73
Command
Range (if applicable)
Default Value
Description
PREBBLK
(B)
Barcode Prefix Block
PREBENA
0 to 1
1
Enable Barcode Prefix
QRCDEFA
Default QR Code parameters
QRCENAB
0 to 1
1
Enable QR Code Decoding
REVSOFT
Report Software revision
REVTIME
Report Build Time
RSEENAB
0 to 1
1
Enable RSS-Expanded (GS1 Databar Expanded)
RSLENAB
0 to 1
1
Enable RSS-Limited (GS1 Databar Limited)
RSSENAB
0 to 1
1
Enable RSS-14 (GS1 Databar)
SUFBBLK
[CR]
Barcode Suffix
SUFBENA
0 to 1
1
Enable Barcode Suffix
TRGMODE
0, 1
0
Trigger Mode 0=Single, 1=Presentation
TRGOFF
Software Trigger Off
TRGON
Software Trigger On
TRGTIME
0 to 300000
9900
Trigger Timeout (in milliseconds)
UE1ENAB
0 to 1
0
Enable UPC-E1 Decoding
UPADEFA
Default UPC-A parameters
UPAENAB
0 to 1
1
Enable UPC-A Decoding
UPAXMIT
0 to 1
1
Transmit UPC-A Enable Check digit
UPEDEFA
Default UPC-E parameters
UPEENAB
0 to 1
1
Enable UPC-E (0) Decoding
UPEEXPN
0 to 1
0
Enable UPC-E Expanded Decoding
UPEXMIT
0 to 1
1
Transmit UPC-E(0) Check digit
WINDECE
0 to 1
0
Enable Decode Windowing
WINDECB
0 to 639
384
Set Bottom boundary of decode window
WINDECL
0 to 843
338
Set Left boundary of decode window
WINDECR
0 to 843
506
Set Right boundary of decode window
WINDECT
0 to 639
256
Set Top boundary of decode window
XMITCID
0 to 2
0
Transmit Code ID (0-Off, 1-AIM ID, 2-Symbol ID )
Page 74

HS-1RL User’s Manual Page 74
Appendix A1-2 RFID Command List and Standard Default
Parameters
Command
Range (if applicable)
Default Value
Description
BEPLEVL
0 to 3
3
Beeper Volume
BEPSOND
0 to 7
Sound Beeper
KEYRATE
0 to 3
1
HID Keyboard Rate. 0=Slowest 3=Fastest
LEDINDC
0 to 4
LED Indicator 0-4
PRERBLK
(R)
RFID Prefix Block
PRERENA
0 to 1
1
Enable RFID Prefix
PSTTIME
0 to 3.600.000
0
RFID Timeout in Presentation in Milliseconds
RFIDDLY
0 to 5000
1000
RFID Re-Read Delay in Milliseconds
RFIDMIN
0 to 255
0
RFID Start Read Block Number
RFIDMAX
0 to 255
7
RFID End Read Block Number
RFIDMOD
0 to 2
0
RFID Mode 0 = Off, 1 = On
RFIDRBK
RFID Read Block of data to a tag
RFIDTMO
0 to 65535
1000
RFID Read/Write Block Timeout in ms
RFIDTXT
0 to 1
0
RFID Data Text Mode (0=binary, 1=Text)
RFIDUID
0 to 1
0
Little/Big Endian output of UID
RFIDWBK
RFID Write Block of data to a tag
SUFRBLK
[CR]
RFID Suffix
SUFRENA
0 to 1
1
Enable RFID Suffix
UIDONLY
0 to 1
1
Output the UID of an RFID tag only
VIBENAB
0 to 1
1
Enable Vibration
VIBRATE
0 to 2
Vibration Indicator 0-2
Page 75
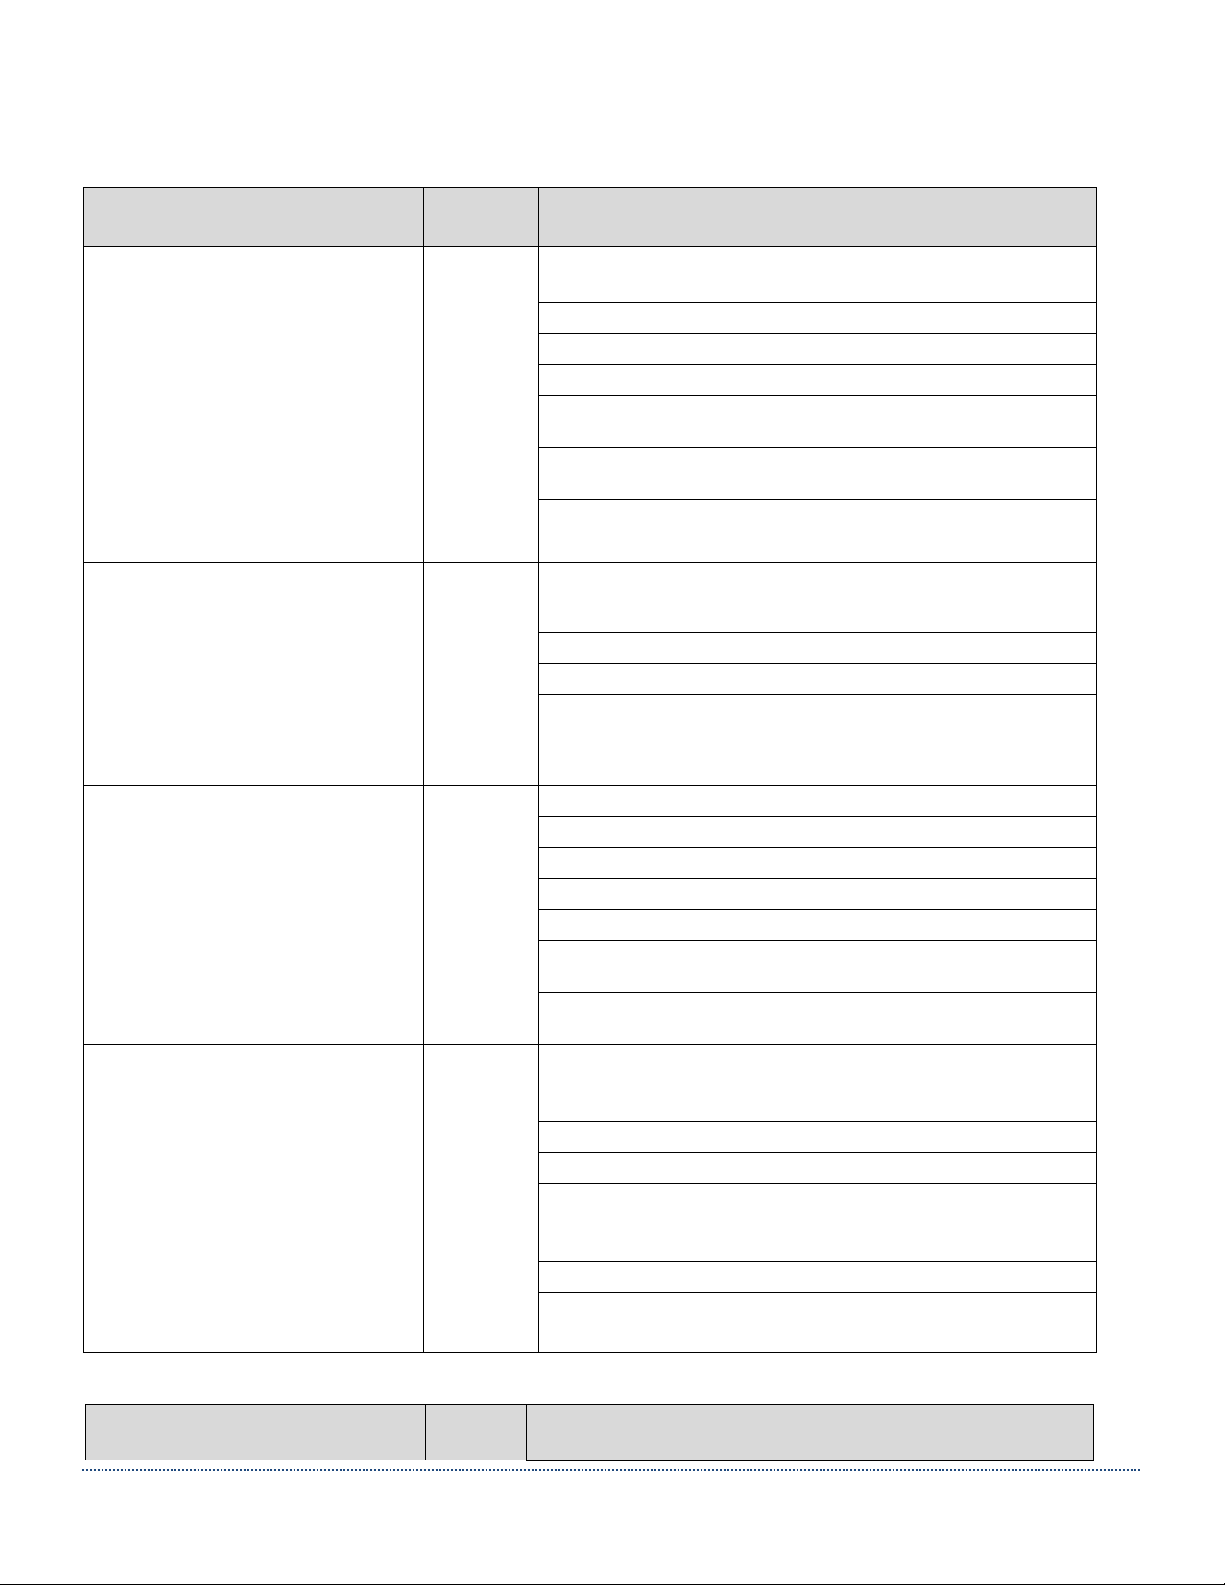
HS-1RL User’s Manual Page 75
Appendix B - AIM IDs
Barcode
AIM ID
AIM ID Modifiers
Code 39, Code 39 Full ASCII,
Code 32
A
0 No check character or Full ASCII processing.
1 Reader has checked one check character.
3 Reader has checked and stripped check character.
4 Reader has performed Full ASCII character conversion.
5 Reader has performed Full ASCII character conversion
and checked one check character.
7 Reader has performed Full ASCII character conversion
and checked and stripped check character.
Example: A Full ASCII bar code with check character W,
A+I+MI+DW, is transmitted as ]A7AIMID where 7 = (3+4).
Code 128, ISBT 128, ISBT 128
Concatenated, GS1-128, Coupon
(Code 128 portion)
C
0 Standard data packet, no Function code 1 in first symbol
position.
1 Function code 1 in first symbol character position.
2 Function code 1 in second symbol character position.
Example: A Code (EAN) 128 bar code with Function 1
character FNC1 in the first position, AIMID is transmitted as
]C1AIMID
Data Matrix
d
0 ECC 000-140, not supported.
1 ECC 200.
2 ECC 200, FNC1 in first or fifth position.
3 ECC 200, FNC1 in second or sixth position.
4 ECC 200, ECI protocol implemented.
5 ECC 200, FNC1 in first or fifth position, ECI protocol
implemented.
6 ECC 200, FNC1 in second or sixth position, ECI protocol
implemented.
UPC/EAN, Coupon (UPC portion)
E
0 Standard data packet in full EAN format, i.e. 13 digits for
UPC-A, UPC-E, and EAN-13 (not including supplemental
data).
1 Two digit supplemental data only.
2 Five digit supplemental data only.
3 Combined data packet comprising 13 digits from EAN-13,
UPC-A or UPC-E symbol and 2 or 5 digits from
supplemental symbol.
4 EAN-8 data packet.
Example: A UPC-A bar code 012345678905 is transmitted
as ]E00012345678905
Barcode
AIM ID
AIM ID Modifiers
Page 76

HS-1RL User’s Manual Page 76
GS1 DataBar Family
e
No option specified at this time. Always transmit 0. GS1
DataBar and GS1 DataBar Limited transmit with an Application
Identifier “01”.
Note: In GS1-128 emulation mode, GS1 DataBar is
transmitted using Code 128 rules (i.e., ]C1).
Example: A GS1 DataBar bar code 0110012345678902 is
transmitted as ]e00110012345678902.
Codabar
F
0 No check digit processing.
1 Reader has checked check digit.
3 Reader has stripped check digit before transmission.
Example: A Codabar bar code without check digit, 4123, is
transmitted as ]F04123
Code 93
G
0 No options specified at this time. Always transmit 0.
Example: A Code 93 bar code 012345678905 is transmitted
as ]G0012345678905
Code 11
H
0 Single check digit
1 Two check digits
3 Check characters validated but not transmitted.
Interleaved 2 of 5
I
0 No check digit processing.
1 Reader has validated check digit.
3 Reader has validated and stripped check digit.
Example: An I 2 of 5 bar code without check digit, 4123, is
transmitted as ]I04123
PDF417, Macro PDF417, Micro
PDF417
L
0 Reader set to conform to protocol defined in 1994 PDF417
Symbology specifications.
Note: When this option is transmitted, the receiver cannot
reliably determine whether ECIs have been invoked or
whether data byte 92DEC has been doubled in transmission.
1 Reader set to follow the ECI protocol (Extended Channel
Interpretation). All data characters 92DEC are doubled.
2 Reader set for Basic Channel operation (no escape
character transmission protocol). Data characters 92DEC are
not doubled.
Note: When decoders are set to this mode, unbuffered
Macro symbols and symbols requiring the decoder to convey
ECI escape sequences cannot be transmitted.
3 The bar code contains a GS1-128 symbol, and the first
codeword is 903-907, 912, 914, 915.
4 The bar code contains a GS1-128 symbol, and the first
codeword is in the range 908-909.
5 The bar code contains a GS1-128 symbol, and the first
codeword is in the range 910-911.
Example: A PDF417 bar code ABCD, with no transmission
protocol enabled, is transmitted as ]L2ABCD.
Page 77

HS-1RL User’s Manual Page 77
Barcode
AIM ID
AIM ID Modifiers
TLC 39
L2
MSI
M
0 Check digits are sent.
1 No check digit is sent.
Example: An MSI bar code 4123, with a single check digit
checked, is transmitted as]M14123
QR Code, MicroQR
Q
0 Model 1 symbol.
1 Model 2 / MicroQR symbol, ECI protocol not implemented.
2 Model 2 symbol, ECI protocol implemented.
3 Model 2 symbol, ECI protocol not implemented, FNC1
implied in first position.
4 Model 2 symbol, ECI protocol implemented, FNC1 implied
in first position.
5 Model 2 symbol, ECI protocol not implemented, FNC1
implied in second position.
6 Model 2 symbol, ECI protocol implemented, FNC1 implied
in second position.
Discrete 2 of 5, IATA 2 of 5
S
0 No options specified at this time. Always transmit 0.
Example: A D 2 of 5 bar code 4123, is transmitted as
]S04123
Maxicode
U
0 Symbol in Mode 4 or 5.
1 Symbol in Mode 2 or 3.
2 Symbol in Mode 4 or 5, ECI protocol implemented.
3 Symbol in Mode 2 or 3,
Aztec, Aztec Rune
z
0 Aztec symbol.
C Aztec Rune symbol.
Trioptic Code 39
X
0 No option specified at this time. Always transmit 0.
Example: A Trioptic bar code 412356 is transmitted as
]X0412356
Bookland EAN
X
0 No options specified at this time. Always transmit 0.
Example: A Bookland EAN bar code 123456789X is
transmitted as ]X0123456789X
ISSN EAN
X
0 No options specified at this time. Always transmit 0.
Example: An ISSN EAN bar code 123456789X is transmitted
as ]X0123456789X
Chinese 2 of 5, Matrix 2 of 5,
Korean 3 of 5, US Postnet, US
Planet, UK Postal, Japan Postal,
Australia Post, Netherlands KIX
Code, USPS 4CB/One Code/
Intelligent Mail, UPU FICS Postal
X
Page 78
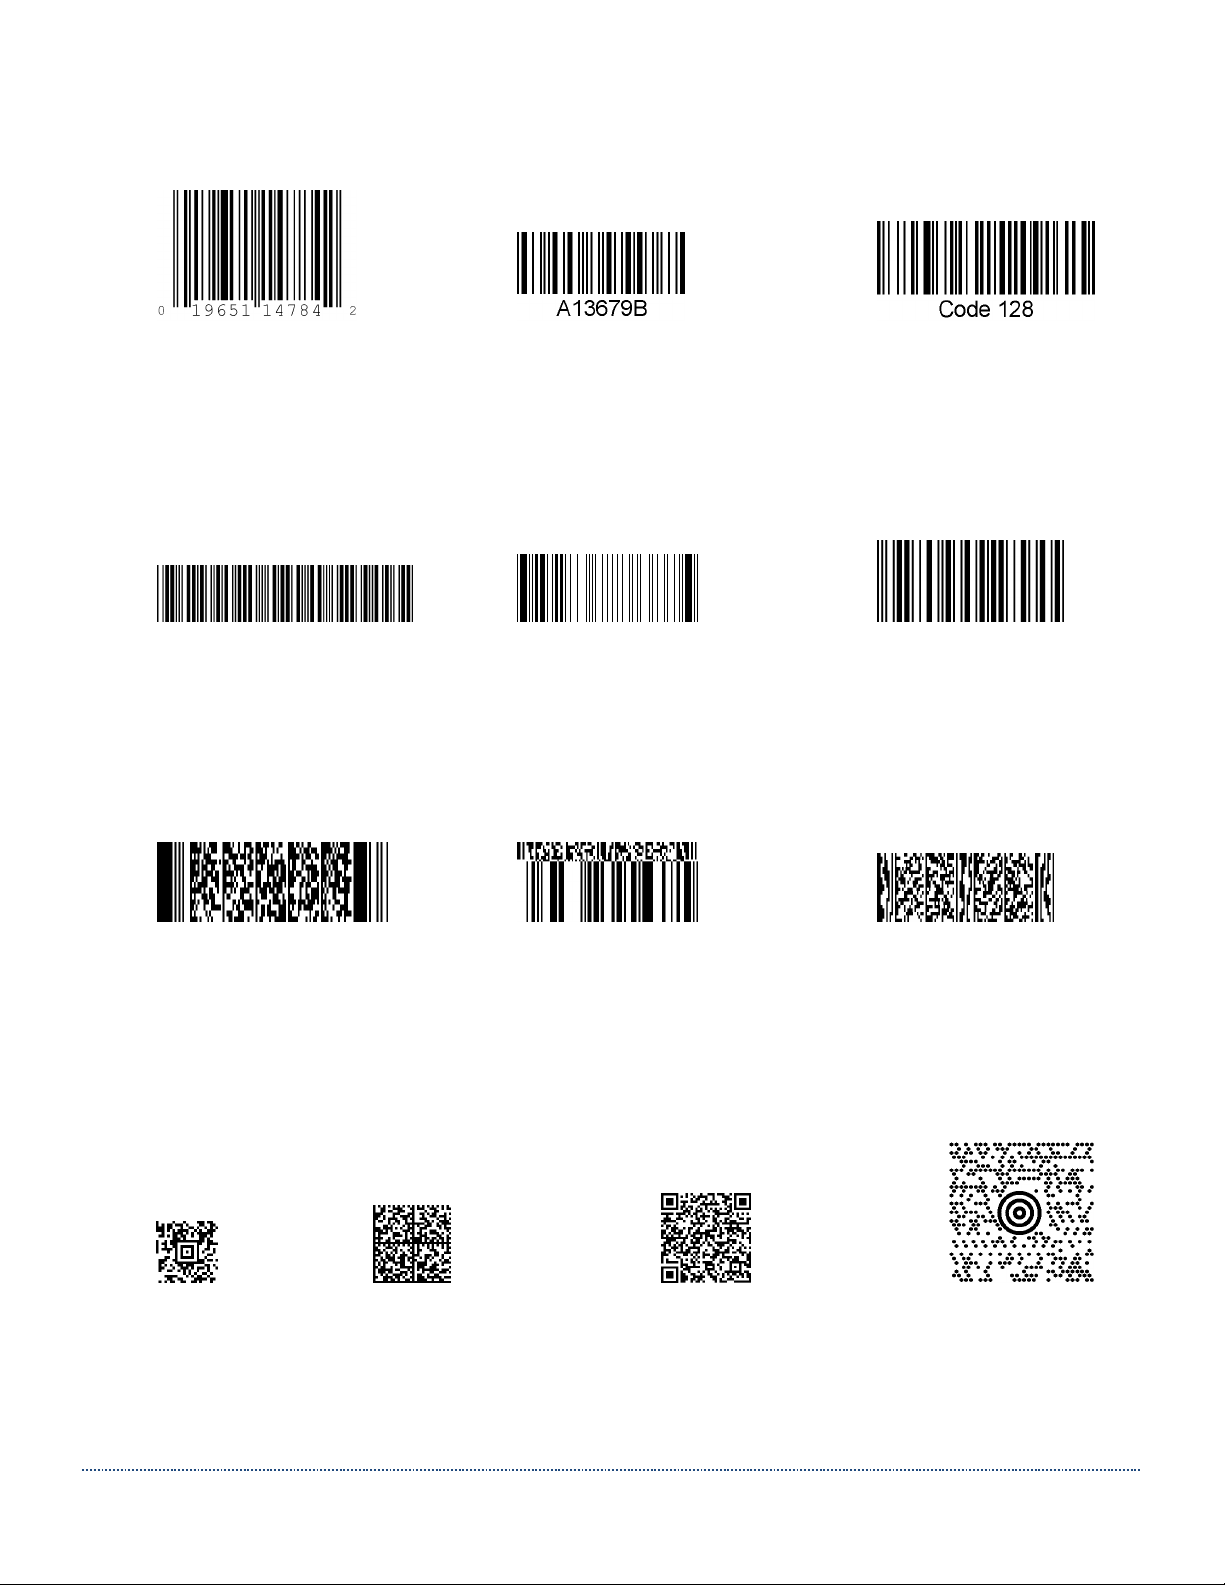
HS-1RL User’s Manual Page 78
Appendix C - Sample Bar Codes
UPC-A Codabar Code 128
Code 39 Code 93 Interleaved 2 of 5
PDF-417 Composite Code MicroPDF
Aztec Data Matrix QR Code MaxiCode
Page 79
HS-1RL User’s Manual Page 79
Appendix D - ASCII Conversion Chart
For these Imager engines, use the 2-digit Hex values to create an ASCII character.
E.g., to create an F, use ‘46’ and to create an f, use ‘66’. The first 32 characters are unprintable.
Dec
Hex
Char
Dec
Hex
Char
Dec
Hex
Char
Dec
Hex
Char
0
00
NUL
32
20
Space
64
40 @ 96
60 ` 1
01
SOH
33
21 ! 65
41 A 97
61
a
2
02
STX
34
22 “ 66
42 B 98
62 b 3
03
ETX
35
23 # 67
43 C 99
63 c 4
04
EOT
36
24 $ 68
44 D 100
64
d
5
05
ENQ
37
25 % 69
45 E 101
65 e 6
06
ACK
38
26 & 70
46 F 102
66 f 7
07
BEL
39
27 ‘ 71
47 G 103
67
g
8
08
BS
40
28 ( 72
48 H 104
68 h 9
09
HT
41
29 ) 73
49 I 105
69 i 10
0A
LF
42
2A * 74
4A J 106
6A
j
11
0B
VT
43
2B + 75
4B K 107
6B k 12
0C
FF
44
2C , 76
4C L 108
6C l 13
0D
CR
45
2D - 77
4D M 109
6D
m
14
0E
SO
46
2E . 78
4E N 110
6E n 15
0F
SI
47
2F / 79
4F O 111
6F o 16
10
DLE
48
30 0 80
50 P 112
70
p
17
11
DC1
49
31 1 81
51 Q 113
71 q 18
12
DC2
50
32 2 82
52 R 114
72 r 19
13
DC3
51
33 3 83
53 S 115
73
s
20
14
DC4
52
34 4 84
54 T 116
74 t 21
15
NAK
53
35 5 85
55 U 117
75 u 22
16
SYN
54
36 6 86
56 V 118
76
v
23
17
ETB
55
37 7 87
57 W 119
77 w 24
19
CAN
56
38 8 88
58 X 120
78
x
25
19
EM
57
39 9 89
59 Y 121
79
y
26
1A
SUB
58
3A : 90
5A Z 122
7A z 27
1B
ESC
59
3B ; 91
5B [ 123
7B { 28
1C
FS
60
3C < 92
5C \ 124
7C
|
29
1D
GS
61
3D = 93
5D ] 125
7D } 30
1E
RS
62
3E > 94
5E ^ 126
7E ~ 31
1F
US
63
3F ? 95
5F _ 127
7F
DEL
Page 80

HS-1RL User’s Manual Page 80
Appendix D – Extended ASCII Conversion Chart
Dec
Hex
Char
Dec
Hex
Char
Dec
Hex
Char
Dec
Hex
Char
128
80 € 160
A0 192
C0 À 224
E0 à 129
81 □ 161
A1 ¡ 193
C1 Á 225
E1
á
130
82 ‚ 162
A2 ¢ 194
C2 Â 226
E2 â 131
83 ƒ 163
A3 £ 195
C3 Ã 227
E3 ã 132
84 „ 164
A4 ¤ 196
C4 Ä 228
E4
ä
133
85 … 165
A5 ¥ 197
C5 Å 229
E5 å 134
86 † 166
A6 ¦ 198
C6 Æ 230
E6 æ 135
87 ‡ 167
A7 § 199
C7 Ç 231
E7
ç
136
88 ˆ 168
A8 ¨ 200
C8 È 232
E8 è 137
89 ‰ 169
A9 © 201
C9 É 233
E9 é 138
8A Š 170
AA ª 202
CA
Ê
234
EA
ê
139
8B ‹ 171
AB « 203
CB
Ë
235
EB ë 140
8C Π172
AC
¬
204
CC
Ì
236
EC ì 141
8D □ 173
AD
205
CD
Í
237
ED
í
142
8E Ž 174
AE ® 206
CE
Î
238
EE î 143
8F □ 175
AF ¯ 207
CF Ï 239
EF ï 144
90 □ 176
B0 ° 208
D0 Ð 240
F0
ð
145
91 ‘ 177
B1 ± 209
D1 Ñ 241
F1 ñ 146
92 ’ 178
B2 ² 210
D2 Ò 242
F2 ò 147
93 “ 179
B3 ³ 211
D3 Ó 243
F3
ó
148
94 ” 180
B4 ´ 212
D4 Ô 244
F4 ô 149
95 • 181
B5 µ 213
D5 Õ 245
F5 õ 150
96 – 182
B6 ¶ 214
D6 Ö 246
F6
ö
151
97 — 183
B7 · 215
D7 × 247
F7 ÷ 152
98 ˜ 184
B8 ¸ 216
D8 Ø 248
F8 ø 153
99 ™ 185
B9 ¹ 217
D9 Ù 249
F9
ù
154
9A Š 186
BA º 218
DA
Ú
250
FA
ú
155
9B › 187
BB » 219
DB
Û
251
FB û 156
9C œ 188
BC
¼
220
DC
Ü
252
FC
ü
157
9D □ 189
BD
½
221
DD
Ý
253
FD ý 158
9E Ž 190
BE ¾ 222
DE
Þ
254
FE þ 159
9F Ÿ 191
BF ¿ 223
DF ß 255
FF
ÿ
Page 81

JADAK HS-1RL UM 5/30/2019
 Loading...