

Jaclo G80 User Manual

Installation Instructions
Luxury Grab Bars
Product Number G20, G21, G30, G33, G60, G61 and G70 Series
They contain valuable product warranty information for future reference.
JA CLO .COM
GR AB BARS | PG 1 REVISED JULY '08
IMPORTANT:
Please leave these instructions with the installed grab bar.
See page three for finish maintenance.
ja c l o i nd u s tr i e s | 129 De r m ody Str eet C r a nfor d, NJ 07016
p 9 0 8.653 . 4433 | 8 00.85 2 .3906 f 908 . 653.1 7 17 | 8 0 0.852 . 4133
Important Information:
1 › Our 1-1/4" grab bars have been designed and tested to meet or
exceed the standards required for CABO/ANSI 117.1. They have
been designed to be attached to a wall using the encloded
#14 x 3
plywood adequately supported by metal or wood studs. It is the
responsibility of the installer (builder or architect) to insure that
the correct hardware is used and that the wall construction is
adequate. Any other fasteners may not meet
CABO/ANSI 117.1 standards.
2 › 1" personal bars do not meet CABO/ANSI 117.1
standards and are used only at the risk of the installer.
We assume no responsibility for improper installation
or use of an improper grab bar for the location.
" long stainless steel screws into a wood stud or 1"
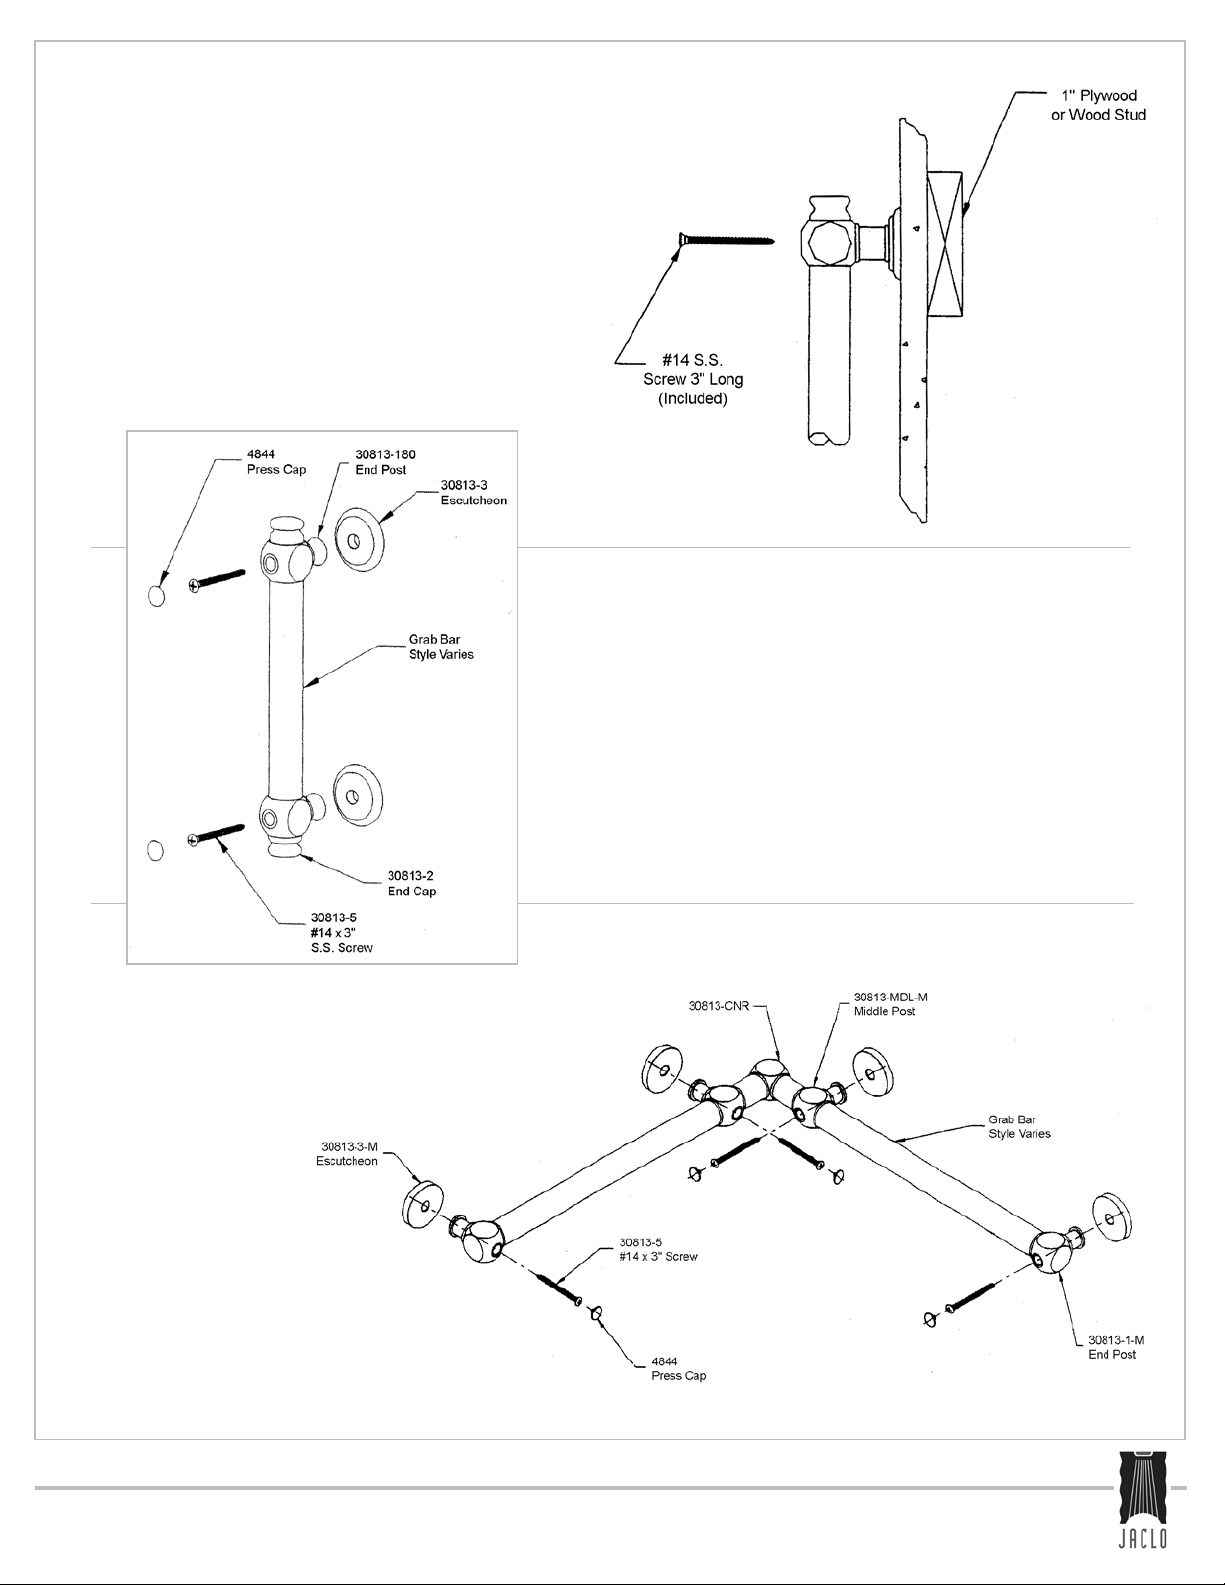
Installation Instructions for Straight Bars:
1 › Mark center of holes for mounting screws.
2 › Drill 1/8" diameter holes.
3 › Place escutcheon on post hubs and place on wall. Drive #14 x 3"
screw into 1" plywood or wood stud, DO NOT TIGHTEN.
Note: Soap applied to screw threads will reduce the power required.
4 › Repeat for other side.
5 › Make sure grab bar is aligned properly, then tighten all screws.
6 › Install press caps.
7 › Install handshower if supplied.
Installation Instructions for Inside Corner Grab Bars:
1 › Mark center of holes for mounting screws on the
two post hubs closest to the corner.
2 › Drill 1/8" diameter holes.
3 › Place escutcheon on the two post hubs closet
to the corner.
Drive #14 x 3
screw into 1
plywood or wood stud,
DO NOT TIGHTEN.
Soap applied to screw threads
will reduce the power required.
4 › Place escutcheon on the other post hubs.
Level bar, drill holes and install screws.
5 › Make sure grab bar is aligned properly,
then all srews.
6 › Install press caps.
JA CLO .COM
|
GR AB BARS
PG 2
"
"
Note:
 Loading...