

V03-12-2020
EN – FR – DE – NL – RU – ES – IT - AR

2

3
EN-
Varia circular blade slicer ............................................................................................................. 5
Translation of original user instructions
FR-
Trancheuse à disque Varia ........................................................................................................... 17
Notice d’utilisation originale
DE- Übersetzung der Originalanleitung
Kreismessermaschine Varia ........................................................................................................ 29
NL- Vertaling van de originele gebruikershandleiding
Snijmachine met schijf Varia ........................................................................................................ 41
RU- Перевод оригинального руководства по эксплуатации
Дисковая хлеборезка Varia ........................................................................................................ 53
ES- Traducción del manual de uso original
Cortadora de disco Varia
........................................................................................................................................................ Erre
ur ! Signet non défini.
IT- Traduzione delle informazioni sull'utilizzo originali
Taglierina a dischi Varia ............................................................................................................... 77
رﻧﺳﻲ - ﺗرﺟﻣﺔ د ﻟ ﯾل اﻻﺳﺗﺧد ا م اﻷﺻﻠﻲ
ﻗطﺎﻋﺔ ﺑ ﻘرص Varia ............................................................................................................................... 89

4

5
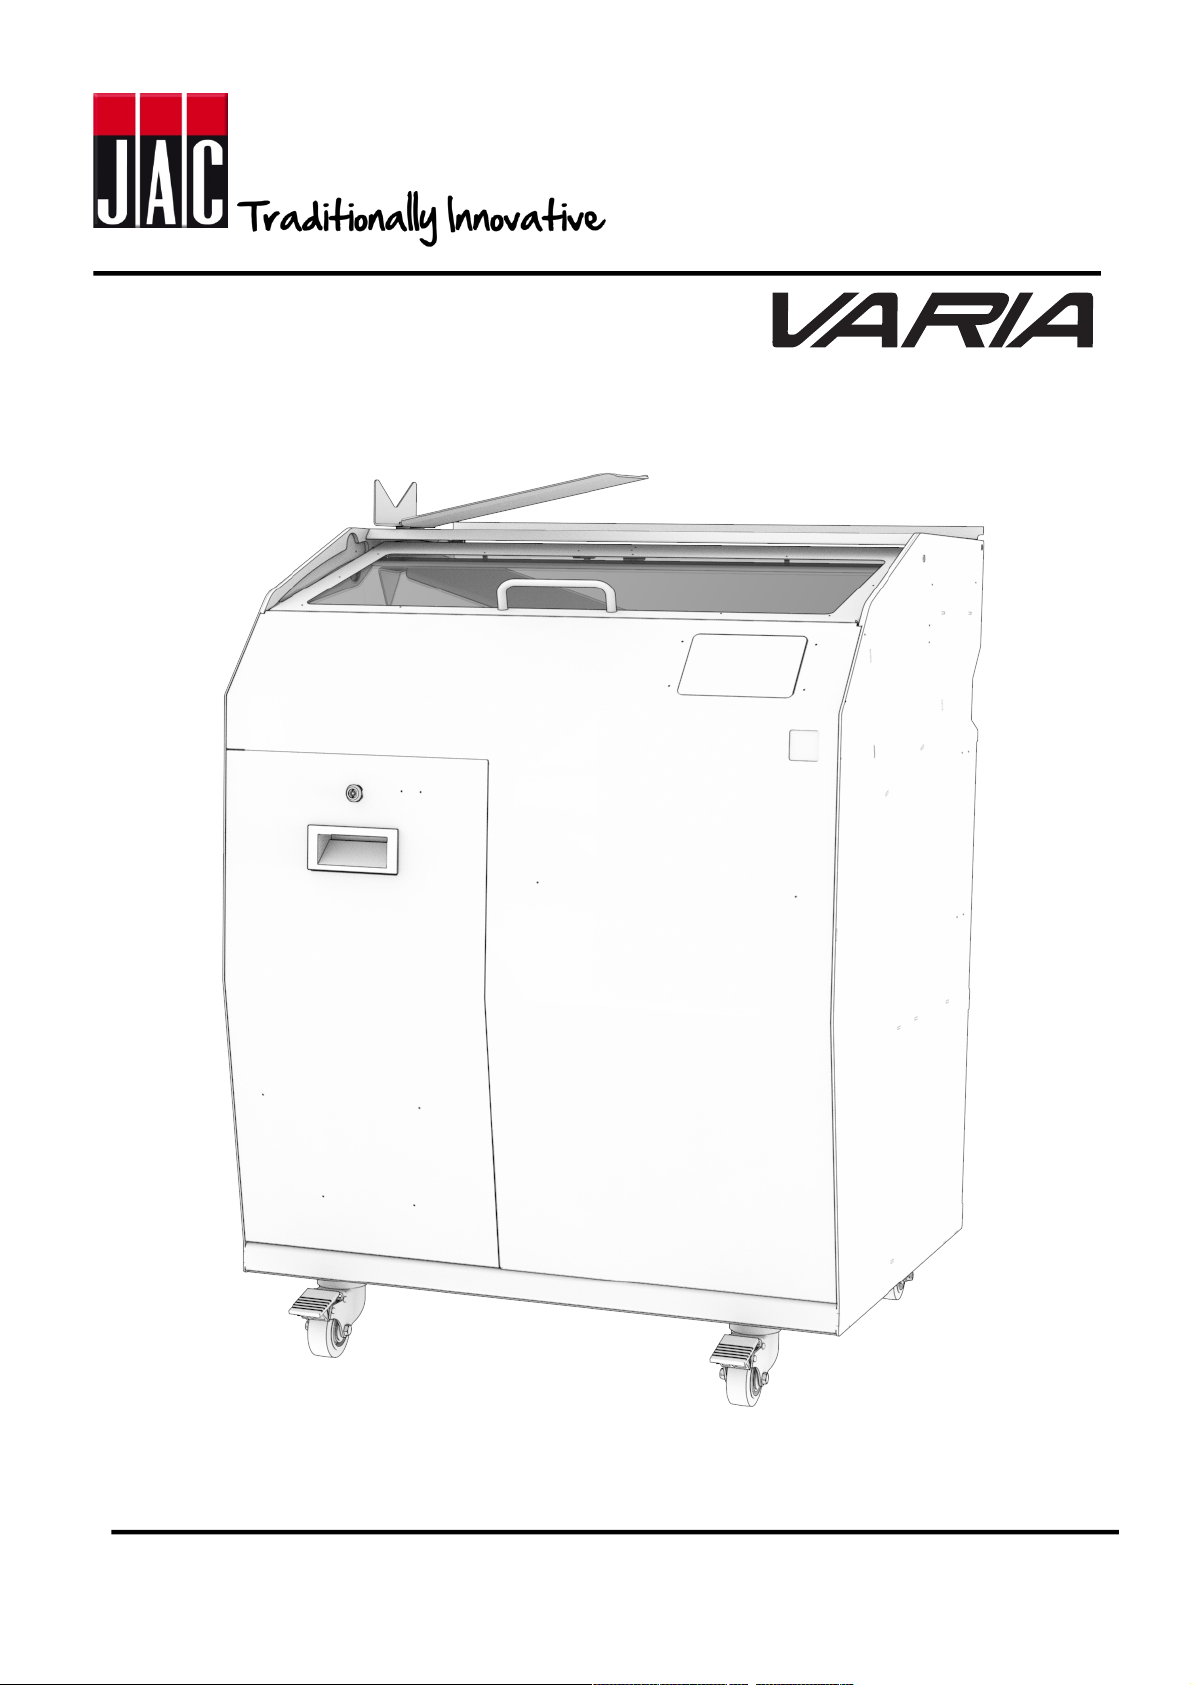
Varia Pro circular blade slicer
1! BEFORE COMMISSIONING .................................................................................... 6!
2! WARRANTY ............................................................................................................. 6!
3! WARNINGS .............................................................................................................. 7!
4! TECHNICAL SPECIFICATIONS .............................................................................. 8!
4.1! Technical specifications ............................................................................................. 8!
4.2! Details of materials in direct contact with dough .................................................... 8!
5! INSTALLATION AND COMMISSIONING ................................................................ 9!
5.1! Unpacking the machine .............................................................................................. 9!
5.2! Location ....................................................................................................................... 9!
5.3! Electrical connection .................................................................................................. 9!
5.4! Commissioning ......................................................................................................... 10!
5.5! Hazard ........................................................................................................................ 10!
6! CONTROL AND SAFETY DEVICES ...................................................................... 10!
6.1! Controls ..................................................................................................................... 10!
6.2! Work area ................................................................................................................... 10!
6.3! Safety features .......................................................................................................... 10!
7! OPERATION ........................................................................................................... 11!
8! MAINTENANCE ...................................................................................................... 12!
8.1! Daily, by a trained user ............................................................................................. 12!
8.2! Every 25,000 loaves and/or at least once a year, by an approved agent. ............ 12!
8.3! Blade replacement .................................................................................................... 12!
9! CONSUMABLES .................................................................................................... 13!
9.1! List of CONSUMABLES ............................................................................................ 13!
10! MALFUNCTIONS ................................................................................................ 14!
11! ERROR CODES .................................................................................................. 15!
12! LIST OF COMPONENTS IN ILLUSTRATIONS .................................................. 16!
English

6
1 BEFORE COMMISSIONING
Thank you for choosing a JAC system. It is essential that you read these instructions
before installing and commissioning this machine. This will enable you to protect yourself and
avoid damaging your machine.
These instructions refer to various illustrations in order to make them easier to understand.
These illustrations are at the end of the instructions. Please refer to them whenever you see
the following symbols: (fig.x, n°y).
To ensure that your machine gives you full satisfaction over the coming years, we
invite you to familiarise yourself with the following advice:
- Enlist the help of your approved agent for installation, commissioning and service
support.
- In order to be covered by the 5-year warranty (see terms and conditions set out below),
please have your dealer fill in the service booklet when your machine is being installed. This
service booklet is at the back of your machine.
English
2 WARRANTY
All JAC products are covered by a 5-year warranty.
This warranty is valid for all parts on your machine, including electronic components but
excluding consumables. This warranty takes effect on the date the equipment is installed.
Subject to the following restrictive conditions:
- equipment acquired from an approved dealer;
- installation carried out by an approved agent;
- equipment used in accordance with the instructions for use and for the intended purpose
for which it was manufactured;
- equipment serviced on a daily basis in compliance with the instructions for use;
- regular servicing by the approved agent in compliance with service specifications, with at
least one service a year (servicing chargeable to the user);
- exclusive use of genuine JAC parts.
If there is no record of servicing by an approved agent and/or if the service booklet
has not been filled in correctly, warranty cover will be limited to one year.
This warranty does not cover:
- replacement of consumables (sect. 9);
- parts not accepted as defective by our company;
- problems due to improper use of the equipment;
- problems due to installation not carried out by an approved agent;
- parts or problems due to transit damage or improper handling.
English
7
Repair and/or replacement of defective parts during the warranty period does not
bring about an extension of said warranty.
3 WARNINGS
It is most important that these user instructions be kept with the machine for any future
reference. Should this machine be sold or transferred to another user, please ensure that the
user instructions are handed over such that this new user can be familiarised with its operation
and warnings associated with it.
These warnings are given for your safety and that of others. We would therefore ask
you to read them carefully before installing and using the machine.
This machine has been designed for use by authorised adults. Please therefore ensure
that children do not touch it or use it as a toy.
This machine is intended exclusively for trade use.
It is dangerous to modify or attempt to modify the specifications of this machine.
After having installed this machine, please ensure that it is not standing on the power cable.
Follow the instructions given for its use.
This machine must be stored and used in an indoor room, protected from moisture and
heat.
This machine must be adequately illuminated to operate it.
The noise level of this machine does not exceed 75 dB(A) in accordance with standard EN
ISO 3744.
This machine must be used by one person at a time (unless instructed otherwise).
This machine is intended for slicing baked bread which has cooled down.
This machine is not intended for the following breads and materials:
- stale bread;
- frozen or partially thawed bread;
- non-edible products such as wood, plastic and similar materials;
- any food that is not included in the bread and loaf cake category.
The machine may be damaged when cutting bread or materials for which the machine
is not intended.
Always disconnect the mains supply before cleaning the machine inside/outside and
when carrying out maintenance.
This machine is heavy. Take all necessary safety precautions when handling it.
English
8
4 TECHNICAL SPECIFICATIONS
Stainless steel exterior
optional
Touch keypad
optional
Bag holder
optional
Pie-holding system
optional
Special colour
optional
VMP800
VMP1000
Height (mm)
1135
1135
Width (mm)
790
990
Depth (mm)
760
760
Entry channel length (mm)
380
480
Infeed channel width (mm)
340
340
Infeed channel height (mm)
16 (20)
16 (20)
Packaging (mm)
1250 x 1200 x 800
1250 x 1200 x 800
Net weight (kg)
230
250
Net weight + packing (kg)
260
280
Motor power rating (kW)
0.75
0.75
Motor type
Three-phase
Three-phase
220 V - 50 Hz (A)
7
7
380 V - 50 Hz (A)
N/A
N/A
Capacity (revolutions per
minute)
120 to 240
120 to 240
Blade diameter (mm)
420
420
Noise level (dB)
<75
<75
4.1 Technical specifications
4.2 Details of materials in direct contact with dough
Infeed table: STAINLESS STEEL 5WL 430
Claw housing: STAINLESS STEEL 430
Claw: STAINLESS STEEL 430
Blade: TEFLON
Outfeed table: STAINLESS STEEL 5WL 430
Bread-holding arm: STAINLESS STEEL 430
Pie-holding system (optional): STAINLESS STEEL 430
Bagger: STAINLESS STEEL 430
English

9
5 INSTALLATION AND COMMISSIONING
5.1 Unpacking the machine
Machines are delivered from our works on pallets, strapped and protected with cardboard. First of all,
the packaging must be examined and any damage caused in transit must be declared directly to the
carrier.
A. Remove the cardboard and the packaging bag from the machine.
B. Remove straps, taking particular care when they are released by cutting.
C. Detach the machine from its pallet by removing the wooden battens wedging the castors.
D. Take the machine off the pallet. Make sure you do this with at least two people in order to
lower it as gently as possible onto the floor.
After unpacking the machine, check that it has not been damaged in transit. Notify us
of any discrepancies.
5.2 Location
In order to achieve excellent performance and long-term reliability, choose a location that is:
Well ventilated, shielded from direct sunlight and away from sources of heat, with a flat and
sturdy surface free from vibration.
5.3 Electrical connection
IMPORTANT: This machine must be earthed.
It is recommended that the system be protected with a fuse and an RCD.
Your mains electricity supply to the machine must be protected as indicated below:
- North America: 15 A protection;
- Rest of the world: 16 A protection.
It is imperative that your machine be connected to a junction box on a circuit fitted with a 300 mA
RCD.
Note: Any problem resulting from any other type of connection will not be covered under warranty.
Before connecting the machine to the mains supply and in order to prevent the motor from burning
out when it is switched on, it is important to check that the mains supply matches the machine
specification (see machine nameplate).
This machine complies with Machinery Directives 2006/42, 2006/95, 2004/108 and is CE-marked as
proof of this compliance.
Please familiarise yourself with the safety pictograms displayed on the machine:
English
10
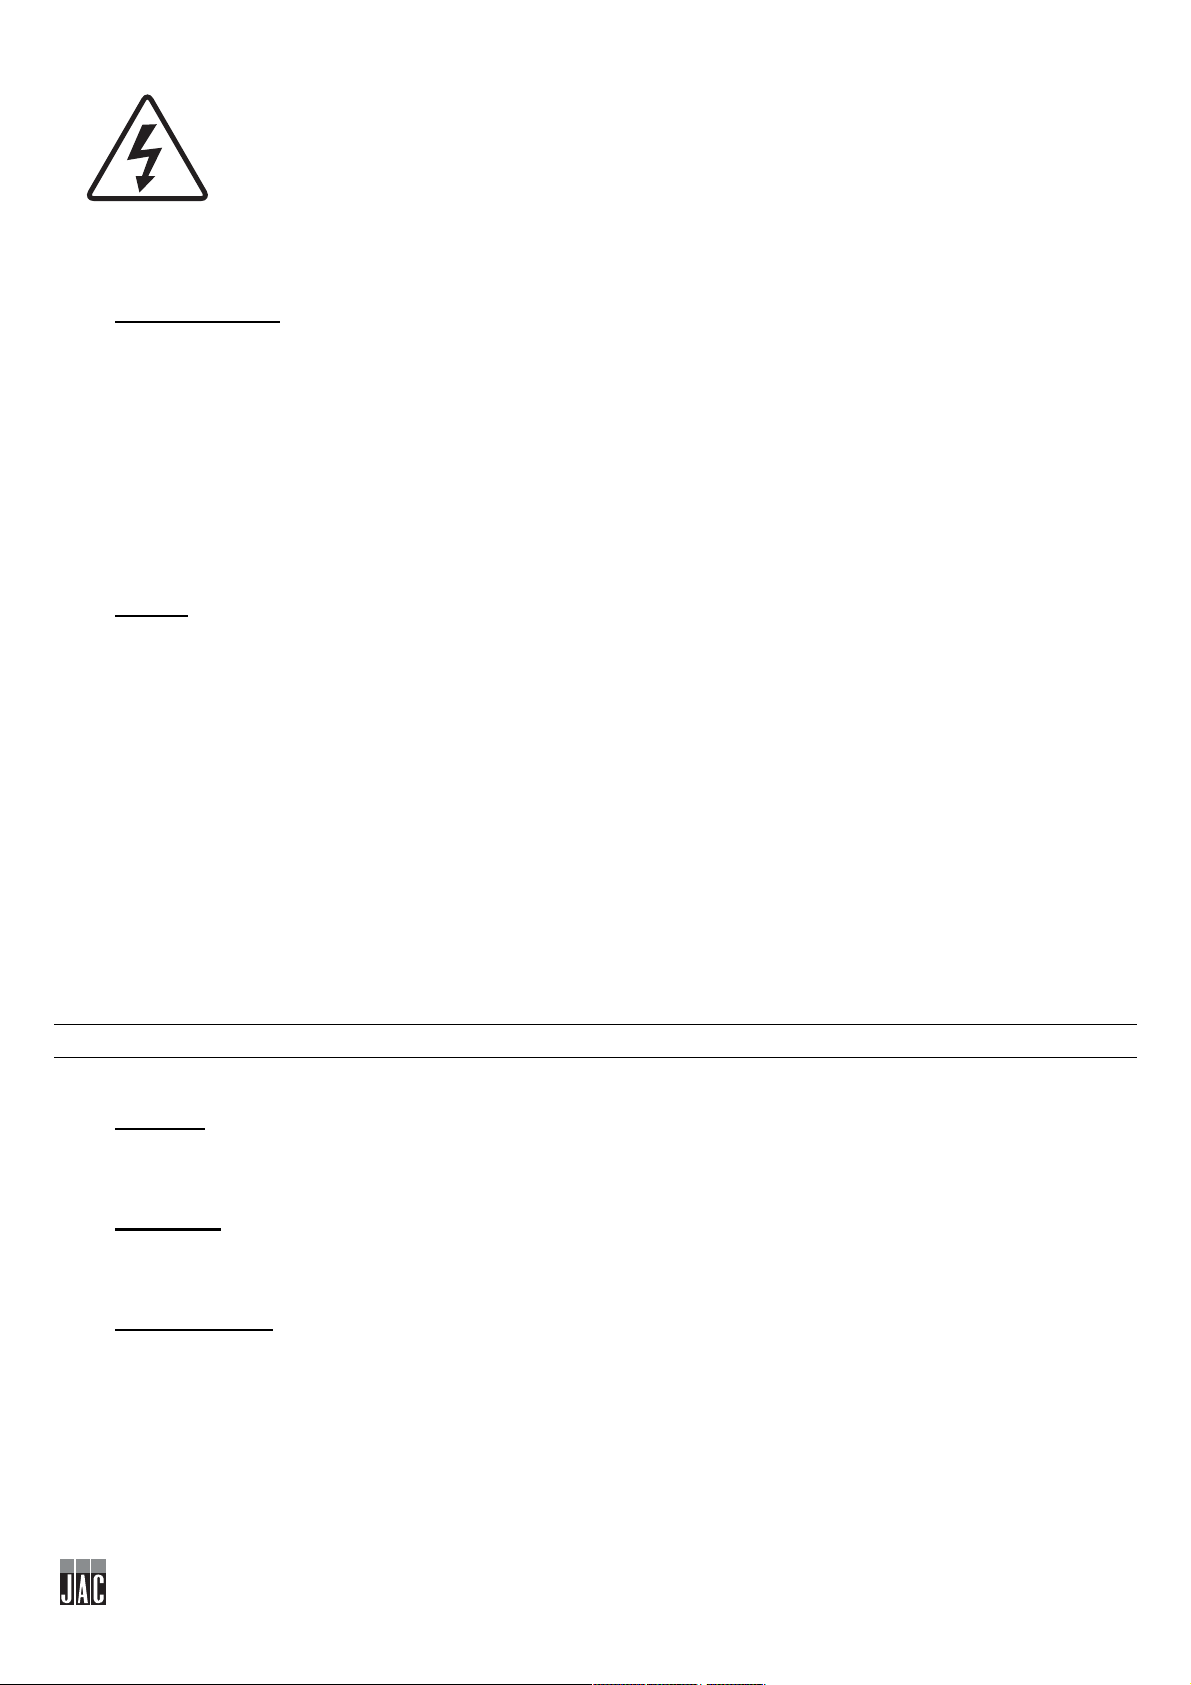
This pictogram indicates an electrocution hazard. Please isolate the machine
before carrying out any work on it. You will find this pictogram at the back of the
machine close to the power cable and inside the machine on the electrical
enclosure (fig.8, n°25).
You will find the circuit diagram for the machine on the back of the electrical
enclosure door (fig.8, n°26).
5.4 Commissioning
Before commissioning, ensure that there are no extraneous objects interfering with the machine’s
moving parts.
Ensure first of all (after verifying electrical compatibility) that the motor is rotating in the right direction.
If the blade stops in the cutting channel and the machine goes into error mode, disconnect
immediately and switch two phase wires in the plug.
For machine operation, please refer to the “Operation” chapter.
5.5 Hazard
If the user or the machine is in danger, use the main isolator switch to cut the power supply to the
machine.
Remove the plug from the mains socket before any maintenance and/or servicing work.
Do not touch the blade, even if it is stationary.
To replace the blade, have the work done by your approved dealer.
Always wear cut-resistant gloves when replacing the blade or when working in the vicinity of the
blades.
Any work involving maintenance or replacement of parts must be carried out by a qualified individual.
6 CONTROL AND SAFETY DEVICES
6.1 Controls
Your slicer is fitted with a touch screen (fig.6).
6.2 Work area
The work area is at the front of the machine (fig.3, n°18).
6.3 Safety features
This machine is equipped with:
An encoded magnetic safety switch (fig.6, n°19, 20)
Comprising a safety cut-out magnet and a magnetic sensor, which stops the machine when the front
door is opened (fig.1, n°10).
An encoded magnetic safety switch (fig.6, n°22)
English

11
Comprising a safety cut-out magnet and a magnetic sensor, which prevent the machine from starting
when the cover is opened (fig.1, n°1).
A mechanical safety lock (fig.6, n°21)
Which prevents the cover (fig.1, n°1) from being opened while the machine is in operation.
7 OPERATION
Braked castors must be locked while the machine is in operation (fig.1, n°7).
Switch on the power to the machine at the start of the day using the main isolator switch
(fig.2, n°11).
Operating procedure (fig.4-5)
A. Open the cover.
B. Place the loaf on the infeed table.
C. Take care to position the loaf correctly in the right-hand corner towards the front of the
machine.
D. If the machine is fitted with a manual claw, ensure the claw is pushed well into the loaf.
E. Close the cover.
F. Choose the slice thickness.
G. If the machine is a Pro version: Choose the type of slicing. In “number of slices” mode, choose
the number of slices desired.
H. If the machine is a Pro version: Select the cutting speed. The default selection is the medium
cutting speed. (The three cutting speeds are factory-set as standard. However, your approved
agent can adjust these speeds when the machine is being commissioned).
I. If the machine is a Pro version: Press the green button to start the slicing cycle.
J. Collect the loaf on the outfeed table (fig.3, n°13) and bag it on the bagger (fig.1, n°3).
The red button stops a cycle in progress.
English

12
8 MAINTENANCE
8.1 Daily, by a trained user
A. Check whether you need to empty the crumb tray (NB: don’t forget to lock the door with the
key) (fig.1, n°8).
B. Clean the tables (fig.3, n°13, 15) using a brush.
C. Clean the cover window (fig.1, n°1) by placing it in the cleaning position (fig.9).
D. Use a dry cloth to clean the inside.
E. Use a damp cloth to maintain the outside.
F. Activate cleaning mode:
press the “brush” symbol in the top right-hand corner.
8.2 Every 25,000 loaves and/or at least once a year, by an approved agent.
A. Remove the plug from the socket (fig.2, n°12).
B. Check the condition of the cutting blade (fig.1, n°2).
C. If you notice a degradation in cutting quality, the cutting blade will need to be replaced (JAC
part number: BVSLCA030 in the JAC Spare Parts catalogue).
D. If the blade needs to be replaced, do so in accordance with the blade replacement procedure
(fig.7).
E. Clean with a brush and vacuum the inside of the machine.
Be sure to check that your approved agent has recorded his work in your service booklet in order to
maintain your 5-year warranty cover.
8.3 Blade replacement
(fig.7)
Be sure to wear cut-resistant gloves (Standard EN 388: 2003 factor B= 5) and safety footwear always
when replacing a blade or when working in the vicinity of the blades.
Having ensured that the plug on the machine (fig.2, n°12) has actually been disconnected from the
mains:
Open the door (fig.1, n°10) using the lock (fig.1, n°9).
Remove the crumb tray (fig.1, n°8).
Replace the blade:
A. Unscrew the two spanners located on the left-hand side of the machine (fig.7, n°23).
B. Remove the blade guard (fig.1, n°6) by means of the Allen screws.
C. Unscrew the nut that secures the blade (fig.7, n°24) using the two spanners supplied (fig.7,
n°23).
D. Remove the spacer and replace the blade, taking care to position it correctly on the locator
pins. Replace the spacer.
E. Fit and tighten the new nut supplied with the new blade to lock the blade, using the
spanners supplied. It is important that the new nut be fitted in order to ensure optimum
tightening.
Refit the crumb tray and close the door.
Connect the machine to the mains supply, it is now ready.
Be sure to check that your approved agent has recorded his work in your service booklet in order to
maintain your 5-year warranty cover.
Please note that your blade can be sharpened; contact your approved agent for further information.
English
13
9 CONSUMABLES
ITEM CODE
DESCRIPTION
MODEL
5740214
COVER ROLLER
ALL
BVMPT012
COVER PAD
ALL
6110029
CIRCULAR BLADE, 420MM DIA. – 3MM
ALL
7240043
LINEAR GUIDE BELT
ALL
MP00304
FOAM STRIP, COVER
ALL
BVMPA005
SPRING STRIP, SLICE HOLDING ARM
ALL
BVMPT005
PAD, SLICE HOLDING ARM
ALL
FOAM, SLICE HOLDING ARM
ALL
BVMPT003
CLAW GUIDE 800
800
BVMPT004
CLAW GUIDE 1000
1000
W008709
FELT PAD, CLAW
MANUAL
CLAW
PLANETARY BRUSH
ALL
BVMPA006
CLAW APERTURE BRUSH 800
800
BVMPA007
CLAW APERTURE BRUSH 1000
1000
When ordering spare parts, check with your approved agent which part is required based on the
spare parts catalogue issued by the manufacturer.
Always specify the machine serial number as shown on the nameplate.
Your agent will place the orders with JAC.
9.1 List of CONSUMABLES
English
14
10 MALFUNCTIONS
Problem
Check
The machine is not running
Connect the machine using the cable (fig.2, n°12)
Switch on the main switch (fig.2, n°11)
Close the cover
Close the door
The machine is running, but
the loaves are damaged or
cut unevenly
Check whether the blades need replacing (fig.7)
Leave the bread to cool down for a few hours
Feed in a loaf of the specified size
Feed in a loaf which is quite firm
If the blade is rotating in the wrong direction, reverse two phases in the
machine mains supply.
NB: The machine must be isolated from the power supply before attempting any work on it.
Should the problem persist, please contact your technician.
English
15
11 ERROR CODES
Flashes or code displayed on
screen
Problem description
Action
ERR 001
Cover or door open
Please close the cover and the door.
Please switch the machine off using the main
switch (fig.2, n°12) and on again after 30
seconds. Should the problem persist, please
contact your technician.
Please ensure that there is no object or dust
interfering with the loaf-holding claw.
Please remove any object in the vicinity of
the blade aperture channel and position the
loaf at the bottom on the right-hand side of
the infeed table.
Please switch the machine off using the main
switch (fig.2, n°12) and on again after 30
seconds. Should the problem persist, please
contact your technician.
ERR 002
Electric circuit fault
ERR 003
Variable speed drive fault
ERR 004
Claw fault
ERR 005
Object in front of the cutting
channel sensor
ERR 006
Linear fault
Should the problem persist, please contact your technician.
English

16
12 LIST OF COMPONENTS IN ILLUSTRATIONS
Figure
Item
Description
1
1
Top cover
2
Blade
3
Bagger
4
Screen
5
Bag holder (optional)
6
Blade guard
7
Braked castors
8
Crumb tray
9
Front door lock
10
Front door
2
11
Main switch
12
Connecting cable
3
13
Outfeed table
14
Bread-holding arm
15
Infeed table
16
Manual claw
17
Automatic claw
18
Work area
6
19
Safety cut-out sensor
20
Safety cut-out magnet
21
Mechanical lock
22
Safety cut-out sensor
7
23
Blade removal spanners
24
Blade nut
8
25
“Electrocution hazard” sticker
26
Circuit diagram
English

17
Trancheuse à disque Varia Pro
1! AVANT LA MISE EN SERVICE .................................................................................................. 18!
2! GARANTIE .................................................................................................................................. 18!
3! AVERTISSEMENTS .................................................................................................................... 19!
4! CARACTERISTIQUES TECHNIQUES ........................................................................................ 20!
4.1! Caractéristiques techniques ........................................................................................................... 20!
4.2! Détail des matériaux en contact direct avec la pâte ..................................................................... 20!
5! INSTALLATION ET MISE EN SERVICE ..................................................................................... 21!
5.1! Déconditionnement de la machine ................................................................................................. 21!
5.2! Emplacement .................................................................................................................................... 21!
5.3! Raccordement électrique ................................................................................................................ 21!
5.4! Mise en service ................................................................................................................................. 22!
5.5! Danger ............................................................................................................................................... 22!
6! ORGANE DE COMMANDE ET DE SECURITE .......................................................................... 22!
6.1! Organe de commande ..................................................................................................................... 22!
6.2! Zone de travail .................................................................................................................................. 22!
6.3! Organes de sécurité ......................................................................................................................... 22!
7! UTILISATION ............................................................................................................................... 22!
8! ENTRETIEN ................................................................................................................................. 24!
8.1! Journalier par un utilisateur formé ................................................................................................. 24!
8.2! Toutes les 25 000 coupes et/ou 1 fois par an au minimum, par un agent agréé ........................ 24!
8.3! Changement des lames ................................................................................................................... 24!
9! CONSOMMABLES ...................................................................................................................... 25!
9.1! Liste des CONSOMMABLES ........................................................................................................... 25!
10! INCIDENTS DE FONCTIONNEMENT ..................................................................................... 25!
11! CODES D’ERREUR ................................................................................................................. 27!
12! LISTE DES COMPOSANTS SUR LES FIGURES ................................................................... 28!
Français
18
1 AVANT LA MISE EN SERVICE
Merci d’avoir choisi une solution JAC. Veuillez impérativement lire ce mode d’emploi avant
d’installer et de mettre en service cette machine. Vous pourrez ainsi vous protéger et éviter
de détériorer votre machine.
Cette notice fait référence à différentes figures afin de faciliter la compréhension des
instructions. Ces figures se trouvent en fin de notice. Veuillez vous y référer dès que vous
rencontrez les symboles suivants (fig.x, n°y).
Pour que votre machine vous donne entière satisfaction au cours des prochaines
années, nous vous invitons à prendre connaissance des conseils suivants :
- Faites vous aider par votre agent agréé pour l’installation, la mise en service et le suivi.
- Afin de pouvoir bénéficier de la garantie de 5 ans (voir conditions reprises ci-après),
faites compléter le carnet d’entretien par votre distributeur lors de l’installation de votre
machine. Ce carnet d’entretien se trouve à l’arrière de votre machine.
Français
2 GARANTIE
JAC offre une garantie de 5 ans sur tous ses produits.
Cette garantie est valable sur toutes les pièces de votre machine, pièces électroniques
incluses, hors consommables. La garantie prend effet à la date d’installation du matériel.
Sous les conditions restrictives suivantes :
- matériel acquis auprès d’un revendeur agréé ;
- installation effectuée par un agent agréé ;
- utilisation du matériel conformément aux indications du mode d’emploi et dans le but
pour lequel il a été fabriqué ;
- matériel quotidiennement entretenu conformément aux indications du mode d’emploi ;
- entretiens suivis par l’agent agréé conformément aux spécifications d’entretien avec, au
minimum, un entretien par an (entretien à charge de l’utilisateur) ;
- utilisation exclusive des pièces d’origine JAC.
S’il n’y a pas de suivi d’entretien par un agent agréé et/ou que le carnet d’entretien
n’est pas correctement complété, la garantie se limite à un an.
Cette garantie ne couvre pas :
- le remplacement des consommables (§9) ;
- les pièces non reconnues défectueuses par nos services ;
- les problèmes résultant d’une utilisation anormale du matériel ;
- les problèmes résultant d’une installation non effectuée par un agent agréé ;
- les pièces ou les problèmes résultant d’un dégât de transport ou d’une manutention
inappropriée.
Français
19
Une réparation et/ou un remplacement de pièces défectueuses effectué(es) durant
la période de garantie n’a (n’ont) pas pour effet de prolonger ladite garantie.
3 AVERTISSEMENTS
Il est très important que cette notice d'utilisation soit conservée avec l'appareil pour toute
future consultation. Si cet appareil devait être vendu ou transféré à une autre personne,
assurez-vous que la notice d'utilisation soit remise de façon à ce que l'utilisateur puisse être
informé de son fonctionnement et des avertissements s'y rapportant.
Ces avertissements sont donnés pour votre sécurité et pour celle d'autrui. Nous
vous prions donc de bien vouloir les lire attentivement avant d'installer et d'utiliser
l'appareil.
Cette machine a été conçue pour être utilisée par des adultes autorisés. Veillez donc à ce
que les enfants n'y touchent pas ou qu'ils ne l'utilisent pas comme un jouet.
Cette machine est exclusivement réservée à un usage professionnel.
Il est dangereux de modifier ou d'essayer de modifier les caractéristiques de cette
machine.
Après l’installation de cette machine, assurez-vous qu’elle ne repose pas sur le câble
d'alimentation.
Suivez les instructions données pour l'utilisation.
Cette machine doit être stockée et utilisée à l’intérieur, dans un local à l’abri de l’humidité
et de la chaleur.
Cette machine doit être suffisamment éclairée pour effectuer le travail.
Cette machine a un niveau sonore inférieur à 75 dB(A), suivant la norme EN ISO 3744.
Cette machine doit être utilisée par une seule personne à la fois (sauf prescription
contraire).
Cette machine est destinée au tranchage de pains cuits et tempérés.
Cette machine n’est pas destinée aux pains et matériaux suivants :
- pains rassis ;
- pains congelés, ou partiellement décongelés ;
- produits non comestibles comme le bois, le plastique et matériaux similaires ;
- tout aliment qui ne fait pas partie de la catégorie des pains ou des cakes.
La machine peut être endommagée lors de la coupe de pains ou matériaux non
autorisés.
Toujours débrancher la prise de courant avant de procéder au nettoyage
intérieur/extérieur de l'appareil et aux opérations de maintenance.
Cet appareil est lourd. Prenez toutes les précautions de sécurité lors de sa manutention.
Français
20
4 CARACTERISTIQUES TECHNIQUES
VMP800
VMP1000
Hauteur (mm)
1135
1135
Largeur (mm)
790
990
Profondeur (mm)
760
760
Longueur du canal d'entrée (mm)
380
480
Largeur du canal d'entrée (mm)
340
340
Hauteur du canal d'entrée (mm)
16 (20)
16 (20)
Colisage (mm)
1250 x1200 x 800
1250 x1200 x 800
Poids net (kg)
230
250
Poids NET + emballage (kg)
260
280
Puissance moteur (kW)
0,75
0,75
Type moteur
Triphasé
Triphasé
220v - 50Hz (A)
7
7
380v - 50Hz (A)
N/A
N/A
Capacité (tours/minute)
120 à 240
120 à 240
Diamètre de lame (mm)
420
420
Niveau sonore (dB)
<75
<75
Carrosserie inox
option
Clavier tactile
option
Porte-sachets
option
Système maintien tourtes
option
Couleur spéciale
option
4.1 Caractéristiques techniques
4.2 Détail des matériaux en contact direct avec la pâte
Table d’entrée : INOX 5WL 430
Carter de griffe : INOX 430
Griffe : INOX 430
Lame : TEFLON
Table de sortie : INOX 5WL 430
Bras de retenue pain : INOX 430
Système de maintien tourtes (optionnel) : INOX 430
Ensachoir : INOX 430
Français

21
5 INSTALLATION ET MISE EN SERVICE
5.1 Déconditionnement de la machine
Les machines sont livrées, sorties de nos ateliers, sur palettes, sanglées et protégées par du carton.
Avant toute chose, l'emballage doit être observé et tout dommage dû au transport doit être déclaré
directement au livreur.
A. Retirer le carton ainsi que le sachet d’emballage de la machine.
B. Enlever les sangles en faisant particulièrement attention à la détente de ces dernières lors de
leur sectionnement.
C. Désolidariser la machine de sa palette en enlevant les lattes de bois qui bloquent les roulettes.
D. Descendre la machine de la palette. Veiller à faire cette manipulation à au moins deux
personnes afin d’amortir au mieux le contact avec le sol.
Après déballage de la machine, vérifier qu'elle n'a pas subi de dommages pendant le
transport. Nous signaler toute anomalie.
5.2 Emplacement
Pour obtenir d'excellentes performances et une fiabilité à long terme, choisir un emplacement :
Bien ventilé, à l'abri du rayonnement solaire direct et éloigné des sources de chaleur, avec une
surface plane et robuste exempte de vibrations.
5.3 Raccordement électrique
IMPORTANT : Mise à la terre obligatoire.
Il est conseillé de protéger l'installation avec un fusible et un disjoncteur différentiel.
Votre installation électrique alimentant la machine doit être protégée comme indiqué ci-dessous :
- Amérique du Nord : Protection 15A ;
- Reste du monde : Protection 16A.
Votre machine doit être impérativement raccordée à une boîte de dérivation sur une ligne équipée
d’un différentiel de 300mA.
Note : Tout problème résultant d’un autre type de raccordement ne sera pas pris en compte par la
garantie.
Avant de connecter la machine au réseau et afin d'éviter une mise hors service du moteur à la mise
sous tension, il est important de vérifier la concordance du réseau d'alimentation avec les
caractéristiques de la machine (voir plaque signalétique de celle-ci).
Cet appareil est conforme aux Directives Machines 2006/42, 2006/95, 2004/108 et porte le marquage
CE attestant cette conformité.
Veuillez prendre connaissance des pictogrammes de sécurité figurant sur la machine :
Français
22
Pictogramme signalant un risque d’électrocution. Veuillez débrancher la machine
avant toute intervention sur celle-ci. Vous retrouverez ce pictogramme à l’arrière
de la machine à proximité du câble d’alimentation et à l’intérieur de la machine sur
le coffret électrique (fig.8, n°25).
Vous trouverez le schéma électrique de la machine sur le verso de la porte du
coffret électrique (fig.8, n°26).
5.4 Mise en service
Avant la mise en service, s’assurer de l'absence de tout objet parasite sur les parties en mouvement
de la machine.
S'assurer tout d'abord (après vérification des concordances électriques) que le moteur tourne dans le
bon sens. Si la lame s’arrête dans le canal de coupe et que la machine se met en erreur, débrancher
immédiatement et inverser, dans la prise, deux fils de phase.
Pour l’utilisation de la machine, se reporter au chapitre « Utilisation ».
5.5 Danger
En cas de danger pour l’utilisateur ou pour la machine, utiliser l’interrupteur général pour couper
l’alimentation de la machine.
Retirer la fiche de la prise électrique avant toute opération de maintenance et d’entretien.
Ne pas toucher la lame, même à l’arrêt.
Pour le changement de lame, faire faire l’opération par votre distributeur agréé.
Veiller à toujours porter des gants de protection anti-coupure lors du remplacement de la lame ou
lors d’une opération au voisinage des lames.
Toute opération de maintenance ou de remplacement de pièce doit être effectuée par une personne
qualifiée.
6 ORGANE DE COMMANDE ET DE SECURITE
6.1 Organe de commande
Votre trancheuse est équipée d’un écran tactile (fig.6).
6.2 Zone de travail
La zone de travail se situe devant la machine (fig.3, n°18).
6.3 Organes de sécurité
Cette machine est équipée :
D’un interrupteur de sécurité magnétique codé (fig.6, n°19, 20)
Composé d’un aimant de sécurité et d’un capteur magnétique, qui arrête la machine lorsqu’on ouvre
la porte avant (fig.1, n°10).
Français

23
D’un interrupteur de sécurité magnétique codé (fig.6, n°22)
Composé d’un aimant de sécurité et d’un capteur magnétique, qui empêche la machine de démarrer
lorsqu’on ouvre le capot (fig.1, n°1).
D’un verrou de sécurité mécanique (fig.6, n°21)
Qui empêche le capot (fig.1, n°1) de s’ouvrir lorsque la machine est en fonctionnement.
7 UTILISATION
Les roulettes pourvues d'un frein doivent être bloquées pour l'utilisation (fig.1, n°7).
En début de journée, mettre la machine sous tension à l’aide de l’interrupteur général
(fig.2, n°11).
Procédure d’utilisation (fig.4-5)
A. Ouvrir le capot.
B. Déposer le pain sur la table d’entrée.
C. Prendre garde à bien placer le pain dans le coin droit vers l’avant de la machine.
D. Si la machine est équipée d’une griffe manuelle, veiller à bien enfoncer la griffe dans le pain.
E. Fermer le capot.
F. Choisir l’épaisseur de tranche.
G. Si la machine est une version Pro : Choisir le type de tranchage. En mode «nombre de
tranches», choisir le nombre de tranches souhaité.
H. Si la machine est une version Pro : Choisir la vitesse de coupe. Par défaut, la vitesse de
coupe intermédiaire est sélectionnée. (Les trois vitesses de coupe sont définies de manière
standard lors de la fabrication de la machine. Toutefois, votre agent agréé peut ajuster ces
vitesses lors de la mise en service de la machine.)
I. Si la machine est une version Pro : Appuyer sur le bouton vert pour démarrer le cycle de
tranchage.
J. Récupérer le pain sur la table de sortie (fig.3, n°13) et l’ensacher sur l’ensachoir (fig.1, n°3).
Le bouton rouge permet d’arrêter un cycle en cours.
Français

24
8 ENTRETIEN
8.1 Journalier par un utilisateur formé
A. Vérifier s’il ne faut pas vider le bac à miettes (NB : ne pas oublier de verrouiller la porte à clé)
(fig.1, n°8).
B. Nettoyer les tables (fig.3, n°13, 15) à l’aide d’une brosse.
C. Nettoyer la vitre du capot (fig.1, n°1) en le mettant en position nettoyage (fig.9).
D. Utiliser un chiffon sec pour le nettoyage intérieur.
E. Pour l’entretien extérieur, utiliser un chiffon humide.
F. Activer le mode nettoyage :
appuyer sur le symbole « brosse » dans le coin supérieur droit.
8.2 Toutes les 25 000 coupes et/ou 1 fois par an au minimum, par un agent agréé
A. Retirer la fiche de la prise (fig.2, n°12).
B. Vérifier l’état de la lame de coupe (fig.1, n°2).
C. Si une dépréciation de la qualité de la coupe est notée, il faut procéder au remplacement de la
lame de coupe (référence JAC : BVSLCA030 du catalogue de Pièces de Rechange JAC).
D. Si elle est à changer, remplacer la lame conformément à la procédure de changement de la
lame de coupe (fig.7).
E. Nettoyer à la brosse et aspirer l’intérieur de la machine.
Bien vérifier que votre agent agréé enregistre son intervention dans votre carnet d’entretien afin de
conserver votre garantie de 5 ans.
8.3 Changement des lames
(fig.7)
Veiller à toujours porter des gants de protection anti-coupure (Norme EN 388 : 2003 indice B= 5) et
des chaussures de sécurité lors du remplacement de la lame ou lors d’une opération au voisinage
des lames.
Après s’être assuré que la fiche de la machine (fig.2, n°12) est bien déconnectée du secteur :
Ouvrir la porte (fig.1, n°10) à l’aide du verrou (fig.1, n°9).
Retirer le bac à mies (fig.1, n°8).
Remplacer la lame :
A. Dévisser les deux clés situées sur le côté gauche de la machine (fig.7, n°23).
B. Retirer la protection de lame (fig.1, n°6) à l’aide des vis 6 pans creux.
C. Dévisser l’écrou qui maintient la lame (fig.7, n°24) à l’aide des deux clés fournies (fig.7,
n°23)
D. Retirer la cale et remplacer la lame en prenant soin de bien la placer dans les ergots
détrompeurs. Remettre la cale.
E. Visser et serrer le nouvel écrou fourni avec la nouvelle lame afin de bloquer la lame, à l’aide
des clés fournies. Il est important de mettre le nouvel écrou afin d’assurer un serrage optimal.
Remettre le bac à mies et fermer la porte.
Connecter la machine au réseau électrique, la machine est prête.
Bien vérifier que votre agent agréé enregistre son intervention dans votre carnet d’entretien afin de
conserver votre garantie de 5 ans.
Veiller à noter que votre lame est réaffûtable, contacter votre agent agréé pour plus d’informations.
Français
25
9 CONSOMMABLES
CODE ARTICLE
LIBELLE
MODELE
5740214
ROULETTE DE CAPOT
TOUS
BVMPT012
PATIN DE CAPOT
TOUS
6110029
LAME CIRCULAIRE Ø420MM – 3MM
TOUS
7240043
COURROIE GUIDAGE LINEAIRE
TOUS
MP00304
BANDE MOUSSE CAPOT
TOUS
BVMPA005
LAMELLE RESSORT BRAS RETENUE
TRANCHE
TOUS
BVMPT005
PATIN BRAS RETENUE TRANCHE
TOUS
MOUSSE BRAS RETENUE TRANCHE
TOUS
BVMPT003
GUIDE GRIFFE 800
800
BVMPT004
GUIDE GRIFFE 1000
1000
W008709
PATIN FEUTRE GRIFFE
GRIFFE
MANUELLE
BROSSE PLANETAIRE
TOUS
BVMPA006
BROSSE PASSAGE GRIFFE 800
800
BVMPA007
BROSSE PASSAGE GRIFFE 1000
1000
Lors d’une commande d’une pièce de rechange, vérifier avec votre agent agréé de quelle pièce il
s’agit sur la base du catalogue de pièces de rechange émis par le fabricant.
Toujours préciser le numéro de machine comme indiqué sur la plaque signalétique.
Votre agent effectue les commandes auprès de JAC.
9.1 Liste des CONSOMMABLES
Français
26
10 INCIDENTS DE FONCTIONNEMENT
Problème
Vérification
La machine ne tourne pas
Brancher la machine à l’aide du câble (fig.2, n°12)
Enclencher l’interrupteur principal (fig.2, n°11)
Fermer le capot
Fermer la porte
La machine fonctionne,
mais les pains sont
endommagés ou coupés de
manière irrégulière
Vérifier s’il ne faut pas remplacer les lames (fig.7)
Laisser le pain refroidir quelques heures
Introduire un pain aux dimensions acceptées
Introduire un pain assez ferme
Si la lame tourne à l’envers, inverser deux phases dans la prise de courant
de la machine
ATTENTION : La machine doit obligatoirement être mise hors tension pour toute intervention.
Si le problème persiste, veuillez contacter votre technicien.
Français
27
11 CODES D’ERREUR
Clignotement ou code affiché
sur l’écran
Description du problème
Action
ERR 001
Capot ou porte ouvert(e)
Veuillez fermer le capot et la porte.
Veuillez éteindre la machine à l'aide de
l'interrupteur principal (fig.2, n°12) et la
rallumer après 30 secondes. Si le problème
persiste, veuillez contacter votre technicien.
Veuillez vous assurez qu’aucun objet ou
poussière encombre la griffe de préhension
du pain.
Veuillez enlever tout objet présent à proximité
du canal de passage de la lame et
positionner le pain en bas à droite de la table
d’entrée.
Veuillez éteindre la machine à l'aide de
l'interrupteur principal (fig.2, n°12) et la
rallumer après 30 secondes. Si le problème
persiste, veuillez contacter votre technicien.
ERR 002
Défaut circuit électrique
ERR 003
Défaut variateur
ERR 004
Défaut griffe
ERR 005
Objet devant le capteur
canal de coupe
ERR 006
Défaut linéaire
Si le problème persiste, veuillez contacter votre technicien.
Français

28
12 LISTE DES COMPOSANTS SUR LES FIGURES
Figure
Bulle
Nom
1
1
Capot supérieur
2
Lame
3
Ensachoir
4
Ecran
5
Porte-sachets (option)
6
Protection de lame
7
Roulettes freinées
8
Bac à mies
9
Verrou de porte avant
10
Porte avant
2
11
Interrupteur principal
12
Câble de raccordement
3
13
Table de sortie
14
Bras de retenue pain
15
Table d'entrée
16
Griffe manuelle
17
Griffe automatique
18
Zone de travail
6
19
Capteur de sécurité
20
Aimant de sécurité
21
Verrou mécanique
22
Capteur de sécurité
7
23
Clés pour le démontage de la lame
24
Ecrou de lame
8
25
Autocollant risque d’électrocution
26
Schéma électrique
Français

29
1! VOR DER INBETRIEBNAHME .............................................................................. 30!
2! GARANTIE ............................................................................................................. 30!
3! WARNHINWEISE ................................................................................................... 31!
4! TECHNISCHE DATEN ........................................................................................... 32!
4.1! Technische Daten ..................................................................................................... 32!
4.2! Material der Teile, die in Kontakt mit dem Teig kommen ...................................... 32!
5! INSTALLATION UND INBETRIEBNAHME ........................................................... 33!
5.1! Auspacken der Maschine ......................................................................................... 33!
5.2! Aufstellung ................................................................................................................ 33!
5.3! Elektrischer Anschluss ............................................................................................ 33!
5.4! Inbetriebnahme ......................................................................................................... 34!
5.5! Gefahr ......................................................................................................................... 34!
6! BEDIENELEMENT UND SICHERHEITSEINRICHTUNGEN ................................. 34!
6.1! Bedienelement ........................................................................................................... 34!
6.2! Arbeitsbereich ........................................................................................................... 34!
6.3! Sicherheitseinrichtungen ......................................................................................... 34!
7! BEDIENUNG ........................................................................................................... 35!
8! INSTANDHALTUNG ............................................................................................... 36!
8.1! Täglich durch einen eingewiesenen Bediener ....................................................... 36!
8.2! Nach 25.000 Schnittzyklen und/oder mindestens ein Mal jährlich durch einen zugelassenen
Vertreter ................................................................................................................................. 36!
8.3! Austausch der Messer .............................................................................................. 36!
9! ERSATZTEILE ........................................................................................................ 37!
9.1! Liste der ERSATZTEILE ............................................................................................ 37!
10! STÖRUNGEN UND FEHLER ............................................................................. 38!
11! FEHLERCODES ................................................................................................. 39!
12! LISTE DER ABGEBILDETEN TEILE ................................................................. 40!
Deutsch
30
1 VOR DER INBETRIEBNAHME
Vielen Dank, dass Sie sich für ein Gerät von JAC entschieden haben. Bitte lesen Sie diese
Bedienungsanleitung vor der Installation und Inbetriebnahme dieser Maschine aufmerksam
durch. Dies dient zu Ihrer Sicherheit und zum Schutz der Maschine vor Schäden.
Diese Bedienungsanleitung enthält Verweise auf verschiedene Abbildungen, die das
Verständnis der Anleitungen erleichtern. Die Abbildungen befinden sich am Schluss der
Bedienungsanleitung. Bitte schlagen Sie die jeweilige Abbildung anhand des angegebenen
Verweises (Fig. x, Nr. y) nach.
Damit Sie sich viele Jahre an dieser Maschine erfreuen können, möchten wir Sie
bitten, die folgenden Hinweise zu berücksichtigen:
- Lassen Sie sich bei der Installation, der Inbetriebnahme und der weiteren Nutzung von
Ihrem zugelassenen Vertreter unterstützen.
- Um die Garantie von 5 Jahren (siehe nachfolgende Garantiebestimmungen) in Anspruch
nehmen zu können, lassen Sie bitte von Ihrem Vertreter bei der Installation Ihrer Maschine
das Wartungsheft ausfüllen. Das Wartungsheft befindet sich an der Rückseite Ihrer
Maschine.
Deutsch
2 GARANTIE
JAC bietet 5 Jahre Garantie auf all seine Produkte.
Diese Garantie gilt für alle Teile Ihrer Maschine, einschließlich elektronischer Bauteile,
außer Ersatzteile. Die Garantiefrist beginnt zum Zeitpunkt der Installation der Anlage.
Es gelten die folgenden Beschränkungen:
- Das Produkt wurde bei einem zugelassenen Vertragshändler erworben.
- Die Installation wurde von einem zugelassenen Vertreter vorgenommen.
- Das Produkt wurde im Rahmen seines bestimmungsgemäßen Gebrauchs und
entsprechend der Bedienungsanleitung verwendet.
- Das Produkt wurde täglich entsprechend den Vorgaben der Bedienungsanleitung
instandgehalten.
- Mindestens einmal jährlich fand eine Instandhaltung durch einen zugelassenen Vertreter
entsprechend den Wartungsvorgaben statt (auf Kosten des Benutzers).
- Es wurden ausschließlich Originalersatzteile von JAC verwendet.
Sofern keine Instandhaltung durch einen zugelassenen Vertreter erfolgt bzw. das
Wartungsheft nicht ordnungsgemäß ausgefüllt ist, ist die Garantie auf ein Jahr
begrenzt.
Diese Garantie deckt nicht:
- den Ersatz von Verschleißteilen (siehe Abschnitt 9)
- Teile, die unser Kundendienst nicht als defekt anerkennt
- Probleme, die sich aus einer ungewöhnlichen Nutzung des Produktes ergeben
Deutsch

31
- Probleme, die darauf zurückzuführen sind, dass die Installation nicht durch einen
zugelassenen Vertreter durchgeführt wurde
- Beschädigungen oder Probleme, die auf einen Transportschaden oder auf die
unsachgemäße Handhabung des Produktes zurückzuführen sind
Die Durchführung einer Reparatur und/oder der Austausch defekter Teile während
der Garantiefrist führen nicht zur Verlängerung der Garantiefrist.
3 WARNHINWEISE
Bitte bewahren Sie diese Bedienungsanleitung unbedingt zusammen mit der Maschine
zum späteren Nachlesen auf. Bei Verkauf oder Weitergabe der Maschine übergeben Sie bitte
diese Bedienungsanleitung an den neuen Besitzer bzw. Benutzer, damit dieser über die
Funktionsweise der Maschine und die Warnhinweise informiert ist und diese befolgen kann.
Diese Warnhinweise dienen Ihrer Sicherheit und der Sicherheit anderer. Bitte lesen
Sie die Warnhinweise vor der Installation und Benutzung der Maschine aufmerksam
durch.
Diese Maschine ist für die Verwendung durch befugte erwachsene Personen bestimmt.
Stellen Sie sicher, dass die Maschine nicht von Kindern angefasst oder als Spielzeug benutzt
wird.
Diese Maschine ist ausschließlich für den professionellen Einsatz vorgesehen.
Die Modifizierung und der Versuch der Modifizierung der Eigenschaften und Merkmale
dieser Maschine ist gefährlich.
Stellen Sie nach der Installation dieser Maschine sicher, dass diese nicht auf dem
Netzkabel steht.
Befolgen Sie stets die Anleitungen zur Bedienung und Benutzung.
Die Maschine ist in einem Innenraum und vor Feuchtigkeit und Hitze geschützt
aufzustellen.
Die Maschine muss im Betrieb ausreichend ausgeleuchtet sein.
Der Geräuschpegel der Maschine liegt unter 75 dB(A) und entspricht damit der Norm
EN ISO 3744.
Die Maschine darf nicht von mehreren Personen gleichzeitig benutzt werden (es sei denn,
die Anleitung gibt etwas anderes vor).
Die Maschine dient zum Schneiden abgekühlter Brotlaibe.
Diese Maschine darf nicht zum Schneiden der folgenden Brote, Artikel und
Materialien verwendet werden:
- altbackenes Brot;
- gefrorenes oder halb aufgetautes Brot;
- ungenießbare Produkte wie Holz, Kunststoff oder Ähnliches;
- Lebensmittel, die nicht zur Gruppe der Backwaren (speziell Brote und Kuchen) gehören.
Deutsch

32
VMP800
VMP1000
Höhe (mm)
1135
1135
Breite (mm)
790
990
Tiefe (mm)
760
760
Länge der Schneidekammer (mm)
380
480
Breite der Schneidekammer (mm)
340
340
Höhe der Schneidekammer (mm)
16 (20)
16 (20)
Verpackungsmaße (mm)
1250 x 1200 x 800
1250 x 1200 x 800
Nettogewicht (kg)
230
250
Nettogewicht + Verpackung (kg)
260
280
Motorleistung (kW)
0,75
0,75
Motortyp
Dreiphasig
Dreiphasig
220 V - 50 Hz (A)
7
7
380 V - 50 Hz (A)
n. zutr.
n. zutr.
Kapazität (Umdrehungen/Minute)
120 bis 240
120 bis 240
Durchmesser des Kreismessers (mm)
420
420
Geräuschpegel (dB)
<75
<75
Edelstahlgehäuse
Option
Touchscreen
Option
Tütenhalter
Option
Pastetenhaltersystem
Option
Sonderfarbe
Option
Die Verwendung der Maschine zum Schneiden nicht zulässiger Brote, Artikel und
Materialien kann zur Beschädigung der Maschine führen.
Vor Reinigungsarbeiten innen und außen an der Maschine und vor Wartungsarbeiten
immer den Netzstecker ziehen.
Diese Anlage ist sehr schwer. Beim Transport und Bewegen der Anlage sind angemessene
Vorsichtsmaßnahmen zu ergreifen.
4 TECHNISCHE DATEN
4.1 Technische Daten
4.2 Material der Teile, die in Kontakt mit dem Teig kommen
Aufgabetisch: Edelstahl 5WL 430
Gehäuse der Brotkralle: Edelstahl 430
Brotkralle: Edelstahl 430
Kreismesser: Teflon
Austragstisch: Edelstahl 5WL 430
Brothaltearm: Edelstahl 430
Pastetenhaltersystem (optional): Edelstahl 430
Brotablage: Edelstahl 430
Deutsch

33
5 INSTALLATION UND INBETRIEBNAHME
5.1 Auspacken der Maschine
Unsere Maschinen werden zur Lieferung ab Werk auf Paletten verpackt, mit Umreifungsbändern
gesichert und mit einer Kartonverpackung geschützt. Prüfen Sie die Verpackung bei Erhalt auf
Beschädigungen und teilen Sie dem Spediteur etwaige Transportschäden direkt mit.
A. Entfernen Sie die Kartonverpackung und die Folie von der Maschine.
B. Entfernen Sie die Umreifungsbänder und bedenken Sie dabei, dass diese beim
Durchschneiden aufspringen.
C. Lösen Sie die Maschine durch Entfernen der Holzleisten, welche die Räder sichern, von der
Palette.
D. Heben Sie die Maschine von der Palette. Dies muss durch mindestens zwei Personen
erfolgen, so dass die Maschine möglichst sicher auf dem Boden abgesetzt werden kann.
Die Maschine nach dem Auspacken auf Transportschäden überprüfen. Melden Sie uns
bitte alle Fehler und Schäden.
5.2 Aufstellung
Um eine hohe Leistung, eine lange Lebensdauer und einen zuverlässigen Betrieb sicherzustellen,
sollte der Aufstellort wie folgt beschaffen sein:
Gut belüftet, vor direkter Sonneneinstrahlung geschützt, in ausreichender Entfernung zu
Wärmequellen, auf einem ebenen, tragfähigen und schwingungsfreien Boden.
5.3 Elektrischer Anschluss
WICHTIG: Die Maschine muss geerdet werden.
Wir empfehlen den Schutz der Anlage durch eine Sicherung und einen FISchutzschalter.
Ihr Stromnetz zur Versorgung der Maschine muss folgendermaßen geschützt werden:
- Nordamerika: Schutz 15 A
- Rest der Welt: Schutz 16 A
Ihre Maschine muss auf jeden Fall mit einem FI-Schutzschalter für 300 mA angeschlossen werden.
Hinweis: Probleme und Störungen durch eine abweichende Ausführung des Anschlusses sind nicht
durch die Garantie gedeckt.
Prüfen Sie vor dem Anschließen der Maschine an das Stromnetz unbedingt, ob die
Spannungsversorgung für die Maschine geeignet ist (siehe Angaben auf dem Typenschild), um ein
Abschalten des Motors beim Einschalten zu vermeiden.
Dieses Gerät entspricht den Maschinenrichtlinien 2006/42/EG, 2006/95/EG und 2004/108/EG und ist
daher mit dem CE-Zeichen gekennzeichnet.
Deutsch

34
Bitte beachten Sie die an der Maschine angebrachten Warnsymbole:
Piktogramm Stromschlaggefahr. Die Maschine vor jedem Eingriff vom Stromnetz
nehmen. Das Warnsymbol ist an der Rückseite der Maschine neben dem
Netzanschluss sowie im Inneren der Maschine auf dem Schaltkasten angebracht
(Fig. 8, Nr. 25).
Den Schaltplan der Maschine finden Sie auf der Rückseite der Schaltkastentür
(Fig. 8, Nr. 26).
5.4 Inbetriebnahme
Stellen Sie vor der Inbetriebnahme sicher, dass sich keine Fremdkörper auf den beweglichen Teilen
der Maschine befinden.
Bei der Inbetriebnahme stellen Sie als Erstes sicher (nach Überprüfung der elektrischen
Übereinstimmung), dass der Motor in die richtige Richtung dreht. Falls das Messer in der
Schneidekammer anhält und die Maschine einen Fehler ausgibt, diese sofort vom Stromnetz nehmen
und im Stecker die beiden Phasen vertauschen.
Weitere Informationen zur Benutzung der Maschine finden Sie im Abschnitt „Bedienung“.
5.5 Gefahr
Bei einer akuten Gefahr für Bediener oder Maschine schalten Sie die Maschine mit dem
Hauptschalter aus.
Vor Wartungs- oder Instandhaltungsarbeiten immer den Stecker aus der Steckdose ziehen.
Das Messer niemals berühren, auch nicht bei abgeschalteter Maschine.
Das Messer muss von einem zugelassenen Vertreter ausgetauscht werden.
Tragen Sie beim Austausch der Messer und bei Arbeiten direkt im Bereich des Messers stets
Schutzhandschuhe zum Schutz vor Schnittverletzungen.
Wartungsmaßnahmen und der Austausch von Ersatzteilen dürfen nur durch eine qualifizierte Person
erfolgen.
6 BEDIENELEMENT UND SICHERHEITSEINRICHTUNGEN
6.1 Bedienelement
Ihre Brotschneidemaschine ist mit einem Touchscreen ausgestattet (Fig. 6).
6.2 Arbeitsbereich
Der Arbeitsbereich befindet sich an der Vorderseite der Maschine (Fig. 3, Nr. 18).
6.3 Sicherheitseinrichtungen
Diese Maschine ist mit folgenden Sicherheitseinrichtungen ausgestattet:
Deutsch

35
einem codierten magnetischen Schutzschalter (Fig. 6, Nr. 19 und 20)
bestehend aus einem Sicherungsmagneten und einem Magnetsensor, der die Maschine bei Öffnen
der Fronttür abschaltet (Fig. 1, Nr. 10);
einem codierten magnetischen Schutzschalter (Fig. 6, Nr. 22)
bestehend aus einem Sicherungsmagneten und einem Magnetsensor, der den Start der Maschine
bei geöffneter Abdeckung verhindert (Fig. 1, Nr. 1);
einer mechanischen Sicherheitsverriegelung (Fig. 6, Nr. 21),
die das Öffnen der Abdeckung (Fig. 1, Nr. 1) bei laufender Maschine verhindert.
7 BEDIENUNG
Vor dem Betrieb die mit Bremsen versehenen Räder feststellen (Fig. 1, Nr. 7).
Die Maschine bei Tagesbeginn mit dem Hauptschalter einschalten
(Fig. 2, Nr. 11).
Bedienung (Fig. 4-5)
A. Die Abdeckung öffnen.
B. Das Brot auf dem Aufgabetisch ablegen.
C. Darauf achten, das Brot vorne rechts in der Maschine zu platzieren.
D. Wenn die Maschine mit einer manuellen Brotkralle ausgestattet ist, Kralle fest genug in das
Brot drücken.
E. Abdeckung schließen.
F. Die Scheibendicke auswählen.
G. Bei einer Maschine in Pro-Ausführung: Die Schneidart auswählen. In der Betriebsart „nombre
de tranches“ (Scheibenanzahl) die gewünschte Scheibenanzahl auswählen.
H. Bei einer Maschine in Pro-Ausführung: Schnittgeschwindigkeit auswählen. Standardmäßig ist
die mittlere Schnittgeschwindigkeit eingestellt. (Die drei Schnittgeschwindigkeiten werden bei
der Herstellung der Maschine werkseitig festgelegt, können jedoch bei der Inbetriebnahme
durch Ihren zugelassenen Vertreter angepasst werden.)
I. Bei einer Maschine in Pro-Ausführung: Anschließend zum Auslösen des Schneidzyklus auf die
grüne Taste drücken.
J. Das geschnittene Brot vom Austragstisch (Fig. 3, Nr. 13) nehmen und auf der Brotablage
(Fig. 1, Nr. 3) verpacken.
Ein laufender Zyklus kann mit der roten Taste unterbrochen werden.
Deutsch

36
8 INSTANDHALTUNG
8.1 Täglich durch einen eingewiesenen Bediener
A. Das Krümelfach überprüfen und bei Bedarf leeren. (Danach die Tür wieder mit dem Schlüssel
verriegeln) (Fig. 1, Nr. 8).
B. Die Tische (Fig. 3, Nr. 13 und 15) mit einer Bürste reinigen.
C. Das Fenster der Abdeckung (Fig. 1, Nr. 1) reinigen und diese dazu in Reinigungsposition
stellen (Fig. 9).
D. Den Innenbereich mit einem trockenen Tuch reinigen.
E. Zur Reinigung des Außenbereichs ein feuchtes Tuch verwenden.
F. Aktivierung des Reinigungsmodus:
Auf das Bürstensymbol in der Ecke rechts oben klicken.
8.2 Nach 25.000 Schnittzyklen und/oder mindestens ein Mal jährlich durch einen zugelassenen
Vertreter
A. Stecker aus der Steckdose ziehen (Fig. 2, Nr. 12).
B. Den Zustand des Messers überprüfen (Fig. 1, Nr. 2).
C. Wenn die Schneidqualität nachgelassen hat, muss das Messer ausgetauscht werden (JAC
Bestellnummer: BVSLCA030 Ersatzteilkatalog JAC).
D. Das Messer ist entsprechend dem für den Austausch des Messers vorgeschriebenen
Verfahren auszutauschen (Fig. 7).
E. Mit der Bürste reinigen und den Innenbereich der Maschine absaugen.
Bitte achten Sie darauf, dass Ihr zugelassener Vertreter diese Maßnahmen im Wartungsheft festhält,
damit Sie Ihren Garantieanspruch von fünf Jahren behalten.
8.3 Austausch der Messer
(Fig. 7).
Beim Austausch des Messers oder bei Arbeiten in der Umgebung der Messer müssen stets
Schnittschutzhandschuhe (Norm EN 388: 2003, Index B = 5) sowie Sicherheitsschuhe getragen
werden.
Zuerst kontrollieren, ob der Netzstecker der Maschine (Fig. 2, Nr. 12) gezogen ist.
Die Tür (Fig. 1, Nr. 10) mit dem Riegel (Fig. 1, Nr. 9) öffnen.
Krümelfach (Fig. 1, Nr. 8) herausziehen.
Messer austauschen:
A. Die beiden Schlüssel auf der linken Maschinenseite (Fig. 7, Nr. 23) lösen.
B. Den Messerschutz (Fig. 1, Nr. 6) mit den Innensechskantschrauben entfernen.
C. Die Mutter zum Halten des Messers (Fig. 7, Nr. 24) mit den beiden mitgelieferten Schlüssel
(Fig. 7, Nr. 23) entfernen.
D. Den Keil entfernen und das Messer austauschen und dabei darauf achten, dass es fest an
den Steckplätzen sitzt. Den Keil wieder einsetzen.
E. Die neue, dem neuen Messer beiliegende Mutter mit Hilfe der mitgelieferten Schlüssel
anziehen, um das Messer zu arretieren. Zur Gewährleistung der optimalen Spannung muss
unbedingt die neue Mutter verwendet werden.
Das Krümelfach wieder einsetzen und die Tür schließen.
Die Maschine ans Stromnetz anschließen. Die Maschine ist betriebsbereit.
Bitte achten Sie darauf, dass Ihr zugelassener Vertreter diese Maßnahmen im Wartungsheft festhält,
damit Sie Ihren Garantieanspruch von fünf Jahren behalten.
Deutsch

37
Beachten Sie bitte, dass das Messer geschliffen werden kann. Für weitere Informationen wenden Sie
Artikelnummer
Bezeichnung
MODELL
5740214
Rolle für Abdeckung
Alle
BVMPT012
Gleitstück für Abdeckung
Alle
6110029
Kreismesser Ø 420 mm – 3 mm
Alle
7240043
Riemen für Linearführung
Alle
MP00304
Schaumstoffband für Abdeckung
Alle
BVMPA005
Federlamelle für Brotscheiben-Haltearm
Alle
BVMPT005
Gleitstück für Brotscheiben-Haltearm
Alle
Schaumstoff für Brotscheiben-Haltearm
Alle
BVMPT003
Brotkrallenführung 800
800
BVMPT004
Brotkrallenführung 1000
1000
W008709
Filzgleitstück für Brotkralle
Manuelle
Brotkralle
Bürste für Planetengetriebe
Alle
BVMPA006
Bürste für Brotkrallenbereich 800
800
BVMPA007
Bürste für Brotkrallenbereich 1000
1000
sich bitte an Ihren Vertragshändler.
9 ERSATZTEILE
Bitte lassen Sie bei der Bestellung von Ersatzteilen von Ihrem Vertreter anhand des
Ersatzteilkatalogs des Herstellers prüfen, um welche Teile es sich genau handelt.
Dabei stets die Maschinennummer auf dem Typenschild angeben.
Ihr Vertreter bestellt das Ersatzteil dann bei JAC.
9.1 Liste der ERSATZTEILE
Deutsch

38
10 STÖRUNGEN UND FEHLER
Problem
Fehlersuche
Die Maschine funktioniert
nicht.
Maschine mit dem Kabel anschließen (Fig. 2, Nr. 12).
Hauptschalter einschalten (Fig. 2, Nr. 11).
Abdeckung schließen
Maschinentür schließen
Die Maschine funktioniert,
das Brot wird jedoch
zerdrückt oder
ungleichmäßig geschnitten.
Möglicherweise müssen die Messer ausgetauscht werden (Fig. 7).
Lassen Sie das Brot einige Stunden lang abkühlen.
Schneiden Sie nur Brot passender Größe.
Schneiden Sie nur ausreichend festes Brot.
Wenn sich das Messer in die falsche Richtung dreht, die Phasen im
Stromanschluss der Maschine vertauschen.
Achtung: Vor jedem Eingriff an der Maschine ist die Maschine unbedingt von der Stromversorgung
zu trennen.
Besteht das Problem immer noch, wenden Sie sich bitte an Ihren Servicetechniker.
Deutsch

39
11 FEHLERCODES
Blinken oder Fehlercode am
Touchscreen
Fehlerbeschreibung
Fehlerbehebung
ERR 001
Abdeckung oder Tür offen
Abdeckung und Maschinentür schließen.
Maschine mit dem Hauptschalter (Fig. 2,
Nr. 12) aus- und nach 30 Sekunden wieder
einschalten. Besteht das Problem immer
noch, wenden Sie sich bitte an Ihren
Servicetechniker.
Kontrollieren Sie, dass die Brotkralle nicht
durch einen Fremdkörper oder Staub in ihrer
Bewegung behindert wird.
Entfernen Sie alle Fremdkörper im
Schnittbereich des Messers und legen Sie
das Brot unten rechts auf den Aufgabetisch.
Maschine mit dem Hauptschalter (Fig. 2,
Nr. 12) aus- und nach 30 Sekunden wieder
einschalten. Besteht das Problem immer
noch, wenden Sie sich bitte an Ihren
Servicetechniker.
ERR 002
Fehler Stromkreis
ERR 003
Fehler Umrichter
ERR 004
Fehler Brotkralle
ERR 005
Gegenstand vor
Schneidkammersensor
ERR 006
Fehler Linearführung
Besteht das Problem immer noch, wenden Sie sich bitte an Ihren Servicetechniker.
Deutsch

40
12 LISTE DER ABGEBILDETEN TEILE
Abbildung
Nummer
Bezeichnung
1
1
Obere Abdeckung
2
Messer
3
Brotablage
4
Bildschirm
5
Beutelhalter (Option)
6
Messerschutz
7
Rollen mit Bremse
8
Krümelfach
9
Verriegelung der Fronttür
10
Fronttür
2
11
Hauptschalter
12
Anschlusskabel
3
13
Austragstisch
14
Brothaltearm
15
Aufgabetisch
16
Manuelle Brotkralle
17
Automatische Brotkralle
18
Arbeitsbereich
6
19
Sicherheitssensor
20
Sicherungsmagnet
21
Mechanische Verriegelung
22
Sicherheitssensor
7
23
Schlüssel zum Ausbauen des Messers
24
Mutter des Messers
8
25
Aufkleber „Stromschlaggefahr“
26
Schaltplan
eismessermaschine Varia Pro
Deutsch

41
Snijmachine met schijf Varia Pro
1! VÓÓR DE INBEDRIJFSTELLING .......................................................................... 42!
2! GARANTIE ............................................................................................................. 42!
3! WAARSCHUWINGEN ............................................................................................ 43!
4! TECHNISCHE GEGEVENS .................................................................................... 44!
4.1! Technische kenmerken ............................................................................................ 44!
4.2! Materialen die in direct contact met het deeg komen ............................................ 44!
5! INSTALLATIE EN INBEDRIJFSTELLING ............................................................. 45!
5.1! De machine uit de verpakking halen ....................................................................... 45!
5.2! Plaatsing .................................................................................................................... 45!
5.3! Elektrische aansluiting ............................................................................................. 45!
5.4! Inbedrijfstelling ......................................................................................................... 46!
5.5! Gevaar ........................................................................................................................ 46!
6! BEDIENINGS- EN VEILIGHEIDSAPPARAAT ....................................................... 46!
6.1! Bedieningsapparaat .................................................................................................. 46!
6.2! Werkzone ................................................................................................................... 46!
6.3! Veiligheidsvoorzieningen ......................................................................................... 46!
7! GEBRUIK ................................................................................................................ 47!
8! ONDERHOUD ......................................................................................................... 48!
8.1! Dagelijks door een opgeleide gebruiker ................................................................. 48!
8.2! Om de 25.000 snij-acties en/of minimaal één keer per jaar door een erkende verdeler. 48!
8.3! Vervanging van de bladen ........................................................................................ 48!
9! VERBRUIKSGOEDEREN ...................................................................................... 49!
9.1! Lijst met VERBRUIKSGOEDEREN ........................................................................... 49!
10! FUNCTIONERINGSINCIDENTEN ...................................................................... 50!
11! FOUTCODES ...................................................................................................... 51!
12! LIJST MET ONDERDELEN OP DE AFBEELDINGEN ...................................... 52!
Nederlands

42
1 VÓÓR DE INBEDRIJFSTELLING
Bedankt voor uw keuze van een JAC-oplossing. Neem deze gebruikershandleiding
grondig door voordat u deze machine installeert en in werking stelt. Zo kunt u zich
beschermen en schade aan uw machine vermijden.
Deze handleiding verwijst naar diverse afbeeldingen zodat u de instructies beter kunt
begrijpen. Deze afbeeldingen bevinden zich op het einde van de handleiding. Raadpleeg ze
wanneer u de volgende symbolen tegenkomt (fig.x, n°y).
Om in de volgende jaren uw machine tot volledige tevredenheid te kunnen
gebruiken, raden we u aan om de volgende adviezen na te leven:
- Doe een beroep op uw erkende verdeler voor de installatie, inbedrijfstelling en follow-up.
- Om te kunnen genieten van de garantie van vijf jaar (zie verder voor de voorwaarden),
moet u bij de installatie van uw machine het onderhoudsboekje laten invullen door uw
verdeler. Dit onderhoudsboekje bevindt zich aan de achterkant van uw machine.
Nederlands
2 GARANTIE
JAC biedt een garantie van vijf jaar op al zijn producten.
Deze garantie is geldig voor alle onderdelen van uw machine, inclusief de elektronische,
maar uitgezonderd de verbruiksgoederen. De garantie gaat in op de installatiedatum van het
materiaal.
Onder de volgende beperkende voorwaarden:
- Het materiaal moet bij een erkende verdeler zijn aangekocht.
- De installatie moet door een erkende verdeler zijn uitgevoerd.
- Het materiaal moet worden gebruikt in overeenstemming met de aanwijzingen in de
gebruikershandleiding en voor het doel waarvoor het werd geproduceerd.
- Het materiaal moet dagelijks worden onderhouden in overeenstemming met de
aanwijzingen in de gebruikershandleiding.
- Ten minste een keer per jaar moet onderhoud worden uitgevoerd door de erkende
verdeler en dit in overeenstemming met de onderhoudsspecificaties (onderhoud ten laste
van de gebruiker).
- Alleen originele JAC-onderdelen mogen worden gebruikt.
Als er geen onderhoud wordt uitgevoerd door een erkende verdeler en/of het
onderhoudsboekje niet correct wordt ingevuld, is de garantie beperkt tot één jaar.
De volgende zaken vallen niet onder deze garantie:
- De vervanging van verbruiksgoederen (§9).
- Defecte stukken die door onze diensten niet worden erkend.
- Problemen ten gevolge van een abnormaal gebruik van het materiaal.
- Problemen doordat de installatie niet door een erkende verdeler is uitgevoerd.
Nederlands

43
- De onderdelen of problemen die het gevolg zijn van transportschade of een ongepaste
behandeling.
Een reparatie en/of een vervanging van defecte onderdelen tijdens de
garantieperiode verlengt deze garantie niet.
3 WAARSCHUWINGEN
Het is heel belangrijk dat deze gebruikershandleiding bij het apparaat wordt bewaard zodat
ze later kan worden geraadpleegd. Als dit apparaat wordt verkocht of aan een andere persoon
wordt overgedragen, zorg er dan voor dat de gebruikershandleiding wordt overhandigd zodat
de gebruiker op de hoogte is van de werking ervan en van de daarin vermelde
waarschuwingen.
Deze waarschuwingen worden gegeven voor uw veiligheid en die van anderen. We
vragen u dan ook ze aandachtig te lezen voordat u het apparaat installeert en gebruikt.
Deze machine werd ontworpen om door bevoegde volwassenen te worden gebruikt. Zorg
er dus voor dat ze niet door kinderen wordt aangeraakt en dat ze het niet als speelgoed
beschouwen.
Deze machine is uitsluitend voorbehouden voor professioneel gebruik.
Het is gevaarlijk om de eigenschappen van deze machine te wijzigen of te proberen
wijzigen.
Zorg er na de installatie van deze machine voor dat ze niet op het netsnoer staat.
Volg de verstrekte gebruiksinstructies.
Deze machine moet worden bewaard en gebruikt in een ruimte die niet vochtig of warm
wordt.
Deze machine moet voldoende verlicht zijn om het werk uit te voeren.
Deze machine heeft een geluidsniveau van minder dan 75 dB(A) conform de norm EN ISO
3744.
Deze machine moet door één enkele persoon tegelijkertijd worden gebruikt (behoudens
tegenstrijdig voorschrift).
Deze machine is bedoeld voor het snijden van gebakken en lauw brood.
Deze machine is niet bedoeld voor het volgende brood en materiaal:
- oud brood
- bevroren of half ontdooid brood
- niet-eetbare producten zoals hout, plastic en soortgelijk materiaal
- elk voedingsmiddel dat niet hoort tot de categorie brood of cake
De machine kan beschadigd raken als niet toegestaan brood of materiaal wordt
gesneden.
Nederlands

44
VMP800
VMP1000
Hoogte (mm)
1135
1135
Breedte (mm)
790
990
Diepte (mm)
760
760
Lengte van het toevoerkanaal (mm)
380
480
Breedte van het toevoerkanaal (mm)
340
340
Hoogte van het toevoerkanaal (mm)
16 (20)
16 (20)
Verpakking (mm)
1250 x1200 x 800
1250 x1200 x 800
Nettogewicht (kg)
230
250
Nettogewicht + verpakking (kg)
260
280
Motorvermogen (kW)
0,75
0,75
Motortype
Driefasig
Driefasig
220 V - 50 Hz (A)
7
7
380 V - 50 Hz (A)
N.v.t.
N.v.t.
Capaciteit (toeren/minuut)
120 tot 240
120 tot 240
Bladdiameter (mm)
420
420
Geluidsniveau (dB)
<75
<75
Afwerking uit roestvrij staal
optie
Aanraakscherm
optie
Draagzakken
optie
Houdsysteem voor plat boerenbrood
optie
Speciale kleur
optie
Haal altijd de stekker uit het stopcontact voordat u de buiten- of binnenkant van het
apparaat schoonmaakt of onderhoud uitvoert.
Dit apparaat is zwaar. Neem alle veiligheidsmaatregelen tijdens het onderhoud.
4 TECHNISCHE GEGEVENS
4.1 Technische kenmerken
4.2 Materialen die in direct contact met het deeg komen
Toevoerband: INOX 5WL 430
Omhulling van de greep: INOX 430
Greep: INOX 430
Blad: TEFLON
Afvoerband: INOX 5WL 430
Steunarm voor brood INOX 430
Houdsysteem voor plat boerenbrood (optioneel): INOX 430
Broodplank: INOX 430
Nederlands

45
5 INSTALLATIE EN INBEDRIJFSTELLING
5.1 De machine uit de verpakking halen
De machines worden uit onze ateliers op paletten, verankerd en met karton beschermd geleverd. U
moet eerst en vooral de verpakking bekijken en elke transportschade rechtstreeks aan de koerier
melden.
A. Verwijder het karton en de verpakkingszak van de machine.
B. Verwijder de riemen en let daarbij met name op de terugslag wanneer ze worden
doorgesneden.
C. Maak de machine los van de pallet door de houten latten te verwijderen die de wieltjes
blokkeren.
D. Haal de machine van de pallet. Doe dit met ten minste twee personen zodat de machine niet
hard in contact komt met de grond.
Na het uitpakken van de machine moet u nakijken of ze tijdens het transport geen
schade heeft opgelopen. Meld ons elke afwijking.
5.2 Plaatsing
Voor uitstekende prestaties en betrouwbaarheid op lange termijn moet u een plaats kiezen die:
Goed verlucht is, niet blootgesteld is aan direct zonlicht en uit de buurt is van warmtebronnen,
met een vlak, stevig en trillingsvrij oppervlak.
5.3 Elektrische aansluiting
BELANGRIJK: Verplichte aarding.
Er wordt aangeraden om de installatie te beveiligen met een zekering en
differentiaalschakelaar.
Uw elektriciteitsinstallatie die stroom levert aan de machine moet zoals hieronder aangegeven
worden beveiligd:
- Noord-Amerika: Bescherming van 15 A
- Rest van de wereld: Bescherming van 16 A
Uw machine moet verplicht worden aangesloten op een aftakdoos op een lijn die uitgerust is met een
differentieel van 300 mA.
Opmerking: Elk probleem dat te wijten is aan een andere soort aansluiting wordt niet gedekt door de
garantie.
Voordat u de machine op het net aansluit en om een buitenbedrijfstelling van de motor bij het onder
spanning zetten te vermijden, is het belangrijk dat u controleert of het elektriciteitsnet overeenstemt
met de eigenschappen van de machine (zie het identificatieplaatje).
Dit apparaat is conform de machinerichtlijnen 2006/42, 2006/95, 2004/108 en draagt de CEmarkering die van deze conformiteit getuigt.
Nederlands

46
Neem kennis van de veiligheidspictogrammen op de machine:
Pictogram dat wijst op elektrocutiegevaar. Schakel de machine voor elke
interventie uit. U vindt dit pictogram aan de achterkant van de machine in de buurt
van het netsnoer en binnenin de machine op de schakelkast. (fig.8, n°25).
U vindt het elektrische schema van de machine op de achterkant van de deur van
de schakelkast (fig.8, n°26).
5.4 Inbedrijfstelling
Zorg er vóór de inbedrijfstelling voor dat er zich geen enkel storend voorwerp bevindt op de
bewegende onderdelen van de machine.
Wees er eerst zeker van (na controle van de elektrische overeenstemming) dat de motor in de juiste
richting draait. Als het blad in het snijkanaal stopt en er zich in de machine een fout voordoet, schakel
de machine dan onmiddellijk uit en keer in de stekker de twee fasedraden om.
Raadpleeg het hoofdstuk "Gebruik" voor informatie over het gebruik van de machine.
5.5 Gevaar
Als er gevaar is voor de gebruiker of voor de machine, gebruikt u de hoofdschakelaar om de
stroomtoevoer naar de machine te onderbreken.
Haal de stekker uit het stopcontact voordat u onderhoud uitvoert.
Raak het blad niet aan, ook niet als het stilstaat.
Het blad mag alleen worden vervangen door uw erkende verdeler.
Draag altijd snijbestendige veiligheidshandschoenen tijdens de vervanging van het blad of tijdens
een handeling in de buurt van de bladen.
Elk onderhoud of vervanging van een onderdeel moet door een bekwame persoon worden
uitgevoerd.
6 BEDIENINGS- EN VEILIGHEIDSAPPARAAT
6.1 Bedieningsapparaat
Uw snijmachine is uitgerust met een aanraakscherm (fig.6).
6.2 Werkzone
De werkzone bevindt zich voor de machine (fig.3, n°18).
6.3 Veiligheidsvoorzieningen
Deze machine is uitgerust met:
Een gecodeerde magnetische veiligheidsschakelaar (fig.6, n°19, 20)
Nederlands

47
Deze bestaat uit een veiligheidsmagneet en magnetische sensor die de machine stopt wanneer de
deur vooraan wordt geopend (fig.1, n°10).
Een gecodeerde magnetische veiligheidsschakelaar (fig.6, n°22)
Deze bestaat uit een veiligheidsmagneet en magnetische sensor, die verhindert dat de machine start
wanneer de klep wordt geopend (fig.1, n°1).
Een mechanische veiligheidsvergrendeling (fig.6, n°21)
Deze verhindert dat de klep (fig.1, n°1) kan worden geopend wanneer de machine werkt.
7 GEBRUIK
De met een rem uitgeruste zwenkwielen moeten vóór het gebruik worden vastgezet (fig.1, n°7).
Zet de machine in het begin van de dag onder spanning met de hoofdschakelaar
(fig.2, n°11).
Gebruiksprocedure (fig.4-5)
A. Open de klep.
B. Plaats het brood op de toevoerband.
C. Let erop dat u het brood goed in de rechterhoek naar de voorkant van de machine plaatst.
D. Als de machine een manuele greep heeft, druk de greep dan goed in het brood.
E. Sluit de klep.
F. Kies de snijbreedte.
G. Als de machine een Pro-versie is: Kies het type van snijden. Kies in de modus 'aantal sneden'
het gewenste aantal sneden.
H. Als de machine een Pro-versie is: Kies de snijsnelheid. Standaard wordt de middelste
snijsnelheid geselecteerd. (De drie snijsnelheden zijn standaard bepaald tijdens de fabricage
van de machine. Uw verdeler kan deze snelheden evenwel aanpassen tijdens de
inbedrijfstelling van de machine.)
I. Als de machine een Pro-versie is: Druk op de groene toets om de snijcyclus te starten.
J. Haal het brood van de afvoerband (fig.3, n°13) en steek het op de broodplank in een zak
(fig.1, n°3).
Met de rode knop kunt u een lopende cyclus stoppen.
Nederlands

48
8 ONDERHOUD
8.1 Dagelijks door een opgeleide gebruiker
A. Controleer of de kruimelbak niet moet worden leeggemaakt (NB Vergreet de deur niet te
vergrendelen) (fig.1, n°8).
B. Maak de planken schoon (fig.3, n°13, 15) met een borstel.
C. Maak het glas van de klep schoon (fig.1, n°1) en houd deze daarbij in schoonmaakpositie
(fig.9).
D. Gebruik een droge doek om de binnenkant schoon te maken.
E. Gebruik een vochtige doek om de buitenkant schoon te maken.
F. De schoonmaakmodus inschakelen:
druk op het symbool 'borstel' in de rechterbovenhoek.
8.2 Om de 25.000 snij-acties en/of minimaal één keer per jaar door een erkende verdeler.
A. Haal de stekker uit het stopcontact (fig.2, n°12).
B. Controleer de staat van het snijblad (fig.1, n°2).
C. Als de snijkwaliteit daalt, vervang dan het snijblad (JAC-referentie: BVSLCA030 in de
wisselstukkencatalogus van JAC).
D. Als het moeten worden vervangen, vervang het blad dan conform de vervangingsprocedure
voor snijbladen (fig.7).
E. Maak schoon met een borstel en stofzuig de binnenkant van de machine.
Controleer goed of uw erkende verdeler zijn interventie in uw onderhoudsboekje heeft genoteerd
zodat u uw garantie van vijf jaar behoudt.
8.3 Vervanging van de bladen
(fig.7)
Draag altijd snijbestendige veiligheidshandschoenen (norm EN 388: 2003 index B= 5) en
veiligheidsschoenen tijdens de vervanging van het blad of tijdens een handeling in de buurt van de
bladen.
Nadat u er zeker van bent dat de stekker van de machine (fig.2, n°12) uit het stopcontact is gehaald:
Open de deur (fig.1, n°10) met de grendel (fig.1, n°9).
Maak de kruimelbak schoon (fig.1, n°8).
Het blad vervangen:
A. Schroef de twee sleutels op de linkerkant van de machine los (fig.7, n°23).
B. Haal de bladbescherming (fig.1, n°6) eruit met behulp van de schroeven met holle
binnenzeskant.
C. Draai de schroef los die het blad op zijn plaats houdt (fig.7, n°24) met behulp van de twee
meegeleverde sleutels (fig.7, n°23).
D. Verwijder de stut en vervang het blad. Let er daarbij op dat u het goed in de
veiligheidsringen plaatst. Plaats de stut terug.
E. Draai met de meegeleverde sleutels de nieuwe bij het blad meegeleverde schroef vast om
het blad vast te zetten. Het is belangrijk om de nieuwe schroef te gebruiken voor een optimale
aanspanning.
Plaats de kruimelbak terug en sluit de deur.
Steek de stekker in het stopcontact. De machine is klaar.
Controleer goed of uw erkende verdeler zijn interventie in uw onderhoudsboekje heeft genoteerd
zodat u uw garantie van vijf jaar behoudt.
Nederlands

49
Houd er rekening mee dat uw blad opnieuw kan worden geslepen. Neem contact op met uw erkende
ARTIKELCODE
OMSCHRIJVING
MODEL
5740214
WIELTJE VAN KLEP
ALLE
BVMPT012
KAPGLIJDER
ALLE
6110029
CIRKELBLAD Ø420 MM – 3 MM
ALLE
7240043
LINEAIRE GELEIDINGSRIEM
ALLE
MP00304
BAND SCHUIM KAP
ALLE
BVMPA005
VEERPEN STEUNARM VOOR SCHIJF
ALLE
BVMPT005
SCHOEN STEUNARM VOOR SCHIJF
ALLE
SCHUIM STEUNARM VOOR SCHIJF
ALLE
BVMPT003
GELEIDING GREEP 800
800
BVMPT004
GELEIDING GREEP 1000
1000
W008709
SCHOEN VILT GREEP
GREEP
MANUEEL
EXCENTRIEKE BORSTEL
ALLE
BVMPA006
BORSTEL BIJ DOORGANG GREEP 800
800
BVMPA007
BORSTEL BIJ DOORGANG GREEP
1000
1000
verdeler voor meer informatie.
9 VERBRUIKSGOEDEREN
Ga bij de bestelling van een wisselstuk met uw verdeler na om welk stuk het gaat op basis van de
wisselstukkencatalogus van de fabrikant.
Geef altijd het machinenummer op zoals vermeld op het identificatieplaatje.
Uw verdeler doet de bestellingen bij JAC.
9.1 Lijst met VERBRUIKSGOEDEREN
Nederlands

50
10 FUNCTIONERINGSINCIDENTEN
Probleem
Verificatie
De machine werkt niet
Sluit de machine met de kabel op het stopcontact aan (fig.2, n°12)
Schakel de hoofdschakelaar in (fig.2, n°11)
Sluit de kap bovenaan.
Sluit de deur.
De machine werkt maar het
brood wordt beschadigd of
onregelmatig gesneden
Controleer of de bladen niet moeten worden vervangen (fig.7).
Laat het brood enkele uren afkoelen.
Plaats brood met toegelaten afmetingen.
Plaats een redelijk stevig brood.
Als het blad omgekeerd draait, keer dan de twee fasen in de stekker van de
machine om.
OPGELET: De machine moet bij elke tussenkomst verplicht worden uitgeschakeld.
Als het probleem zich blijft voordoen, neem dan contact op met uw technicus.
Nederlands

51
11 FOUTCODES
Knipperen of code op het
scherm weergegeven
Beschrijving van het
probleem
Actie
ERR 001
Open klep of deur
Sluit de klep en de deur.
Schakel de machine uit met behulp van de
hoofdschakelaar (fig.2, n°12) en schakel ze
opnieuw in na 30 seconden. Als het probleem
zich blijft voordoen, neem dan contact op met
uw technicus.
Zorg ervoor dat er geen enkel voorwerp of
stof de greep van het brood blokkeert.
Verwijder elk voorwerp dat in de buurt van
het doorgangskanaal van het blad zit en
plaats het brood onderaan rechts van de
toevoerband.
Schakel de machine uit met behulp van de
hoofdschakelaar (fig.2, n°12) en schakel ze
opnieuw in na 30 seconden. Als het probleem
zich blijft voordoen, neem dan contact op met
uw technicus.
ERR 002
Storing van de stroomkring
ERR 003
Storing van de regelaar
ERR 004
Storing van de greep
ERR 005
Voorwerp vóór de sensor
van het snijkanaal
ERR 006
Lineaire storing
Als het probleem zich blijft voordoen, neem dan contact op met uw technicus.
Nederlands

52
12 LIJST MET ONDERDELEN OP DE AFBEELDINGEN
Afbeelding
Bol
Naam
1
1
Bovenste kap
2
Blad
3
Broodplank
4
Scherm
5
Draagzakken (optie)
6
Bladbescherming
7
Wieltjes met rem
8
Kruimelbak
9
Vergrendeling van deur vooraan
10
Deur vooraan
2
11
Hoofdschakelaar
12
Aansluitingskabel
3
13
Afvoerband
14
Steunarm voor brood
15
Toevoerband
16
Manuele greep
17
Automatische greep
18
Werkzone
6
19
Veiligheidssensor
20
Veiligheidsmagneet
21
Mechanische grendel
22
Veiligheidssensor
7
23
Sleutels voor de demontage van het blad
24
Bladschroef
8
25
Sticker gevaar voor elektrocutie
26
Elektrisch schema
Nederlands

53
Дисковая хлеборезка Varia Pro
1! ПЕРЕД ВВОДОМ В ЭКСПЛУАТАЦИЮ ............................................................... 54!
2! ГАРАНТИЯ ............................................................................................................. 54!
3! ПРЕДУПРЕЖДЕНИЯ ............................................................................................. 55!
4! ТЕХНИЧЕСКИЕ ХАРАКТЕРИСТИКИ .................................................................. 56!
4.1! Технические характеристики ................................................................................ 56!
4.2! Данные о материалах, находящихся в непосредственном контакте с тестом56!
5! УСТАНОВКА И ВВОД В ЭКСПЛУАТАЦИЮ ....................................................... 57!
5.1! Распаковка машины ............................................................................................... 57!
5.2! Место установки ...................................................................................................... 57!
5.3! Электрическое подключение ................................................................................ 57!
5.4! Ввод в эксплуатацию ............................................................................................. 58!
5.5! Опасность ................................................................................................................. 58!
6! ОРГАНЫ УПРАВЛЕНИЯ И ПРЕДОХРАНИТЕЛЬНЫЕ УСТРОЙСТВА ............ 59!
6.1! Органы управления ................................................................................................ 59!
6.2! Рабочая зона ............................................................................................................ 59!
6.3! Предохранительные устройства ......................................................................... 59!
7! ЭКСПЛУАТАЦИЯ .................................................................................................. 59!
8! ТЕХНИЧЕСКОЕ ОБСЛУЖИВАНИЕ ..................................................................... 60!
8.1! Ежедневное, выполняется пользователем, прошедшим подготовку .......... 60!
8.2! Через каждые 25 000 нарезок и/или не реже 1 раза в год; выполняется уполномоченным
специалистом ...................................................................................................................... 60!
8.3! Замена лезвий ......................................................................................................... 60!
9! РАСХОДНЫЕ МАТЕРИАЛЫ ............................................................................... 61!
9.1! Список РАСХОДНЫХ МАТЕРИАЛОВ .................................................................... 61!
10! НЕПОЛАДКИ В РАБОТЕ .................................................................................. 62!
11! КОДЫ ОШИБОК ................................................................................................ 63!
12! СПИСОК КОМПЛЕКТУЮЩИХ НА ИЗОБРАЖЕНИЯХ ................................... 64!
Русский

54
1 ПЕРЕД ВВОДОМ В ЭКСПЛУАТАЦИЮ
Благодарим за то, что выбрали продукцию компании JAC. Перед установкой машины
и ее вводом в эксплуатацию обязательно прочтите настоящее руководство. Таким
образом вы сможете защитить себя и избежать повреждений машины.
В настоящем руководстве содержатся ссылки на различные изображения,
облегчающие понимание инструкций. Эти изображения находятся в конце руководства.
Обращайтесь к ним, когда встретите в тексте обозначения следующего вида: (рис. x,
поз. y).
Для обеспечения бесперебойной работы машины в будущем предлагаем
ознакомиться с представленными ниже указаниями:
— для установки машины, ее ввода в эксплуатацию и контроля работы обращайтесь
к уполномоченному специалисту;
— чтобы воспользоваться 5-летней гарантией (см. необходимые условия ниже), при
установке машины дистрибьютор должен заполнить журнал технического
обслуживания. Журнал технического обслуживания находится в задней части машины.
Русский
2 ГАРАНТИЯ
Компания JAC предоставляет 5-летнюю гарантию на всю свою продукцию.
Гарантия распространяется на все детали машины, в том числе электронные, кроме
расходных материалов. Гарантия вступает в силу с даты установки оборудования.
Гарантия действует при соблюдении следующих ограничительных условий:
— приобретение оборудования у аккредитованного дистрибьютора;
— выполнение установки уполномоченным специалистом;
— использование оборудования в соответствии с указаниями, содержащимися в
руководстве по эксплуатации, и по назначению, предусмотренному при
производстве;
— ежедневное техническое обслуживание оборудования в соответствии с
указаниями, содержащимися в руководстве по эксплуатации;
— выполнение технического обслуживания уполномоченным специалистом в
соответствии с требованиями по техническому обслуживанию не реже одного раза в
год (производится за счет пользователя);
— использование исключительно оригинальных деталей компании JAC.
При отсутствии контроля за техническим обслуживанием со стороны
уполномоченного специалиста и/или в случае неправильного ведения журнала
технического обслуживания действие гарантии ограничивается одним годом.
Гарантия не распространяется:
— на замену расходных материалов (§ 9);
— на детали, признанные неисправными сторонними службами;
Русский

55
— на проблемы, возникшие вследствие неправильной эксплуатации оборудования;
— на проблемы, возникшие вследствие установки машины не уполномоченным
специалистом;
— на детали или проблемы, связанные с повреждениями оборудования во время
транспортировки или ненадлежащим обращением при погрузочно-разгрузочных
работах.
Ремонт и/или замена неисправных деталей, выполненные в течение
гарантийного периода, не могут служить основанием для продления данной
гарантии.
3 ПРЕДУПРЕЖДЕНИЯ
Настоящее руководство следует сохранить для получения справочной информации
при дальнейшей эксплуатации машины. В случае продажи или передачи машины
другому лицу следует удостовериться, что руководство по эксплуатации передается
вместе с ней, чтобы пользователь мог получить информацию о ее работе и связанных с
ней предупреждениях.
Данные предупреждения необходимы для обеспечения вашей безопасности и
безопасности других лиц. Просим вас внимательно прочесть эти предупреждения
перед установкой и эксплуатацией машины.
Машина разработана для использования совершеннолетними лицами с
соответствующим разрешением. Поэтому нужно следить за тем, чтобы дети не
прикасались к машине и не использовали ее в качестве игрушки.
Машина предназначена исключительно для профессионального использования.
Опасно вносить изменения в характеристики машины или предпринимать
соответствующие попытки.
После установки машины убедитесь в том, что она не стоит на кабеле
электропитания.
Соблюдайте данные инструкции по эксплуатации.
Машина должна храниться и использоваться в помещении, защищенном от сырости
и жары.
Машина должна быть достаточно освещена для выполнения работы.
Уровень шума машины ниже 75 дБ (A) согласно стандарту EN ISO 3744.
Данную машину должен обслуживать одновременно один оператор (если не указано
иное).
Данная машина предназначена для нарезки печеного и выдержанного хлеба.
Данная машина не предназначена для следующих материалов и видов хлеба:
- черствый хлеб;
- замороженный или частично размороженный хлеб;
Русский

56
- непищевые изделия из древесины, пластмассы и аналогичных материалов;
VMP800
VMP1000
Высота (мм)
1135
1135
Ширина (мм)
790
990
Глубина (мм)
760
760
Длина входного канала (мм)
380
480
Ширина входного канала (мм)
340
340
Высота входного канала (мм)
16 (20)
16 (20)
Упаковка (мм)
1250 x 1200 x 800
1250 x 1200 x 800
Масса нетто, кг
230
250
Масса нетто + упаковка (кг)
260
280
Мощность двигателя, кВт
0,75
0,75
Тип двигателя
Трехфазный
Трехфазный
220 В, 50 Гц (A)
7
7
380 В, 50 Гц (A)
Нет данных
Нет данных
Мощность (об/мин)
120—240
120—240
Диаметр ножа (мм)
420
420
Уровень шума (дБ)
<75
<75
Отделка из нержавеющей стали
опция
Сенсорная клавиатура
опция
Приспособление с крючками для пакетов
опция
Система удержания буханки специфической
формы
опция
Специальный цвет
опция
- любые пищевые продукты, не входящие в категорию хлебных или кексовых
изделий.
Нарезка перечисленных видов хлеба или материалов может привести к
повреждению машины.
Обязательно отключайте машину от сети электропитания перед выполнением
чистки внутренних/внешних поверхностей, а также операций по техническому
обслуживанию.
Устройство имеет большой вес. Принимайте все необходимые меры
предосторожности при транспортировке и погрузочно-разгрузочных работах.
4 ТЕХНИЧЕСКИЕ ХАРАКТЕРИСТИКИ
4.1 Технические характеристики
4.2 Данные о материалах, находящихся в непосредственном контакте с тестом
Входная полка: НЕРЖ. 5WL 430
Кожух захвата: нерж. 430
Захват: нерж. 430
Русский

57
Нож: ТЕФЛОН
Выходная полка: НЕРЖ. 5WL 430
Рычаг отведения буханки: нерж. 430
Система удержания буханки специфической формы (опция): нерж. 430
Устройство для упаковки в пакеты: нерж. 430
5 УСТАНОВКА И ВВОД В ЭКСПЛУАТАЦИЮ
5.1 Распаковка машины
Машины из наших цехов поставляются на поддонах, закрепленные ремнями и в защитной
картонной коробке. Прежде всего следует осмотреть упаковку на предмет наличия повреждений,
полученных во время транспортировки, и сообщить о них непосредственно поставщику.
A. Удалите картонную коробку и упаковочный пакет машины.
B. Снимите ремни, обратив особое внимание на их ослабление при разрезании.
C. Открепите машину от поддона, сняв деревянные рейки, фиксирующие колесики.
D. Снимите машину с поддона. В этой операции должно участвовать не менее двух
человек для обеспечения максимально плавного соприкосновения машины с полом.
После распаковки машины убедитесь, что она не получила повреждений при
транспортировке. Сообщайте нам о любых дефектах.
5.2 Место установки
Для обеспечения долгосрочной высокой производительности и надежности машины следует
правильно выбрать место установки:
оно должно быть хорошо проветриваемым, защищенным от воздействия прямых
солнечных лучей, удаленным от источников тепла, с ровной и прочной поверхностью, не
подвергающейся вибрации.
5.3 Электрическое подключение
ВАЖНАЯ ИНФОРМАЦИЯ! Обязательно наличие заземления.
Рекомендуется защитить электрическую цепь с помощью плавкого
предохранителя и дифференциального автоматического выключателя.
Электрическая установка, обеспечивающая питание машины, должна быть защищена
следующим образом:
— Северная Америка: предохранительное устройство 15 A;
— остальные страны: предохранительное устройство 16 A.
Машина должна быть подключена к разветвительной коробке на линии с дифференциальным
автоматом 300 мА.
Примечание. На любые проблемы, возникшие в связи с иным видом подключения, гарантия не
распространяется.
Русский

58
Перед подключением машины к электросети и во избежание выхода двигателя из строя в
момент подключения следует убедиться в соответствии электросети характеристикам машины
(см. заводскую табличку).
Машина соответствует Директивам по механическому оборудованию 2006/42, 2006/95,
2004/108 и имеет подтверждающую маркировку CE.
Ознакомьтесь с пиктограммами техники безопасности, имеющимися на машине.
Пиктограмма, предупреждающая об опасности поражения электрическим
током. Отключите устройство от сети перед выполнением любых работ по
ремонту и обслуживанию. Данная пиктограмма находится на задней панели
устройства, рядом с кабелем питания, и внутри устройства на отсеке
электрощитка (рис. 8, № 25).
Электросхема машины находится на обратной стороне дверцы отсека
электрощитка (рис. 8, № 26).
5.4 Ввод в эксплуатацию
Перед вводом в эксплуатацию убедитесь в отсутствии любых посторонних предметов на
подвижных частях машины.
После проверки соответствия электрических характеристик в первую очередь убедитесь в том,
что двигатель вращается в правильном направлении. Если нож останавливается в канале
нарезки, и машина переходит в режим сбоя, немедленно отключите электропитание и
поменяйте местами два провода фазы на разъеме.
Сведения об использовании машины см. в разделе «Эксплуатация».
5.5 Опасность
В случае возникновения опасности для пользователя или для машины следует отключить
электропитание с помощью главного выключателя.
Извлеките штекер из электрической розетки перед выполнением любых операций по
техническому обслуживанию и ремонту.
Не прикасайтесь к ножу, даже если машина выключена.
Для замены ножа обратитесь к аккредитованному дистрибьютору.
Обязательно надевайте защитные перчатки, предохраняющие от порезов, при выполнении
операций в непосредственной близости от лезвий или при замене лезвий.
Все операции по техническому обслуживанию или замене деталей должны осуществляться
квалифицированным специалистом.
Русский

59
6 ОРГАНЫ УПРАВЛЕНИЯ И ПРЕДОХРАНИТЕЛЬНЫЕ УСТРОЙСТВА
6.1 Органы управления
Хлеборезка оборудована сенсорным экраном (рис 6).
6.2 Рабочая зона
Рабочая зона находится перед машиной (рис. 3, № 18).
6.3 Предохранительные устройства
Оборудование на данной машине:
кодированный магнитный аварийный выключатель (рис. 6, № 19, 20),
состоящий из предохранительного магнита и магнитного датчика, который останавливает
машину при открытии передней дверцы (рис. 1, № 10);
кодированный магнитный аварийный выключатель (рис. 6, № 22),
состоящий из предохранительного магнита и магнитного датчика, который предотвращает
запуск машины при открытой крышке (рис. 1, № 1);
механический предохранительный запор (рис. 6, № 21),
препятствующий открытию крышки (рис. 1, № 1) во время работы машины.
7 ЭКСПЛУАТАЦИЯ
Перед началом работы колесики, оснащенные тормозами, необходимо заблокировать (рис. 1,
№ 7).
В начале рабочего дня машину следует включить с помощью главного выключателя.
(рис. 2, № 11).
Порядок эксплуатации (рис. 4—5)
A. Откройте крышку.
B. Поместите буханку на входную полку.
C. Обязательно поместите буханку в правый угол в направлении передней части машины.
D. Если машина оборудована ручным захватом, убедитесь, что он плотно вставлен в хлеб.
E. Закройте крышку.
F. Выберите нужную толщину ломтей.
G. Если машина является Pro-версией: Выберите вид нарезки. В режиме количества
ломтей выберите нужное количество ломтей.
H. Если машина является Pro-версией: выберите скорость резания. По умолчанию
выбрана промежуточная скорость резания. (При изготовлении машины три скорости
резания являются стандартными. Однако уполномоченный специалист может
отрегулировать эти скорости при вводе машины в эксплуатацию.)
I. Если машина является Pro-версией: для запуска цикла нарезки нажмите на зеленую
кнопку.
J. Заберите хлеб с выходной полки (рис. 3, № 13) и упакуйте его с помощью устройства
для упаковки в пакеты (рис. 1, № 3).
Остановить текущий цикл можно с помощью красной кнопки.
Русский

60
8 ТЕХНИЧЕСКОЕ ОБСЛУЖИВАНИЕ
8.1 Ежедневное, выполняется пользователем, прошедшим подготовку
A. Проверьте, не следует ли опорожнить бак для крошек (рис. 1, № 8). (Внимание! Не
забудьте запереть дверцу на ключ.)
B. Очистите полки (рис. 3, № 13, 15) с помощью щетки.
G. Очистите стекла крышки (рис. 1, № 1) в положении для чистки (рис. 9).
H. Для очистки внутренних поверхностей используйте сухую ткань.
I. Внешние поверхности протрите влажной тканью.
J. Включите режим чистки:
нажмите на изображение щетки в правом верхнем углу.
8.2 Через каждые 25 000 нарезок и/или не реже 1 раза в год; выполняется уполномоченным
специалистом
A. Извлеките штекер из разъема (рис. 2, № 12).
B. Проверьте состояние ножа (рис. 1, № 2).
C. При констатации снижения качества нарезки заказать замену ножа (артикул JAC:
BVSLCA030 в каталоге запасных частей компании JAC).
D. Если нож подлежит замене, эта операция должна быть выполнена в соответствии с
процедурой замены ножа (рис. 7).
E. Очистите внутренние поверхности машины с помощью щетки и пылесоса.
Проверьте внесение аккредитованным специалистом записи о выполненной работе в журнал
технического обслуживания для сохранения 5-летней гарантии.
8.3 Замена лезвий
(рис. 7)
Обязательно надевайте защитные перчатки, предохраняющие от порезов (стандарт EN 388:
2003, индекс B = 5), и защитную обувь во время выполнения замены лезвия или операций в
непосредственной близости от лезвий.
Убедитесь, что штекер машины (рис. 2, № 12) отсоединен от электросети:
откройте дверцу (рис. 1, № 10) с помощью запора (рис. 1, № 9).
Извлеките бак для крошек (рис. 1, № 8).
Замена ножа:
A. Открутите два ключа на левой стороне машины (рис. 7, № 23).
B. Снимите защитное устройство ножа (рис. 1, № 6), открутив винты с 6-гранным
углублением.
C. Открутите гайку, удерживающую нож (рис. 7, № 24) с помощью двух ключей,
входящих в комплект поставки (рис. 7, № 23).
D. Извлеките клин и замените нож, убедившись в правильном расположении выступов,
предохраняющих от неправильной установки. Установите клин на место.
E. Закрутите новую гайку, поставляемую вместе с новым ножом, и зажмите ее с
помощью ключей, входящих в комплект поставки. Для оптимального зажатия важно,
чтобы была использована именно новая гайка.
Установите на место бак для крошек и закройте дверцу.
Подключите машину к электросети. Машина готова к работе.
Проверьте внесение аккредитованным специалистом записи о выполненной работе в журнал
технического обслуживания для сохранения 5-летней гарантии.
Русский

61
Обратите внимание, что нож можно затачивать повторно. Свяжитесь с аккредитованным
КОД ДЕТАЛИ
НАИМЕНОВАНИЕ
МОДЕЛЬ
5740214
РОЛИК КРЫШКИ
ВСЕ
BVMPT012
КАРЕТКА КРЫШКИ
ВСЕ
6110029
ДИСКОВЫЙ НОЖ Ø 420—3 ММ
ВСЕ
7240043
РЕМЕНЬ ЛИНЕЙНОЙ
НАПРАВЛЯЮЩЕЙ
ВСЕ
MP00304
ЛЕНТА ПЕНОПЛАСТ. КРЫШКИ
ВСЕ
BVMPA005
ПЛАСТИНКА ПРУЖИНЫ РЫЧАГА
ОТВЕДЕНИЯ ЛОМТЯ
ВСЕ
BVMPT005
КАРЕТКА РЫЧАГА ОТВЕДЕНИЯ
ЛОМТЯ
ВСЕ
ПЕНОПЛАСТ РЫЧАГА ОТВЕДЕНИЯ
ЛОМТЯ
ВСЕ
BVMPT003
НАПРАВЛЯЮЩАЯ ЗАХВАТА 800
800
BVMPT004
НАПРАВЛЯЮЩАЯ ЗАХВАТА 1000
1000
W008709
ВОЙЛОЧНЫЙ ПОЛОЗОК ЗАХВАТА
ЗАХВАТ
РУЧНОЙ
ЩЕТКА ПЛАНЕТАРНАЯ
ВСЕ
BVMPA006
ЩЕТКА ПРОХОДА ЗАХВАТА 800
800
BVMPA007
ЩЕТКА ПРОХОДА ЗАХВАТА 1000
1000
специалистом для получения более подробной информации.
9 РАСХОДНЫЕ МАТЕРИАЛЫ
При заказе запчасти проверьте вместе с уполномоченным специалистом, о какой детали идет
речь, по каталогу запчастей, выпускаемому производителем.
Всегда уточняйте номер машины, указанный на заводской табличке.
Заказ в компании JAC может разместить ваш уполномоченный специалист.
9.1 Список РАСХОДНЫХ МАТЕРИАЛОВ
Русский

62
10 НЕПОЛАДКИ В РАБОТЕ
Проблема
Проверка
Машина не работает
Подключить машину с помощью кабеля (рис. 2, № 12).
Включить главный выключатель (рис. 2, № 11).
Закрыть крышку.
Закрыть дверцу.
Машина работает, но
буханки разрушаются или
нарезаются неровно.
Проверить, не нужно ли заменить лезвия (рис. 7).
Дать хлебу остыть несколько часов.
Загрузить буханку подходящих размеров.
Загрузить достаточно плотную буханку.
Если нож вращается в обратную сторону, поменяйте две фазы на
разъеме электропитания машины.
ВНИМАНИЕ! При любых работах машину необходимо отключать от электропитания.
Если проблема не устраняется, обратитесь к вашему техническому специалисту.
Русский

63
11 КОДЫ ОШИБОК
Мигание или отображение
кода на экране
Описание проблемы
Действие
ERR 001
Крышка или дверца
открыты
Закройте крышку и дверцу.
Выключите машину с помощью главного
выключателя (рис. 2, № 12) и повторно
запустите ее через 30 секунд. Если
проблема не устраняется, обратитесь к
вашему техническому специалисту.
Убедитесь, что захват для хлеба не закрыт
посторонними предметами или пылью.
Удалите все предметы, находящиеся
рядом с каналом прохода для лезвия, и
поместите хлеб в правом нижнем углу
входной полки.
Выключите машину с помощью главного
выключателя (рис. 2, № 12) и повторно
запустите ее через 30 секунд. Если
проблема не устраняется, обратитесь к
вашему техническому специалисту.
ERR 002
Неисправность
электрической цепи
ERR 003
Сбой вариатора
ERR 004
Сбой захвата
ERR 005
Предмет перед датчиком
канала резки
ERR 006
Линейный сбой
Если проблема не устраняется, обратитесь к вашему техническому специалисту.
Русский

64
12 СПИСОК КОМПЛЕКТУЮЩИХ НА ИЗОБРАЖЕНИЯХ
Рисунок
Позиция
Наименование
1
1
Верхняя крышка
2
Нож
3
Устройство для упаковки в пакеты
4
Экран
5
Держатели пакетов (опция)
6
Защитное устройство ножа
7
Тормозные ролики
8
Бак для крошек
9
Замок передней дверцы
10
Передняя дверца
2
11
Главный выключатель
12
Соединительный кабель
3
13
Выходная полка
14
Рычаг отведения буханки
15
Входная полка
16
Ручной захват
17
Автоматический захват
18
Рабочая зона
6
19
Предохранительный датчик
20
Предохранительный магнит
21
Механический запор
22
Предохранительный датчик
7
23
Ключи для демонтажа ножа
24
Гайка ножа
8
25
Наклейка «Опасность поражения
электрическим током»
26
Электрическая схема
Русский

65
1! ANTES DE LA PUESTA EN SERVICIO ................................................................ 66!
2! GARANTÍA ............................................................................................................. 66!
3! ADVERTENCIAS .................................................................................................... 67!
4! CARACTERÍSTICAS TÉCNICAS .......................................................................... 68!
4.1! Características técnicas ........................................................................................... 68!
4.2! Detalle de materiales en contacto directo con la masa ......................................... 68!
5! INSTALACIÓN Y PUESTA EN SERVICIO ............................................................ 69!
5.1! Desembalaje de la máquina ..................................................................................... 69!
5.2! Ubicación ................................................................................................................... 69!
5.3! Conexión eléctrica .................................................................................................... 69!
5.4! Puesta en servicio ..................................................................................................... 70!
5.5! Peligro ........................................................................................................................ 70!
6! CUADRO DE CONTROL Y DE SEGURIDAD ........................................................ 70!
6.1! Cuadro de control ..................................................................................................... 70!
6.2! Área de trabajo .......................................................................................................... 70!
6.3! Cuadro de seguridad ................................................................................................ 70!
7! USO ........................................................................................................................ 71!
8! LIMPIEZA ............................................................................................................... 72!
8.1! Diaria por un usuario formado ................................................................................. 72!
8.2! Cada 25 000 cortes o 1 vez al año como mínimo, por un agente autorizado ...... 72!
8.3! Cambio de las cuchillas ........................................................................................... 72!
9! CONSUMIBLES ...................................................................................................... 73!
9.1! Lista de CONSUMIBLES ........................................................................................... 73!
10! INCIDENTES DE FUNCIONAMIENTO ............................................................... 74!
11! CÓDIGOS DE ERROR ........................................................................................ 75!
12! LISTA DE COMPONENTES DE LAS FIGURAS ................................................ 76!

66
A. ANTES DE LA PUESTA EN SERVICIO
Gracias por haber elegido una solución JAC. Lea con atención este manual de uso antes
de instalar y poner en servicio esta máquina. De esta forma, puede protegerse y evitar el
deterioro de su máquina.
Este manual hace referencia a distintas figuras con el fin de facilitar la comprensión de las
instrucciones. Estas figuras se encuentran al final del manual. Consúltelas cuando vea los
siguientes símbolos (fig. x, n.º y).
Para que el funcionamiento de su máquina sea satisfactorio a lo largo de los
próximos años, le aconsejamos que lea los siguientes consejos:
- Solicite ayuda a su agente autorizado para la instalación, la puesta en servicio y el
seguimiento.
- Para poder beneficiarse de la garantía de 5 años (consulte las condiciones indicadas a
continuación), solicite a su distribuidor que complete la tarjeta de mantenimiento al instalar
su máquina. Esta tarjeta de mantenimiento se encuentra en la parte trasera de su máquina.
Español
13 GARANTÍA
JAC ofrece una garantía de 5 años en todos sus productos.
Esta garantía es válida para todas las piezas de su máquina, incluidas las electrónicas,
excluyendo los consumibles. La garantía entra en vigor a partir de la fecha de instalación del
material.
Con las siguientes condiciones restrictivas:
- el material debe haberse adquirido a un revendedor autorizado;
- la instalación deberá efectuarla un agente autorizado;
- el material debe utilizarse conforme a las indicaciones del manual de uso y para la
finalidad para la que ha sido fabricado;
- el mantenimiento diario del material debe efectuarse conforme a las indicaciones del
manual de uso;
- el agente autorizado debe hacer un seguimiento del mantenimiento conforme a las
especificaciones de mantenimiento, como mínimo, una vez al año (mantenimiento a cargo
del usuario);
- deben utilizarse exclusivamente piezas originales JAC.
Si un agente autorizado no efectúa el seguimiento del mantenimiento y/o la tarjeta
de mantenimiento no está cumplimentada correctamente, la garantía se limita a un
año.
Esta garantía no cubre:
- la sustitución de consumibles (§9);
- las piezas que nuestros servicios no reconozcan como defectuosas;
- los problemas derivados de un uso anormal del material;
Español

67
- los problemas derivados de una instalación no efectuada por un agente autorizado;
- las piezas o los problemas causados por daños en el transporte o por un mantenimiento
inadecuado.
Una reparación y/o una sustitución de piezas defectuosas efectuada(s) durante el
periodo de garantía no supondrá(n) la prolongación de dicha garantía.
14 ADVERTENCIAS
Es muy importante conservar este manual de uso junto con el aparato para futuras
consultas. Si este aparato se vende o se transfiere a otra persona, asegúrese de que se le
entrega también el manual de uso para que el usuario pueda estar informado de su
funcionamiento y de las advertencias que se indican aquí.
Estas advertencias se indican por su seguridad y la de los demás. Le rogamos que
las lea con atención antes de instalar y utilizar el aparato.
Esta máquina está diseñada para ser utilizada por adultos autorizados. Asegúrese de que
los niños no la toquen o que no la usen como un juguete.
Esta máquina está destinada únicamente a un uso profesional.
Es peligroso modificar o intentar modificar las características de esta máquina.
Después de instalar la máquina, asegúrese de que no aplasta el cable de alimentación.
Siga las instrucciones de uso.
Esta máquina debe almacenarse y utilizarse dentro de un local protegido de la humedad
y del calor.
Esta máquina debe estar suficientemente iluminada para efectuar el trabajo.
Esta máquina tiene un nivel sonoro inferior a 75 dB(A), conforme a la norma EN ISO 3744.
Esta máquina debe utilizarla una sola persona a la vez (salvo indicación contraria).
Esta máquina está diseñada para el corte de panes cocidos y templados.
Esta máquina no está diseñada para los siguientes panes y materiales:
- panes duros;
- panes congelados o parcialmente descongelados;
- Productos no comestibles como la madera, el plástico y materiales similares.
- Cualquier otro alimento que no forme parte de la categoría de panes o bizcochos.
La máquina puede sufrir daños al cortar panes o materiales no permitidos.
Desconecte siempre la toma de corriente antes de proceder a la limpieza interior y
exterior del aparato y a las operaciones de mantenimiento.
Español

68
Este aparato es pesado. Tome todas las precauciones de seguridad durante su
VMP800
VMP1000
Altura (mm)
1135
1135
Anchura (mm)
790
990
Profundidad (mm)
760
760
Longitud del canal de entrada (mm)
380
480
Anchura del canal de entrada (mm)
340
340
Altura del canal de entrada (mm)
16 (20)
16 (20)
Embalaje (mm)
1250 x 1200 x 800
1250 x 1200 x 800
Peso neto (kg)
230
250
Peso neto + embalaje (k)
260
280
Potencia del motor (kW)
0,75
0,75
Tipo de motor
Trifásico
Trifásico
220 v - 50 Hz (A)
7
7
380 v - 50 Hz (A)
N.A.
N.A.
Capacidad (rpm)
De 120 a 240
De 120 a 240
Diámetro de la cuchilla (mm)
420
420
Nivel sonoro (dB)
<75
<75
Chasis de acero inoxidable
Opcional
Teclado táctil
Opcional
Portabolsas
Opcional
Sistema de sujeción de hogazas
Opcional
Color especial
Opcional
mantenimiento.
15 CARACTERÍSTICAS TÉCNICAS
15.1 Características técnicas
15.2 Detalle de materiales en contacto directo con la masa
Tabla de entrada: ACERO INOXIDABLE 5WL 430
Cárter de garra: ACERO INOXIDABLE 430
Garra: ACERO INOXIDABLE 430
Cuchilla: TEFLÓN
Tabla de salida: ACERO INOXIDABLE 5WL 430
Brazo de agarre del pan: ACERO INOXIDABLE 430
Sistema de sujeción de hogazas (opcional): ACERO INOXIDABLE 430
Embolsador: ACERO INOXIDABLE 430
Español

69
16 INSTALACIÓN Y PUESTA EN SERVICIO
16.1 Desembalaje de la máquina
Las máquinas que salen de nuestros talleres se entregan en palés atados y protegidos con cartón.
Antes de realizar cualquier acción, debe observarse el embalaje e informar al transportista de cualquier
daño debido al transporte.
A. Quite el cartón y el plástico de embalaje de la máquina.
B. Quite las cinchas prestando especial atención a destensarlas al seccionarlas.
C. Separe la máquina del palé levantando los listones de madera que bloquean las ruedas.
D. Baje la máquina del palé. Efectúe esta operación entre dos personas como mínimo para
amortiguar al máximo el contacto con el suelo.
Después de desembalar la máquina, compruebe que no ha sufrido daños durante el
transporte. Infórmenos de cualquier anomalía.
16.2 Ubicación
Para obtener un rendimiento excelente y una fiabilidad a largo plazo, elija una ubicación que esté:
Bien ventilada, protegida de los rayos directos del sol y alejada de fuentes de calor, con una
superficie plana y robusta y sin vibraciones.
16.3 Conexión eléctrica
IMPORTANTE: La toma de tierra es obligatoria.
Es aconsejable proteger la instalación con un fusible y un disyuntor diferencial.
La instalación eléctrica que suministra energía a la máquina debe estar protegida tal y como se
indica a continuación:
- América del Norte: protección de 15 A;
- Resto del mundo: protección de 16 A.
Su máquina debe estar conectada obligatoriamente a un cuadro de derivación en una línea equipada
con un diferencial de 300 mA.
Nota: la garantía no cubrirá cualquier problema ocasionado por una conexión de otro tipo.
Antes de conectar la máquina a la red y con el fin de evitar un fallo del motor al encenderla, es
importante comprobar la adecuación de la red de alimentación con las características de la máquina
(consulte la placa informativa de la máquina).
Este aparato se ajusta a las Directivas sobre Máquinas 2006/42, 2006/95 y 2004/108, y lleva el
marcado CE que lo certifica.
Consulte los pictogramas de seguridad que figuran en la máquina:
Español

70
Pictograma que indica un riesgo de electrocución. Desconecte la máquina antes
de hacer cualquier intervención. Encontrará el icono en la parte trasera de la
máquina, cerca del cable de alimentación y dentro de la máquina en el cuadro
eléctrico (fig. 8, n°25).
Encontrará el esquema eléctrico de la máquina en la parte trasera de la puerta del
cuadro eléctrico (fig. 8, n°26).
16.4 Puesta en servicio
Antes de la puesta en servicio, asegúrese de que no queda ningún objeto molesto en las partes en
movimiento de la máquina.
En primer lugar, y después de comprobar que la toma de corriente se ajusta a las características
eléctricas de la máquina, asegúrese de que el motor gira en el sentido correcto. Si la cuchilla se
detiene en el canal de corte y la máquina indica un error, desconecte inmediatamente e invierta, en
la toma, los dos cables de fase.
Para utilizar la máquina, consulte el apartado «Uso».
16.5 Peligro
En caso de peligro para el usuario o para la máquina, debe utilizar el interruptor general para cortar
la alimentación de la máquina.
Quite el enchufe de la toma de corriente antes de efectuar cualquier operación de mantenimiento y
de limpieza.
No toque la cuchilla incluso si la máquina está parada.
Para cambiar la cuchilla, solicite la intervención de su distribuidor autorizado.
Lleve siempre guantes de protección anticorte al sustituir la cuchilla o cuando trabaje cerca de las
cuchillas.
Cualquier operación de mantenimiento o de sustitución de piezas debe efectuarla una persona
cualificada.
17 CUADRO DE CONTROL Y DE SEGURIDAD
17.1 Cuadro de control
Su cortadora está equipada de serie con una pantalla táctil (fig. 6).
17.2 Área de trabajo
El área de trabajo está situada en la parte delantera de la máquina (fig. 3, n.° 18).
17.3 Cuadro de seguridad
Esta máquina está equipada con:
Un interruptor de seguridad magnético codificado (fig. 6, n.° 19, 20)
Español

71
Consta de un imán de seguridad y de un sensor magnético que detiene la máquina al abrirse la
puerta delantera (fig. 1, n.° 10).
Un interruptor de seguridad magnético codificado (fig. 6, n.° 22)
Consta de un imán de seguridad y de un sensor magnético que impide que la máquina empiece a
funcionar al abrir la tapa (fig. 1, n.° 1).
Un cierre mecánico de seguridad (fig. 6, n.° 21)
Que impide abrir la tapa (fig. 1, n.° 1) mientras la máquina está en funcionamiento.
18 USO
Para utilizar la máquina, las ruedas provistas de freno deben estar bloqueadas (fig. 1, n.° 7).
Al principio del día, encienda la máquina usando el interruptor general
(fig. 2, n.° 11).
Procedimiento de uso (fig. 4-5)
A. Abra la tapa.
B. Coloque el pan en la tabla de entrada.
C. Tenga cuidado de colocar correctamente el pan en el rincón derecho, hacia la parte delantera
de la máquina.
D. Si la máquina está equipada con una garra manual, enganche bien la garra en el pan.
E. Cierre la tapa.
F. Seleccione el grosor de rebanada.
G. Si la máquina es una versión Pro: Seleccione el tipo de rebanado. En el modo «número de
rebanadas», seleccione el número de rebanadas deseado.
H. Si la máquina es una versión Pro: Seleccione la velocidad de corte. De forma predeterminada,
estará seleccionada la velocidad intermedia. Las tres velocidades de corte se definen de
manera estándar al fabricar la máquina. No obstante, su agente podrá ajustar dichas
velocidades durante la puesta en servicio.
I. Si la máquina es una versión Pro: Pulse el botón verde para iniciar el ciclo de rebanado.
J. Recoja el pan en la tabla de salida (fig. 3, n.° 13) y embólselo con el embolsador (fig. 1, n.° 3).
El botón rojo permite detener un ciclo en curso.
Español

72
19 LIMPIEZA
19.1 Diaria por un usuario formado
A. Compruebe si debe vaciar la bandeja de migas. NOTA: No olvide bloquear la puerta (fig. 1,
n.° 8).
B. Limpie las tablas (fig. 3, n.° 13, 15) con ayuda de un cepillo.
C. Limpie el cristal de la tapa (fig. 1, n.° 1) poniéndolo en posición de limpieza (fig. 9).
D. Utilice un paño seco para limpiar el interior.
E. Para la limpieza exterior, utilice un paño húmedo.
F. Active el modo de limpieza:
presione en el símbolo del «cepillo» en la esquina superior derecha.
19.2 Cada 25 000 cortes o 1 vez al año como mínimo, por un agente autorizado
A. Extraiga el enchufe de la toma de corriente (fig. 2, n.° 12).
B. Compruebe el estado de la cuchilla de corte (fig. 1, n.° 2).
C. Si se percibe una bajada de la calidad de corte, es necesario sustituir la cuchilla de corte
(referencia JAC: BVSLCA030 del catálogo de piezas de recambio JAC).
D. Si se debe cambiar, hágalo de acuerdo con el procedimiento de cambio de la cuchilla de corte
(fig. 7).
E. Limpie con un cepillo y aspire el interior de la máquina.
Compruebe que su agente autorizado registre su intervención en su tarjeta de mantenimiento para
conservar su garantía de 5 años.
19.3 Cambio de las cuchillas
(fig. 7)
Lleve siempre guantes de protección anticorte (Norma EN 388: 2003 índice B= 5) y calzado de
seguridad al sustituir la cuchilla o cuando trabaje cerca de las cuchillas.
Después de asegurarse de que el enchufe de la máquina (fig. 2, n.° 12) está desconectado de la
corriente:
Abra la puerta (fig. 1, n.° 10) con ayuda del cerrojo (fig. 1, n.° 9).
Retire la bandeja de migas (fig. 1, n.° 8).
Cambie la cuchilla:
A. Afloje las dos llaves situadas en el lado izquierdo de la máquina (fig. 7, n.° 23).
B. Retire la protección de la cuchilla (fig. 1, n.° 6) con ayuda de los tornillos hexagonales
huecos.
C. Afloje la tuerca de sujeción de la cuchilla (fig. 7, n.° 24) con las dos llaves incluidas (fig. 7,
n.° 23).
D. Retire el calzo y cambie la cuchilla procurando colocarla correctamente en los pasadores
de posicionado. Vuelva a colocar el calzo
E. Atornille y apriete la nueva tuerca suministrada con la nueva cuchilla para bloquear la
cuchilla con ayuda de las llaves incluidas. Es importante colocar la nueva tuerca con un
apriete óptimo.
Coloque la bandeja de migas y cierre la puerta.
Conecte la máquina a la red eléctrica. La máquina está lista.
Compruebe que su agente autorizado registre su intervención en su tarjeta de mantenimiento para
conservar su garantía de 5 años.
Español

73
La cuchilla se puede volver a afilar, póngase en contacto con su agente para obtener más
CÓDIGO DE
ARTÍCULO
ETIQUETA
MODELO
5740214
RUEDA DE TAPA
TODOS
BVMPT012
ZAPATA DE LA TAPA
TODOS
6110029
CUCHILLA CIRCULAR Ø 420 MM, 3 MM
TODOS
7240043
CORREA GUÍA LINEAL
TODOS
MP00304
TIRA DE ESPUMA DE LA TAPA
TODOS
BVMPA005
CUCHILLA DE MUELLE DEL BRAZO DE
AGARRE DE REBANADA
TODOS
BVMPT005
ZAPATA DEL BRAZO DE AGARRE DE
REBANADA
TODOS
ESPUMA DEL BRAZO DE AGARRE DE
REBANADA
TODOS
BVMPT003
GUÍA DE GARRA 800
800
BVMPT004
GUÍA DE GARRA 1000
1000
W008709
ZAPATA DE FIELTRO DE LA GARRA
GARRA
MANUAL
CEPILLO PLANETARIO
TODOS
BVMPA006
CEPILLO DE PASO DE GARRA 800
800
BVMPA007
CEPILLO DE PASO DE GARRA 1000
1000
información.
20 CONSUMIBLES
Al pedir una pieza de recambio, compruebe con su agente autorizado de qué pieza se trata en el
catálogo de piezas de recambio del fabricante.
Indique siempre el número de máquina tal y como se indica en la placa informativa.
Su agente efectuará el pedido a JAC.
20.1 Lista de CONSUMIBLES
Español

74
21 INCIDENTES DE FUNCIONAMIENTO
Problema
Comprobación
La máquina no gira
Conecte la máquina con el cable (fig. 2, n.° 12)
Active el interruptor principal (fig. 2, n.° 11)
Cierre la tapa superior
Cierre la puerta
La máquina funciona, pero
los panes están dañados o
cortados de forma irregular
Compruebe si es necesario sustituir las cuchillas (fig. 7)
Deje que el pan se enfríe unas horas
Introduzca un pan con el tamaño adecuado
Introduzca un pan lo suficientemente firme
Si la cuchilla gira al contrario, invierta dos fases en la toma de corriente de
la máquina
ATENCIÓN: para cualquier intervención, la máquina deberá estar desenchufada obligatoriamente.
Si el problema persiste, póngase en contacto con su técnico.
Español

75
22 CÓDIGOS DE ERROR
Parpadeo o código mostrado
en pantalla
Descripción del problema
Acción
ERR 001
Tapa o puerta abierta
Cierre la tapa y la puerta.
Apague la máquina con el interruptor
principal (fig. 2, n.° 12) y vuelva a encenderla
transcurridos 30 segundos. Si el problema
persiste, póngase en contacto con su
técnico.
Compruebe que no hay objetos o polvo
obstaculizando la garra de prensado del pan.
Retire cualquier objeto situado junto al canal
de paso de la cuchilla y coloque el pan en la
parte inferior derecha de la tabla de entrada.
Apague la máquina con el interruptor
principal (fig. 2, n.° 12) y vuelva a encenderla
transcurridos 30 segundos. Si el problema
persiste, póngase en contacto con su
técnico.
ERR 002
Fallo del circuito eléctrico
ERR 003
Fallo del variador
ERR 004
Fallo de garra
ERR 005
Objeto que obstaculiza el
sensor del canal de corte
ERR 006
Fallo de alineación
Si el problema persiste, póngase en contacto con su técnico.
Español

76
23 LISTA DE COMPONENTES DE LAS FIGURAS
Figura
Número
Nombre
1
1
Tapa superior
2
Cuchilla
3
Embolsador
4
Pantalla
5
Porta-bolsas (opcional)
6
Protección de cuchilla
7
Ruedas con freno
8
Bandeja de migas
9
Cierre de puerta delantera
10
Puerta delantera
2
11
Interruptor principal
12
Cable de conexión
3
13
Tabla de salida
14
Brazo de agarre del pan
15
Tabla de entrada
16
Garra manual
17
Garra automática
18
Área de trabajo
6
19
Sensor de seguridad
20
Imán de seguridad
21
Cierre mecánico
22
Sensor de seguridad
7
23
Llaves para desmontar la cuchilla
24
Tuerca de la cuchilla
8
25
Pegatina de riesgo de electrocución
26
Esquema eléctrico
Español

77
1! PRIMA DELLA MESSA IN SERVIZIO ................................................................... 78!
2! GARANZIA ............................................................................................................. 78!
3! AVVERTENZE ........................................................................................................ 79!
4! CARATTERISTICHE TECNICHE ........................................................................... 80!
4.1! Caratteristiche tecniche ........................................................................................... 80!
4.2! Dettaglio materiali a diretto contatto con la pasta ................................................. 80!
5! INSTALLAZIONE E MESSA IN SERVIZIO ............................................................ 81!
5.1! Disimballo della macchina ....................................................................................... 81!
5.2! Posizionamento ......................................................................................................... 81!
5.3! Collegamento elettrico ............................................................................................. 81!
5.4! Messa in servizio ....................................................................................................... 82!
5.5! Pericolo ...................................................................................................................... 82!
6! ORGANO DI COMANDO E DI SICUREZZA .......................................................... 82!
6.1! Organo di comando .................................................................................................. 82!
6.2! Zona di lavoro ............................................................................................................ 82!
6.3! Organi di sicurezza ................................................................................................... 82!
7! UTILIZZO ................................................................................................................ 83!
8! MANUTENZIONE ................................................................................................... 84!
8.1! Quotidiana da parte di un utilizzatore addestrato .................................................. 84!
8.2! Ogni 25.000 tagli e/o 1 volta l'anno almeno, da parte di un tecnico autorizzato . 84!
8.3! Sostituzione delle lame ............................................................................................ 84!
9! COMPONENTI DI CONSUMO ............................................................................... 85!
9.1! Elenco dei COMPONENTI DI CONSUMO ................................................................ 85!
10! INCIDENTI DI FUNZIONAMENTO ..................................................................... 86!
11! CODICI DI ERRORE ........................................................................................... 87!
12! ELENCO DEI COMPONENTI INDICATI NELLE FIGURE ................................. 88!
Italiano

78
B. PRIMA DELLA MESSA IN SERVIZIO
Grazie per aver scelto una soluzione JAC. Si invita a leggere con attenzione queste note
informative prima di procedere all'installazione e alla messa in servizio di questa macchina.
Contengono informazioni su come proteggersi e come evitare il deterioramento della
macchina.
Queste informazioni fanno riferimento a diverse figure, in modo da facilitare la
comprensione delle istruzioni. Le figure si trovano al fondo delle informazioni. Si invita a farvi
riferimento quando si incontrano i seguenti simboli (fig. x, n. y).
Per una totale soddisfazione dall'utilizzo della macchina nei prossimi anni, si invita
a tenere presenti i seguenti consigli:
- Farsi aiutare dall’agente autorizzato per l'installazione, la messa in servizio e il follow-up.
- Per beneficiare della garanzia di 5 anni (vedere le condizioni riportate in seguito), far
compilare dal distributore il libretto di manutenzione al momento dell'installazione della
macchina. Il libretto di manutenzione si trova nella parte posteriore della macchina.
Italiano
24 GARANZIA
JAC offre una garanzia di 5 anni su tutti i suoi prodotti.
Questa garanzia è valida su tutte le parti della macchina, comprese quelle elettroniche,
escluse le componenti di consumo. La garanzia entra in vigore a partire dalla data di
installazione del materiale.
Secondo le seguenti condizioni restrittive:
- materiale acquistato presso un rivenditore autorizzato;
- installazione effettuata da un agente autorizzato;
- utilizzo del materiale conformemente alle indicazioni sul modo di utilizzo e nel rispetto
della finalità per la quale è stato fabbricato;
- materiale quotidianamente manutenuto nel rispetto delle indicazioni delle modalità di
utilizzo;
- manutenzioni successive da parte dell’agente autorizzato conformemente alle specifiche
di manutenzione con, al minimo, una manutenzione l’anno (manutenzione a carico
dell’utente);
- l’utilizzo esclusivo di parti originali JAC.
Se non si eseguono interventi di manutenzione da parte di un tecnico autorizzato
e/o il libretto di manutenzione non è correttamente completato, la garanzia si limita ad
un anno.
Questa garanzia non copre:
- la sostituzione dei componenti di consumo (§9);
- le parti non riconosciute difettose dai nostri servizi;
- i problemi derivanti da un utilizzo anomalo del materiale;
Italiano

79
- i problemi derivanti da un’installazione non effettuata da un agente autorizzato;
- le parti o i problemi derivanti da un danno di trasporto o da una manutenzione
inadeguata.
Una riparazione e/o una sostituzione di parti difettose effettuate durante il periodo di
garanzia non producono l'effetto di prolungare detta garanzia.
25 AVVERTENZE
È molto importante che le istruzioni per l'utilizzo siano conservate con l'apparecchio per
ogni consultazione futura. Se questo macchinario deve essere venduto o trasferito ad un'altra
persona, accertarsi che le istruzioni per l'utilizzo siano consegnate all'utente destinatario in
modo che possa essere informato sul funzionamento e sui messaggi di avvertenza ad esso
riferiti.
Tali avvertenze sono fornite per la vostra sicurezza e per quella altrui. Si prega di
leggerle con attenzione prima di installare e utilizzare il macchinario.
Questa macchina è stata progettata per essere utilizzata da adulti autorizzati. Accertarsi
quindi che i bambini non le si avvicinino e che non la utilizzino come un giocattolo.
Questa macchina è destinata unicamente ad un uso professionale.
È pericoloso modificare o provare a modificare le caratteristiche di questa macchina.
Dopo l’installazione di questa macchina, accertarsi che non appoggi sul cavo di
alimentazione.
Seguire le istruzioni fornite per l'utilizzo.
Questa macchina deve essere sistemata e utilizzata all'interno di un locale, al riparo da
umidità e calore.
Deve essere illuminata a sufficienza per poter funzionare.
La macchina produce un livello sonoro inferiore a 75 dB(A), conforme alla norma EN ISO
3744.
La macchina deve essere utilizzata da una sola persona per volta (salvo prescrizioni
contrarie).
Questa macchina è destinata al taglio del pane cotto e raffreddato.
Questa macchina non è destinata ai seguenti materiali e tipi di pane:
- pani raffermi;
- pane congelato, o parzialmente decongelato;
- prodotti non commestibili come legno, plastica e materiali simili;
- ogni alimento che non fa parte della categoria dei tipi di pane o delle torte.
La macchina si può danneggiare con il taglio di pani o materiali non autorizzati.
Italiano

80
Staccare sempre il cavo di alimentazione prima di procedere alla pulizia
VMP800
VMP1000
Altezza (mm)
1135
1135
Larghezza (mm)
790
990
Profondità (mm)
760
760
Lunghezza del canale d'ingresso (mm)
380
480
Larghezza del canale d'ingresso (mm)
340
340
Altezza del canale d'ingresso (mm)
16 (20)
16 (20)
Imballaggio (mm)
1250 x 1200 x 800
1250 x 1200 x 800
Peso netto (kg)
230
250
Peso NETTO + imballaggio (kg)
260
280
Potenza motore (kW)
0,75
0,75
Tipo di motore
Trifase
Trifase
220v - 50Hz (A)
7
7
380v - 50Hz (A)
N/A
N/A
Capacità (giri/minuto)
da 120 a 240
da 120 a 240
Diametro della lama (mm)
420
420
Livello sonoro (dB)
<75
<75
Involucro inox
opzionale
Tastiera tattile
opzionale
Porta-sacchetti
opzionale
Sistema di mantenimento grandi pagnotte
opzionale
Colore speciale
opzionale
interna/esterna del macchinario e alle operazioni di manutenzione.
Questo macchinario è pesante. Adottare tutte le precauzioni di sicurezza al momento della
manutenzione.
26 CARATTERISTICHE TECNICHE
26.1 Caratteristiche tecniche
26.2 Dettaglio materiali a diretto contatto con la pasta
Ripiano di alimentazione: INOX 5WL 430
Carter di griffa: INOX 430
Griffa: INOX 430
Lama: TEFLON
Ripiano d'uscita: INOX 5WL 430
Braccio di ritegno pane: INOX 430
Sistema di mantenimento grandi pagnotte (opzionale): INOX 430
Insacchettatrice: INOX 430
Italiano

81
27 INSTALLAZIONE E MESSA IN SERVIZIO
27.1 Disimballo della macchina
Le macchine sono consegnate, franco fabbrica, su pallet, legate con cinghie e protette con pannelli di
cartone. Prima di tutto, occorre esaminare l'imballaggio e ogni danno dovuto al trasporto deve essere
dichiarato direttamente all'addetto alla consegna.
E. Togliere il cartone e il sacchetto d'imballaggio dalla macchina.
F. Togliere le cinghie facendo particolare attenzione allo sgancio di queste ultime durante il
taglio.
G. Staccare la macchina dal pallet togliendo i listelli di legno che bloccano le ruote.
H. Far scendere la macchina dal pallet. Accertarsi di essere almeno in due per questa
operazione per ammortizzare al meglio il contatto con il terreno.
Dopo il disimballo della macchina, verificare che non abbia subito danni durante il
trasporto. Segnalare ogni anomalia.
27.2 Posizionamento
Per ottenere performance eccellenti e affidabilità a lungo termine, scegliere una posizione:
Ben ventilata, al riparo dai raggi solari diretti e lontano da fonti di calore, con una superficie
piana, robusta e priva di vibrazioni.
27.3 Collegamento elettrico
IMPORTANTE: Messa a terra obbligatoria.
Si consiglia di proteggere l'impianto con un fusibile e un salvavita.
L'impianto elettrico che alimenta la macchina deve essere protetto secondo quanto indicato qui di
seguito:
- Nord America: Protezione 15 A;
- Resto del mondo: Protezione 16 A.
La vostra macchina deve necessariamente essere collegata ad una scatola di derivazione su di una
linea dotata di salvavita da 300 mA.
Nota: Ogni problema derivante da un altro tipo di collegamento non sarà preso in considerazione ai
fini della garanzia.
Prima di collegare la macchina alla rete e onde evitare una dismissione del motore all'avvio, è
importante verificare la compatibilità della rete di alimentazione con le caratteristiche della macchina
(vedere la relativa targa segnaletica).
Questo apparecchio è conforme alle Direttive Macchine 2006/42, 2006/95, 2004/108 e reca la
marcatura CE che attesta detta conformità.
Si invita a prendere visione della segnaletica di sicurezza che figura sulla macchina:
Italiano

82
Segnale che indica un rischio di folgorazione. Scollegare il cavo di alimentazione
prima di qualsiasi intervento sulla macchina. Si trova nella parte posteriore della
macchina vicino al cavo di alimentazione e all’interno della macchina sul quadro
elettrico (fig.8, n. 25).
Sul retro della porta del quadro elettrico si trova lo schema elettrico della macchina
(fig. 8, n. 26).
27.4 Messa in servizio
Prima della messa in servizio, accertarsi che non vi siano oggetti estranei sulle parti in movimento
della macchina.
Accertarsi innanzitutto (dopo aver verificato le connessioni elettriche) che il motore giri nel senso
corretto. Se la lama si ferma nel canale di taglio e la macchina entra in errore, scollegare
immediatamente e invertire, nella presa, i due fili di fase.
Per l’utilizzo della macchina, fare riferimento al capitolo "Utilizzo".
27.5 Pericolo
In caso di pericolo per l’utente o per la macchina, utilizzare l’interruttore generale per interrompere
l’alimentazione della macchina.
Estrarre la scheda della presa elettrica prima di ogni operazione di manutenzione o di assistenza.
Non toccare la lama, anche all'arresto.
Per la sostituzione della lama, rivolgersi al distributore autorizzato.
Indossare sempre guanti di protezione anti-taglio per la sostituzione della lama o per un'operazione
nelle vicinanze delle lame.
Ogni operazione di manutenzione o sostituzione delle parti deve essere effettuata da una persona
qualificata.
28 ORGANO DI COMANDO E DI SICUREZZA
28.1 Organo di comando
La taglierina è dotata di un display tattile (fig. 6).
28.2 Zona di lavoro
La zona di lavoro si trova davanti alla macchina (fig. 3 n. 18).
28.3 Organi di sicurezza
Questa macchina è dotata:
Di un interruttore di sicurezza magnetico codificato (fig.6, n. 19, 20)
Italiano

83
Composto da una calamita di sicurezza e da un sensore magnetico, che ferma la macchina nel caso
in cui si dovesse aprire lo sportello anteriore (fig.1, n. 10).
Di un interruttore di sicurezza magnetico codificato (fig.6, n. 22)
Composto da una calamita di sicurezza e da un sensore magnetico, che impedisce alla macchina di
partire quando si apre il coperchio (fig. 1, n. 1).
Di una serratura di sicurezza meccanica (fig.6, n.21)
Che impedisce che il coperchio (fig. 1, n. 1) si apra se la macchina è in funzione.
29 UTILIZZO
Per l'utilizzo, le rotelle di freno provviste devono essere bloccate (fig. 1, n. 7).
All'inizio della giornata, alimentare la macchina tramite l'interruttore generale
(fig.2, n. 11).
Procedura di utilizzo (fig. 4-5)
A. Aprire il coperchio.
B. Depositare il pane sul ripiano di alimentazione.
C. Fare attenzione a posizionare correttamente i pani nell'angolo a destra verso la parte anteriore
della macchina.
D. Se la macchina è dotata di una griffa manuale, serrare la griffa sul pane.
E. Chiudere il coperchio.
(fig. XX)
F. Scegliere lo spessore di taglio.
G. Se la macchina è una versione Pro: Scegliere il tipo di affettatura. In modalità "numero delle
fette", scegliere il numero di fette desiderato.
H. Se la macchina è una versione Pro: Scegliere la velocità di taglio. In modo predefinito, è
selezionata la velocità di taglio intermedia. (Le tre velocità di taglio sono definite in modo
standard al momento della fabbricazione della macchina. Tuttavia, il vostro agente autorizzato
può regolare queste velocità al momento della messa in servizio della macchina.)
I. Se la macchina è una versione Pro: Premere il pulsante verde per avviare il ciclo di taglio.
J. Recuperare il pane sul ripiano di uscita (fig. 3 n. 13) e passarlo all'insacchettatrice (fig. 1 n. 3).
Il pulsante rosso consente di fermare un ciclo in corso.
Italiano

84
30 MANUTENZIONE
30.1 Quotidiana da parte di un utilizzatore addestrato
A. Verificare se occorre svuotare il cassetto raccogli briciole (NB: non dimenticare di chiudere lo
sportello a chiave) (fig. 1 n. 8).
B. Pulire i ripiani (fig. 3, n. 13, 15) con una spazzola.
K. Pulire il vetro del coperchio (fig. 1 n. 1) mettendolo in posizione pulizia (fig. 9).
L. Utilizzare un panno asciutto per la pulizia interna.
M. Per la manutenzione esterna, utilizzare un panno umido.
N. Attivare la modalità pulizia:
premere sull'icona "spazzola" nell'angolo superiore destro.
30.2 Ogni 25.000 tagli e/o 1 volta l'anno almeno, da parte di un tecnico autorizzato
A. Staccare la presa della corrente (fig. 2, n. 12).
B. Verificare lo stato della lama da taglio. (fig. 1, n. 2).
C. Se si nota un deterioramento della qualità del taglio occorre procedere alla sostituzione della
lama da taglio (riferimento JAC: BVSLCA030 del catalogo di Parti di ricambio JAC).
D. Se è da cambiare, sostituirla nel rispetto della procedura di sostituzione della lama da taglio
(fig. 7).
E. Pulire con una spazzola e aspirare l'interno della macchina.
Verificare attentamente che il tecnico autorizzato registri l'intervento sul libretto di manutenzione al
fine di mantenere la garanzia di 5 anni.
30.3 Sostituzione delle lame
(fig. 7)
Far sempre attenzione ad indossare guanti di protezione anti-taglio (Norma EN 388: 2003 indice B=
5) e scarpe di sicurezza al momento della sostituzione della lama o di un'operazione vicino alle lame.
Dopo essersi accertati che la presa della macchina (fig. 2, n. 12) sia ben scollegata dalla corrente.
Aprire lo sportello (fig. 1, n. 10) con un chiavistello (fig. 1 n. 9).
Estrarre il cassetto raccogli briciole (fig.1, n. 8).
Sostituire la lama:
A. Svitare le due chiavi situate sul lato sinistro della macchina (fig.7 n. 23).
B. Togliere la protezione della lama (fig.1 n. 6) servendosi delle 6 viti ad esagono.
C. Svitare il dado che mantiene la lama (fig. 7 n. 24) con le due chiavi fornite (fig. 7 n. 23).
D. Estrarre la protezione e sostituire la lama avendo cura di posizionarla correttamente nelle
fenditure apposite. Reinserire la protezione.
E. Avvitare e serrare il nuovo dado in dotazione con la nuova lama per bloccarla, servendosi
delle chiavi in dotazione. È importante montare il nuovo dado per garantire un serraggio
ottimale.
Riposizionare il cassetto raccogli briciole e chiudere lo sportello.
Collegare la macchina alla rete elettrica, la macchina è pronta.
Verificare attentamente che il tecnico autorizzato registri l'intervento sul libretto di manutenzione al
fine di mantenere la garanzia di 5 anni.
Notare che la lama è riaffilabile, contattare l'agente autorizzato per maggiori informazioni.
Italiano

85
31 COMPONENTI DI CONSUMO
CODICE
ARTICOLO
VERSIONE
MODELLO
5740214
RUOTA DEL COPERCHIO
TUTTI
BVMPT012
PATTINO DEL COPERCHIO
TUTTI
6110029
LAMA CIRCOLARE Ø420MM -3MM
TUTTI
7240043
CINGHIA GUIDA LINEARE
TUTTI
MP00304
STRISCIA IN SCHIUMA COPERCHIO
TUTTI
BVMPA005
LAMELLA MOLLA BRACCIO DI
RITEGNO TAGLIO
TUTTI
BVMPT005
PATTINO BRACCIO DI RITEGNO
TAGLIO
TUTTI
SCHIUMA BRACCIO DI RITEGNO
TAGLIO
TUTTI
BVMPT003
GUIDA GRIFFA 800
800
BVMPT004
GUIDA GRIFFA 1000
1000
W008709
PATTINO FELTRO GRIFFA
GRIFFA
MANUALE
SPAZZOLA PLANETARIA
TUTTI
BVMPA006
SPAZZOLA DI PASSAGGIO GRIFFA 800
800
BVMPA007
SPAZZOLA DI PASSAGGIO GRIFFA
1000
1000
Al momento dell'ordine di parti di ricambio, verificare con l’agente autorizzato di quale parte si tratta
in base al catalogo delle parti di ricambio emesso dal fabbricante.
Precisare sempre il codice della macchina indicato sulla targa segnaletica.
L’agente effettua gli ordini presso JAC.
31.1 Elenco dei COMPONENTI DI CONSUMO
Italiano

86
32 INCIDENTI DI FUNZIONAMENTO
Problema
Verifica
La macchina non funziona
Collegare la macchina con un cavo (fig.2 n°12).
Scollegare l'interruttore principale (fig. 2, n. 11).
Chiudere il coperchio
Chiudere lo sportello.
La macchina funziona, ma
le forme di pane sono
danneggiate o tagliate in
modo irregolare.
Verificare se occorre sostituire le lame (fig.7)
Lasciar raffreddare la forma di pane per alcune ore.
Introdurre una forma di dimensioni accettate.
Introdurre una forma molto soda.
Se la lama gira al contrario, invertire le due fasi nella presa di corrente della
macchina.
ATTENZIONE: La macchina deve obbligatoriamente essere messa fuori tensione per ogni
intervento.
Se il problema persiste, contattare il proprio tecnico.
Italiano

87
33 CODICI DI ERRORE
Lampeggiamento o codice
visualizzato a video
Descrizione del problema
Intervento
ERR 001
Coperchio o sportello aperti
Chiudere il coperchio e lo sportello.
Spegnere la macchina con l'interruttore
principale (fig.2 n. 12) e riaccenderla dopo 30
secondi. Se il problema persiste, contattare il
proprio tecnico.
Accertarsi che nessun oggetto o gomitolo di
polvere ingombri la griffa di presa del pane.
Eliminare ogni oggetto presente in prossimità
del canale di passaggio della lama e
posizionare il pane in basso a destra del
ripiano di alimentazione.
Spegnere la macchina con l'interruttore
principale (fig.2 n. 12) e riaccenderla dopo 30
secondi. Se il problema persiste, contattare il
proprio tecnico.
ERR 002
Anomalia circuito elettrico
ERR 003
Anomalia variatore
ERR 004
Anomalia griffa
ERR 005
Oggetto davanti al sensore
del canale di taglio
ERR 006
Anomalia di linea
Se il problema persiste, contattare il proprio tecnico.
Italiano

88
34 ELENCO DEI COMPONENTI INDICATI NELLE FIGURE
Figura
Numero
Nome
1
1
Coperchio superiore
2
Lama
3
Insacchettatrice
4
Display
5
Porta sacchetti (opzionale)
6
Protezione della lama
7
Rotelle frenanti
8
Cassetto raccogli-briciole
9
Serratura sportello anteriore
10
Porta anteriore
2
11
Interruttore principale
12
Cavo di raccordo
3
13
Ripiano d'uscita
14
Braccio di ritegno pane
15
Ripiano di alimentazione
16
Griffa manuale
17
Gancio automatico
18
Zona di lavoro
6
19
Sensore di sicurezza
20
Calamita di sicurezza
21
Chiusura meccanica
22
Sensore di sicurezza
7
23
Chiavi per lo smontaggio della lama
24
Dado della lama
8
25
Adesivo rischio di folgorazione
26
Schema elettrico
dischi Varia Pro
Italiano

89
ﻗﻄﺎﻋﺔ ﺑ ﻘﺮص Varia Pro
ﻣﺮة ﺗ ﻘﻄﯿ ﻊ ﻟ ﻠ ﺨﺒ ﺰ و / أ و ﻣﺮ ة و ا ﺣﺪ ة ﻋ ﻠﻰ ا ﻷﻗ ﻞ ﻛﻞ
1! ﻗﺒ ﻞ ا ﻟﺘ ﺸﻐﯿﻞ ........................................................................................................ 90!
2! اﻟﻀﻤ ﺎن ................................................................................................................ 90!
3! ﺗﻨﺒﯿﮭﺎت ................................................................................................................. 90!
4! اﻟ ﻤﻮ اﺻﻔﺎت اﻟﻔ ﻨﯿﺔ ........................................................................................... 91!
4.1! اﻟ ﻤﻮ اﺻﻔﺎت اﻟﻔ ﻨﯿﺔ ..................................................................................................... 91!
4.2! ﺗﻔﺎﺻﯿ ﻞ اﻟ ﺨ ﺎﻣﺎت اﻟﻤﻼﻣﺴﺔ ﺑ ﺸﻜﻞ ﻣﺒﺎﺷﺮ ﻟ ﻠﻌﺠ ﯿ ﻦ .................................... 92!
5! اﻟﺘﺮﻛ ﯿﺐ و اﻟﺘﺸﻐﯿﻞ .......................................................................................... 93!
5.1! ﻓﻚ ﺗ ﻐ ﻠ ﯿﻒ اﻷﻟ ﺔ ........................................................................................................ 93!
5.2! اﻟﻤﻮﺿﻊ ....................................................................................................................... 93!
5.3! اﻟﺘﻮﺻﯿﻞ اﻟ ﻜﮭﺮﺑﺎﺋﻲ ............................................................................................... 93!
5.4! اﻟﺘﺸﻐ ﯿﻞ ........................................................................................................................ 93!
5.5! ﺧﻄﺮ .............................................................................................................................. 94!
6! أزرار ا ﻟ ﺘﺤﻜﻢ وا ﻟﺴﻼ ﻣﺔ ................................................................................. 94!
6.1! أزرار ا ﻟ ﺘﺤﻜﻢ .............................................................................................................. 94!
6.2! ﻣﻨﻄﻘﺔ ﻋﻤﻞ ................................................................................................................ 94!
6.3! أﺟﮭﺰة اﻷﻣﺎن .............................................................................................................. 94!
7! اﻻﺳﺘﺨﺪ ا م .............................................................................................................. 94!
8! اﻟﺼﯿﺎﻧ ﺔ ................................................................................................................ 95!
8.1! ﯾﻮﻣﯿﺔ ﺑﻮاﺳﻄﺔ ﻣﺴﺘﺨﺪم ﻣُﺪﱠرب ........................................................................... 95!
8.2! ﻛﻞ 25,000
ﻋﺎ م ﺑﻮ اﺳﻄﺔ وﻛﯿﻞ ﻣﻌﺘ ﻤﺪ 95!
8.3! ﺗﻐﯿ ﯿﺮ ا ﻟﺸﻔﺮات ........................................................................................................ 95!
9! ﻗﻄﻊ ا ﻟ ﻤﺴﺘ ﮭ ﻠ ﻜ ﺎت ............................................................................................... 96!
9.1! ﻗﺎﺋﻤ ﺔ ﻗﻄﻊ اﻟﻤﺴﺘﮭﻠﻜﺎت ........................................................................................... 96!
10! اﻷﺣﺪ اث ا ﻟ ﻌ ﺎرﺿﺔ أ ﺛ ﻨ ﺎ ء ا ﻟ ﺘﺸﻐﯿﻞ .............................................................. 97!
11! رﻣﻮز ا ﻟ ﺨﻄﺄ ........................................................................................................ 98!
12! ﻗﺎﺋﻤ ﺔ ﺑﺎﻟﻤ ﻜﻮﻧﺎت اﻟﻤ ﻮﺟﻮ دة ﻓﻲ ا ﻷﺷﻜﺎل ................................................ 99!

90
. ﺗﺄﻛ ﺪ ﻣﻦ ﻗ ﺮ اءة دﻟﯿ ﻞ ا ﻻﺳ ﺘ ﺨﺪام ھ ﺬا ﻗﺒ ﻞ ﺗ ﺮﻛﯿﺐ وﺗ ﺸﻐﯿ ﻞ ھ ﺬه ا ﻵ ﻟﺔ. ﯾﻤ ﻜﻨ ﻚ ھ ﻜ ﺬا أ ن ﺗ ﺤﻤﻲ ﻧﻔ ﺴﻚ
وﺗ ﺘﺠﻨﺐ أن ﺗ ﺘ ﻠﻒ اﻷﻟﺔ.
ﯾﺸﯿﺮ ھﺬا اﻟﺪﻟﯿﻞ إﻟﻰ أﺷﻜﺎل ﻣﺨﺘﻠﻔﺔ ﻣﻦ أﺟﻞ ﺗﺴﮭﯿﻞ ﻓﮭﻢ اﻟﺘﻌﻠﯿﻤﺎت. ھﺬه اﻷﺷﻜﺎل ﻣﻮﺟﻮدة ﻓﻲ ﻧﮭﺎﯾﺔ اﻟﺪﻟﯿﻞ. ﯾُﺮﺟﻰ اﻟﺮﺟﻮع إﻟﯿﮭﺎ ﻣﺎ إن
ﺗﺮى ا ﻟﺮﻣﻮز ا ﻟ ﺘ ﺎ ﻟ ﯿ ﺔ )ﺷﻜﻞ ﻛﺬ ا ، رﻗﻢ ﻛﺬ ا ( .
ﻣﻦ أﺟﻞ أن ﺗﻜﻮن راﺿﯿًﺎ ﺗﻤﺎﻣًﺎ ﻋﻦ أداء ھﺬه اﻷﻟﺔ ﺧﻼل اﻟﺴﻨﻮات اﻟﻘﺎدﻣﺔ، ﻧﺪﻋﻮك إﻟﻰ اﻻطﻼع ﻋﻠﻰ اﻟ
اﺳﺘﻌﻦ ﺑﻮﻛﯿﻞ ﻣﻌﺘﻤﺪ ﻣﻦ أﺟﻞ ا ﻟ ﺘﺮﻛﯿﺐ و ا ﻟ ﺘﺸﻐﯿﻞ وا ﻟ ﻤﺘ ﺎ ﺑ ﻌﺔ.
ﻣﻦ أ ﺟﻞ ا ﻻﺳ ﺘ ﻔ ﺎ د ة ﻣﻦ ا ﻟﻀﻤ ﺎ ن وﻣ ﺪ ﺗ ﮫ 5 ﺳﻨﻮ ات ) ا ﻧﻈﺮ ا ﻟﺸﺮوط ﻣﺬﻛﻮرة ﺑﻌﺪ ( ، ﻗ ﻢ ﺑﻮ اﺳﻄﺔ ا ﻟ ﻤﻮزع، ﺑ ﺎﺳﺘ ﻜﻤ ﺎل د ﻓ ﺘﺮ ا ﻟﺼﯿ ﺎ ﻧ ﺔ أ ﺛ ﻨ ﺎء
ﺗﺮﻛﯿﺐ اﻷﻟ ﺔ. ﯾﻮﺟﺪ د ﻓ ﺘﺮ ا ﻟﺼﯿ ﺎ ﻧﺔ ﺧﻠﻒ اﻷﻟ ﺔ.
ﯾﺴﺮي ھﺬا اﻟﻀﻤﺎن ﻋﻠﻰ ﻛﻞ ﻗﻄﻊ اﻷﻟﺔ، ﺑﻤﺎ ﻓﯿﮭﺎ اﻟﻘﻄﻊ اﻹﻟﻜﺘﺮوﻧﯿﺔ، دون ﻗﻄﻊ اﻟﻤﺴﺘﮭﻠﻜﺎت. ﯾﺴﺮي اﻟﻀﻤﺎن ﻣﻦ ﺗﺎرﯾﺦ ﺗﺮﻛﯿﺐ اﻟﻤُﻌﺪة.
ﺑﺤﺴﺐ ا ﻟﺸﺮوط ا ﻟ ﻤ ﻘ ﯿ ﺪ ة ا ﻟ ﺘ ﺎ ﻟ ﯿ ﺔ :
ﺗﻢ ﺷﺮاء اﻟﻤُﻌﺪة ﻣﻦ اﻟﺘﻮﻛﯿﻞ اﻟﻤﻌﺘﻤﺪ؛
ﺗﻢ ا ﻟ ﺘﺮﻛﯿ ﺐ ﺑﻤﻌ ﺮﻓﺔ و ﻛﯿﻞ ﻣﻌﺘﻤﺪ؛
اﺳﺘﺨﺪام اﻟﻤُﻌﺪة وﻓﻘًﺎ ﻟﺘﻌﻠﯿﻤﺎت دﻟﯿﻞ اﻻﺳﺘﺨﺪام وﻓﻲ اﻟﻐﺮض اﻟﺘﻲ ﺻُﻨﻌﺖ ﻣﻦ أﺟﻞ؛
ﯾﺘﻢ ﺻﯿﺎﻧﺔ اﻟﻤُﻌﺪة ﯾﻮﻣﯿًﺎ وﻓﻘًﺎ ﻹرﺷﺎدات دﻟﯿﻞ اﻻﺳﺘﺨﺪام؛
ﯾﺘﺎﺑﻊ اﻟﺼﯿﺎﻧﺔ اﻟﻮﻛﯿﻞ اﻟﻤﻌﺘﻤﺪ وﻓﻘًﺎ ﻟﺸﺮوط اﻟﺼﯿﺎﻧﺔ، ﻣﻊ إﺟﺮاء اﻟﺼﯿﺎﻧﺔ ﻣﺮة ﻓﻲ اﻟﻌﺎم، ﻋﻠﻰ اﻷﻗﻞ )اﻟﺼﯿﺎﻧﺔ ﻋﻠﻰ ﺣﺴﺎب
اﻻﺳﺘﺨﺪ ا م ا ﻟﺤﺼ ﺮي ﻟ ﻘﻄﻊ ا ﻟ ﻐ ﯿ ﺎر اﻷﺻﻠ ﯿﺔ ﻣﻦ
إذا ﻟﻢ ﯾﻜﻦ ﯾﻮﺟ ﺪ ﺻﯿﺎﻧﺔ ﻣﻦ و ﻛﯿﻞ ﻣﻌﺘﻤﺪ و/أو أن دﻓﺘﺮ ا ﻟﺼﯿﺎﻧﺔ ﻏﯿﺮ ﻣﻜﺘﻤﻞ ﺑﺸ ﻜﻞ ﺻﺤﯿﺢ ، ﺗﻘﺘﺼﺮ ﻓﺘﺮة اﻟﻀﻤﺎن ﻋﻠﻰ ﻋﺎم واﺣ ﺪة.
ﻋﻠﻤًﺎ ﺑﺄن اﻟﻀﻤﺎن ﻻ ﯾﺸﻤﻞ:
اﻟﻤﺸﺎﻛﻞ اﻟﻨﺎﺟﻤﺔ ﻋﻦ اﻻﺳﺘﺨﺪام ﻏﯿﺮ اﻟﺴﻠﯿﻢ ﻟﻠﻤُﻌﺪة؛
اﻟ ﻤﺸﺎﻛﻞ اﻟﻨﺎﺟﻤﺔ ﻋﻦ ﺗﺮﻛ ﯿﺐ ﻟ ﻢ ﯾﺘ ﻢ ﺑ ﻤﻌﺮﻓﺔ وﻛ ﯿﻞ ﻣﻌﺘﻤﺪ؛
ﻗﻄﻊ ا ﻟ ﻐ ﯿ ﺎ ر أ و ا ﻟ ﻤﺸﺎ ﻛﻞ ا ﻟ ﻨ ﺎ ﺟﻤﺔ ﻋﻦ ﺗ ﻠﻒ أ ﺛ ﻨ ﺎ ء ا ﻟ ﻨ ﻘﻞ أ و ا ﻟ ﻤ ﻨ ﺎ و ﻟ ﺔ ﻏﯿﺮ ا ﻟ ﻤ ﻨ ﺎﺳﺒ ﺔ .
ﻟﯿﺲ ﻣﻦ ﺷﺄن اﻹﺻﻼح و/أ و اﻻﺳﺘﺒﺪا ل ﻟﻘﻄﻊ اﻟ ﻐ ﯿﺎ ر ا
ﻣﻦ اﻟﻤﮭﻢ ﺟﺪًا ﺣﻔﻆ دﻟﯿﻞ اﻻﺳﺘﺨﺪام ھﺬا ﻣﻊ اﻟﺠﮭﺎز ﻟﻼطﻼع ﻋﻠﯿﮫ ﻓﻲ اﻟﻤﺴﺘﻘﺒﻞ. إذا ﻛﺎن ﺳﯿﺘﻢ ﺑﯿﻊ أو ﻧﻘﻞ ھﺬا اﻟﺠﮭﺎز إﻟﻰ ﺷﺨﺺ آﺧﺮ، ﺗﺄﻛﺪ
اﻻﺳﺘﺨﺪ ا م ھﺬ ا ﺑﺤﯿﺚ ﯾﺴﺘﻄﯿﻊ ا ﻟ ﻤﺴﺘﺨﺪم ﻣﻌﺮﻓ ﺔ ﺗﺸﻐ ﯿ ﻠ ﮫ و ا ﻟ
ﺗﻢ إﻋﻄﺎء ھﺬه اﻟﺘﻨﺒﯿﮭﺎت ﺣﺮﺻًﺎ ﻋﻠﻰ ﺳﻼﻣﺘﻚ وﻋﻠﻰ ﺳﻼﻣﺔ اﻵﺧﺮﯾﻦ. ﯾُﺮﺟﻰ ﻗﺮاءﺗﮭﺎ ﺑﺎﻧﺘﺒﺎه ﻗﺒﻞ ﺗﺮﻛﯿﺐ واﺳﺘﺨﺪام اﻟﺠﮭﺎز.
اﻟﻠ ﻐﺔ اﻟ ﻌﺮﺑﯿ ﺔ
C. ﻗﺒﻞ اﻟﺘ ﺸﻐﯿﻞ
ﻨﺼﺎ ﺋ ﺢ ا ﻟ ﺘ ﺎ ﻟ ﯿ ﺔ :
ﻧﺸﻜﺮﻛﻢ ﻻﺧﺘ ﯿ ﺎرﻛﻢ ﺣﻠ ﻮل JAC
-
-
35 اﻟﻀﻤ ﺎن
ﺗﻘﺪم ﺷﺮﻛ ﺔ JAC ﺿﻤ ﺎ ﻧًﺎ ﻋﻠﻰ ﻛﻞ ﻣﻨﺘﺠﺎﺗﮭﺎ ﻣﺪﺗﮫ 5 ﺳﻨﻮات.
JAC.
ﻟﺘﺎﻟﻔ ﺔ اﻟﺬي ﯾﺘﻢ ﺧﻼل ﻣ ﺪ ة اﻟﻀﻤﺎن أ ن ﯾ ﻤﺪ د ھﺬا اﻟﻀﻤﺎن.
-
-
-
-
-
اﻟ ﻤﺴﺘﺨﺪم( ؛
-
- اﺳﺘ ﺒ ﺪ ال ﻗﻄﻊ ا ﻟﻤﺴﺘﮭ ﻠ ﻜ ﺎت )ﻓﻘ ﺮة 9(؛
- ﻗﻄﻊ ا ﻟ ﻐ ﯿ ﺎ ر ا ﻟ ﺘﻲ ﻟ ﻢ ﯾ ﻘﺮ ﻗﺴﻢ اﻟﺨﺪﻣﺔ اﻟﻔ ﻨﯿﺔ ﺑﺄﻧ ﮭﺎ ﺗﺎﻟﻔﺔ؛
-
-
-
36 ﺗﻨﺒﯿﮭﺎ ت
أن ﯾ ﺘ ﻢ إﻋﻄﺎء د ﻟ ﯿﻞ
ﺘﻨﺒﯿﮭﺎت اﻟﻤﺘﻌﻠﻘﺔ ﺑﮫ.

91
ﺗﻢ ﺗﺼﻤﯿﻢ ھﺬه اﻷﻟﺔ ﻟﻜﻲ ﯾﺴﺘﺨﺪﻣﮭﺎ أﺷﺨﺎص ﺑﺎﻟﻐﯿﻦ ﻣﺴﻤﻮح ﻟﮭﻢ ﺑﺎﺳﺘﺨﺪاﻣﮭﺎ. ﯾُﺮﺟﻰ أﻻ ﯾﻠﻤﺴﮭﺎ اﻷطﻔﺎل أو أن ﯾﺴﺘﺨﺪﻣﻮھﺎ ﻛﻠﻌﺒﺔ.
اﻷﻟﺔ ﻣﺨﺼﺼﺔ ﺣﺼﺮﯾًﺎ ﻟﻼﺳﺘﺨﺪام اﻟﻤﮭﻨﻲ.
ﻣﻦ ا ﻟ ﺨﻄﺮ ﺗ ﻌ ﺪ ﯾ ﻞ أ و ﻣﺤ ﺎ و ﻟ ﺔ ﺗ ﻌ ﺪ ﯾ ﻞ ﻣ ﻮ اﺻﻔ ﺎت ھ ﺬ ه ا ﻷ ﻟ ﺔ .
ﺑﻌﺪ ﺗﺮﻛﯿﺐ ھﺬه اﻵﻟﺔ، ﺗ ﺄﻛﺪ أ ﻧﮭﺎ ﻻ ﺗﺴﺘ ﻨﺪ ﻋﻠﻰ ﻛﺎ ﺑﻞ ا ﻟﻜﮭﺮﺑﺎء.
اﺗﺒﻊ اﻟﺘ ﻌﻠﯿ ﻤﺎت اﻟﻤﻌﻄﺎة ﻣﻦ أﺟﻞ اﻻﺳﺘ ﺨﺪام .
ﯾﺠﺐ ﺗﺨﺰﯾﻦ واﺳﺘﺨﺪام ھﺬه اﻷﻟﺔ ﻓﻲ اﻟﺪاﺧﻞ، ﺑﻌﯿﺪًا ﻋﻦ اﻟﺮطﻮﺑﺔ واﻟﺤﺮار
ﯾﺠ ﺐ أن ﯾ ﻜﻮن ھﻨ ﺎك إﺿﺎء ة ﻛ ﺎ ﻓ ﯿ ﺔ ﻟ ﮭﺬ ه اﻷﻟ ﺔ ﻟ ﻠ ﻘ ﯿ ﺎ م ﺑ ﺎ ﻟﻌﻤﻞ.
اﻟ ﻤﺴﺘ ﻮى اﻟﺼﻮﺗﻲ ھﺬ ه اﻷﻟ ﺔ أ ﻗﻞ ﻣﻦ
ﯾﺠ ﺐ أن ﯾﺴﺘﺨﺪم ھﺬ ه اﻷﻟ ﺔ ﺷﺨﺺ و اﺣﺪ ﻓﻲ ا ﻟ ﻮﻗﺖ ا ﻟﻮ اﺣﺪ )ﻣ ﺎ ﻟ ﻢ ﯾﻮﺟﺪ ﺗ ﻌ ﻠ ﯿﻤ ﺎت ﻣﺨﺎ ﻟ ﻔﺔ( .
ھﺬ ه اﻵﻟ ﺔ ﻣﺨ ﺼﺼﺔ ﻟ ﺘ ﻘﻄﯿﻊ ا ﻟﺨﺒﺮ ا ﻟ ﻨ ﺎﺿ ﺞ
ھﺬه اﻵﻟ ﺔ ﻏﯿﺮ ﻣﺨﺼﺼﺔ ﻷﻧ ﻮاع ا ﻟﺨﺒ ﺰ و ا ﻟﺨﺎ ﻣ ﺎت ا ﻟ ﺘ ﺎ ﻟ ﯿﺔ:
اﻟﺨﺒﺰ اﻟﻤﺠﻤﺪ، أو ﺗﻢ إزاﻟﺔ ﺗﺠﻤﯿﺪه ﺟﺰﺋﯿًﺎ؛
ﻣﻨ ﺘﺠﺎت ﻏﯿﺮ ﻏﺬ ا ﺋ ﯿﺔ ﻣﺜﻞ ا ﻟﺨﺸﺐ وا ﻟ ﺒﻼﺳﺘ ﯿﻚ وا ﻟﺨﺎﻣﺎت ا ﻟﺸﺒ ﯿﮭﺔ؛
أي طﻌ ﺎ م ﻻ ﯾ ﻨ ﺘ ﻤﻲ ﻟ ﻔ ﺌ ﺔ ا ﻟ ﺨﺒﺰ أ و ا ﻟ ﻜﻌﻚ.
اﻓﺼﻞ داﺋﻤًﺎ ﻣﺄﺧﺬ اﻟﺘﯿﺎر ﻗﺒﻞ اﻟﻘﯿﺎم ﺑﺎﻟﺘﻨﻈﯿﻒ اﻟﺪاﺧﻠﻲ/اﻟﺨﺎرﺟﻲ ﻟﻠﺠﮭﺎز وﻗﺒﻞ ﻋﻤﻠﯿﺎت اﻟﺼﯿﺎﻧﺔ.
ھﺬ ا ا ﻟﺠﮭ ﺎز ﺛ ﻘ ﯿﻞ ا ﻟ ﻮزن. ا ﺗﺨﺬ ﻛﻞ اﺣﺘ ﯿ ﺎطﺎت اﻷﻣ ﺎن أ ﺛ ﻨ ﺎ ء ﻣﻨ ﺎ و ﻟ ﺘ ﮫ .
اﻟ ﻤﻮ اﺻﻔﺎت اﻟﻔﻨﯿ ﺔ
اﻟ ﻤﻮ اﺻﻔﺎت اﻟﻔﻨﯿ ﺔ
VMP800
VMP1000
اﻻرﺗ ﻔ ﺎع )ﻣﻢ(
1135
1135
اﻟ ﻌﺮض )ﻣﻢ (
790
990
اﻟ ﻌﻤﻖ )ﻣﻢ (
760
760
ﻋﺮض ﻗ ﻨ ﺎ ة ا ﻹ د ﺧ ﺎ ل ) ﻣ ﻢ (
380
480
ﻋﺮض ﻗ ﻨ ﺎ ة ا ﻹ د ﺧ ﺎ ل ) ﻣ ﻢ (
340
340
ارﺗ ﻔ ﺎع ﻗ ﻨ ﺎ ة اﻹدﺧﺎل )ﻣﻢ(
16 )20(
16 )20(
اﻟﺤﺰم )ﻣﻢ(
1250 × 1200 × 800
1250 × 1200 × 800
اﻟ ﻮزن اﻟﺼﺎﻓﻲ )ﻛﺠﻢ(
230
250
اﻟ ﻮزن اﻟﺼﺎﻓﻲ + ﻋﺒ ﻮة اﻟﺘﻐ ﻠﯿﻒ )ﻛﺠﻢ (
260
280
ﻗﻮة ا ﻟ ﻤﻮﺗﻮر )ﻛﯿ ﻠﻮ واط(
0.75
0.75
ﻧﻮع ا ﻟﻤﻮﺗﻮر
ﺛﻼﺛﻲ اﻷطﻮ ا ر )3 ﻓﺎ ز ة(
ﺛﻼﺛﻲ اﻷطﻮ ا ر )3 ﻓﺎ ز ة(
220 ﻓﻮﻟﻂ - 50 ھﺮ ﺗ ﺰ )A) 7 7
380 ﻓﻮﻟﻂ - 50 ھﺮ ﺗ ﺰ )A)
ﻏﯿﺮ ﻣ ﺘﻮﻓﺮ
ﻏﯿﺮ ﻣ ﺘﻮﻓﺮ
اﻟﺴﻌﺔ ) ﻟﻔﺔ /د ﻗ ﯿﻘﺔ(
120 إﻟﻰ 240
120 إﻟﻰ 240
ھﺬ ه
ة.
75 دﯾﺴﯿﺒﻞ وﻓﻘًﺎ ﻟﻠﻤﻌﯿﺎر EN ISO 3744.
وا ﻟﻤﻌﺘﺪل ا ﻟﺤ ﺮارة.
اﻟﺨﺒﺰ اﻟﺒﺎ ﺋﺖ؛
-
-
-
-
ﯾﻤﻜﻦ أن ﺗ ﺘ ﻠ ﻒ اﻵﻟﺔ أ ﺛ ﻨ ﺎء ﻗﻄ ﻊ اﻟﺨﺒﺰ أو اﻟﺨﺎﻣ ﺎت ﻏﯿﺮ اﻟ ﻤﺼﺮح ﺑ ﮭ ﺎ .
37
37.1

92
ﻗُﻄﺮ اﻟﺸﻔﺮة )ﻣﻢ(
420
420
اﻟ ﻤﺴﺘ ﻮى اﻟﺼﻮﺗﻲ )د ﯾﺴﯿﺒﻞ(
> 75
> 75
ھﯿﻜﻞ ﻣﻦ ا ﻟ ﻔﻮﻻذ ا ﻟﻤﻘ ﺎوم ﻟ ﻠﺼ ﺪأ
اﺧﺘ ﯿ ﺎري
ﻟﻮﺣﺔ ﻣﻔﺎ ﺗﯿﺢ ﺑ ﺎ ﻟ ﻠﻤﺲ
اﺧﺘ ﯿ ﺎري
ﺣﺎﻣﻞ أ ﻛﯿ ﺎس
اﺧﺘ ﯿ ﺎري
ﻧﻈﺎ م ﺗ ﺜ ﺒ ﯿﺖ ا ﻟ ﻔﻄﺎ ﺋﺮ
اﺧﺘ ﯿ ﺎري
ﻟﻮن ﺧﺎص
اﺧﺘ ﯿ ﺎري
ﺗﻔﺎ ﺻﯿﻞ اﻟﺨﺎﻣﺎت ا ﻟﻤ ﻼ ﻣﺴﺔ ﺑﺸ ﻜﻞ ﻣﺒﺎﺷﺮ ﻟ ﻠﻌﺠﯿﻦ
ﻧﻈﺎ م ﺗ ﺜ ﺒ ﯿﺖ ا ﻟ ﻔﻄﺎ ﺋﺮ ) اﺧﺘ ﯿ ﺎ ري(:
37.2
ﻓﻮﻻذ ﻣﻘ ﺎوم ﻟ ﻠﺼ ﺪ أ 430
ﻣﻨﻀﺪة إدﺧﺎل: INOX 5WL 430
ﺣﻮض ﻣﺨ ﻠ ﺒﻲ: ﻓﻮﻻذ ﻣﻘ ﺎوم ﻟ ﻠﺼ ﺪ أ 430
ﻣﺨ ﻠﺐ: ﻓﻮﻻذ ﻣﻘ ﺎوم ﻟ ﻠﺼ ﺪ أ 430
ﺷﻔ ﺮ ة : اﻟﺘﺎ ﻓﻠﻮن
ﻣﻨﻀﺪة إﺧﺮاج: INOX 5WL 430
ذراع ﺣﺠﺰ ا ﻟﺨﺒﺰ: ﻓﻮﻻذ ﻣﻘ ﺎوم ﻟ ﻠﺼ ﺪ أ 430
ﺟﮭ ﺎ ز ا ﻟ ﺘ ﻜ ﯿ ﯿﺲ: ﻓﻮﻻذ ﻣﻘ ﺎوم ﻟ ﻠﺼ ﺪ أ 430

93
38
اﻟﺘ ﺮﻛﯿﺐ و اﻟﺘﺸﻐ ﯿﻞ
ﺗُﺒﺎع اﻵﻻت، ﻋﻨﺪ ﺧﺮوﺟﮭﺎ ﻣﻦ ورﺷﻨﺎ، ﻋﻠﻰ أﻟﻮاح، وﻣﺮﺑﻮطﺔ ﺑﺄﺷﺮطﺔ وﻣﺤﻤﯿﺔ ﺑﻮرق اﻟﻜﺮﺗﻮن. ﻗﺒﻞ اﻟﻘﯿﺎم ﺑﺄي ﺷﻲء، ﯾﺠﺐ ﻓﺤﺺ اﻟﻌﺒﻮة وإﺑﻼغ
ﺷﺮ ﻛ ﺔ ا ﻟ ﺘ ﻮﺻﯿ ﻞ ﻣ ﺒ ﺎ ﺷﺮ ة ﺑ ﺄ ي ﺗ ﻠﻒ ﻧ ﺎ ﺗ ﺢ ﻋﻦ ا ﻟ ﻨ ﻘ ﻞ .
اﺳﺤ ﺐ ا ﻟ ﻜﺮﺗﻮﻧ ﺔ وﻛﺬ ﻟﻚ ﻛ ﯿﺲ ﺗﻐ ﻠ ﯿﻒ اﻵﻟ ﺔ .
اﻷﺷﺮطﺔ ﻣﻊ اﻻﻧ ﺘ ﺒ ﺎ ه ﺑﺸﻜﻞ ﺧﺎص ارﺗﺨﺎء ھﺬه اﻷﺧﯿﺮة أ ﺛ ﻨ ﺎء ﻗﻄﻌﮭ ﺎ .
أﻓﻀﻞ اﻟ ﺠﮭﺎ ز ﻣﻦ ﻋ ﻠﻰ ا ﻷ ﻟ ﻮاح ﺑﺄن ﺗﻨ ﺰع اﻟ ﺸﺮ اﺋﺢ اﻟ ﺨﺸﺒﯿﺔ اﻟﺘﻲ ﺗﻌﺮ ﻗﻞ ﺣﺮﻛﺔ اﻟﻌﺠﻼت.
أﻧﺰل اﻵﻟ ﺔ ﻣﻦ ﻋﻠﻰ اﻟﻠ ﻮح. أ ﺣﺮص ﻋ ﻠﻰ أن ﯾﻘ ﻮم ﺷﺨﺼﺎ ن ﻋﻠﻰ اﻷﻗﻞ ﺑ ﮭﺬا اﻷﻣﺮ ﻣﻦ أ ﺟﻞ ﺗﺨﻔﯿﻒ اﻟﺘﻼﻣﺲ ﻣﻊ ا ﻷرض ﺑﺸﻜﻞ أﻓﻀﻞ.
ﻓﻚ ﺗ ﻐ ﻠ ﯿﻒ اﻵﻟ ﺔ ، ﺗﺤﻘﻖ أ ﻧ ﮭ ﺎ ﻟ ﻢ ﺗ ﺘ ﻌﺮ ض ﻟ ﻠ ﺘ ﻠﻒ أ ﺛ ﻨ ﺎ ء ا ﻟ ﻨ ﻘﻞ . و أ ﺑ ﻠ ﻐ ﻨ ﺎ ﺑ ﺄي ﻋﻄﺐ.
ﻟﻠﺤﺼﻮل ﻋﻠﻰ أداء ﻣﻤﺘﺎز وﻓﻌﺎﻟﯿﺔ ﻋﻠﻰ اﻟﻤﺪى اﻟﻄﻮﯾﻞ، اﺧﺘﺮ ﻣﻮﺿﻌًﺎ:
ﺟﯿﺪ اﻟﺘﮭﻮﯾﺔ، وﺑﻌﯿﺪًا ﻋﻦ أﺷﻌﺔ اﻟﺸﻤﺲ اﻟﻤﺒﺎﺷﺮة وﺑﻌﯿﺪًا ﻋﻦ ﻣﺼﺎدر اﻟﺤﺮارة ﻣﻊ ﺳﻄﺢ ﻣﺴﺘﻮٍ وﻗﻮي وﺧﺎلٍ ﻣﻦ
اﻟﺘ ﻮﺻﯿ ﻞ اﻟ ﻜﮭﺮ ﺑﺎﺋﻲ
ﺗﻮﺻ ﯿﻞ ا ﻟﻄﺮف اﻷرﺿﻲ إ ﻟﺰاﻣﻲ.
ﯾُﻨﺼﺢ ﺑﺤﻤﺎﯾﺔ اﻟﺘﻤﺪﯾﺪات اﻟﻜﮭﺮﺑﺎﺋﯿﺔ ﺑﻤﻨﺼﮭﺮ وﻗﺎطﻊ ﺗﯿﺎر ﺗﻔﺎﺿﻠﻲ.
ﯾﺠﺐ ﺣﻤﺎﯾﺔ اﻟﺘﻤﺪﯾﺪات اﻟﻜﮭﺮﺑﺎﺋﯿﺔ اﻟﺘﻲ ﺗُﻐﺬي اﻵﻟﺔ ﻛﻤﺎ ھﻮ ﻣُﺒﯿﻦ أدﻧﺎه:
أﻣﺮﯾﻜﺎ ا ﻟﺸﻤﺎ ﻟ ﯿﺔ: ﺣﻤﺎﯾﺔ
ﺑﻘﯿﺔ د ول اﻟﻌﺎﻟﻢ: ﺣﻤﺎﯾﺔ
ﯾﺠﺐ ﺗﻮﺻﯿﻞ اﻵﻟﺔ ﻋﻠﻰ ﻋُﻠﺒﺔ اﻟﺘﻔﺮﯾﻎ ﻋﻠﻰ ﺧﻂ ﻣﺠﮭﺰ ﺑﻘﺎطﻊ ﺗﯿﺎر ﺗﻔﺎﺿﻠﻲ
ﻣﻠﺤ ﻮ ظ ﺔ: أي ﻣ ﺸﻜﻠﺔ ﻧﺎﺟﻤﺔ ﻋﻦ ا ﻟ ﺘﻮﺻﯿﻞ ﺑﺸ ﻜﻞ آﺧ ﺮ ﻟﻦ ﯾﺸ ﻤﻠﮭﺎ ا ﻟﻀﻤﺎن.
ﻗﺒ ﻞ ﺗﻮﺻﯿ ﻞ اﻵ ﻟﺔ ﻋﻠ ﻰ ﺷ ﺒﻜ ﺔ اﻟﻜ ﮭﺮﺑﺎء و ﻣﻦ أﺟﻞ ﺗ ﺠ ﻨﺐ وﻗﻒ ﺗ ﺸﻐﯿﻞ ا ﻟﻤ ﻮﺗﻮر ﻋ ﻨﺪ ﺗﻮﺻﯿﻠﮫ ﺑﺎﻟﻜ ﮭﺮﺑﺎء، ﻣﻦ اﻟﻤ ﮭ ﻢ اﻟﺘ ﺤ ﻘﻖ ﻣﻦ ﺗﻮ
ﻣﻮ اﺻﻔ ﺎت اﻵﻟ ﺔ ) ا ﻧﻈﺮ ﻟ ﻮﺣﺔ ا ﻟ ﺒ ﯿ ﺎ ﻧ ﺎت ﻟ ﮭﺬ ه اﻷﻟ ﺔ ( .
ﯾﺘ ﻮاﻓﻖ ھ ﺬا اﻟ ﺠﮭﺎز ﻣﻊ اﻟﺘﻌﻠﯿﻤﺎت اﻟ ﺨ ﺎﺻﺔ ﺑﺎ ﻵﻻت
ﯾﺮﺟﻰ اﻻط ﻼع ﻋﻠﻰ ا ﻟﺼﻮر ا ﻟ ﺘﻮ ﺿﯿﺤﯿﺔ ا ﻟ ﻤﺘﻌ ﻠ ﻘﺔ ﺑ ﺎ ﻟﺴ ﻼﻣﺔ ا ﻟﻤﻮﺟﻮدة ﻋﻠﻰ
ﺻﻮرة ﺗﻮﺿﯿﺤﯿﺔ ﺗُﺸﯿﺮ إﻟﻰ ﺧﻄﺮ اﻟﺼﻌﻖ ﺑﺎﻟﻜﮭﺮﺑﺎء. ﯾُﺮﺟﻰ ﻓﺼﻞ اﻟﻜﮭﺮﺑﺎء ﻋﻦ اﻵﻟﺔ ﻗﺒﻞ أي إﺻﻼح ﻟﮭﺎ. ﺳﻮف ﺗﺠﺪ ھﺬه
اﻟﺼﻮرة اﻟﺘﻮﺿﯿﺤﯿ ﺔ ﺧﻠﻒ اﻵﻟ ﺔ ﺑﺎﻟﻘﺮب ﻣﻦ ﻛﺎﺑﻞ اﻟﺘ ﻐﺬ ﯾﺔ وداﺧﻞ اﻵﻟ ﺔ ﻋﻠﻰ اﻟﺼﻨ ﺪوق اﻟ ﻜﮭﺮﺑﻲ
ﺳﻮف ﺗ ﺠ ﺪ ا ﻟ ﺮﺳ ﻢ ا ﻟ ﺘ ﺨﻄ ﯿﻄﻲ ا ﻟ ﻜ ﮭﺮ ﺑﻲ ﻟ ﻶ ﻟ ﺔ ﻋ ﻠ ﻰ ظﮭﺮ ﺑ ﺎب ا ﻟﺼﻨ ﺪ وق
38.1 ﻓﻚ ﺗ ﻐ ﻠ ﯿﻒ اﻷﻟ ﺔ
ﺑﻌﺪ
I.
J. اﻧ ﺰع
K.
L.
38.2 اﻟ ﻤﻮﺿﻊ
اﻻھﺘﺰازات.
38.3
300 ﻣﻠﻲ أﻣﺒﯿﺮ.
اﻓﻖ ﺷﺒﻜ ﺔ اﻟﻜ ﮭﺮ ﺑﺎ ء ﻣﻊ
2006/42 و 2006/95 و 2004/108 وﯾﺤﻤﻞ ﻋ ﻼﻣﺔ CE اﻟﺘﻲ ﺗﺸﮭﺪ ﺑ ﮭﺬ ا اﻟﺘﻮاﻓﻖ.
اﻵﻟ ﺔ:
)fig.8, n°25).
اﻟ ﻜﮭﺮﺑﻲ )fig.8, n°26).
15 أﻣﺒﯿﺮ؛
16 أﻣﺒ ﯿﺮ.
ھﺎم:
-
38.4 اﻟﺘﺸﻐ ﯿ ﻞ

94
ﻗﺒ ﻞ ا ﻟﺘ ﺸﻐﯿﻞ ، ﺗﺄﻛﺪ ﻣﻦ ﻋ ﺪ م وﺟﻮ د أ ي ﺷﻲء دﺧ ﯿ ﻞ ﻋﻠ ﻰ اﻷﺟﺰاء اﻟﻤﺘ ﺤﺮﻛ ﺔ ﻟ ﻶ ﻟﺔ.
ﺗﺄﻛ ﺪ أوﻻ )ﺑﻌ ﺪ اﻟﺘ ﺤﻘﻖ ﻣﻦ اﻟﺘﻮاﻓﻖ اﻟﻜ ﮭﺮ ﺑﻲ( أ ن اﻟﻤﻮ ﺗ ﻮر ﯾﺪور ﻓﻲ ا ﻻﺗﺠﺎه اﻟﺼﺤ ﯿﺢ. إذا ﺗﻮ ﻗﻒ اﻟ ﺸﻔﺮ ة ﻓﻲ ﻣﺠﺮى اﻟﻘﻄﻊ وﺣﺼﻞ ﺧﻄﺄ ﻓﻲ ا ﻵﻟﺔ ،
اﻟ ﻜﮭﺮﺑﺎء ﻋﻠﻰ اﻟﻔﻮر وﻗﻢ ﺑﻘ ﻠﺐ ﺳﻠﻜﯿﻦ ﻟ ﻠ ﻔ ﺎزة ﻓﻲ ا ﻟﻤﻘﺒﺲ.
ﻻﺳ ﺘ ﺨ ﺪ ا م ا ﻵ ﻟ ﺔ ، ر ا ﺟﻊ ﻓﺼﻞ " ا ﻻﺳ ﺘ ﺨ ﺪ ا م " .
ﻓﻲ ﺣﺎ ﻟ ﺔ وﺟﻮد ﺧﻄﺮ ﻋ ﻠﻰ ا ﻟ ﻤﺴﺘﺨﺪ م أ و ﻋ ﻠﻰ اﻵﻟ ﺔ ، ا ﺳﺘﺨﺪ م ﻣ ﻔ ﺘ ﺎح ا ﻟ ﻘﻄﻊ ا ﻟ ﻌﻤﻮﻣﻲ ﻟ ﻔﺼﻞ ا ﻟ ﺘ ﯿ ﺎ ر ا ﻟ ﻜﮭﺮ ﺑﻲ ﻋﻦ ا ﻵﻟ ﺔ .
اﺳﺤ ﺐ ا ﻟ ﻘ ﺎ ﺑﺲ ﻣﻦ ﻣﺄﺧﺬ ا ﻟ ﺘ ﯿ ﺎر ﻗ ﺒﻞ ا ﻟ ﻘ ﯿ ﺎ م ﺑ ﺄ ﯾ ﺔ ﻋﻤﻠ ﯿﺔ ﺻﯿ ﺎ ﻧ ﺔ أو ﻓﺤﺺ.
اﻟﺸﻔﺮة ، ﺣﺘﻰ أﺛﻨ ﺎ ء اﻟﺘﻮﻗﻒ.
ﻟﺘ ﻐ ﯿﯿﺮ اﻟﺸﻔﺮة، اطﻠﺐ ﻣﻦ اﻟ ﻤﻮزع اﻟﻤﻌ ﺘ ﻤ ﺪ أ ن ﯾﻘ ﻮم ھﻮ ﺑﺎﻟﻌﻤ ﻠﯿﺔ.
أﺣﺮص ﻋﻠﻰ ارﺗ ﺪ اء ﻗ ﻔ ﺎزات ﺣﻤ ﺎ ﯾﺔ ﻣﻦ ا ﻟﺠﺮوح أ ﺛ ﻨ ﺎ ء اﺳﺘ ﺒ ﺪ ال ا ﻟﺸﻔﺮة أ و أ ﺛ ﻨ ﺎ ء ا ﻟ ﻘ ﯿ ﺎ م ﺑﻌﻤﻠ ﯿﺔ ﻗﺮﯾ ﺒﺔ ﻣﻦ ا ﻟﺸﻔﺮة .
أي ﻋﻤ ﻠ ﯿ ﺔ ﺻﯿ ﺎ ﻧ ﺔ أ و اﺳﺘ ﺒ ﺪ ا ل ﻗﻄﻌﺔ ﻏﯿ ﺎ ر ﯾﺠﺐ أ ن ﺗ ﺘ ﻢ ﺑ ﻮ اﺳﻄﺔ ﺷﺨﺺ ﻣﺆھﻞ .
ر ا ﻟ ﺘﺤﻜﻢ وا ﻟﺴ ﻼﻣﺔ
اﻟﻘﻄﺎﻋﺔ ﻣﺰودة ﺑﺸﺎﺷﺔ ﺗﻌﻤﻞ ﺑﺎﻟﻠﻤﺲ )
ﺗﻮﺟﺪ ﻣﻨﻄﻘﺔ ا ﻟﻌﻤﻞ أﻣﺎ م اﻵﻟﺔ
ھﺬ ه اﻷﻟ ﺔ ﻣﺠﮭﺰة ﺑ ـ :
ﻣﻔﺘﺎح أﻣﺎن ﻣﯿﻜﺎﻧﯿﻜﻲ ﻣﻐﻨﺎطﯿﺴﻲ ﻣُﺸﻔﺮ
ﯾﺘﻜﻮن ﻣﻦ ﻣ ﻐﻨﺎطﯿﺲ أﻣﺎ ن وﺣﺴ ﺎس ﻣﻐ ﻨ ﺎطﯿﺴﻲ، ا ﻟ ﺬي ﯾ ﻮﻗﻒ اﻵﻟ ﺔ ﻋﻨ ﺪ ﻧ ﺎ ﯾ ﺘ ﻢ ﻓ ﺘﺢ ا ﻟ ﺒ ﺎب اﻷﻣ ﺎ ﻣﻲ )
ﻣﻔﺘﺎح أﻣﺎن ﻣﯿﻜﺎﻧﯿﻜﻲ ﻣﻐﻨﺎطﯿﺴﻲ ﻣُﺸﻔﺮ
ﯾﺘﻜﻮن ﻣﻦ ﻣﻐﻨﺎطﯿﺲ أﻣﺎن وﺣﺴﺎس ﻣﻐﻨﺎطﯿﺴﻲ، اﻟﺬي ﯾﻤﻨﻊ اﻵﻟﺔ ﻣﻦ اﻟﻌﻤﻞ ﻋﻨﺪﻣﺎ ﯾﻜﻮن اﻟﻐﻄﺎء ﻣﻔﺘﻮﺣًﺎ )
ﻗﻔ ﻞ أﻣﺎن ﻣﯿﻜﺎﻧﯿﻜﻲ
وا ﻟﺬ ي ﯾﻤﻨﻊ ا ﻟﻐﻄﺎء )
ﻣﻦ أ ﺟﻞ ا ﻻﺳ ﺘ ﻌ ﻤ ﺎ ل، ﯾ ﺠﺐ ﻗ ﻔﻞ ا ﻟ ﻌﺠﻼت ا ﻟﺼﻐ ﯿ ﺮ ة ا ﻟ ﻤﺰو د ة ﺑ ﻔ ﺮﻣ ﻠ ﺔ )
ﻓﻲ ﺑﺪاﯾﺔ اﻟﯿﻮم، وﺻّﻞ اﻵﻟﺔ ﺑﺎﻟﻜﮭﺮﺑﺎء ﺑﺎﺳﺘﺨﺪام ﻣﻔﺘﺎح اﻟﻘﻄﻊ اﻟﻌﻤﻮﻣﻲ
ﺧﻄﻮ ا ت ا ﻻﺳ ﺘ ﺨ ﺪ ا م
اﻓﺼﻞ
38.5 ﺧﻄﺮ
ﻻ ﺗ ﻠ ﻤﺲ
39 أزرا
39.1 أزرار ا ﻟ ﺘﺤﻜﻢ
fig.6(.
39.2 ﻣﻨﻄﻘﺔ ﻋﻤﻞ
)fig.3, n°18).
39.3 أﺟﮭﺰة اﻷﻣﺎن
)fig.6, n°19, 20)
fig.1, n°10(.
)fig.6, n°22)
fig.1, n°1(.
)fig.6, n°21)
fig.1, n°1( ﻣ ﻦ ا ﻟ ﻔﺘﺢ ﻋﻨﺪﻣﺎ ﺗﻌﻤ ﻞ اﻵﻟﺔ.
40 اﻻﺳﺘﺨﺪ ا م
fig.1, n°7(.
)fig.4-5)
)fig.2, n°11).
A. اﻓﺘﺢ اﻟﻐﻄﺎ ء.

95
ﺿﻊ ا ﻟ ﺨ ﺒ ﺰ ﻋ ﻠ ﻰ ﻣ ﻨ ﻀ ﺪ ة ا ﻹ د ﺧ ﺎ ل .
اﻧﺘﺒﮫ ﻛﻲ ﺗﻀﻊ اﻟﺨﺒ ﺰ ﺟﯿ ﺪا ﻓﻲ اﻟ ﺮﻛﻦ اﻷﯾ ﻤﻦ ﻧﺤﻮ ﻣ ﻘ ﺪ ﻣﺔ اﻻﻟﺔ .
إذا ﻛﺎﻧﺖ اﻵﻟﺔ ﻣﺰودة ﺑﻤﺨﻠﺐ ﯾﺪوي، اﺣﺮص ﻋﻠﻰ ﻏﺮس اﻟﻤﺨﻠﻒ ﺟﯿﺪًا ﻓﻲ اﻟﺨﺒﺰ.
إذا ﻛﺎﻧﺖ اﻵﻟﺔ إﺻﺪار
اﺧﺘﺮ ﻧﻮع ا ﻟ ﺘ ﻘﻄﯿﻊ ﻟﺸﺮا ﺋﺢ. ﻓﻲ و ﺿﻊ "ﻋﺪد ا ﻟﺸﺮا ﺋﺢ"، اﺧﺘﺮ ﻋﺪد ا ﻟﺸﺮا ﺋﺢ ا ﻟﻤﻄﻠﻮب.
إذا ﻛﺎﻧﺖ اﻵﻟﺔ إﺻﺪار
: اﺧﺘﺮ ﺳﺮﻋﺔ اﻟﺘﻘ ﻄ ﯿﻊ. ﺑ ﺸﻜ ﻞ اﻓﺘﺮاﺿﻲ، اﻟﺴﺮﻋ ﺔ ا ﻟﻤﺨ ﺘﺎرة ھﻲ ﺳﺮﻋﺔ اﻟﺘﻘ ﻄ ﯿﻊ اﻟﻤﺘﻮﺳﻄﺔ. )ﺳﺮﻋﺎت ا ﻟﺘﻘ ﻄ ﯿﻊ
اﻟﺜﻼث ﻣﺤﺪدة ﺑﻄﺮﯾﻘ ﺔ ﻗﯿﺎﺳﯿ ﺔ أﺛﻨﺎء ﺗﺼﻨﯿﻊ اﻵﻟ ﺔ . وﻣﻊ ذ ﻟﻚ، ﯾﻤﻜﻦ ﻟﻮﻛﯿ ﻠﻚ ا ﻟﻤﻌﺘﻤﺪ ﺿﺒﻂ ھﺬه ا ﻟﺴﺮﻋﺎت أ ﺛ ﻨ ﺎ ء ﺗﺸﻐ ﯿﻞ اﻵﻟ ﺔ( .
إذا ﻛﺎﻧﺖ اﻵﻟﺔ إﺻﺪار
اﺿﻐﻂ ﻋ ﻠ ﻰ ا ﻟ ﺰر ا ﻷﺧﻀﺮ ﻟ ﺒ ﺪ ء ا ﻟ ﺪ ور ة ا ﻟ ﺘ ﻘ ﻄ ﯿ ﻊ ﻟ ﺸﺮ ا ﺋ ﺢ .
اﺳﺘﻌﺪ ا ﻟﺨﺒﺰ ﻣﻦ ﻋﻠﻰ ﻣﻨﻀ ﺪ ة اﻹﺧﺮاج
ﯾﺘﯿ ﺢ اﻟﺰر ا ﻷﺣﻤﺮ وﻗﻒ د ور ة اﻟﻌ ﻤﻞ اﻟ ﺠ ﺎ ر ﯾﺔ.
ﯾﻮﻣﯿﺔ ﺑﻮاﺳﻄﺔ ﻣﺴﺘﺨﺪم ﻣُﺪﱠرب
ﺗﺄﻛ ﺪ إذا ﻛﺎ ن ﯾﺠﺐ ﺗﻔﺮ ﯾ ﻎ وﻋ ﺎ ء اﻟﻔﺘﺎت ) ﻣﻠ ﺤﻮظﺔ : ﻻ ﺗﻨﺲ ﻗﻔ ﻞ اﻟﺒﺎب ﺑﺎﻟﻤﻔﺘﺎح( )
ﻗﻢ ﺑﺘﻨﻈﯿ ﻒ ز ﺟﺎج ا ﻟﻐ ﻄﺎء )
اﺳﺘﺨﺪم ﻗﻄﻌﺔ ﻗﻤﺎش ﺟﺎ ﻓﺔ ﻟ ﻠ ﺘ ﻨﻈﯿﻒ ﻣﻦ ا ﻟ ﺪ اﺧﻞ.
ﺑﺎﻟﻨﺴﺒﺔ ﻟﻠﻌﻨﺎﯾﺔ اﻟ ﺨﺎ رﺟ ﯿ ﺔ ، اﺳ ﺘﺨﺪ م ﻗﻄﻌﺔ ﻗ ﻤﺎش رطﺒﺔ.
ﺗﺸﻐ ﯿﻞ وﺿ ﻊ ا ﻟ ﺘ ﻨﻈﯿﻒ:
ﻣﺮة ﺗ ﻘﻄﯿﻊ ﻟ ﻠﺨﺒ ﺰ و / أ و ﻣﺮة و اﺣﺪة ﻋﻠﻰ اﻷﻗﻞ ﻛﻞ ﻋﺎ م ﺑ ﻮ اﺳﻄﺔ وﻛ ﯿ ﻞ ﻣﻌ ﺘ ﻤﺪ
اﺳﺤ ﺐ ا ﻟ ﻘ ﺎ ﺑﺲ ﻣﻦ ﻣﻘ ﺒﺲ ا ﻟ ﻜﮭﺮﺑ ﺎء .
ﺗﺤﻘﻖ ﻣﻦ ﺣﺎ ﻟ ﺔ ﺷﻔﺮة ا ﻟ ﻘﻄﻊ )
إذا ﻻﺣﻈﺖ ا ﻧﺨ ﻔﺎض ﺟﻮدة ا ﻟﺘﻘ ﻄﻊ، ﯾﺠﺐ اﻟﻘﯿﺎم ﺑﺎﺳﺘﺒﺪال ﺷ ﻔﺮة ا ﻟﺘﻘ ﻄﻊ )اﻟﺮﻗﻢ ا ﻟﻤﺴﻠﺴﻞ ﻟﺪى ﺷﺮ ﻛ ﺔ
إذا ﻛﺎن ﻻﺑﺪ ﻣﻦ ﺗﻐﯿﯿﺮھﺎ، اﺳﺘﺒﺪل اﻟﺸﻔﺮة وﻓﻘًﺎ ﻹﺟﺮاء ﺗﻐﯿﯿﺮ ﺷﻔﺮة اﻟﻘﻄﻊ
ﻗﻢ ﺑﺎ ﻟ ﺘ ﻨﻈﯿ ﻒ ﺑﺎﺳﺘﺨﺪام ﻓﺮ ﺷﺎة واﺷﻔﻂ داﺧ ﻞ اﻵﻟﺔ.
ﺗﺄﻛ ﺪ ﻣﻦ أ ن اﻟﻮﻛ ﯿ ﻞ اﻟﻤﻌﺘﻤ ﺪ ﯾﻘ ﻮم ﺑﺘﺴﺠﯿ ﻞ زﯾﺎ ر ﺗ ﮫ ﻓﻲ دﻓﺘ ﺮ اﻟﺼﯿﺎﻧﺔ ﻣﻦ أﺟﻞ اﻟ ﺤﻔﺎظ ﻋ ﻠﻰ ﺿﻤﺎ ن اﻟـ
اﺣﺮص داﺋﻤًﺎ ﻋﻠﻰ ارﺗﺪاء ﻗﻔﺎزات ﺣﻤﺎﯾﺔ ﻣﻦ اﻟﺠﺮوح )ﻣﻌﯿﺎر
ﻗﺮﯾ ﺒ ﺔ ﻣﻦ ا ﻟﺸﻔﺮات.
ﺑﻌﺪ ا ﻟ ﺘ ﺄﻛﺪ أن ﻗ ﺎ ﺑ ﺲ اﻵﻟﺔ
اﻓﺘﺢ اﻟﺒﺎب )
اﺳﺤ ﺐ وﻋﺎء ا ﻟ ﻔ ﺘ ﺎت )
اﺳﺘ ﺒ ﺪل ا ﻟﺸﻔﺮة :
أ. ﻗﻢ ﺑﻔﻚ اﻟﻤ ﻔﺘﺎﺣﯿﻦ اﻟﻤﻮﺟﻮ د ﯾﻦ ﻋ ﻠﻰ اﻟ ﺠﺎﻧﺐ ا ﻷﯾﺴﺮ ﻟﻶﻟﺔ
ب. ا ﺳﺤﺐ و ا ﻗﻲ ا ﻟ ﺸ ﻔ ﺮ ة )
ج. ﻗ ﻢ ﺑ ﻔﻚ ا ﻟﺼﺎ ﻣﻮ ﻟ ﺔ ا ﻟ ﺘﻲ ﺗ ﺜ ﺒﺖ ا ﻟﺸﻔﺮة )
د. اﺳﺤﺐ اﻟﺴﻨﺪة واﺳﺘﺒﺪل اﻟﺸﻔﺮة ﻣﻊ اﻟﺤﺮص ﻋﻠﻰ وﺿﻌﮭﺎ ﺟﯿﺪًا ﻓﻲ دﺑﺎﺑﯿﺲ اﻻﺳﺘﻘﻄﺎب. أﻋﺪ وﺿﻊ اﻟﺴﻨﺪة.
ھـ . ارﺑﻂ وﺷﺪ ا ﻟ ﺼ ﺎﻣﻮﻟﺔ ا ﻟﺠﺪﯾﺪة ا ﻟﻤﺒ ﺎﻋﺔ ﻣﻊ ا ﻟﺸﻔﺮة ا ﻟﺠﺪﯾﺪة ﻣﻦ أﺟ ﻞ ﺗ ﺜ ﺒ ﯿﺖ ا ﻟﺸﻔﺮة، ﺑ ﺎﺳﺘﺨﺪ ا م ا ﻟﻤﻔ ﺎ ﺗ ﯿﺢ ا ﻟﻤﺒ ﺎﻋﺔ ﻣﻊ
اﻟﺼﺎ ﻣﻮ ﻟ ﺔ اﻟﺠﺪ ﯾ ﺪ ة ﻣﻦ أﺟﻞ ﺿﻤ ﺎن أ ﻓﻀﻞ ﺷﺪ .
Pro:
Pro
Pro:
)fig.3, n°13) وﻋ ﺒ ﺌ ﮫ ﻓﻲ أ ﻛ ﯿ ﺎس ﻋ ﻠ ﻰ ﺟﮭ ﺎ ز ا ﻟ ﺘ ﻜ ﯿ ﯿﺲ )fig.1 n°3(.
B.
C.
D.
E. أﻏﻠﻖ ا ﻟﻐﻄﺎء.
F. اﺧﺘﺮ ﺳُﻤﻚ اﻟﺸﺮﯾﺤﺔ.
G.
H.
I.
J.
41 اﻟﺼﯿﺎﻧ ﺔ
41.1
fig.1, n°8(.
fig.1 n°1( ﺑﺄن ﺗﻀﻌﮫ ﻓﻲ وﺿﻊ ا ﻟﺘﻨﻈﯿﻒ )fig.9).
A.
B. ﻗﻢ ﺑﺘﻨﻈﯿﻒ ا ﻟﻤﻨ ﺎﺿﺪ )fig.3, n°13, 15) ﺑﺎ ﺳﺘﺨﺪام ﻓﺮﺷﺎة.
C.
D.
E.
F.
اﺿﻐﻂ ﻋ ﻠ ﻰ ا ﻟ ﺮ ﻣ ﺰ "brosse" )ﻓﺮﺷﺎ ة( ﻓﻲ ا ﻟﺮﻛﻦ ا ﻟﻌﻠﻮ ي اﻷﯾﻤﻦ.
)fig.2, n°12).
fig.1, n°2(.
JAC: BVSLCA030 ﻣﻦ ﻛ ﺘ ﺎ ﻟ ﻮج
)fig.7).
5 ﺳﻨﻮ ات.
41.2 ﻛﻞ 25,000
A.
B.
C.
ﻗﻄﻊ ا ﻟ ﻐ ﯿ ﺎ ر JAC(.
D.
E.
41.3 ﺗﻐﯿﯿﺮ ا ﻟﺸﻔﺮات
)fig.7)
EN 388: 2003 ﻣﺆﺷﺮ B=5( وأﺣﺬﯾﺔ أﻣﺎن أ ﺛﻨﺎء اﺳﺘﺒﺪال ا ﻟﺸﻔﺮة أو أ ﺛﻨﺎء ﻋ ﻤﻠ ﯿﺔ
)fig.2, n°12) ﻣﻔﺼﻮل ﺟﯿﺪًا ﻋﻦ اﻟﺘﯿﺎر اﻟﻜﮭﺮﺑﻲ:
fig.1 n°10( ﺑ ﺎﺳﺘﺨ ﺪام ا ﻟ ﻘﻔﻞ )fig.1 n°9(.
fig.1, n°8(.
)fig.7, n°23).
fig.1, n°6( ﻣﻔﺘ ﺎح ﺳ ﺪاﺳﻲ ﻣ ﺠﻮف.
fig.7, n°24) ﺑﺎ ﺳﺘ ﺨﺪام اﻟﻤﻔﺘﺎﺣﯿ ﻦ اﻟﻤﺒﺎ ﻋﯿﻦ ﻣﻊ ا ﻵﻟﺔ )fig.7, n°23(
اﻵﻟ ﺔ . ﻣﻦ ا ﻟ ﻤﮭﻢ و ﺿ ﻊ

96
أﻋﺪ و ﺿﻊ وﻋﺎء ا ﻟ ﻔ ﺘ ﺎت وأﻏﻠﻖ ا ﻟ ﺒ ﺎب.
ﻗﻢ ﺑﺘﻮﺻﯿﻞ اﻵﻟﺔ ﺑ ﺎ ﻟ ﺘ ﯿ ﺎر ا ﻟﻜﮭﺮﺑﻲ، ﻓ ﺘﻜﻮ ن اﻵﻟﺔ ﺟﺎھ ﺰة.
ﺗﺄﻛ ﺪ ﻣﻦ أ ن اﻟﻮﻛ ﯿ ﻞ اﻟﻤﻌﺘﻤ ﺪ ﯾﻘ ﻮم ﺑﺘﺴﺠﯿ ﻞ زﯾﺎ ر ﺗ ﮫ ﻓﻲ دﻓﺘ ﺮ اﻟﺼﯿﺎﻧﺔ ﻣﻦ أﺟﻞ اﻟ ﺤﻔﺎظ ﻋ ﻠﻰ ﺿﻤﺎ ن اﻟـ
ﺑﺮﺟﺎء ﻣﻼ ﺣﻈﺔ أن ا ﻟﺸﻔﺮة ﻗ ﺎ ﺑ ﻠ ﺔ ﻟ ﻠﺸﺤﺬ، ا ﺗﺼﻞ ﺑ ﺎ ﻟﻮﻛﯿﻞ ا ﻟ ﻤﻌﺘﻤﺪ ﻣﻦ أﺟﻞ ﻣﺰﯾ ﺪ ﻣﻦ ا ﻟ ﻤﻌﻠﻮﻣﺎت.
ﻗﻄﻊ ا ﻟ ﻤﺴﺘ ﮭﻠ ﻜ ﺎت
أﺛﻨﺎء طﻠﺐ ﻗﻄﻌﺔ ﻏﯿﺎر، ﺗﺄﻛ ﺪ ﻣﻊ اﻟ ﻮﻛ ﯿﻞ اﻟﻤﻌ ﺘ ﻤ ﺪ ﺑﺸ ﺄن اﻟﻘﻄﻌﺔ اﻟﻤﻄﻠ ﻮ ﺑ ﺔ ﻋﻠﻰ أ ﺳﺎس ﻛ ﺘﺎﻟ ﻮج ﻗﻄﻊ اﻟ ﻐﯿﺎر اﻟﺬي أﺻﺪره اﻟﺼﺎﻧ ﻊ.
ﺣﺪ د د ا ﺋ ﻤ ﺎ ر ﻗ ﻢ ا ﻵ ﻟ ﺔ ﻛﻤ ﺎ ھﻮ ﻣ ﺒ ﯿﻦ ﻋﻠﻰ ﻟ ﻮﺣﺔ ا ﻟ ﺒ ﯿ ﺎ ﻧ ﺎت.
ﻮﻛ ﯿﻞ ﺑ ﻌﻤﻞ ا ﻟﻄﻠ ﺒ ﯿ ﺎت ﻟ ﺪى ﺷﺮﻛﺔ
ﻗﺎﺋﻤ ﺔ ﻗ ﻄﻊ اﻟﻤﺴ ﺘﮭﻠﻜﺎ ت
رﻣﺰ ا ﻟﺼﻨﻒ
اﻻﺳﻢ
اﻟ ﻤﻮدﯾﻞ
5740214
ﻋﺠ ﻠ ﺔ ا ﻟ ﻐﻄ ﺎ ء ا ﻟﺼﻐ ﯿ ﺮ ة
اﻟ ﻜﻞ
BVMPT012
ﻧﻌﻞ ا ﻟﻐﻄﺎء
اﻟ ﻜﻞ
6110029
ﺷﻔﺮة د ا ﺋﺮة ﻗﻄﺮ 420 ﻣﻢ - 3 ﻣﻢ
اﻟ ﻜﻞ
7240043
ﺳﯿﺮ ﺗﻮﺟﯿ ﮫ ﺧﻄﻲ
اﻟ ﻜﻞ
MP00304
ﺷﺮ ﯾ ﻂ ﻓ ﻠ ﯿ ﻦ ﻟ ﻠ ﻐﻄ ﺎ ء
اﻟ ﻜﻞ
BVMPA005
ﺷﻔﺮة ﻧ ﺎ ﺑ ﺾ ذراع اﺣﺘﺠﺎز ا ﻟﺸﺮﯾﺤﺔ
اﻟ ﻜﻞ
BVMPT005
ﻧﻌﻞ ذراع اﺣﺘﺠﺎز ا ﻟﺸ ﺮﯾﺤﺔ
اﻟ ﻜﻞ
ﻓﻠﯿ ﻦ ذر ا ع ا ﺣﺘ ﺠﺎ ز اﻟ ﺸﺮ ﯾﺤﺔ
اﻟ ﻜﻞ
BVMPT003
دﻟﯿﻞ ﻣﺨﻠﺐ 800
800
BVMPT004
دﻟﯿﻞ ﻣﺨﻠﺐ 1000
1000
W008709
ﻧﻌﻞ ﻟ ﺒ ﺎد ا ﻟﻤﺨﻠﻒ
ﻣﺨ ﻠﺐ ﯾ ﺪ وي
ﻓﺮﺷﺎ ة ﻛﻮﻛﺒ ﯿ ﺔ
اﻟ ﻜﻞ
BVMPA006
ﻓﺮﺷﺎ ة ﻣﺮور اﻧﺘﻘﺎل اﻟﻤﺨ ﻠﺐ 800
800
BVMPA007
ﻓﺮﺷﺎ ة ﻣﺮور ا ﻧ ﺘ ﻘ ﺎل ا ﻟ ﻤﺨﻠﺐ 1000
1000
5 ﺳﻨﻮ ات.
JAC.
42
وﯾ ﻘﻮم ا ﻟ
42.1

97
43
اﻷﺣﺪ اث ا ﻟﻌﺎر ﺿ ﺔ أ ﺛ ﻨ ﺎء ا ﻟ ﺘﺸﻐﯿﻞ
ﻗﺒ ﻞ ا ﻟﻘﯿﺎم ﺑﺄﯾﺔ إﺻﻼﺣ ﺎت، ﯾ ﺠﺐ ﻓﺼﻞ اﻟﺘﯿﺎر ﻋﻦ اﻵ ﻟﺔ.
اﻟ ﻤﺸﻜﻠﺔ
اﻟﺘﺤﻘﻖ
اﻵﻟﺔ ﻻ ﺗ ﺪور
ﻗﻢ ﺑﺘﻮﺻﯿﻞ اﻵﻟﺔ ﺑ ﺎﺳﺘﺨﺪام ا ﻟﻜﺎﺑﻞ )fig.2, n°12)
ﺷﻐﻞ ﻣ ﻔ ﺘ ﺎح ﻗﻄﻊ ا ﻟ ﺘ ﯿ ﺎ ر ا ﻟ ﺮ ﺋ ﯿﺴﻲ )fig.2, n°11)
أﻏﻠﻖ ا ﻟ ﻐﻄﺎ ء
أﻏﻠﻖ ا ﻟ ﺒ ﺎب
اﻵﻟﺔ ﺗﻌﻤﻞ، ﻟﻜﻦ اﻟﺨﺒﺰ ﺗﺎﻟﻒ أو ﻣُﻘﻄﻊ
ﺑﻄﺮﯾ ﻘﺔ ﻏﯿﺮ ﻣ ﺘﺴﺎوﯾﺔ
ﺗﺤﻘﻖ إ ذ ا ﻛ ﺎن ﯾﺠ ﺐ اﺳﺘ ﺒ ﺪ ال ا ﻟﺸﻔﺮات )fig.7)
اﺗﺮك اﻟﺨﺒﺰ ﯾﺒ ﺮد ﻟﻌ ﺪ ة ﺳ ﺎﻋﺎت
ﺿﻊ ا ﻟ ﺨ ﺒ ﺰ ﺑ ﺎ ﻟ ﻤ ﻘ ﺎ ﺳ ﺎ ت ا ﻟ ﻤ ﻘ ﺒ ﻮ ﻟ ﺔ
ﺿﻊ ﺧ ﺒ ﺰ إ ﻟ ﻰ ﺣ ﺪ ﻣ ﺎ ﻧ ﺎ ﺷﻒ
إذا ﻛﺎﻧﺖ ا ﻟﺸﻔﺮة ﺗﺪور ﻓ ﻲ اﻻﺗﺠﺎه ا ﻟﺨﻄﺄ، ﯾﺮﺟﻰ ﻗﻠ ﺐ 2 ﻓﺎ ز ه ﻓﻲ ﻣﻘﺒﺲ اﻟﺘﯿﺎر اﻟﺨﺎص ﺑﺎﻵﻟ ﺔ
إذا اﺳﺘﻤﺮت اﻟﻤﺸﻜﻠﺔ ﺑﻌﺪ ذﻟﻚ، ﯾﺮﺟﻰ اﻻﺗﺼﺎل ﺑﺎﻟﻔﻨﻲّ.
اﻧﺘﺒ ﮫ :

98
44 رﻣﻮز ا ﻟﺨﻄﺄ
إذا اﺳﺘﻤﺮت اﻟﻤﺸﻜﻠﺔ ﺑﻌﺪ ذﻟﻚ، ﯾﺮﺟﻰ اﻻﺗﺼﺎل ﺑﺎﻟﻔﻨﻲّ.
وﻣ ﯿﺾ أ و ا ﻟ ﺮﻣﺰ ا ﻟ ﻤﻌﺮو ض ﻋﻠﻰ ا ﻟﺸﺎﺷﺔ
وﺻﻒ ا ﻟ ﻤ ﺸ ﻜ ﻠ ﺔ
اﻟﺘﺼﺮف
ERR 001
اﻟ ﻐﻄﺎ ء أ و اﻟﺒﺎب ﻣﻔ ﺘ ﻮح
اﻏﻠﻖ ا ﻟ ﻐﻄﺎ ء و ا ﻟ ﺒ ﺎب.
ﺑﺮﺟﺎ ء إ ﯾ ﻘ ﺎف اﻵﻟ ﺔ ﺑ ﺎﺳﺘﺨﺪ ا م زر ﻗﻄﻊ ا ﻟ ﺘ ﯿ ﺎر ا ﻟﺮﺋ ﯿﺴﻲ )fig.2,
n°12
( وإﻋﺎدة ﺗﺸ ﻐﯿﻠﮭﺎ ﺑﻌﺪ ﻣ ﺮ و ر 30 ﺛﺎﻧﯿﺔ. إذا ا ﺳﺘﻤﺮت اﻟﻤﺸﻜﻠﺔ
ﺑﻌﺪ ذﻟﻚ، ﯾﺮﺟﻰ اﻻﺗﺼﺎل ﺑﺎﻟﻔﻨﻲّ.
ﯾُﺮﺟﻰ اﻟﺘﺄﻛﺪ أﻧﮫ ﻻ ﯾﻮﺟﺪ ﺷﻲء أو أﺗﺮﺑﺔ ﺗﻌﯿﻖ ﺧﻄﺎف إﻣﺴﺎك
اﻟﺨﺒﺮ.
ﯾُﺮﺟﻰ ﻧﺰع أي ﺷﻲء ﻣﻮﺟﻮد ﻋﻠﻰ ﻣﻘﺮﺑﺔ ﻣﻦ ﻗﻨﺎة ﻣﺮور ا ﻟ ﺸﻔ ﺮ ة ،
وﺿﻊ ا ﻟ ﺨ ﺒ ﺰ ﻓ ﻲ ا ﻷ ﺳ ﻔ ﻞ ﻋ ﻠ ﻰ ﯾ ﻤ ﯿ ﻦ ﻣ ﻨ ﻀﺪ ة ا ﻹ د ﺧ ﺎ ل .
ﺑﺮﺟﺎ ء إ ﯾ ﻘ ﺎف اﻵﻟ ﺔ ﺑ ﺎﺳﺘﺨﺪ ا م زر ﻗﻄﻊ ا ﻟ ﺘ ﯿ ﺎر ا ﻟﺮﺋ ﯿﺴﻲ )fig.2,
n°12
( وإﻋﺎدة ﺗﺸ ﻐﯿﻠﮭﺎ ﺑﻌﺪ ﻣ ﺮ و ر 30 ﺛﺎﻧﯿﺔ. إذا ا ﺳﺘﻤﺮت اﻟﻤﺸﻜﻠﺔ
ﺑﻌﺪ ذﻟﻚ، ﯾﺮﺟﻰ اﻻﺗﺼﺎل ﺑﺎﻟﻔﻨﻲّ.
ERR 002
ﻋﻄﻞ ﻓ ﻲ ا ﻟ ﺪ ا ﺋ ﺮ ة ا ﻟ ﻜ ﮭ ﺮ ﺑ ﺎ ﺋ ﯿ ﺔ
ERR 003
ﻋﻄﻞ اﻟﻤُﻐّﯿﺮ
ERR 004
ﻋﻄﻞ ﻓ ﻲ ا ﻟ ﺨﻄ ﺎ ف
ERR 005
ﯾﻮﺟﺪ ﺷ ﻲء أﻣﺎم ﺣ ﺴﺎ س ﻗ ﻨ ﺎ ة ا ﻟ ﻘﻄﻊ
ERR 006
ﻋﻄﻞ ﺧﻄﻲ

99
45
ﻗﺎﺋﻤ ﺔ ﺑﺎﻟﻤﻜ ﻮﻧﺎ ت اﻟﻤ ﻮﺟﻮدة ﻓﻲ اﻷﺷﻜﺎل
ﺷﻜﻞ
اﻟﺮﻗ ﻢ
اﻻﺳﻢ
1
1
اﻟ ﻐﻄﺎ ء اﻟ ﻌﻠﻮي
2
ﺷﻔﺮة
3
ﺟﮭ ﺎ ز ا ﻟ ﺘ ﻜ ﯿ ﯿﺲ
4
ﺷﺎﺷﺔ
5
ﺣﺎ ﻣﻞ اﻷﻛ ﯿ ﺎس ) اﺧﺘ ﯿ ﺎري(
6
وا ﻗﻲ ا ﻟﺸﻔﺮة
7
ﻋﺠﻼت ﺻﻐ ﯿ ﺮ ة ﺑ ﻔ ﺮ ﻣ ﻠ ﺔ
8
وﻋ ﺎ ء ﻓ ﺘ ﺎت ا ﻟ ﺨ ﺒ ﺰ
9
ﻗﻔ ﻞ اﻟﺒﺎب اﻷﻣﺎﻣﻲ
10
ﺑﺎب أﻣﺎﻣﻲ
2
11
ﻣﻔ ﺘ ﺎح ﻗﻄ ﻊ رﺋﯿﺴ ﻲ
12
ﻛﺎ ﺑﻞ ا ﻟ ﺘﻮﺻﯿﻞ
3
13
ﻣﻨﻀﺪة إﺧﺮاج
14
ذراع ﺣﺠﺰ ا ﻟﺨﺒﺰ
15
ﻣﻨﻀﺪة إد ﺧ ﺎل
16
ﻣﺨ ﻠﺐ ﯾ ﺪ وي
17
ﻣﺨ ﻠﺐ آ ﻟﻲ
18
ﻣﻨﻄﻘﺔ ﻋﻤﻞ
7
6
19
ﺣﺴ ﺎس أ ﻣ ﺎ ن
20
ﻣﻐ ﻨ ﺎطﯿﺲ أ ﻣ ﺎن
21
ﻗﻔ ﻞ ﻣﯿﻜﺎﻧﯿﻜﻲ
22
ﺣﺴ ﺎس أ ﻣ ﺎ ن
7
23
ﻣﻔ ﺎ ﺗ ﯿﺢ ﻟ ﻔﻚ ا ﻟﺸﻔﺮة
24
ﺻﺎ ﻣ ﻮ ﻟ ﺔ ا ﻟ ﺸ ﻔ ﺮ ة
8
25
ﻣﻠﺼﻖ ﻟﺨﻄﺮ ا ﻟﺼﻌ ﻖ ﺑﺎ ﻟﻜﮭﺮﺑ ﺎء
26
رﺳ ﻢ ﺗ ﺨﻄ ﯿ ﻄﻲ ﻛ ﮭ ﺮ ﺑ ﻲ

100
fig.1
fig.2
 Loading...