

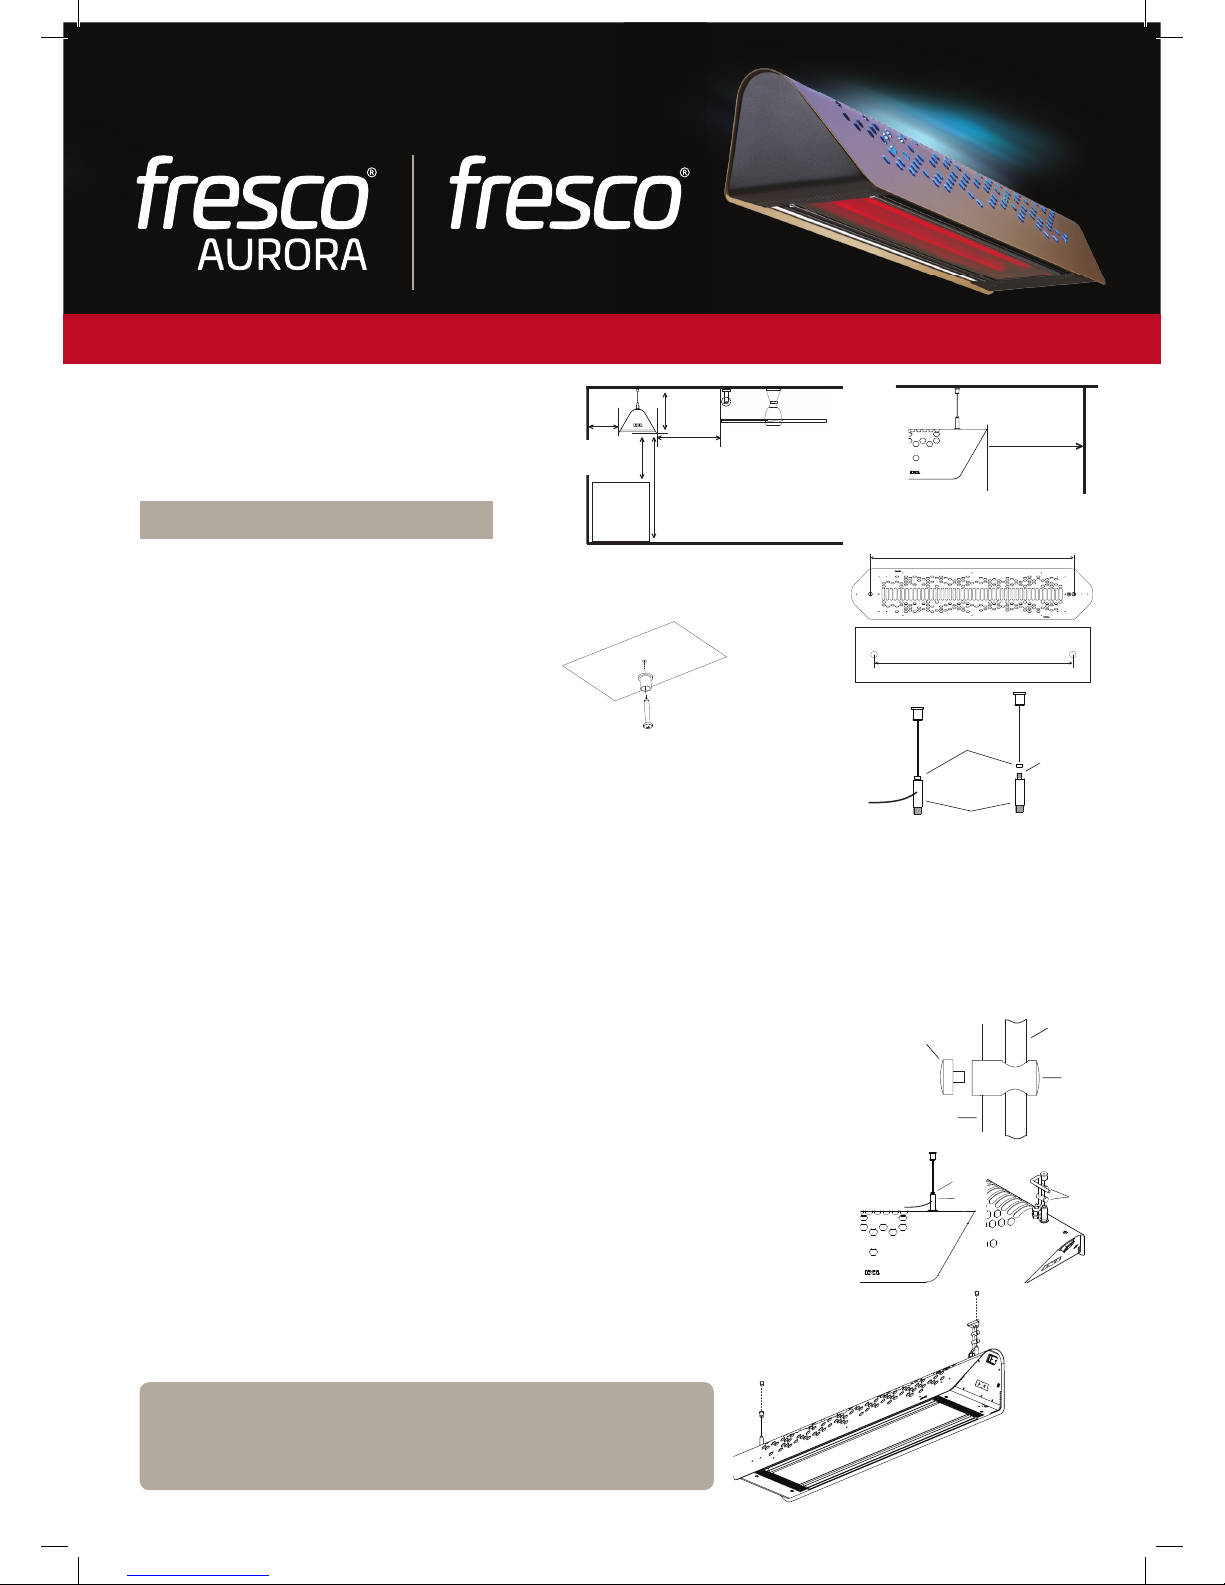
The following clearances are
required, when installing
the Fresco.
Installing Fresco
STEP 1
Measure and mark the mounting holes on the ceiling at a distance of 1025mm. When installing into
a plaster board ceiling, make sure that the unit is hung from the joists, beams or rafters. This Fresco
unit is not suitable for recessed mounting.
1025mm
1025mm
1025mm
STEP 2
Screw the xing caps to the ceiling with the screws provided.
STEP 4
After the cable is removed from the gripper assembly, measure out the required cable length. The cable length required is calculated by
the following formula.
Cable length required = Ceiling height – 2.1m (e.g. 2.4m – 2.1m = 0.3m of cable required)
When cutting the cable, the cut must be clean so that the end is not frayed which could cause the Cable catching on either the cable
guides or the gripper assembly.
Note: This length is based on the lowest surface for the heater being 2.1 metres from the oor.
Note: The lowest point of the heater must be a minimum of 2.1m from the oor. If this is not done, the installation is not complaint.
Fans, Lights and
Sprinkler Fittings
Must Not Be Below
The Heater
400mm
min
300mm
min
2100mm
min
400mm
min
1000mm min
from surfaces
below heater
FLOOR
CEILING
<
400mm min
on both ends
For further installation details refer to the Fresco User Guide.
Installation of any electrical wiring, power outlet or switch is to be carried
out by registered/licensed electrician and must comply with the current
Australian/New Zealand Wiring Rules AS/NZS 3000.
Quick set up guide
STEP 3
To remove the cable from the cable gripper assembly, loosen the clamping nut at the top of the gripper
and push down. This loosens the lock and the cable is able to move freely through the gripper. When
the downward pressure is released the gripper will lock onto the cable.
Clamping
Nut
Gripper
Assembly
Small
Thread
Section
STEP 5
After the cable is cut and before securing the cable back into the gripper assembly, thread the cable through
the two cable guides (located on power cord). When threading the cable guide ensure the grub screw is
loose to allow the cable to pass through easily. NOTE, do not pull the cable back through the grub without
loosening as this will cause the cable to strip. When the right hight is achieved, tighten and secure the grub
screw in place.
Grub
Screw
Mounting
Cable
Power
Cord
Cable
Guide
STEP 6
Now thread the mounting Cable through the gripper assembly and use the Clamping Nut to secure
the Cable in place as shown in the picture from Step 3. When this is done screw the gripper assembly
into the Fresco.
Clamping
Nut
Gripper
Assembly
Cable
Guides
STEP 7
Lift the unit up to the ceiling and screw the xture attachment to the xing cap mounted in Step 2.
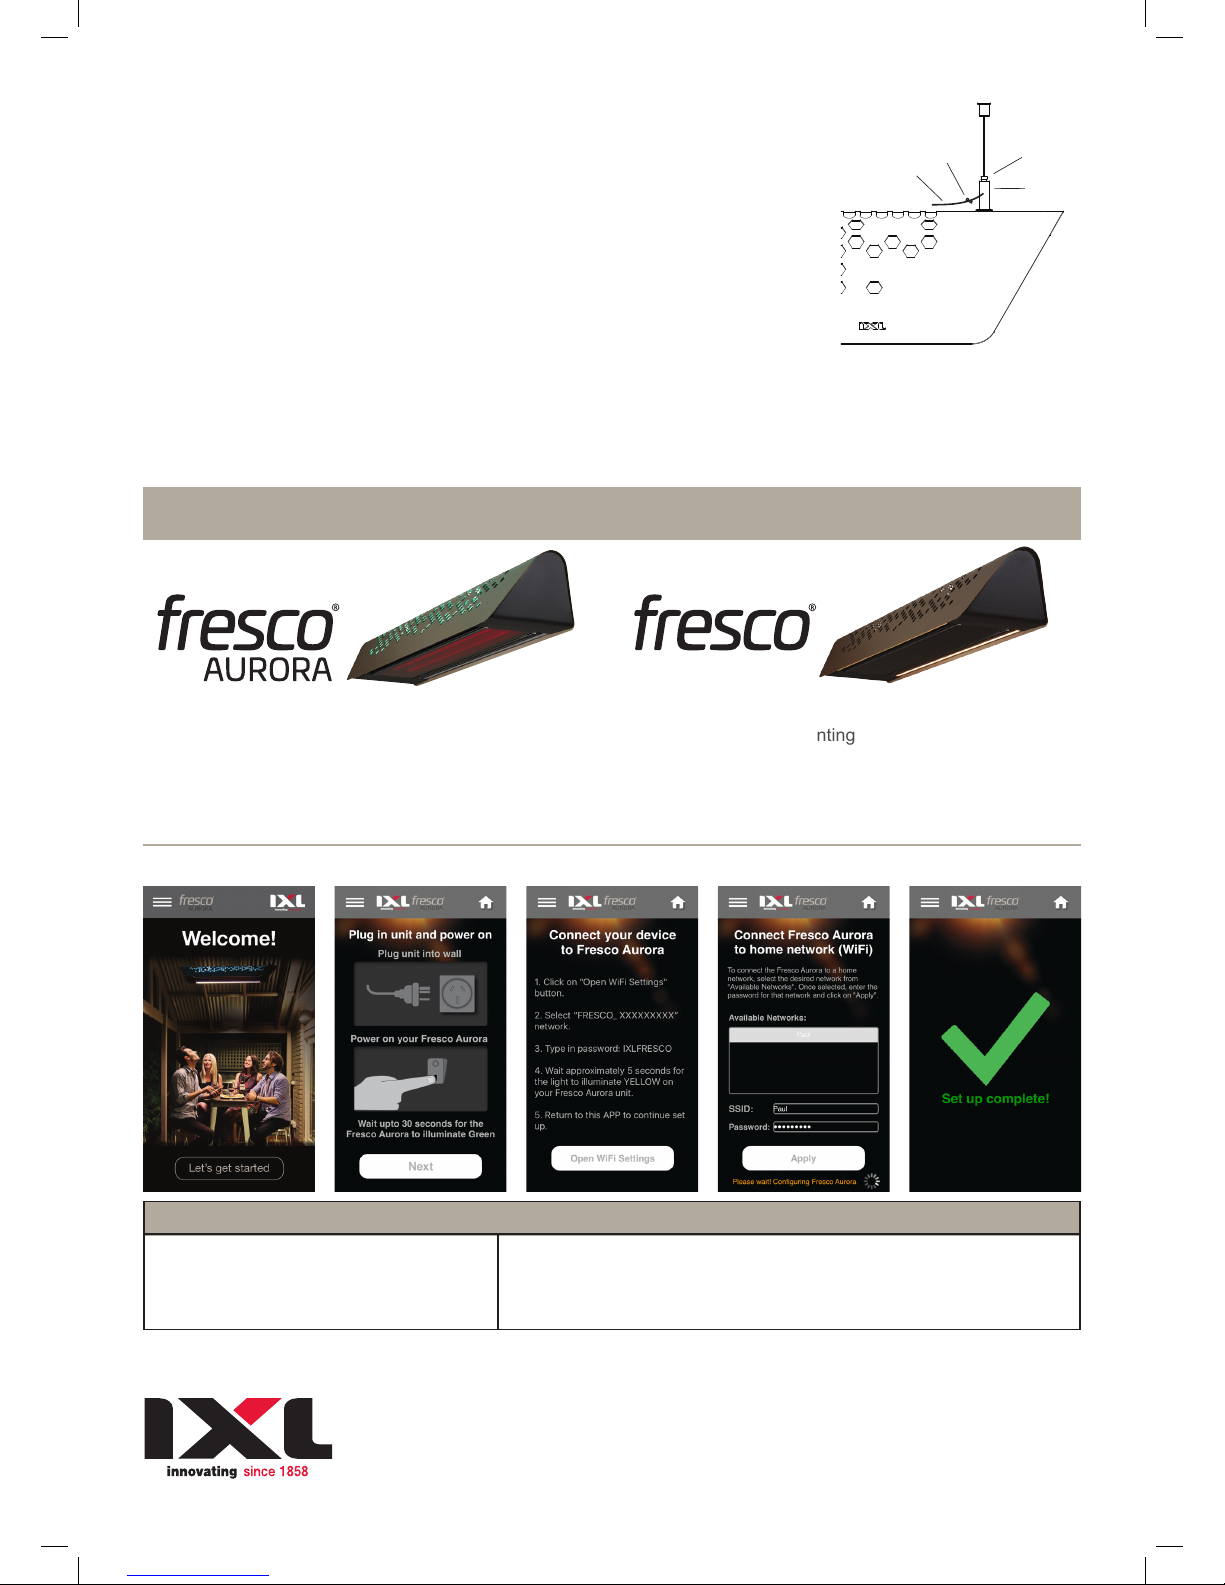
MODEL No. 23101
MODEL No. 22001
NOTE: Before operating the unit, the instructions and detailed safety cautions must be read.
What’s Included
Australia
www.ixlappliances.com.au
1300 727 421
New Zealand
www.ixlappliances.co.nz
0800 727 421
• 2 x screws for mounting
• 2 x mounting wires assemblies
• 1 x remote
• User Guide
• Quick Set Up Guide
MODEL No. 23101 MODEL No. 22001
• 2 x screws for mounting
• 2 x mounting wires assemblies
• User Guide
• Quick Set Up Guide
Fresco Aurora App Set Up
Fresco Aurora – Coloured Light Indicators for Connection
Green Light Access Point Ready
Yellow Light Successful Connection to Access Point
Red Light Disconnect from Access Point
Blue Light on for 20 seconds Successful Connection to a Network
If you are having trouble connecting the Fresco Aurora App with the Fresco unit, please refer to the User Guide.
Part Number: 611422 Revision C
STEP 8
After the Fresco is secured to the ceiling, loosen one clamping nut at the time to ensure that the
Fresco is horizontal and the bottom edge of the Fresco is a minimum of 2.1m from the oor.
When this is adjusted to suit the requirements above, tighten the clamping nut.
Tie a knot in the cable after the gripper assembly and cut excess cable length.
The knot is to prevent the wire from slipping through the clamp if it becomes loose.
Note: The lowest point of the heater must be a minimum of 2.1m from the oor.
If this is not done, the installation is not complaint.
Note: The clamping nut MUST be very tight to ensure that the wire does not
slip out. Refer to the image below.
Step 9
Connect the power cord to a socket outlet located in close proximity to the Fresco. The Fresco is now ready to operate.
Note: It is not recommended to connect the Fresco in an extension cord.
Note: Only a licensed electrician can shorten the power cord if it is too long. When shortening the Power Cord the internal wiring
of the Fresco unit must not be disrupted in any way.
Clamping
Nut
Excess
Wire
Knot
Gripper
Assembly
 Loading...