

Page 1
FLUSH MOUNT CEILING LIGHT
ASSEMBLY INSTRUCTIONS
REMOVE ALL PARTS FROM PACKAGE, BE CAREFUL NOT
TO DAMAGE ANY COMPONENTS.
PROFESSIONAL INSTALLATION RECOMMENDED
Page 2
FLUSH MOUNT CEILING LIGHT
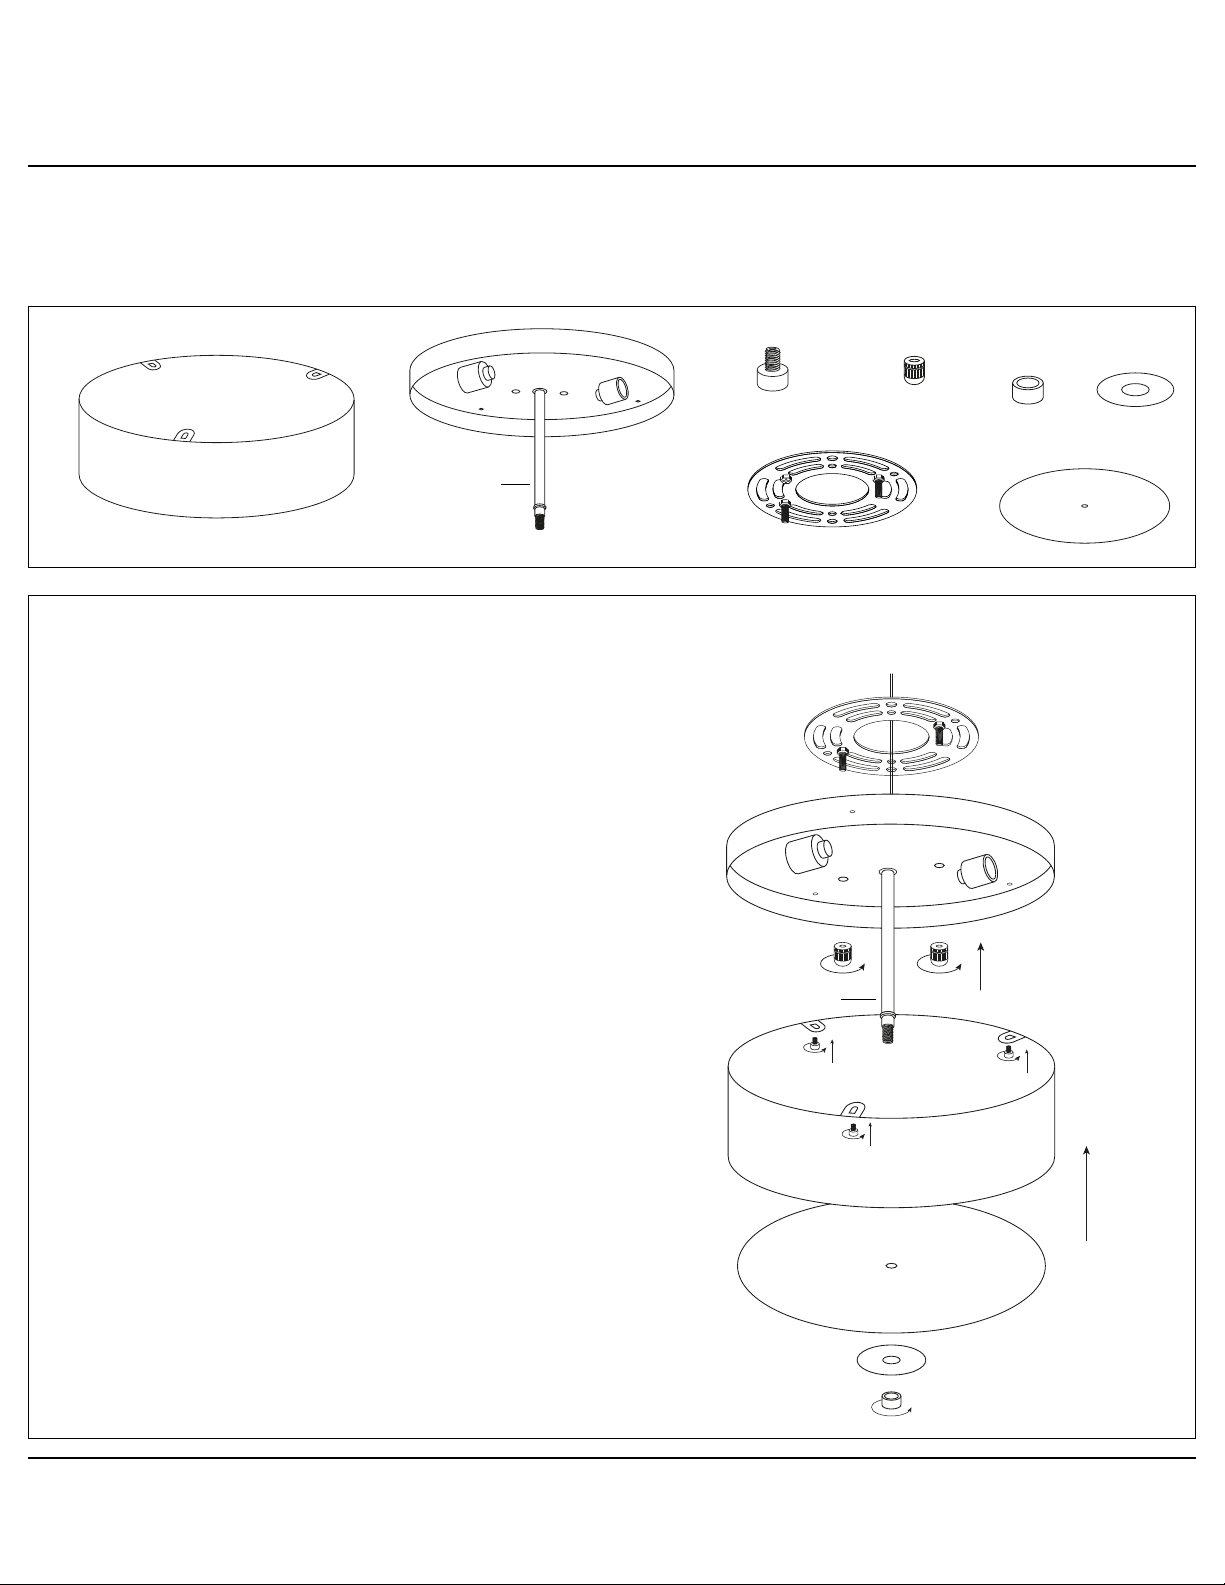
REMOVE ALL PARTS FROM PACKAGE, BE CAREFUL NOT TO DAMAGE ANY COMPONENTS.
B
C
x3
A
x2
E
GF
Remove shade [A] from canopy [B] by removing three
1.
shade nuts [C]. Remove plastic wrap from shade [A] and
reattach to canopy [B].
2.
Detach mounting plate [D] from canopy [B] by removing
canopy nuts [E].
Mounting plate [D] will attach to ceiling junction box.
3.
Install bulbs 60W max (not included).
4.
Install light to ceiling. We recommend installation by a
5.
qualified electrical professional. Canopy nuts [E] are used
to tighten light to ceiling.
H
D
I
D
B
E
H
C
Remove decorative nut[F] and washer[G] from fixture
6.
rod[H].
Place diffuser[I] over fixture rod[H].
7.
8.
Replace washer[G] and tighten with decorative nut[F].
Note: Turn off switch before replacing the bulb. Make sure the bulb has sufficient time to cool down.
Do not subject the lamp to any shock while lit as shattering of glass shade may result.
A
I
G
F
 Loading...