

Page 1
User Manual
NOTE: For Spanish users, please go to 'Settings", then go to “Language & Input” to change from
English to Spanish Language OSD.
10.1" SupraPad Tablet PC
To assure the product to work in best status please read the user’s manual carefully before
operation and keep it well for future use
Page 2

The iView 10.1" SupraPad is the dependable, versatile tablet-PC you’ve been looking for.
Featuring an A53 quad core Cortex processor and 10.1" high-resolution screen, the tablet-PC
delivers performance and clarity where you need it most. Web browsing, access to thousands of
apps, and full audio and video streaming capability for your favorite music and movies are at your
fingertips. Enjoy ample memory storage space for pictures, videos, and more, plus expandable
Micro-SD up to 128GB. With built-in Bluetooth functionality, the iView 10.1" SupraPad is ready to
link up with external devices and quick file-sharing. Don’t miss out on the next-gen tablet-PC!
Notes:
* This product is highly electric. Do not dismantle.
* Take necessary precautions to avoid dropping.
* Store in a cool environment: avoid extreme temperatures, humidity, and dust. Keep product away from
strong magnets and long-term exposure to the sun.
* Clean the device by gently wiping the product with a damp cloth; the use of chemical cleaners is
prohibited. Keep out of water.
* When using headphones for long periods of time, be advised that high volume may cause permanent
damage to hearing.
* When using headphones, be mindful of your surroundings while traveling.
* Only use permitted battery, charger and accessories. The use of any other type of product could damage
the device and may be dangerous.
* Please deal with waste machinery and accessories according to local environmental regulations.
* If you have any questions about the product, please contact the store of purchase or iVIEW’s customer
service center directly.
* Please follow the user's guide and backup your files. The company is not responsible for any data loss
that may occur due to product damage.
Page 3

1
Table of Contents
1. Product Overview ........................................................................................... 2
2. Start-up and shut-down .................................................................................. 3
3. Desktop .......................................................................................................... 3
4. Taskbar Icons ................................................................................................. 4
5. All Apps Menu ................................................................................................. 5
System settings ............................................................................................ 5
*Date & Time: ......................................................................................... 6
*Brightness: ........................................................................................... 7
*Sleep Mode: ......................................................................................... 8
*Wireless Setup: .................................................................................... 8
*Third-Party Applications ........................................................................ 9
*Backup & reset ................................................................................... 10
*Storage ................................................................................................ 11
*Languages & Input .............................................................................. 11
*ES file explorer ................................................................................... 12
6. Web Browser ................................................................................................ 13
7. Play Music .................................................................................................... 14
8. Videos App ................................................................................................... 15
9.Google Photos ............................................................................................... 16
10. Wallpapers........................................................................................17
11. Sound Recorder ......................................................................................... 18
12. Camera....................................................................................................... 18
13. G-mail ......................................................................................................... 19
14.USB Support ............................................................................................... 22
15. Features ..................................................................................................... 23
16. Accessories ................................................................................................ 23
Page 4
2
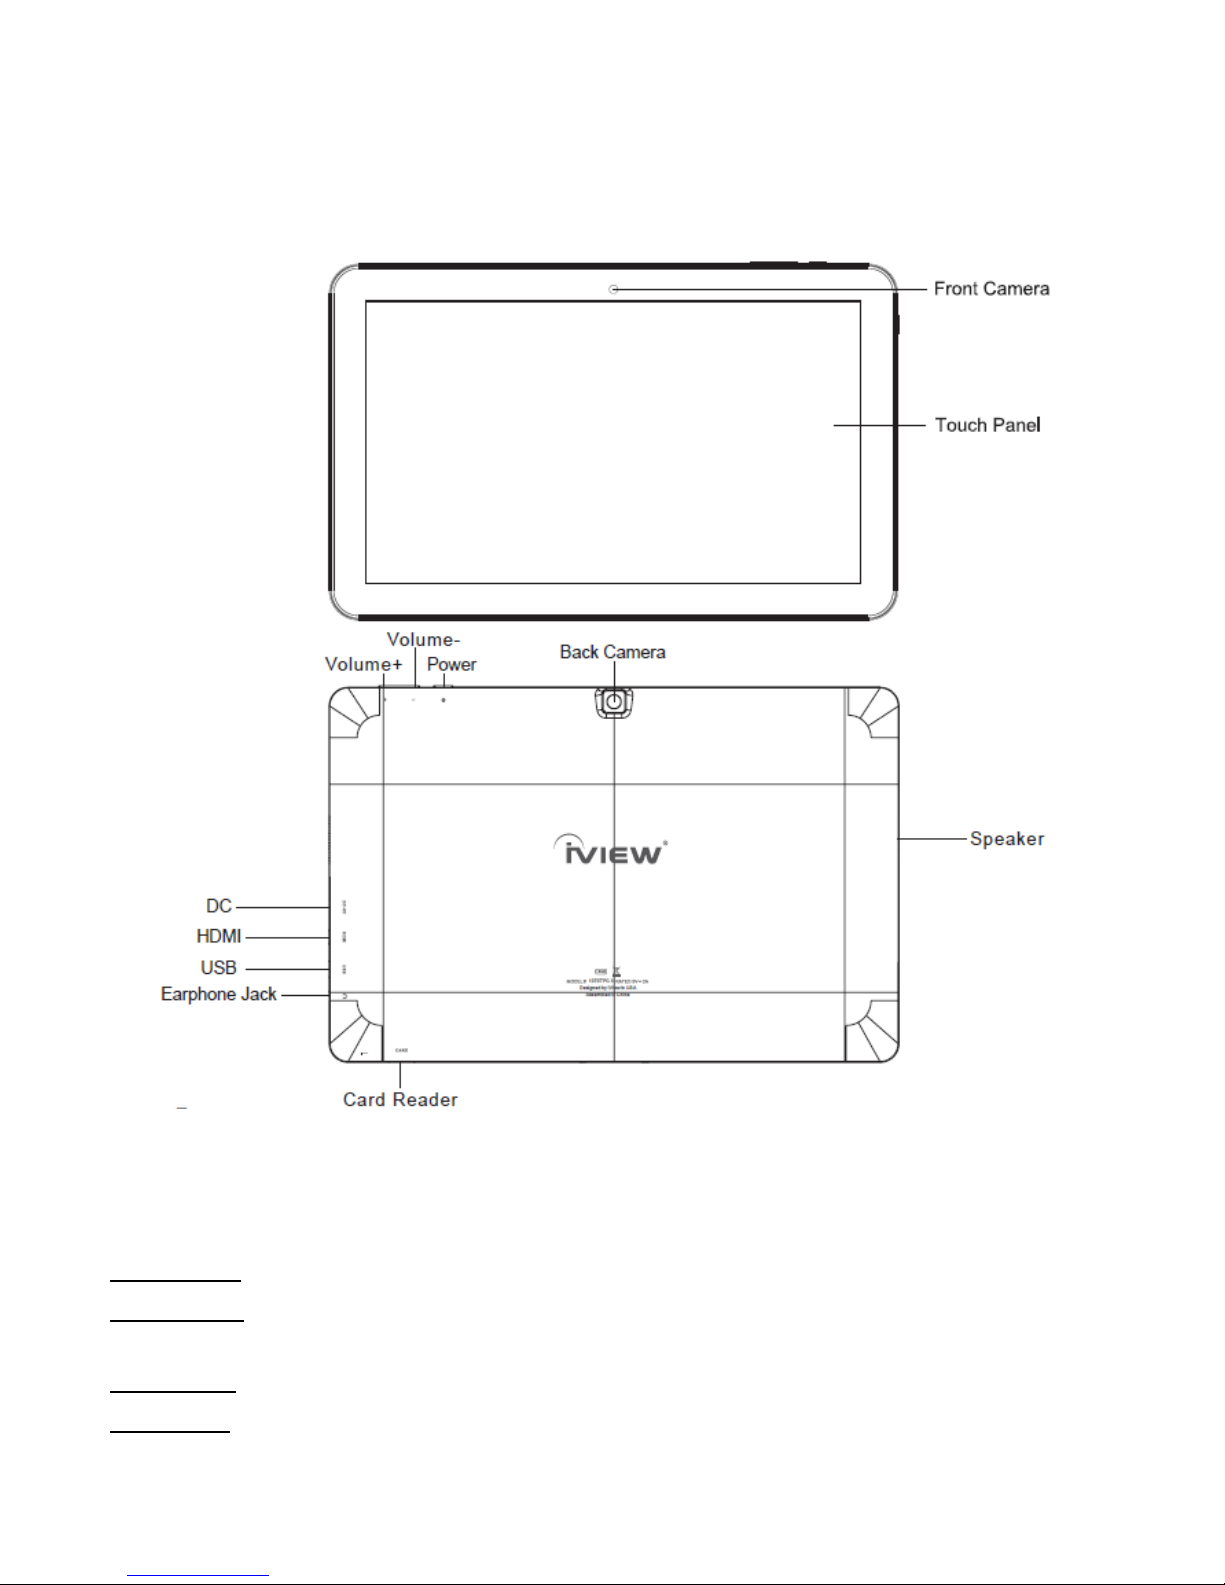
1. Product Overview
【Basic Functions】
To Power on: Press and hold the power button to power on. Device will boot up automatically.
To Power off: During use, press and hold the power button for about 5 seconds to power off, a
system window will appear. Select “power off” followed by “ok.” Device will shut down.
Sleep Mode: Tap the Power button to enter/exit sleep mode.
Screenshot: Press and hold the Power Button and the Vol- on the touch screen for 3 seconds.
Device will shut down automatically when battery power is low.
Page 5
3
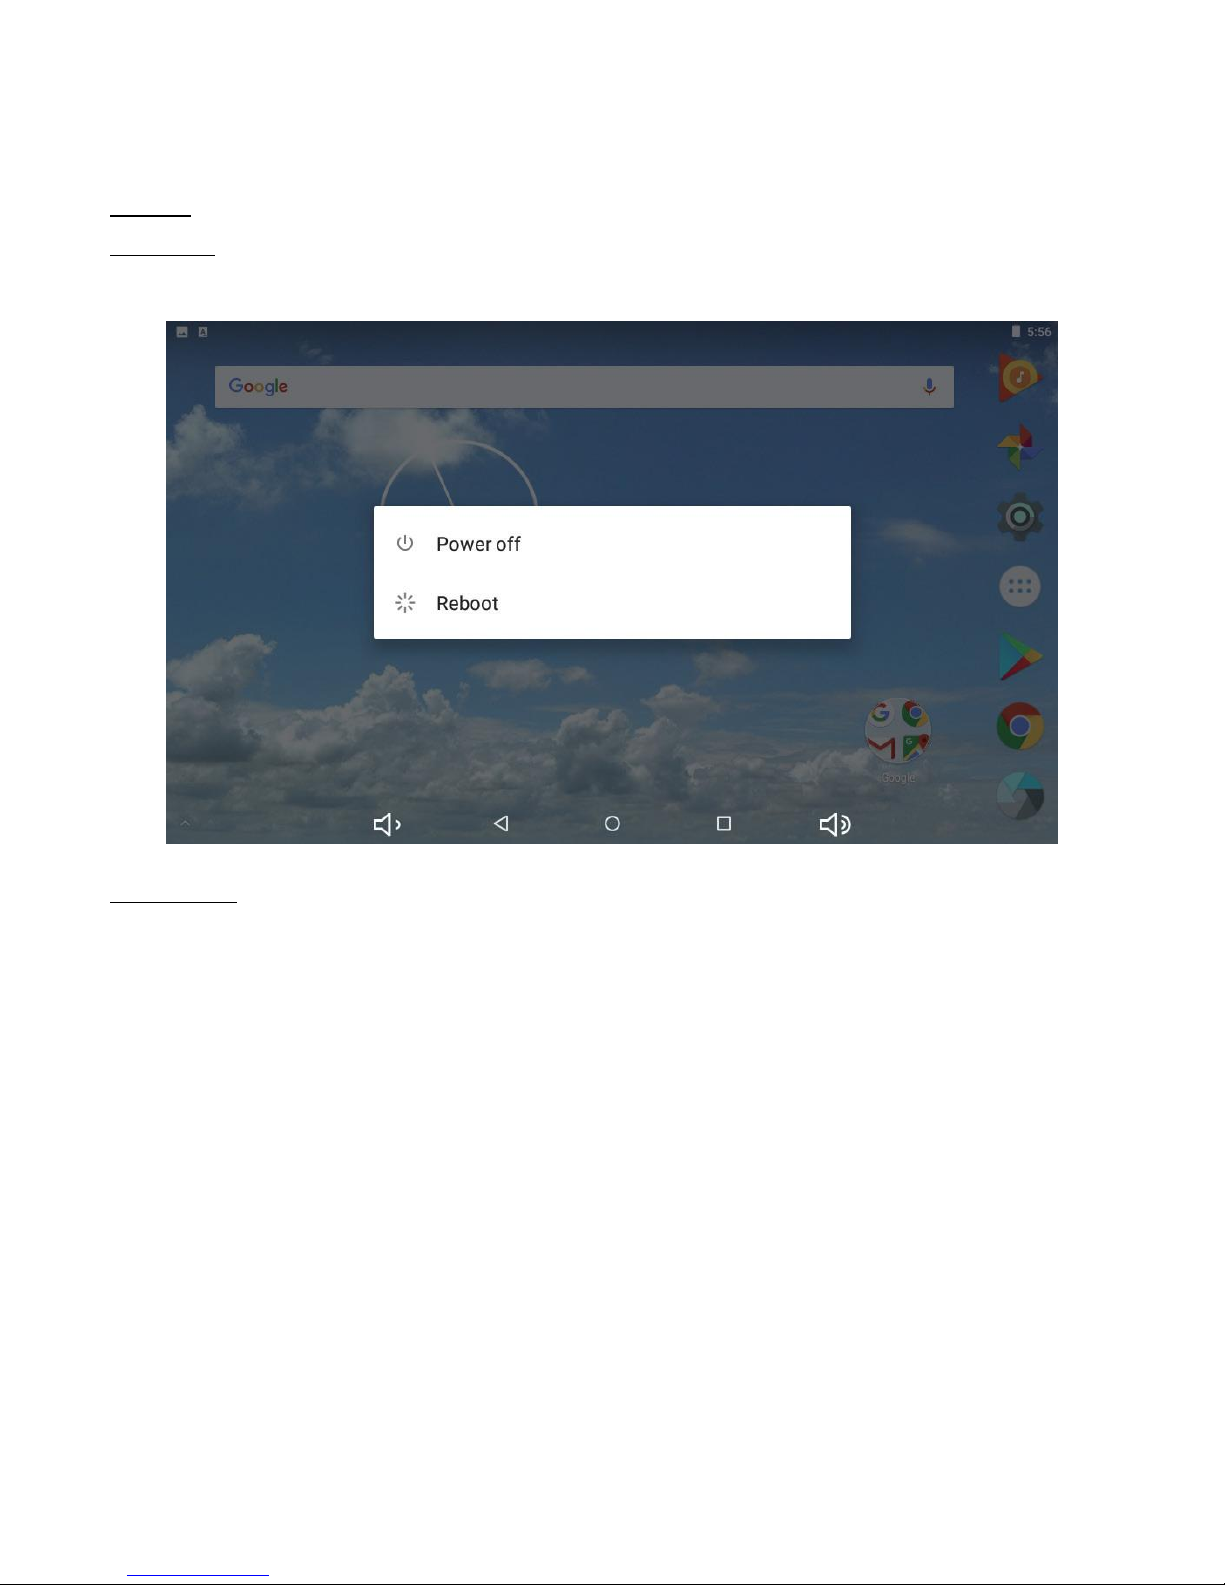
2. Start-up and shut-down
Startup: Press and hold the power button to power on the device.
Shutdown: During use, press and hold the power button for about 5 seconds to power off, a
system window will appear. Select “Power Off” followed by “OK.” Device will shut down.
Sleep Mode: When not in use for short periods of time, tap on the power button. The tablet will
enter sleep mode. Nearly all functions will be powered down, until the tablet wakes up. You can
tap on the power button to wake the tablet up from sleep mode.
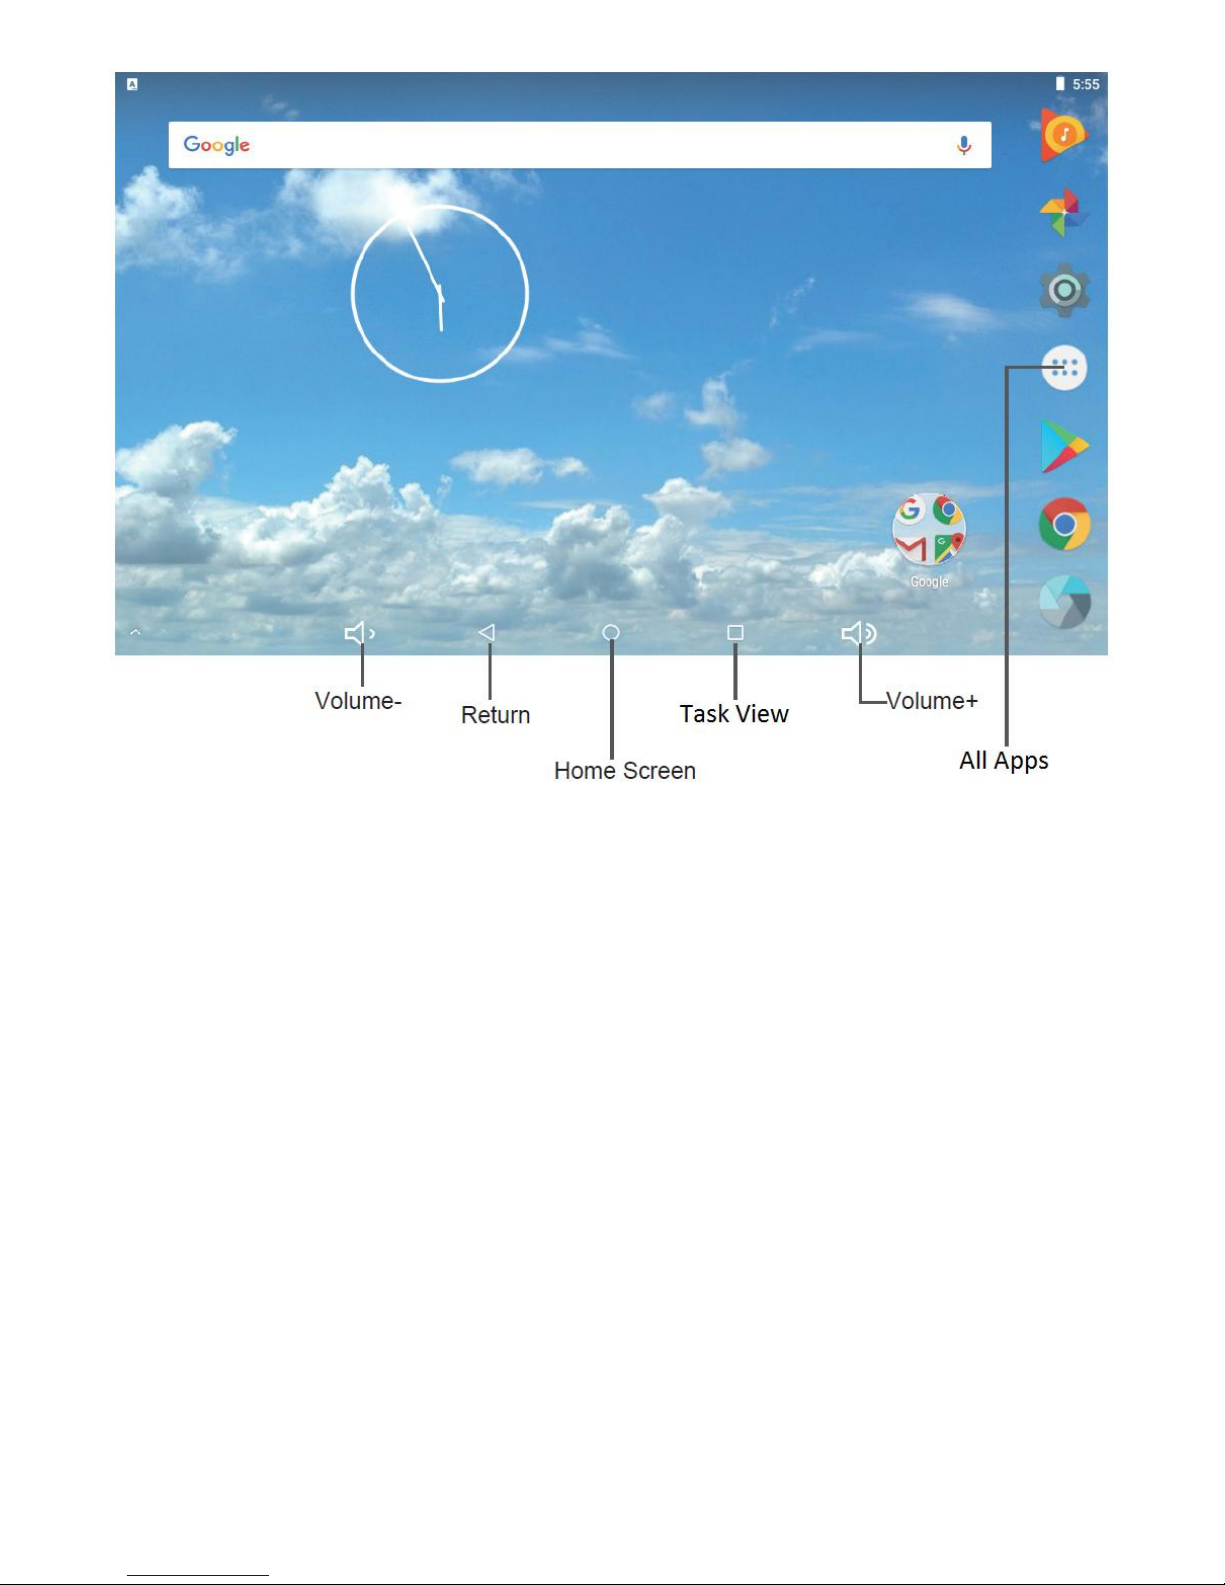
3. Desktop
Once the device has fully booted, you be taken to the Android 7.1 desktop (below). By default ,
desktop will display a quick search bar, status bar, and menu label icon.
Page 6
4
The status bar (top of the screen) will display notifications and your tablet’s current status.
The quick search box can be used to quickly search the web by typing keywords or with voice
recognition.
4. Taskbar Icons
The following icons will be displayed at the bottom of your screen:
Volume +/-: Increase or decrease the volume.
Home Screen: Will take you back to the main desktop.
Task View: Views all apps currently running on your device.
Return: Returns to the previous menu.
Page 7
5
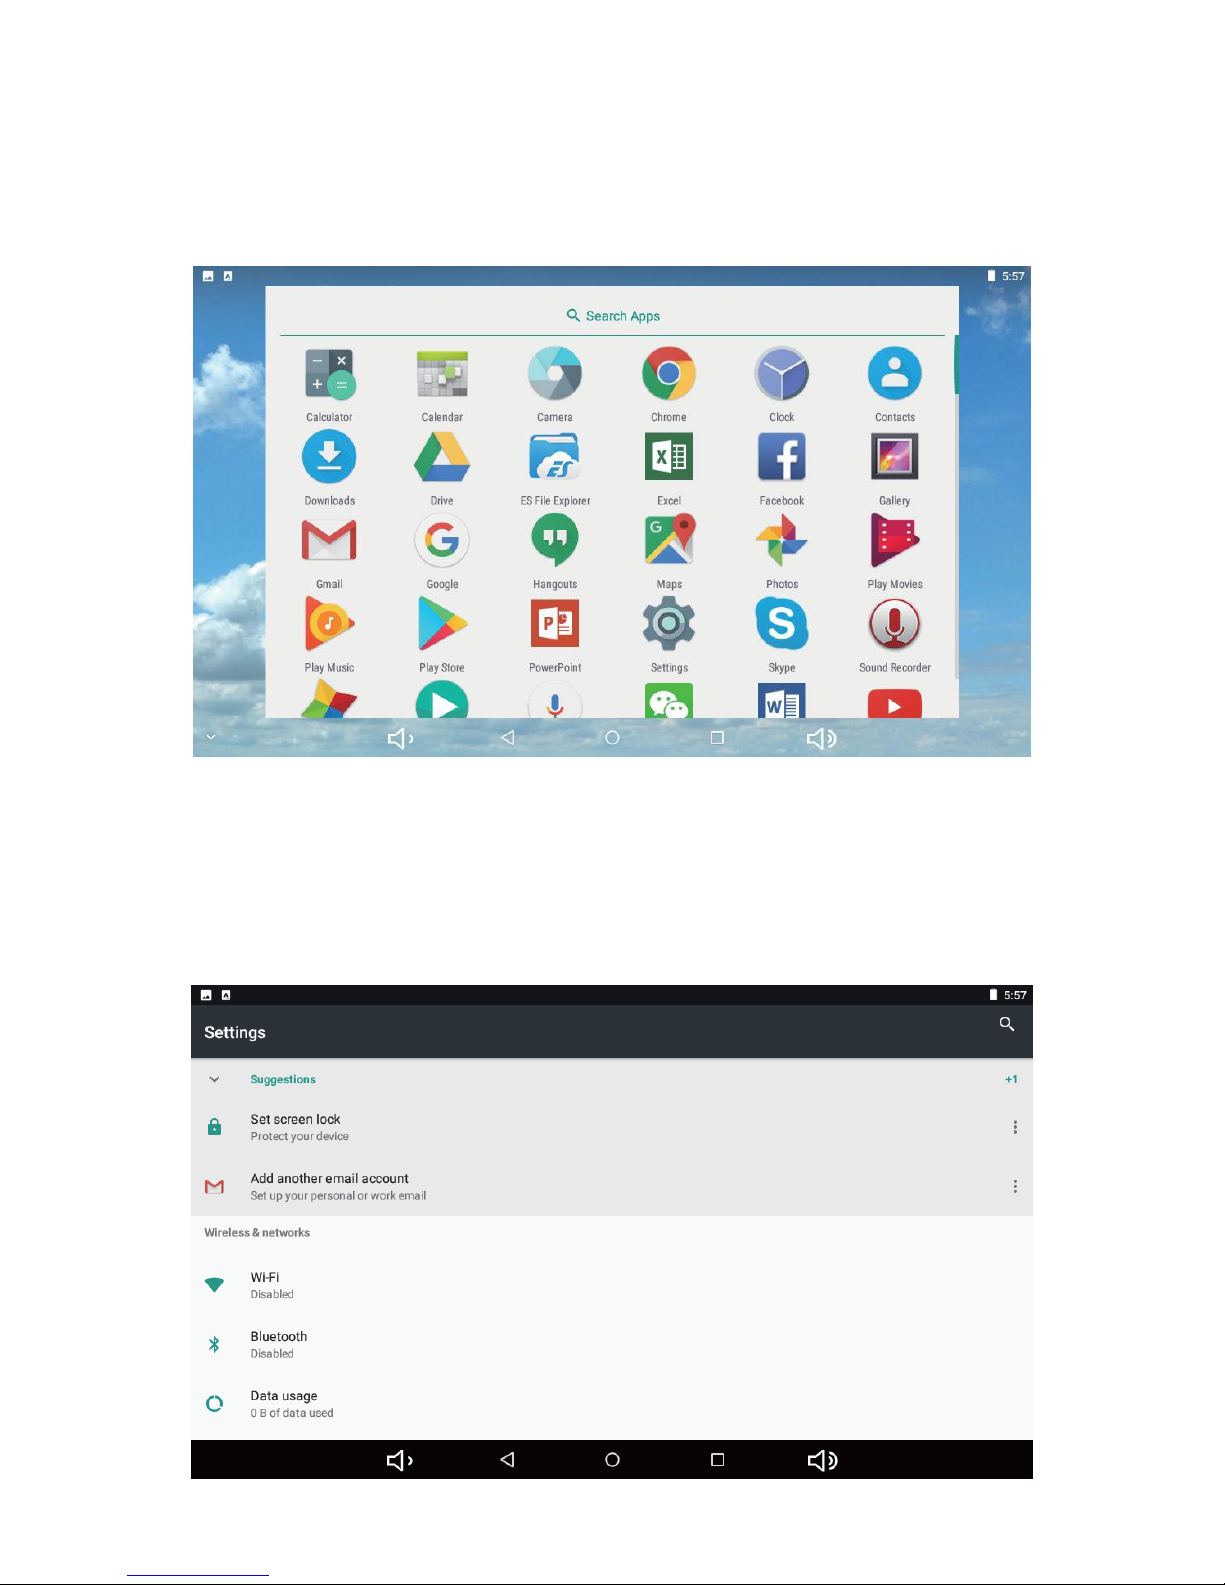
5. All Apps Menu
Press the All Apps icon on the main menu. You’ll be given a list of all apps currently installed on
your device
Here, you can run apps not currently on your home screen. You can also add shortcuts to your
home screen by tapping and holding on an application and placing it anywhere on the desktop.
System settings
Click “Settings” icon, from the home screen to open your device’s system settings, shown below:
Page 8
6
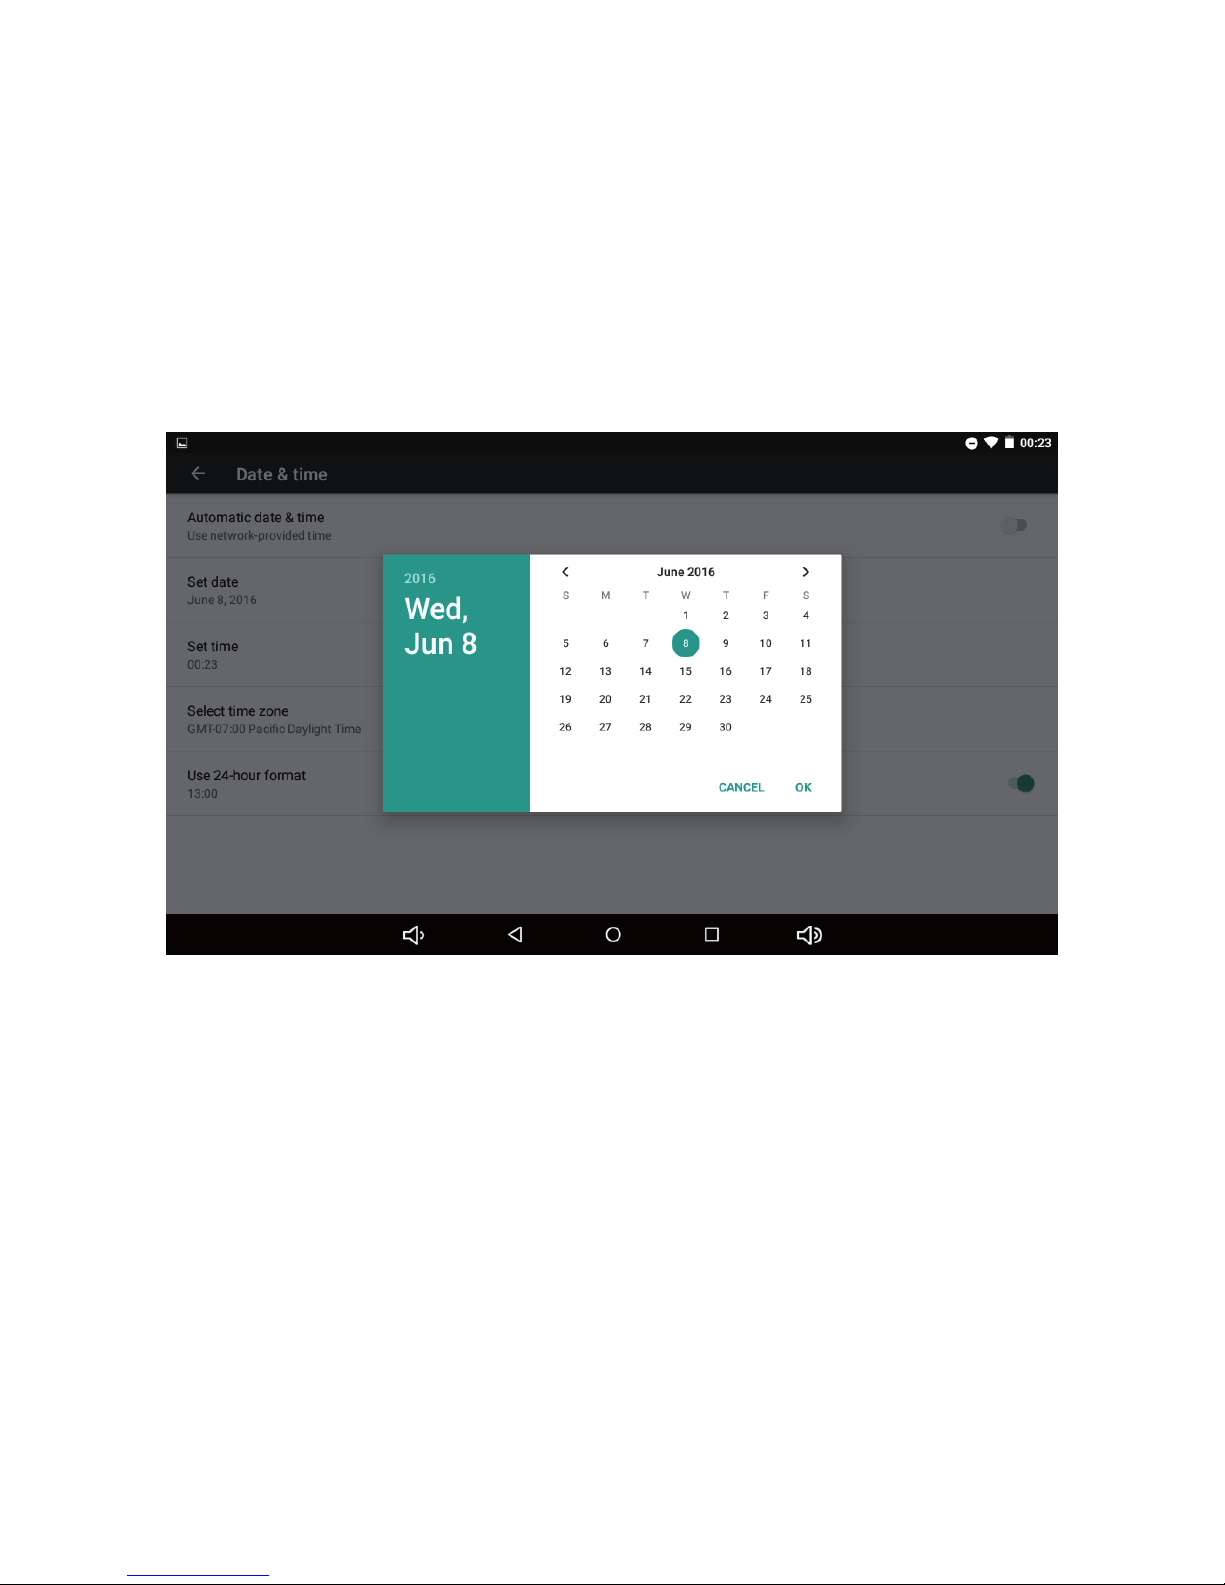
Date & Time:
In the settings menu, select “Date & Time” to edit the date and time displayed on your device.
By default, “Automatic Date & Time” is turned on. The device will automatically synchronize with
an internet time server
“Automatic Date & Time” can be turned off if you choose to set the date and time manually.
Manually setting the date will take you to the following window:
While in this window, you can tap on “<” or “>” buttons to change the month. You can then tap on
the date underneath to select the day. Select “OK” when finished.
Manually setting the time will take you to the window below. You will be prompted to select the
hour, followed by the minutes:
Page 9
7
Select “OK” when finished. The device will use the new settings.
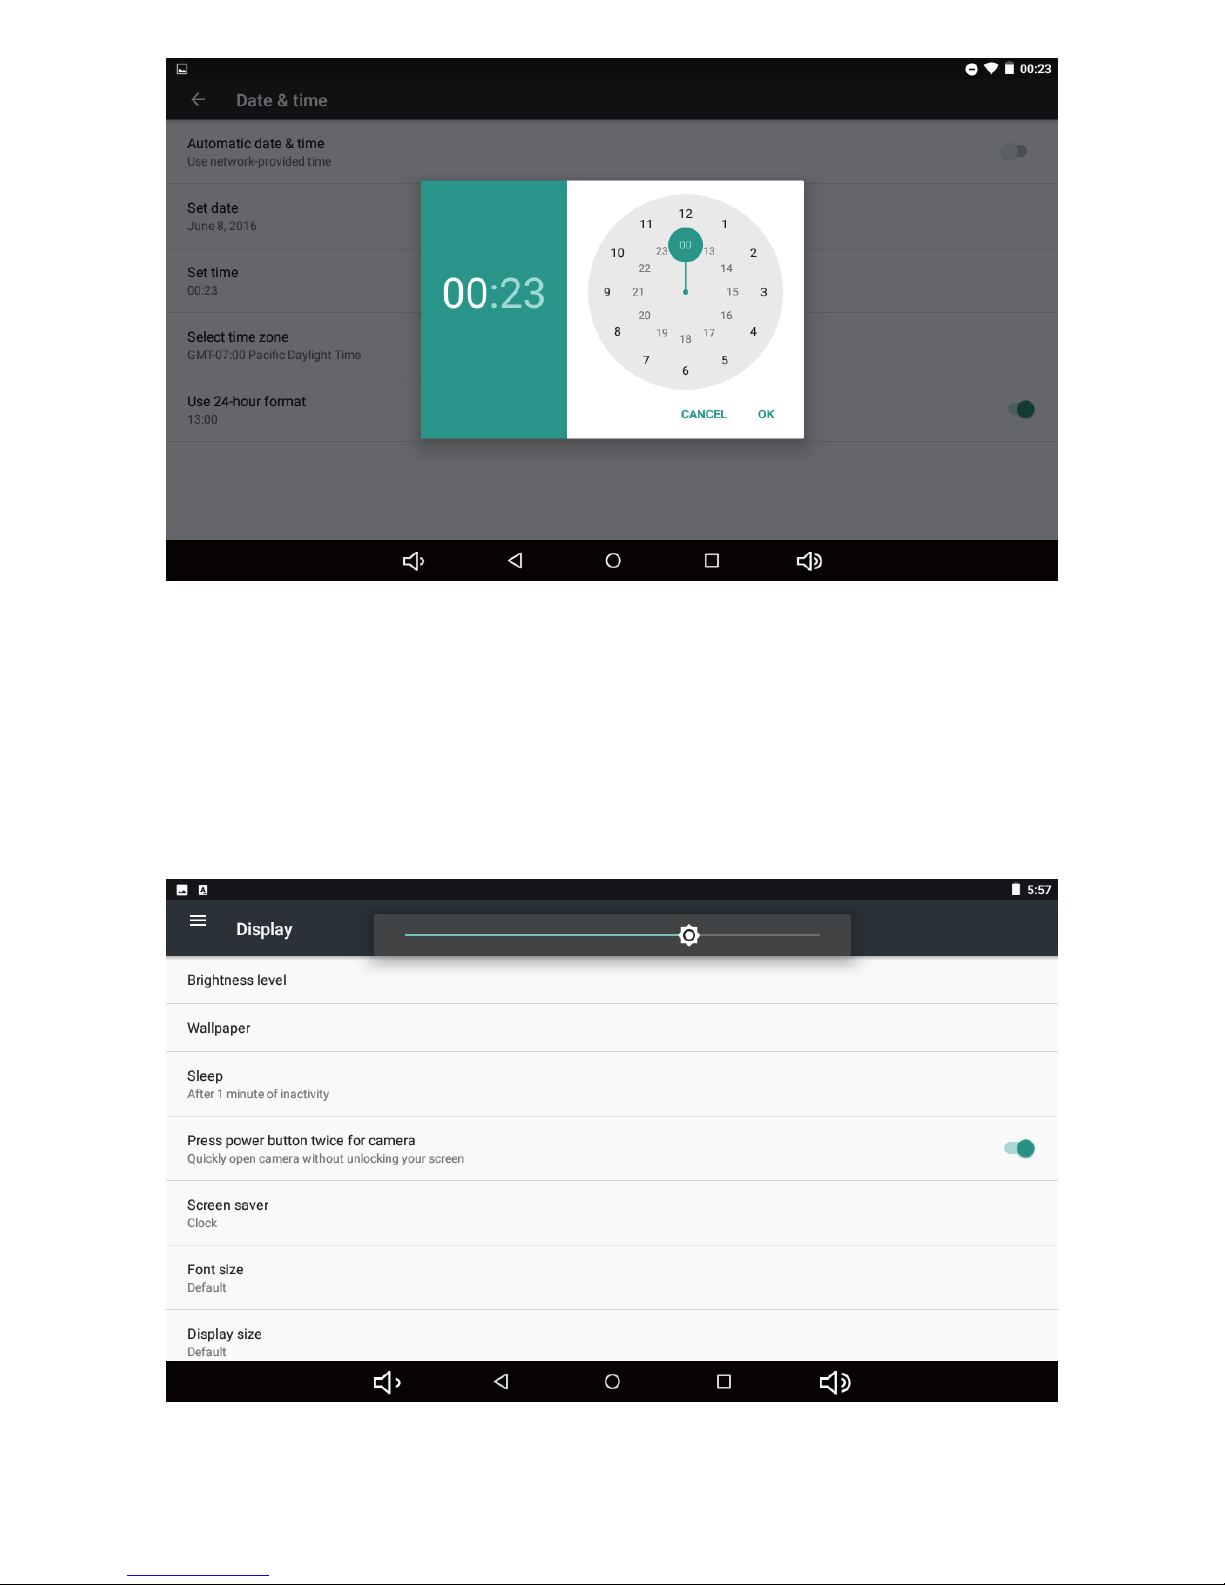
Brightness:
In the settings menu, select “Display” to edit the display settings on your device. Select
“Brightness” at the top of the menu and you’ll be given a sliding button to adjust screen
brightness, shown below.
Page 10

8
Sleep Mode:
You can set a timer for the device to enter sleep mode. If left inactive for a set period of time, the
device will enter sleep mode automatically.
In the settings menu, select “Display” to edit the display settings on your device. Then select
“Sleep”. You’ll be given the option to select how long before the device will enter sleep mode
Note: Device will not enter sleep mode during video playback.
Wireless Setup:
In the settings menu, select “Wi-Fi.” You’ll be able to connect your device to a wireless network.
Make sure Wi-Fi is set to “ON” and your device will scan and list all nearby wireless networks, as
shown below:
Select your wireless network and you may be prompted to enter your network’s password. If
prompted, type in your Wi-Fi password and click “Connect.” Your device will connect to your
Wi-Fi network.
Page 11

9
Third-Party Applications
While Android uses Google Play Store to download and install apps, you can also download
apps you find on the internet. However, Android may deem them as “unsafe.” You can disable
this by going into System Settings, selecting “Security,” and selecting “Unknown Sources,” as
shown below. When prompted, select “OK.”
NOTE: Iview cannot be held responsible for any viruses you may receive from third-party
software
Page 12

10
Uninstalling Apps
1. Select “Settings,” followed by “Apps.” You will see a list of all installed apps.
2. Click on the app that you would like to uninstall.
3. Click Uninstall. The app will be deleted from the device.
Backup & Reset
If your device is not performing well, click “Settings,” select “Backup & reset”, followed by
“Factory Data Reset” and follow the instructions it provides to reset your device back to its
original factory settings
Page 13

11
Storage
Select “Settings” followed by “Storage” to manage your device’s storage space.
【Note】: If you have an SD-Card inserted, click on the Eject icon before disconnecting
SD-Card from the device.
Languages & Input
Select “Languages & Input to change your device’s language settings. You’ll be given the
following options;
Languages: Change to one of 54 different languages. You can also set your device to read
multiple languages.
NOTE:While most android devices support 12 different languages, the Iview device supports 54.
Spell Checker: Settings for your device’s built-in spelling and grammar correction.
Personal Dictionary: Add or remove words not in the system dictionary.
Keyboard: Settings for physical and virtual keyboard languages.
Speech: Speech-to-text settings
.
Page 14

12
ES file explorer
In From the “All Apps Menu”, you can manage your files and install/uninstall apps with “ES File
Explorer”. Tap the “ES File Explorer” icon, and you’ll be able to manage all of your personal files,
even move them to and from an external SD Card or a USB Flash Drive.
Applications (including downloaded APK files), Will be listed by selecting “Library” followed by
“APP.”
.
Page 15

13
If you have any downloaded APK files, click them and select “Install”:
You can purchase and download apps from the Play Store or from the internet, via web browser..
*Uninstalling Applications: You can uninstall apps using ES File Explorer or the device’s built-in
settings..
See “Uninstalling Apps” in previous sections to uninstall using Android Settings
6. Web Browser
Google Chrome:
Many of Google Chrome’s features are included in your IVIEW Device.
Page 16

14
7. Play Music
The device comes with Play Music as its default music player. Play Music will scan and list all
audio files on the device, as shown below:
Page 17

15
You can also play music from an SD card or USB drive, as well as download music online. Play
Music will detect them automatically
Once, listed, you be able to sort your audio files by filename, artist, and album.
8. Videos App
You can find the default video player by opening the All Apps Menu and selecting the “Videos”
app. The device will scan both internal and external storage for videos and display them like on
the screen below:
During video playback, you have the following options:
On the right side of the screen, slide your finger up and down to adjust the volume.
On the left side of the screen, slide your finger up and down to adjust brightness.
Slide your finger from left to right to rewind or fast-forward the video.
Briefly tap on the screen to display additional options (Previous/Next video, Play/Pause, etc.)
.
Page 18

16
Additional Apps:
Users can download additional apps and players from the Play Store or the internet, allowing for
streaming video and radio
.
Users can also download additional apps for web browsing, instant messaging, and games
9. Google Photos
Your Iview Device uses Google Photos for photo and video viewing. You can find it by selecting
the All Apps icon, followed by “Photos”:
Pictures will be sorted by file folder. When viewing, you can double-tap a picture to zoom in/out,
as well as view them as a slide show.
When viewing videos, you can set them to loop or to continue to the next video.
You can also manage your photos by deleting any unwanted pictures from your device.
Page 19

17
10. Wallpapers
Your Iview Device supports both static and 3D wallpapers.
To change your wallpaper, tap on any empty area of the desktop for about 5 seconds, then tap on
“Wallpapers” shown below:
You’ll then be given a list of wallpapers currently installed on the device:
You can select and preview your desktop wallpaper before setting. You can even use your
personal photos as your device’s wallpaper.
Once selected, tap “Set Wallpaper” and you’ll be able to set it as your home screen, lock screen,
or both.
Page 20

18
11. Sound Recorder
You can access the built-in sound recorder by selecting All Apps, followed by “Sound Recorder”
shown below:
You can select the Record button, to start recording Press stop when finished.
You can press the Play button to preview your recording. Press “Done” to save it.
You’ll be able to find your recordings by going into Settings and selecting “Storage settings,
followed by “Explore”
Press “Discard” to delete the recording.
12. Camera
Click on the Camera icon, from the desktop, to enter the camera app, shown below:
Page 21

19
Click on the shutter button (on the right side) to take pictures. You can also slide your finger to
the right, from the left side of the screen to change from photos to videos. You can also access
the camera settings, shown below
13. G-mail
Select Gmail from the All Apps menu, and you’ll be taken to the Gmail app. Before using, you will
need to input your account information shown below:
Make sure you have a stable connection, before using.
Page 22

20
Select “Add An Email Address.”
First, select the email service (gmail, outlook, etc.). If you’re not using any of the services listed,
select “Other” shown below
Enter your email address. Before selecting “Next,” you can select “Manual Setup,” to configure
your email manually.
Page 23

21
If “Other” was selected, select POP3. If you’re using a major email service (Gmail, yahoo, etc.)
they can be configured automatically.
Enter your email password.
Page 24

22
You will be asked to confirm both your Incoming and Outgoing server settings, shown below:
Select “Next” when finished.
Page 25

23
You’ll be asked if you would like to change your basic settings. You can be notified whenever you
receive and email, and you can set your device to manually sync with your email service. Select
“Next” when finished.
Congrats! You’ve set up your email!
Page 26

24
14. USB Support
PC Connection
You can connect your Iview device to a PC. By default, it’s set to charging mode.
Tap the top of the touch screen of your device and slide towards the bottom. This will open the
status menu.
.
Tap on the option shown above, and you will be taken to a second menu. Select “Transfer Files”
and your PC will immediately download the drivers provided by the tablet.
Once finished, you’ll be able to transfer files to and from your Iview device.
OTG Support
You can connect a variety of USB plug-and-play devices to your SupraPad, using the provided
OTG Cable.
External USB Storage Devices, such as Flash Drives and Hard Drives, are only supported in
FAT32 format.
Keyboard and Mouse Support
SupraPad supports any Plug & Play mouse and/or keyboard using the provided OTG Cable.
Page 27

25
15. Features
* Screen: 10.1" Capacitive Touch Screen, 800x1280 IPS High Resolution
* Processor: Quad Core, Cortex A53, 1.2GHz
* OS: Android 7.1 Nougat
* RAM: 1GB
* Memory: 16GB
* Wireless Connection: WIFI 802.11 b/g/n
* Build in Bluetooth 4.0
* Support Dual Camera: Front 0.3MP, Rear 2.0MP
* Support Skype Video Call
* Support 1080P full HD video
* I/O port: Micro USB
* Card Slot: Micro SD Card (Max: 128GB)
* Audio Output: Stereo Speaker (8Ω 1.0w)/3.5MM Stereo Headphone Jack
* Play Store, Internet Browser, Calendar, Calculator, E-mail
* Picture Viewing, Music / Video Playback, Games
* Multi-Language Support
* Battery: Built in 6000 mAh / 3.7V Li-ion, rechargeable
* Power Source: 5V 2A
16. Accessories
Below items are included in your tablet package:
* SupraPad complete device
* Power adapter
* OTG cable
* USB cable
* Earphone
* User manual
Page 28

Basic Warranty Statement
This product is warranted to the original purchaser ONLY, to be free from defects in materials and
workmanship under normal use, for ninety (90) DAYS (parts and labor) and one (1) YEAR (parts only) from the
date of original purchase. We agree under the warranty period to replace product if it is determined to be
defective at 'No Charge" This limited warranty does not cover any loss or damages that occur as result of:
Cosmetic damage.
Shipping or improper installation or maintenance.
Misuse.
Neglect.
Any cause other than ordinary commercial or industrial
application.
Adjustment by non-authorized source or any of the
Product’s firmware or hardware that you or any third party have modified or altered
Improper environment
Excessive or inadequate heating or air conditioning or electrical power failures, surges, connection to
improper voltage supply or settings or other irregularities
Accidents, or acts of God
In the United States and Canada contact Customer Service at www.iviewus.com.
Please note that in order to have your merchandise repaired and replaced by warranty, you must
contact our customer service representatives by phone or email, and get RMA number.
To obtain factory service, the original purchaser MUST present the following:
1. A sales receipt/proof of purchase indicating date of purchase
2. Your name, place of purchase, address, unit model and description of problem.
3. Send the unit pre-paid to the address below in the original packaging or reasonable substitute to prevent
damage. No return will be shipped back to a PO BOX.
4. All of the accessories that came with the product package must be sent along with the main unit
5. Please include your check or money order in the amount of $25.00 to cover handling and return shipping
charges we will not be responsible for delays or unprocessed claims resulting from purchaser's failure to
provide any or all of the necessary information
6. There is Additional Shipping Charge for areas outside of United States. For shipping charge please consult
with our customer service.
Page 29

Please review your user
Guide carefully before
Using this product.
Additional troubleshooting information
can also be found on the web at:
www.iviewus.com and click on “Support”
or email us at support@iviewus.com
 Loading...