

Page 1
REMOTE MR 400 INSTALLATION
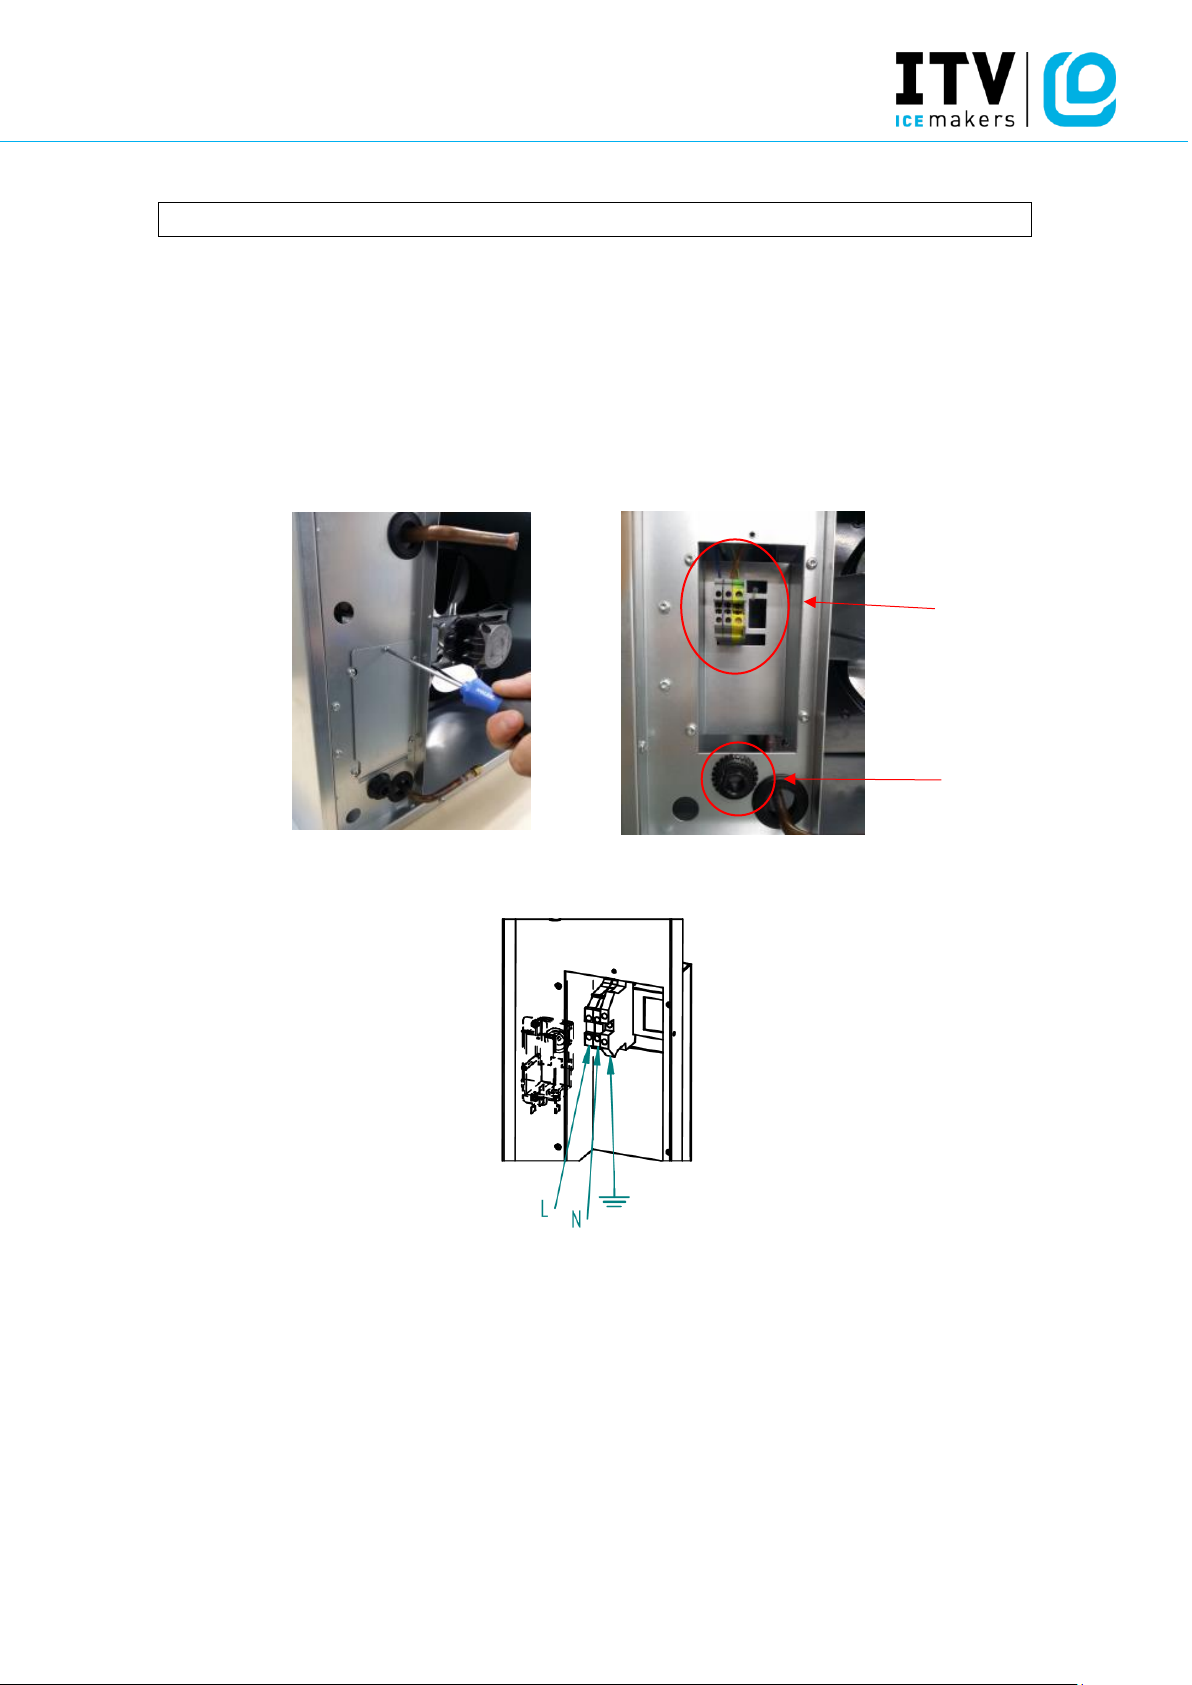
Terminal connector
Cable
passing hole
STEPS TO INSTALL A REMOTE MR 400
STEP 1: PLACING BOTH UNITS (REMOTE CONDENSER AND SPLIT MACHINE) IN ITS LOCATION
CHECKING THE PROPER CONNECTIONS FOR EACH UNIT:
REMOTE CONDENSER:
It needs an electrical supply (check label with power supply specifications). It comes
without an electrical cable. Connect to the power supply directly (it does not need
communication with the split unit).
To connect, remove the rear cover, using a Torx screwdriver. The electrical cable must
go through the hole next to the piping hole. Use a 3x1.5 mm2 electrical cable.
Terminal connector to supply electrical power to the remote condenser, located behind the
metallic cover.
Level the unit correctly.
Locate the remote condenser unit under a shadow. We advise to place it under a roof,
whenever possible.
The remote condenser unit works between 0ºC (32ºF) and 43ºC (109.4ºF) air
temperature.
Page 2
REMOTE MR 400 INSTALLATION
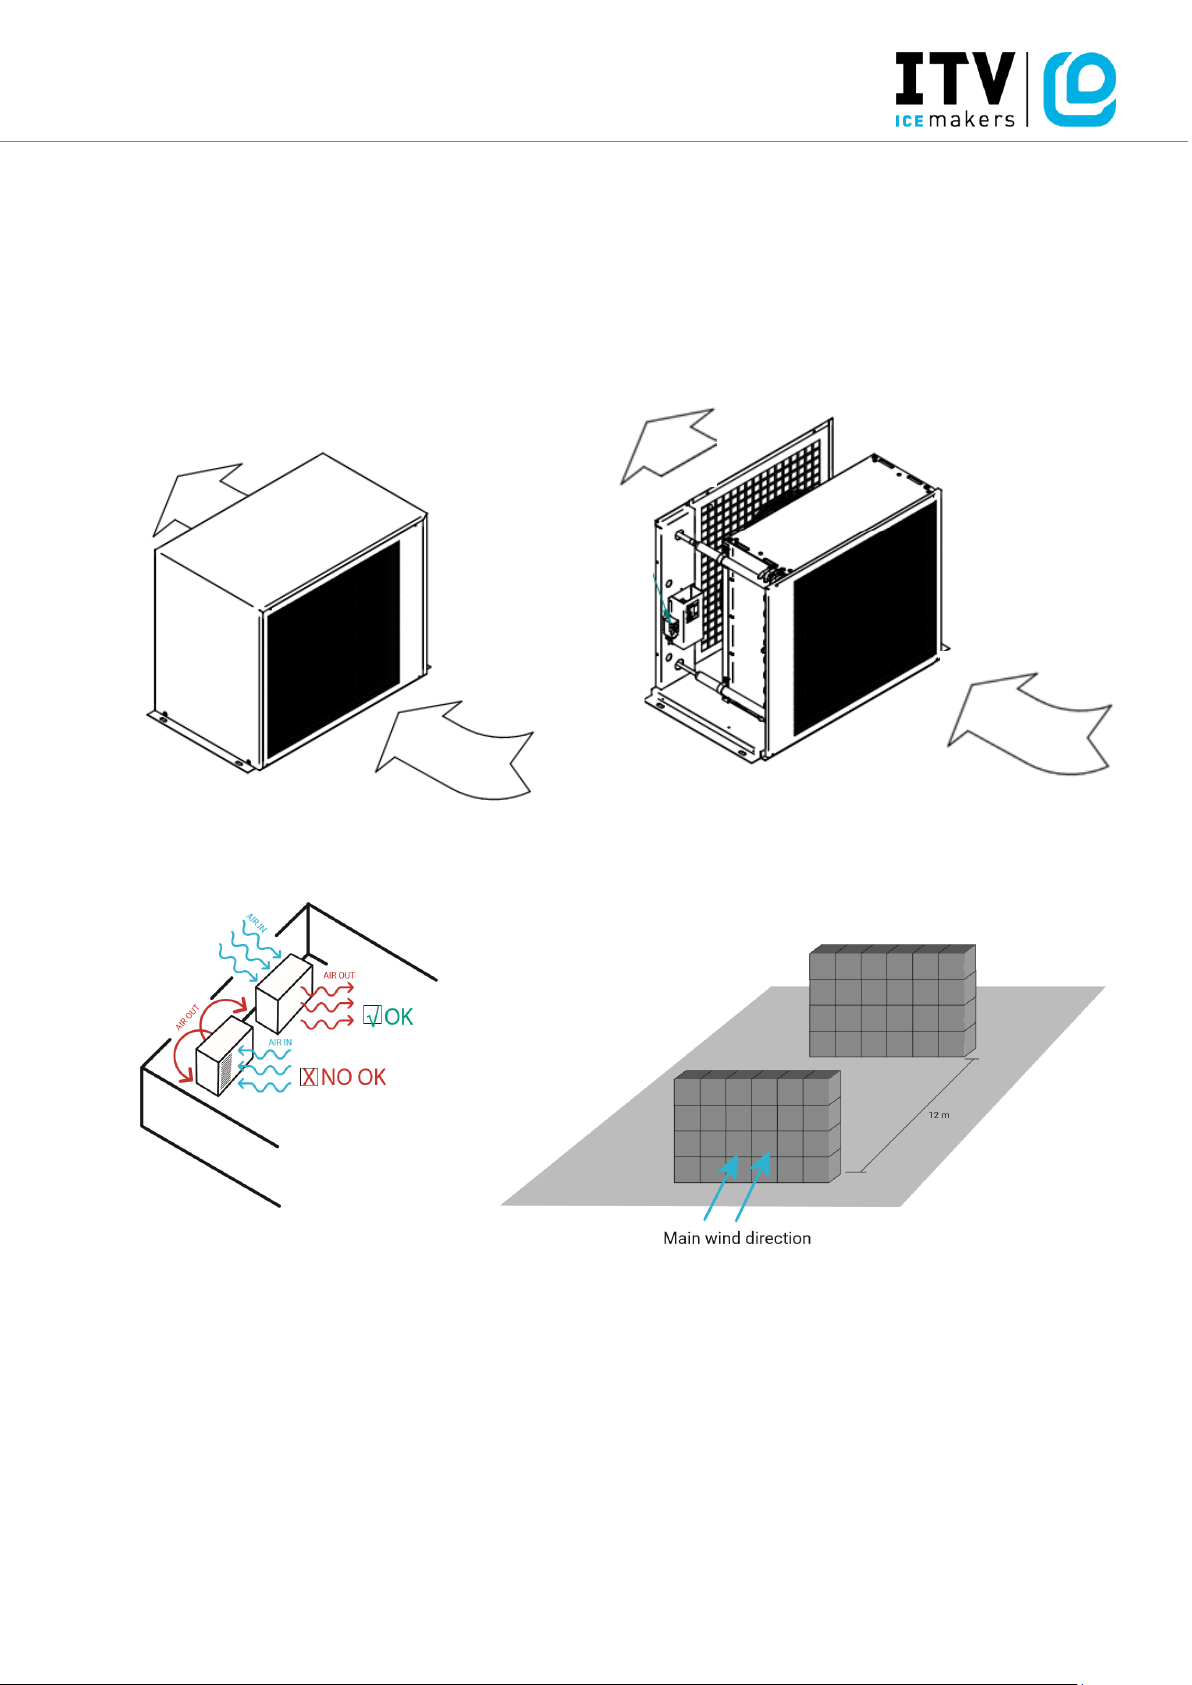
Check the air direction through the remote condenser, always install the unit with the
air direction out to the ambient when installed in a wall, to avoid condensed air
returning to the condenser.
If more than one unit is going to be installed, please located them to avoid the
condensed air going from one unit to the other.
Page 3
REMOTE MR 400 INSTALLATION
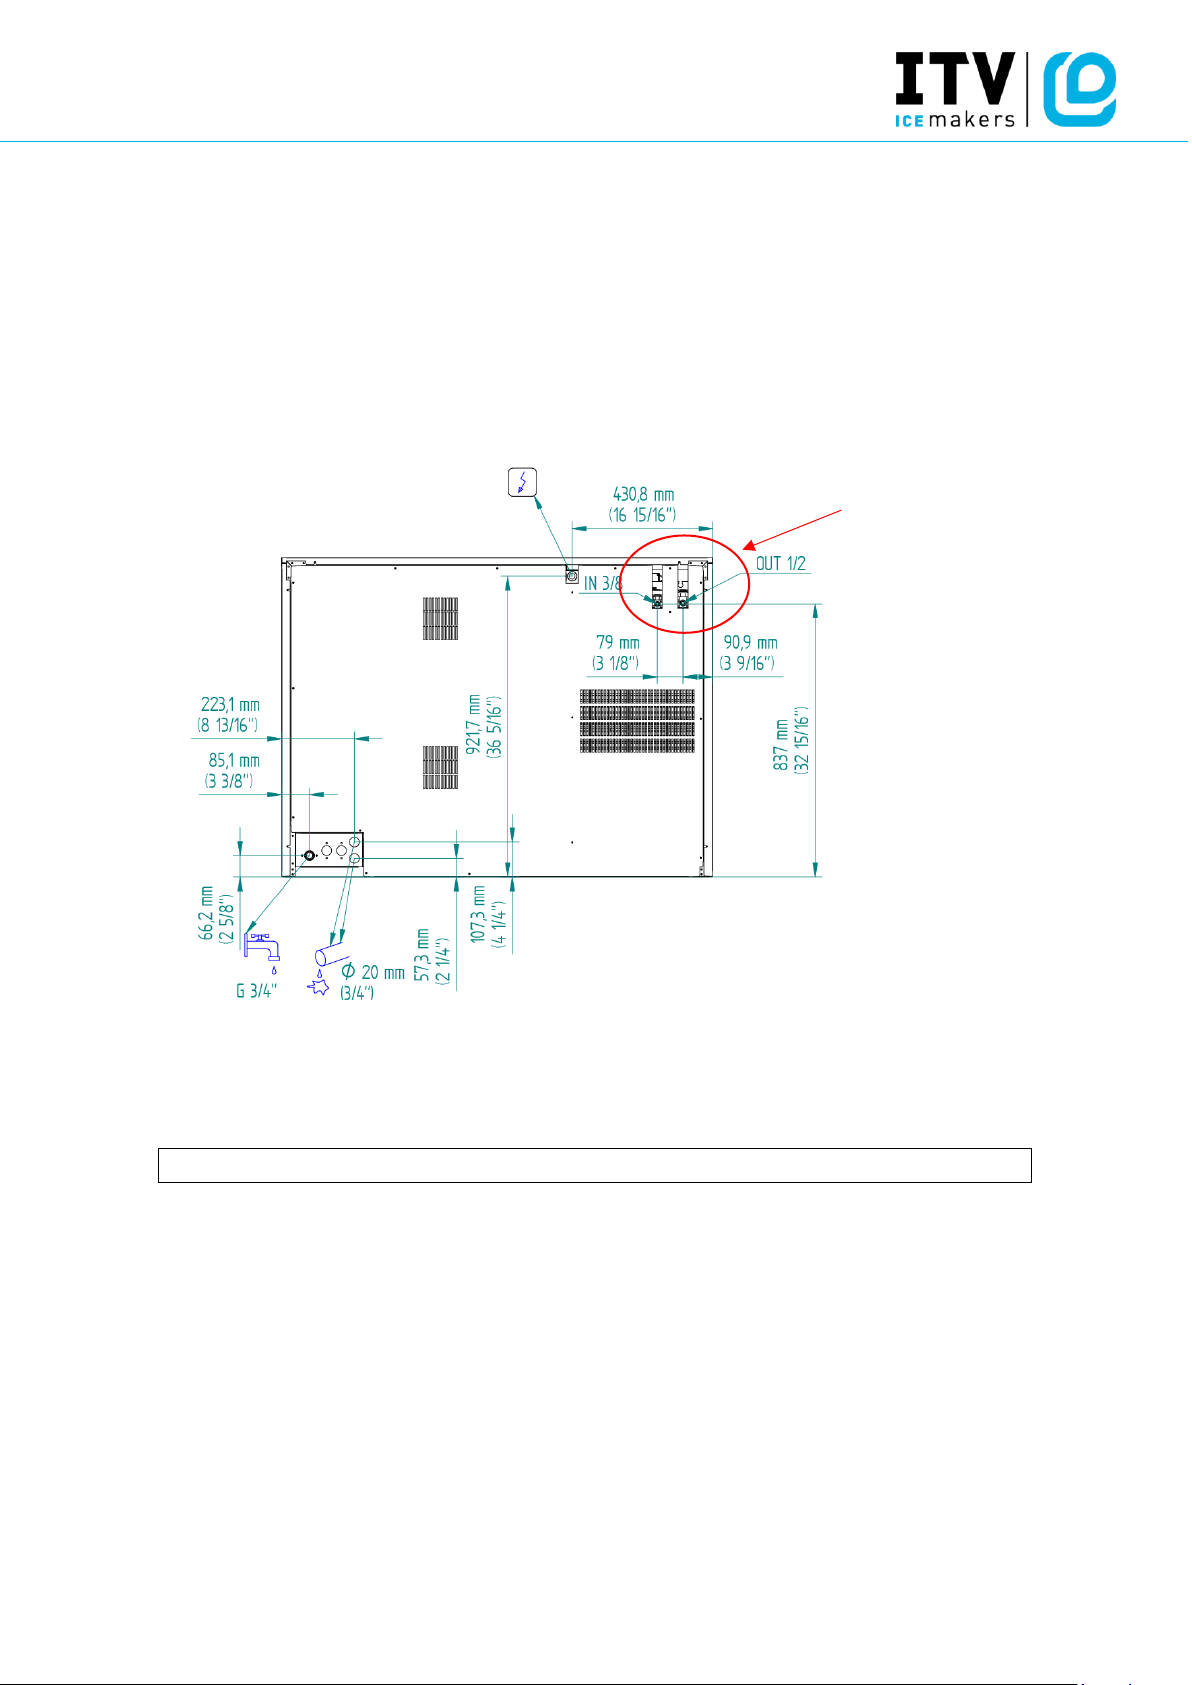
Refrigeration taps
MR400:
It needs an electrical supply (check label with power supply specifications). The unit
comes with an electric cable, and no plug.
Water supply: it needs a water tap nearby. The unit comes with a water hose, ¾” GAS
connection, and two net filters.
Drain pipe: The unit has two drain pipes. A drainage is need it. The drain pipes must be
straight, no siphons allowed, to let the water drain directly.
Level the unit correctly.
Always check the ice exit, to allow the ice cubes fall free.
In case of stacking two units, please follow the stacking manual.
STEP 2: REFRIGERATION CONNECTION BETWEEN BOTH UNITS
REMOTE CONDENSER: Remove the rear cover if need it.
REMOTE CONDENSER PIPING CONNECTION
Gas pipe: up inlet 1/2”
Liquid pipe: down outlet 3/8”
The remote condenser is sent from factory pressurized. To ensure there is no damage
from the transport, please check that is still pressurized, before cutting the pipes to start
the connection.
Page 4
REMOTE MR 400 INSTALLATION
Always connect the remote condenser to the refrigeration pipes by welding. The remote
condenser comes with the inlet gas pipe closed, and the outlet liquid pipe with a gas
intake. Cut both pipes to weld.
Do the refrigeration installation between the remote condenser and the split unit. Check
always that each tube is in the correct position, and the pipes are not together (to avoid
heat exchange between pipes. We advise to insulate the liquid line.
Try to do a clean installation, as straight forward as possible.
The liquid line must always go from the outlet remote condenser (liquid, lower pipe) to
the split unit liquid inlet (3/8” tap), and the gas inlet from the remote condenser (upper
pipe) to the gas outlet in the split unit (1/2” tap).
If the remote condenser is lower than the split unit, it is necessary to install a siphon in
the liquid line, near the remote condenser, to avoid the oil staying at the condenser.
Do not install the remote condenser lower than 3 meters from the split unit.
If the remote condenser higher or equal to the split unit, a siphon must be installed in
the gas line, one every 4 vertical meters and one every 8 horizontal meters.
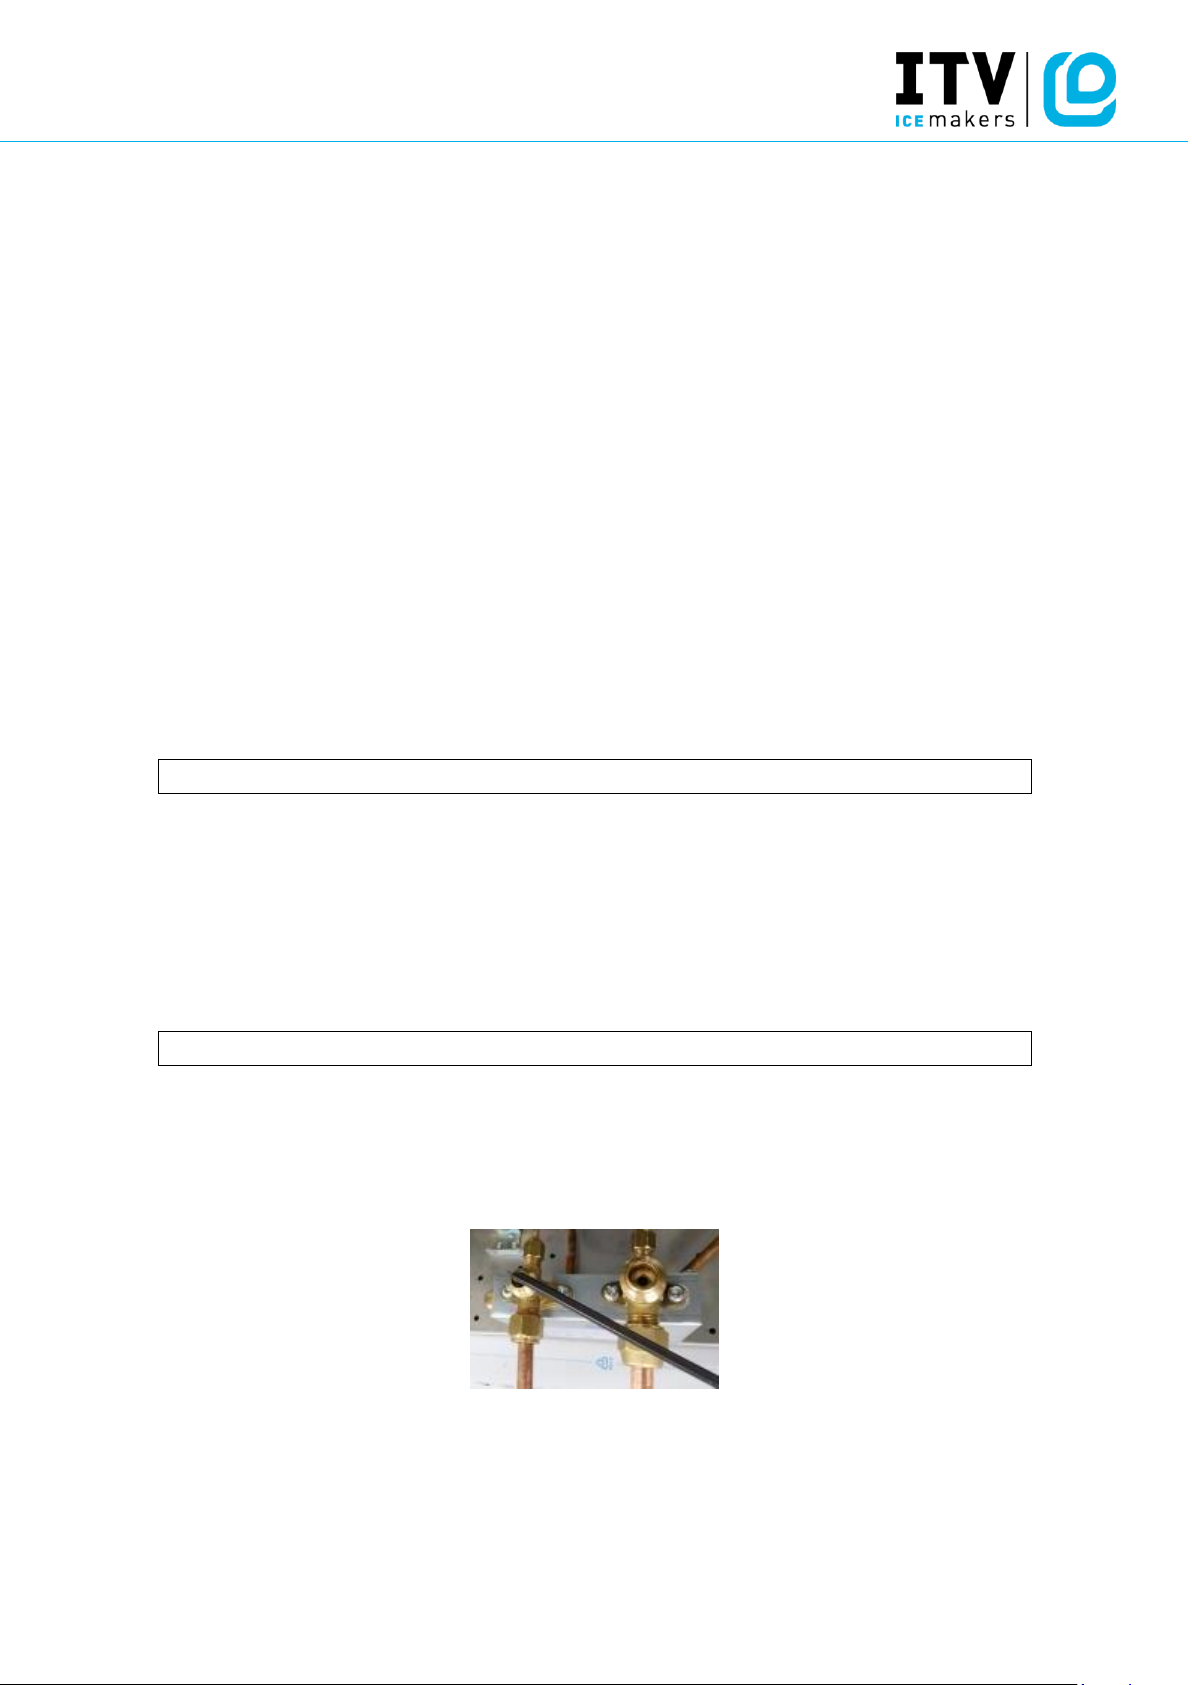
SPLIT UNIT: It is connected by a gas tap 3/8” and a liquid gas tap ½”, using the nut that comes
with the tap.
STEP 3: INSTALLATION LEAKING TEST AND VACUUM
Once the refrigeration pipes are weld and connected, a leaking test must be done to
check that the line has no leakage in the nuts or the welding.
After checking for leakages, a correct vacuum must be done. We advise to keep vacuum
for around 4 hours.
ATENTION: Do not open the gas taps from the split before doing the vacuum, as the unit
comes with refrigerant.
STEP 4: OPEN GAS AND LIQUID TAPS
Once that everything is correctly installed and there are no leakages, and the vacuum
has been done properly, open the split unit, that comes with a refrigerant charge for 5
meters of distance between the remote condenser and the split unit. Open slowly the
liquid gas tap (3/8”) and then the gas tap (1/2”).
Page 5
REMOTE MR 400 INSTALLATION
STEP 5: ONLY FOR GREATER DISTANCES THAN 5 METERS BETWEEN UNITS
If the distance between the remote condenser and the split is greater than 5 meters, it
is necessary to add some refrigerant. Add 40 grams per extra meter, up to 15 meters
maximum.
STEP 6: START UP
Now the split unit can be turn on to try it, and modified the control parameters if need
it (electronic board). Instruccions in the user manual.
NOTE: It is better to use the ambient probe from the split unit to obtain the temperature of
the air getting inside the remote condenser (in the air intake of the condenser). To do so,
enlarge the probe cable and put the probe in the condenser.
 Loading...