

Itronix GoBook PRO II, IX600 User Manual

Users’ Manual
Model
IX600
Itronix Corporation

Getting Started
Congratulations on your purchase of the Itronix GoBook PRO II computer! Your new GoBook PRO II
features the most innovative advances in portable computing technology. It combines state-of-the-art
ergonomics with sophisticated architecture to provide you with a personal computer that is compact,
p
owerful, and easy to use.
Designed for a wide range of general, business, and personal productivity applications, the semi-rugged,
wireless ready GoBook PRO II is an ideal choice wherever you need a computer; in the office, at home,
and on the road.
Your GoBook II is both expandable and portable, supporting the features
you expect in a desktop
computer but with the mobility of a laptop.
This online document, GoBook PRO II Help, contains all the information
you need to set up and use your new GoBook PRO II. For information on
printing, navigating or otherwise using GoBook PRO II Help see the How to
Use This Help System topics.
Unpacking Your System
Inside your packaging you will find:
GoBook® PRO II Help
Page 1 of 100GoBook PRO II Hel
p
Standard
Options
Where to Look For Information
Features
This computer was designed with the user in mind. Here are just a few of its many features:
Performance
Multimedia
Connectivity
Human-centric design and ergonomics
Expansion
See Specifications for more information.
The First Time. . .
Before using your computer, install the battery and then attach the computer to AC power.
Installing the battery:
72_0128_001
16 May 2005
© 2005 Itronix Corporation. All rights reserved.
GoBook® PRO II Help
72_0128_001
16 May 2005
©
2005 Itronix Corporation. All rights reserved.
GoBook® PRO II Help
. Line up the battery connectors.
. Press gently on the battery until it
clicks into place.
Page 2 of 100GoBook PRO II Hel
p

Attaching AC Power:
Begin Using the Computer
3. Slide the battery locks
toward the outside of the
computer to lock the battery.
. Connect the AC adapter power cord to the AC
adapter.
. Connect the AC adapter to the DC power port
on the rear panel of your computer.
. Connect the AC adapter power cord to a
properly grounded AC outlet.
NOTE It is recommended you use a quality
surge protector
.
insert picture
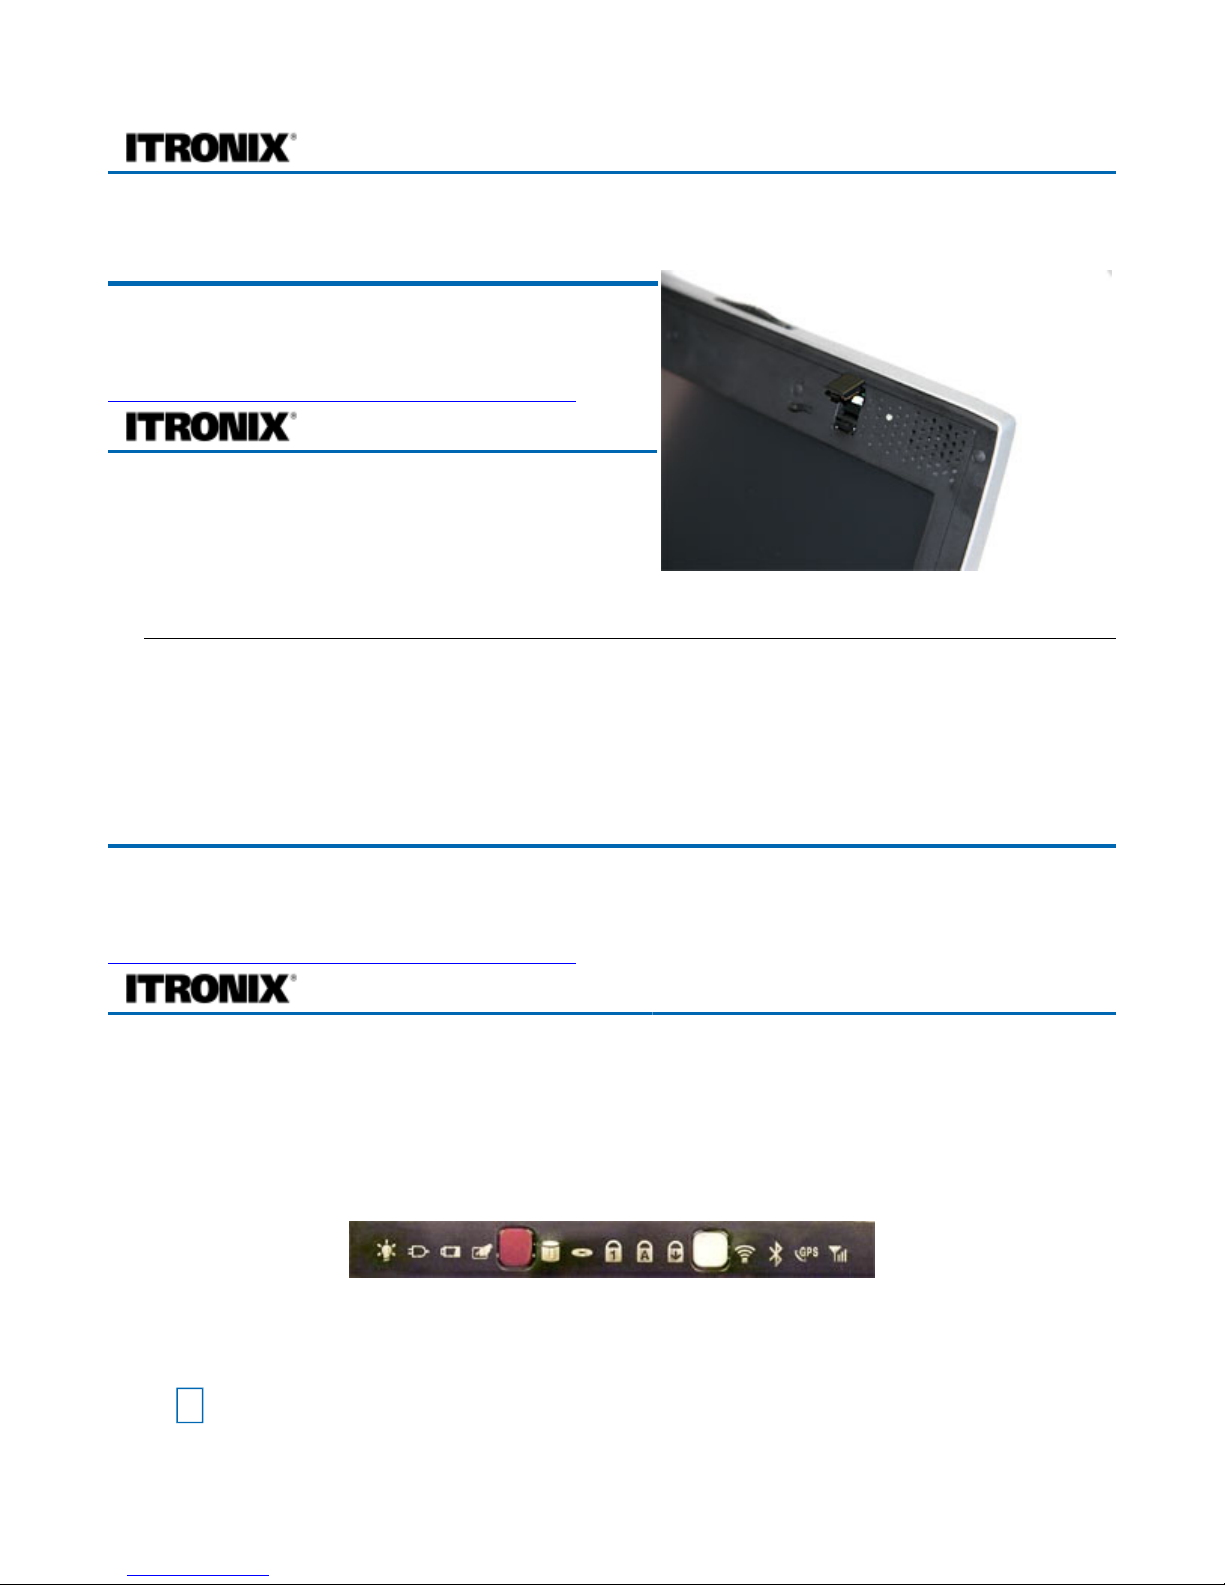
. Slide the display cover release latch to the
right.
. Open the display to a comfortable viewing
angle.
. Press the power switch to turn on the power.
The POST
(power-on self-test) routine
executes and Windows begins loading.
NOTE When using a battery pack for the
first time, fully charge the battery, then
Page 3 of 100GoBook PRO II Hel
p
Turning off Your Computer
Turning off the computer properly is important to maintaining your computer. Select Start,
Shut Down
and follow the instructions on the screen.
If you are going to be away from the computer for a short period, there are ways to conserve power
without shutting down the system. See Power Saving Modes
for details.
NOTE
If you are unable to shut down your computer normally, press and hold the power button more
than four seconds to turn off the computer. If you turn off the computer and want to turn it on again,
wait at least two seconds before powering up.
CAUTION Shutting off the computer improperly may result in data loss.
Loading Windows
This section is for installing the Windows operating system only. If you are installing a different
operating system, please check with your vendor for installation details.
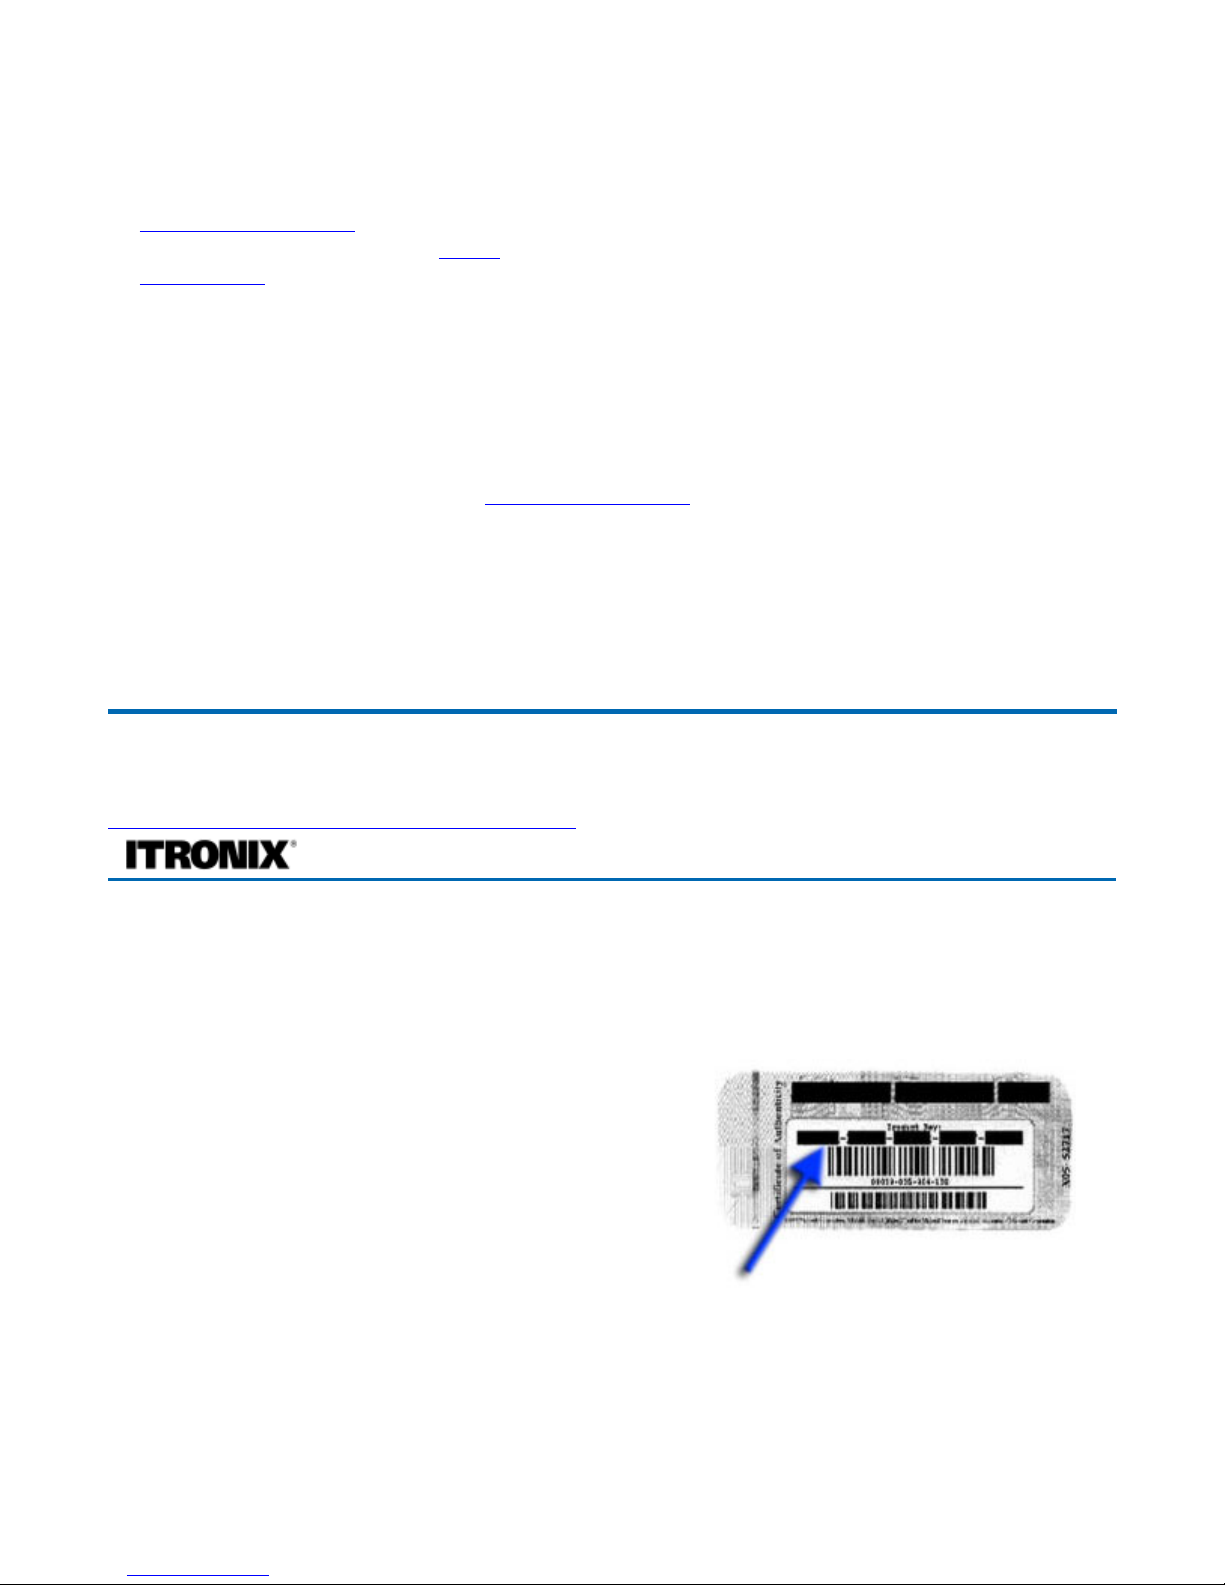
Your computer will begin loading Windows once you turn
on the power. Wait a few seconds for Windows setup to
load. The Windows setup will prompt you for the product
key number. You can find the product key number on a
sticker attached to the bottom of the computer.
1. Type your name, and, if applicable, the name of
your company.
2. Read the End User's License Agreement. Click
Next
to accept it.
3. Enter the product key number. You can find this on the Certificate of Authenticity on a sticker
attached to the computer. Click
Finish
.
4. The Start Wizar
d
will prompt you to set the date, and your local time.
disconnect the adapter to use up the battery
b
efore recharging again. Perform this action
twice to condition the battery pack.
Calibrating the battery before use is also
highly recommended. Refer to Power
Management, for more information.
72_0128_001
16 May 2005
© 2005 Itronix Corporation. All rights reserved.
GoBook® PRO II Help
Page 4 of 100GoBook PRO II Hel
p

Some software comes pre-loaded with Windows. New users can familiarize themselves with this
software by selecting All Programs from the start menu, then clicking on programs to run them.
CAUTION
When you are installing the Windows operating system and enter the product key number,
we strongly recommend connecting the AC adapter - DO NOT use battery alone to avoid warning
messages.
Startup Problems?
If your computer does not operate, try these solutions.
z
Connect the AC adapter to charge the battery if it is not charged.
NOTE The Power LED on the AC adapter should be lit as well as the External Power Indicator on
the GoBook PRO II if the AC adapter is connected and functioning properly. Additionally, one of
the power icons should appear in the task tray.
z
If the AC adapter is connected but the unit will still not turn on, make sure the electrical outlet you
are using works.
z
Check to make sure the battery is installed and charged properly.
z
If the battery does not begin charging, remove the battery, connect the AC adapter, and turn on the
computer by pressing the Power Button. Reinstall the battery. The Battery Indicator is solid
orange while the battery is charging.
The Troubleshooting
section lists additional solutions you can try.
Safety and Ergonomics
Important safety instructions
1. Read these instructions carefully. Save these instructions for future reference.
72_0128_001
16 May 2005
© 2005 Itronix Corporation. All rights reserved.
GoBook® PRO II Help
72_0128_001
16 May 2005
© 2005 Itronix Corporation. All rights reserved.
GoBook® PRO II Help
Page 5 of 100GoBook PRO II Hel
p

2. Follow all warnings and instructions marked on the product.
3. Unplug this product from the wall outlet before cleaning. Do not use liquid cleaners or aerosol
cleaners. Use a damp cloth for cleaning.
4. Do not use this product near water.
5. Do not place this product on an unstable cart, stand, or table. The product may fall, causing
serious damage to the product.
6. Slots and openings in the cabinet and the back or bottom are provided for ventilation; to ensure
reliable operation of the product and to protect it from overheating, these openings must not be
blocked or covered. The openings should never be blocked by placing the product on a bed, sofa,
rug, or other similar surface. This product should never be placed near or over a radiator or heat
register, or in a built-in installation unless proper ventilation is provided.
7. This product should be operated from the type of power indicated on the marking label. If you are
not sure of the type of power available, consult your dealer or local power company.
8. Do not allow anything to rest on the power cord. Do not locate this product where persons will
walk on the cord.
9. If an extension cord is used with this product, make sure that the total ampere rating of the
equipment plugged into the extension cord does not exceed the extension cord ampere rating.
Also, make sure that the total rating of all products plugged into the wall outlet does not exceed
the fuse rating.
10. Never push objects of any kind into this product through cabinet slots as they may touch
dangerous voltage points or short out parts that could result in a fire or electric shock. Never spill
liquid of any kind on the product.
11. Do not attempt to service this product yourself, as opening or removing covers may expose you to
dangerous voltage points or other risks. Refer all servicing to qualified service personnel.
12. Unplug this product from the wall outlet and refer servicing to qualified service personnel under
the following conditions:
1. When the power cord or plug is damaged or frayed
2. If liquid has been spilled into the product
3. If the product has been exposed to rain or water
4. If the product does not operate normally when the operating instructions are followed. Adjust
only those controls that are covered by the operating instructions since improper adjustment of
other controls may result in damage and will often require extensive work by a qualified
technician to restore the product to normal condition.
5. If the product has been dropped or the cabinet has been damage
d
Page 6 of 100GoBook PRO II Hel
p

6. If the product exhibits a distinct change in performance, indicating a need for service.
13. Replace the battery with the same type as the product's battery we recommend. Use of another
battery may present a risk of fire or explosion. Refer battery replacement to a qualified
serviceman.
14.
WARNING!
Batteries may explode if not handled properly. Do not disassemble or dispose of
them in fire. Keep them away from children and dispose of used batteries promptly.
15. Use only the proper type of power supply cord set (provided in your accessories box) for this unit.
It should be a detachable type: UL listed/CSA certified, type SPT-2, rated 7A 125V minimum,
VDE approved or its equivalent. Maximum length is 15 feet (4.6 meters).
Ergonomics
Tips for New Owners
z
Take responsibility for backup
Back up files often. Users who need to manage large amounts of data may wish to use backup
devices such as a ZIP drive.
z
Don't leave passwords anywhere on your notebook or carrying case
z
Be careful when placing your notebook on an airport security conveyor belt
In most airports, security conveyor belts are safe for computers. If you are not sure, ask the
security staff. You should keep a close eye on your computer.
z
Tape your business card to the notebook and accessories
In the workplace, notebooks and accessories may often look exactly alike, leading to equipment
mix-ups. Prevent such mix-ups by placing your name on your equipment.
z
Develop ergonomic work habits
The science of ergonomics studies the relationship between health and a suitable work
environment. For more information on ergonomics, contact your nearest computer bookstore, or
local library. See Safety and Ergonomics.
72_0128_001
16 May 2005
© 2005 Itronix Corporation. All rights reserved.
GoBook® PRO II Help
Page 7 of 100GoBook PRO II Hel
p

z
Consider using a lock
For added security, consider purchasing a Kensington lock to put into the Security Slot on the
right side of your computer. Use the Kensington lock to secure the computer to a desk or table.
NOTE
Using a computer for extended periods of time with a poor workstation setup and incorrect work
habits can cause health problems.
Getting Familiar with Your Computer
This chapter introduces the different components and controls of your notebook computer, including the
hardware components, the software, and the audio and video systems.
Before you begin using your GoBook PRO II, read this chapter to familiarize yourself with the main
components installed in the system.
This computer combines high-performance, versatility, power management features and multimedia
capabilities with a unique style and ergonomic design. Work with unmatched productivity and reliability
with your new power computing partner.
This chapter gives an in-depth "tour" of the computer's many features.
Front View
Hover the mouse over each number on the picture to see a description
72_0128_001
16 May 2005
©
2005 Itronix Corporation. All rights reserved.
GoBook® PRO II Help
Page 8 of 100GoBook PRO II Hel
p
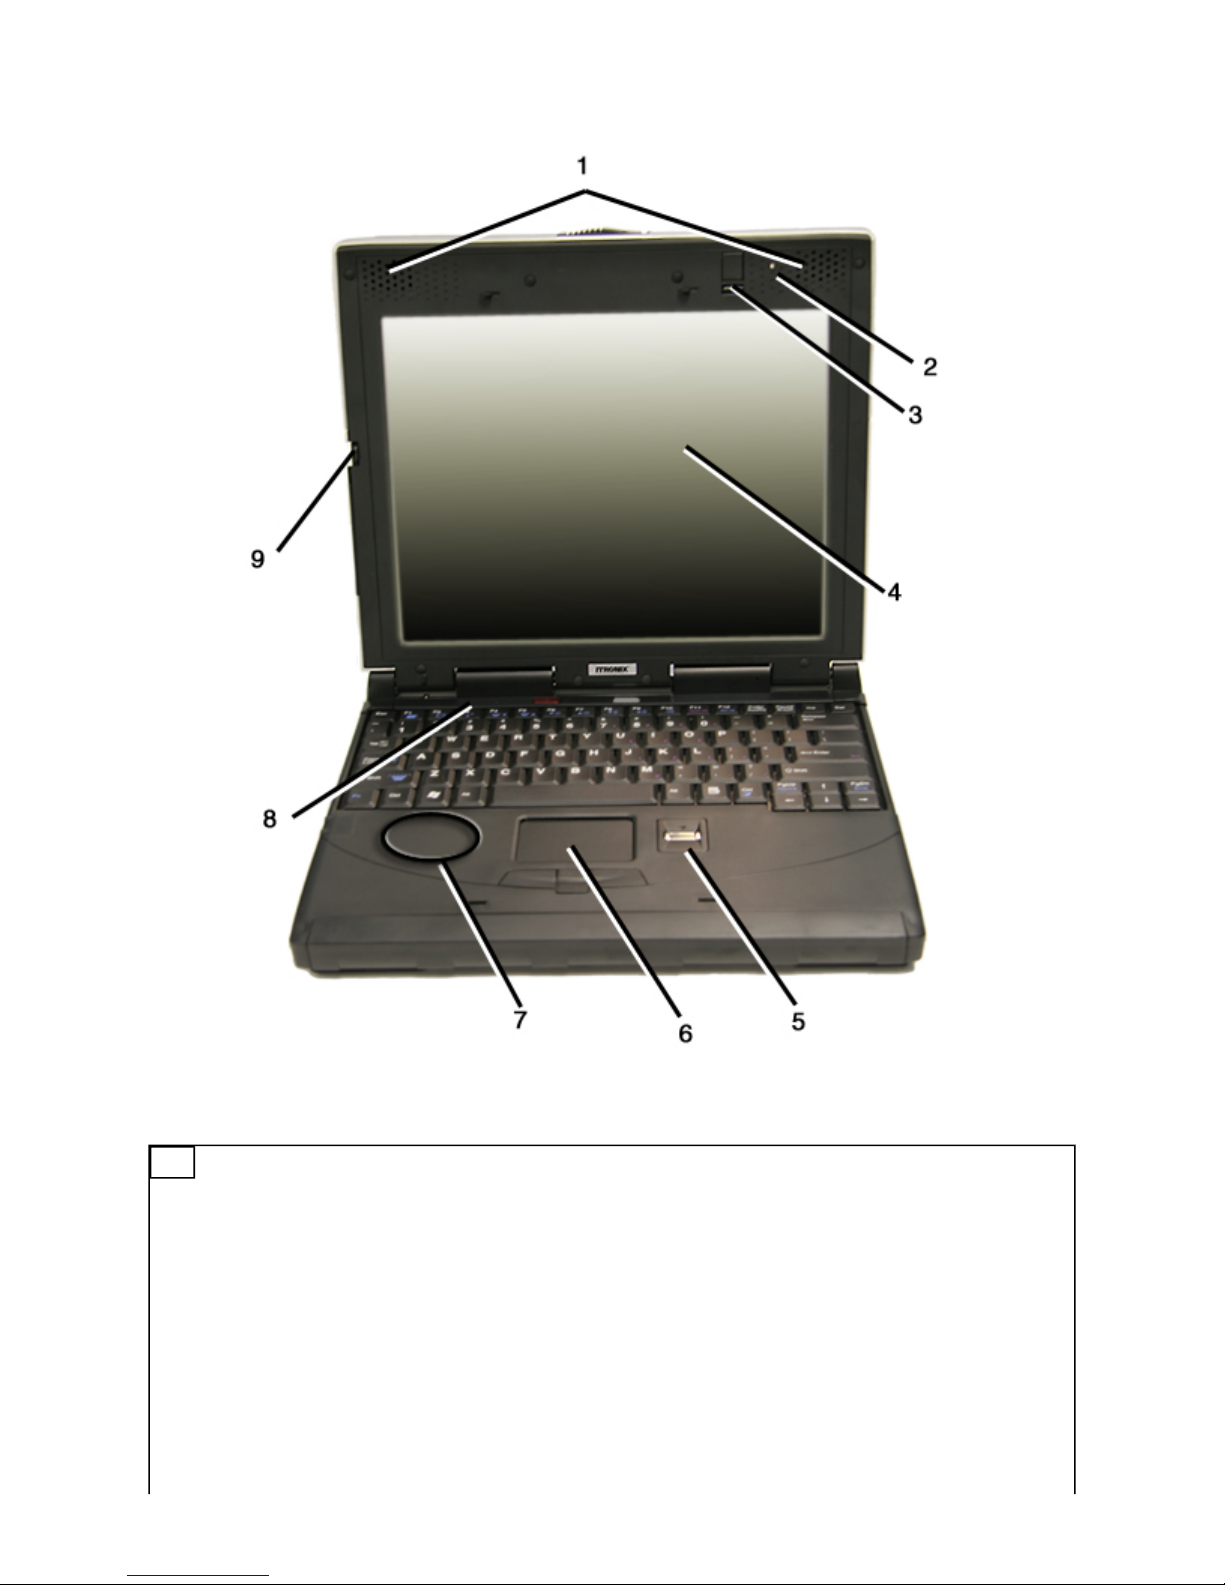
#
Feature Description
1 Speakers
2 Photo Sensor
3 Keyboard Light
4 Touch Screen
Display
5 Fingerprint
Scanner
Optional feature
6 Touchpad
7 Bluetooth /
Diversity for
EVDO Antenna
Page 9 of 100GoBook PRO II Hel
p
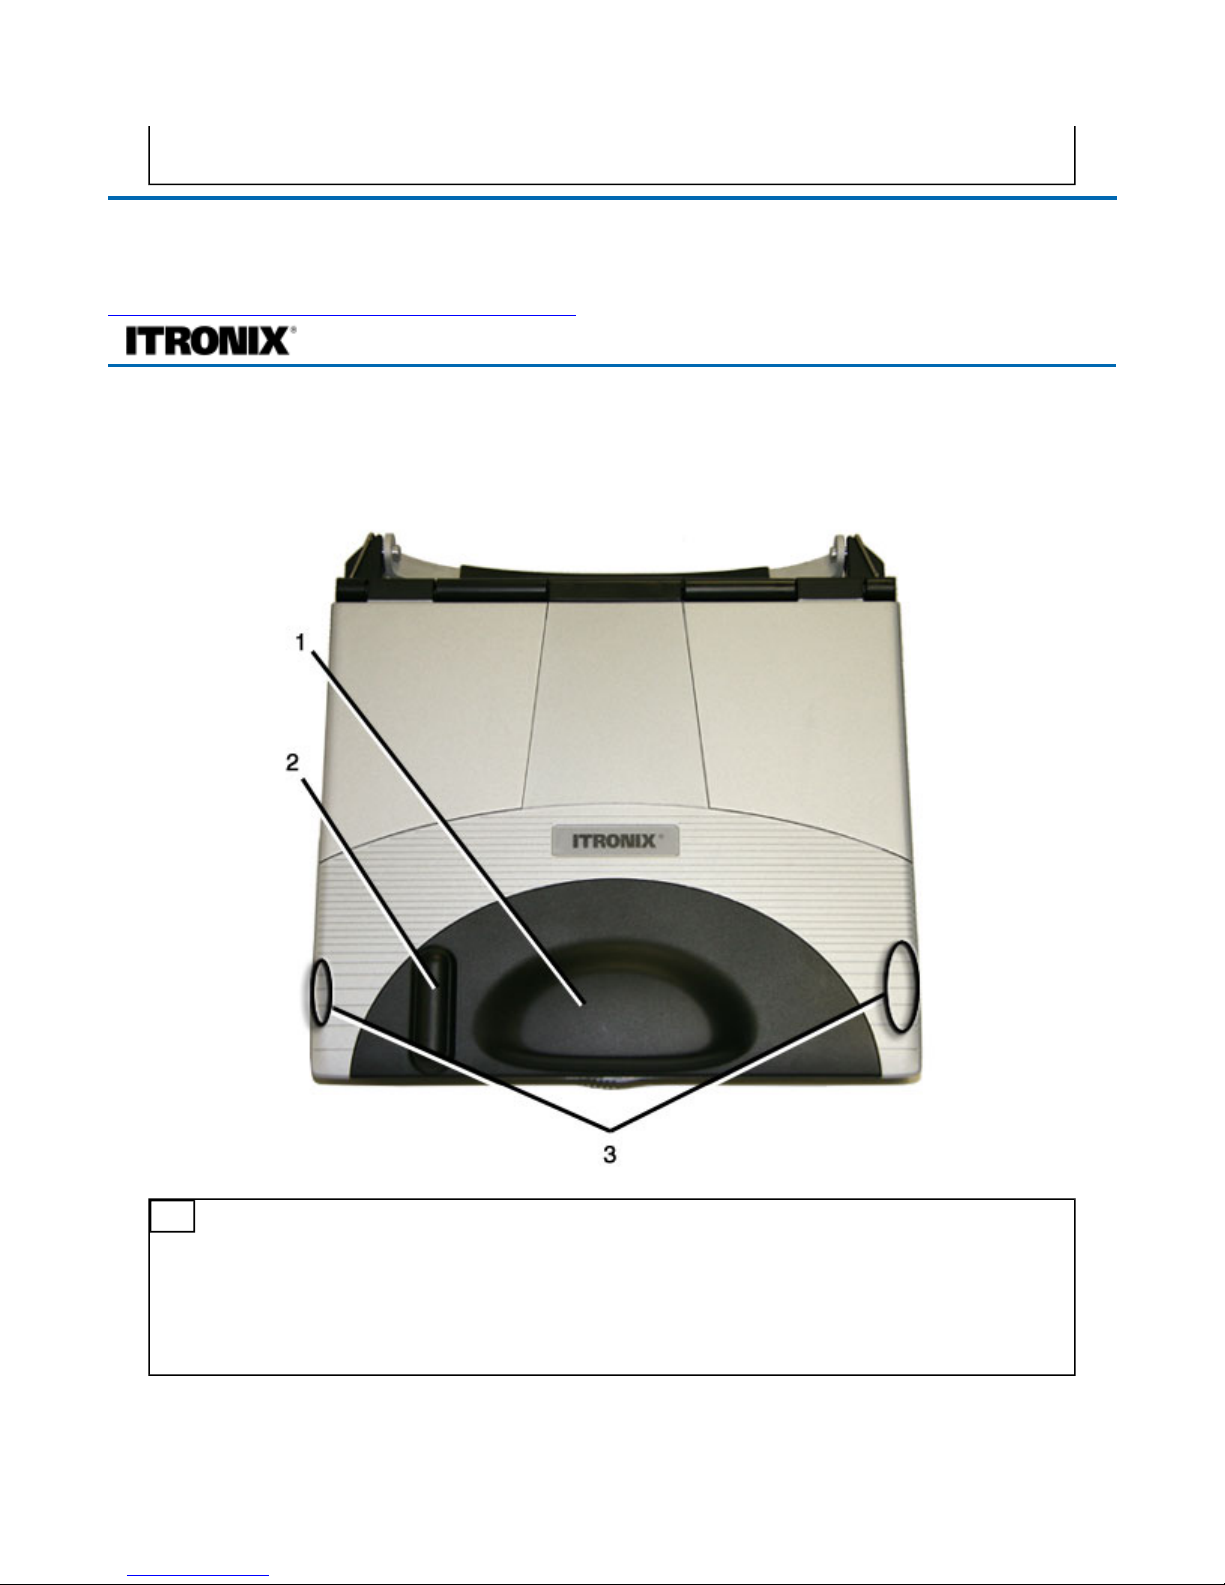
Top View
Hover the mouse over each number on the picture to see a description
CAUTION
Please avoid hitting wireless communication antennas as this may adversely affect
communications quality.
8 LEDs Lights that turn on, of or blink to show the status of the computer and its
functions
72_0128_001
16 May 2005
© 2005 Itronix Corporation. All rights reserved.
GoBook® PRO II Help
#
Feature Description
1 CRMA Express
Antenna
Antenna for WAN Communications
2 GPS Antenna Antenna for GPS Communications
3 WLAN
Antennas
Antenna for WLAN Communications
Page 10 of 100GoBook PRO II Hel
p
Left Side View
Hover the mouse over each number on the picture to see a description
** insert picture**
Right Side View
Hover the mouse over each number on the picture to see a description
**insert picture**
72_0128_001
16 May 2005
©
2005 Itronix Corporation. All rights reserved.
GoBook® PRO II Help
#
Feature Description
1 Volume Control Knob Use to adjust the volume
2 Memory Stick / Secure
Digital Card Slot (optional)
Use with a Memory Stick, Secure Digital (SD) or MultiMediaCard
(MMC) memory card.
3 PC Card Slot
4 Infrared Port (optional)
5
6
72_0128_001
16 May 2005
© 2005 Itronix Corporation. All rights reserved.
GoBook® PRO II Help
#
Feature Description
1
2
3
4
5
6
7
8
9
10
Page 11 of 100GoBook PRO II Hel
p
Back Edge View
Hover the mouse over each number on the picture to see a description
**insert picture**
Bottom View
Hover the mouse over each number on the picture to see a description
1. USB ports
2. S-Video port
3. DVD-ROM drive
4. DVD-ROM drive lock
5. DVD-ROM drive eject button
6. GPRS Headset Jack
7. Shoulder strap hole
72_0128_001
16 May 2005
© 2005 Itronix Corporation. All rights reserved.
GoBook® PRO II Help
#
Feature Description
1 DC-in jack Connects to an AC adapter.
2 S-video out port Connects to a television or display device with S-video input.
3 External monitor port Connects to a display monitor (up to 2048x1536 resolution).
4 Parallel port Connects to a parallel device (e.g., parallel printer).
5 Modem jack Connects a phone line (only for models with an internal fax/data
modem).
6 Network jack Connects to an Ethernet-based network.
7 IEEE 1394 port (firewire) Connects to a IEEE 1394-compatible (4-pin) device (e.g., digital
video camera).
8 USB ports Connect to USB devices (e.g., USB digital camera).
9 Line-in jack Accepts audio line-in devices (e.g., audio CD player, stereo
walkman).
10 S/PDIF line-out jack Connects to audio line-out devices (e.g., speakers, headphones);
supports S/PDIF connections.
72_0128_001
16 May 2005
© 2005 Itronix Corporation. All rights reserved.
GoBook® PRO II Help
Page 12 of 100GoBook PRO II Hel
p

Keyboard Basics
The GoBook PRO II computer features:
z
Full size keys 85-key US keyboard; 87-key international keyboard
z
Twelve function keys
z
Embedded numeric keypad
#
Feature Description
1 Memory compartment User expandable memory slot
2 Hard Disk Lock Slide this to lock or unlock the hard disk drive
3 Hard Disk Drive Removable hard disk drive for data storage
4 Battery Locks Slide these locks toward the outer edges of the computer to lock the
battery.
5 Battery
6 Serial Number Label
7 Battery Release Latch Slide this latch to the left to remove the battery. NOTE You must
first unlock the battery.
72_0128_001
16 May 2005
©
2005 Itronix Corporation. All rights reserved.
Page 13 of 100GoBook PRO II Hel
p

z
Mouse keys and cursor control keys
z
USB port that enables you to connect an external keyboard
Keyboard ergonomics
Located below the keyboard, the wide and curved palm rest is ergonomically designed to provide you
with a very comfortable place to rest your hands while you type.
Primary Keys
GoBook® PRO II Help
Key Description
ALT
The ALT (alternate) key is used with other keys to perform special tasks. On
some operating systems pressing CTRL+ALT+DEL twice soft reboots the
computer .
ALT GR
The ALT GR key, a special function key found on the 87-key international
keyboard, when pressed and held, allows you to use characters in the bottom
right of a three character key.
BACKSPACE
The BACKSPACE key, sometimes represented on the keyboard as a left
arrow, moves the cursor one position to the left. The character to the left of
the cursor is erased.
CAPS LOC
K
Pressing the caps lock key one time locks keys A through Z in the UPPER
CASE position. Pressing the caps lock key again returns the letters to lower
case. While in the upper case mode, pressing the shift key results in lowercase
characters when entered. You still have to use the shift key to display
characters located on the upper portion of the keyboard. For example, press
shift+8 to type an asterisk (*), even when the caps lock key is activated.
The CAPS LOCK activity indicator is on when the keyboard is in CAPS
LOCK mode.
CTRL
The ctrl (control) key works with other keys to perform a variety of functions.
ENTER
The enter key signals the computer that you have completed your entry. This
is your way of telling the computer to process the information that you have
entered.
ESC
The esc (escape) key allows you to exit a pop-up window or message box.
PRTSC
In Windows, pressing the prtsc (print screen) key or ALT+PRTSC key copies
the current screen or window to the clipboard so you can paste it into
documents.
SHIFT
The shift key changes the keys A through Z to the UPPER CASE position.
When you press an alphabetic key, the character appears as a capital letter.
When you press shift with other keys, the characters on the upper part of the
keys appear. For example, pressing shift+7 displays an ampersand (&).
Fn
Some special Fn (function) keys have been established to perform important
tasks when pressed and held with the Fn key. These keys are described later in
this document. The Fn key legend is color keyed to other special keys on the
Page 14 of 100GoBook PRO II Hel
p

Arrow Keys
The arrow keys are defined by the software application.
The up arrow key usually moves the cursor up one line. In some cases, you can use the up arrow to
make selections from menus and scrollable list boxes.
The down arrow key usually moves the cursor down one line. In Windows, you can use the down arrow
to make selections from menus and scrollable list boxes.
The right arrow key usually moves the cursor one character position to the right.
The Left arrow key usually moves the cursor one character position to the left.
Function Keys and Key Combinations
When using function keys, press and hold the
Fn
key before pressing the other key in the key
combination.
keyboard
spacebar
Use the spacebar to enter a space and move the cursor one character to the
right.
TAB
The tab key moves the cursor to the next tab stop or field. Tab stops are
defined by your operating system or application program. Press the tab key to
move from one field or text box to another.
72_0128_001
16 May 2005
©
2005 Itronix Corporation. All rights reserved.
GoBook® PRO II Help
72_0128_001
16 May 2005
©
2005 Itronix Corporation. All rights reserved.
GoBook® PRO II Help
Function
Key
Function Icon Description
Fn+F1
Display
toggle
Switches the display output between the display
screen, external monitor (if connected) and both the
display screen and external monitor
NOTE When a DVD or VCD is playing, this
hotkey is disabled.
Page 15 of 100GoBook PRO II Hel
p

Quick Launch Buttons
Five Quick Launch Buttons, located at the top of the
keyboard, launch frequently used applications. The
Quick Launch Buttons automatically lock when the
Fn+F2
Screen
blank
Turns off the display screen backlight and turns off
the external monitor, if attached. Press any key to
turn it back on.
Fn+F3
Standby
Puts the computer in standby mode, which can be
defined via the advanced section of the Power
Management Properties in the Windows Control
Panel
Fn+F4
Tasklight
Brightness
Down
Dims the keyboard tasklight. NOTE You must first
turn on the tasklight by pressing Fn+Shift
Fn+F5
Tasklight
Brightness Up
Increases the brightness of the keyboard tasklight.
NOTE You must first turn on the tasklight by
pressing Fn+Shift
Fn+F6
Brightness
Down
Decreases the screen brightness
Fn+F7
Brightness Up Increases the screen brightness
Fn+F8
Speaker
Volume Down
Decreases the speaker volume
Fn+F9
Speaker
Volume Up
Increases the speaker volume
Fn+F10
Speaker
on/off
Turns the speakers on and off; mutes the sound
Fn+F12
Scr Lk
Scroll Lock
Fn+PgUp
Home
Home
Functions as the “Home” key
Fn+PgDn
End
End
Functions as the “End” key
Fn+ Right
Ctrl
Touchpad
on/off
Toggles the touchpad on and off
Fn+ Left
Shift
Keyboard Task
Light
Toggles the keyboard tasklight on and off
Fn+Caps
Lock
Wireless Toggles the power on and off to all radio devices.
The radio devices include GPS, Bluetooth,
WLAN,and WWAN radios.
NOTE If radio wakeup is enabled, radio power will
turn back on before the system suspends.
72_0128_001
16 May 2005
©
2005 Itronix Corporation. All rights reserved.
GoBook® PRO II Help
Page 16 of 100GoBook PRO II Hel
p
cover is closed so you don't have to worry about the
GoBook PRO II getting turned on accidentally.
For more information, see Launch Manager.
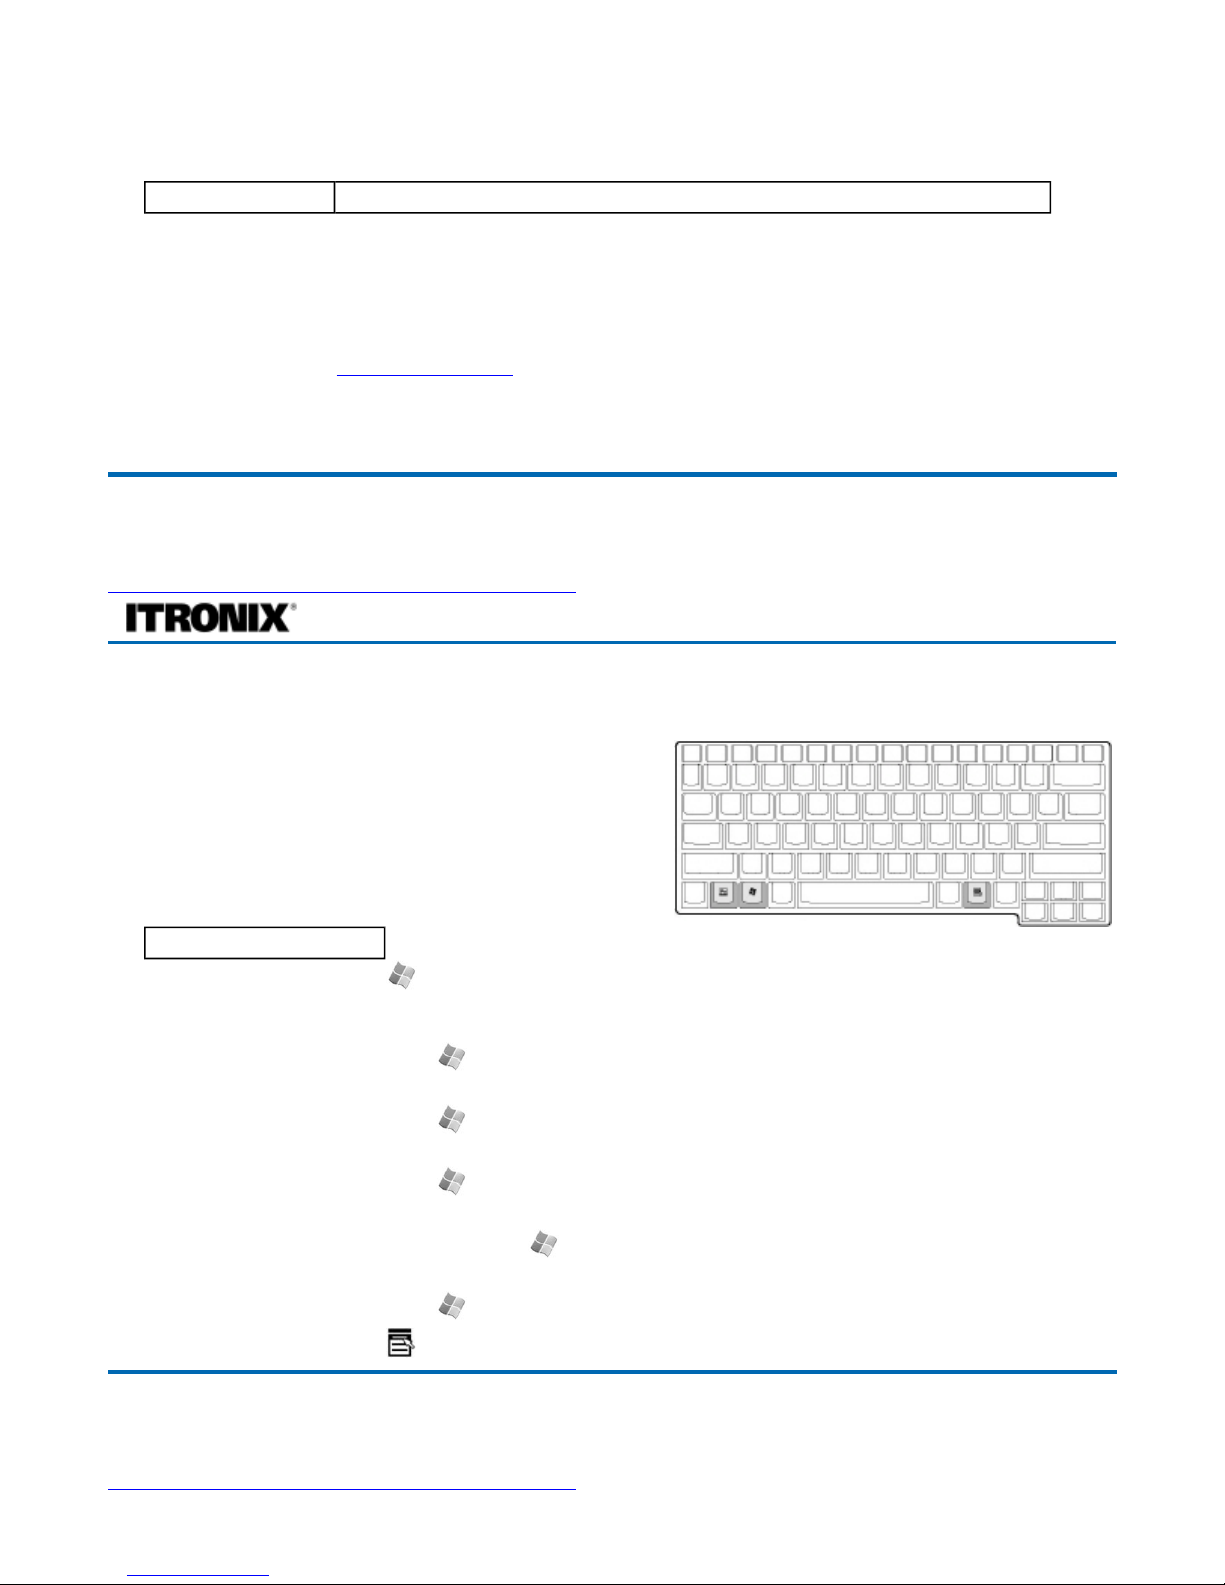
Numeric Keypad
The embedded numeric keypad consists of ten keys that make number intensive input more convenient.
It is indicated by small characters located on the upper right corner of the keycaps. To simplify the
keyboard legend, cursor-control key symbols are not printed on the keys. Press FN+NumLock to enable
or disable the numeric keypad.
**insert picture**
Lock Keys
#
Item Icon Description
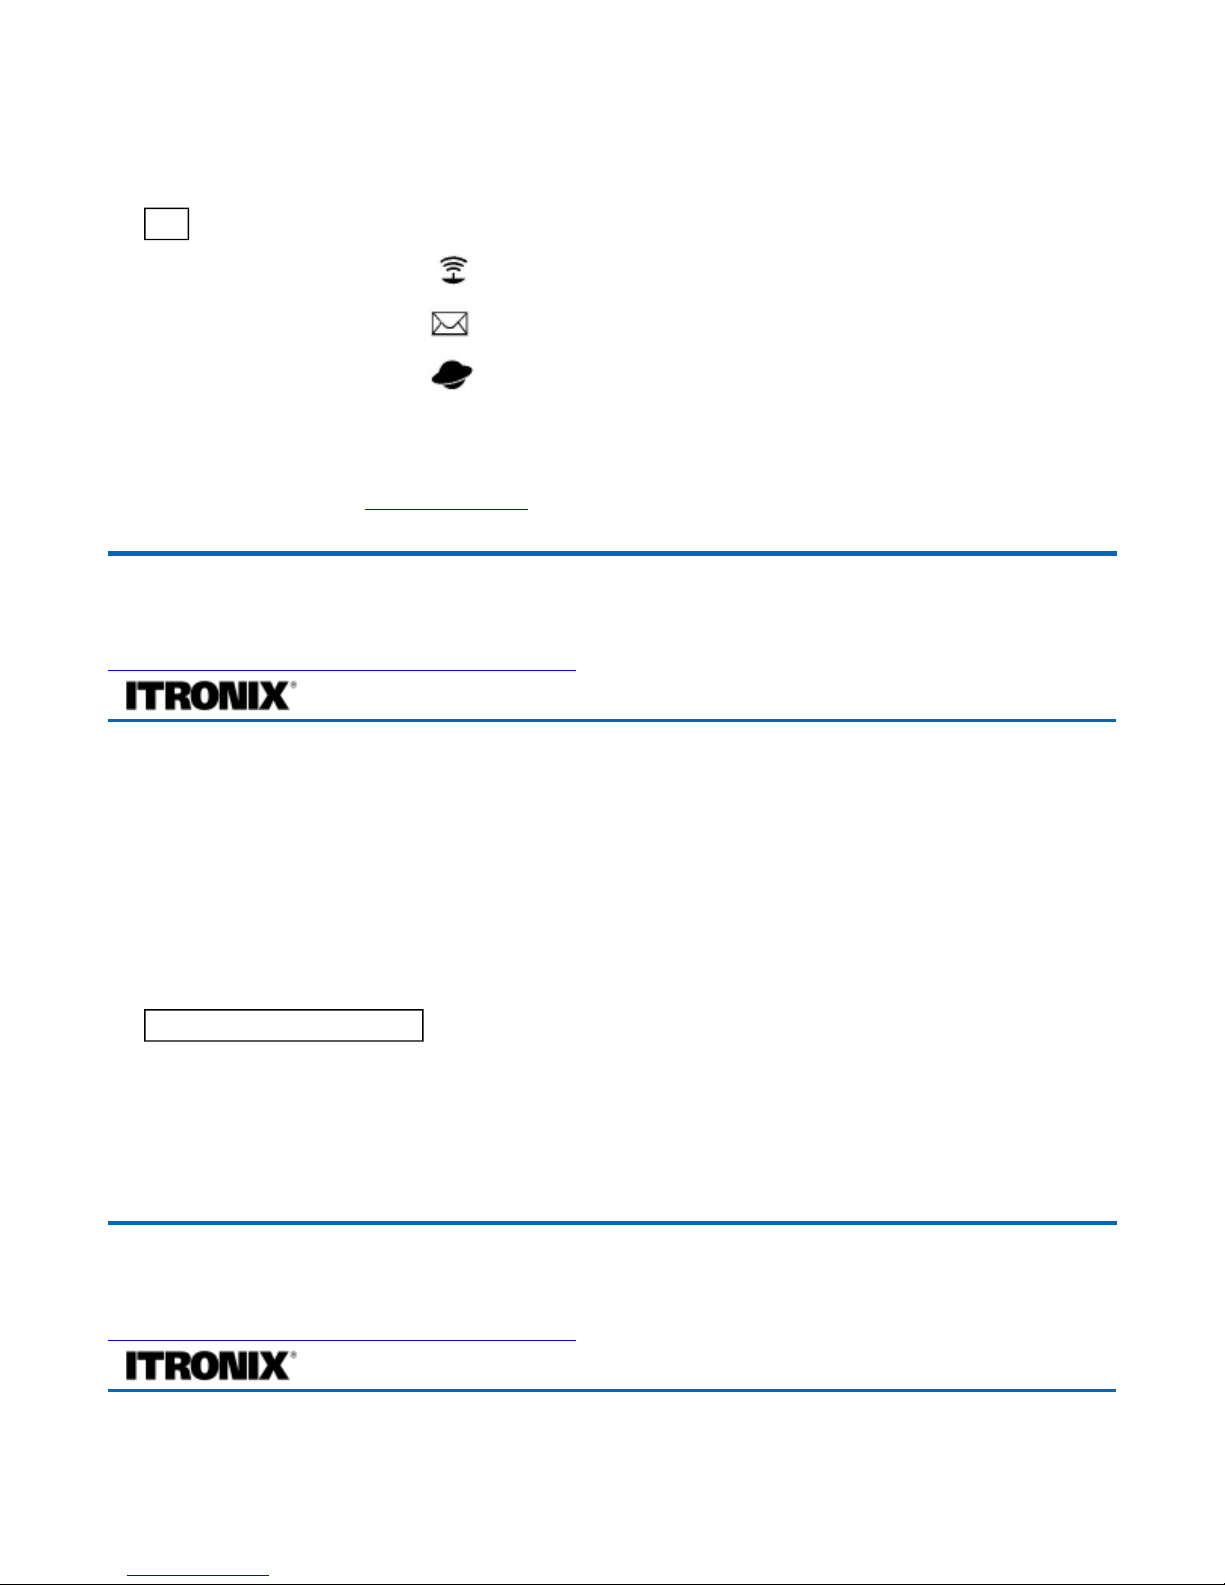
1 Wireless
Communication
This button is used to enable or disable the wireless LAN
(optional) function.
2 Email
The mail button is used to launch the email application.
3 Internet browser
By default, is used to launch your internet browser.
4 P1 This button is user-programmable
5 P2 This button is user-programmable
72_0128_001
16 May 2005
© 2005 Itronix Corporation. All rights reserved.
GoBook® PRO II Help
Desired Access
Num Lock On Num Lock Off
Number keys on
embedded keypad
Type numbers in a normal
manner.
Cursor-control keys on
embedded keypad
Hold Shift while using cursorcontrol keys.
Hold Fn while using
cursor-control keys.
Main keyboard keys Hold Fn while typing letters on
embedded keypad.
Type the letters in a
normal manner.
72_0128_001
16 May 2005
©
2005 Itronix Corporation. All rights reserved.
GoBook® PRO II Help
Page 17 of 100GoBook PRO II Hel
p
The keyboard has three lock keys which you can toggle on and off.
Windows Keys
The keyboard has two keys that perform Windowsspecific functions.
Lock Key Description
CAPS LOCK
When Caps Lock is on, all alphabetic characters typed are in uppercase.
NUM LOCK
(Fn-F11)
When Num Lock is on, the embedded keypad is in numeric mode. The
keys function as a calculator (complete with the arithmetic operators +, -,
*, and /). Use this mode when you need to do a lot of numeric data
entry. A better solution would be to connect an external keypad. See
External keyboard
SCROLL
LOCK
(Fn-F12)
When Scroll Lock is on, the screen moves one line up or down when you
press Ł or ¯ respectively. Scroll Lock does not work with some
applications.
72_0128_001
16 May 2005
© 2005 Itronix Corporation. All rights reserved.
GoBook® PRO II Help
Key
Icon Description
Windows Logo Key
Start button. Combinations with this key perform special
functions. Below are a few examples:
+ TAB (Activates next Taskbar button)
+ E (Explores My Computer)
+ M (Undoes Minimize All)
SHIFT + + M (Undoes Minimize All)
+ R (Displays Run dialog box)
Application Key
Opens the application's context menu (same as right-click).
72_0128_001
16 May 2005
©
2005 Itronix Corporation. All rights reserved.
Page 18 of 100GoBook PRO II Hel
p
Keyboard Light
Restarting the Computer
Restarting the Computer
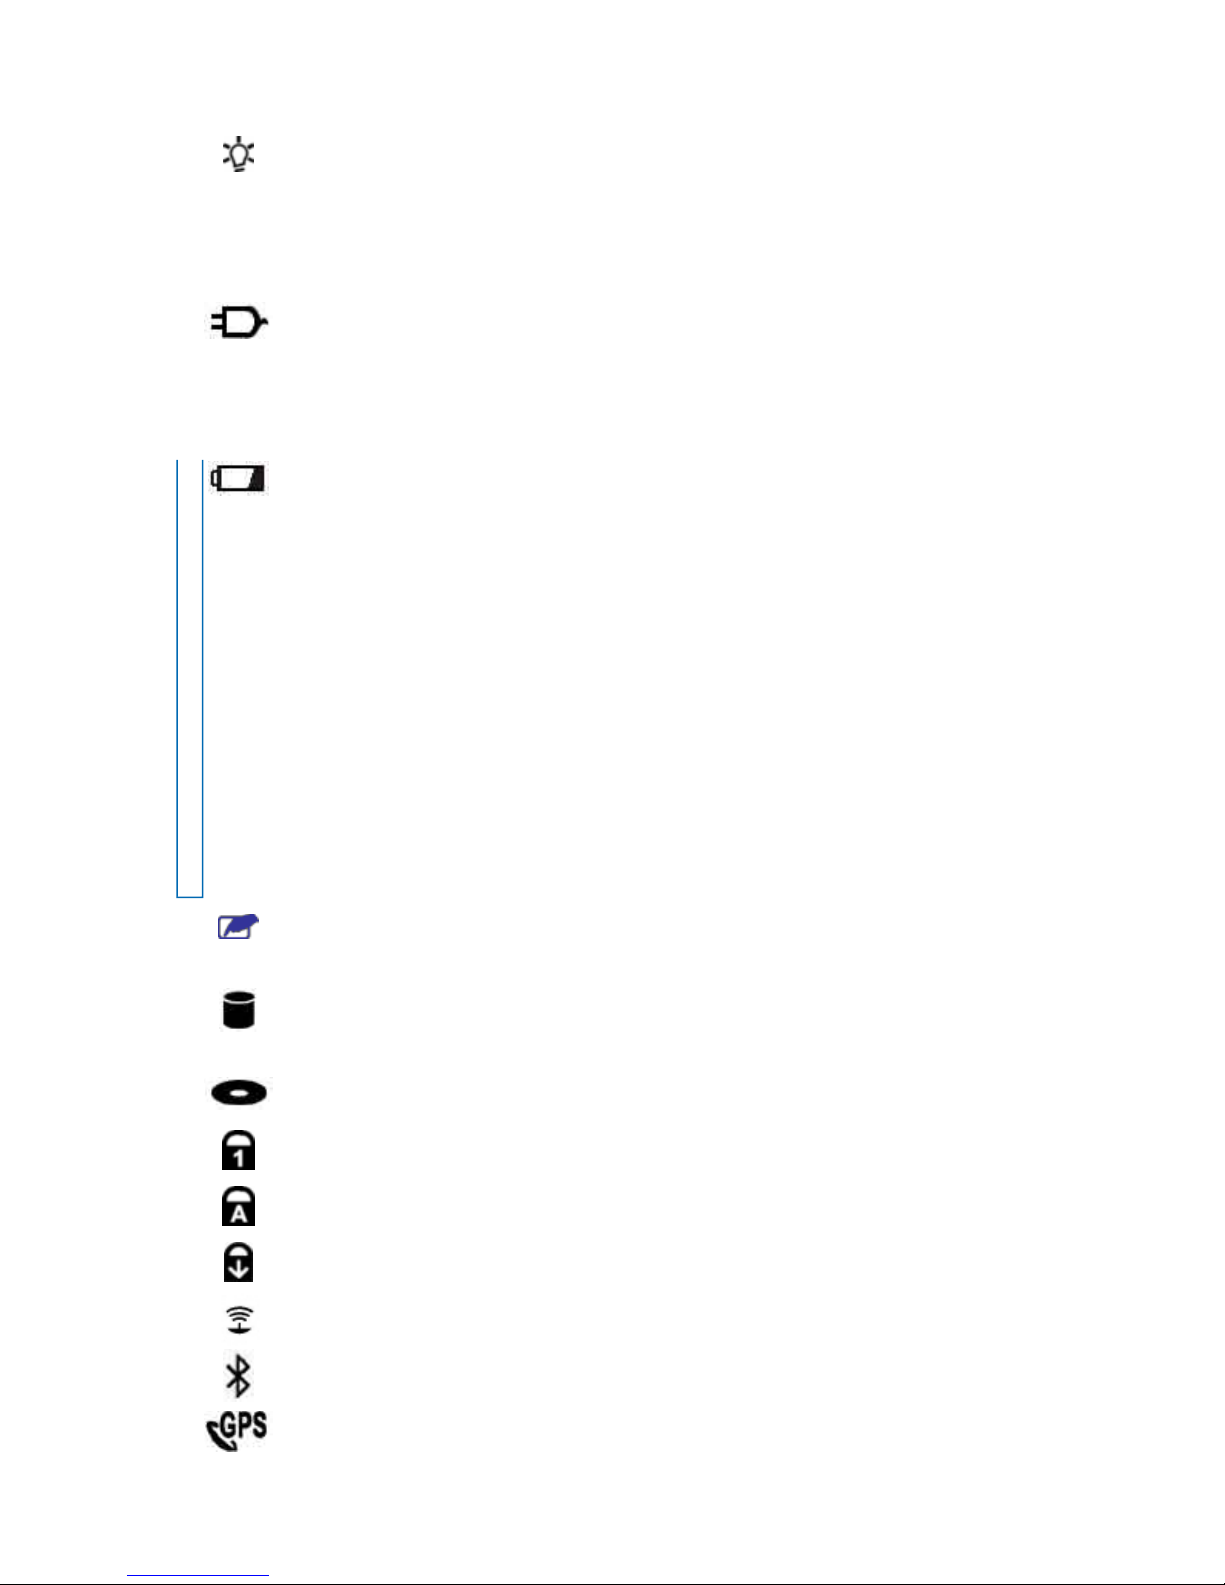
Activity Status LEDs
Thirteen easy-to-read LEDs under the display screen indicate activity status for common functions.
***insert picture with callout of LEDs
The Power indicators are visible even when you close the display cover so you can see the status of the
computer while the cover is closed.
GoBook® PRO II Help
72_0128_001
16 May 2005
© 2005 Itronix Corporation. All rights reserved.
GoBook® PRO II Help
Press… To do this
CTRL+ALT+DEL twice Soft reboot the computer.
CAUTION All open and unsaved data will be lost.
Press and hold the Power
Button for approximately ten
seconds and then release it.
Reset the computer
CAUTION All open and unsaved data will be lost.
72_0128_001
16 May 2005
© 2005 Itronix Corporation. All rights reserved.
GoBook® PRO II Help
#
Icon Function LED Description
Power Steady
Green
Computer is on and operating
Page 19 of 100GoBook PRO II Hel
p
1
Blinking
Green
Computer has suspended to RAM
2
External
Power
Steady
Green
Power is on and external power is applied from one of
the following:
1. The AC Adapter connected to a wall outlet, or
2. A vehicle-mounted cradle, or
3. A vehicle power adapter.
Blinking
Green
AC adapter is in use and computer is in suspend mode
3
Battery
Power
Steady
Green
Battery is charging
Blinking
Green
Battery is low
NOTES
If the computer is not plugged into external power
within a few minutes, it will go into a Suspend Power
Mode.
If the computer is radio-equipped and is in the middle
of communication, it will suspend power to the radio
when the battery is low. The computer must then be
plugged into external power to continue radio
communication.
No Light The battery is fully charged or a main battery pack is
not fitted.
4
Touch
Pad
Steady
Green
5
Hard
Disk
Drive
Blinking
Green
Computer is reading from, or writing to the built-in
hard disk
6
Media
Bay
Blinking
Green
Computer is reading information from the DVD ROM
or Combo DVD/CD-RW drive in the Media Bay.
7
Num
Lock
Steady
Green
Keyboard is in Num Lock mode
8
Caps
Lock
Steady
Green
Keyboard is in Caps Lock mode
9
Scroll
Lock
Steady
Green
Keyboard is in Scroll Lock mode
10
WLAN
Communication
Steady
Green
Wireless LAN radio is on
11
Bluetooth
Communication
Steady
Green
Bluetooth radio is on
12
GPS
Communication
Steady
Green
GPS radio is on
WWAN Steady WWAN radio is on
Page 20 of 100GoBook PRO II Hel
p
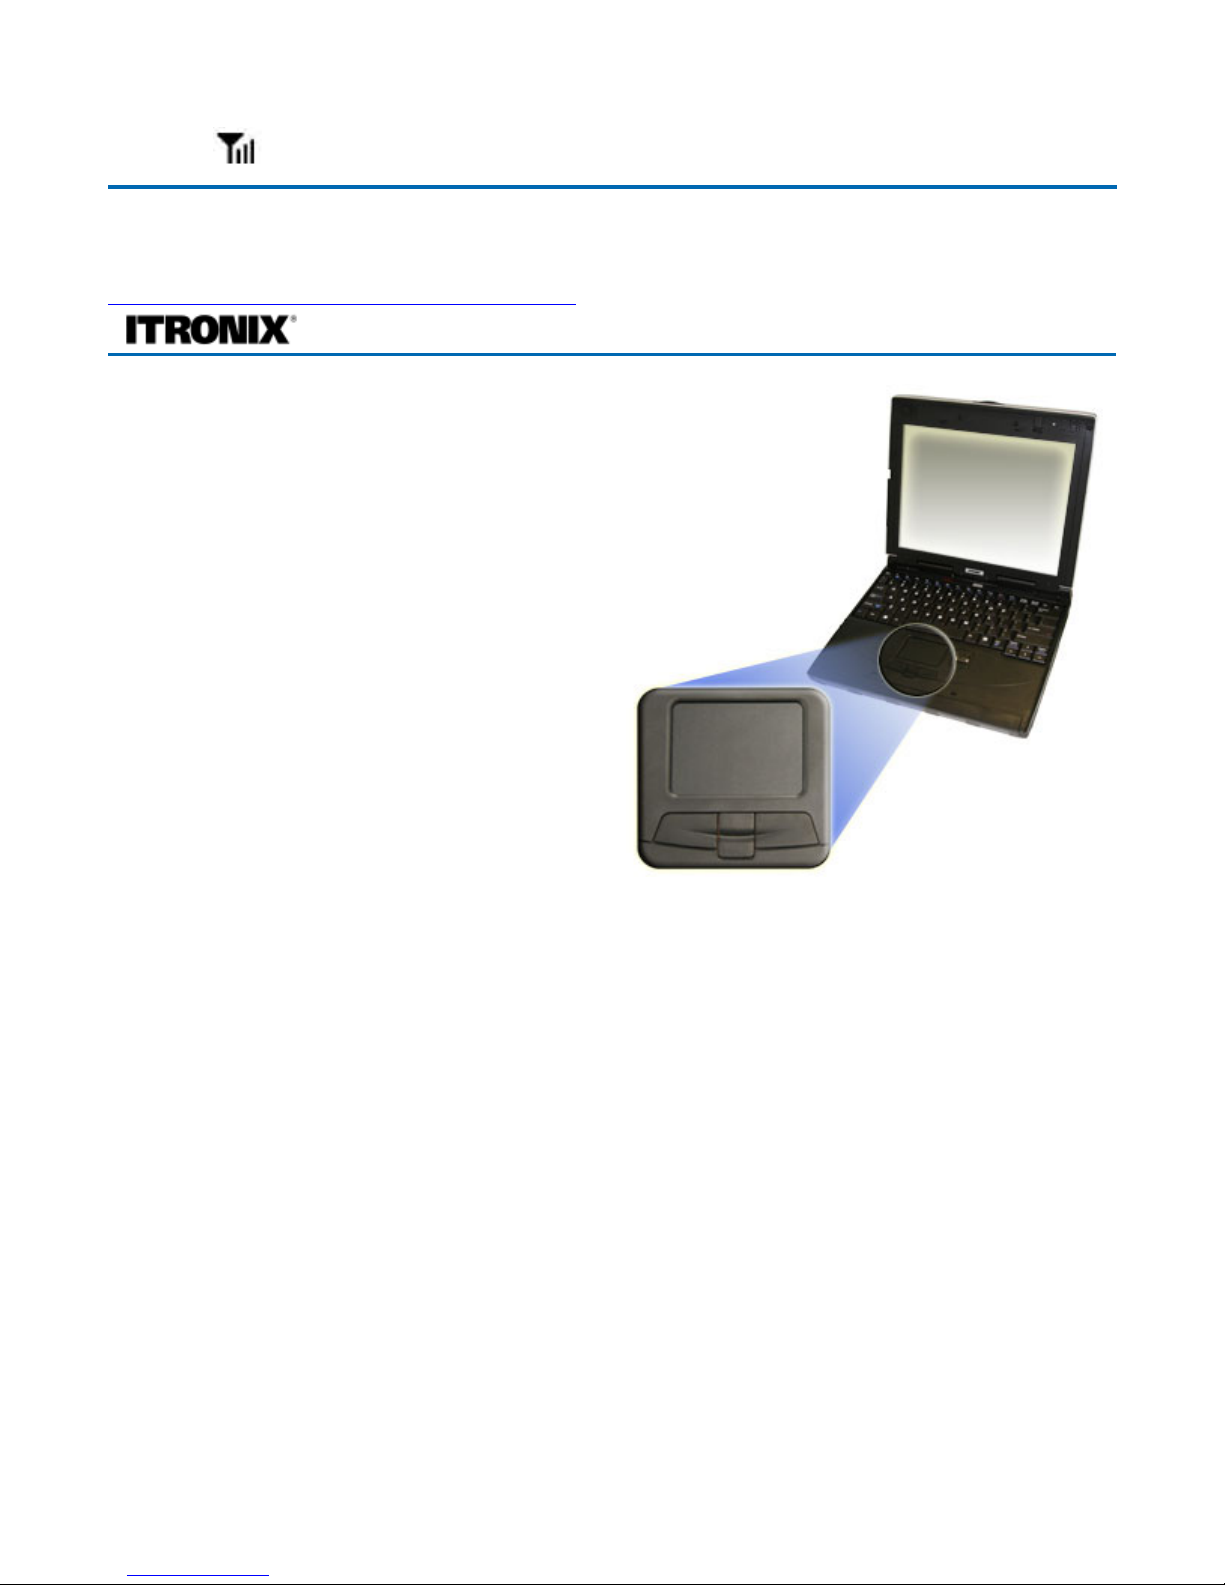
Touchpad
The built-in touchpad is a pointing device that
senses movement on its surface. This means the
cursor responds as you move your finger over of the
touchpad. It also provides all the features of a twobutton mouse.
How to Use the Touchpad
1. First, place your fingers on the keyboard in
the normal typing position. The touchpad is
easily accessible by moving either your left or
right thumb off the space bar and onto the
touchpad.
2. Gently move your thumb across the pressuresensitive touchpad in the direction you want
the cursor to move. The pad detects the change in pressure and moves the cursor in the
corresponding direction.
3. You can also make selections by double-tapping. This function corresponds to double-clicking
with a mouse. Once the cursor has been moved to the object you want to select, lightly double-tap
the pressure sensitive touchpad. This double-tapping on the touchpad will select the desired item
and prompt the software to perform the related operation.
4. The buttons located directly below the touchpad are the same in function as those on a twobuttoned mouse. Clicking these buttons makes selections, drags objects, or performs a variety of
other functions depending on the software. To select an object, first move the pointer over the
object you want to select, and then press the left button one time. The functions of these buttons
are software specific.
5. Double-clicking is a common technique for selecting objects or launching programs from icons.
Once you have moved the pointer over the object you wish to select, rapidly press the left button
two times. This action is commonly referred to as "double-clicking" an object.
Dragging
z
Move the pointer to the desired location then press down the left button. While still holding down
the left button, move the pointer to the desired location. Release the button.
13
Communication Green
72_0128_001
16 May 2005
© 2005 Itronix Corporation. All rights reserved.
GoBook® PRO II Help
Page 21 of 100GoBook PRO II Hel
p
z
Move the pointer to the desired location. Tap the touchpad twice quickly as if you were doubleclicking, however do not remove your finger after the second tap. Move the cursor to the desired
location. Lift your finger to finish dragging.
Adjust the touchpad settings by selecting Settings/Control Panel/Mouse/Buttons. These settings allow
you to change the orientation of the joystick from right-handed to left-handed, and fine-tune the pointer
movement and timing of clicks.
Touchpad Precautions
The touchpad is a pressure-sensitive device. If not properly cared for, it can be easily damaged. Please
take note of the following precautions:
z
Make sure the touchpad does not into come into contact with dirt, liquids or grease.
z
Do not touch the touchpad if your fingers are dirty.
z
Do not rest heavy objects on the touchpad or the touchpad buttons.
Scrolling buttons
If you are scrolling through a document, you may find that using the scrolling button is more restful to
your hand than holding down a mouse button. The scrolling button is located between the touchpad
buttons. Push the top of the button to scroll up in a document or Web page; press the bottom of the
button to scroll down in a document or web page.
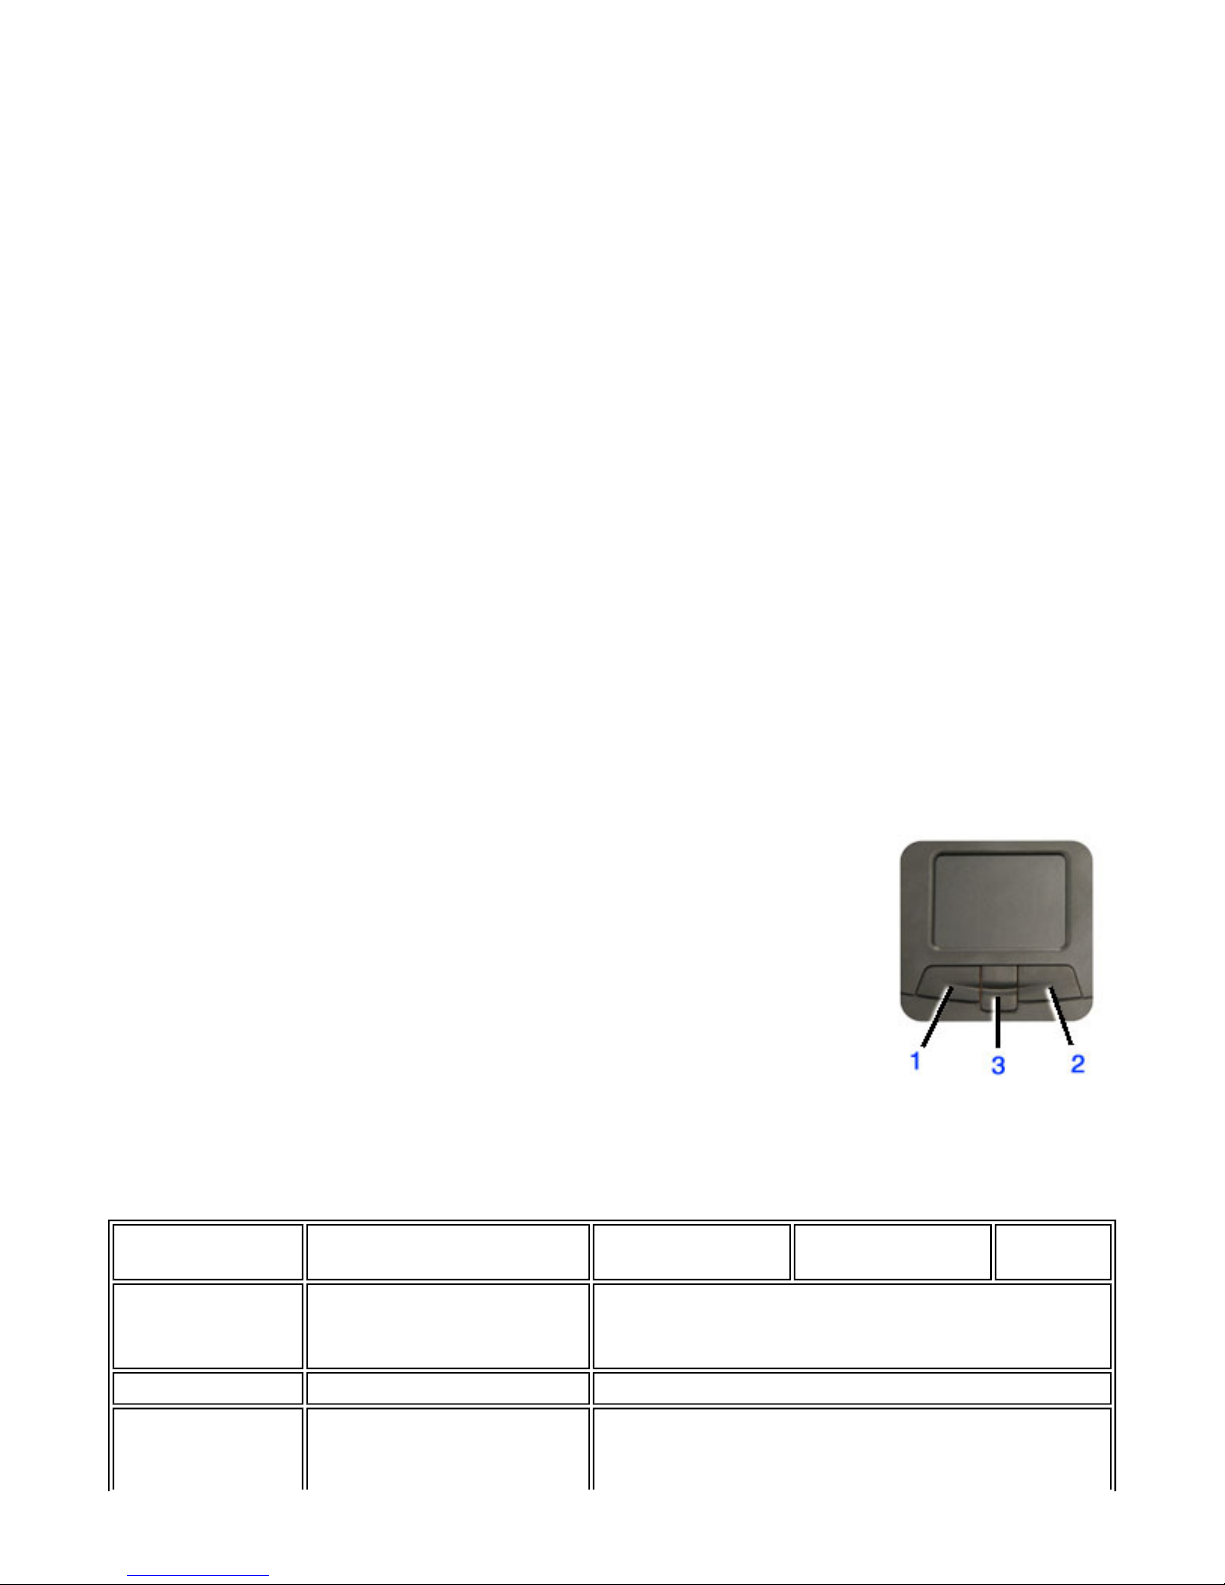
Touchpad basics
The following teaches you how to use the touchpad:
z
Move your finger across the touchpad to move the cursor.
z
Press the left (1) and right (3) buttons located below the touchpad to do
selection and execution functions. These buttons are similar to the left and
right buttons on a mouse. Tapping on the touchpad produces similar
results.
z
Press the center 4-way scroll button (2) to scroll up, down, left, and right on a page. This button
mimics the cursor pressing the right and bottom scroll bars of your Windows applications.
Function Left Button Right
Button
Center
Button
Tap
Execute Click twice
quickly.
Tap twice (at the same
speed as double-clicking
the mouse button).
Select Click once. Tap once.
Drag Click and
hold, then
Tap twice (at the same
speed as double-clicking
Page 22 of 100GoBook PRO II Hel
p
NOTES
Keep your fingers dry and clean when using the touchpad and keep the touchpad dry and clean.
The touchpad is sensitive to finger movements. It responds best to light touches. Tapping too hard will
not increase the touchpad's responsiveness.
The Graphics System
Your computer has a high-performance graphics system that can easily handle the demands of today's
multimedia computing. The display offers excellent viewing, display quality and desktop-performance
graphics. The computer supports a large Thin-Film Transistor (TFT) liquid crystal display (LCD)
displaying up to 16.7 million colors at 1024x768 XGA or 1400x1050 SXGA+ resolution, depending on
the LCD display model.
Screen Controls
Adjusting Display Brightness
Function keys can increase or decrease the display brightness.
z
FN + F6 decreases the LCD panel brightness
z
FN + F7 increases the LCD panel brightness
Adjusting Display Resolution
use finger to
drag the
cursor on the
touchpad.
the mouse button) and
hold finger to the
touchpad on the second
tap to drag the cursor.
Access
context
menu
Click once.
Scroll Click and hold
the button in
the desired
direction (up/
down/left/
right).
72_0128_001
16 May 2005
© 2005 Itronix Corporation. All rights reserved.
GoBook® PRO II Help
Page 23 of 100GoBook PRO II Hel
p

1. Select My Computer, Control Panel, Display, Settings. Select the Settings tab. The dialog box
indicates the monitor resolution.
2. Use the slide bar to adjust the resolution. Normally, you should use the resolution suggested for
the LCD or monitor.
N
OTE Using a lower resolution than the screen was designed for will reduce the area of the display.
You can stretch low resolution displays to full screen size by selecting either the Expanded Display or
Display Expansion Mode features in the BIOS utility. However, the stretching may cause distortion,
especially to fonts.
Higher resolution modes may be used, as long as the monitor supports them.
Photo Sensor
The built in photo sensor automatically adjusts the display brightness unless you use the function keys to
manually adjust display brightness.
N
OTE Fn+F6 and Fn+F7 override the photo sensor. Once they have been used, the photo sensor is
disabled until the next resume or reboot.
The sensitivity of photo sensor is adjustable in BIOS Setup Utility. The photo sensor does not have a
time out setting.
Auto Dim Feature
To save the battery power, your GoBook PRO II automatically dims the display when the computer is
not attached to external power.
N
OTE You may still use the display brightness function keys (Fn+F6 and Fn+F7) to adjust display
brightness.
See Power
management for more information on power management features.
Simultaneous display
The computer's crisp display and multimedia capabilities are great for viewing movies or giving
p
resentations. If you prefer, you can also connect an external monitor when giving presentations. This
computer supports simultaneous LCD and external display output via the external display port or the Svideo output port. Simultaneous display allows you to control the presentation from your computer and
at the same time face your audience. You can also connect other output display devices such as LCD
p
rojection panels for large-audience presentations.
Opening and closing the display
To open the display, press the display cover latch and lift up the cover, then tilt it to a comfortable
viewing position. See Connecting your computer
. The computer employs a microswitch that turns off
the display (e.g., enters standby mode) to conserve power when you close the display cover, and turns it
b
ack on when you open the display cover.
Page 24 of 100GoBook PRO II Hel
p

To close the display cover, fold it down gently until the display cover latch clicks into place.
CAUTION
To avoid damaging the display, do not slam it when you close it. Also, do not place any
object on top of the computer when the display is closed.
Cursor Visibility
The mobile computer uses a Liquid Crystal Display (LCD), a type of screen used on many notebook and
sub-notebook computers. One problem experienced on computers with an LCD display, especially in
cold environments, is that the cursor seems to “disappear” whenever the mouse is moved quickly. To
improve the visibility of the mouse cursor, you should:
z
Enable the “Pointer Trails” feature to add trailing cursors.
z
Use a slow or medium speed/sensitivity level.
You can combine a higher level of acceleration with a slow or medium speed/sensitivity level. This
allows you to move the mouse cursor quickly by increasing your finger pressure, while still providing a
finer degree of control when you apply minimum pressure.
N
OTE To change the speed of the mouse, from the Start Menu select Settings, Control Panel, and then
choose Mouse to make adjustments.
Memory
Adding memory allows the computer to operate faster, handle more tasks simultaneously, and work
more smoothly with large files. Users who increase memory demands - by adding additional programs,
for example - may notice a slowdown in operating speed, and wish to increase memory. The notebook
includes a memory card slot for adding additional memory.
Calculate memory size by adding the size of the memory module to the existing built-in memory. For
example: 128 MB (module) + 128 MB (built-in memory) = 256 MB Total
Replacing a Memory Card
CAUTION Memory modules can be easily damaged by static electricity. Leave the module inside its
static-proof bag until it is ready for installation.
Removing a Memory Card
1. Turn off the computer and disconnect the AC adapter.
72_0128_001
16 May 2005
© 2005 Itronix Corporation. All rights reserved.
GoBook® PRO II Help
Page 25 of 100GoBook PRO II Hel
p

Turn the computer upside down and lay it on a flat surface.
2. Carefully remove the two RAM compartment cover screws and remove the RAM compartment
cover.
3. Gently pull tabbed latched in the direction of the arrows (1). The card will pop up slightly.
4. Pull upwards on the card and then slide the card out (2).
Inserting a Memory Card
1. Hold the memory card by its edges with the edge-connector side towards the slot.
2. Hold the card at a shallow angle (about 25 degrees) and insert the edge connector into the
connector slot. The "gold teeth" of the edge connector should no longer be visible when the card is
fully inserted.
3. Press the card downwards so that it is flat inside the compartment. You may hear an audible click
as the latches of the connector lock the card in place.
4. Replace the RAM compartment cover and secure it with the two screws.
Your notebook computer will automatically detect the change in RAM capacity when it restarts. You
can verify RAM capacity has changed in the Setup Utility or in Windows:
1. Setup: Press DEL during boot-up when you see the "Hit DEL if you want to run Setup" prompt.
Then select Standard CMOS Setup. This screen shows the base memory and the extended memory.
2. Windows: Right click on my computer and select properties. The bottom of the system Properties
General tab lists the memory detected by Windows.
Audio
Your computer includes 16-bit high-fidelity stereo audio. The speaker is located above the display.
72_0128_001
16 May 2005
© 2005 Itronix Corporation. All rights reserved.
GoBook® PRO II Help
Page 26 of 100GoBook PRO II Hel
p

You can attach external audio devices via the audio ports on the left side of the computer.
Adjusting the Volume
z
To increase volume, press FN+F9
z
To decrease volume, press FN+F8
You can also adjust the volume with the Windows volume control applet located on the taskbar.
However, the volume control function keys override the Windows volume control applet. If your
volume is too low or too high after setting the volume in the applet, adjust the volume with the function
keys.
The PC Card Slot
The computer has a built-in CardBus PC Card slot on the left panel of the computer that can
accommodate one Type II PC Card. It accepts credit-card sized cards that enhance the usability and
expandability of the computer. The PC card slot can be used as an interface between your computer and
a variety of communications devices, such as network adapters, SCSI adapters, or fax/modems. They
can also be used to provide additional data storage capacity. Please consult your dealer for PC Card
options available that you can purchase for your computer.
PC Cards (formerly PCMCIA) are add-on cards for portable computers, giving you expansion
p
ossibilities long afforded by desktop PCs. Popular type II cards include flash memory, SRAM, fax/data
72_0128_001
16 May 2005
©
2005 Itronix Corporation. All rights reserved.
GoBook® PRO II Help
Page 27 of 100GoBook PRO II Hel
p
modem, LAN and SCSI cards. CardBus improves on the 16-bit PC card technology by expanding the
data path to 32 bits.
NOTE
Refer to your card's manual for details on how to install and use the card and its functions.
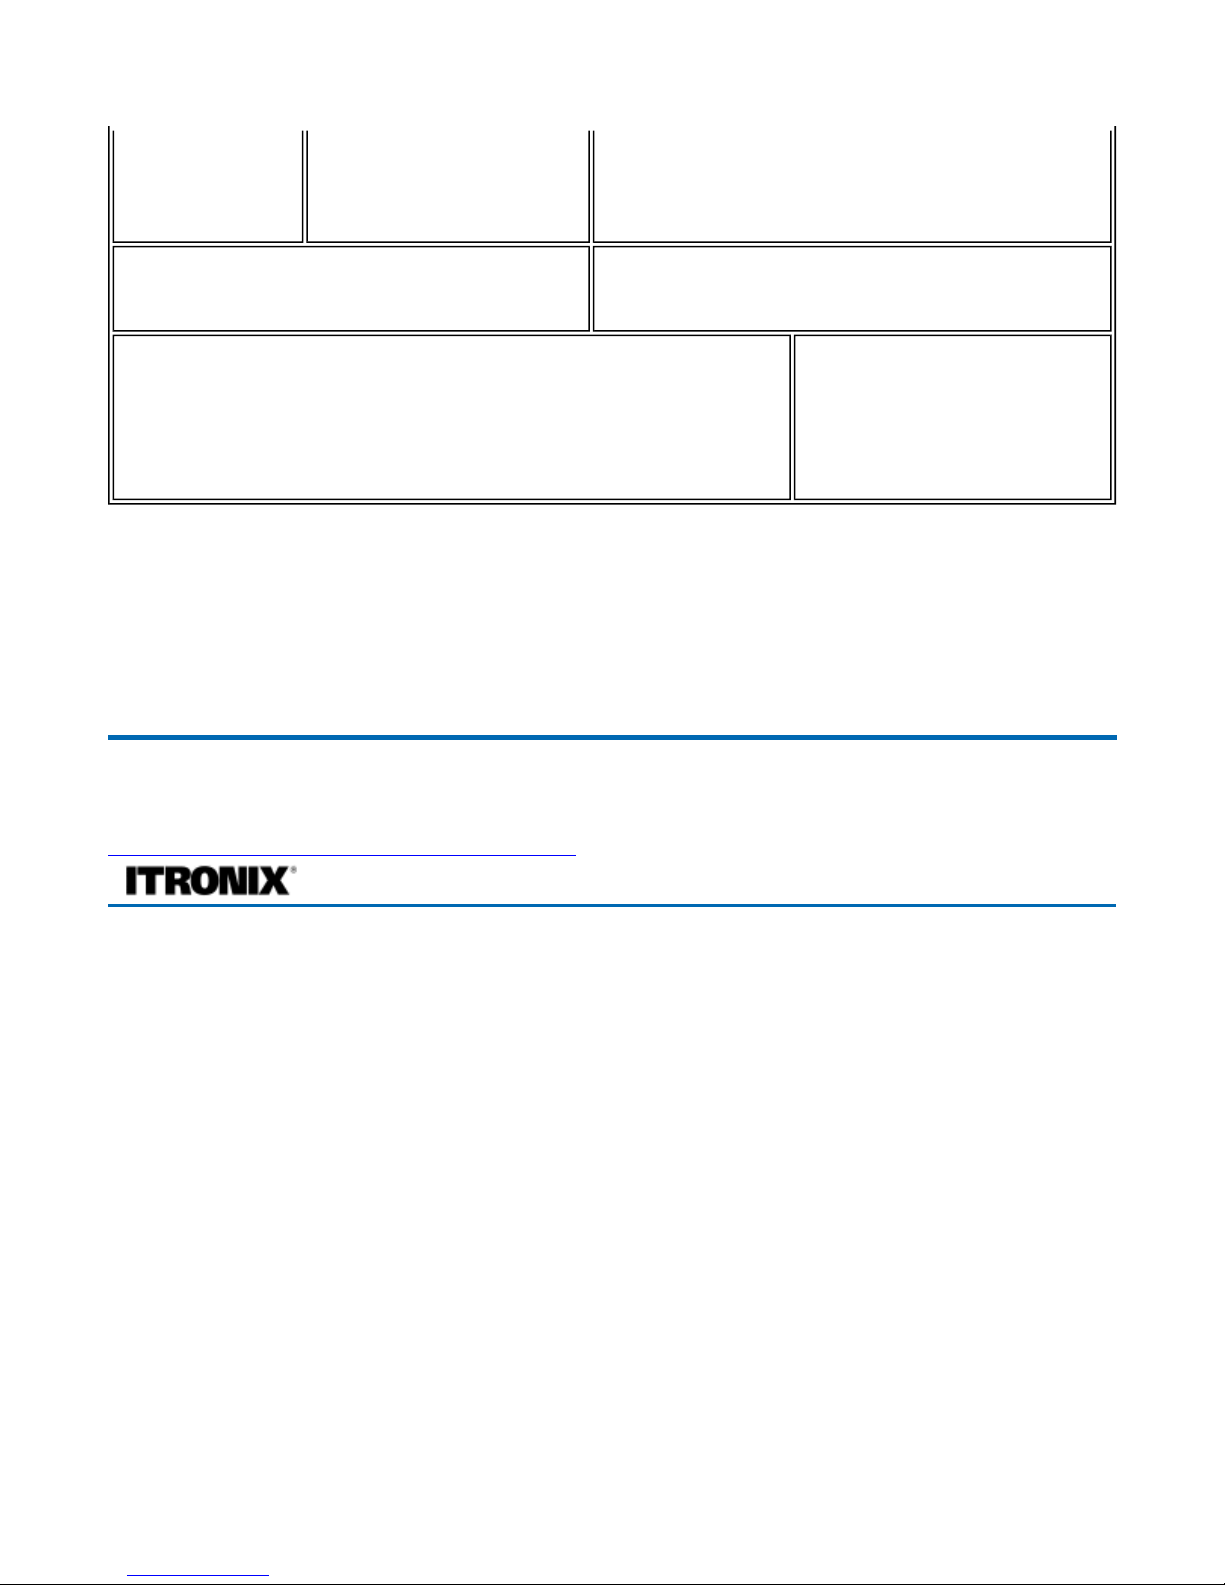
Inserting a Card
1. The top side of a PC Card is usually identified with a
label. Insert the card into the slot with the top up and the
edge with pinhole contacts going in first. You will feel
some resistance as the card slides into the back of the
slot.
2. PC Cards require drivers, or a program that allows the
operating system
to use a specific device. Many drivers
are included with Windows, but if not, you will be
prompted to install the driver included with your card.
3. The computer will beep twice to indicate successful
installation. A single beep means that there was a
problem recognizing the card.
NOTE
Please read the instructions included with individual PC Cards. Some cards may be inserted
with power on, while others require that the computer be turned off.
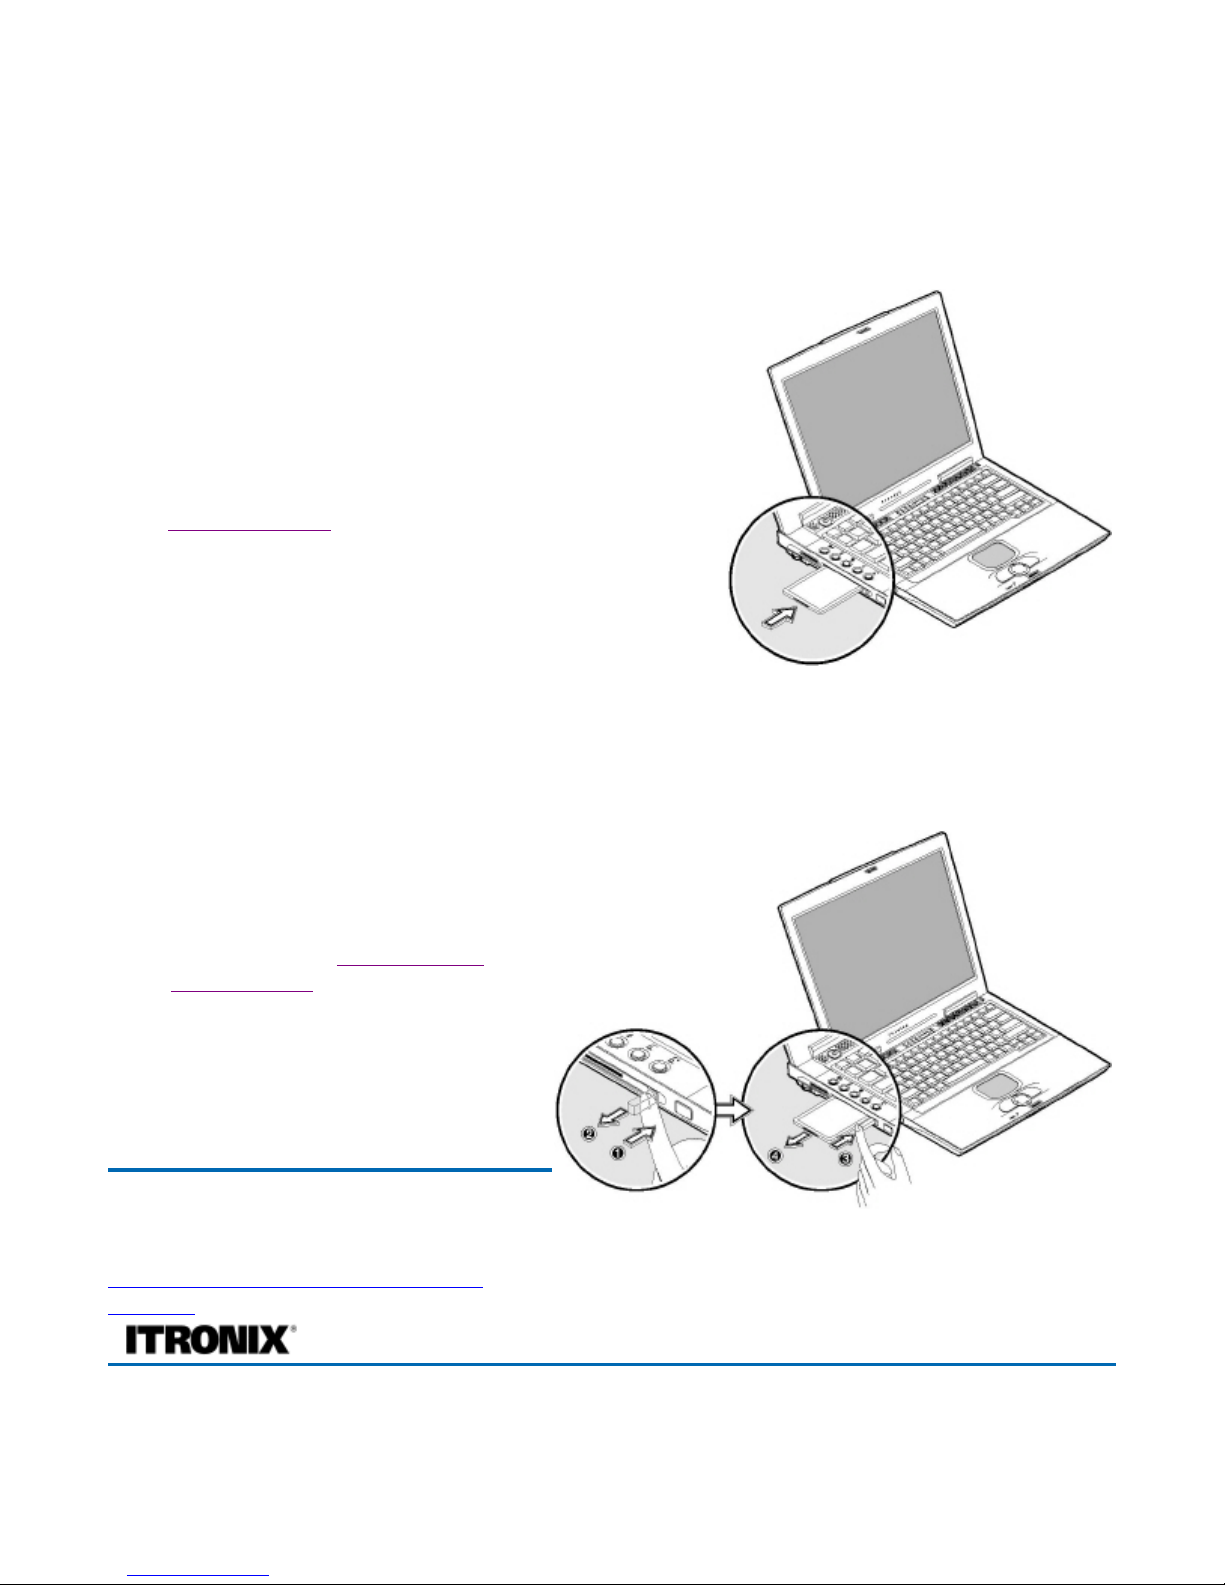
Ejecting a Card
1. First, exit the application using the
card.
2. Left-click on the Safely Remove
Hardware icon on the taskbar and stop
the card operation.
3. Press the slot eject button once (1) to
pop it out (2); then press it again (3) to
eject the PC Card.
Memory Stick/SD combo slot (option)
Your computer comes with a Memory Stick/Secure Digital (SD) combo slot (option). This slot is useful
72_0128_001
16 May 2005
© 2005 Itronix Corporation. All rights
reserved.
GoBook® PRO II Help
Page 28 of 100GoBook PRO II Hel
p

for transferring data to and from a Memory Stick, SD or MultiMediaCard (MMC). Memory cards are
used in a variety of digital devices such as digital cameras, digital camcorders and mobile phones.
Insert a card (label side up) into the slot until it clicks into place.
The card now appears on My Computer as a removable storage device that you can copy files to and
from.
To remove the card from the slot, do the following:
1. Make sure no operation (e.g., file copying or deletion) is using the card.
2. Press the card further into the slot to release the card (you hear a click); then pull out and remove
the card.
Ports and Connectors
72_0128_001
16 May 2005
© 2005 Itronix Corporation. All rights reserved.
Icon
Ports and Connectors Connection Location
RJ-11
Phone line/modem (internet and fax)
RJ-45
Ethernet
DC-in
AC Adapter (power)
2 USB 2.0
USB Peripherals such as a mouse or
printer
Multi-I/O Extension
Slot
Vehicle Dock, Desk Mount
Audio In
Microphone
Page 29 of 100GoBook PRO II Hel
p
 Loading...