

Page 1
Installing the 2.4GZ OpenWay Gas Module
• If the index wriggler has a drive post (1), place the index wriggler's drive post
in the backplate wriggler's drive slot (2).
1
2
WARNING! Failure to place the drive post into the drive slot can cause binding
and lead to poor registration or meter failure
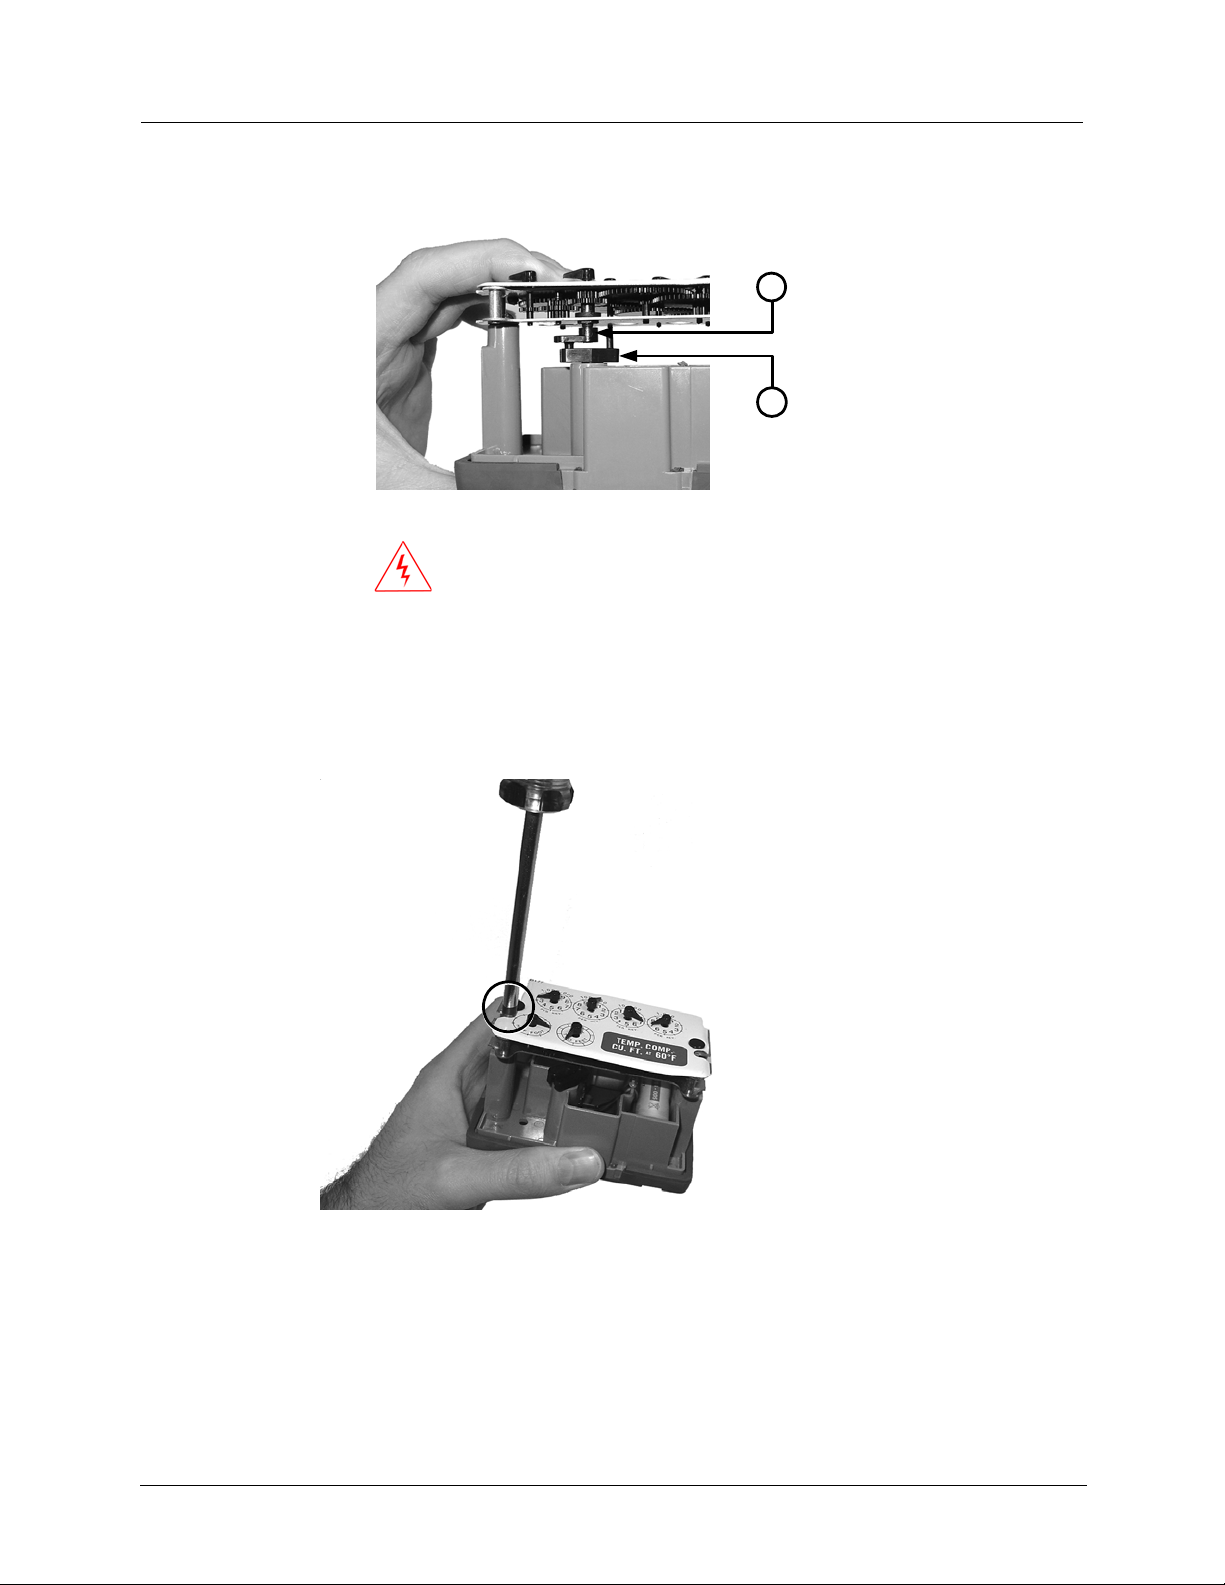
9. Install and tighten the left-hand index mounting screw (for indexes with either
mounting screw slots or holes). Use one 8 - 32 x 3/16-inch screw for this step (you
can use an original mounting screw if it was the correct size and not corroded;
otherwise, use the correct size replacement screw).
10. Tighten the right-hand index mounting screw.
11. Slide the OpenWay Gas Module cover (1) over the index and backplate (2).
2.4GZ OpenWay Gas Module Installation Guide 15
Page 2
Chapter 2 American Meter Installation
Next, program the OpenWay Gas Module.
Program the OpenWay Gas Module
Once the OpenWay Gas Module has been assembled, the module must be programmed
using FieldPro on a laptop with a ZigBee dongle. Refer to FieldPro documentation for
programming information.
IMPORTANT You must perform the following programming procedure for
the OpenWay Gas Module to function properly.
When programming the OpenWay Gas Module, you must take note of the drive rate shown
on the index of American meters.
16 2.4GZ OpenWay Gas Module Installation Guide
Page 3

Installing the 2.4GZ OpenWay Gas Module
Examples of 1-foot (1) and 2-foot (2) drive rates are shown below (a 0.05 cubic metre drive
rate is not shown). Be sure to program the OpenWay Gas Module based on the drive rate
indicated on the index.
1
2
To Program the OpenWay Gas Module
1. Make sure the 2.4GZ OpenWay Gas Module is within 10 feet of the programming
device.
2. Verify that the programming software is running.
3. Verify that red LED on ZigBee dongle is on.
4. Hold the magnet under the 2.4GZ OpenWay Gas Module for 5 seconds and then
remove it. You will see three red blinks from the LED. This signifies that the 2.4GZ
OpenWay Gas Module is searching for a programming device. Within a few seconds
the red LED will blink five more times. The programming device will indicate
programming success or failure.
a) If five red LED blinks are not seen on the 2.4GZ OpenWay Gas Module, hold the
magnet under 2.4GZ OpenWay Gas Module for 5 seconds.
2.4GZ OpenWay Gas Module Installation Guide 17
Page 4
Chapter 2 American Meter Installation
b) If 5 red LED blinks are seen on the 2.4GZ OpenWay Gas Module, but the
programming device indicates that programming failed, verify the following (1)
2.4GZ is within 10 foot range of programming device and (2) programming
software is using correct security key. Repeat holding magnet under 2.4GZ for 5
seconds.
When the 2.4GZ OpenWay Gas Module has been programmed to normal mode, it is ready
to commission to an OpenWay CENTRON meter. If an OpenWay CENTRON meter is
within range of the 2.4GZ OpenWay Gas Module, the red LED on the 2.4GZ OpenWay Gas
Module will blink three times, indicating that it is looking for all available OpenWay
CENTRON meters.
After choosing the OpenWay CENTRON meter with the best signal, the 2.4GZ OpenWay
Gas Module will blink five times to indicate successful commissioning to the meter. The
timing for this could be as quick as one second after being programmed. If within two
minutes of successful programming, the five blinks are not seen, make note of the
installation for further investigation.
NOTE Itron will be moving to this programming solution in 2008
1. Using the FC200 and Belt Clip radio, program the reading of the index that was on the
meter into the OpenWay Gas Module assembly.
During programming, the OpenWay Gas Module is programmed to the nearest 100
cubic feet; the last two digits (the tens and units) are programmed as zeros (0). Once
programming is complete, however, the OpenWay Gas Module assembly can be read
to the nearest cubic foot.
2. Slowly turn the OpenWay Gas Module drive wriggler two turns in the direction
indicated on the index drive rate. This lets you verify the module is counting properly
after assembly.
IMPORTANT Do not turn the drive wriggler faster than one turn per second.
18 2.4GZ OpenWay Gas Module Installation Guide
Page 5

Installing the 2.4GZ OpenWay Gas Module
3. Read the OpenWay Gas Module assembly using the FC200 and Belt Clip radio.
Consult the EndPoint-Link Programming Guide or other applicable instructions for
details on how to read an OpenWay Gas Module.
• If this reading is higher than the one you programmed in step 1 above, the
module assembly is counting correctly.
If the OpenWay Gas Module assembly reading is not higher than what was programmed in
step 1, replace the module with a new one.
2.4GZ OpenWay Gas Module Installation Guide 19
Page 6
Chapter 2 American Meter Installation
Attach the OpenWay Gas Module to the Meter
After the 2.4GZ OpenWay Gas Module has been programmed and is reading correctly,
follow the steps below to attach it to the meter.
To attach the 2.4GZ OpenWay Gas Module to the meter
1. For 5B 225 Meters Only: If you are installing the OpenWay Gas Module on a 5B
225 aluminum meter, cut 1/16-inch off each post of the module wriggler to prevent it
from rubbing on the face of the nut that holds the wriggler in place. If you are not
installing on a 5B 225 meter, continue to step 2 below.
2. Set the wriggler to the desired position for mounting the OpenWay Gas Module
assembly to the meter.
• For One-Foot Meters: Align the OpenWay Gas Module assembly wriggler
with the meter drive post (as shown below). Make sure the wriggler is
perpendicular to the meter drive post.
20 2.4GZ OpenWay Gas Module Installation Guide
Page 7

Installing the 2.4GZ OpenWay Gas Module
• For Two-Foot Meters: Align the OpenWay Gas Module assembly wriggler
with the meter drive slot (as shown below). It is acceptable for the pin on the
module wriggler to be installed inside or outside of the meter drive slot. For
ease of assembly, Itron recommends that the pin on the OpenWay Gas Module
wriggler be installed outside of the meter drive slot.
3. Gently place the OpenWay Gas Module assembly on the meter. Align the four screw
holes on the module assembly with the holes on the meter.
4. Turn each screw 1/4 to 1/2 turn after it contacts the cover. Use the 1/4 - 20 x 5/8-inch
screws for this step. You can use the original mounting screws if they were the correct
size and not corroded, otherwise, use the correct size
Replacement Screws on page 7.
IMPORTANT Meter manufacturers should torque the mounting screws 15 to 20
inch-pounds.
2.4GZ OpenWay Gas Module Installation Guide 21
Page 8

Chapter 2 American Meter Installation
3
2
41
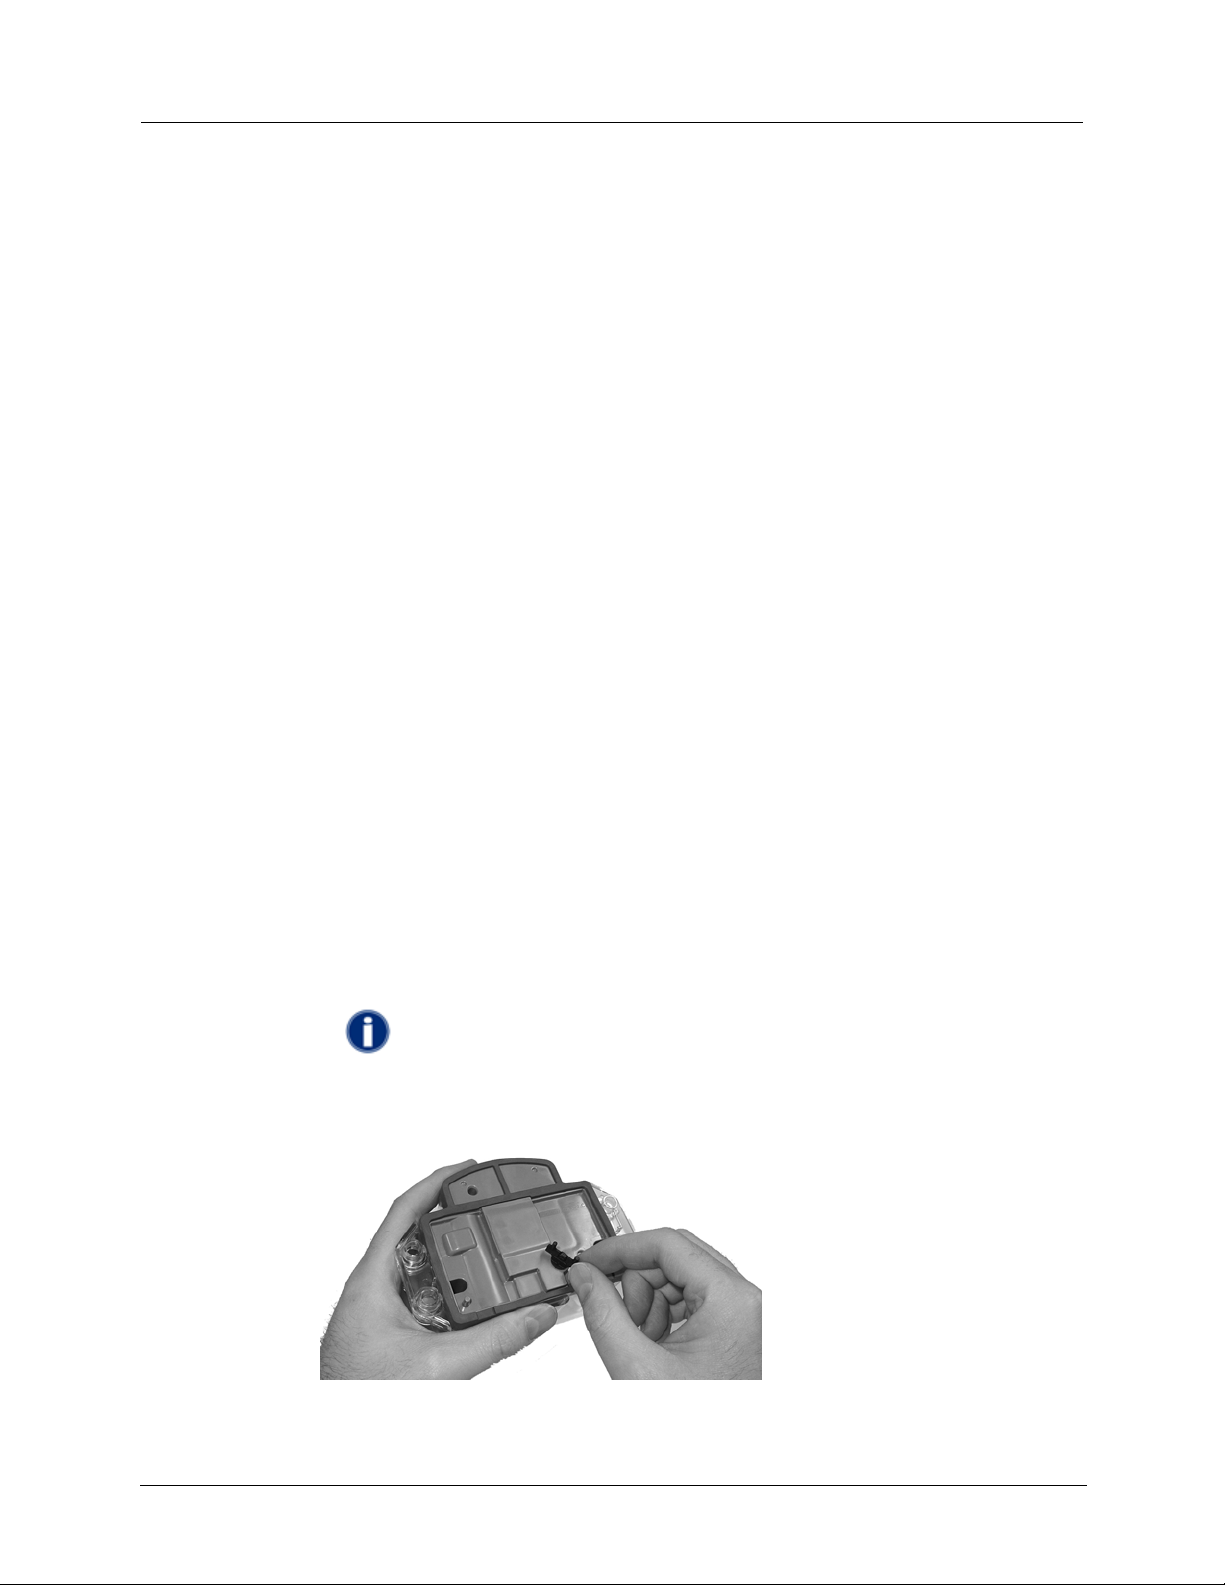
5. Place a new tamper seal over two of the mounting screws as shown below.
2
1
6. Press the new tamper seals into place using the 11/32-inch nut driver (or another
similar blunt tool).
7. Complete any necessary paperwork. Make sure no excess material is left on the
customer premises; dispose of it properly.
22 2.4GZ OpenWay Gas Module Installation Guide
Page 9

Installing the 2.4GZ OpenWay Gas Module
The OpenWay Gas Module is now installed on the meter.
Waking Up the 2.4GZ OpenWay Gas Module
You can use an Itron magnet (part number MSE-0159-003) to wake up the 2.4GZ
OpenWay Gas Module.
To wake up the 2.4GZ OpenWay Gas Module
1. Place the magnet under the index cover with the arrow on the magnet pointing up
toward the cover.
2.4GZ OpenWay Gas Module Installation Guide 23
Page 10

Chapter 2 American Meter Installation
2. Slide the magnet back toward the 2.4GZ OpenWay Gas Module backplate until it is
within a 1/4-inch of the backplate.
3. Hold the magnet there for five seconds to wake up the 2.4GZ OpenWay Gas Module.
24 2.4GZ OpenWay Gas Module Installation Guide
Page 11

C HAPTER 3
Sensus Meter Installation
This chapter shows you how to install a 2.4GZ OpenWay Gas Module on a Sensus meter.
The instructions in this chapter apply to 11-tooth, 16-tooth, and 18-tooth Sensus endpoints.
Installation Prerequisites
The following items are required to install the Itron 2.4GZ OpenWay Gas Module.
Materials Supplied By Itron
The following items are supplied by Itron:
• 2.4GZ OpenWay Gas Modules
• New tamper seals
Materials Supplied By You
You must supply the following items to install, initialize, and check the 2.4GZ OpenWay
Gas Module on the meter.
• Small and medium flat-blade or Phillips screwdrivers Used to remove and tighten
index and index-cover screws.
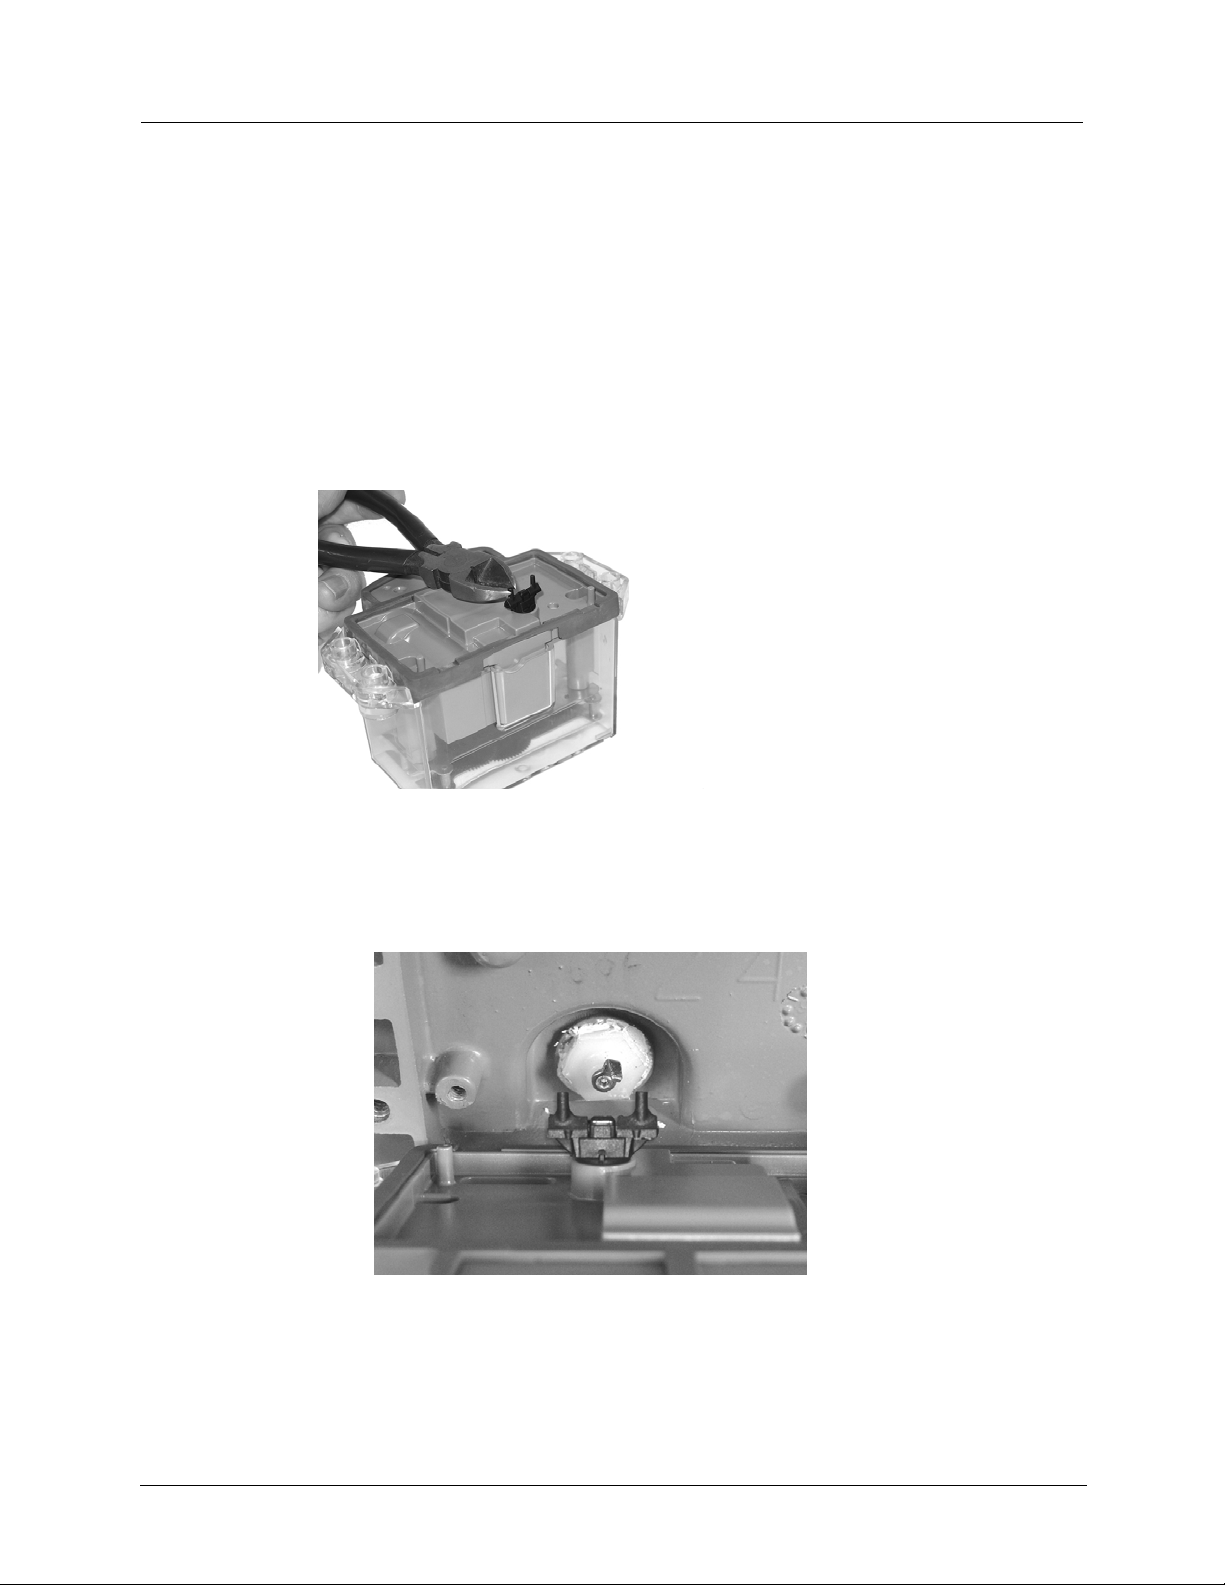
• Side-cutting plier/wire snips Used for cutting wire seals, if necessary.
• Small putty knife Used to remove all traces of old gaskets from the meter.
• Meter seals, wire seals, and seal press Used to secure the meter from tampering, if
necessary.
• 11/32-inch nut driver or other blunt tool Used to securely seat new tamper plugs
over screw holes.
• Replacement screws Used to mount 2.4GZ OpenWay Gas Module assembly to
meter and index to module assembly backplates.
Replacement Screws
Replacement screws used in this procedure are shown below.
For mounting 2.4GZ OpenWay Gas Module assemblies on meters:
• Use 10 - 24 x5/8-inch slotted, Fillister head screws.
For mounting indexes on 2.4GZ OpenWay Gas Module backplates:
• Use 6 - 32 x 5/8-inch slotted, round head screws.
2.4GZ OpenWay Gas Module Installation Guide 25
Page 12

Chapter 3 Sensus Meter Installation
Preinstallation Preparations
Before installing the 2.4GZ OpenWay Gas Module on a meter, verify that:
• All Itron gas modules are 2.4GZ OpenWay Gas Modules for your brand of gas
meters.
• The model numbers of all meters on which the 2.4GZ OpenWay Gas Modules will be
installed are included in the Meter Compatibility List.
Installing the 2.4GZ OpenWay Gas Module
There are four major steps to installing the 2.4GZ OpenWay Gas Module on a meter:
• Remove the index
• Assemble the 2.4GZ OpenWay Gas Module
• Program the 2.4GZ OpenWay Gas Module
• Attach the 2.4GZ OpenWay Gas Module to the meter.
NOTE Properly dispose of all unused screws, old index covers, gaskets, tamper
seals, and other left-over materials. Do not leave any materials on customer
premises.
Remove the Index
The first major step when installing a 2.4GZ OpenWay Gas Module on a Sensus meter is to
remove the existing index from the meter.
To Remove the Index
1. Remove any tamper seals from the meter.
2. Detach the index cover from the meter by removing the four screws holding it in
place.
4
2
1
3
26 2.4GZ OpenWay Gas Module Installation Guide
Page 13

Installing the 2.4GZ OpenWay Gas Module
3. Examine the index cover screws you just removed. Verify that they are 5/8-inch long
and are not corroded.
• If the screws are 5/8-inch long and are not corroded, keep them for later use.
• If they are an incorrect length or are corroded, dispose of them properly. Use 10
- 24 x 5/8-inch screws as described in
Replacement Screws on pag
e 25 instead.
TIP You can use the index cover you just removed as a temporary storage
location for screws.
4. Unscrew one index mounting screw completely.
5. Remove the other index mounting screw.
6. Set the index aside for the moment. Place it where it will not be damaged; get filled
with dirt, rain or snow; or fall to the ground or floor. The index will be used later in
this procedure.
7. Examine the index screws you just removed. Verify that they are 5/8-inch long and
are not corroded.
• If the screws are 5/8-inch long and are not corroded, keep them for later use.
• If the screws are an incorrect length or are corroded, dispose of them properly.
Use 6 -32 x 5/8-inch screws as described in
Replacement Screws o
n page 25
instead.
2.4GZ OpenWay Gas Module Installation Guide 27
Page 14

Chapter 3 Sensus Meter Installation
8. Use a putty knife or similar object to completely remove the old index gasket from the
meter (if applicable). All traces of the gasket must be removed before the OpenWay
Gas Module can be installed.
Assemble the OpenWay Gas Module
When installing a 2.4GZ OpenWay Gas Module, the next major step is to create the
OpenWay Gas Module assembly by combining the module backplate and cover with the
meter index. Follow the procedure below to do so.
To Assemble the OpenWay Gas Module
1. Obtain a new 2.4GZ OpenWay Gas Module.
2. Separate the OpenWay Gas Module backplate from the cover.
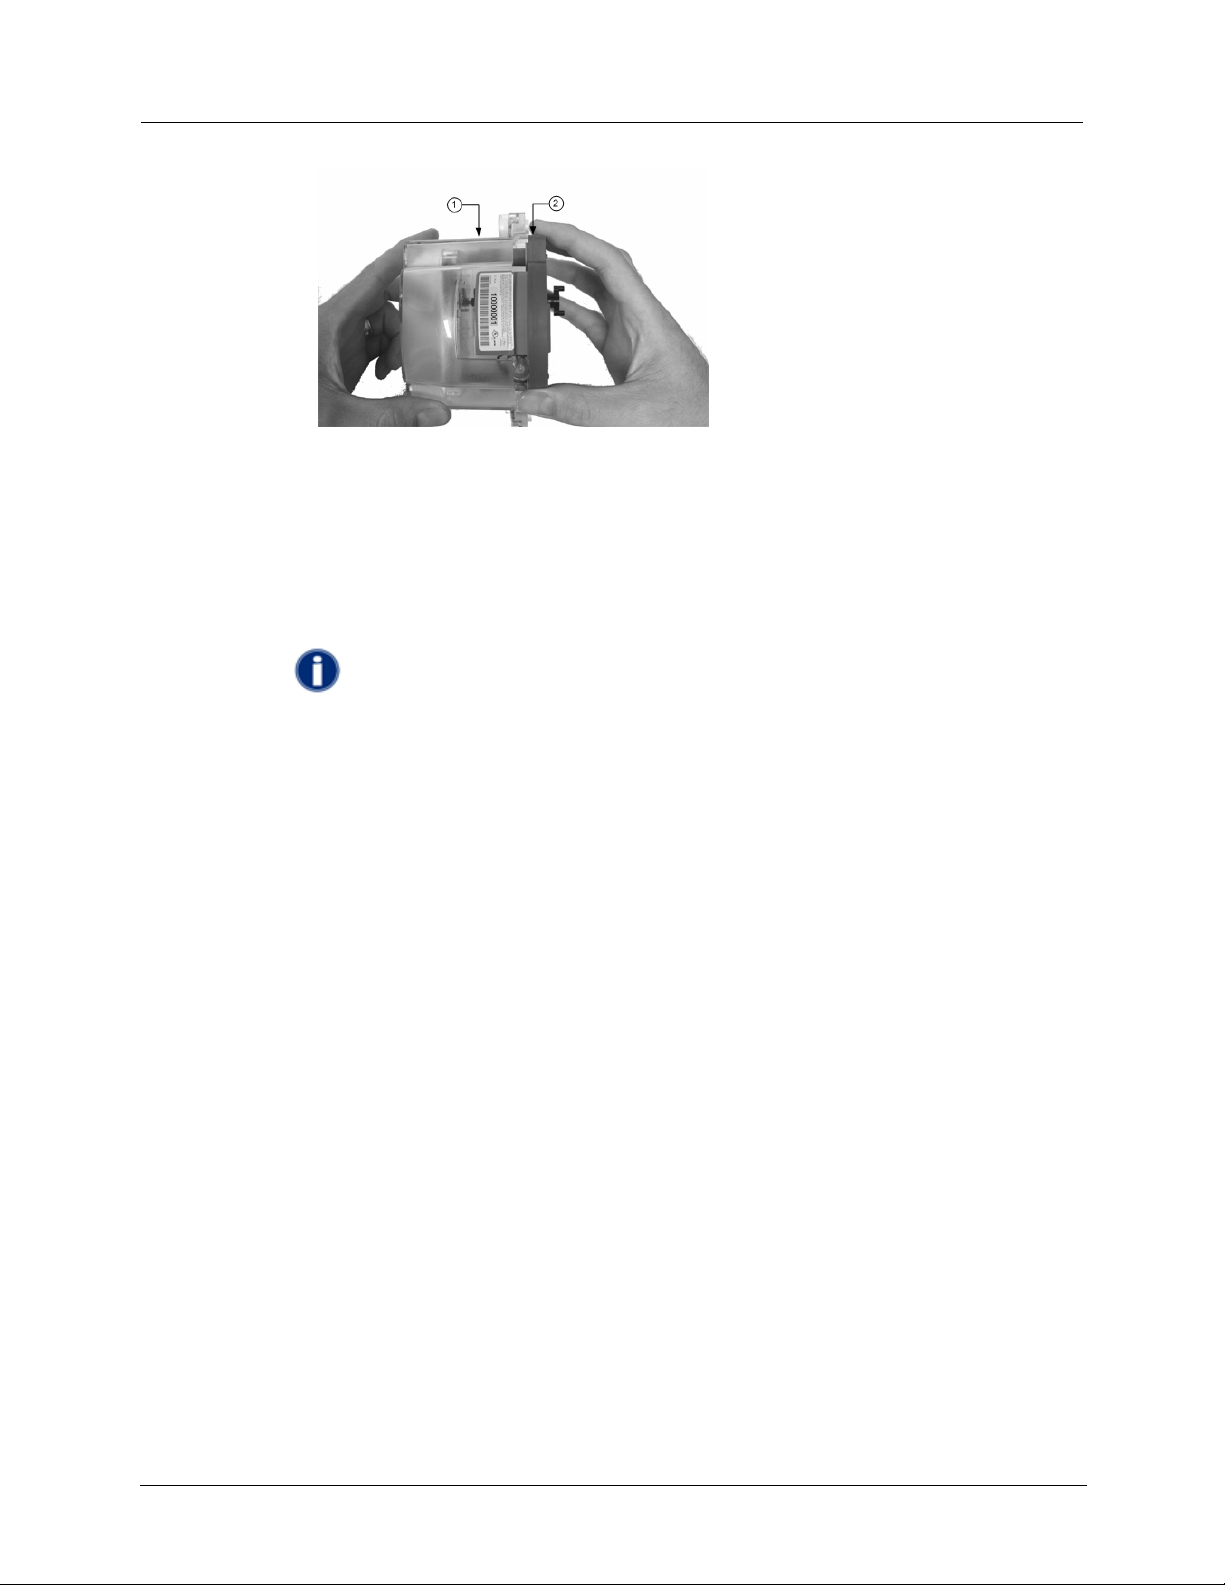
3. Place the index drive gear (1) in the backplate wriggler gear cup (2) of the OpenWay
Gas Module (please note that the following example uses an 11-tooth drive gear; your
index may have a 16- or 18-tooth drive gear, and you must use the appropriate 2.4GZ
OpenWay Gas Module for your specific meter. See the
page
2 for more information).
Meter Compatibility list on
28 2.4GZ OpenWay Gas Module Installation Guide
Page 15

Installing the 2.4GZ OpenWay Gas Module
Once properly in place, the index drive gear and backplate wriggler cup should look
similar to the following example.
4. Attach the right-hand mounting screw to the index and meter, just far enough to hold
the index in place. Use one 6 - 32 x 5/8-inch screw for this step (you can use an
original mounting screw if it was the correct size and not corroded; otherwise, use the
correct size
Replacement Screw s
ee "Replacement Screws" on page 25).
1
2
5. Install and tighten the left-hand index mounting screw.
6. Tighten the right-hand index mounting screw completely.
2.4GZ OpenWay Gas Module Installation Guide 29
Page 16

Chapter 3 Sensus Meter Installation
7. Slide the OpenWay Gas Module cover over the index and backplate.
8. Verify that the cover is installed correctly.
Once combined, the OpenWay Gas Module backplate, meter index, and OpenWay
Gas Module cover create an OpenWay Gas Module Assembly.
Next, program the OpenWay Gas Module.
Program the OpenWay Gas Module
Once the OpenWay Gas Module has been assembled, the module must be programmed
using FieldPro on a laptop with a ZigBee dongle. Refer to FieldPro documentation for
programming information.
IMPORTANT You must perform the following programming procedure for
the OpenWay Gas Module to function properly.
When programming the OpenWay Gas Module, you must take note of the drive rate shown
on the index of Sensus meters. Sensus meters have a 2-foot drive rate, as indicated in the
example below (1), or a 0.05 cubic metre drive (not shown).
1
30 2.4GZ OpenWay Gas Module Installation Guide
Page 17

Installing the 2.4GZ OpenWay Gas Module
To Program the OpenWay Gas Module
NOTE Itron will be moving to this programming solution in early 2008
1. Using the FC200 and Belt Clip radio, program the reading of the index that was on the
meter into the OpenWay Gas Module assembly.
During programming, the OpenWay Gas Module is programmed to the nearest 100
cubic feet; the last two digits (the tens and units) are programmed as zeros (0). Once
programming is complete, however, the module assembly can be read to the nearest
cubic foot.
2. Slowly turn the OpenWay Gas Module drive wriggler two turns in the direction
indicated on the index drive rate. This lets you verify the module is counting properly
after assembly.
IMPORTANT Do not turn the drive wriggler faster than one turn per second.
3. Read the OpenWay Gas Module assembly using the FC200 and Belt Clip radio.
Consult the EndPoint-Link Programming Guide or other applicable instructions for
details on how to read an OpenWay Gas Module.
• If this reading is higher than the one you programmed in step 1 above, the ERT
module assembly is counting correctly.
• If the OpenWay Gas Module assembly reading is not higher than what was
programmed in step 1, replace the module with a new one.
Attach the OpenWay Gas Module to the Meter
After the OpenWay Gas Module has been programmed and is reading correctly, follow the
steps below to attach the module to the meter.
2.4GZ OpenWay Gas Module Installation Guide 31
Page 18

Chapter 3 Sensus Meter Installation
To Attach the OpenWay Gas Module to the Meter
1. Gently place the OpenWay Gas Module assembly against the front of the meter as
shown. Make sure all four mounting screw holes in the 2.4GZ line up with the
corresponding holes on the meter.
2. Insert the top-right cover mounting screw and tighten the screw just enough to hold
the 2.4GZ OpenWay Gas Module in place. Use the 10 - 24 x 5/8-inch screws for this
and the following step (you can use the original mounting screws if they were the
correct size and not corroded; otherwise, use the correct size as described in
Replacement Screws on page 25).
3. Install the remaining three mounting screws and tighten them in the order shown
below.
IMPORTANT Meter manufacturers should torque the mounting screws 15 to 20
inch-pounds.
32 2.4GZ OpenWay Gas Module Installation Guide
 Loading...