

ITI Concord Owner's Manual

CO N CO RD
User's Guide
1
AWAYSTAY
5
ALARM -
Both Flashing
NO DELAY
Test System Weekly
A
B
C
D
press both
press both
press both
Off
No Delay
415
Features
7
Status
*
Stay
Away
23
Silent
Pager
6
System
Menu
8
9
Lights
Bypass
0#
Test System Weekly
A
B
C
D
press both
press both
press both
No Delay
Features
2
6
Off
415
7
Status
*
i
3
4
TroubleBypass
7
8
Check
Status
Enter Code
Power
Stay
Away
3
2
Silent
Pager
6
System
Menu
8
9
Lights
Bypass
0
#

ii
Commands at a Glance
Disarm the system.
Cancel an accidental alarm.
Arm to Level 2—STAY.
Arm to Level 3—AWAY.
Send a police alarm. Press and hold both POLICE
Send an auxiliary alarm. Press and hold both AUXILIARY
Send a fire alarm. Press and hold both FIRE
Arm system with No Delay.
1 + CODE
2 + CODE
3 + CODE
buttons for 2 seconds.
buttons for 2 seconds.
buttons for 2 seconds.
2 + CODE + 4 or
3 + CODE + 4
Arm system for Latchkey.
2 + CODE + 6 or
3 + CODE + 6
Bypass a sensor.
Indirectly:
2 + CODE + ƒ or
3 + CODE + ƒ
Arm system silently.
Directly:
5 + 2 + CODE or
ƒ + CODE + Sensor Number
5 + 3 + CODE
Arm system with
exit lights off.
Turn all lights on/off.
Turn specific lights on/off.
Check the system status.
Turn Chime on/off.
Turn Energy Saver on/off.
Disable local pho ne access.
(This is a phone
command only.)
Check alarm memory.
2 + CODE + 0 or
3 + CODE + 0
0 + 0
0 + Light number
‚
7 + 1
7 + 2
ƒ + 7 + 3
7 + 6

iii
User's Guide
Status
Features
press both
Lights
System
Away
Pager
Off
No Delay
press both
press both
Test System Weekly
Silent
Stay
D
*
7
0
#
8
B
A
415
6
2
3
Bypass
Menu
C
9
5
1
6
2
7
8
3
4
NO DELAY
Enter Code
Power
Check
Status
TroubleBypass
Both Flashing
ALARM -
AWAYSTAY
Status
Features
press both
Lights
System
Away
Pager
Off
No Delay
press both
press both
Test System Weekly
Silent
Stay
D
*
7
0#
8
B
A
415
6
23
Bypass
Menu
C
9
Text: 466–1515 Rev. D

iv

Table of Contents
Getting to Know Your Security System 3
Overview 3
Communicating with the Panel 4
Instructing the Panel 4
Touchpads—Your System Interface 4
Alphanumeric Touchpads 4
LED Touchpads 4
Wireless Handheld Touchpad 4
Keychain Touchpads 4
Touchtone Phones 5
Panic Buttons 5
Beeps—How Your System Talks to You 5
Key Beeps 5
Status Beeps 5
What Happens in an Alarm Condition 5
Notification by Pager 5
Preventing Accidental Alarms 6
Cancelling Accidental Alarms 6
Basic System Operations 7
Arming Your System 7
Arming Level 1—OFF 7
Arming Level 2—STAY 8
Arming Level 3—AWAY 8
Exit and Entry Delay Times 9
Exit Delay Example 9
Entry Delay Example 9
Extended Delay 10
No Delay—For Instant Alarm 10
Arming While a Door or Window is Open 10
Bypassing a Sensor Directly 10
Bypassing a Sensor Indirectly 11
Was the Bypass Successful? 11
Basic Light Control 11
Checking the Status of Your System 12
Short System Status 12
Full System Status 12
Panic Alarms 13
Fire Panic 13
Lighting During a Fire Panic Alarm 13
Resetting Smoke Detectors 13
Police Panic Alarm 13
Lighting During a Police Panic Alarm 13
Auxiliary Panic Alarm 14
Lighting During an Auxiliary Panic Alarm 14
Siren Time-out 14
Assigning User Codes 14
Programming Access Codes 14
Good Access Code Hygiene 14
System Master Code Privileges 15
Partition Master Code Privileges 15
Regular User Code Privileges 15
The Touchpad Tamper Feature 15
Changing or Erasing User Codes 15
Changing a User Code 15
Erasing a User Code 15
Setting the Time and Date 16
Adjusting System Sounds and Touchpad Brightness 16
Arming Your System Silently 16
Silent Arming on Demand 16
Arming Always Silent 16
Using the Chime Feature 17
Adjusting the Volume of the Wireless Siren 17
Adjusting the Touchpad Display Brightness 17

Using the Energy
Saver Feature 18
Energy Saver Example 18
Setting the Energy Saver High and
Low Temperature Settings 18
Turning Energy Saver On and Off 19
Notification by Pager 20
Pager Messages 20
Streamlining the Page Report 20
Creating Time Schedules 21
Scheduling Consecutive Days 21
One Day Rollover 21
Multiple Day Rollover 21
Attaching Time Schedules 22
Time Schedules and Partitions 22
Advanced Light Control 22
Controlling Lights By Time Schedule 22
Installer Programmable Lighting 23
Opening and Closing Reports 23
When Will this Feature Be Active? 23
Who Will Be Paged? 23
What Will the Pager Report? 23
Assigning a Time Schedule
to Exception Opening and Closing 26
The No Activity Feature 28
Using the Panel Downlo ad Feature 28
System Information 28
Using a Partitioned System 29
Global Settings 29
Partition-Specific Settings 29
Jumping Partitions 29
Arming and Disarming the Other Partition 29
Programming the Other Partition 29
Using a Touchtone Phone to Operate Your
System 30
Phone Command Prefix 30
Accessing the System from Off-site 30
How the Panel Answers the Phone 30
Codes with Remote Access Capability 30
Touchtone Phone System Operation 31
Sending a Police Panic Alarm 31
Using the Voice Chime Feature 31
Latchkey Paging 24
Page In the Event of . . . 24
Who Will Be Paged? 24
Who Can Send a Page? 24
What Will the Pager Report? 24
Latchkey Opening 24
Basic Latchkey Opening 24
Advanced Latchkey Opening 25
Latchkey Closing 25
Assigning a Time Schedule
to Latchkey Paging 25
Applying the Latchkey 6 25
Notify by Exception 26
Page In the Event of . . . 26
Who Will Be Paged? 26
Who Can Send a Page? 26
What Will the Pager Report? 26
When Will this Feature Be Active? 26
Testing the System 32
Automatic Test Features 32
Manual Tests 32
Sensor Test 32
Phone Communication Test 34
Troubleshooting 35
Appendix A: User Sheets 39
Appendix B:
Planning for Emergencies 45
Appendix C:
Shortcuts to User Programming 49
ECTION
S
ETTING TO KNOW YOUR
G
ECURITY SYSTEM
S
1:
3
This security system is designed to protect your
family and property, whether you ar e on the
premises or away.
This manual describes how to operate your system.
It describes basic arming and disarming commands
as well programming instructions for system features.
The dealer or installer may have already discussed
with you many details concerning your system.
Specific setup information is included in the User
Sheets, found in Appendix A.
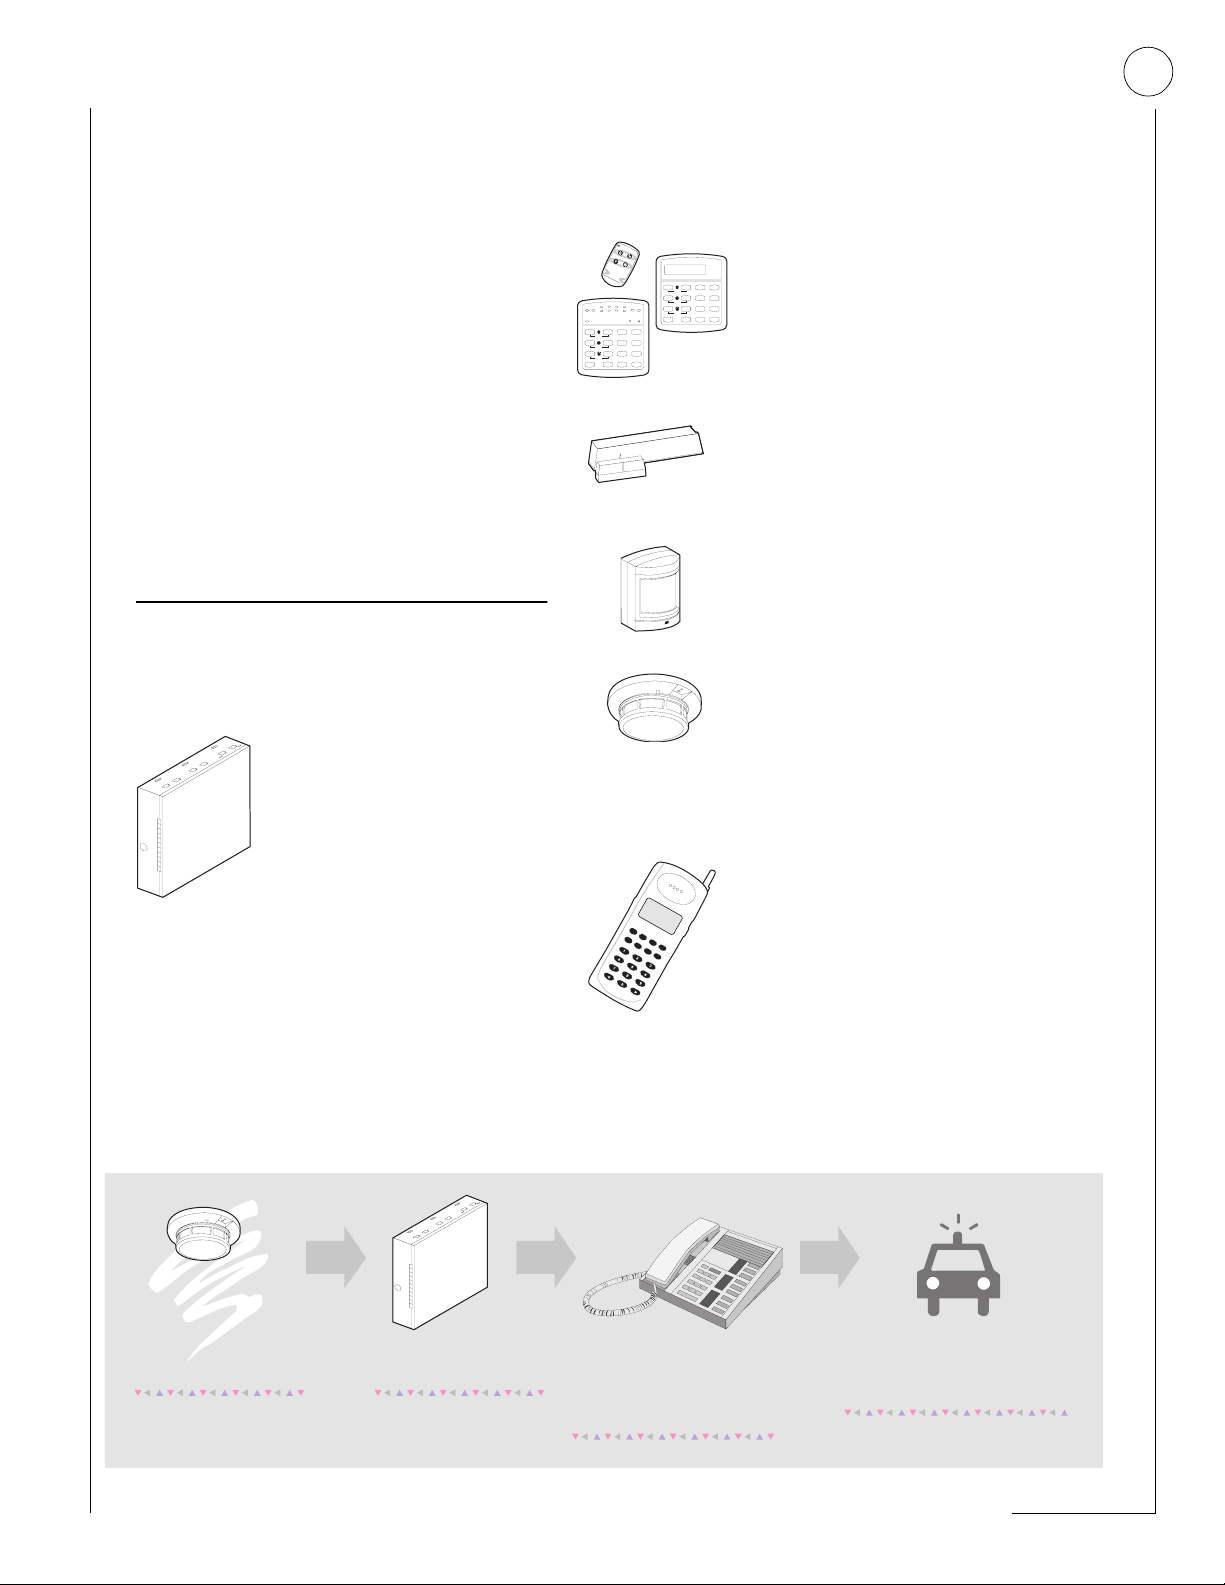
Overview
Your security system is comprised of different components. Each component plays a special role in
the system’s operation:
The panel is at the heart of your
system. It stores the intelligence to monitor all the sensors
and devices in the system. The
panel is the piece of equipment
that initiates a call to the centr al
station in an alarm situation.
The panel’s circuitry is enclosed in a steel cabinet
and is installed out of the way of household or
workplace traffic.
3
4
1
TroubleBypass
AWAYSTAY
627
8
5
Check
ALARM -
Status
Both Flashing
Enter Code
Power
NO DELAY
Test System Weekly
Stay
Away
Off
23
A
press both
Silent
Pager
No Delay
4156
B
press both
Features
System
Menu
8
7
C9
press both
Status
Lights
Bypass
D
0#
*
Test System Weekly
A41562
B
C
D
Touchpads allow you to
communicate with your panel.
Stay
Away
Off
3
press both
Silent
Pager
No Delay
press both
press both
You’ll use a touchpad to arm,
Features
System
Menu
8
7
9
Status
Lights
Bypass
0#
disarm, and program your
*
system.
Door and window sensors protect the perimeter of your home
by alerting the panel when a
door or window is opened.
Motion detectors in hallways or
individual rooms detect a person moving across the field of
detection.
Smoke and heat detectors
remain alert for the presence of
fire 24 hours a day.
Other environmental sensors
detect freezing temper atures o r
carbon monoxide.
Your system may contain a
Phone Interface and Voice
Module that allows you to use
a Touchtone phone located onor off-site as a touchpad. The
module also makes it possible
to get voice feedback from
speakers, guiding and informing
with spoken prompts and system status reports.
A s e n s o r is a c tiv a te d .
The sensor im m ediately
a le rts th e p a n e l.
The pan el activates sirens and
lights. If the system is m onitored,
th e p a n e l c a lls th e c e n t r a l
m onitoring station.
The central m onitoring station
operator reports the alarm to
the police or fire departm ent.
4
1
2
3
6
9
8
5
4
7
ST
0
BY
OFF
STAY
AWAY
NO DELAY
CHIME
STATUS
BYPASS
COMMAND
ECTION
S
OMMUNICATING
C
2:
WITH THE PANEL
Touchpads allow you to communicate with the
panel. In turn, the system can be set up to communicate with you through:
• status beeps from touchpads and speakers,
• alarm sirens,
• scrolling text on alphanumeric touchpads,
• flashing lights on LED touchpads,
• voice feedback over Touchtone phones or
interior speakers, and
• system information over pagers.
Instructing the Panel
Most of your ins tructions t o the panel consis t of this
basic pattern:
Command A ccess C o de
Not just anyone can walk up to a touchpad and
operate your security system. Before the system
will process most commands, users are required to
enter a pre-programmed 4-digit access code.
Keychain touchpads that are enroll ed as part of the
system do not require an access code, but are usually kept in an individual’s pocket or purse.
If you would rather use an
actual key to arm and disarm
the system, your security
dealer can install a special key
and keyswitch in your home.
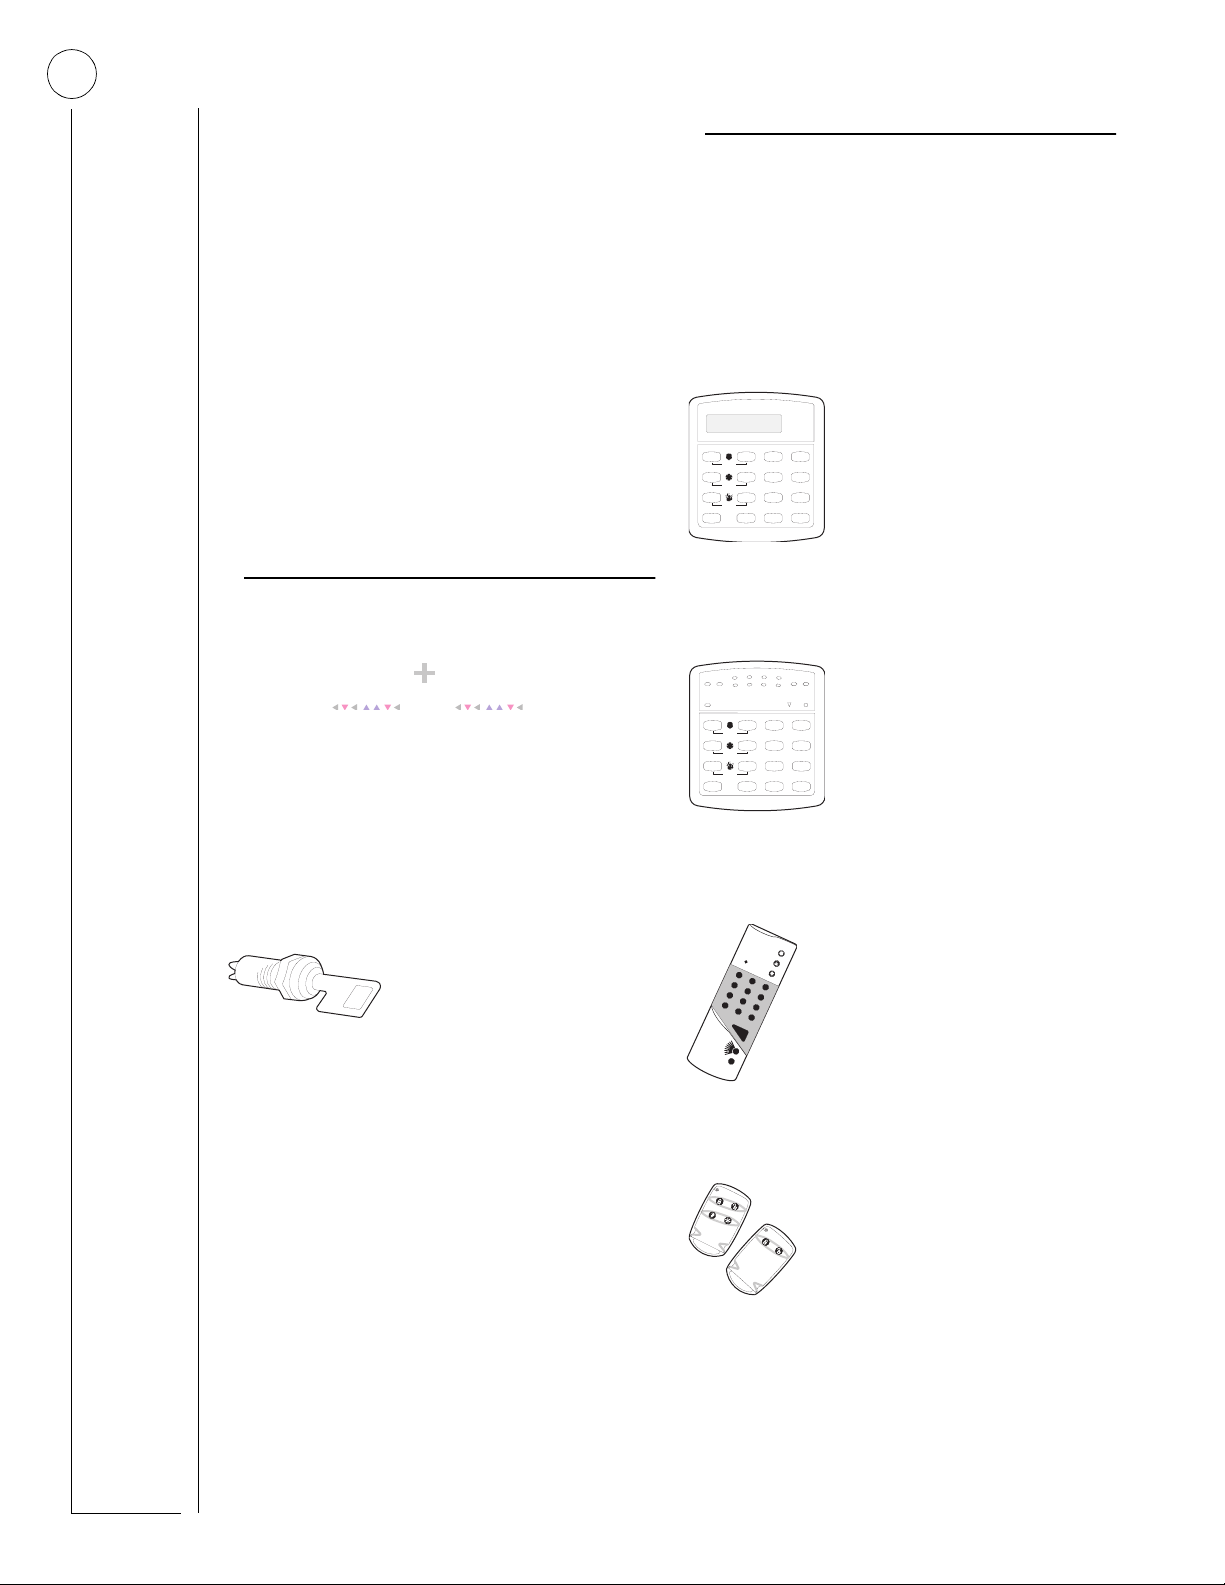
Touchpads—Your System Interface
There is a broad range of touchpads that can be
used with your panel—from a single-button panic
sensor which sends only panic alarms, to an alphanumeric touchpad that displays text and allows
extensive user progr amming.
Alphanumeric Touchpads
Alphanumeric touchpads are
mounted on a wall and commu-
Test System Weekly
A41
press both
B
press both
C
press both
D
No Delay
Features
Status
Off
7
*
Stay
2
Silent
5
System
8
Lights
0#
nicate by displaying text on a
Away
3
Pager
two-line display.
6
Menu
9
Bypass
LED T ouchpads
LED touchpads are mounted on
TroubleBypass
a wall and communicate by
Check
Status
Enter Code
Power
lighting specific LEDs and LED
Away
Pager
light patterns on the touchpad.
6
Menu
9
Bypass
ALARM -
Both Flashing
NO DELAY
Test System Weekly
A41
B
C
D
3
2
4
1
AWAYSTAY
7
6
8
5
Stay
Off
23
press both
Silent
No Delay
5
press both
Features
System
8
7
press both
Status
Lights
0#
*
Wireless Handheld Touchpad
This touchpad is wireless and
can be carried from room to
room. Users can even arm the
system from outside the home
or business.
Keychain Touchpads
Keychain touchpads are handy for
simple arming and disarming functions. They are wireless and can
be carried off-site in a purse or
pocket.
The installer can program specific
buttons or button co mbinations to oper ate a gate or
garage door, or to send a Police or Auxiliary panic
alarm.

5
To uc htone Phones
Your system can be set up to allow
system operation from a Touchtone
phone on- or off-site. This includes
arming and disarming, plus system
features such as checking the sy st em
status and turning on and off lights.
Panic Buttons
Panic button touchpads are dedicated to sending only one signal—
usually a Police or Auxiliary panic
alarm. These touchpads are wireless
and usually kept near the user.
Beeps—How Your System Talks to You
Touchpads and interior sirens produce a variety of
operating beeps to inform you of different system
states and operations.
There is more than one type of Status beep:
• Exit Delay beeps indicate that an arming command has been entered and the countdown to
arming has begun.
• Entry Delay beeps indicate that you’ve entered
the building and the countdown to an alarm has
begun. (So disarm the system as soon as you get
in!)
• Chime feature beeps tell you that a door was
opened.
• Protes t beeps inform you that y ou’re trying to arm
the system while there is an open door or window.
• Trouble beeps tell you that there is a problem
with the system or one of its components.
• Sensor test beeps are the sound the system mak es
during a sensor test to indicate that a sensor was
tested properly.
Status beeps are described in more detail throughout the manual.
What Happens in an Alarm Condition
Key Beeps
A Key beep is the tone you hear when you press a
button on an alphanumeric, LED, or handheld wireless touchpad. The sound confirms that the button
was pressed adequately. Key Beeps can be turned
on or off by the installer.
Status Beeps
Status beeps come fr om t ouchpads or s peak ers and
are sounded when there is a change in the current
status of the system. Status beeps are not alarms,
but they do warrant your attention.
When there is an alarm condition, three things happen all at once:
• Speakers and touchpads emit emergency tones
• System lights flash
• Panel notifies the central station for help.*
* Your system may or may not be monitored.
If it is not monitored, no call will be made.
Notification by Pager
Y our sys tem can notify up to five different pagers to
report events.
Some of the events include:
• System disarming
•System arming
• T rouble conditions
• Alarm conditions
For more information, see “Notification by Pager”
on page 20.

6
G u id e lin e s fo r P re v e n tin g
A ccidental A larm s
Close doors and w indow s before you leave
W hen getting ready to leave the house, gather
A lw ays enter and exit w ithin the program m ed
M ake sure yo u leave throu gh a door that has
W h e n y o u re tu rn , im m e d ia te ly d isa rm yo u r sy ste m .
B e a w a re o f th e d evice s in yo u r sec u rity sy stem
Liste n to system b ee p s an d vo ice a n no u n c e m e n ts.
If yo u have p ets, ask yo ur installer if yo u need pet
Check the location of your sm oke detectors.
ECTION
S
REVENT ING ACCIDENTAL ALARMS
P
Your security system is engineered with advanced
technology that reduces the chance of an accidental alarm caused by a te chnical pro blem. In wireless
systems, this te chnology prevents o ther devices,
such as garage door openers, ham radios, television
remote controls, and cellular phones, from interfering with your security system.
Most accidental alarms occur when leaving the
house after arming the system, or upon returning,
before disarming the system.
If, for example, you arm the system, then run
upstairs for something you forgot, the Exit Delay
time may expire. Once the Exit Delay expires,
opening an armed door or moving in front of a
motion detector will cause an alarm.
3:
Cancelling Accidental Alarms
Your system can be set up with the opportunity to
cancel an accidental intrusion, Police or Auxiliary
alarm. (Fire alarms cannot be cancelled.)
If the Dialer Abort feature is turned on, cancelling
the alarm within a specified period will silence the
siren and prevent the alarm from being reported to
the central monitoring station.
Cancelling a fire alarm will silence the siren, but fire
alarms are always r eported. If an accidental fire
alarm has sounded, follow the procedures of your
central monitoring station to prevent a false dispatch.
To cancel an alarm:
1. Press
2. Enter your access code.
1—OFF at any touchpad.
• Alphanumeric touchpads display,
“ENTER CODE.”
• On LED touchpads, the Enter Code light
blinks.
• Alphanumeric touchpads display
date and time, or programmed text.
• On LED touchpads, the Enter Code light
stops blinking.
The system sounds one long beep.
If you’re using a Touchtone phone, see “Using a
Touchtone Phone to Operate Your System” on
page 30.

7
ECTION
S
ASIC SYSTEM OPERATIONS
B
This section describes:
• Arming your system.
• Bypassing sensors so you can arm your system
while a window is open.
• Basic light control .
For instructions on usin g a pho ne to perform any of
these functions, see “Using a Touchtone Phone to
Operate Your System” on page 30.
4:
Arming Your System
Since your security needs may vary throughout the
day , this sys t em w as desi gned with three arming levels to meet these different needs. By arming your
system to a particular level, only those sensors programmed to detect in that arming level will report
alarm conditions to the panel.
No matter which level your system is in, all sensors
programmed to be active 24 hours a day will continue to report alarm conditions. This includes
smoke detectors, fire sensors, panic buttons, and
environmental sensors.
Level 3AW AY
A ll p e rim e te r s e n so rs a re a c tiv e ,
plus interior sensors.
Level 2 STA Y
P e rim e ter p ro te ctio n is o n .
In te rio r se n so rs a re n o t a c tiv e , so p e o p le
and pets can m ove around freely.
Sm oke detectors, fire
sensors, and other
eniro nm ental sensors
continue to report
a la rm s in a ll le v e ls .
Level 1 O FF
In tru sio n d e te c tio n o ff.
Sm o ke, heat, and eniron m ental
se n so rs rem ain active .
Arming Level 1—OFF
Use arming Level 1 when the system is not being
used for intrusion detection. For example, on an
active Saturday morning—kids playing inside and
out, someone working in the garage, various house
projects going on.
Even though Arming Level 1 disarms the system,
your system continues to monitor fire, smoke, and
panic alarms.
Here are some other situations in which you’d set
the system to Level 1—OFF:
Upon entering the armed premises. When entering the armed premises through a designated delay
door, the entry delay time begins. Sirens beep to
remind you to disarm the system.
Before opening a door or window while inside or
outside the armed premises. When you wake up
in the morning and want to get your newspaper,
you must disarm the system before opening the
door to prevent an accidental alarm.
To stop sirens and cancel an alarm. When an
alarm condition occurs disarming the system turns
off any sirens.
To disarm to Level 1—OFF using a touchpad:
1. Press
2. Enter your access code.
3. The system sounds one long beep.
To disarm to Level 1—OFF using a keychain
touchpad:
• Press the Unlock button
1—OFF at any touchpad.
• Alphanumeric touchpads display,
“ENTER CODE.”
• On LED touchpads,
• Alphanumeric touchpads display,
date and time, or programmed text.
• On LED touchpads,
ing.
Enter Code
Enter Code
blinks.
stops blink-
8
Your installer can set up your key-
chain touchpad to either:
• increase the arming level each time
the Lock button is pressed
(Level 1
Level 2, Level 2 Level 3),
• or to arm directly to Level 3 with no
Exit or Entry delay.
Arming Level 2—STAY
There are times when you want intrusion protection, but still want the freedom to move around
within your house without setting off an alarm. For
example, in the evening when your family is inside
for the night. In this and similar situations, set your
system to 2—STAY.
To arm to Level 2—STAY using a touchpad:
1. Close all protected perimeter doors and windows.
2. Press
2—STAY at any touchpad.
• Alphanumeric touchpads display,
“ENTER CODE.”
• On LED touchpads,
Enter Code
blinks.
3. Enter your access code.
• Alphanumeric touchpads display,
“ARMED TO STAY.”
• On LED touchpads,
1
AWAYSTAY
5
ALARM -
Both Flashing
NO DELAY
STAY
lights up:
3
2
6
4
7
8
Enter Code
Check
Status
TroubleBypass
Power
4. The system sounds two short beeps.
5. If leaving the premises, exit through a designated delay door immediately.
To arm to Level 2—STAY using a keychain
touchpad:
• Press the Lock button
Arming Level 3—AWAY
At other times, you want every sensor to be alert:
when the family goes on vacation, or at closing
time.
In this and similar situations, set your system to
3—AWAY for maximum protection. All sensors are
active—perimeter door and window sensors, and
interior motion detectors.
To arm to Level 3—AWAY using a touchpad:
1. Close all perimeter doors and windows.
2. Press
• Alphanumeric touchpads display,
“ENTER CODE.”
• On LED touchpads,
3. Enter your access code.
• Alphanumeric touchpads display,
“ARMED TO AWAY.”
• On LED touchpads,
3—AWAY at any touchp a d .
Enter Code
AWAY
lights up:
blinks.
If y o u r syste m w ill no t arm :
þ Reread and follow the arm ing
instructio ns carefully.
þ M ake sure that the access code
yo u entered w as valid .
þ If y o u h e a r p ro te s t b e e p s, c h e c k to
see if a protected door or w indow
was left open.
2
3
AWAYSTAY
ALARM -
Both Flashing
NO DELAY
1
6
5
4
7
8
Enter Code
Check
Status
TroubleBypass
Power
4. The system sounds three short beeps.
5. Exit through a designated delay door immediately.
To arm to Level 3—AWAY using a keychain
touchpad:
Press the Lock button twice to go from
Level 1 to Level 3, or once to go from Level 2
to Level 3.
9
p
Quick Arming
The Q uick A rm ing feature lets you arm
y o u r sy ste m w ith o u t u sin g a n a c c e ss c o d e .
You w ill still need to enter an access code
to d is a rm th e sy s te m .
Stay
2
Fro m Level 1 O FF,
sim p ly p re ss 2 fo r
Level 2 STA Y.
Away
3
Fro m Level 1 o r 2,
press 3 for
Level 3AW AY.
C ontact your
in s ta lle r if y o u 'd
lik e to u s e
th is fe a tu re .
Exit Delay Exa mple
You’re about to go on an errand. You are inside
your house and have just armed the system to
3—AWAY.
The interior sirens and speakers sound three status
beeps, telling you that the system accepted the
command and has started the Exit Delay time.
During the Exit Delay time, the system sounds one
short beep every 4 seconds. During the last 10 seconds of Exit Delay, you’ll hear one beep every second.
You must leave through the designated delay door
before you hear three consecutive short beeps, indicating the Exit Delay time has ended.
Exit D elay
B E E P S
After arm ing,
y o u 'll h e a r 3
quick beeps.
During the Exit Delay,
y o u 'll h e a r o n e b e e p
every four seconds.
A fte r th e se c o n d
round of quick
b e ep s, th e sy stem
is a r m e d .
Exit and Entry Delay Times
After arming your system, you need time to exit the
building so you won’t set off an alarm. Likewise,
upon returning to your home or business, you’ll
need enough time to open the door and get to a
touchpad to disarm the system.
•The Exit Delay is a period of time long
enough to let you leave through a designated delay door after arming the
system.
•The Entry Delay is a period of time long
enough to let you unlock a designated
delay door and get to a touchpad to
disarm the system.
Entry Delay Example
You are returning to your house that is armed to
Level 3—AWAY. When you unlock and enter the
designated delay door, the interior sirens and
speaker sound two short beeps every two seconds. This tells you that the Entry Delay time has
begun and reminds you to disarm the system to
avoid setting off an alarm.
During the last 10 seconds of Entry Delay, you’ll
hear one beep every second.
Your installer will work with you to decide which
door(s) should be delay door(s), and determine the
delay times that will w ork best fo r y ou and yo ur family. Then, the installer will program the Exit and
Entry Delay times into your system.
Entry D elay
B E E P S
U pon entering, and during
Entry D elay, yo u 'll hear
2 bee
s e ve ry 2 se co nd s.
D isarm the system b efore
the round of 10 quick beeps
to avoid an accidental alarm .
10
REMEMBER:
When a sensor is bypassed, you are allowing
that door or window to go unprotected.
Extended Delay
In some situations, additional time is
needed to arm or disarm the system.
In these instances, the installer can pro-
gram an Extended Delay time, giving y ou
as much as 16 additional minutes to arm or disarm
the system before setting off an alarm.
Refer to the User Sheets to determine if there is an
Extended Delay for your delay door(s). If there is,
add that to the Entry and Exit Delay times to determine the actual delay times you have.
No Delay—For Instant Alarm
You can choose to turn off the Entry and
Exit Delays, causing the delay doors to
arm immediately. Anyone entering the
house through the delay door when the
system is set to No Delay would immediately cause
an alarm.
No Delay is normally used:
• When you’re staying at home, after you’ve armed
the system.
• When you’re arming your house from the outside.
(You must have a wireless touchpad in order to
do this.)
Arming While a Door or Window is Open
It is possible to arm your system
while leaving a door or window
open. This is useful if, for example,
you like to sleep at night with the
window open.
If the door or window has a sensor
installed on it, the system must be
told to ignore, or bypass, that sensor
when it’s open. All other sensors
will remain active.
There are two methods for bypassing a sensor:
• Directly — After arming the system, bypass
door/window sensors before you open them.
Y ou must know the sensor number of the door or
window you wish to bypass.
• Indirectly — As you are arming, bypass sensor s on
already-open doors and window. This method
should not be used in UL-listed installations.
Arming to Level 2 or 3 with No Delay, using a
touchpad:
1. Close all perimeter doors and windows.
2. Exit the premises if arming to 3—AWAY.
3. Enter:
2 + CODE or 3 + CODE.
The system sounds two or three short beeps.
4. Immediately after hearing the beeps,
4 for No Delay.
press
On LED touchpads, No Delay lights.
1
AWAYSTAY
5
ALARM -
Both Flashing
NO DELAY
Changing the arming level will restore delay doors
to their normal Exit and Entry Delay times.
Bypassing a Sensor Directly
Use this method if the system is armed and you
would like to open a window without disarming.
Refer to the User Sheets in Appendix A to determine what the sensor number is for the door, window, or motion detector you wish to bypass.
To bypass sensors directly using an
alphanumeric or LED touchpad:*
1. Close all doors and windows.
3
2
6
4
7
8
Enter Code
Check
Status
TroubleBypass
Power
2. Arm your system to the desired level.
3. At any touchpad:
Enter BYPASS +
CODE + sensor number.
• Alphanumeric touchpads display,
“BYPASSED.”
• On LED touchpads, the Bypass LED
lights up:
3
AWAYSTAY
ALARM -
Both Flashing
NO DELAY
2
1
6
5
4
7
8
Enter Code
Check
Status
TroubleBypass
Power
11
4. If the touchpad displays “INVALID” or the
Bypass LED does not light, make sure that
you entered a valid sensor number . Heat and
smoke sensors canno t be bypassed.
5. Bypass other sensors, if necessary, by repeating Step 3.
6. The bypassed door or window can now be opened.
* You cannot bypass sensors directly using a
keychain touchpad.
Bypassing a Sensor Indi r e ctly
Use this method if you are arming the system and
would like to bypass doors and windows already
open.
To bypass sensors indirectly using an
alphanumeric or LED touchpad:
1. Leave open only those doors and windows that are to remain open. Close all others.
2. Arm your system to the desired level.
The touchpad will emit protest beeps
because of the open sensor(s).
3. At any touchpad:
Enter BYPASS
• Alphanumeric touchpads display,
“SENSOR 01 BYPASSED,” for example.
• On LED touchpads, the Bypass LED
lights up.
4. The system sounds arming lev el beeps to indicate that the system is armed and open sensors have been successfully bypassed.
Disarming the system will undo the bypassing.
When you arm the system again, those sensors will
arm.
To bypass sensors indirectly using a keychain
touchpad:
• Press the Lock butt on once to arm the syst em
and again to bypass open sensors:
+
.
Was the Bypass Successful?
To confirm that a sensor was bypassed successfully
press the STATUS button on the touchpad:
• On alphanumeric touchpads, a list of bypassed
sensors is displayed.
• On LED touchpads, the LEDs of those bypassed
sensors flash for 2 or 3 seconds along with the
Bypass LED.
3
AWAYSTAY
ALARM -
Both Flashing
NO DELAY
2
1
6
5
4
7
8
Enter Code
Check
Status
TroubleBypass
Power
Basic Light Control
There are two kinds of light control:
Basic
•
•
You cannot turn on a specific light using a keychain
touchpad.
* Refer to the User Sheets in Appendix A to determine
light control, offering instant light control at
any touchpad, and
Advanced
light control, in which lights turn on
and off automatically according to specific situations. See “Advanced Light Control” on page 22.
To turn all lights on or off:
From any touchpad:
•
0 + 0.
Press
From a 4-button keychain touchpad:
•
Press (the LIGHTS button).
To turn a specific light on or off*:
• From any touchpad, press
which light number is associated with which lamp.
0 + light number.
For system lights to respond to
basic and advanced light commands, the light switches must be
turned on.

12
Checking the Status of Your System
Checking the system status means finding out about
the current condition of your system. This includes
finding out if any sensors are currently bypassed,
whether or not the AC power and backup battery
are okay, the nature of the most recent alarm, and
more, depending on the features in use and the
equipment in your system.
Check the system status if:
• Your system sounds trouble beeps
(five short beeps every minute).
• Alphanumeric touchpads display a blinking
asterisk.
• Trouble is lit on an LED touchpad.
3
AWAYSTAY
ALARM -
Both Flashing
NO DELAY
2
1
6
5
4
7
8
Enter Code
Check
Status
TroubleBypass
Power
Short System S tatus
A Short Status indicates the current arming level,
sensor status (whether open or bypassed), low battery, or supervisory, AC power or backup battery
failures.
If an alarm or system tr ouble condition has recently
occurred, it will be displayed on an alphanumeric
touchpad the first time you perform a Short or Full
Status check. Performing a system status check a
second time will display the system status including
any trouble conditions.
If any alarm or system trouble is active, it will show
up in every status check until the system is disarmed.
Full System Status
A Full Status combines the Short Status information
with added details about specific system features.
To get a Full System Status:
•Press
Note There is no Full System Status available from
‚ + ‚.
Interior sirens sound beeps according to the
current arming level. Alphanumeric touchpads display the status information, for example, “SENSOR 03 BYPASSED,” “SYSTEM
BATTERY IS OK,” “A C POWER IS OK,” “TEMPERATURE 72 DEGREES.”
an LED touchpad.
To get a Short System Status:
• Press
‚ (STATUS button).
Interior sirens sound beeps according to the
current arming level.
Alphanumeric touchpads display the status
information, for example: “SENSOR O2
OPEN.”
On LED touchpads, if any sensor is in tro uble,
the Trouble and the corresponding sensor
LED flash at the same time. If Trouble is on,
but no sensor number is lit, try troubleshooting the problem before calling the installer.

13
ECTION
S
ANIC ALARMS
P
Panic alarms are easily acti vat ed fr om an y t ouchpad
to quickly alert the central monitoring station to a
Fire, Police, or Auxiliary emergency. A panic alarm
can be sent at any time, regardless of the current
arming level: 1—OFF, 2—STAY, or 3—AWAY.
This system is designed to inform a central monitoring station of the nature of the emergency so the
correct personnel can be dispatched immediately.
Each type of panic alarm sounds and reacts differently when activated.
Type of Alarm Alarm Sound
5:
Fire
Police
Auxiliary
Repeating series of three beeps
Continuous tone
Rapid beeps
Resetting Smoke Detectors
Hardwired and wireless smoke detectors used with
this system automatically reset themselves.
To reset a smoke alarm:
• Disarm the system.
The smoke dete ctor will reset once all the
smoke has cleared.
In some cases, the installer may have installed a
smoke sensor reset switch which y ou’ll need to
press.
1. Disarm the system.
2. The light on the smoke detector remains lit until the smoke clears.
3. Disarm system again to reset hardwired detectors.
Police Panic Alarm
The Police panic alarm sounds from all interior and
exterior sirens, scaring off any intruder and alerting
neighbors to the trouble. On monitored systems,
the central monitoring station responds by calling
the police.
Fire Panic
The Fire panic alarm sounds from all interior and
exterior sirens. On monitored systems, the central
monitoring station responds by calling the fire
department.
To activate a Fire panic alarm from a touchpad:
• Press and hold both Fire buttons for
2 seconds.
Lighting During a Fire Panic Alarm
If your system is equipped with system lighting, all
system lights will turn on and remain on during a
Fire panic alarm.
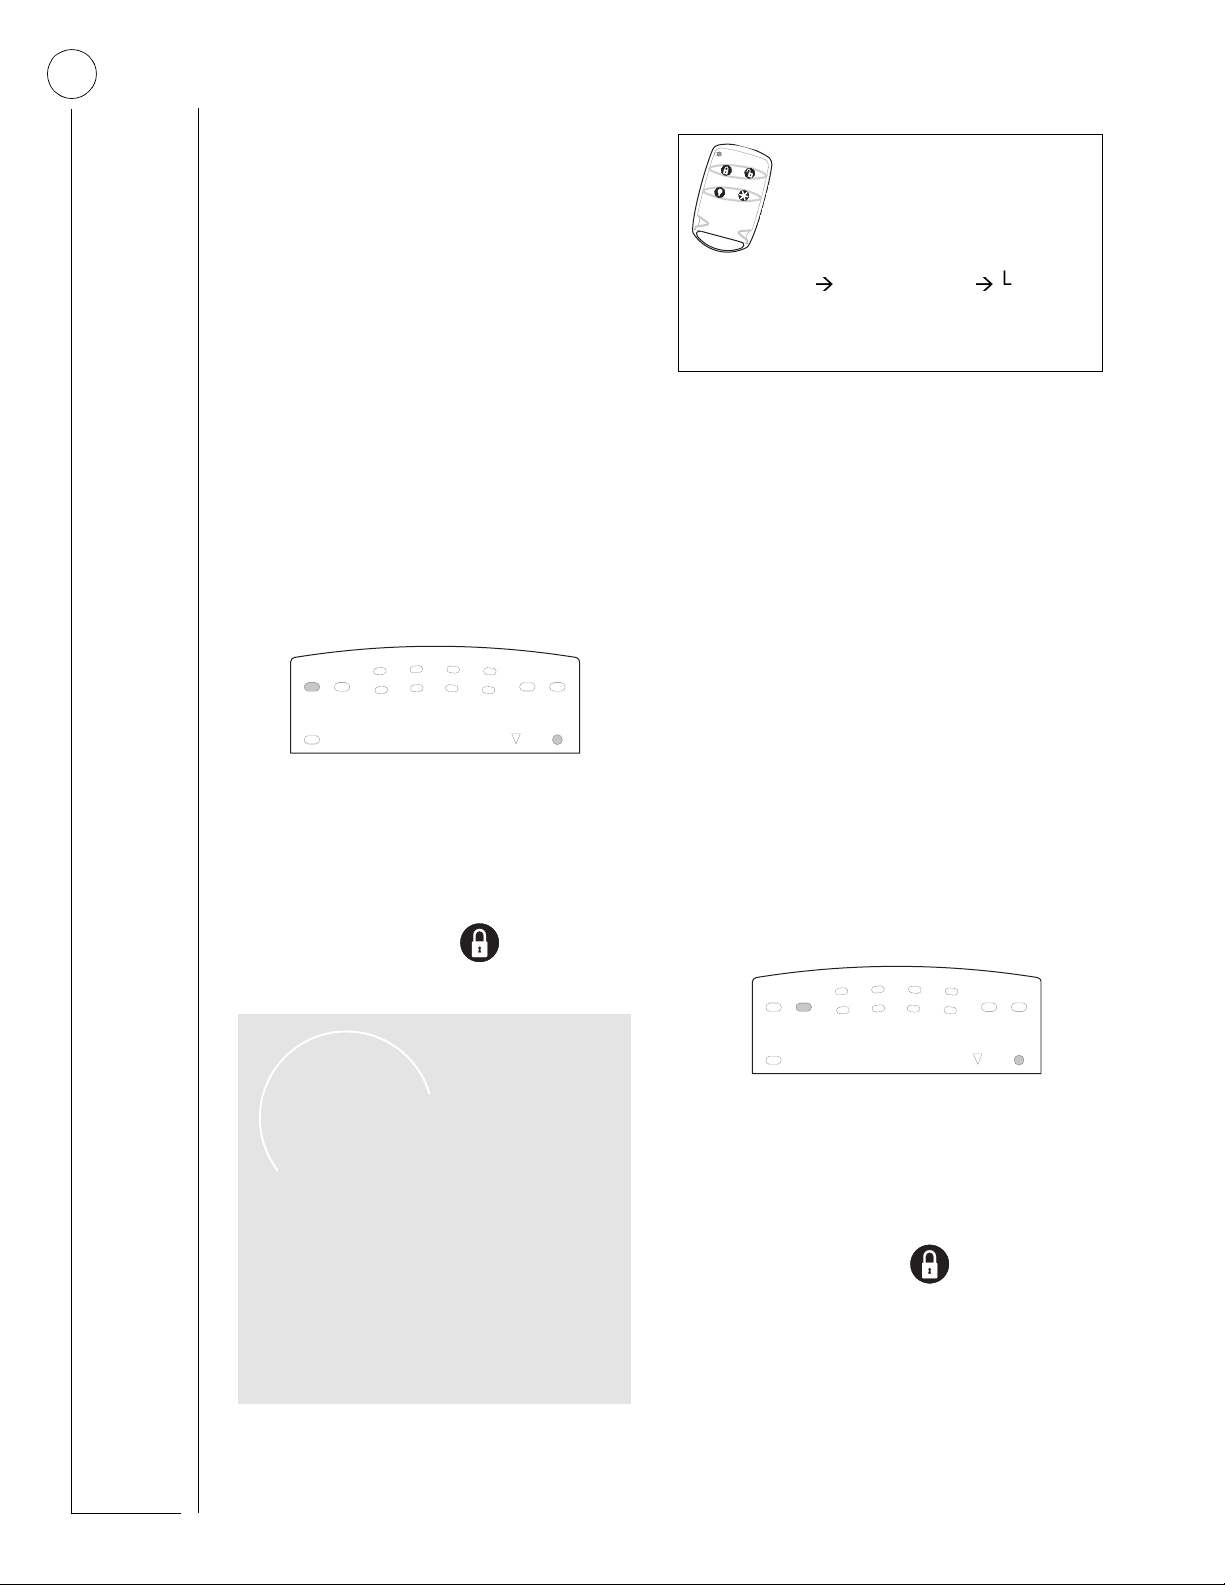
To activate a Police panic alarm using a touchpad:
• Press and hold the Police button(s) for
2 seconds.
To activate a Police panic alarm from a keychain
touchpad*:
• Press and hold the Lo ck and
Unlock buttons at the same time for 2
seconds.
* The installer must configure the Police panic alarm to
work this way.
Lighting During a Police Panic Alarm
If your system is equipped with system lighting, all
system lights will flash continuously during a Police
panic alarm.
14
Good Access Code Hygiene
T o preserve the integrity of your
system, keep access codes
confidential and
delete extra codes
as soon as they
are no longer needed.
We recommend that you
avoid using obvious code
patterns such as 1234 or
1111, 2222, etc.
Auxiliary Panic Alarm
The Auxiliary panic alarm sounds from interior
sirens only. It is typically set up by your security
dealer, based on your specific needs. On monitored systems, the central station responds by calling the service or agency you specified through
your dealer, such as an ambulance service.
To activate an Auxiliary panic alarm from a
touchpad:
• Press and hold the AUXILIARY button(s)
for 2 seconds.
To send an Auxiliary panic alarm from a keychain touchpad:
• Press and hold the Lights and Star
buttons at the same time for 2 seconds.
Lighting During an Auxiliary Panic Alarm
ECTION
S
SSIGNING USER CODES
A
The system requires a valid access code before it
will process most commands.
There is one System Master code which serves as
the primary User Programming code for your system. Only a very limited number of users will need
to know this code.
There are two Partition Master codes (one for each
partition) which allow access to system operations
in their respective partitions.
There are 60 Regular User codes which act like
keys to arm and disarm the system. If necessary,
they can be assigned to neighbors, baby-sitters, or
repair persons for temporary use. Regular user
codes can be changed in User Programming and
are easily deleted from the system when no longer
necessary.
6:
If your system is equipped with system lighting, all
system lights will turn on and remain on during an
Auxiliary panic alarm.
Siren Time-out
If the system is not disarmed after an alarm, the
sirens will continue to sound until the time-out
period is reached. The time-out period can be
changed by the installer, but is usually 4 minutes.
Even though reaching the time-out stops the sirens,
the alarm will still be in progress and will remain so
until the system is manually disarmed.
Programming Access Codes
The code you use to enter User Programming det ermines which access codes you’ll be able to change.
A user code can be given certain attributes which
limit what the user can do within the system. These
attributes can be changed only b y a dealer o v er the
phone by using ITI downloading software.
The User Sheets in Appendix A provide a location
for you to record the actual user codes and the
attributes of each. If you would like any of the
attributes changed for any code, contact your
dealer.

15
System Master Code Privileges
Using the System Master code to enter User Programming allows you to:
• Change the System Master code.
• Change or delete the Partition Mast er code in the
current partition.
• Change or delete Regular User codes in the current partition.
The System Master default code is
important that you change this def ault and writ e the
new code on the User Sheets in Appendix A.
1234. It is
Partition Master Code Privileges
Using the Partition Master code to enter User Programming allows you to:
• Change the Partition Master code in the current
partition
• Change or delete the Regular User codes in the
current partition
Changing a User Code
To change or assign a user access code:
1. Enter User Programming by pressing
9 + System or Partition Master CODE.
2. Press
3. Press
4. Enter the new code and press
B until the touchpad displays
“USER CODES,” then press
ƒ.
B until the touchpad displays the type
of code you wish to change, then press
For example, if you want to change a Regular
User code, press
plays “REGULAR USER CODES.”
ƒ when the touchpad dis-
ƒ.
ƒ.
If you’re changing a Regular User code, press
B until the touchpad displays the user code
number you wish to change. Then proceed
to enter the new code and press
5. Press
B to move to another code, or
ƒ.
‚ + 7 + ƒ to exit User Programming.
Note The system will not accept the same code
for two different users.
Regular User Code Privileges
Y ou cannot enter User Progr amming with a Regular
User code.
The Touchpad Tamper Feature
The installer can program your syst em to send a
Police alarm in the case of possible touchpad
tampering.
If more than 40 keys are pressed when the system asks for a code, and those keystrokes are
not part of a valid access code, a siren will
sound.
Changing or Erasing User Codes
An LED touchpad or Touchtone phone can be
used to change or erase user codes, but an
alphanumeric touchpad works much better
because of its extensive feedback.
See Appendix C for LED and phone programming instructions.
Erasing a User Code
When a code is deleted from the system, that code
no longer acts as a key for operating the system in
any manner.
When a code is deleted, it appears as 4 as terisks on
alphanumeric touchpads: ✽ ✽ ✽ ✽
To erase a user code:
1. Enter User Programming by pressing
9 + System or Partition Master CODE.
2. Press
3. Press
4. Enter the System Master or Partition Master
5. Press
B until the touchpad displays
“USER CODES,” then press
ƒ.
B until the touchpad displays the type
of code you wish to erase, then press
code you used in Step 1 and press
The deleted code appears as, for example,
“USER 01 — ✽ ✽ ✽ ✽.”
ƒ.
ƒ.
B to move to another code, or
‚ + 7 + ƒ to exit User Programming.

16
ECTION
S
ETTING THE TIME AND DATE
S
Although the installer usually sets the time and date
at the time of installation, the user can change it
when necessary.
To set the system’s time and date using an alphanumeric touchpad:
1. Enter User Programming by pressing
7:
9 + System or Partition Master CODE.
The touchpad displays “SYSTEM MENU,”
briefly, then “USER CODES.”
2. Press
3. Enter the correct time in 24-hour format,
4. To set the current date, press
5. Enter today’s date as 6 digits (mm/dd/yy)
6. Press
To set the system’s time and date using an LED
touchpad:
1. Enter User Programming by pressing
B until the touchp ad displays
“TIME AND DATE,” then press
then press
time is 7:23 a.m., enter 0723.
The touchpad displays, “TIME 7:23 PM.”
ƒ. For example, if the current
ƒ.
B.
and press
“DATE 12/07/99,” for example.
ƒ. The touchpad displays,
‚ + 7 + ƒ to exit User Program-
ming.
9 + System or Partition Master CODE.
2. Press
3. Enter the correct time in 24-hour format,
4. To set the current date, press
‚ + 1 + 0.
then press
ƒ.
‚ + 1 + 1.
5. Enter today’s date as 6 digits (mm/dd/yy)
then press
6. Press
ming.
24-H our Form at
Midnight
00:00
1:00 am
01:00
02:00
2:00 am
3:00 am
03:00
4:00 am
04:00
05:00
5:00 am
6:00 am
06:00
7:00 am
07:00
ƒ.
‚ + 7 + ƒ to exit User Program-
08:00
09:00
10:00
11:00
12:00
13:00
14:00
15:00
8:00 am
9:00 am
10:00 am
11:00 am
Noon
1:00 pm
2:00 pm
3:00 pm
16:00
17:00
18:00
19:00
20:00
21:00
22:00
23:59
4:00 pm
5:00 pm
6:00 pm
7:00 pm
8:00 pm
9:00 pm
10:00 pm
11:59 pm
ECTION
S
DJUSTING SYSTEM SOUNDS AND
A
OUCHPAD BRIGHTNESS
T
8:
Arming Your System Silently
Use the Silent Arming feature to arm your system
without disturbing people throughout the house
with arming status beeps. There are two methods
for implementing Silent Arming:
• Silent on Demand
(User presses
• Arming Always Silent (Silent Arming feature on).
Regardless of the method employed, when Silent
Arming is in effect, no Exit beeps sound.
5 before arming.)
Silent Arming on Demand
Pressing 5 before arming silences arming status
beeps from touchpads and interior sirens.
To use Silent Arming on demand:
1. From any touchpad, press
2. Within 4 seconds enter:
5.
2 + CODE or 3 + CODE.
Alphanumeric touchpads display, “SILENT
ARM ON” for 5 seconds before displaying
the arming level.
Arming Always Silent
Turning this f eatur e on in User Progr amming means
that the status beeps that come fr om touchp ads and
interior speakers while arming will always be silent.
You will not have to enter
with Silent Arming on Demand.
To enable Silent Arming:
1. Enter User Programming by pressing
5 before arming, as
9 + System or Partition Master CODE.
2. Alphanumeric touchpads:
• Press
• Press
LED touchpads:
• Press
B until the touchpad displays
“OPTIONS,” then press
ƒ.
B until the touchpad displays
“SILENT ARMING OFF,” for example.
‚ + 4 + 1.
 Loading...