

Page 1
MULTIMIX 8/4 digital
MANUAL VERSION 3.0, AUGUST 2007
PART 1: HARDWARE DESCRIPTION
www.itec-audio.com
Page 2

MULTIMIX 8/4 DIGITAL
Dear customer!
It is the most important goal of our development endeavours to produce practice-orientated
devices that make work easier; this applies, on the one hand, to the end user who needs to
come to terms with the device, and, on the other hand, to the engineer and technician who
install the product and set its functions according to the customer’s requirements. Many
years of experience in the field of sound reinforcement installations have taught us the main
requirement: a multi-functional device allowing all kinds of signal adjustments to the
technician and offering an easy-to-use control surface to the person running the device.
The ITEC-MULTIMIX 8/4 digital fulfils this requirement to perfection. With his PC, the
technician can easily configurate the device as requested and implement a wide variety of
sound effects without using additional devices. The end user receives an easy-to-grasp and
easy-to-use sound system. Adjustments can be made only within the predetermined limits,
thus eliminating operating mistakes to a large extent.
The configuration software ITEC-MixDesign is easy to survey and understand, and can
consequently be operated effortlessly by anybody.
You can store up to 15 different complete configurations in the Multi-Mix’s flash and switch
(load) them externally according to the occasion.
In contrast to comparable products, the ITEC-MULTIMIX 8/4 is an analogue mixer in its
paths (with the exception of the optional DSP output module)! However, it is fully digitally
controlled. The processors control and adjust the VCAs, measure level and transmitter, and
switch the signals.
The analogue basic concept is the decisive factor for the extraordinary quality, particularly in
respect to signal to noise ratios, dynamics, and the distortion factor of small signals.
Please pay attention to the installation and configuration instructions in this manual of the
ITEC-MULTIMIX 8/4 digital, so that you can make the most of this device.
Your ITEC acoustics team
www.itec-audio.com MULTIMIX 8/4 DIGITAL
2
Page 3

MULTIMIX 8/4 DIGITAL
CONTENTS: PART 1
HARDWARE DESCRIPTION
Dear customer!.......................................................................................................................2
SAFETY PRECAUTIONS........................................................................................................4
SUPPLY EXTENT...................................................................................................................5
PART 1: HARDWARE DESCRIPTION ................................................................................6
FRONT PANEL CONTROLS and DISPLAY.......................................................................6
1) Power indicator:........................................................................................................................... 6
2) Multifunctional LED display:........................................................................................................ 6
3) Potentiometers 1- 8:.................................................................................................................... 7
4) PC interface:................................................................................................................................7
5) Device Status:............................................................................................................................. 7
PLUGS and SOCKETS of the REAR PANEL ....................................................................8
6) Ground Lift:.................................................................................................................................. 8
7) Power supply socket: .................................................................................................................. 8
8) External control inputs:................................................................................................................ 9
8 a) External potentiometer:............................................................................................................ 9
8 b) External configuration switching:............................................................................................ 10
9) Interface for media remote control:........................................................................................... 11
10) Digital Link:.............................................................................................................................. 11
11) Analog Link:............................................................................................................................. 11
12) Inputs:...................................................................................................................................... 12
13) Outputs:................................................................................................................................... 12
14) Optional LAN-module:............................................................................................................. 13
15) Device Status Output: .............................................................................................................13
Optional Input Equalizer......................................................................................................13
MULTIMIX 8/4 BLOCK DIAGRAM........................................................................................14
Optional 4x4 DSP-Matrix......................................................................................................15
DSP BLOCK DIAGRAM ....................................................................................................15
Installing and removing Modules .......................................................................................16
Installing the DSP Module................................................................................................16
Removing the DSP Module..............................................................................................17
Installing the Input-Equalizer Module.............................................................................18
Removing the Input-Equalizer Module ...........................................................................19
Installing/Removing the LAN Module .............................................................................19
SPECIFICATIONS:................................................................................................................20
www.itec-audio.com MULTIMIX 8/4 DIGITAL
3
Page 4

MULTIMIX 8/4 DIGITAL
SAFETY PRECAUTIONS
The installation and configuration of the ITEC-Multimix 8/4 must be carried out solely by
trained experts. For the configuration use exclusively the original software ITEC-MixDesign.
You must only use the original power supply, which has on its primary side an IEC power
inlet C14 and which is to be connected to the mains socket customary in your country (115 –
230V) with an adequate cable.
When installing the device into a closed cabinet, make sure that there is sufficient air
circulation in order to avoid an inadmissible heating of the device.
When connecting other devices (sound sources, PC), make sure you pay attention both to
the right connection as well as to the input and output specifications.
Do not try to open the device forcefully or by undoing the screw joints. It does not contain any
parts that can be repaired by a layman. In case of problems please contact the manufacturer
or your regional sales office.
By no means must the device be exposed to temperatures above 50°C, humidity above 95%
or rain.
Attention: unplug the power supply any time the device is opened by an expert.
www.itec-audio.com MULTIMIX 8/4 DIGITAL
4
Page 5

MULTIMIX 8/4 DIGITAL
SUPPLY EXTENT
ITEC-Multimix 8/4 digital
Power supply with connection cable
Manual (English or German)
optional:
4x4 DSP-Modul (built in)
Input equalizer (built in)
Accessories:
ITEC-MM-PC-1.5 RS-232 to PC connection cable
ITEC-MM-PC-1.5 opto PC connection cable with a galvanically separated interface
ITEC-MM-RJ-0.5 Analog-Link-Kabel
The standard phantom power of the inputs is 12 Volt. For a higher phantom power you need:
ITEC-MM-Ph-48V plug module for 48 Volt phantom power
ITEC-MM-Ph-24V plug module for 24 Volt phantom power
ITEC-MixDesign configuration software:
You will always find the latest version for a free of charge download under:
http://itec-audio.com/download/mixer/mixersetup.exe
www.itec-audio.com MULTIMIX 8/4 DIGITAL
5
Page 6

MULTIMIX 8/4 DIGITAL
PART 1: HARDWARE DESCRIPTION
FRONT PANEL CONTROLS and DISPLAY
Hardware 2.1
Hardware 1.0 to 2.0
1) Power indicator 4) PC-Interface
2) LED-Display 5) Device Status
3) POTIS 1-8
1) Power indicator:
A red LED shows that the operation voltages are in order.
2) Multifunctional LED display:
Depending on the configuration (see software description), the 8 LEDs have the
following functions:
Off: LEDs are switched off.
Signal:* input signal at corresponding input (post-fade) is higher than - 60 dB.
Comp:* indicates a Compressor/Limiter activitiy on the corresponding input.
Clip:* input signal at corresponding input (post-fade) is higher than + 3 dB.
Value: level display for one input or output (one LED is equivalent to 10 dB).
*When running on „Auto-switcher“ the LEDs show the active channels (microphones).
If the display if configured to display a Value, you can determine the current level with the
following table:
LED no 1 2 3 4 5 6 7 8
Value greater or equal -55dB -50dB -40dB -30dB -20dB -10dB -0dB +10dB
www.itec-audio.com MULTIMIX 8/4 DIGITAL
6
Page 7

MULTIMIX 8/4 DIGITAL
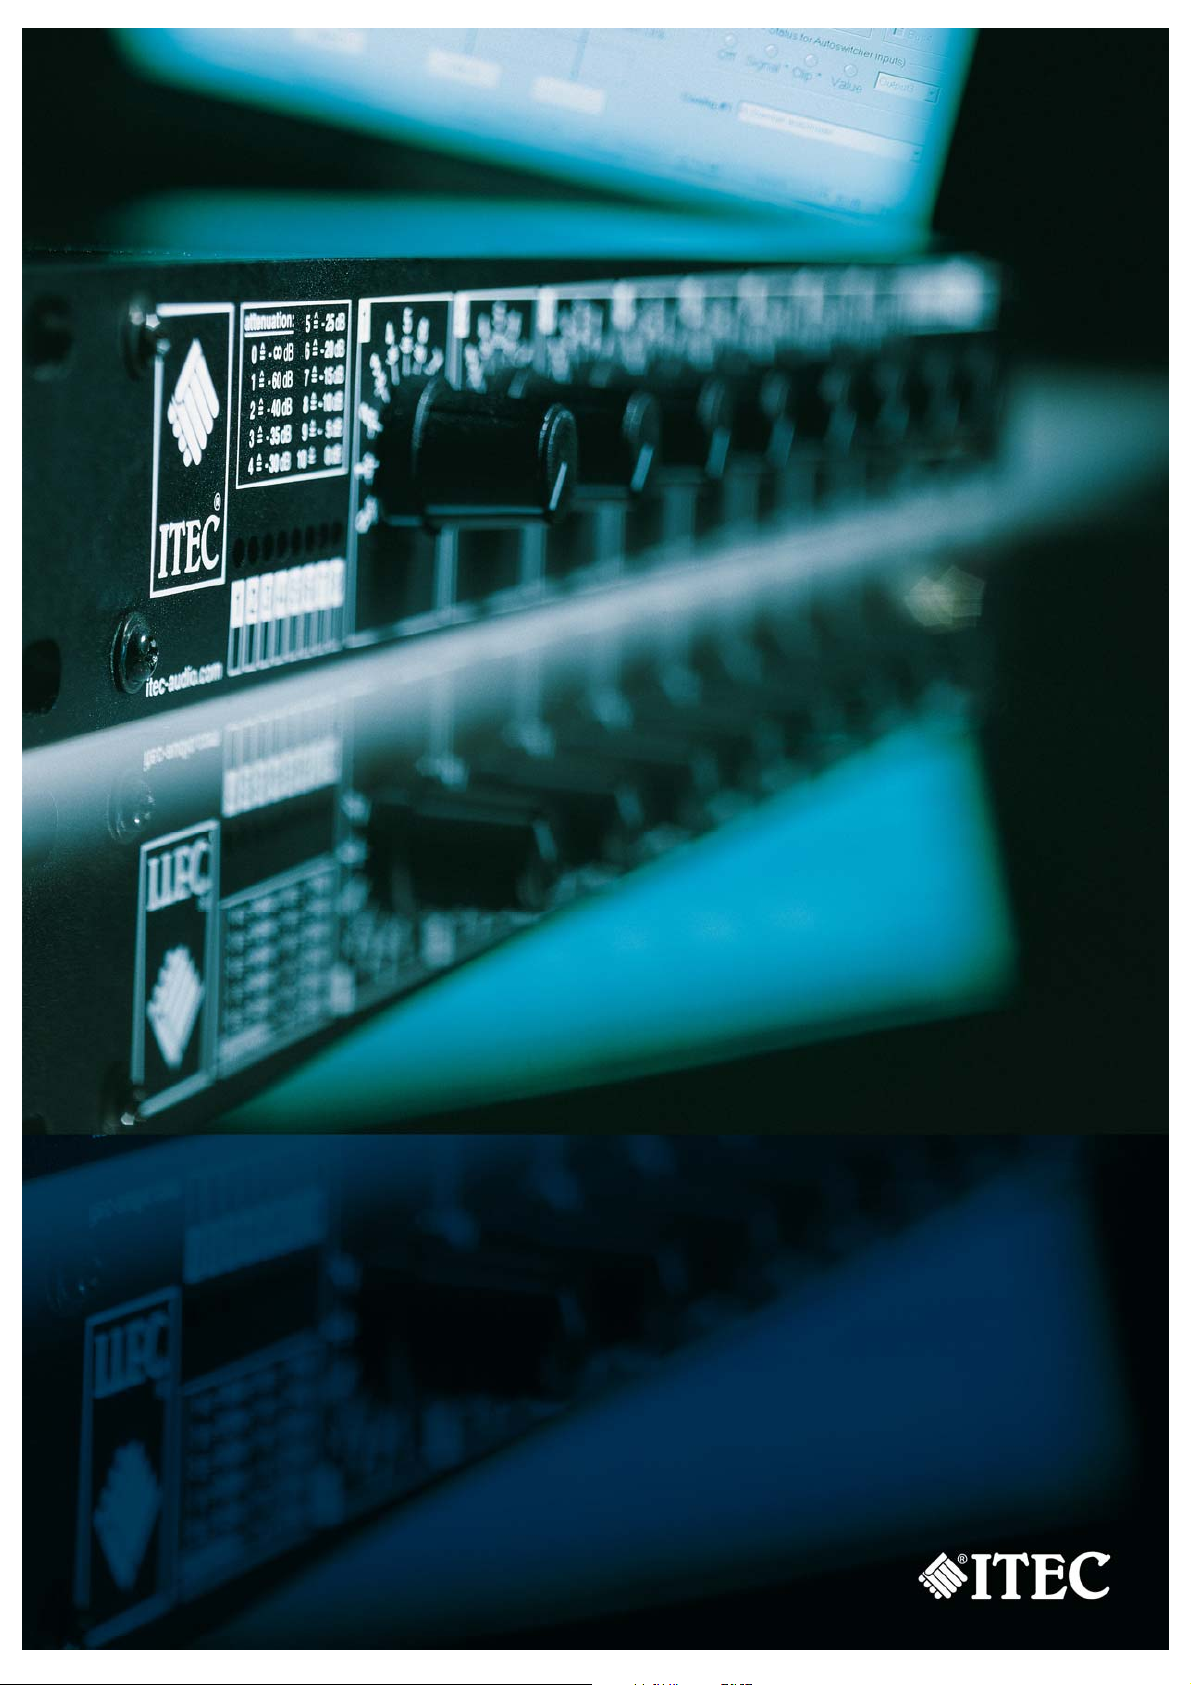
3) Potentiometers 1- 8:
A considerable advantage of the ITEC-MultiMix is the manual controllability of the volumes
in a most simple form, namely by means of the potentiometers on the front panel. This is the
only way of realising a really user-friendly stand-alone solution. The 8 volume controls can be
allocated individually; and you can also control several inputs by one control only(e.g. stereo
sources: contro the left and right channel by one pot only).
The potentiometer’s scale shows, apart from the usual 0 - 10 inscription, also dB statements.
The correlation is:
These figures refer to an attenuation, in relation to the predetermined maximum
amplification.
Example 1: An input is preset at an amplification of +45 dB (microphone).
The potentiometer is at 7.
The total amplification is: +45 - 15 = +30 dB.
Example 2: several control elements have been chosen for this input (see software
description „basic configuration“):
The potentiometer is at 7.
The external potentiometer is at 8.
Preset is at 9.
The total amplification is: +45 - 15 - 10 - 5 = +15 dB.
4) PC interface:
The 9-pole Sub-Min-D-plug on the front panel (RS 232 PC) is to be used exclusively for
connecting a PC or laptop with ITEC-MixDesign software.
A suitable connection cable is the ITEC-MM-PC-1.5 (available accessory).
You can use any Nullmodem cable, also known as “AT-Link Cable“.
If your Laptop hasn´t got any serial interface, you can also use a “USB-to-serial” converter,
which are full supported by the software. Take a look at
http://www.qbik.ch/usb/devices/showdevcat.php?w=d&id=15
When connecting a laptop supplied with a switching power supply you may get audible
interferences. This can be avoided by using the galvanically separated interface cable
ITEC-MM-PC-1.5-opto.
5) Device Status:
The device continuously monitors itself and indicates a possible device failure caused by
various internal faults. The reason for a device fault can be determined from within
MixDesign. See also
1 ..... -60 dB 6 ….. –20dB
2 ..... -40 dB 7 ….. –15dB
3 ..... -35 dB 8 ….. –10dB
4 ..... -30 dB 9 ….. –5dB
5 ..... -25 dB 10 …. 0dB
Device Status Output
www.itec-audio.com MULTIMIX 8/4 DIGITAL
7
Page 8

MULTIMIX 8/4 DIGITAL
PLUGS and SOCKETS of the REAR PANEL
Hardware 2.1
Hardware 1.0 to 2.0
6) Ground lift 10) Digital link 14) Ethernet Port
7) Power supply 11) Analogue link 15) Device Status Output
8) External control inputs 12) inputs 1 - 8
9) Media remote control interface 13) outputs 1 - 4
6) Ground Lift:
Rocker switch on the housing rear panel, called “GROUNDLIFT”.
Connects/separates the electronics ground with/from the housing ground.
A separation may be necessary to avoid ground loops if the housing already has ground
contact (metal rack, connection with power amplifier).
1 ..... electronics ground and housing are connected.
0 ..... electronics ground and housing are not connected.
7) Power supply socket:
6-pole DIN-socket on the housings rear panel, called ”DC POWER IN“
The original power supply unit is to be connected with the DIN-socket. The connection
diagram is:
1 ....... GND
2 ....... GND
3 ....... + 5 Volt
4 ....... - 12 Volt
5 ....... + 12 Volt
6 ....... phantom power
www.itec-audio.com MULTIMIX 8/4 DIGITAL
8
Page 9

MULTIMIX 8/4 DIGITAL
The voltage for phantom power on pin 6 is 12 Volt. By using the plug modules
ITEC-MM-Ph-24 and ITEC-MM-Ph-48 respectively you can achieve higher phantom
voltages.
Attention: When using 48 Volt phantom voltage, short-circuiting the input signal wires on
ground must be avoided.
8) External control inputs:
15-pole Sub-Min-D-socket on the housings rear panel, called ”EXT.CONTROL“.
volume remote control:
A simple volume remote control becomes possible by using the control inputs „External“.
The 8 control inputs can be activated with external potentiometers and a control DC of
0 -10V respectively. It is your choice (see software description) which input channels you
decide to control.
Configuration change:
The same socket houses the control inputs for a configuration switch. External switch
contacts activate one of the 15 predetermined settings.
Socket allocation:
1….External1 9 …External2
8 a) External potentiometer:
2….External3 10…External4
3….External5 11…External6
4….External7 12…External8
5.... +10 Volt 13…GND
6....Config.1 14...Config.2
7....Config.4 15...Config.8
8....GND
EXTERNAL POTENTIOMETERS
Ext pot 1
Ext pot 8
www.itec-audio.com MULTIMIX 8/4 DIGITAL
9
Page 10

MULTIMIX 8/4 DIGITAL
Input resistance: 40 kOhm
We recommend the use of linear potentiometers 1 k or 5 k.
With long wirings you need to use shielded cables (as shown in the illustration).
When using linear potentiometers and a scale of 0 – 10, you can determine the influence of
the external controls according to the calculation method mentioned in item 3.
8 b) External configuration switching:
The control inputs for changing the configuration are BCD-coded.
The inputs are preset at 5V with an internal pull-up resistance (4k7), hence their inactive
condition is „logically 1“. The switch takes place by changing to 0 Volt.
config.no conf8 conf4 conf2 conf1 config.no conf8 conf4 conf2 conf1
#1 1 1 1 0 #5 1 0 1 0
#2 1 1 0 1 #6 1 0 0 1
#3 1 1 0 0 #7 1 0 0 0
#4 1 0 1 1 #8 0 1 1 1
The switch will become effective only if and when it is cleared by the software (see software
description „edit“ / „project preferences“ and „tools“ / „enable configuration“ respectively).
With configuration #0 (no switch is activated, all inputs are at „1“) the device chooses the
preset start configuration (see software description). In this condition the switch can be
executed via the PC.
Choosing a non-defined configuration does not cause any changes.
Configuration change with selector switch:
www.itec-audio.com MULTIMIX 8/4 DIGITAL
10
Page 11

MULTIMIX 8/4 DIGITAL
Configuration change with BCD coded switch:
9) Interface for media remote control:
9-pole Submin-D plug on the housings rear panel, called ”RS-232 Remote“.
2 RXT
3 TXT
5 GND
Settings:
Baud rate: 19200 Parity: none
Data bits: 8 Stop bits: 1
Attached to the software description you will find the communication protocol between the
MultiMix and a media remote control.
7
10) Digital Link:
Hardware 1.0 to 2.0: Cinch sockets on the housings rear panel, called ”SERIAL LINK“
Prepared for e.g. multi-channel auto-mixing or other master-slave combinations in software
versions to come.
11) Analog Link:
RJ-45 sockets on the housings rear panel, called ”LINK OUT“, ”LINK IN“.
Serves the cascading of several devices, by linking the Bus to each consecutive device. The
connection is made by cable MM-RJ-0.5, each from one device’s Link-out to the next
device’s Link-in.
www.itec-audio.com MULTIMIX 8/4 DIGITAL
11
Page 12

MULTIMIX 8/4 DIGITAL
Provided the configuration of the corresponding Bus signal is set on „ADD-LINK” (see
software description “basic configuration”), the incoming Bus signal will be added to the own
Bus. The summary Bus signal wil then be available again at the link-out socket.
12) Inputs:
The device has 8 symmetrical inputs, which come as XLR-sockets at the housings
rear panel.
Maximum input amplification is at: Line operation from -20 to +30 dB
Mic operation from +10 to +60 dB
You can determine (switch) any channel for MIC or LINE amplification. This way, any
commercial microphone and playback device can be adjusted perfectly.
NOTE: Devices delivered before 10. June 2003
have a maximum input amplification of: Line operation from -20 to +20 dB
Mic operation from +10 to +50 dB
Phantom power can be switched individually to each channel, and is a standard 12 Volt. As
an option you can reach either 24 Volt or 48 Volt by means of plug modules
(see chapter 6, voltage supply).
13) Outputs:
Each of the 4 outputs is symmetrical and comes as a XLR plug on the housings rear panel.
The maximum output level is +20 dB,
when using the DSP, it is +10 dB.
www.itec-audio.com MULTIMIX 8/4 DIGITAL
12
Page 13

MULTIMIX 8/4 DIGITAL
14) Optional LAN-module:
Available as an option is a version with a built-in Ethernet LAN module.
Enables you the ability to configure and/or update the device via the TPC/IP protocol.
You will find more detailed info on the LAN module in the software description.
15) Device Status Output:
The device features a floating distance Device Status Output, which can pass failures to
external devices if an internal error occurs.
Max. load of output is 30VDC/2A or 125VAC/400mA.
1 2 3
1 Device Fault (NC)
2 Common
3 Device OK (NO)
Optional Input Equalizer
Available as an option is a version with a built-in 8-channel 7-band equalizer module.
The configuration software for the DSP module is included in the ITEC-MixDesign software.
The equalizer module comes with 7-band graphic filters for each input channel, adjustable
from -10dB to +10dB in 2dB steps, enabling the user an optimal adjustment of different signal
sources.
You will find more detailed info on the possibilities of the input equalizer module and its
settings in the software description.
See also
Installing the Input-Equalizer Module and Removing the Input-Equalizer Module
www.itec-audio.com MULTIMIX 8/4 DIGITAL
13
Page 14

MULTIMIX 8/4 DIGITAL
MULTIMIX 8/4 BLOCK DIAGRAM
www.itec-audio.com MULTIMIX 8/4 DIGITAL
14
Page 15

MULTIMIX 8/4 DIGITAL
Optional 4x4 DSP-Matrix
Available as an option is a version with a built-in 4x4 DSP matrix module.
The configuration software for the DSP module is included in the ITEC-MixDesign software
and is comfortably easy to use. The DSP module works in 24 Bit / 44.1 kHz mode, and is
equipped with the best possible algorithms.
The DSP module comes with 9-band parametric filters, with quality and frequency being
your choice.
The 4x4 matrix enables the mix of the four signals on to the four outputs, with the additional
implementation per output of a delay (0.0023 to 500 ms) and a band pass filter (1st to 4th
order).
You will find more detailed info on the possibilities of the DSP module and its settings in the
software description.
See also
Installing the DSP Module and Removing the DSP Module
DSP BLOCK DIAGRAM
www.itec-audio.com MULTIMIX 8/4 DIGITAL
15
Page 16

MULTIMIX 8/4 DIGITAL
Installing and removing Modules
Installing the DSP Module
A) Hardware installation
1) Remove the top cover of the device (8 screws)
2) Remove 4 jumpers (see picture)
3) If the three spacers aren´t already mounted (marked blue in picture below), remove the
bottom cover and fasten the spacers(M3, 15mm)
4) Take the DSP module carefully from the packing and put it onto the main module.
Make sure the module is correctly connected to all 4 socket strips. (red)
www.itec-audio.com MULTIMIX 8/4 DIGITAL
16
Page 17

MULTIMIX 8/4 DIGITAL
5) Fix the DSP module with three screws
6) Reinsert the top and bottom cover
B) Software settings
1) Connect the Multimix 8/4 digital with a computer and make sure the device is switched on.
2) Run MixDesign (At least Version 2.0)
Go to “Extras”|”Hardware setup” and click menu item "DSP is installed"
After the device has restarted itself automatically, the DSP related settings are available.
Note: If the item is disabled, go to “Extras”|”MixDesign preferences” and check the item
"Enable hardware setup changes" in "Other options"
Removing the DSP Module
A) Hardware removal
1) Remove the top and bottom cover of the device (8 screws for each side)
2) Remove the DSP module
3) Insert 4 jumpers of the DSP section (marked “3”,”4”,”1”,”2”)
4) Reinsert the top and bottom cover
B) Software settings
1) Connect the Multimix 8/4 digital with a computer and make sure the device is switched on.
2) Run MixDesign (At least Version 2.0)
On connecting, a message box will pop up to inform you that the DSP doesn´t answer.
Go to “Extras”|”Hardware setup” and click menu item "DSP is not installed"
www.itec-audio.com MULTIMIX 8/4 DIGITAL
17
Page 18

MULTIMIX 8/4 DIGITAL
Installing the Input-Equalizer Module
A) Hardware installation
1) Remove the top cover of the device (8 screws)
2) Remove 8 jumpers (JP1..JP8, marked red in picture below)
3) If the two spacers aren´t already mounted (marked blue in picture below), remove the
bottom cover and fasten the spacers(M3, 10mm)
4) Take the module carefully from the packing and put it onto the
main module. Make sure the module is correctly connected
to all 9 socket strips. (JP1..JP8,JP23, marked red)
www.itec-audio.com MULTIMIX 8/4 DIGITAL
18
Page 19

MULTIMIX 8/4 DIGITAL
5) Fix the module with two screws
6) Reinsert the top and bottom cover
B) Software settings
1) Connect the Multimix 8/4 digital with a computer and make sure the device is switched on.
2) Run MixDesign (At least Version 2.0)
Go to “Extras”|”Hardware setup” and click menu item "Input Equalizer is installed"
Note: If the item is disabled, go to “Extras”|”MixDesign preferences” and check the item
"Enable hardware setup changes" in "Other options"
Removing the Input-Equalizer Module
A) Hardware removal
1) Remove the top and bottom cover of the device (8 screws for each side)
2) Remove the Input-Equalizer module
3) Insert 8 jumpers at the Input section (JP1..JP8, the pin on the right side is unconnected)
4) Reinsert the top and bottom cover
B) Software settings
1) Connect the Multimix 8/4 digital with a computer and make sure the device is switched on.
2) Run MixDesign (At least Version 2.0)
Go to “Extras”|”Hardware setup” and click menu item "Input Equalizer is not installed"
Installing/Removing the LAN Module
A LAN module is a fixed part of a device and can´t be installed or removed by the user.
www.itec-audio.com MULTIMIX 8/4 DIGITAL
19
Page 20

MULTIMIX 8/4 DIGITAL
SPECIFICATIONS:
GENERAL
Frequency Response 40 Hz – 20 kHz/ -1 dB
Harmonic Distorsion < 0,005 %
Overall Dynamics 103 dB
POWER SUPPLY External power supply unit
Input 115 – 230 VAC
Output +12V, -12V, +5V / 20W
INPUTS Symmetrical; max. amplification configurable from –20 dB to +50 dB
Phantom Power +12V, optional +24V or +48V
Input Impedance 6,6 k Ohm
OUTPUTS Symmetrical; max. output level +20 dB
Output Impedance Symmetrical 300 Ohm, Unsymmetrical 150 Ohm
DIMENSIONS (WxH xD) mm 482(431) x 44 x 180; (19 inch 1 U)
WEIGHT kg 2.40
DSP MODULE
GENERAL
EACH INPUT 9 band fully parametric equalizer +/- 15 dB
Centre Frequencies configurable from 20Hz to 20kHz
Filter quality configurable from 0,1 to 70
EACH OUTPUT Delay: 0,023 – 500ms / band pass filter: 1st – 4th order
INPUT EQ MODULE
GENERAL
EACH INPUT 7 band graphical equalizer +/- 10 dB, 2 dB stepping
LAN-MODUL
INTERFACE Ethernet 10Base-T oder 100 Base-TX (Auto-Sensing, Full/half duplex)
PROTOCOLS TCP/IP, UDP/IP, ARP, ICMP, SNMP, TFTP, Telnet, DHCP, HTTP Internet
MIXDESIGN-SOFTWARE
You can download the latest version of our software any time: http://itec-audio.com/download/mixer/mixersetup.exe
In case of any questions please contact us: office@itec-audio.com, www.itec-audio.com
24 bit/44,1 kHz
4 inputs, 4 outputs
4x4 Matrix
8 analog inputs and outputs
Pluggable PCB module
Microprocessor-controlled
Web Server
ITEC Tontechnik und Industrieelektronik GesmbH, A-8200 Lassnitzthal 300
/ Austria / Europe
Tel.: +43 (0)3133 /3780-0,
office@itec-audio.com, www.itec-audio.com
www.itec-audio.com MULTIMIX 8/4 DIGITAL
20
 Loading...