

Italian Inspiration WD-8880 Operation Manual
Before using
Automatic Drum Washing Machine
Table of Contents
During using
Maintenance
Names of parts---------------inside front cover
Matters needing attention-------------------1-3
Installation---------------------------------------4-5
Control panel--------------------------------------6
Operational functions-------------------------6-7
Program selection-----------------------------8-9
Washing methods------------------------------11
Additional information-------------------------12
Maintenance-------------------------------------13
Trouble shooting--------------------------------15
Wiring circuit-------------------------------------17
Technical specification------------Back cover
Warning-------------------------------------------16
Warning code------------------------------------14
Operation Manual
Main power
Max working current(A)
Water pressure(MPa)
Washing power(W)
Spining power(W)
Washing capcity(Kg)
Spinning speed(rpm)
Drying power(W)
Size(high,depth,width)mm
Weight(Kg)
220-240V~/50Hz
10
0.05P1
650
1200
5
1200/900/600
1250
850550595
72
Heating power(W) 1700
WD-8880
Item
Model
WD-8880
Technica specifications
Preparations-------------------------------------10
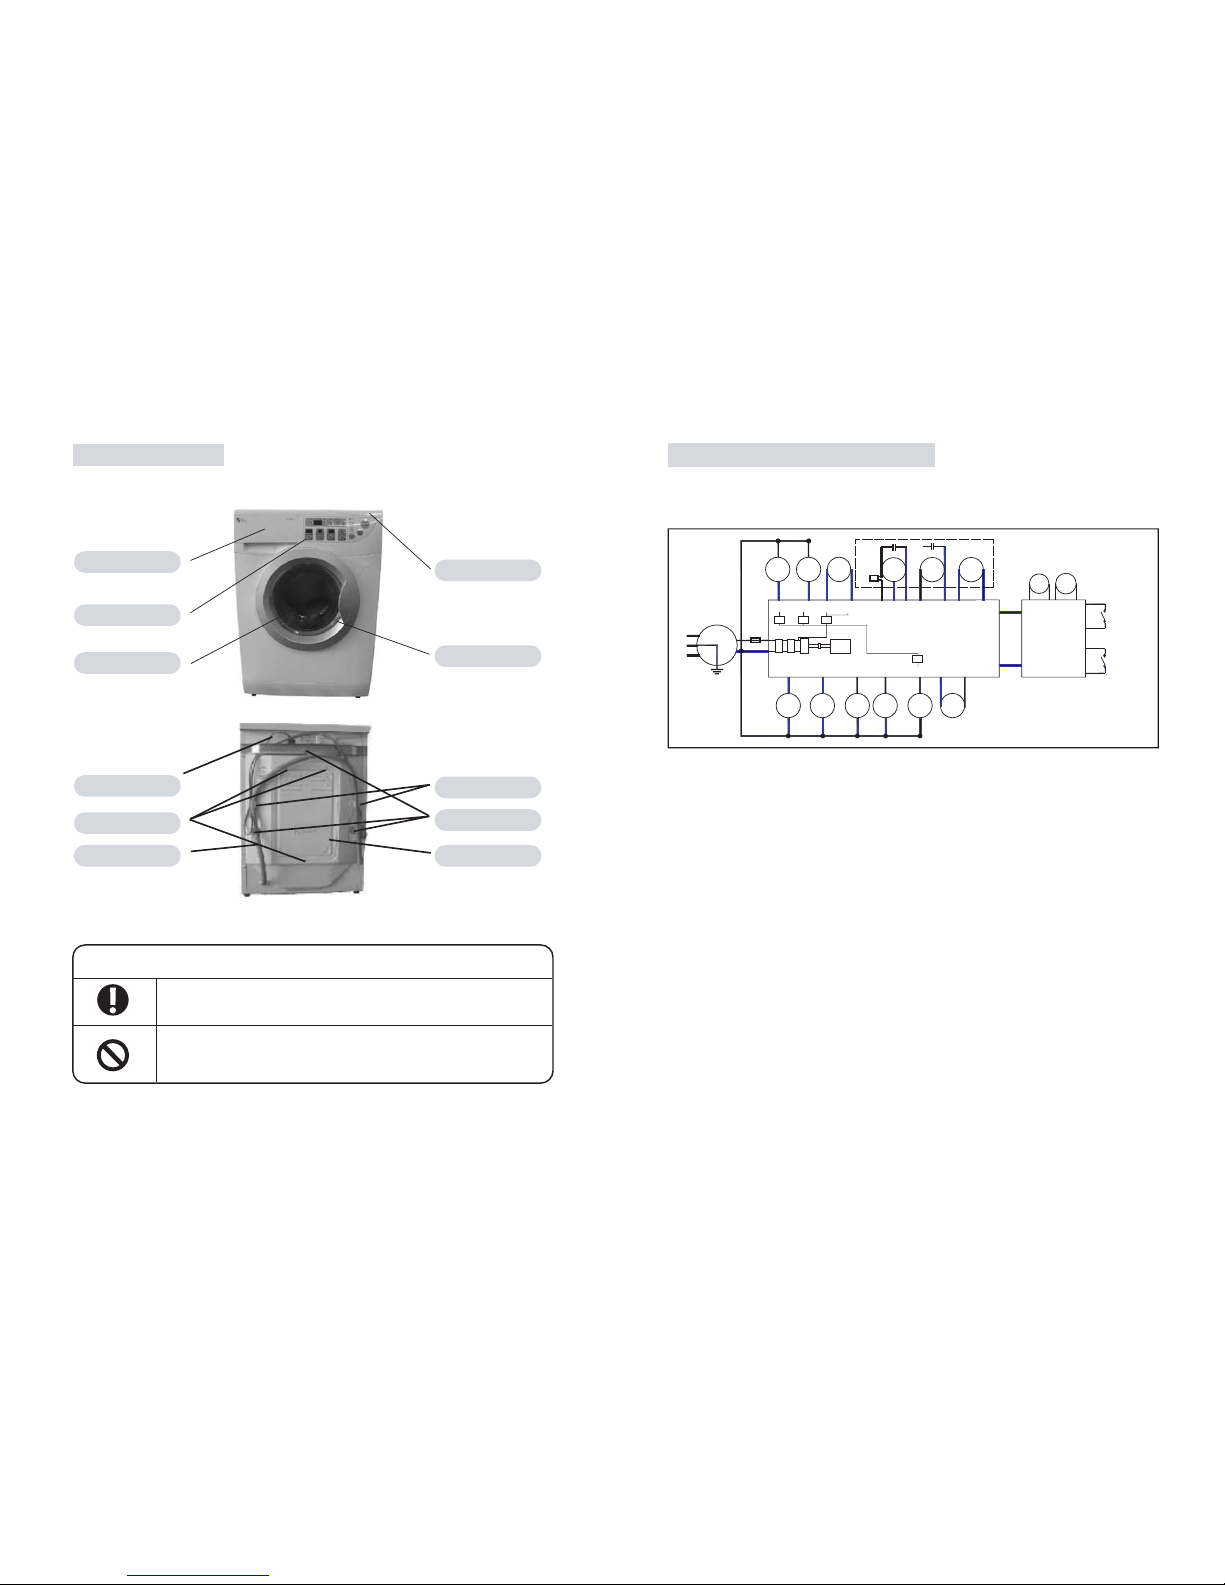
Names of parts
Detergent dispenser
Operation panel
Glass porthole
Power supply cable
Back plate screw(3)
Drainage hose
Table cover
Washer door
Drainage hose clip
Packing bolt(3)
Back plate
This diagram may vary slightly with the layout of the washing machine you have just
purchased due to technical inprovements.
Caution and warning symbols
For your safety, any instructions in this manual with this "Warning"
sign must be followed strictly.
For your safety and to prevent damage to the washing machine, any
instructions in this manual with this "Stop" sign must be followed
strictly.
Electronic system diagram
A:heater1 B:heater2(for drying) C:door engine(Micro-delay door switch)
G:water inlet electromagnetic valve for pre-washing Kġdrying fan motorJ:pump
H:water inlet electromagnetic valve for main washing L:water level sensor
I:water inlet electromagnetic valve for drying M:water temprature sensor
N:drying temprature sensor
D:low speed winding of motor E:high speed winding of motor Fġspeed test motor of motor
C1ǃC42˖capacitor X2 RV2ġvaristor K3ǃK4˖relay(12VDC 10A)PCB
T1ġtransformerK1ǃK2˖relay(12VDC 5A)
M6
M2
M4
M3
M1
M5
M7 M8
20F
20F
thermal
motor
protector
T1
C1
C42
RV2
L1
K4 K3 K2
L
G
N
interference
eliminator
N
N
fuse
250V 15A
CNI CNJ CNG CNH
CNA-2
CNA-1
(L)
(N)
ABC D E F
A1A3 A2 A4
A5
A7
A8
CNB CNC CND CNE CNF CN4-1 CN4-2
K1
Driving Computer Board Line
Controlling
Computer
Board
close
switch
lock
switch
MN
GH IJ KL
17
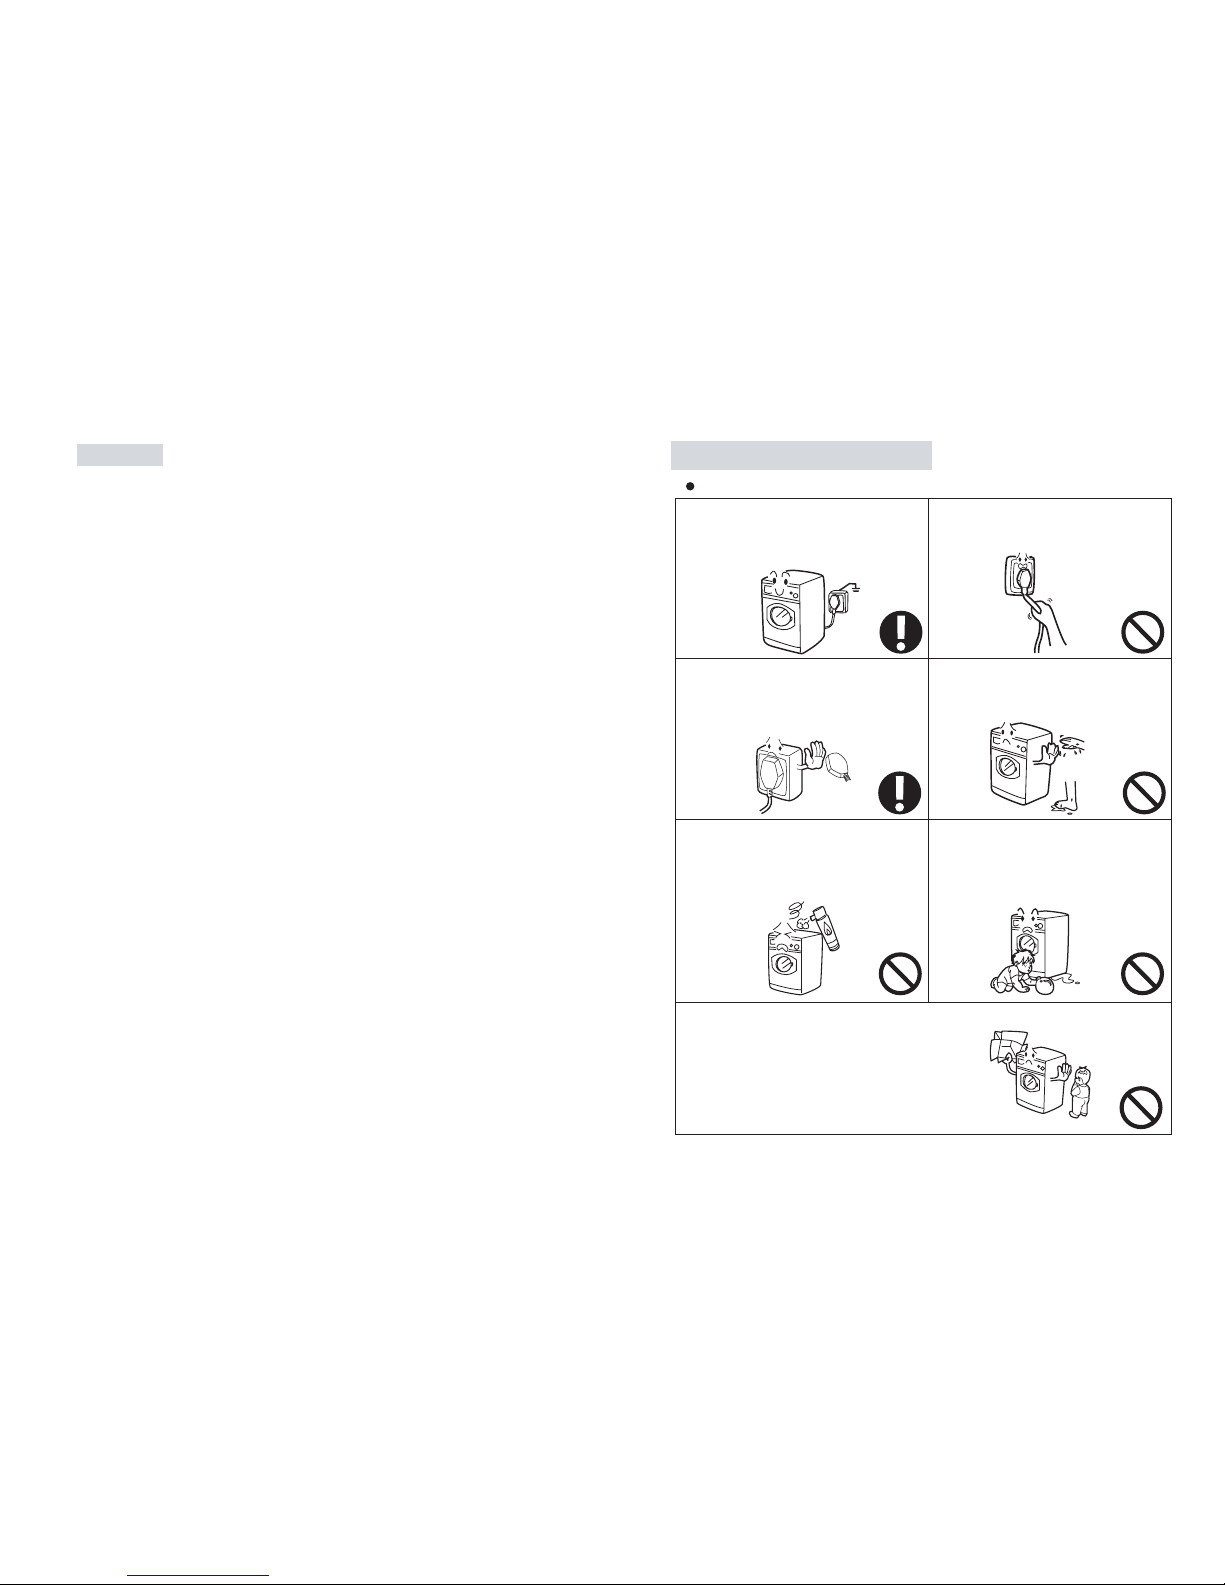
1. A separate earthed socket is required for the
power supply. After installation of the washing
machine the power plug must be accessible
during normal operation.
2. Pull the plug and not the electric cable
when unplugging the washing machine.
3. Fuses in the power circuit should be rated for
15A. Contact a washing machine technician or
a desiganted service point for power cable
replacement.
4. For you safety, dry your hands before touching the washing machine and wear appropriate footwear.
5. Do not use flammable detergents or dry cleaning agents; do not use flammable sprays
near the washing machine; do not remove or
insert the plug in the presence of flammable
gas.
6. The door of the washing machine becomes hot during the water heating or drying
process. Avoid contact with the door during
the heating or drying process. For safety,
keep children away from the washing machine.
7. Do not allow children to play with the packing materials after unpacking.
Safety
Matters needing attentionWarning
1.If the supply cord is damaged, it must be replaced by a special cord or assembly available
from the manufacturer or its service agent.
2.If a stationary appliance is provided, with a supply cord and a plug, the instructions shall
state that the appliance must be positioned so that the plug is accessible.
Note: this requirement does not apply if the appliance incorporates other means for
disconnection from the supply.
3.For washing machines with ventilation opening in the base, do not place directly on carpet
as it will obstruct the openings.
4.The instructions shall state that the appliance is to be connected to the water mains using
new hose-sets and that old-sets should not be reused.
Note: these instructions are not required if the hoses are permanently attached to the
appliance.
5.When connecting the washing machine for water supply and drainage, make sure the plug
is within reach.
6.Keep the vent outlet at the bottom of the washing machine free from being blocked.
7.To prevent danger, damaged electrical cables must be replaced by the manufacturer or an
authorised service agent.
16 1
 Loading...