

User Guide

1
WELCOME
Thank you for selecting the iSWAG IS-Q3100/Q3200
Journey model. By reading this manual you will fully
understand the operation of your mobile phone and will
appreciate its simple operation and functionality.
The phone Journey IS-Q3100/Q3200 is designed for use in
a GSM network environment. This model is Quadband
GSM quad band (850/900/1800/1900 MHz) and is
available in two versions:
IS-Q3100 Single SIM
IS-Q3200 Dual SIM
The Journey IS-Q3100/Q3200 provides many functions
practices such as sending messages, audio and video
player, camera and video recorder, E-book, games,
B-tooth, alarm clock, calculator, auto power on and off,
it which is very convenient for work and personal
activities.
For purposes of worldwide distribution, the default
language of this mobile phone GSM is Spanish.
You can set the language you need with the following
instructions:
2
1 Input the switching code of your target language under the STANDBY
status. The switching codes are listed as follows:
English
Spanish
Portuguese
*#0044#
*#0034#
*#0351#
2 Please press the DIAL KEY after inputting the switching code, then you
will get the language you need which is already loaded in the software.
For example: The default language is English, but you need Spanish.
Please input the relevant switching code “*#0034#”, then press the DIAL
KEY, now you have got Arabic!
*Specifications are subject to change without prior notice.

3
CONTENT
1 SAFTEY NOTICE ................................................... 3
2 YOUR DEVICE .................................................... 5
3 KEY INSTRUCTIONS ............................................ 6
4 BEGIN TO USE .................................................... 8
4.1 INSTALL SIM CARD AND BATTERY .................. 8
4.2 CHARGE THE BATTERY ..................................... 8
4.3 SECURITY CODE ............................................... 9
5 BASIC FUNCTIONS ........................................... 10
5.1 POWERING ON/OFF THE MOBILE PHONE ... 10
5.2 LINKING TO THE NETWORK ........................... 10
5.3 DIAL ................................................................. 10
5.4 TORCH ............................................................. 13
6 MENU LIST ......................................................... 13
6.1 PHONEBOOK .................................................. 13
6.2 CALL CENTER ................................................. 14
6.3 MESSAGING ................................................... 18
6.4 MULTIMEDIA ................................................... 21
6.5 FILE MANAGER ............................................... 26
6.6 FUN AND GAMES ........................................... 26
6.7 ORGANAIZER ................................................. 27
6.8 SETTINGS ......................................................... 29
6.9 USER PROFILES ................................................ 31
7 EXTRA ................................................................ 31
8 SERVICES .......................................................... 32
9 SHORTCUTS
……………………….………………33
10 FAQ AND SOLUTIONS …………………..………33
11 IMPORTANT SECURITY INFORMATION….…….35

4
5
1 SAFETY NOTICE
You should read the following information carefully before using the
phone in order for you to use it safely and effectively.
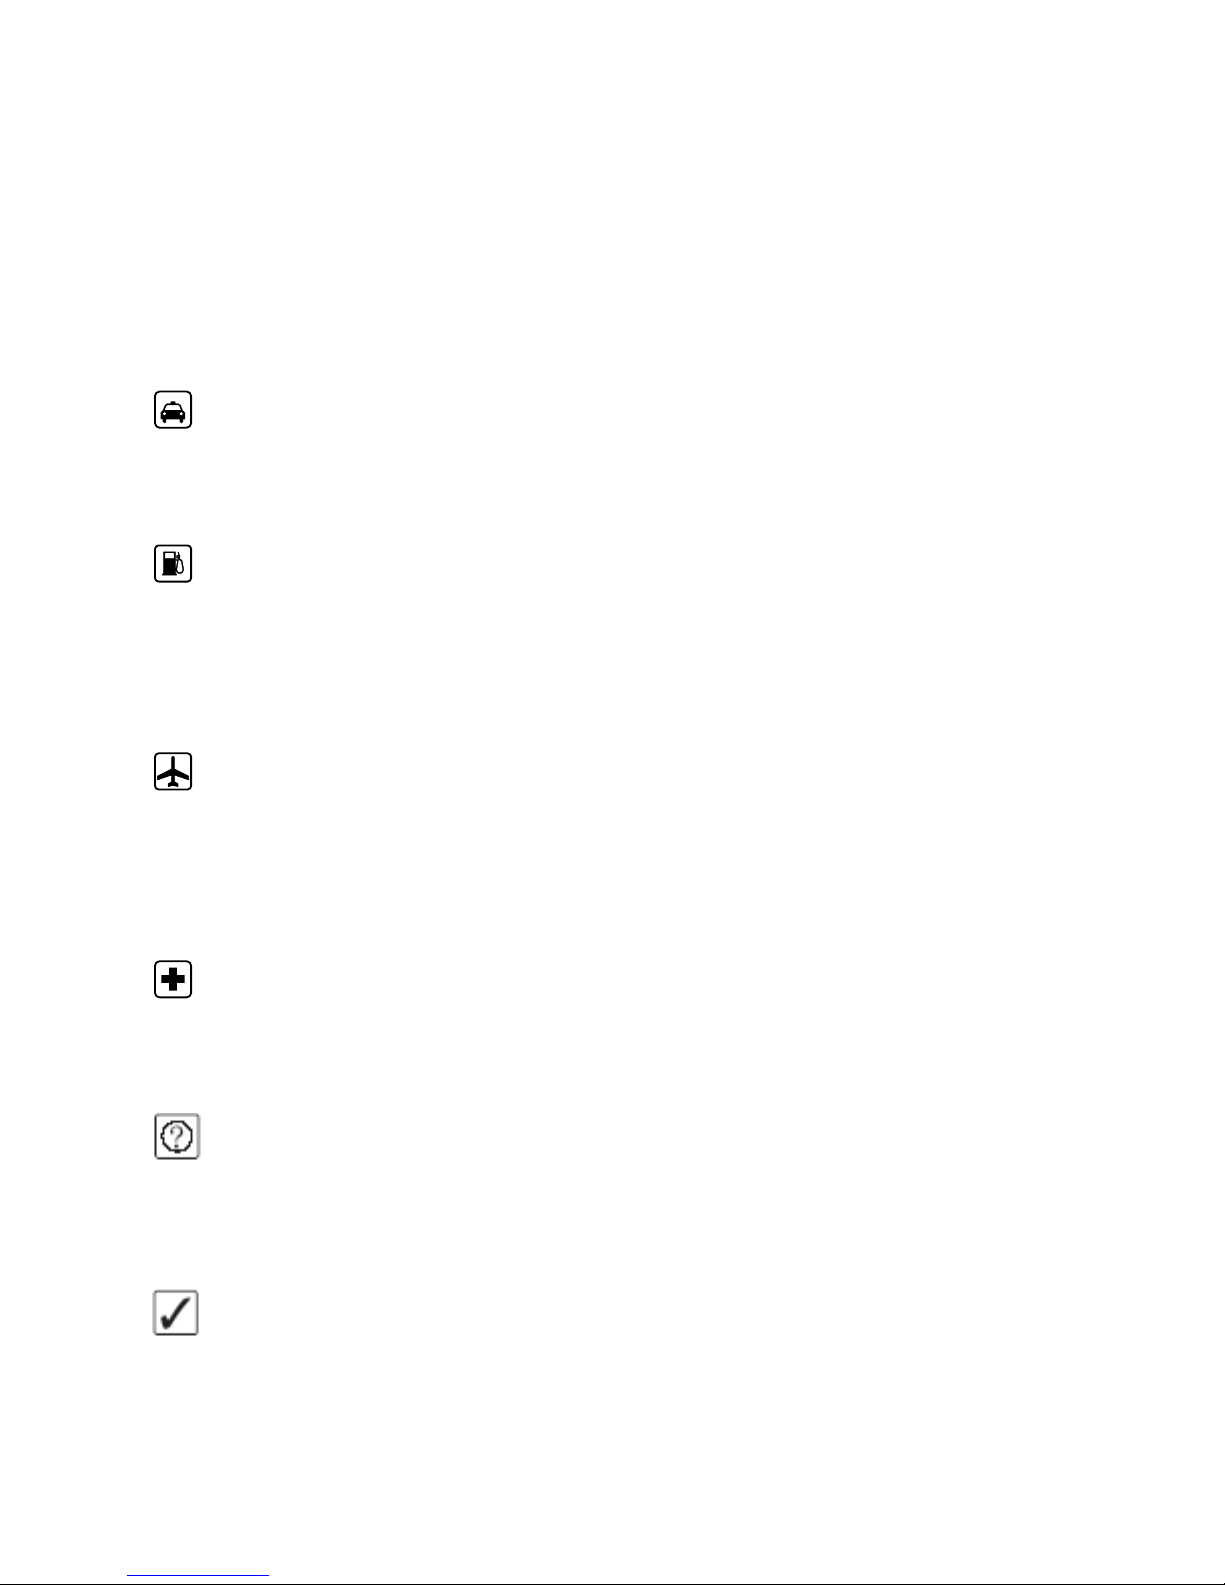
Traffic safety is first
If you dial or answer a call while driving, please use the
hands-free device or use your phone after parking the vehicle.
Power the phone off at gas station
To avoid the risk of any explosion, please switch off the phone
at gas stations and places near fuel, chemicals or other dangerous
substances.
Power the phone off on flight
Please make sure your phone is switched off or in flight mode
during the whole flight, for mobile phone will interfere with the
communication network for the airplane.
Power the phone off at hospitals
Please switch off your phone near medical devices or places
which phone using is forbidden.
Disturbance
All phones may be susceptible to interference, which could
affect performance.
Use sensibly
Use only in a normal and proper manner. Do not put your
hand on the part of internal antenna since it is battery-costly and will

6
affect the conversation quality.
Qualified Service
Only qualified personnel may install or repair phone equipment.
Installing or repairing the mobile phone on your own may bring great
danger and violates the warranty rules.
Connectivity
If you need to connect your phone to other devices, please
read the user guide of that device carefully for safety.
Accessories
Use only approved accessories and batteries.
Children safety
Keep your phone and accessories out of the reach of
children.
7
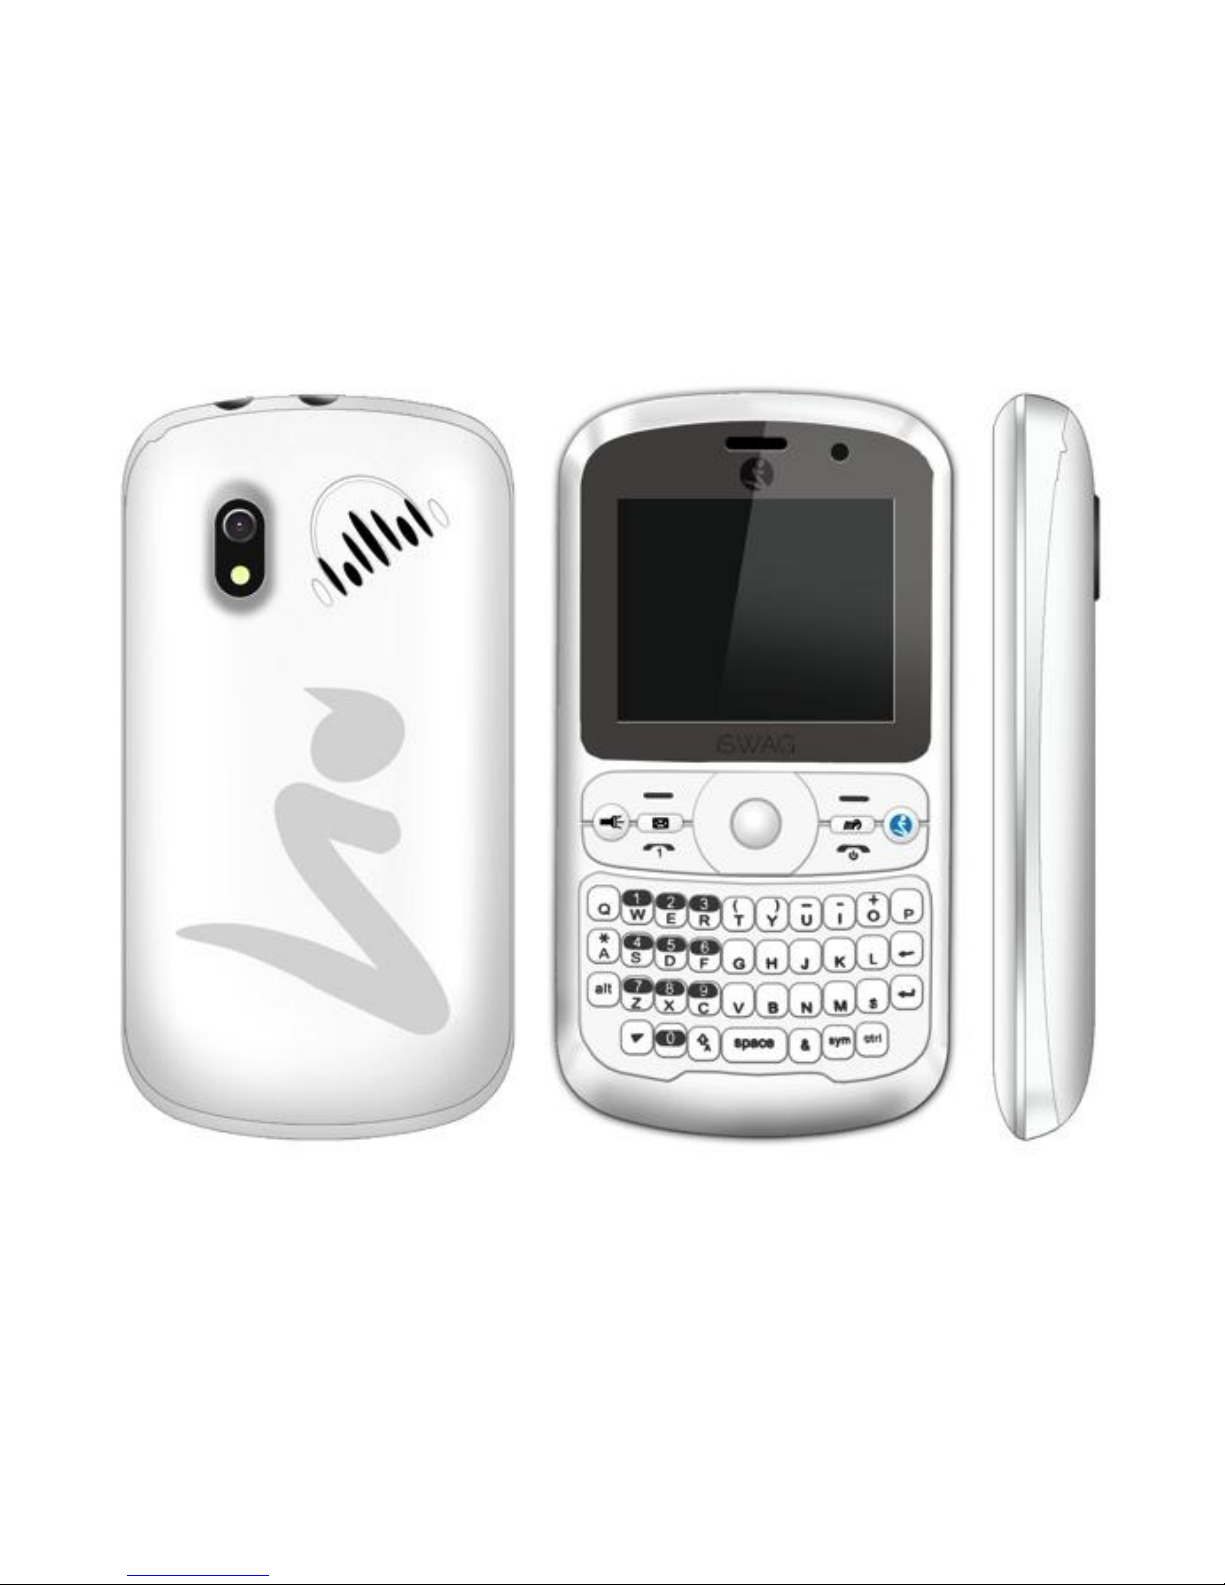
2 YOUR DEVICE
ISWAG JOURNEY IS-Q3100/Q3200
8
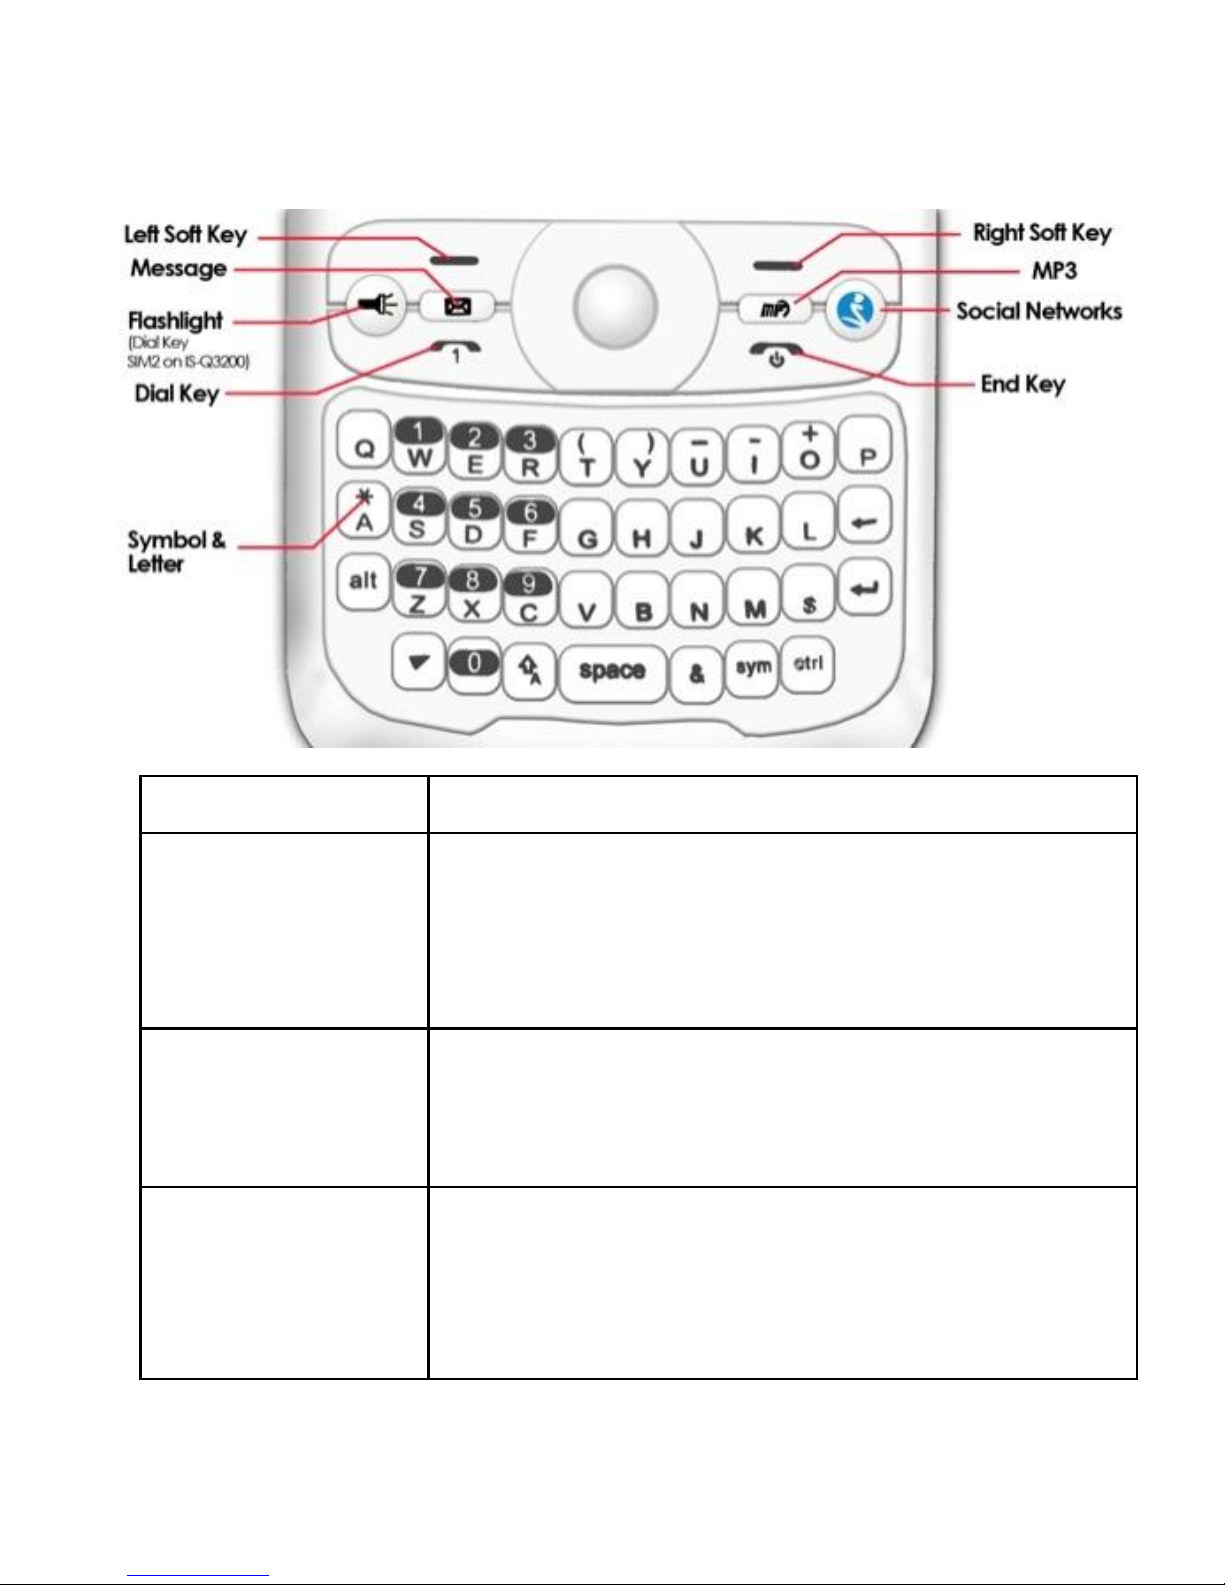
3 KEY INSTRUCTIONS
Keys
Description
Left/Right key
In editing, press the left/right key to move
the cursor left and right; in some sub-menus,
press the right key to open the selected
menu, press the left key to back to the
previous menu.
SIM1/2
dial key
Dial or receive a call. In standby mode,
view the dialed numbers. or press it in
standby state to show the latest call
records.
End key
Press it to end a call being dialed or end an
ongoing call; or press it to exit the menu
and return to the standby state; or hold it for
two or three seconds to power on or off the
mobile phone.

9
Navigation
key
Press them to scroll the options when
browsing a function list. In edit state, press
direction keys to navigate. In standby state,
press a direction key to enter the specified
function page. You can also customize
direction keys to match the desired
functions. In conversation status, press up or
down direction key to tune the sound
volume.
Central key
Press it to confirm your selection. In standby
mode, press the central key to enter the
main menu.
* key
Different functions are shown in different
states or different function menus.
Press * key to input "+" for dialing an
international call, or press and hold * key to
input P or W to call an extension number.
Press * key in edit status to select a symbol.
# key
Long press the # key: to exchange
silence/general mode.
Press the # key in edit state to switch
between input methods, or press it after
pressing left soft key to lock/unlock the
keyboard when the keypad.
Number keys
0-9
Press number keys 0 through 9 in input or
edit state to input numbers and make a
call; press and hold 1 for voice command
or setting.
Shortcut key
In standby state, press this key to enter the
Message and MP3 interface.
Symbol&Letter
Kepad Area
Press these keys to input Letter and Symbol.

10
4 BEGIN TO USE
4.1 Install SIM Card and Battery
Please be sure to disconnect the phone with the adapter before
disassembling the battery.
This version is a dual-card dual-standby phone which can be inserted
with 2 SIM cards. Both SIM cards can register onto an identical network.
Each SIM card is included in the socket generally. The SIM card 1 is
inserted in the Socket 1 and SIM card 2 in Socket 2. You should be
careful to use, insert and disassemble the SIM card because the
contact of the SIM card is easy to be scraped or bent to damage.
1. Disassemble the battery cover.
2. Disassemble the battery.
3. Slide the SIM card into the socket.
4. Insert the battery.
5. Cover the battery.
4.2 Charge the Battery
The phone will release the warning tone displaying the insufficient
battery capacity with the indication of the empty battery icon when
the battery capacity is low. Under this case, the phone may not be
used in partial functions. The phone will power off automatically when
the battery capacity is too lower. Please charge the battery.
The battery icon on the screen will flash when the phone is being
charged. After completion of charging, the full battery icon will display
on the screen. The charging animation will be displayed on the screen
when the phone is being charged under the power-off state. After
completion of charging, the screen will display the prompt system of
finishing charging. Under the standby mode, it takes 2-3 hours to
charge the battery.

11
1. Insert the adapter in AC electric outlet.
2. Connect the adapter to the phone.
3.The symbol indication of charging the battery appears on the
screen. (The symbol indication of charging the battery can
appear after waiting for a few minutes if the battery capacity is
exhausted).
4.Pull the adapter apart from the power supply socket and then
pull the adapter out of the phone after completion of the
charge.
4.3 Security code
PIN: The PIN (Personal identification number, 4 to 8 digits) code
prevents your SIM card from being used by unauthorized people. In
general, the PIN is supplied with SIM card by the network operator. If
PIN check is enabled, you need to input the PIN each time when you
power on your mobile phone. The SIM card will be locked if you input
wrong PIN code for three times. To unlock the PIN, please contact
your local service provider.
PIN2: The PIN2 comprises four to eight digits. Provided along with an SIM
card, it sets functions such as call billing and fixed dialing. Please
contact the network operator to verify whether your SIM card supports
these functions. If the PIN2 you input at three consecutive times is
wrong, the PIN2 will be locked. To unlock the PIN2, please contact your
local service provider.
PUK: The PUK code (Personal Unlocking Key, 8 digits) is required to
change a blocked PIN. It is supplied with SIM card. If not, contact your
network operator. If you input wrong PUK code for 10 times, SIM card
will be invalid. Please contact the network operator to replace the SIM
card.

12
Phone lock code
The phone lock code may be set to prevent your mobile phone from
being misused. In general, this code is provided along with the mobile
phone by the manufacturer. The initial phone lock code is set to 1234
by the manufacturer. If the phone lock code is set, you need to input
the phone lock code when powering on the mobile phone.
5 BASIC FUNCTION
5.1 Powering On/Off the Mobile Phone
Hold the End key for a while to power on the mobile phone.
A power-on animation appears on the display screen.
Input the phone lock code and press the OK key if the mobile phone
prompts you to input the phone lock code. The default phone lock
code is 1234.
Enter the standby interface.
To power off the mobile phone, hold the End key for a while.
5.2 Linking to the Network
After the SIM card and the mobile phone are successfully unlocked,
the mobile phone automatically searches for an available network.
After finding a network, the mobile phone enters the standby state.
When the mobile phone is registered in the network, the name of the
network operator is displayed on the screen. Then you can dial or
receive a call.
5.3 Dial
You can dial with several ways as follows:
Input the phone number (should affix the international/national/
regional code or district code if necessary) and then press
[Send1/Send2] under the standby mode.

13
Press [Send1/Send2] to dial a phone number listed in the recent call log
under the standby mode.
Press and hold numeric keys [2]-[9] to dial the shortcut phone number
set on the numeric keys under the standby mode.
Dial with the contact name or phone number in the phone book.
The phone supports dialing the international emergency phone
number, such as 112 and 911 etc. With the phone, you can dial an
emergency call at any country or region under the normal situation
regardless of SIM card inserted when the phone is located within the
coverage of the GSM network. Input the emergency phone number
and press [Send1/Send2] to dial out.
Answer Incoming Call
You can perform as follows when there is an incoming call:
Press [Send1/Send2] to receive the incoming call. You can use the
earphone to answer the call when the generic earphone or B-tooth
earphone is inserted in the phone.
Press [End] to decline an incoming call.
Reject a call
When there is an incoming call, you can press 【End Key】to reject it.
Directly call on Home Screen
On the Home Screen, input the area code and phone number.
Briefly press 【Call Key 1/2】 to call from SIM 1/2.
Make an international call
Enter the country code (To enter “+”, just press【* Key】twice).
Enter the area code (Usually exclude the first “0”) and the
phone number.
Briefly press 【Call Key 1/2】 to call from SIM 1/2.

14
Call from Phonebook
Enter the phonebook to select the desired information.
Briefly press 【Call Key 1/2】 to call from SIM 1/2.
Redial from call history
Enter the main menu and select [Call center], then select your
desired number.
On the Home Screen, press 【Call Key 1/2】to check the call history, and
selected the desired dialed number.
Briefly press 【Call Key 1/2】 to call from SIM 1/2.
Dial an extension number
Enter the switchboard number.
Press * quickly when P appears, then enter the extension number.
Briefly press 【Call Key 1/2】 to call from SIM 1/2. The extension number
will be transmitted in few seconds after getting through the
switchboard.
Make an emergency call
Enter the emergency phone number.
(1) Press briefly 【Call Key 1/2】to call from SIM 1/2.
Function During Call
You can use many functions during the call process.
Option During call
Press <Option> to use the following options:
Hold single call: temporarily hold the current call.
End single call: end the current call.
New Call: call the opposite party to build a Call to Many.
Phonebook: enter in the phonebook menu.
Messages: enter in the SMS menu.
Mute: open or close the mute mode.

15
5.4 Torch
On the Home Screen, Long press [OK] keys can be used to open or
close the torch feature
6 MENU LIST
6.1 Phonebook
You can save the phone number in SIM cards or phone. The mobile
phone can store up to 300 telephone numbers. The number of
telephone numbers that an SIM card can store depends on the storage
capacity of the SIM card. Press RSK under the standby mode or press
shortcut to enter Phonebook function.
Quick search
Select to enter the telephone directory browser interface, according to
the soft keyboard in the English alphabetical list of names to find points
of the first letter of the alphabet can be quickly identified.(Note: SIM1/2
phone messages were used next to the user name to distinguish
between small numbers 1/2) Press Dial key can directly call this searched
contact, and press End key can terminate the call. Press LSK to Options:
edit, send text message, send multimedia message, call, etc.
Phonebook list
Select a contact in the contact list window and press<Option> to
perform:
View: view the detailed information of a selected contact.
Send text message: send a SMS to the current contact.
Send multimedia message: send a multimedia to the current contact.
Call: Call SIM1/2 selected contact.
Edit: edit the current contact.
Delete: delete the current contact.
Copy: You can copy the contact information to SIM 1/2 and phone.
Move: You can copy contract from SIM Card A to SIM Card B, or from
SIM Card A to handset, or the opposite direction

16
Send contact: send SMS, MMS, B-tooth to the current contact.
Add to Blacklist: Add to blacklist the contact.
Phonebook Settings :You can manage the phonebook with this function.
Preferred storage: choose the priority for the storage location- the
mobile phone or SIM1 / SIM 2 or All.
Speed dial: set quick dial. Up to 8 numbers can be set. In standby
interface, press and hold corresponding number key“2~9” and you
can call the specified number. Speed dial list will be displayed in speed
dial menu. Corresponding number key “(2 ~ 9) = contacts” will be
displayed if set. If not, corresponding number key “(2~9)=invalid”.
Press LSK to Options:
Human voice prompt::activate/Deactivate this function.
6.1.1 Add new contact
Press navigation key to select “Add new contact” in phonebook list,
then press OK add name, number, etc. to destination.
Phonebook copy
6.1.2 Phonebook backup
Backup contacts the phonebook deposit T card by default phonebook
folder, numbers in phone and SIM card backups to the appropriate
folders respectively. Each of contact with a VCF file storage , will cover
before each backup namesake backup corresponding.
6.1.3 Phonebook Restore
When restore please select Default path : the file Phonebook folder of
T card.
First restore the phone numbers in the phone, add then the SIM card.
Recovery the numbers can only be stored within phone.
6.2 Call Center
Call history
With this function, you can view the information of the missed, dialed,
received or all calls in SIM card 1 or 2。

17
6.2.1 SIM1 call history
Call List
All calls: view all call records.
Dialed calls: Display the recently dialed calls in SIM cards upon entering
in this function.
Received calls: Display the recently received calls in SIM cards upon
entering in this function.
Missed calls: Display the recently missed calls in SIM cards upon
entering in this function.
Select a call in the call list window and press<Option> to perform:
Call: Call use SIM1 selected log.
Send Text message: send a SMS to the current contact.
Send Multimedia message: send an MMS to the current contact.
Add to Blacklist: add to blacklist the contact.
Edit before call: edit before call number and make a call.
Delete: delete this call log.
Delete all: delete all call logs in SIM cards.
6.2.2 Advanced: Call timers: You can view the time record of the last
calls, dialed calls or received calls in SIM cards or zero the call timer in
SIM cards upon entering the function.
SIM1/2 last call: view the time length of last call in SIM cards.
SIM1/2 dialed calls: view the total time length of dialed call in
SIM cards.
SIM1/2 received calls: view the total time length of answered call in
SIM cards.
SIM1/2 reset all: zero the call timer in SIM cards.
SIM1 text msg. counter: Upon entering the function, you can view the
entries of sent and received SMS or zero the SMS counter.
SIM1/2 sent: view the entries of SMS sent.

18
SIM1/2 received: view the entries of SMS received.
Press <Reset > to zero the SMS counter in SIM1.
SIM1/2 GPRS counter: Upon entering the function, you can view the last
sent, last received, totally sent and totally received GPRS flow
capacities or zero the GPRS counter in SIM1.
SIM1/2 last sent: view the last sent GPRS flow capacity in SIM1.
SIM1/2 last received: view the last received GPRS flow capacity
in SIM1.
SIM1/2 all sent: view the totally sent GPRS flow capacity in SIM1.
SIM1/2 all received: view the totally received GPRS flow capacity
in SIM1.
SIM1/2 reset counter: clear all records the GPRS in SIM1.
6.2.3 Call settings
SIM1/2 call settings
Call waiting: New incoming call will be informed during calling. Please
contact your network operator for details. Perform as follows:
Activate: launch the Call Waiting function.
Deactivate: Disable Call waiting function.
Query status: view the present state of this function.
Call divert: This feature enables you to forward incoming calls to
another number or voice mail box.
Following options for call divert can be activated or deactivated. Input
the phone number when activated per your phone’s instruction.
Divert all voice calls: Divert all incoming calls to the preset number.
Divert if unreachable: Divert an incoming call to the preset number only
when the called party is unreachable.
Divert if no answer: Divert an incoming call to the preset number only
when the called party does not answer the call within the specified time.
Divert if busy: Divert an incoming call to the preset number only when
the called party is busy. Press right soft key to divert.
Divert all data calls: Divert an incoming call to the preset number only
when the called party is out of service of your service provider.

19
Cancel all divert:Cancel all call diverting.
6.2.4 Call barring: you can set up as follows:
Outgoing calls
All calls: Restricted all outgoing calls except emergency calls.
International calls: Restricted all international calls.
International calls except home: Only local network call can be made
when roaming. Please contact with the network operator for details.
Incoming calls
All calls: Restricted all incoming calls.
When roaming: Restricted all incoming calls when roaming.
Cancel all: cancel all call restrictions.
Change barring password: modify the password of barring
outgoing/incoming calls.
Line switch: switch between Line 1 & Line 2.
6.2.5 Advance settings
Blacklist
Open or close the blacklist for incoming calls. Input the phone number
to the blacklist or press OK button to select the phone number to be
added to the blacklist.
Auto redial
Set up whether the phone is redialed when the call is not connected.
Press the on/off button to launch or shut down the function.
IP dial
Add or edit IP call number.
Call time reminder
Select to release prompt tone during the call in each integral minute
time.
Auto quick end
Set a time limit. The call will automatically interrupt if there is a time

20
limitation.
Reject by SMS
Choose Open to reject a call and send message.
Answer mode
When any key is marked, when a call is coming, pressing any key will
answer this call.
6.3 Messaging
You can send and receive the SMS and MMS as well as use cell
broadcast with this function.
Press <Menu> under the standby mode and then select Messages if
you desire to enter in the function.
6.3.1 Write message
Text message You can edit, send the SMS with this function.
Multimedia message
You can edit, send and receive the MMS with this function.
When editing the content, you can press <Options> to enter the option
list, where you can choose:
Send to – to finish editing the content.
Input method – to select the input method you want to use.
Add picture - to add a picture to the message content.
Add audio - to add a audio resource to the message content
add video - to add a video resource to the message content.
Add slide before - to insert a new slide before this slide.
Add slide after - to insert a new slide after this slide.
Delete slide - to delete current slide.
Next slide - to change to next slide.
Add bookmark text - to add a bookmark to message content.
preview - to preview the content.
Slide timing-to set the slides change time.

21
6.3.2 Inbox
Under the standby window, enter the main menu window press the left
soft key to select Message Center, then SMS, and finally select the
Inbox. Select one message and press [OK] key to view it. Press [RSK]
key return to the SMS window. In the Inbox list, select one message
and then press the left soft key to enter in the following options:
View: to view this message content.
Reply by SMS: reply the SMS to sender.
Reply by MMS: reply the MMS to sender.
Call sender: Make a call to sender
Forward: forward the selected SMS to other;
Delete: delete the selected message;
Delete all: delete all SMS in inbox;
Save to Phonebook: to save the sender number to phonebook.
6.3.3 Advanced
Use Number: Extract the phone number from the message to dial or
add to the phonebook or send message.
Use USSD: Extract the USSD number from the message to dial.
details: The phone number can be used to send MMS, call and can be
saved in the phonebook.
6.3.4 Drafts
With this menu, you can operate the SMS or MMS after it saved, and
options as follows: send, edit, delete, delete all, Advanced and Edit
options.
6.3.5 Outbox
The messages send failed are stored in this item.
6.3.6 Sent messages

22
To save the sent message when the setting in [SMS settings]-[Common
settings] - [Delivery report] is activated.
6.3.7 Delete messages
You can delete all messages from Inbox/Drafts/Outbox/Sent
messages/All messages.
6.3.8 Broadcast message
Press<Ok>to enter this menu, and to set the parameter according to the
menu hints. This function needs support from the OPERATER, please
connect with them to activate this service.
6.3.9 Message settings
Text Message
You can set the SMS setting for SIM1/2 with this function.
Profiles settings: set the SMS services address
Voicemail server: You can hear the voice message leaved by others
with this function. The message that you received will be saved, if you
want to listen the voice message you should dial the voice mailbox
number.
Common settings
Delivery report: turn on/off delivery report.
Reply Path: turn on/off reply path.
Save sent message: turn on/off save sent message.
Memory status: you can view the SMS store status.
Preferred storage: save the SMS in the SIM card or phone.
6.3.10 Multimedia message
Data account
Set the MMS services address
Common settings
Compose: use to set up the Creation mode, Picture resizing, Best page

23
time, Auto signature.
Send: use to set up entries related to sending MMS including Validity
period, Delivery report, Read report, Priority, Slide time, and Delivery
time. Retrieve: use to set up entries related to receiving MMS including
Home network, Roaming, Read report and Delivery report.
Filter: use to filter the anonymous sender and advertisement message.
Memory status: the user can view the MMS store status.
6.4 Multimedia
With this function, you can perform the multimedia functions, such as
Camera, video recorder or Sound recorder.
Press <Menu> and then select Multimedia under the standby mode if
desired to enter in this function.
6.4.1 Camera
Press the [LSK] or [OK] key to select it, enter in the camera window,
press [OK] key to snap. Press the [LSK] key to select the option and you
can perform: Camera settings, Image quality, White balance, Scene
mode, Effect settings, etc.
Use Camera Option
Press <Option> to use the following options under the following
view-finding window.
Photos: enter in the album to view the photos.
Camera settings: set Shutter sound, set EV, turn on/off night mode, set
Contrast, Set Anti-flicker, Delay timer and Cont.shot.
Image settings: set the Image size and Image quality.
White balance: adjust the white balance of the photo.
Scene mode: select the snapping mode.
Effect settings: use the special effects for the photos snapped in the
normal mode.
Storage: You can choose the path to save the photo: Memory card or

24
phone.
Restore default: recover all settings into the initial values.
6.4.2 Image viewer:
You can view the photos snapped with the camera through this
function.
Photo list option: Select a photo file and press <Options> under the
photo list window and perform:
View: view the selected image.
Browse style : Select browsing mode between list style and Matrix style
Send: send the selected image file to MMS or to B-tooth.
Use as: use the selected image file to the wallpaper, screen saver,
power on display, power off display or caller picture.
Rename: change the name of the image.
Delete: delete the selected image.
Sort by: sort the images by the name, type, time, size or None.
Delete all files: delete all images.
Storage: Choose the path is stored photos.
6.4.3 Video recorder
Please insert the T-Flash card before using this function.
Press the left soft key to select it, enter in the Digital Camcorder window,
press OK key to snap. Press the left soft key to select the Option and you
can perform: Camcorder Settings, Video settings, White balance,
Effect settings, Storage, Restore default.
6.4.4 Video player
Please insert the T-Flash card before using this function.
Enter in the video player window, select a video file, press the [LSK] key
to select it, performing: Play, Send, Rename, Delete, Delete all files, Sort
by, Storage.
Play: play the Video file.

25
Send: send the selected image file to MMS or to B-tooth.
Rename: change the name of the current video file.
Delete: delete the currently-selected video file.
Delete all files: delete all the currently-selected video files.
Sort by: sort the video files by menu: name, type, time, size or None.
Storage: choose to view video files saved in phone or in memory card.
6.4.5 Audio player
You can enjoy the music with this function.
Player:
Press to enter into play, Switch to different functions via pressing [LSK]
keys and other function key. You can use the following keys when you
go to Audio Player.
List: In the Audio Player interface, press the [LSK] to open playlist.
Press [OK] or [LSK] to open below options in playlist window:
Play: Play the selected song in playlist.
Details: show the selected songs detail information, such as: Filename,
Channel, Quality, Size, Time, Title, Artist, Genre, year and so on.
Refresh list: Refresh the playlist.
Key
Function
UP
Press to decrease the
Down
Press to increase the
OK
Press to Play/Pause Music.
[LSK]
Open playlist.
Left
Press to previous song.
Right
Press to next song.

26
Settings:
Pre.play list: you can choose from phone or from memory card.
List auto gen.: turn on/off this function.
Repeat: set the repeat as Repeat, Repeat All or Turn off repeat.
Shuffle: Turn on/off Shuffle.
Background play: Turn on/off Background play.
Audio effects: set the Equalizer as Pop, Rock, Normal, Bass, Dance,
Classical, Treble, Party. You can turn off the Equalizer as well.
Lyrics display: Turn on/off this function.
6.4.6 Sound recorder
Press the [LSK] or [OK] to select it, entering in the recorder window to
record file.
You can record the voice with this function.
Record
Select New Record option in the record file option and begin to record.
Select <Pause> to stop recording temporarily and select < Cont. > to
continue to record.
Select <Stop> to stop recording.
Option
New record: start to record.
List: Open the recorded file list.
Select a recorded file and press <Option> under the record file list
window and perform: Play, Rename, Delete, Delete all files, Use as, and
Send.
Play: play the selected record file.
Append: continuously record after the previous record file and
append it after the record file.
Rename: rename the selected record file.
Delete: delete the selected record file.

27
Delete all files: delete all the recorded files
Use as: use the record To User profiles.
Send: send the record file To MMS, To B-tooth.
Settings: to set the record file storage and file format
6.4.7 FM radio
You can receive the FM broadcast with this function.
Key
Function
UP
Press to increase the volume.
Down
Press to decrease the volume.
Left
Press to previous channel.
Right
Press to next channel.
“#”
Press to open or stop the radio Record.
“*”
Press to open or stop the auto search.
OK
Press to open or stop the radio.
FM Radio option
Press <Option> under the radio window to use the following options:
Channel list: play, edit or delete the saved channels.
Manual input: manually input the channel to search.
Auto search: automatically search the channel.
Settings: Settings Loudspeaker, record format, Audio quality, Record
storage.
Record: set the recording format and audio quality.
Append: continuously record after the previous record file and
append it after the record file.
File list: list all recorded files.
6.5 File Manager
Under the main menu window, press the LSK to select File Manager to

28
the file manager window. You can view the data saved in the T-Flash
card. When inserting T-Flash card, there are 5 operating window to the
file: open, format, remove, rename, and details. Please confirm the
store path when opening the folder.
Ebook: TXT format
My music: Enjoy the music. (to your music list)
Photos: Store photos. bmp、gif、jpg format
Received: B-tooth received files stored.
Recordings: to record as amr / .wav format.
Videos: AVI,3GP.VIDEO format
6.6 Funs & Games
Enter in the game window, the following operations are available:
Games, MSN ,Yahoo , Facebook , Twitter, eBuddy and Nimbuzz and Help.
With the game setting menu, you can set the background music, sound
effect and volume.
Select a game, press the soft key to select it, you can perform:
Start game: The game has entered a new initial state.
Game level: choose the game level you want to play.
Best grades: a game score list.
Help: instruction to the game operation.
MSN
Log in your MSN account to experience mobile connection. This function
need your network support, please contact your network service
provider for detailed information.
Yahoo
Yahoo is an Internet portal. Its services include: search engines, e-mail,
news and so on. That may arise during use GPRS communications
traffic fees charged by local operators.
Facebook
Facebook is a social networking service site. That may arise during use

29
GPRS communications traffic fees charged by local operators.
eBuddy
ebuddy is a Web and mobile messaging tool. That may arise during use
GPRS communications traffic fees charged by local operators.
Twitter
Twitter is a service for friends, family, and co-workers to communicate
and stay connected through the exchange of quick, frequent answers
to one simple question. That may arise during use GPRS
communications traffic fees charged by local operators.
Nimbuzz
Nimbuzz is a instant messaging software. That may arise during use
GPRS communications traffic fees charged by local operators.
Help
Using the WAP service will pay a fee for GPRS, the fee standards, please
consult local operators.
Game settings
You can set the BGM, Sound effect, volume.
6.7 Organizer
You effectively manage your daily life with this function.
Press <Menu > under the standby mode and select Organizer if you
desire to enter in the function.
6.7.1 Calendar
View the routines or the memo saved in the calendar.
The phone will prompt you with the related affairs in assisting you to
manage your daily schedule.
6.7.2 Tasks
Press the left soft key to Add task.
If the task list is added, press the up and down navigation keys to select
a task list, press Option button: View, Add, Edit, Search, Delete, Delete
overdue, Delete all, Jump to date, View uncompleted, Send
vCalendar, and Save as file.

30
6.7.3 Alarm
Set that the alarm clock will ring at specific time with this function.
Set up alarm clock
Select an alarm clock and enter into alarm clock setup window.
Set up the alarm clock with the following setting:
Set the alarm clock status as on or off.
Set the alarm clock time.
Select the ring mode as Everyday, Once or Custom.
Set the Alarm tone as Tone or FM radio.
Select the Snooze time.
Select alert type.
Press<done>.
6.7.4 World Clock
You can view the current local time of various countries.
6.7.5 Torch
You can select ON to open the torch, select OFF to turn off torch.
On the Home Screen, Long press [OK] keys can be used to open or
close the torch feature
6.8 Settings
You can set various functions of the phone with these functions.
Press <Menu> under the standby window and then select Settings if you
desire to enter in this function.
6.8.1 Dual SIM switch
To set the work status Manually selected by user or Automatically
decided by SIM cards.
6.8.2 Dual SIM settings

31
To set the work status of this two SIM cards: Dual SIM open, only SIM card
A open, only SIM Card B open.
6.8.3 Phone Settings
You can customize your favorite phone functions based your interest
with this function.
Time and date: you can set up time/date and time zone for your
phone.
Schedule power on/off: you can set up to power the phone on/off at
the set time. This function can be opened or closed.
Language: select the language used for the phone.
6.8.4 Display
Mobile phone display can be set.
Wallpaper:Can be images stored in phone and file manager.
Screen saver:Screen saver can be set here. Image will be auto shown
in full-screen if no operation is taken.
Show date and time: Turn on/off Show date and time.
Particle style: Set the main menu highlight the effects.
Shortcuts
Press “Navigation Key” to enter shortcuts menu if you have set shortcut
functions to navigation keys in the dedicated key.
Dedicated key: Customize the shortcut functions of the Up, Down, Left,
and Right direction keys. In the standby interface, you can press a
direction key to directly enter the function menu corresponding to that
direction key.
Auto update time: activate/Deactivate this function.
Flight mode: Turn on/off Flight mode.

32
6.8.5 Misc. settings
LCD backlight
Brightness:Set the brightness level by left-right navigation key.
Time (sec):set the time to close the backlight by left-right
navigation key.
Network settings
Network setting operation is list as below.
Network selection
Mobile phone will prefer the network where the SIM card is registered.
Preferences
You can add from list or create new.
6.8.6 Security Settings
You can manage your phone safely with this function.
Phone lock: the correct phone password is required to input after the
phone lock is to be unlocked and to be recovered into the default
setting, which is preset as 1234.
Personal data security: the correct phone password is required to input
after the Personal data security lock is to be unlocked In the
menus ,you can press the left soft key to set up for the Phone Book,
Messages, Call History, Photo, Videos And Audios and File Manager
lock or unlock.To be recovered into the default setting, which is preset
as 1234.
Auto keypad lock: press the left soft key to set up for the keypad lock in
menus: None, 5 Sec, 15Sec, 1 Min and 5 Min.
Change password: you can change the PIN, PIN2.
Restore factory settings
Recover the setting of the phone into the initial values with this function.
The default password is 1234.

33
6.8.7 Sound effects
Set the audio equalizer or turn off the Equalizer as well.
6.9 User profiles
Press left soft key to enter "Options": Active/ Customize.
General
Silent
Power save mode
Meeting
Outdoor
My style
7 EXTRA
Calculator
You can conduct the basic arithmetic operations with this function.
Input the first number. Press one of directional keys to select the
arithmetic operation sign.
Input the second number.
Press [LSK] or [OK] to view the calculation results.
Bluetooth
You can activate the B-tooth function with this function, can connect
the antenna of the phone with the other B-tooth in the wireless and
exchange data, call in hand-free way or remotely control the phone
with these device.
Stopwatch
Typical stopwatch: Split Timing, Lap Timing and View or Delete Record.
nWay stopwatch: to record time in multi-way form severally.
Ebook reader

34
You can view file in TXT format by Ebook and copy the TXT file to the
[Ebook] folder in the memory card from your PC.
On the Home Screen, press【Left Soft Key】to enter the main menu and
select [Extra→Ebook] to enter the Ebook screen you read last time.
Select <Back> to enter the Ebook list and reselect the desired file to
read.
8 SERVICES
8.1 Internet service
Homepage: Enter the homepage; it will connect with default page
automatically.
Bookmarks: You can select, add bookmark, enter the bookmark's
address, name and save it. Press left soft key to access options:
Go to: Connect with WAP page.
View: view the web address of the bookmark.
Add bookmark: add new web address as a bookmark, edit the address
and title.
Set as Homepage: set this bookmark as homepage.
New folder: create a new folder.
Memory status: to view all memory status, available memory, assigned
memory.
Recent Pages: Recent pages are stored here.
Input address: Input address to Internet.
Stored pages: To view pages while Stored.
Service inbox: To receive internet service messages
8.2 Settings
To do the following operations: select profile, profiles, browser options,
preferences, security settings, service message settings.

35
8.3 Data account
To list all the data account supported, you should select one of them
and edit them according to the real parameter.
The account parameters sometimes may changed by the OPERATOR,
so if there is some error, please connect with your OPERATOR and
change it.
9 SHORTCUTS
You are able to perform the following options in this menu.
Add: You can select a menu and add it to shortcuts list.
Edit: A menu would become the first one in the shortcuts list if you
edit it.
Delete: Select a menu and delete it from shortcuts list.
Delete all: The shortcuts list would become empty if you delete all.
Disable:Disable a menu.
Change order: to set the order of shortcuts.
10 FAQ AND SOLUTIONS
Cannot power the phone on?
Check whether the Powering-on key is pressed and hold for 1 second
or above; Check whether the battery is contacted badly or not. Please
remove the battery firstly and then try to power the phone on;
Check whether the battery capacity is used up or not; please charge
the battery;
Upon power-on, there is information displayed
Input phone lock password: select the locking function and should
input the phone password before use.
Input PIN: select the function of inputting PIN when the phone is
powered on. The PIN shall be input; Input PUK: after the PIN is input
wrongly for successively 3 times, the phone will be locked. The PUK

36
provided by the network operator should be input;
SIM card error
There is some dirt o the metal surface of the SIM card. Please wipe the
metal contacts of the SIM card with a clean cloth ;
SIM card is not installed. You should install the SIM card based on the
User’s Manual.
SIM card is damaged. Please contact with your network supplier;
Cannot access to network
The signal is weak, please move to the place where the signal is strong
and retry; Beyond the coverage of the network of the network server;
SIM card is invalid, please contact with your network supplier;
Cannot dial out
Please confirm whether the dial key is pressed after the number is
dialed;
Please confirm whether the call is barred due to owned toll;
Please confirm whether the SIM card is valid or not;
Please confirm whether the call restriction function is set up;
Please confirm whether the fixed dial function is set up;
Bad call quality
Check whether the volume is adjusted appropriately;
Use the phone at the place where the receiving quality is not good,
such as near to the building or in the basement where the radio wave
cannot reach.
Use the phone at the peak time, such as at the time of going on/off the
duty, the channel is congested;
Failed to call you
Please confirm that the phone is powered on and is uplinked with
network;
Please confirm that the call is barred because of owned toll;
Please confirm whether the SIM card is valid;
Please confirm whether the fixed dial function is set up;
Failed to hear you

37
Please confirm that the microphone is opened;
Please keep the microphone at the bottom of the phone close to your
mouth.
Short standby time
The stand-by time is relevant to the system setup. The phone is possibly
at the place where the signal state is bad. When the phone cannot
receive the signal, the phone will transmit to search the base station
continuously; consuming a great deal of battery capacity and
shortening the stand-by time of the battery. Please move to the place
where the signal is strong to use the phone or temporarily power the
phone off.
The battery requires to be displaced with a new battery ;
Cannot charge
Bad connection; inspect whether the plug is connected well or not;
Wipe the interfaces of the phone and battery with soft and dry
clothing.
Charge at the environment below -0℃ or beyond 45℃. Please change
the charging environment;
The battery or adapter is damaged and requires to be replaced;
Please record the phone model and SN, authorized or insurance
information and detailed statement and then contact with the local
after sales service if the aforementioned instruction cannot facilitate
you to conquer these problems.
11 IMPORTANT SECURITY INFORMATION
11.1 Battery
Do not use the damaged adapter or battery.
Please use the battery correctly, do not make the battery short circuit,
or otherwise produced heat will cause the fire.
Prohibit putting the battery into the fire, or otherwise the battery will
explode.

38
Should return the waste battery to the supplier or at the designated
recycling location, and should not discard with the life trash.
The battery charging time depends on the remained capacity, type
and adapter. The battery may be charged for thousands of times, but
will wear out gradually. Please purchases new battery when the
standby time is shorter than the normal time obviously.
Please use the adapter and battery dedicated to or authorized for the
phone.
Please disconnect the adapter and the power supply when the
adapter is not used.
Please do not charge the battery for too long time, or otherwise
damage the battery and shorten the service life of the battery.
Please cool or heat the battery to the normal temperature because
the temperature extremes will affect the charging (because the lithium
ion battery will be affect when the temperature is lower than 0℃).
11.2 Traffic Safety
The phone has a strong wireless voice communication function. With it,
you can call at any time and any place, thus the subscriber shall
undertake some important responsibilities.
To drive is your first duty when you are driving. Should be aware of
answering the call and abide by the local regulations during the drive.
Understand the wireless phone and its function, such as quick dial and
redial, which can help you to dial out conveniently without distraction
during the drive.
Should use the hand-free device if there is and use any hand-free
attachment currently-offered if possible to enhance the convenience
and safety for the use of the wireless phone.
Place the wireless phone at an easy-to-find place. Do not distract from

39
the road to sue the phone. Please use the voice mailbox as far as
possible to answer the call if receiving a call at an inconvenient time.
Tell the caller that you are driving. If necessary, hang up during the
traffic congestion and bad weather. It is dangerous in rainy, snowy,
freeze, icy and traffic congestion situation.
Safety airbag, brake, speed control system and fuel injection system
shall not be affected by the wireless transmission. Please contact with
automobile distributor in case of the above problems.
Please close your mobile phone when fueling or at any place where
the bidirectional wireless devices are prohibited using. Please do not
place the phone together with the flammable and explosive articles
because the internal sparkle can ignite.
Please close the mobile phone before the plane takes off. Be sure not
use the phone during the flight in order to prevent the phone form
disturbing the plane communication system. To use the phone before
the plane takes off shall be approved by the screw members based on
the safety regulation.
Please confirm that the phone alarm clock will not be opened
automatically during the flight.
11.3 Operating Environment
Please abide by this regulation at any place. Please close the phone at
place where the phone is prohibited using or the phone may cause the
risks.
Should read the User’s Manual; understand the security instruction
when the phone is connected with other device. The phone is
prohibited connecting with other incompatible devices.
The subscriber shall use the phone at the correct location (to the ear

40
with the antenna pointing to top of the arm) in order to operate
satisfactorily and protect your health. Please use the phone at
applicable temperature range -10℃ to 50℃
11.4 Electronic Apparatus
Most electronic devices shield the radio information. Please contact
with the manufacturer for related information.
Pacemaker: keep the phone 6 inches (15cm) or above apart from the
pacemaker; should not carry the phone in the chest pocket; answer
the incoming call with the ear at the other side of the pacemaker to
lower the possible disturbance. Please close the phone if you concern
about the disturbance of the phone.
Hearing aid: partial digital wireless phones disturb the hearing aid
possibly. Please contact with the hearing aid manufacturer in case of
disturbance.
Other medical apparatus: please consult with manufacturer if you use
other personal medical apparatus in confirmation of wireless shield
wave. The doctor may assist you obtaining the information. Please
close the phone if the phone is prohibited using near the healthcare
facilities.
Automobile device: please consult the manufacturer in confirmation of
the information because the wireless signal may affect the electronic
devices installed in the automobile.
11.5 Emergency Call
The phone uses the wireless signal similarly with other ropeless phone
and cannot be ensured to connect under all cases. Thus, the important
calls should do not rely on the wireless phone only, in stance medical
emergency call.

41
The phone shall be kept on with enough strong signals within the
network coverage.
Please input the emergency call under the standby mode and then
press the Dial key to dial out if you want to dial the emergency call.
11.6 Other Important Safety Information
Please use the accessories of the original manufacturer or the
accessories approved by the manufacturer. The usage of any
unapproved accessory will affect the phone performance and
damage the phone, even result in the human body risks or in violation
of the related national regulations on the communication terminals.
Please clean the phone with the slightly-wet and static-free clothing.
Do not use the dry or static-prone clothing. Please note not to use the
chemicals such as detergents when cleaning the phone surface.
Please power the phone off when cleaning the phone.
Please do not place your phone near to the magnetic memory
medium such as PC disk. The phone may disturb the TV, radio, PC, thus
affecting the call performance when using the phone near them.
Do not let the phone exposed to the strong sunlight in avoidance of
being heated.
Do not enter various liquids in to the phone in avoidance of be
damaged.
Do not throw and strike the phone, do not crudely treat and damage
the internal circuit board of the phone.
Do not connect the phone with other device not supporting the
phone.
 Loading...