

Page 1

T-G35-HD 2.5” Industrial 12Gb/s
Hot-Swap Rack
User’s Manual
Hot Swap 1x2.5”HDD
Standard Drive Bays
3.5” Drive: 1
T-G35-HD
i
StarUSA - Powered by iStarUSA Group
727 Phillips Drive City of Industry, CA 91748
United States of America
Tel: 1-626-303-8885
Toll-Free: 1-888-989-1189
Email: sales@istarusa.com
T-G35-HD is iStarUSA's new generation screw-less hot-swap hard drive
cage. It features the latest transfer rate technology of 12Gb/s and supports
all standard HDDs on the market. By popular demand, the LED display
lights feature the new blue light to show drive activity and red light for HDD
accessing. The SATA power connector increases compatibility with most
power supplies. The metal key locks and thumbscrews help to secure your
hard drives from any unauthorized access.
Dimension (W x H x D)
Material
HDD Interface
Weight
Cable
Model Number:
T-G35-HD
D4
101.6mm x 25.4mm x 143.3mm
Metal with Anti-rust Coating
SAS / SATA
0.88 lbs
SATA Cable Included (1pc)
Color:
Black
UPC Code:
846813042277
D1
Features:
• Patent screw-less 2.5” HDD mounting design
• Power/drive activity LEDs
• Point to point transferring data design
• Stainless steel handle
• Cable-less connection, support plug & play, hot-swappable
• Aluminum body for best cooling
• High performance transfer rate up to 12Gb/s
• Supports 2.5" SAS I/II/III & SATA I/II/III HDD/SSD
• Support all standard HDDs on the market
D3
D-1
Thumbscrew: The thumbscrew provide the convenient way
to secure your hard disk.
D-2
The metal handle: The strong metal handle can bear heavy
user to plug in and out.
D-3
Safety lock: The safety lock safeguards the hard disk
in the correct position and prevents unauthorized access.
D-4
Power & HDD access LED. power on, LED indicates blue.
red blinking for HDD access.
D2
Page 2
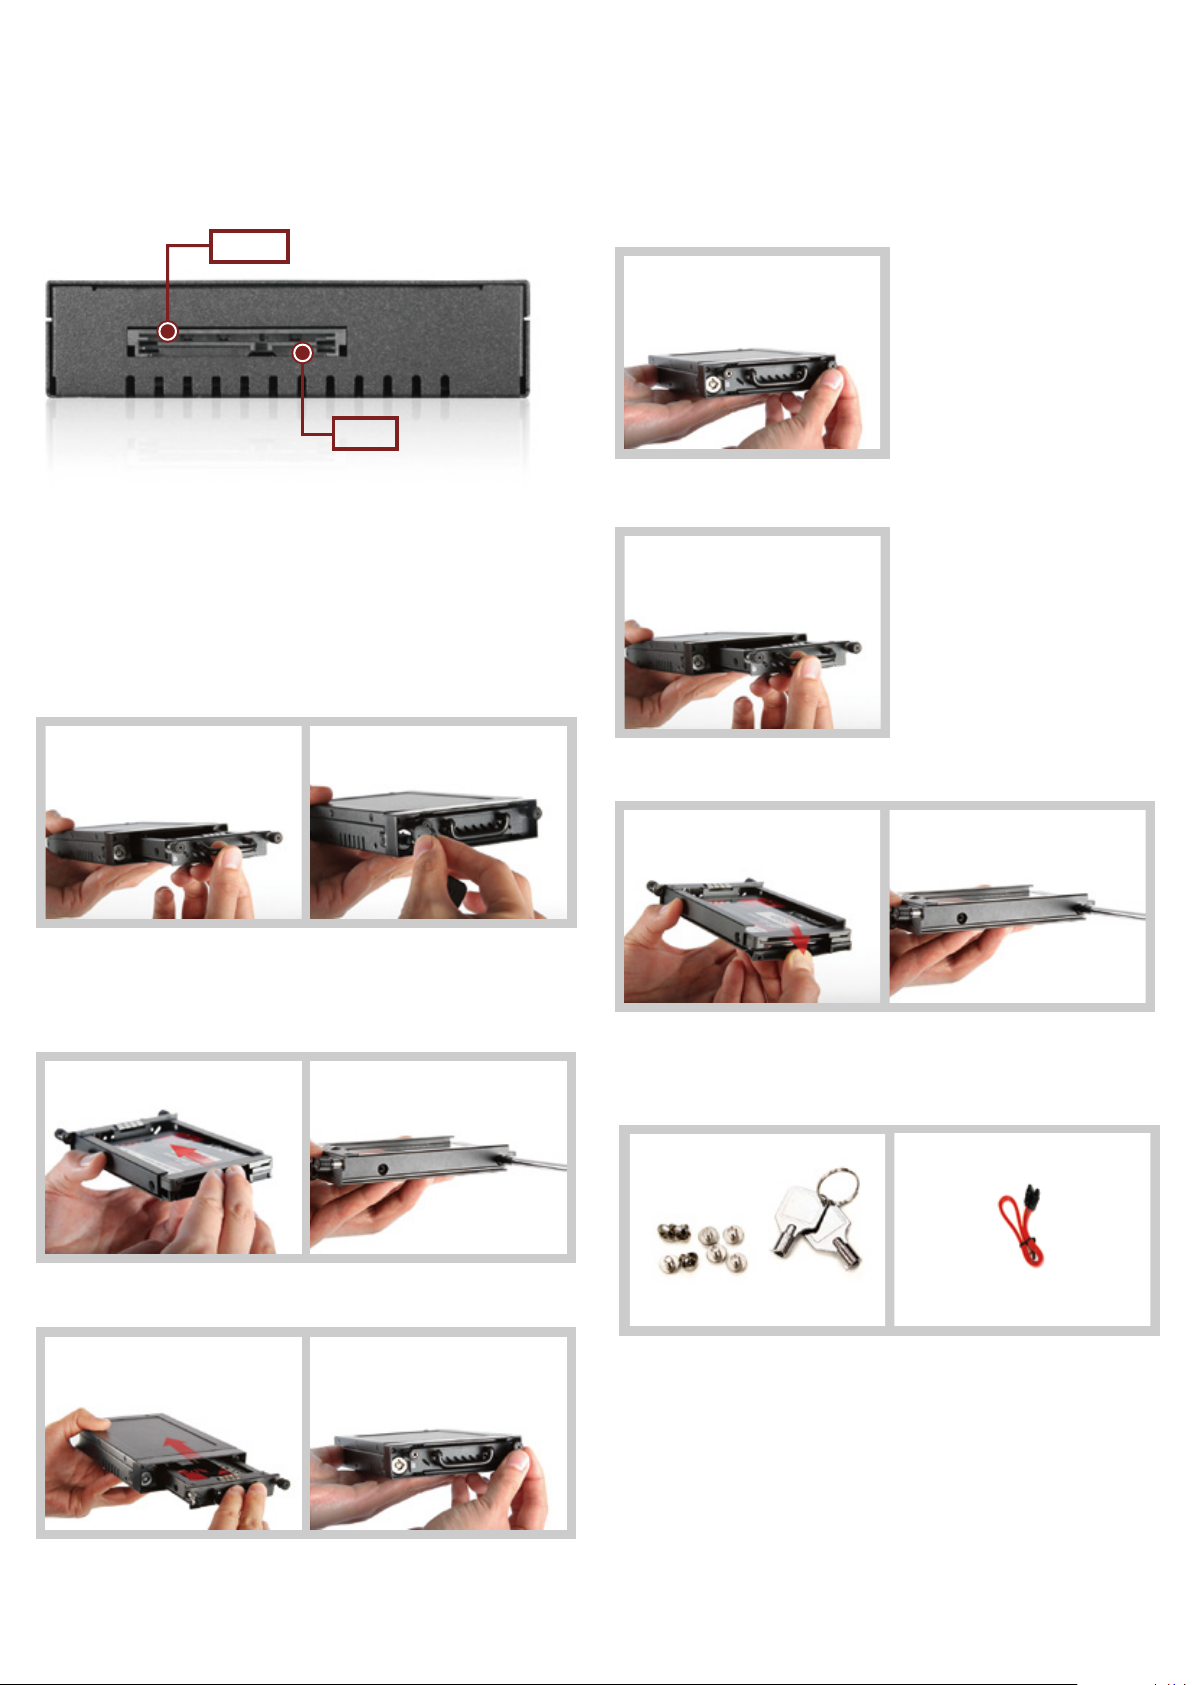
Hardware Informaon: Rear View Hard Drive Removal
1)
Unlock and unscrew the tray.
Power
HDD
2)
Power: 15pin SATA power connector
HDD: SATA 7Pin data single connector for SATA or SAS primary
channel connections.
Pull the lever outwards and HDD will be release from the backplane
as the handle is being pulled.
Hard Drive Installaon
1)
Unscrew and unlock the tray, then hold the handle to pull out the
HDD tray.
T-G35-HD
2)
Slide HDD into the tray, and make sure the HDD is secured with plastic
latch installed.
2.1 2.2
3)
Plug the tray back, lock and tight the thumbscrew.
3)
Hold down plastic latch and release HDD from the rear ( Image 3.1 ) or
unscrew HDD ( Image 3.2 )
3.1 3.2
Accessories
• Screws & Keys • 1 SATA cable
 Loading...