

Page 1

iSCSI GbE to SATA Chassis
iAge820
Quick Installation Guide
1. Overview
iStarUSA’s iSCSI enclosure uses Intel 331, 64-bit Xscale processor to be
core engine that can deliver the performance while running by dual
Gigabit iSCSI channel and supports the hareware Raid levels from Raid
0, 1, 0+1, 3, 5, 6 & JBOD in wide range Raid function selection for data
protection.
2. Package Checklist
Before installing this unit, verify that package contains the following
items.
iAge820-iSCSI
Enclosure x 1
HDD Tray x 8
Power Cord x 2 (Redundat PSU model), x1 (Single PSU Model)
Hard Drive Mounting Screw pacakgex 1
Key for HDD tray x 2
CD User Manual x 1
mAge208U20-iSCSI
Enclosure x 1
HDD Tray x 8
Power Cord x 2 (Redundat PSU model), x1 (Single PSU Model)
Hard Drive Mounting Screw pacakgex 1
Key for HDD tray x 2
CD User Manual x 1
3. Product Description
Panel Layout
1
2
3
10
11
244 3 10 11
5
HDD 1
HDD 1
HDD 2
HDD 2
HDD 3
HDD 3
HDD 4
HDD 4
HDD 5
HDD 5
HDD 6
HDD 6
HDD 7
HDD 7
HDD 8
HDD 8
HDD 1 HDD 2 HDD 3 HDD 4
HDD 1 HDD 2 HDD 3 HDD 4
HDD 5 HDD 6 HDD 7 HDD 8
HDD 5 HDD 6 HDD 7 HDD 8
10 1124 3
7
8
9 CH 0
12
566789
iAge820-iSCSI
CH 1
RJ 45
RS 232
12
mAge208U20-iSCSI
CH 0
RS 232
CH 1
RJ 45
mAge316U20-iSCSI
1. Power LED
2. Mute Button
Reset for Buzzer Beeping
3. Temperature LED
Normal – Green;
Fail – Red (too slow rpm or stop)
4. Fan Status LED
Normal – Green; Over 55°C – Red
5. LCM
6. Back (Control button)
7. Up (Control button)
8. Enter (Control button)
9. Down (Control button)
10. HDD Power LED
11. HDD Status LED
12. Power Cord Receptacle
*CH 0, CH 1
Gigabit Ethernet ports
*RJ 45
Ethernet port for management
*RS 232
Consol port
4. Disk Installation
Install each Hard Drive into the Crive Trays and fasten using the
supplied HDD screws.
mAge316U20-iSCSI
Enclosure x 1
HDD Tray x 16
Power Cord x 2 (Redundat PSU model), x1 (Single PSU Model)
Hard Drive Mounting Screw pacakgex 1
Key for HDD tray x 2
CD User Manual x 1
Page. 1 Page. 2 Page. 3
HDD 1 HDD 2 HDD 3 HDD 4
HDD 1 HDD 2 HDD 3 HDD 4
HDD 5 HDD 6 HDD 7 HDD 8
HDD 5 HDD 6 HDD 7 HDD 8
HDD 9 HDD 10 HDD 11 HDD 12
HDD 9 HDD 10 HDD 11 HDD 12
HDD 13 HDD 14 HDD 15 HDD 16
HDD 13 HDD 14 HDD 15 HDD 16
12
56789
CH 0
RS 232
CH 1
RJ 45
5. Product Connection
MAC OS
Windows OS
Attach screws
GbE Switch
Gigabit IP Storage
Page 2
iSCSI GbE to SATA Chassis
Quick Installation Guide
1. Connect CH 0, CH 1 to GbE switching ports.
2. Connect RJ 45 to Ethernet port.
3. Plug power cord and turn on the enclosure.
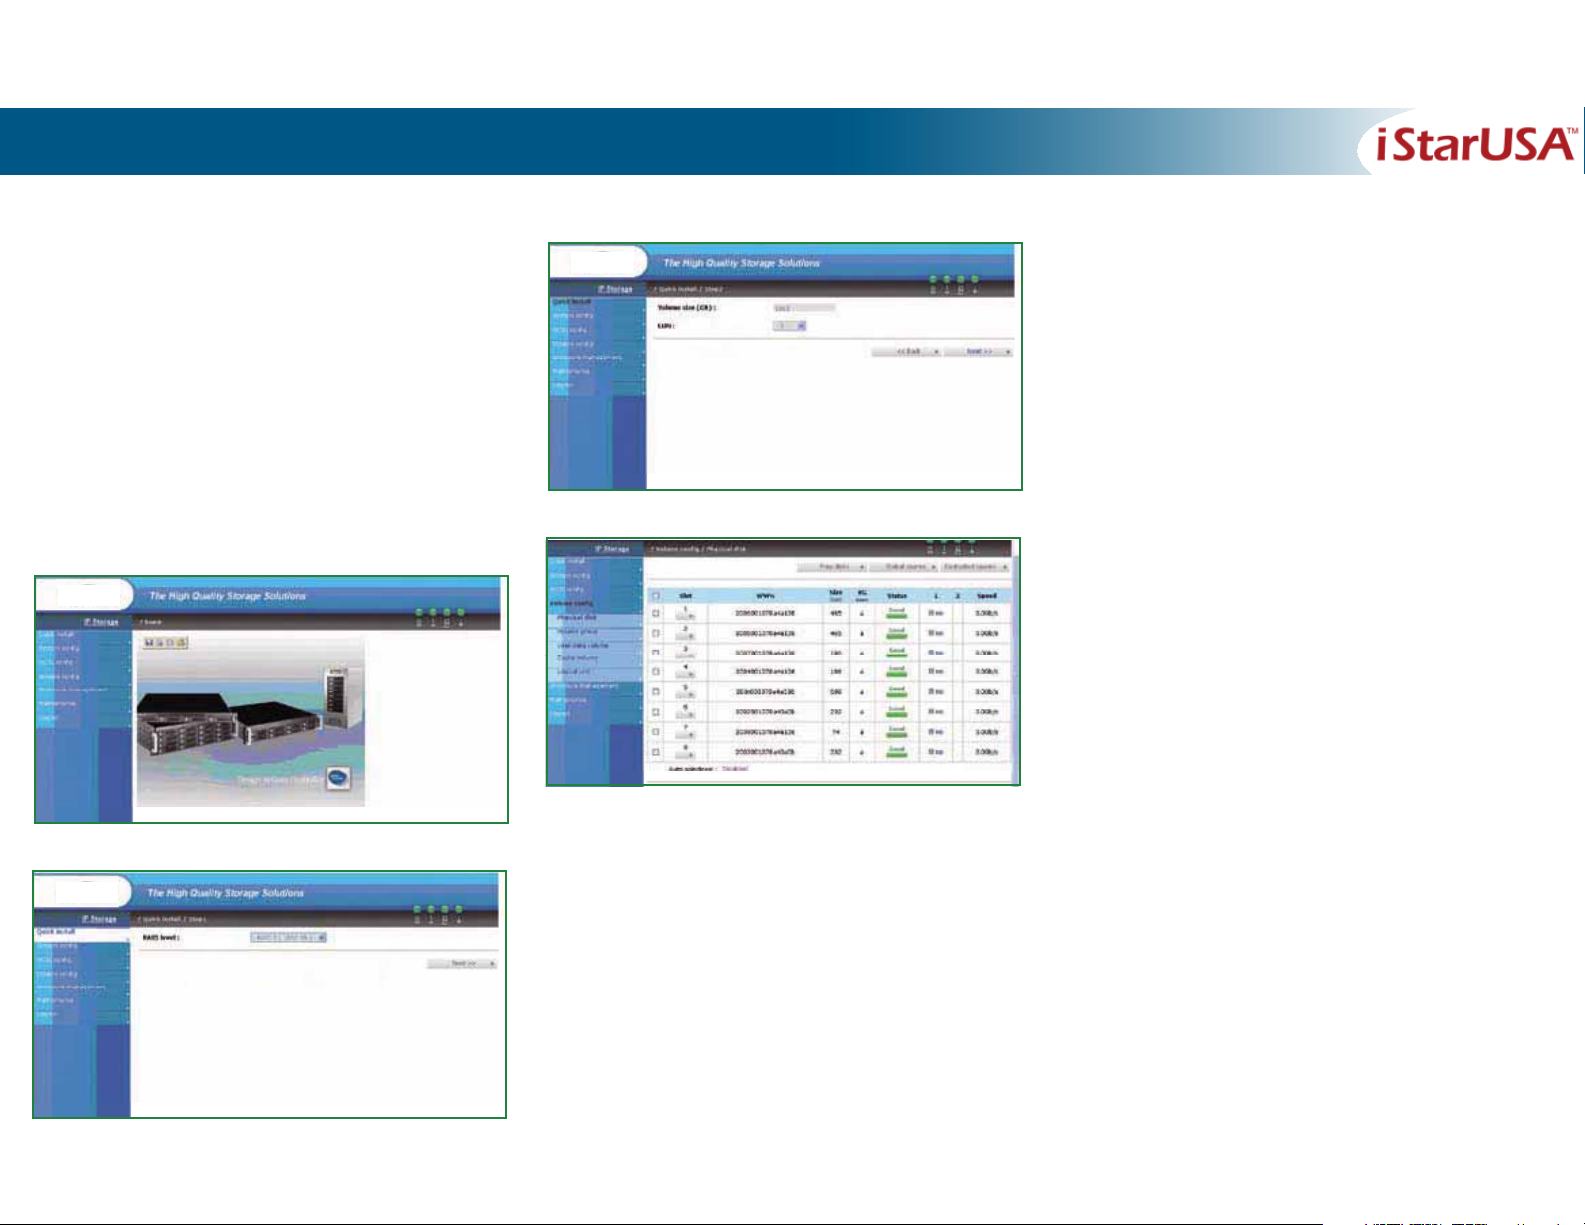
1. Open the web browser (IE etc...), and type in the IP
address that shows on LCD display.
2. Key in default Username: admin
Password: 1234
3. Go to Quick install.
5. Select the volume size and LUN number, click Next.
6. Click Confirm to finish Quick install.
4. Select the desired RAID level, click Next
Page. 1 Page. 2 Page. 3
 Loading...