

iStarUSA BPN-DE110SS-BLACK, BPN-DE110SS-SILVER, BPN-DE110SS-BLUE, BPN-DE110SS-RED User Manual
BPN-DE110SS 3.5”Hard Drive Cage
User’s Manual
Specica
on:
Hot Swap 1x3.5”HDD
Standard Drive Bays 5.25” Drive: 1
Dimension (W x H x D) 5.75 x 1.65 x 7.10 inches
Material Aluminum Design with Conduc ve Dissipa on
HDD Interface SATA / SAS
Weight 0.6 lbs
Order Informa
Model Number: Color: UPC Code:
BPN-DE110SS-BLACK
BPN-DE110SS-RED
BPN-DE110SS-BLUE
BPN-DE110SS-SILVER
(lockable handle)
on:
Black
Red
Blue
Silver
BPN-DE110SS
Grooves
846813021883
846813021906
846813021890
846813021913
iStarUSA – Powered by iStarUSA Group
727 Phillips Drive
Tel: (888) 989-1189
Email: sales@istarusa.com
Introduc on:
BPN-DE110SS is iStarUSA's third genera n tray-less hot-swap hard drive cage. It
features the latest transfer rate technology of 6.0 Gb/s (SATA I/II/III and SAS I/II),
and is RAID ready. By popular demand, the LED display lights features the
new blue light to show drive ac
construc
compa
hard drives and prevent unauthorized access.
n and op onal 40mm fan. SATA power connector increases
bility with most power supplies. The metal key locks help secure your
vity. Heat dissipa n is enhanced by aluminum
Features:
.
Aluminum Frame; light weight and durability design
.
Support SAS I/II, SATA I/II/III 3.5” Hard Drives
.
Data Transfer Rate up to 6.0 Gb/s
.
Tray-less and screw-less HDD moun ng
.
Support Hot Swap: Plug & play
.
Integra ve shaping aluminum design for quickest heat dissipa on
.
Aluminum front bezel with metal key lock mechanism for security
.
LED for Power & HDD access
.
Bezel Color Op ons: black/ red/ silver/ blue
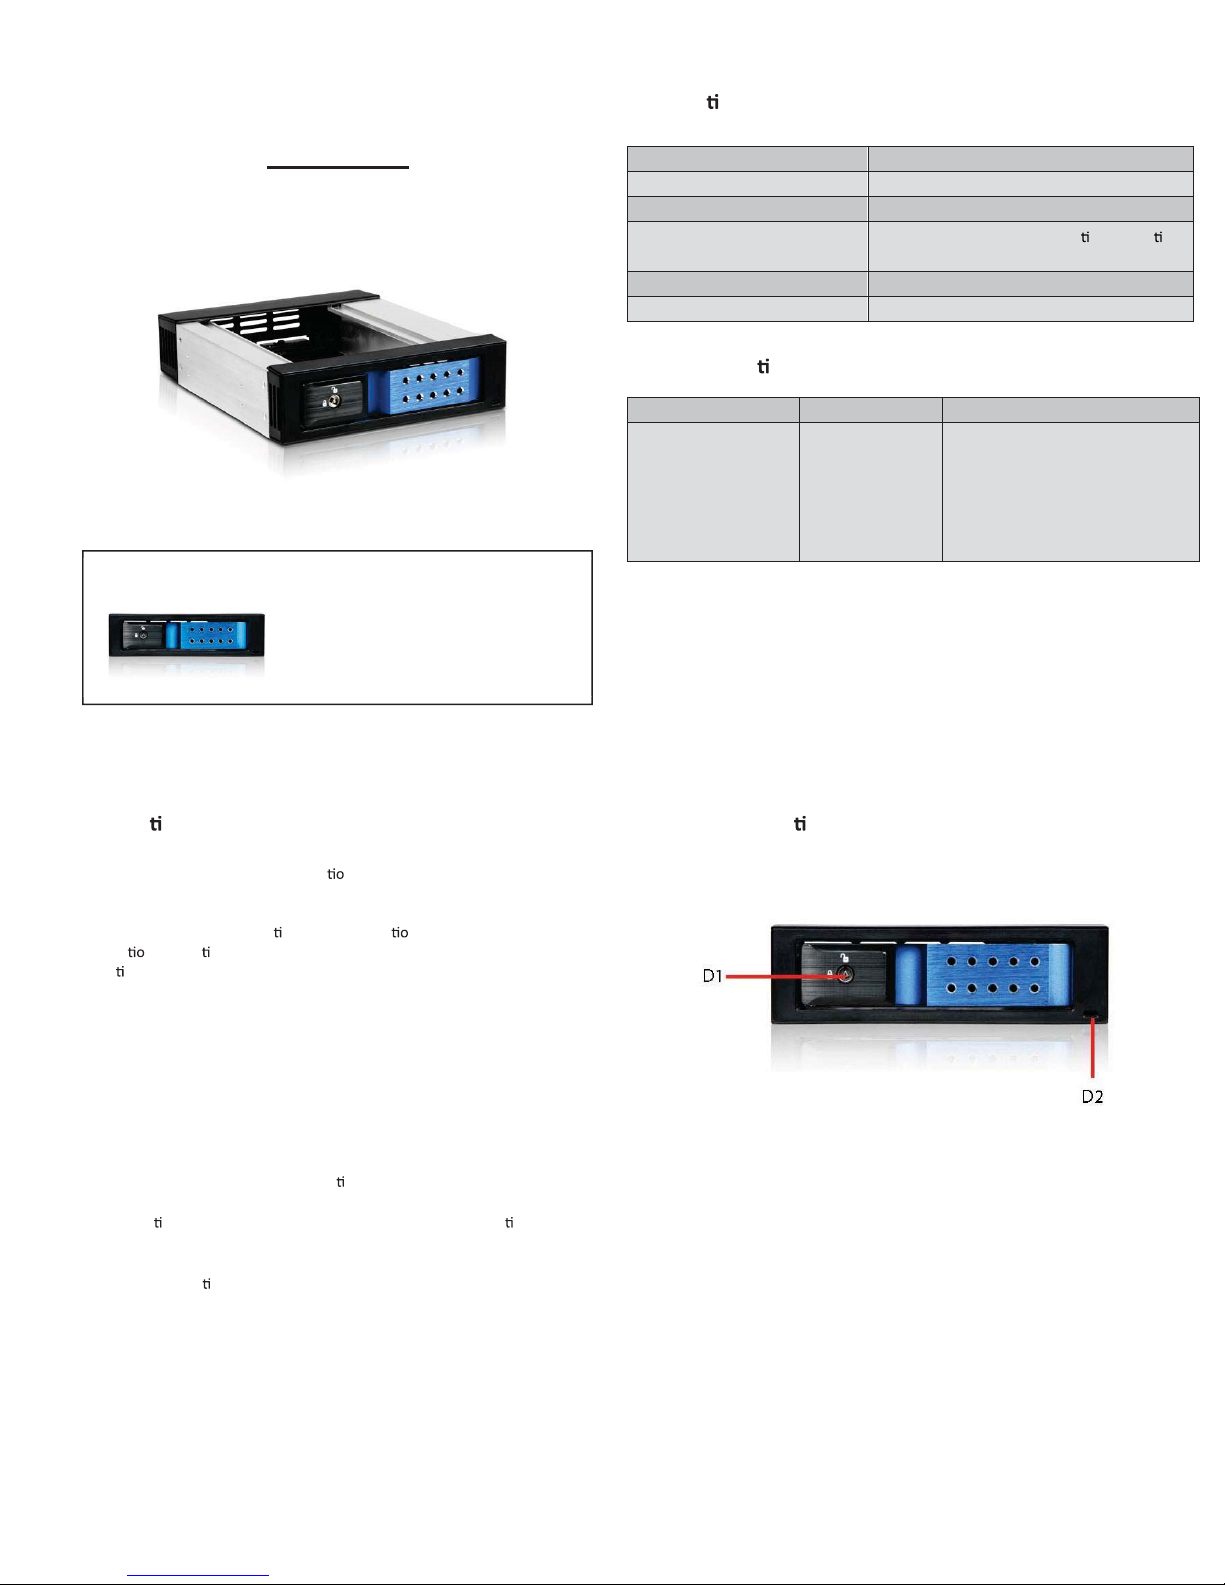
Hardware Informa
on: Front View
D-1: Safety Lock. The safety lock safeguards the hard disk in the correct position and
prevents unauthorized access.
D-2: Power & HDD access LED. Power On, LED indicates Blue. Purple blinking for HDD
access.
BPN-DE110SS
BPN-DE110SS
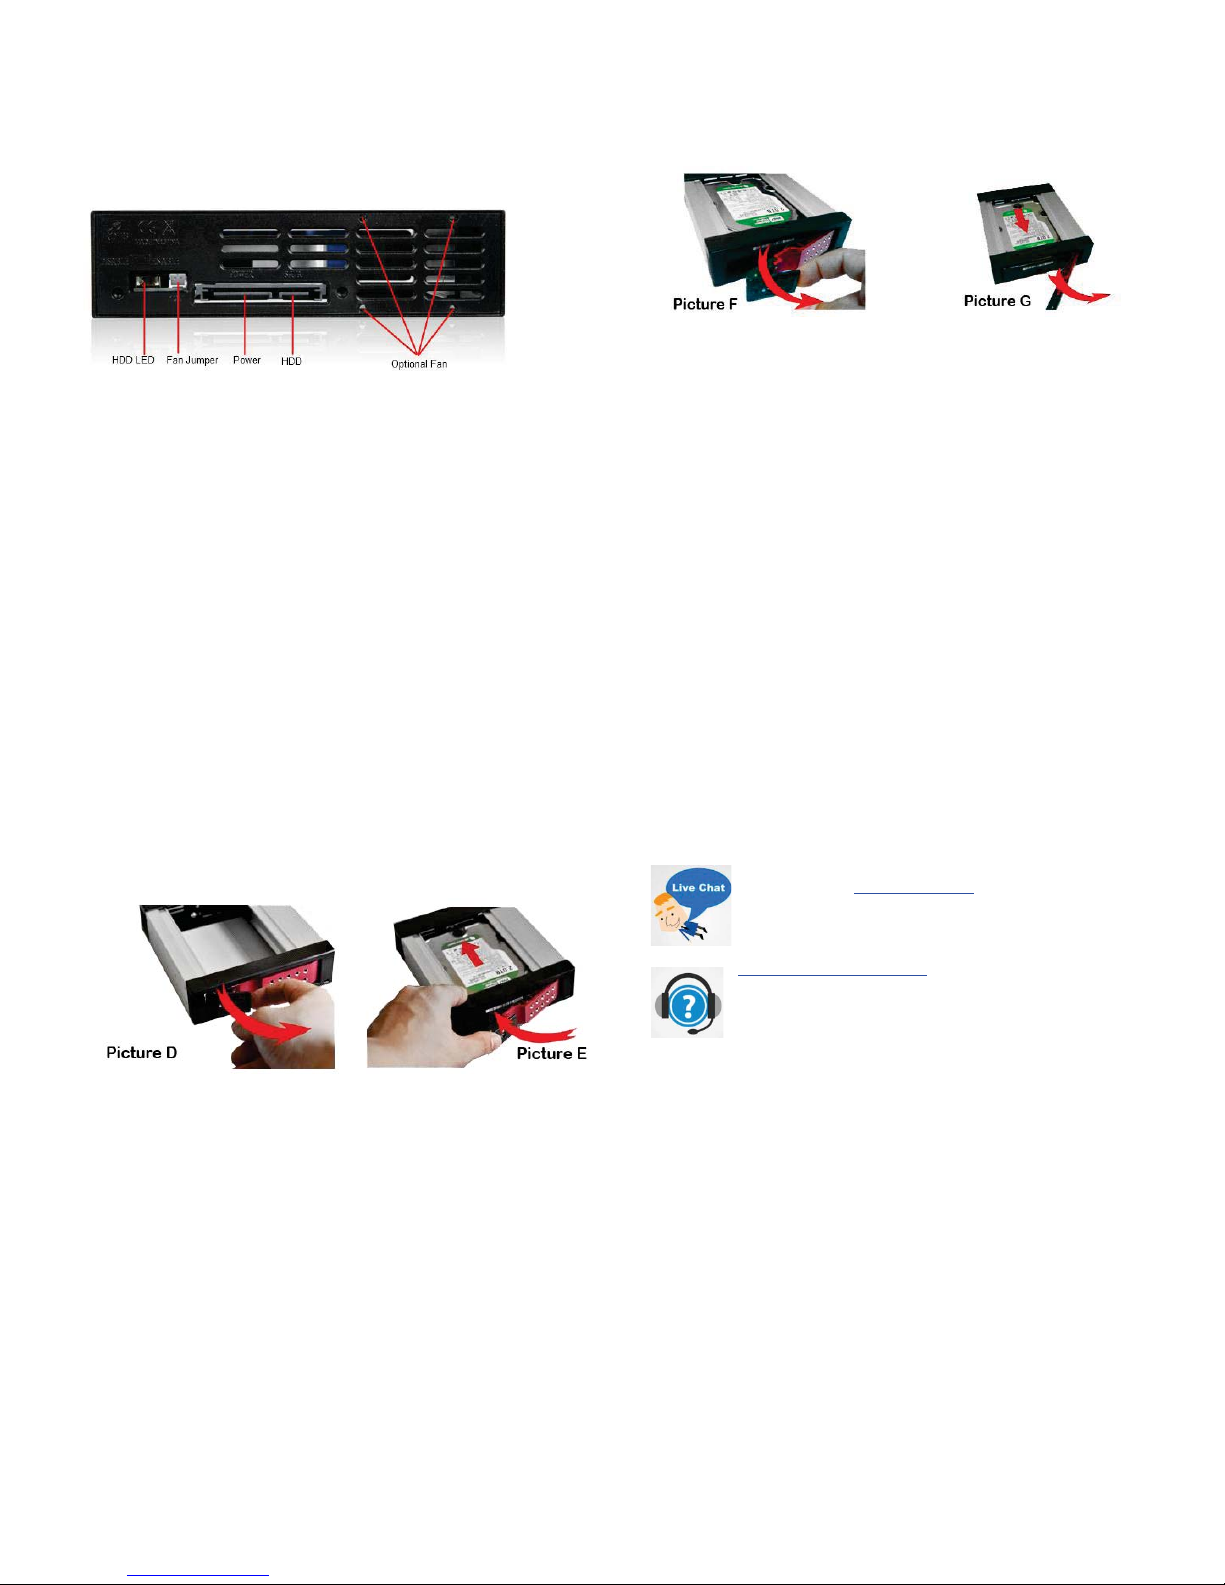
Hardware Information:
Rear View
HDD LED:
LED switch that enables or disables the HDD activity light (purple).
Fan Jumper
: 12V Fan 2pin Power output jumper.
Power:
15pin SATA Power connector
HD
D: SATA 7Pin data single connector for SATA or SAS primary channel
connections
Optional Fan:
Mounting screw holes for optional 40mm fan.
Hard Drive Installation
Hard Drive Removal
iStarUSAcare:
We will help you navigate our website to find the information that
you need. Go to www.istarusa.com, and click on live chat bubble
above the Search Bar.
Our technicians are standing by to take your questions. Visit
http://istarusa.com/support/
, and you will receive a technical support
ticket to help track your requests from the beginning to the end. Or
you can contact us @ 888-989-1189.
FCC and CE Radiatio n Norm
FCC
This equipment h as been tested and found to comply with limits for Class B digital device pur suant to Part 15 of Federal Comm unications Commission (FCC)
rules.
CE
This equipment h as been tested and found to compl y with the limits of the European C ouncil Directive on the approxi mation of the law of the member states
relating to electromagnetic com patibility (89/336/E EC) according to E N 55022 Class B.
FCC and CE Complia nce Statement
These limits are designed to pr ovide reasonable pr otection against fr equency interferenc e in residential inst allation. This equip ment generates uses and can
radiate radio freq uency energy, and if not installed or us ed in accordance with the instructi ons may cause harmful in
terf erenc e to radi o comm unicat ion. Ho wever,
there is no guarant ee that interference will not occur in television reception, whic h can be determined by turning th e equipm
ent off and on. The user is enc ouraged
to try and cor rect the interferenc e by one or mor e of the following me asures: Reorient or relocate the recei ving antenna, Incr ease the separation betw een the
equipment an d the receiver, connect t he equipment into an outlet on a circu it different from th at to which the recei ver is connect ed to.
CAUTION!
The Federal C ommunications Com mission warns the us er that changes or modifications to th e unit not expressl y approved by the party responsi ble for the
compliance coul d void the user’s authority to op erate the equipment
.
BPN-DE110SS
BPN-DE110SS
1. Pull the lever to open HDD handle.
2. Slide in HDD halfway into the cage and close the handle until the
lever clicks. The HDD is now connected to the backplane.
1. Unlock the handle.
BPN-DE110SS
BPN-DE110SS
2. Pull the lever outwards and HDD will be disconnected from the
backplane as the handle is being pulled.
3. Remove HDD from the cage.
 Loading...