

Page 1
Canon® EF/EF-S Lens Controller (LC-2)
Operation Manual (Version 4.0)
Page 2

Innovative Scientific Solutions, Inc.
Made in
U.S.A.
Table of Contents
Description ....................................................................................................................... 2
Specifications.................................................................................................................... 2
Environmental Specifications ........................................................................................... 2
Connections ...................................................................................................................... 3
Installation and Operation ................................................................................................ 5
Maintenance ..................................................................................................................... 8
Network Setup .................................................................................................................. 9
Software Operation .......................................................................................................... 11
Multi Control ..................................................................................................................... 16
Firmware Upgrade ............................................................................................................ 16
Troubleshooting ............................................................................................................... 19
Lenses Tested with LC-2 .................................................................................................... 22
Dimensions ....................................................................................................................... 23
Export Disclaimer .............................................................................................................. 26
For questions or comments, please contact ISSI
Innovative Scientific Solutions, Incorporated
7610 McEwen Road
Dayton, OH 45459
Ph.: (937) 630-3012
Fax: (937) 630-3015
Tech Support: support@innssi.com
Sales: issi-sales@innssi.com
Website: www.psp-tsp.com/canon
Revision Date: 5/15/2018
1
Page 3
Innovative Scientific Solutions, Inc.
Power
100-240 V, 50-60Hz
Input
6V 1.5A
Interface
10/100 Mbps Ethernet
Lens Adapter
c , M42x1, T
Lens inputs
1
Presets
Unlimited, programmable
Software
Windows GUI
Warranty
1 year
ECCN
EAR99
Uses
Indoor, Outdoor
Altitude
2,000 m
Operating Temperature
2- 60 ˚C
Relative Humidity
80% (up to 31˚C), 50% (40˚C)
Description
The ISSI Canon® EF/EF-S Lens Controller (LC-2) is a control device for Canon® and Tamron®
EF/EF-S auto focus lenses. The LC-2 can operate most Canon® (USM) and Tamron® (USD)
EF/EF-S lenses including L series and IS/VC models. The device is operated via a graphical
user interface and allows for preset positions of the lens to be saved and then recalled at any
time. It can also be integrated into existing software via TCP/IP API commands in Windows
and Linux operating systems. The presets will save the position of the focus and aperture.
Since the LC-2 is an Ethernet device, it can be networked with other LC-2s or Ethernet
devices. This makes communication and physical cable connections much simpler than
traditional serial lens controllers and also allows them to be operated over a longer distance
than serial devices. The IP address of the LC-2 can be configured to match the local network.
Specifications
Environmental Specifications
2
Page 4
Innovative Scientific Solutions, Inc.
Power
Device is powered on
Ethernet
Ethernet communication connection
Lens
Connection for LC-A-CMT lens adapter
Reset
Reset switch
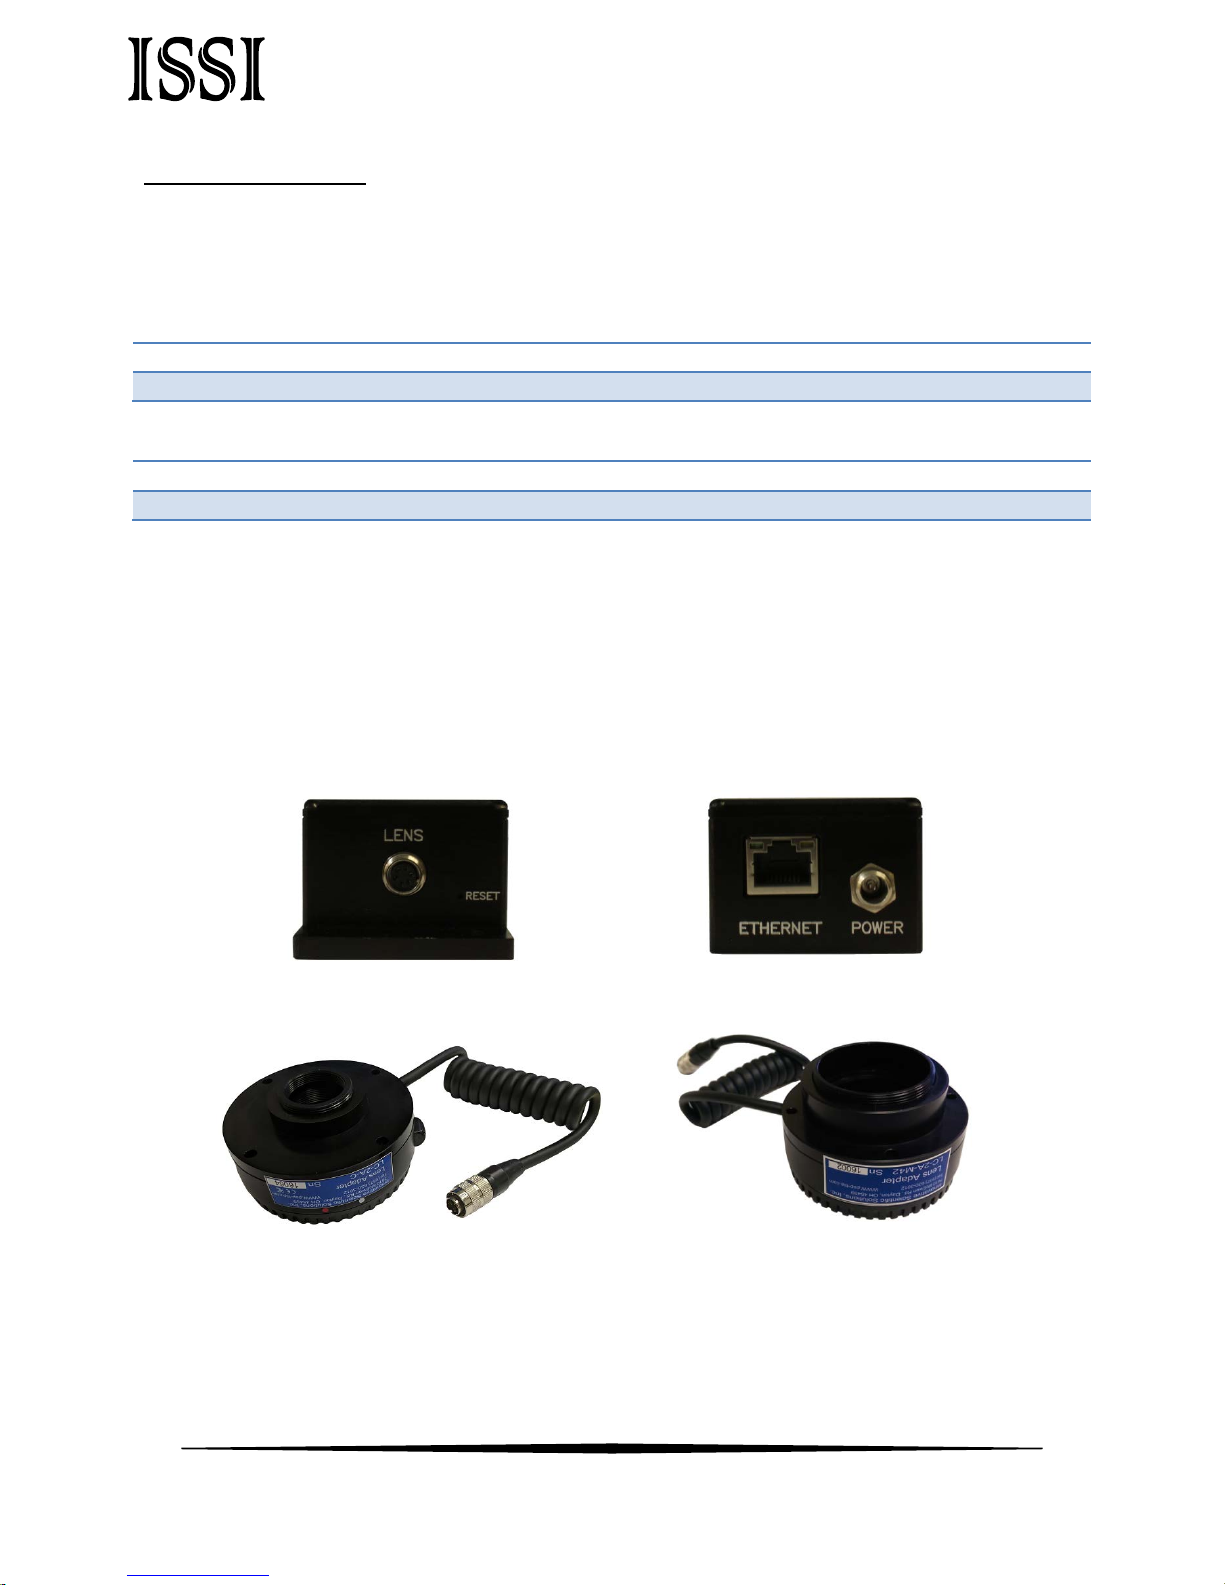
Connections
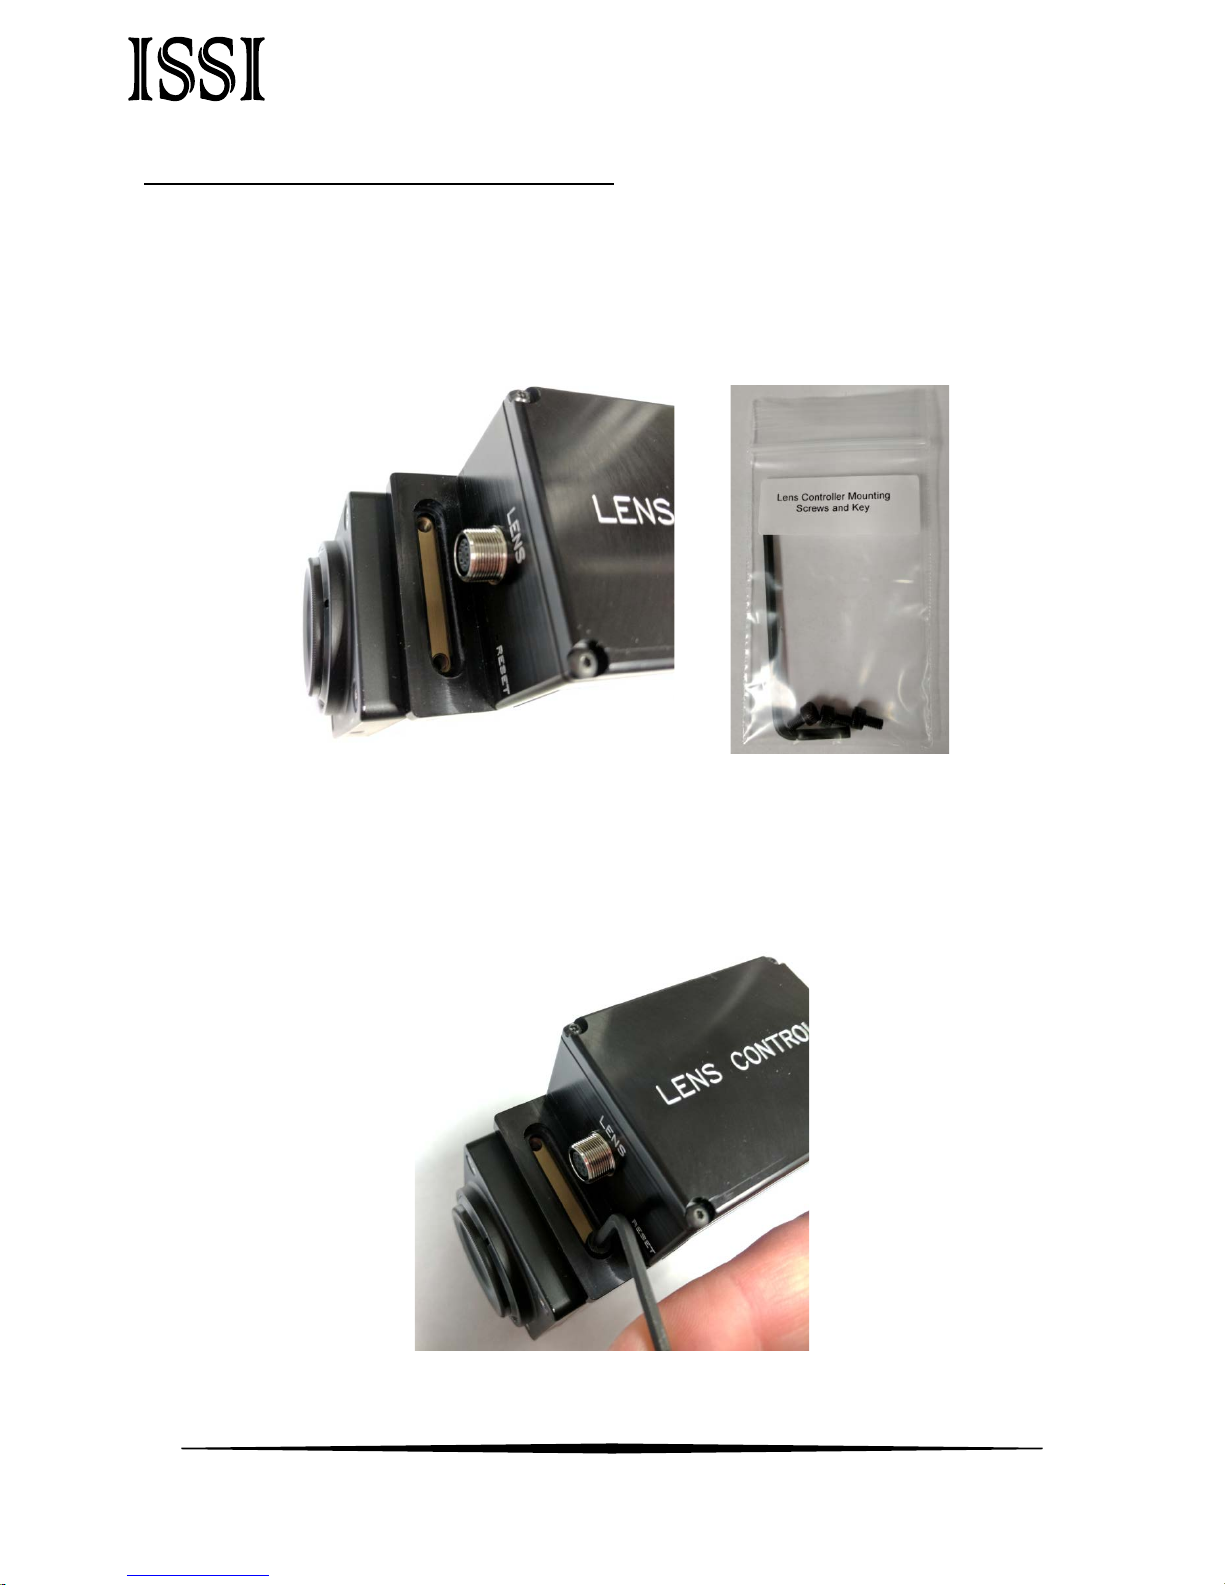
The Canon® lens control system consists of the control box (LC-2) and adapter (LC-2AC/M42/T). The adapter should be selected to match the desired camera body connection.
LC-2 Control Box Back Panel
LC-2 Control Box Front Panel
On the front panel, the power and Ethernet communication connections are made.
The lens connection is located on the back panel. The side panel contains the reset switch for
the device. If the IP address is changed and forgotten, the reset switch will set the device
back to its default IP address of 192.168.2.252. Use a paper clip to reset the device, holding
for 3 seconds. Restart the software and the LC-2 will connect with its default IP address.
Lens Connection / Reset Ethernet / Power Connection
LC-2A-C Lens Adapter LC-2A-M42 Lens Adapter
The lens adapters feature an EF lens mount on one side and the option of c- or M42x1-mount
on the other. The EF side connects to the lens and the c/M42 side connects to the camera
body.
3
Page 5
Innovative Scientific Solutions, Inc.
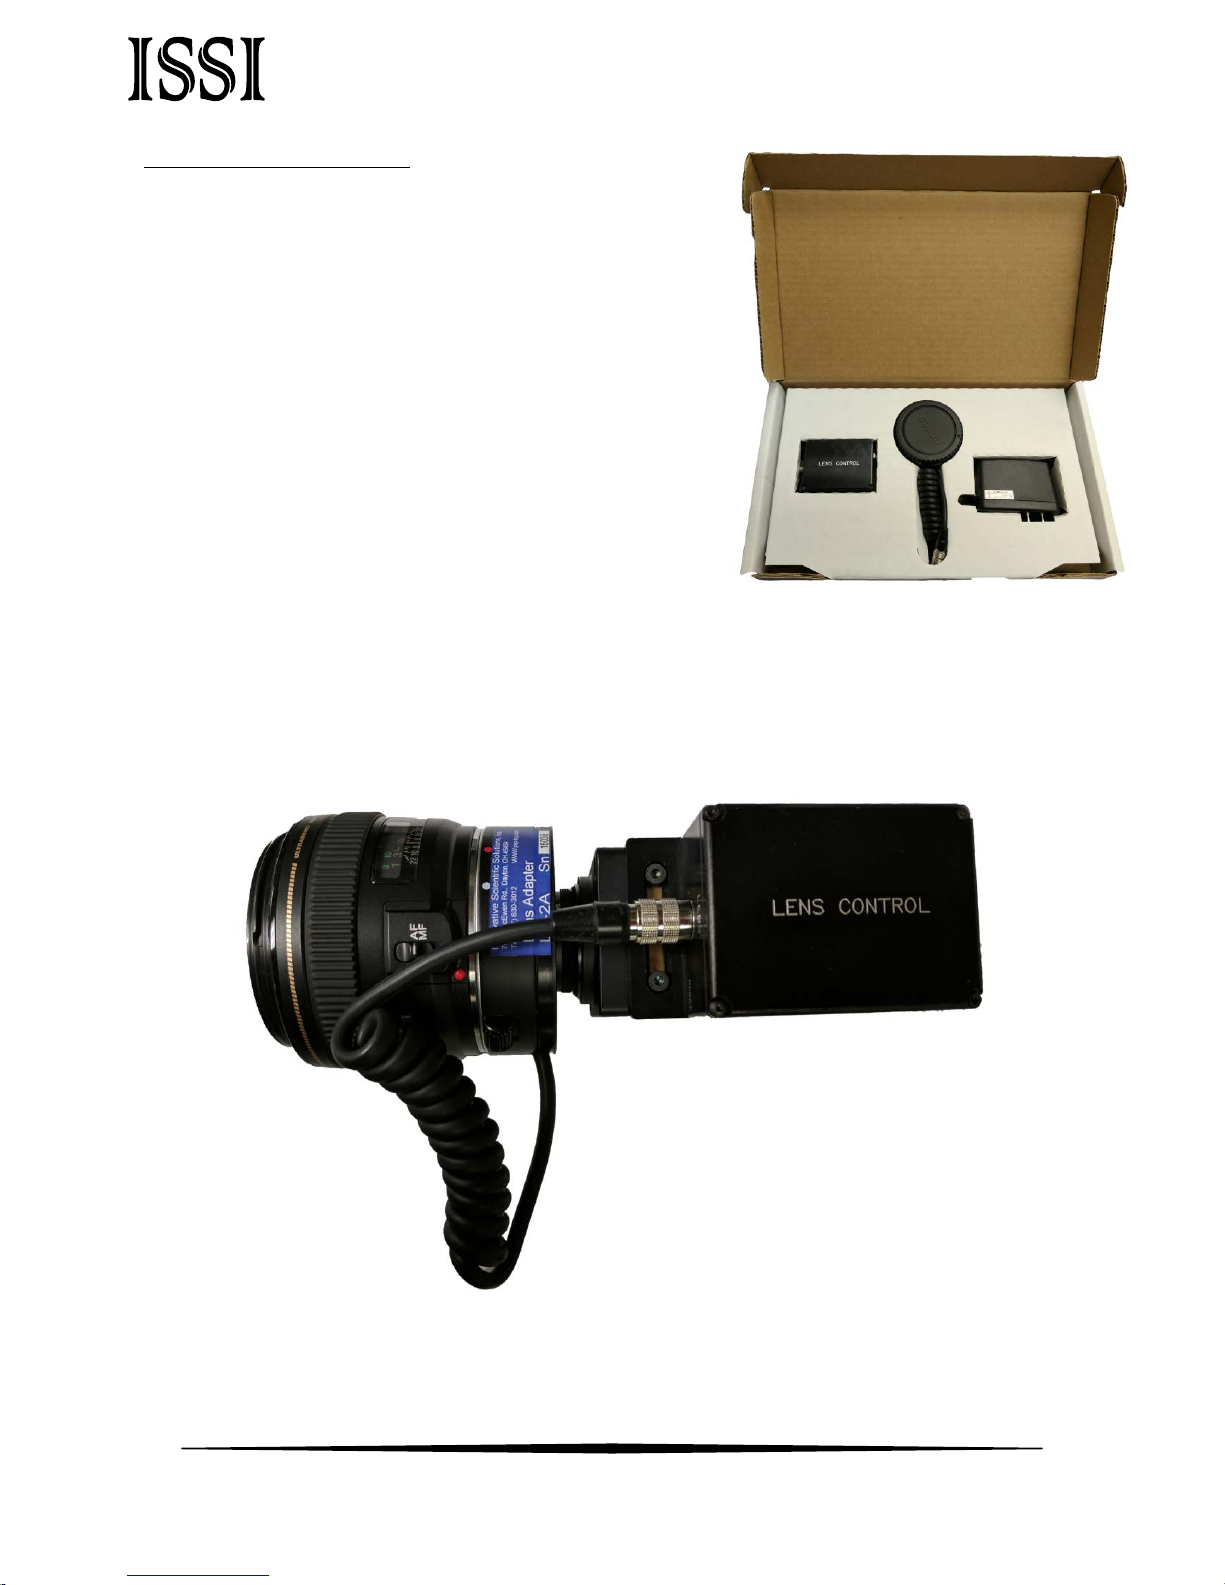
Unboxing the LC-2 Lens Controller
The LC-2 is shipped with:
1. DC Power adapter
2. Ethernet cable
3. LC-2A-C/M42/T lens adapter
4. LC-2 lens control box
5. M3 Toolkit for mounting
6. USB drive with software and instruction manual
Connection of LC-2 to Canon® EF Lens using LC-2A-C lens adapter on c-mount camera
4
Page 6
Innovative Scientific Solutions, Inc.
Installation and Operation
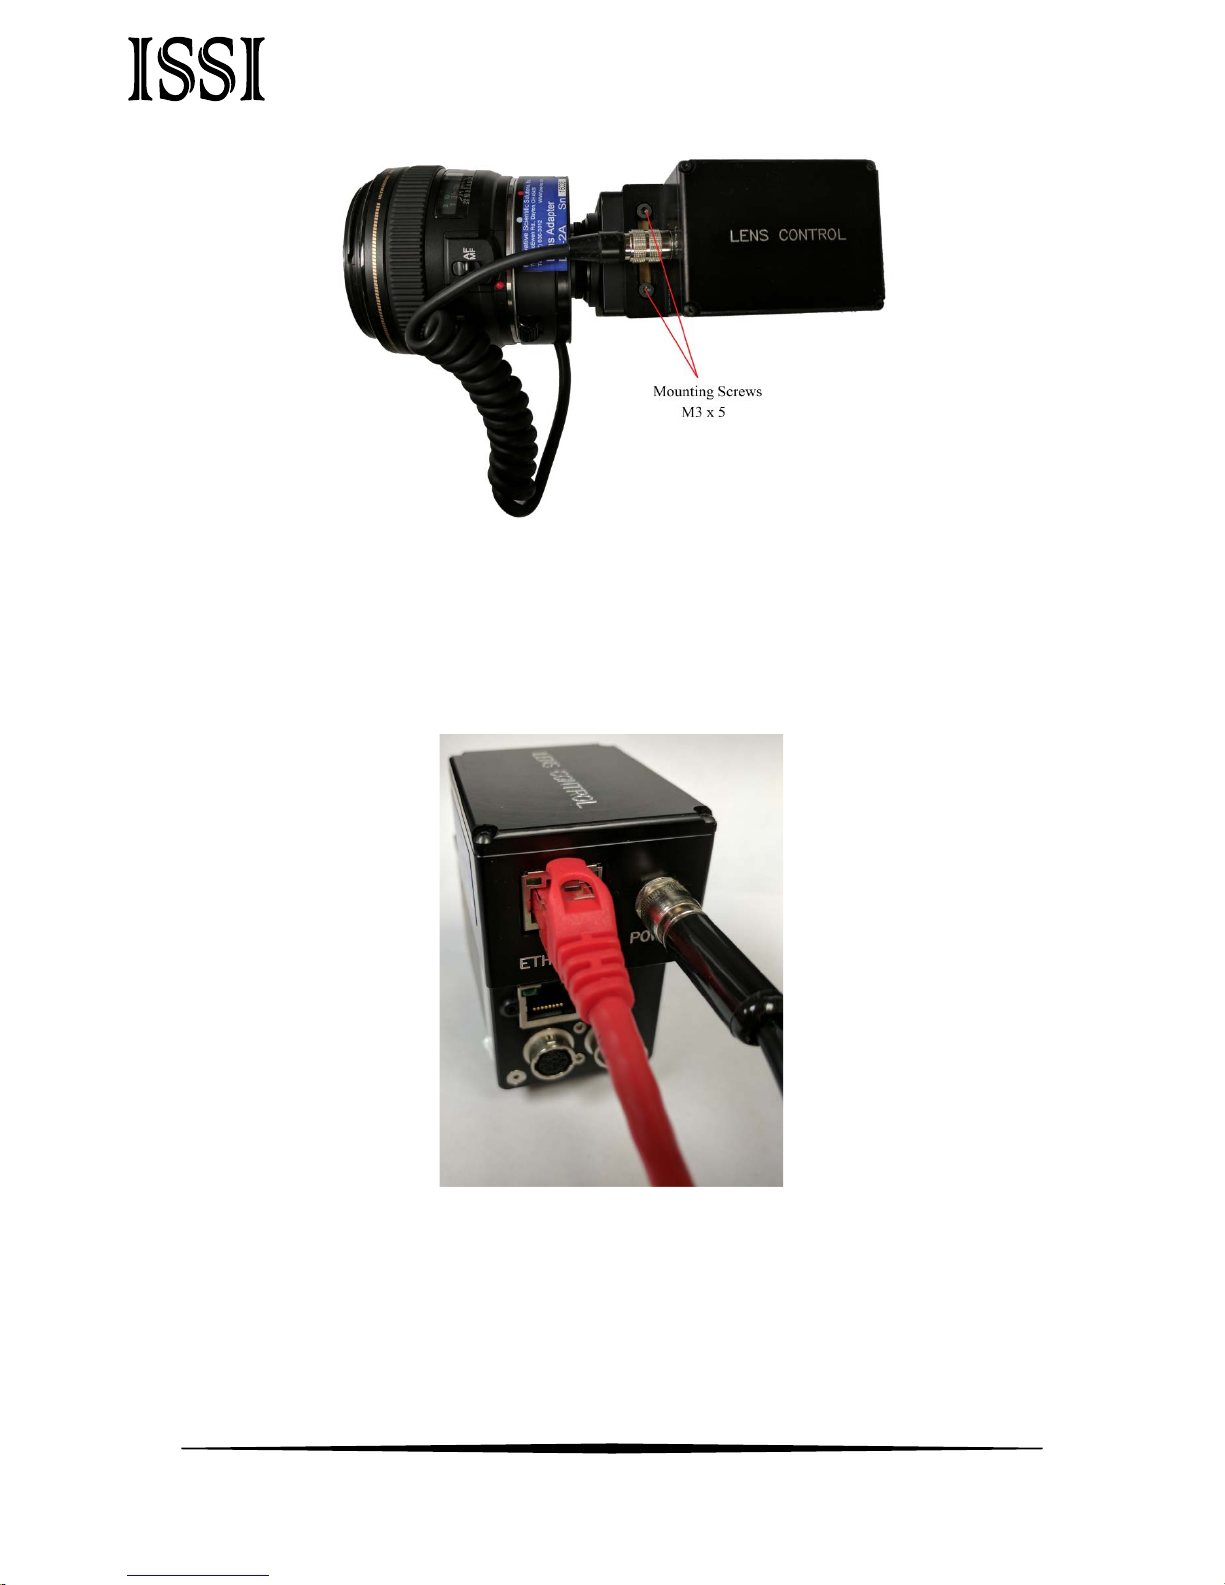
The LC-2 control box has a small slotted bracket to countersink M3 hex bolts for mounting. If
the camera being used with the LC-2 has no mounting holes to mount the LC-2 control box, a
bracket will need to be made to bolt the control box. It should be mounted within 6-inches
(150-mm) of the lens connection on the camera.
Line up the mounting bracket to the camera body mounting holes. If your camera has
different mounting holes, secure with customized bracket to fit the camera. Place the M3-0.5
hex bolt in place and tighten each using M3 hex wrench. Three M3-05 bolts are supplied with
the hardware kit.
5
Page 7
Innovative Scientific Solutions, Inc.
Once the LC-2 control box is secured, connect the power adapter to universal power (110-240
VAC). Plug the power adapter to the LC-2 control box in the receptacle labeled POWER. Seat
the plug so it is fully inserted in the power receptacle. Screw the locking connector clockwise
until tight. When mounting the control box, do not position it so that the power plug is
difficult to plug in or unplug.
Connect the Ethernet cable to the NIC of the control computer or local network switch.
Connect the other end of the Ethernet cable to the ETHERNET receptacle on the LC-2. The
green and orange lights on the Ethernet receptacle will flash once communication has been
established.
6
Page 8
Innovative Scientific Solutions, Inc.
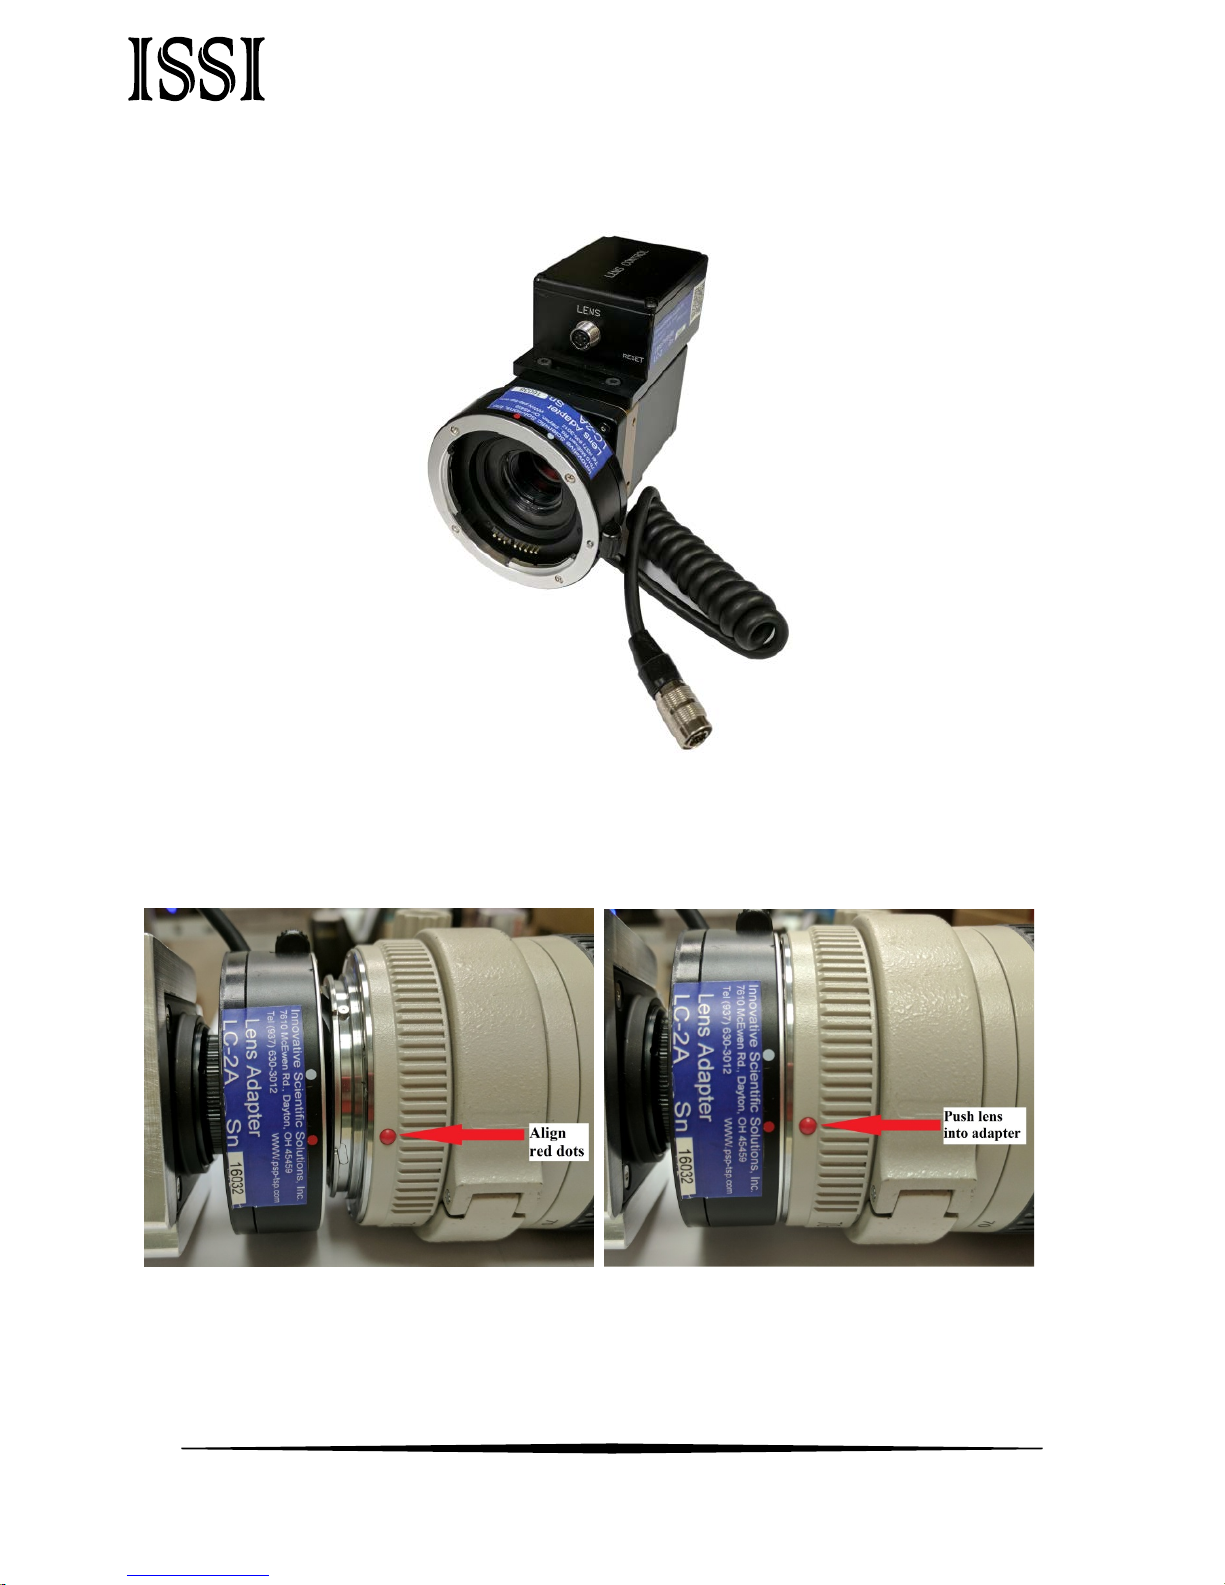
Next connect the lens adapter (LC-2A-C or LC-2A-M42) to the lens connection on the camera.
This is a screw-on connection and should be screwed on clockwise until secure.
Connect the lens to the adapter. The lens will have a red dot indicating the position of the
lens to correctly install to the adapter. Line up the red dot on the lens with the one on the
adapter and insert lens into adapter.
Align Red Dots Push Lens Into Adapter
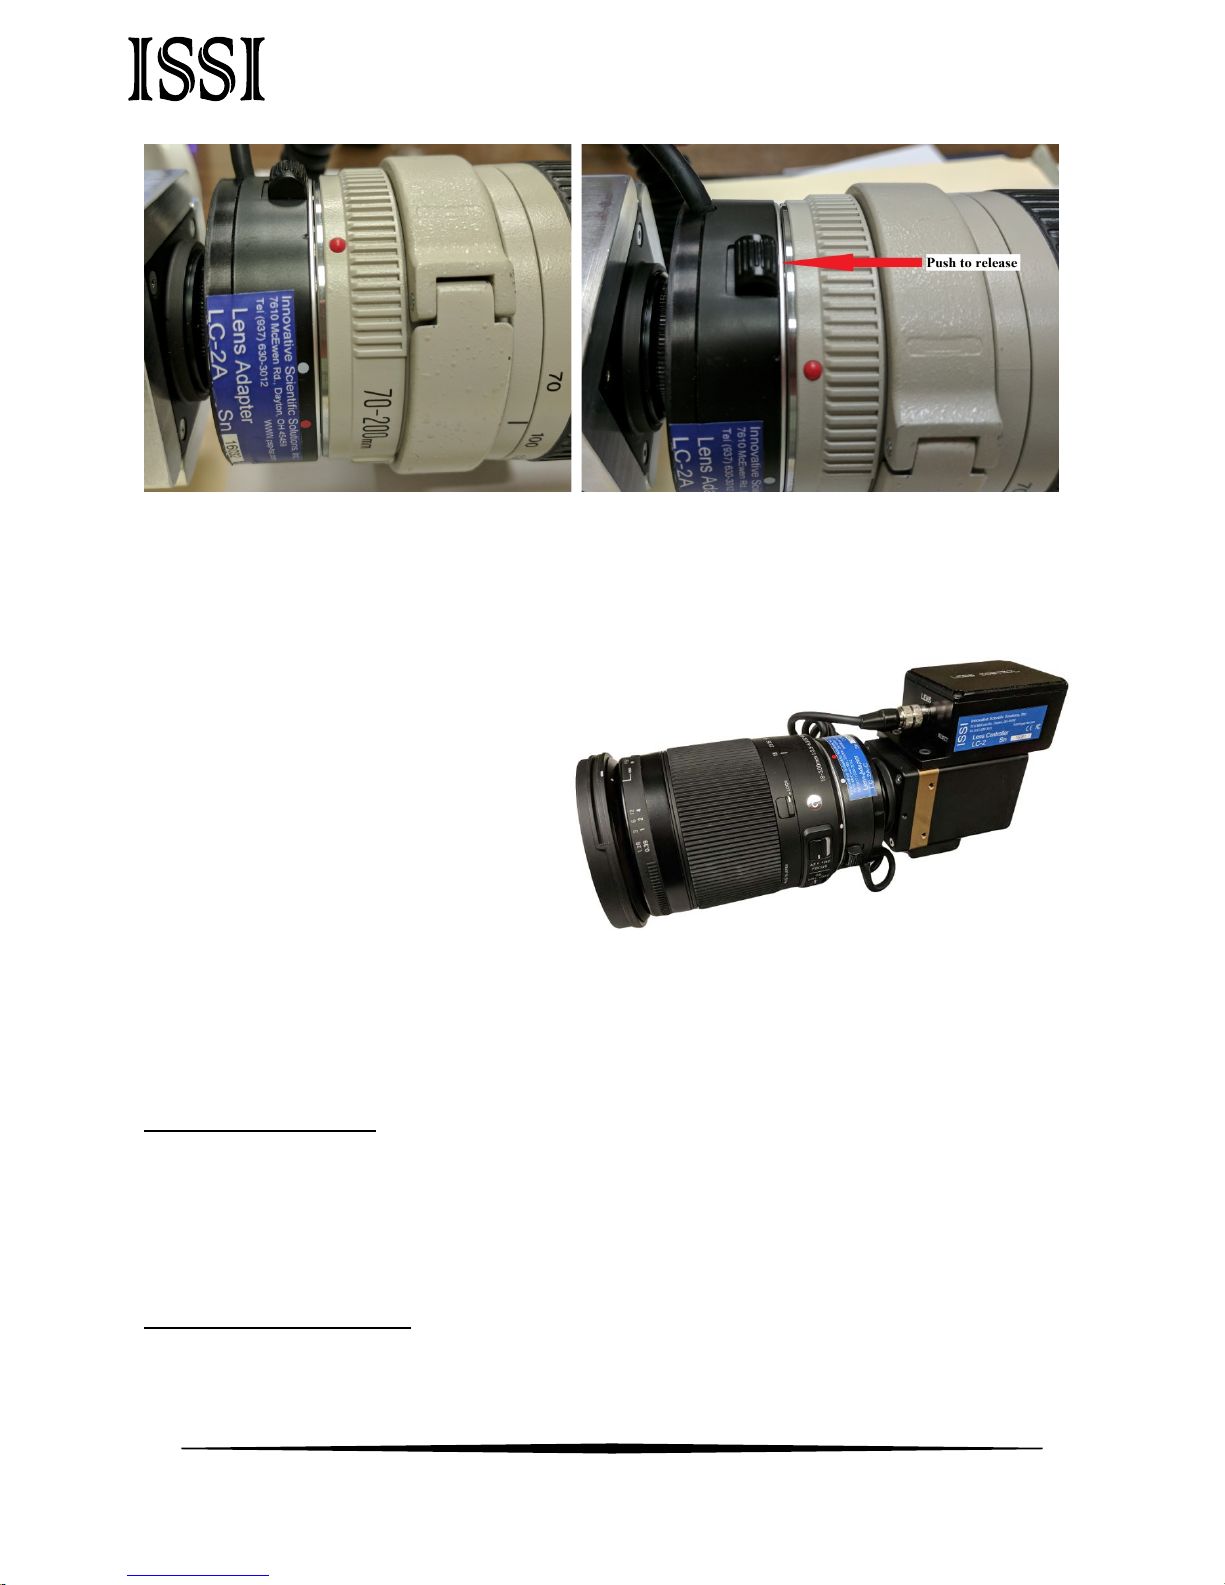
Twist the lens clockwise until it clicks and locks. To release the lens, push down (toward the
camera) on the release button (pictured on next page) and twist the lens counterclockwise.
7
Page 9
Innovative Scientific Solutions, Inc.
Lens Controller and Lens Connected to Camera
Lens in Lock Position Push Button to Release
Once the lens is connected, connect the plug from the lens adapter to the receptacle labeled
LENS on the control box. This is a keyed connector. Rotate and push in until it slides on and
locks. Screw on clockwise until secure.
Some EF lenses have a zoom function but
they are not motorized zoom, only
manual. For these lenses, the zoom is
displayed in the interface but not
controlled. The LC- will connect with
non-AF EF lenses but will only be able to
control the aperture as they have no
motor to control focus.
Failure to install and operate the LC-
according to instructions may result in impairment or damage to the controller and attached
lens.
Maintenance
Inspect all connections and ensure they are free of debris that could prevent electrical contact
from being made. Make sure no debris is present that could cause an electrical short. Always
disconnect the device from power when performing routine maintenance inspections.
Network Setup
The network on the PC NIC (network interface card) needs to be properly configured for
communication over the network. To do this, navigate to the ‘Network Connections’ page on
8
Page 10

Innovative Scientific Solutions, Inc.
the control panel where the local
networks of the computer is displayed.
Right-click on the network where the LC-2
is connected and select ‘Properties.’
From the ‘Local Area Connection X
Properties’ window, click on ‘Internet
Protocol Version 4 (TCP/IPv4)’ and then
press the ‘Properties’ button, now useable.
This will open the ‘Internet Protocol Version 4 (TCP/IPv4) Properties’ window. This is where the
IP addresses are entered so that LC-2 can be reached over the local network. The settings
needed for communication are IP Address and Subnet mask.
The IP address of the NIC should use the following conventions:
IP Format: Network.Network.Subnet.Host
• LC-2 IP: 192.168.2.252
• NIC IP: 192.168.2.XXX
The NIC IP address should have the same network and subnet addresses but a unique host,
the last line of the IP address. The host can be any value 1-254 but different from the host
9
Page 11

Innovative Scientific Solutions, Inc.
address of the LC-2. The subnet mask should be set to match that of the LC-2 which, by
default is 255.255.255.0. The Default Gateway and all other fields can be left blank.
Additional subnetworks can be configured for the same NIC. In the ‘Internet Protocol Version 4
(TCP/IPv4)’ window, the Advanced button will open the ‘Advanced TCP/IP Settings’ window.
IP addresses of any subnetwork can be added for that NIC here. If multiple devices are being
used on the same network and they have differing subnetworks, this option provides
communication for all devices without the need to change IP addresses for each device.
If the lens controller is not connected properly a connection error (below) will be displayed.
First, reset the device via the reset switch which will restores the default IP address.
If connection problems persist, check the connection of the Ethernet cable between the
computer NIC and the LC-2. To check that there is a physical connection, ping the IP address
of the LC-2 from the Command Prompt. To do this, open the command prompt window and
enter: Ping XXX.XXX.XXX.XXX –t
Software Operation
Open the software for the LC-2 from the desktop and it will ask for the IP of the connected LC-
2. Enter the IP address of the LC-2 connected to the network.
10
Page 12

Innovative Scientific Solutions, Inc.
If the IP address is unknown, press ‘Browse’ to search through all IP addresses on the network
under the subnetwork(s) of the NIC.
Once connected, the GUI will learn the limits on the attached lens and show the current
position of each motor of the lens. For the preset capability, this determines the minimum
and maximum motor positions. The firmware version, serial number and IP address are
displayed at the bottom of the GUI. The lens information (focal length and F number) are
displayed as well. To communicate with multiple LC-2s over this network (through a network
switch), open up another instance of the program on the desktop.
The user interface displays the current positions of the Focus and Aperture. There are two
sets of arrows below this which are used to move the position of the motor. The single-arrow
moves the focus one step increment and the double-arrow moves the focus 2x one step size
11
Page 13

Innovative Scientific Solutions, Inc.
for coarse adjustments. Step size can be set from 1 to 50. The focus and aperture can also be
moved to points within its range using the sliding adjustment labeled ‘Value’.
Image stabilization (IS) can be enabled and disabled for lenses that have the IS feature. The IS
switch on the lens must be switched ON to use this feature. Check ‘Image Stabilization’ to
enable and leave unchecked to disable. Once checked, a pop-up window will appear so the
timeout can be set. The maximum timeout is 3600 seconds
(1 hour). This feature will be disabled for lenses without IS
capability. If a longer timeout is needed, the API commands
can be set so that the IS stays on continuously although
continuous operation is not recommended.
To connect to a different lens controller, select ‘Connect to’ from the Settings menu.
Once connected, the IP address, mask and gateway (if being used through a router) of the
lens controller can be changed if desired. Under the Change IP window the settings can be
updated. If networking multiple LC-2s the IP address of each must be unique.
12
Page 14

Innovative Scientific Solutions, Inc.
If the toolbar is red, that means it is not a valid IP address. Type in the desired IP address and
click Apply to implement.
The new IP address will automatically be connected:
If the IP address does not change and the following message is displayed after the IP is
changed, it may need to be run as administrator.
When the IP address is changed, the software will automatically attempt to switch
communication to the new address. If it can’t find that address, it is likely to be because the
IP address previously used is stored on the computer and needs to be cleared before the new
address can take hold. The timeout for this to occur by itself can sometimes be 10-20
seconds. To do this, there are two options:
1. Run the lens control software as the administrator
13
Page 15

Innovative Scientific Solutions, Inc.
2. Clear the list of IP addresses in the computer through the command prompt (shown
below):
Open the Command Prompt (Start > Search > cmd) as administrator:
Once the command prompt is open, type “arp –a” to display the IP address and Physical
Address of all devices on the local network.
To clear the table so the lens controller IP is reset to the new address entered, type “arp –d”.
Running the lens control software as administrator will automatically clear the ARP table.
Always on Top makes the LC-2 software always appear as the front window for all windows
open on the desktop.
The save and load settings are used to save positions and recall them on each motor of the
lens. When the lens parameters are at their desired location, those positions on each motor
can be saved and later recalled. To save new settings, select Save Settings and enter a name
for those lens settings. Settings are saved to the computer in which the interface is open, not
the lens controller itself.
14
Page 16

Innovative Scientific Solutions, Inc.
To recall those lens settings, select Load Settings and the lens will return each motor to those
positions. The lens focal length, position of the focus motor and F number will be displayed
for each saved set point.
When the position of the lens is being set, the above status window will show the progress.
Keyboard Commands
For faster access to preset positions, keyboard commands can be used to recall saved
positions. If a preset is saved with any single digit integer (0-9) it can be recalled by the
command Ctrl+0, 2……9. Individually recall these commands by holding Ctrl + the number
of the preset. To recall these presets, they must have the name of the single digit integer
being recalled. For example, if a preset is saved as 1, then pressing Ctrl+1 will recall that
preset.
Set Name will allow a device name to be entered for the
connected lens controller. If multiple lens controllers are
being used over the same network, this will aid in
distinguishing them.
This name will then be displayed in the bottom right corner of the user interface.
15
Page 17

Innovative Scientific Solutions, Inc.
Restart LC will perform a software reset. This should be used to fix connection problems or if
the software becomes unresponsive.
Focus Init will find the limits again. This can be used if the lens limits need to be re-learned
for lenses will multiple focal range settings.
Exit will disconnect from the lens controller and exit the program.
Multi Control
The Lens Controller Interface allows for master control of multiple LC-2s connected over a local
network. This is only done through the ProAcquire Multi-camera add-on and is detailed in
the ProAcquire user manual.
Firmware Upgrade
Firmware can be upgraded over the Ethernet connection. When a firmware update is
available, download from the ISSI website (www.psp-tsp.com/canon) and save. The firmware
update tool can be found in the ‘About’ menu. Firmware updates will be issued if needed
and will always be posted to the ISSI website under the ISSI products page in the download
section for the LC-2. Always use the software version recommended for the firmware.
Click on Firmware Update to open the window to select the firmware file to upload.
16
Page 18

Innovative Scientific Solutions, Inc.
Select the file to upload.
Once the file is loaded into the Firmware Upload tool, click Upload.
The following warning will appear to notify the user to cycle the power by the power
connection before uploading the firmware update.
Restarting the power to the LC-2 will place it into firmware upgrade mode. Cycle the power
and the firmware will be uploaded.
When the firmware is uploading the status will be displayed.
Once the firmware is successfully uploaded, the following message will appear.
**Lens controllers purchased after July 2017 will update firmware without requiring a
power reset.**
17
Page 19

Innovative Scientific Solutions, Inc.
Troubleshooting
Communication
The lights on the Ethernet port should be
flashing if communication is established. If the
device is locked and the lights are not flashing,
it is locked in firmware upgrade mode.
Check the lens to assure the lens is locked in
place. If the lens is not locked in place, the pins
may not be correctly aligned, which can cause
the device to lose power.
Firmware Upgrade
If the lens controller firmware update fails to initialize, it may appear that the lens controller is
locked and communication can’t be established. Start by pinging the IP address in the
command prompt to assure there is communication.
If there is no communication and a general failure message is displayed, there may be
another issue like the Windows Firewall or antivirus blocking the program.
The firewall or antivirus will either need to be turned off or an exception for the software will
have to be made to allow it through.
In this case, try connecting to the lens controller in the software interface. It won’t connect so
press the STOP button.
18
Page 20

Innovative Scientific Solutions, Inc.
Another solution to communication issues is to clear the associated IP addresses to the LC-2.
This problem can occur when the IP address is changed. There are two methods to clear the
IP addresses.
1.) Run the lens control interface as administrator
2.) Open the command prompt (as administrator) and type “arp d”.
Next, go to the firmware update and load the firmware again. Even though the
communication is not established with the software interface, it is still connected to the NIC,
which means the firmware can still be updated. Once the firmware is uploaded, the
controller should connect via the interface.
Locked In Programming Mode
If the controller can be pinged but not connected via software, it could be in programming
mode, awaiting firmware. In that case, follow the steps below to gain control back:
19
Page 21

Innovative Scientific Solutions, Inc.
If it does not start automatically (after 1-2 sec), restart by power.
Recovery and Reset
Once all network settings have been verified to be correct and if resetting the controller
doesn’t solve communication problems, the following steps can be performed to reset the
controller by power and recover communications.
20
Page 22

Innovative Scientific Solutions, Inc.
1.) Connect a lens to the adapter to allow the controller to find the lens. It may be in a loop
looking for a lens.
If that does not work:
2.) Open the software and go to the firmware update. Select the firmware and load (even if
the lens won't connect). Disconnect the power. Hold the reset button down. While
continuing to hold down the reset button, re-connect power. Continue to hold the reset
button down until the lights on the Ethernet port begin to flash. Connect lens and try
connecting to the controller again.
Focus Drift
Many lenses experience drift in the focus motor position. This causes the encoder position
associated with a particular focus point to change. This is not an effect of the controller, but
the lens encoder itself.
Lenses will drift a few encoder counts once they hit a stop. The higher-quality lenses (L-series
and with USM) will have far less drift than the cheaper lenses. To account for drift, the focus
range needs to be re-learned by the controller. This can be done using the Focus Init
function in the software (or “refRange” command for API). After the focus range is re-learned,
load the saved preset and it will move to the correct position.
21
Page 23

Innovative Scientific Solutions, Inc.
Lenses Tested with LC-2
• Canon EF 18-55mm f/3.5-5.6 USM
• Canon EF 20mm f/2.8 USM
• Canon EF 24mm f/2.8 IS USM
• Canon EF 28mm f/1.8 USM
• Canon EF 35mm f/2.0 IS USM
• Canon EF 35mm f/1.4 L USM
• Canon EF 50mm f/1.4 USM
• Canon EF 50mm f/1.2 L USM
• Canon EF-S 60mm f/2.8 USM
• Canon EF 85mm f/1.8 USM
• Canon EF 100mm f/2.8 USM
• Canon EF 100mm f/2.8L Macro IS USM
• Canon EF 100mm f/2.0 USM
• Canon EF 135mm f/2.8 STM
• Canon EF 180mm f/3.5 L USM
• Canon EF 70-200mm f/2.8 L IS II USM
• Canon EF 70-200mm f/4 L USM
• Canon EF 200mm f/2.8 L USM
• Canon EF 600mm f/4L IS II USM
• Tamron EF SP 85mm f/1.8 Di VC USD
• Sigma EF 18-300mm f/3.5-6.3 DC OS HSM Contemporary
• Sigma EF 150-600mm f/5-6.3 DG OS HSM Contemporary
• Tamron EF 150-600mm f/5-6.3 USD
22
Page 24

Innovative Scientific Solutions, Inc.
Dimensions
LC-2 Control Box
23
Page 25

Innovative Scientific Solutions, Inc.
Standard Lens Mount Lens Adapters
LC-2A-C Lens Adapter (EF-C lens adapter)
LC-2A-M42 Lens Adapter (EF-M42x1 lens adapter)
24
Page 26

Innovative Scientific Solutions, Inc.
T-Mount Lens Adapters
LC-2A-T (EF-T lens adapter)
For use with ASI1600 cameras
For use with ASI1600 cameras with ZWO EFW filter wheel
LC-2A-T18 (EF-T lens adapter)
25
Page 27
Innovative Scientific Solutions, Inc.
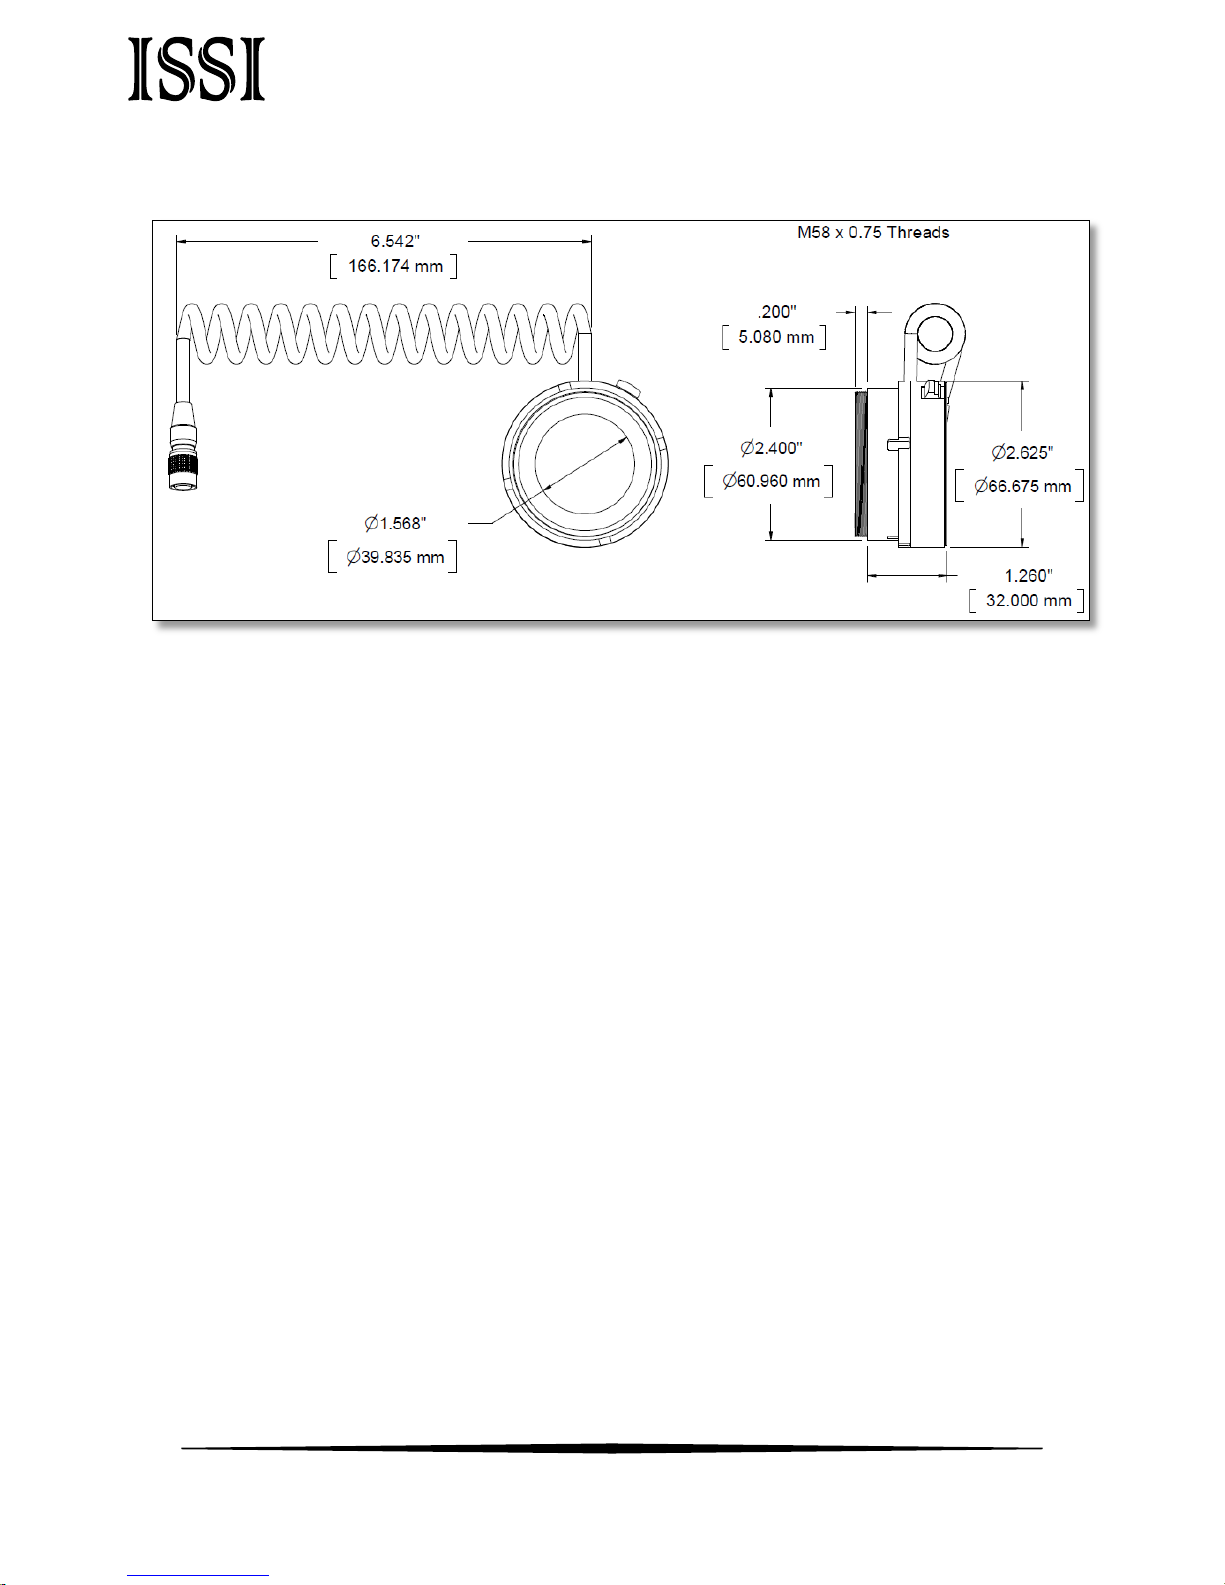
Large Format Lens Adapters
LC-2A-M58-75 Lens Adapter (EF-M58x0.75 lens adapter)
26
Page 28

Innovative Scientific Solutions, Inc.
Export Disclaimer
Any and all underlying information and technology contained in this document may be
subject to U.S. export controls, including the Export Administration Act (50 U.S.C. Appx. §§
2401 et seq.) and the Export Administration Regulations ("EAR", 50 C.F.R. Parts 730-774), and
may be subject to export or import regulations in other countries. You are responsible for
complying with all trade regulations and laws both foreign and domestic. Except as
authorized by law or distributor agreement with ISSI, you agree and warrant not to export or
re-export the information to any country, or to any person, entity, or end-user subject to U.S.
export controls, including without limitation persons or entities listed on the U.S. Department
of Commerce Bureau of Export Administration's Denied Parties List and the U.S. Department
of Treasury's Specially Designated Nationals. You further represent and warrant that no U.S.
federal agency has suspended, revoked, or denied your export privileges.
27
 Loading...