

iSIVAL iSIVAL, AUR-UNIPROJECTOR 16-9 User Manual
mini projector
User Manual


User Manual
Safety instructions
Follow these instructions to ensure that the safety and functionality of the device
are not compromised in any way.
Note: The mini projector can be operated in the upright position when
attached to the supplied stand or in the horizontal position.
• Never push objects of any kind into the receiver as this could result in a fire
or electric shock.
• Never spill liquid of any kind onto the receiver. If any liquid or solid object
does get into the receiver, switch it off immediately and have it checked by
qualified personnel.
• To prevent fire or shock hazard, do not expose the receiver to rain or moisture.
• Never place the receiver in hot, humid, or excessively dusty places. Do not
install the receiver where it may be exposed to mechanical vibrations or electromagnetic radiation.
• Clean the receiver with a soft, lightly dampened cloth. Do not use any type of
abrasive pad, alkaline cleaner, scouring powder, or solvent such as alcohol or
benzene.
• Do not place any objects on top of the receiver. To prevent fire, keep inflammable objects or objects such as candles away from the receiver.
• Do not cover the ventilation openings of the receiver with newspapers or curtains. For ventilation, leave a space of at least 10cm all around the receiver.
• Remember to dispose of batteries in an environmentally friendly manner. Do
not dispose in domestic waste containers.
Warning
• Hazardous moving parts
• Keep away from moving fan blades
iii

mini projector
Customer Support
If you need assistance, please visit our website: http://www.sivalinstruments.com
for help.
Copyright information
No part of this manual, including the products and software described in it, may be
reproduced, transmitted, transcribed, stored in a retrieval system, or translated into
any language in any form or by any means, except documentation kept by the purchaser for backup purposes, without the express written permission of the manufacturer.
Products and corporate names appearing in this manual may or may not be registered trademarks or copyrights of their respective companies, and are used only for
identification or explanation and to the owners’ benefit, without intent to infringe.
All trademarks are the property of their respective owners.
Copyright © 2009. All rights reserved.
iv

User Manual
Table of Contents
Introducing the mini projector
Features ............................................................................................... 1
Package contents ................................................................................. 2
Hardware description .......................................................................... 3
Front view ..................................................................................... 3
Rear view ...................................................................................... 3
Control panel ................................................................................. 4
Overview of the remote control .......................................................... 5
Setting up the projector
Connecting power ............................................................................... 7
Connecting AV devices ...................................................................... 7
Connecting HDMI devices ................................................................. 8
Connecting USB drive ........................................................................ 8
Connecting to a computer ................................................................... 9
Connecting speakers ........................................................................... 9
Installing remote control battery ....................................................... 10
Installing baffle plate ........................................................................ 11
Using the mini projector
Positioning your projector ................................................................ 13
Turning on the power ........................................................................ 13
Turning the power off ....................................................................... 13
Adjusting the OSD settings .............................................................. 14
Switching the input source ................................................................ 14
Adjusting picture .............................................................................. 14
Picture Mode ....................................................................... 15
Brightness ............................................................................ 15
Contrast ................................................................................ 16
v

mini projector
Sharpness ............................................................................. 16
Color .................................................................................... 17
Tint ...................................................................................... 17
Digital NR ........................................................................... 18
Aspect Ratio ........................................................................ 18
Color Temp .......................................................................... 19
Recall ................................................................................... 19
Adjusting Keystone .......................................................................... 20
Auto ..................................................................................... 20
Manual ................................................................................. 21
Image Flip H. ....................................................................... 21
Image Flip V. ....................................................................... 22
Setting up the mini projector ............................................................ 22
Sleep Time ........................................................................... 23
OSD Time ............................................................................ 23
Selecting the OSD language ................................................ 24
Background .......................................................................... 24
Auto Search ......................................................................... 25
Viewing information ......................................................................... 25
Adjusting PC settings ....................................................................... 26
H Position ............................................................................ 26
V Position ............................................................................ 27
Phase .................................................................................... 27
Clock .................................................................................... 28
Auto Adjust ......................................................................... 28
Viewing pictures in USB mode ........................................................ 29
Thumbnail view ................................................................... 29
SlideShow ............................................................................ 29
Zoom .................................................................................... 29
Pan ....................................................................................... 29
Rotate ................................................................................... 29
Appendix
Specifications .................................................................................... 31
Troubleshooting ................................................................................ 32
vi

User Manual
Introducing the mini projector
Congratulations on purchasing the mini projector. The mini projector is a slim,
compact digital system with multiple video outputs that can be connected to most
TV connectors. Read this chapter to learn more about the features and functions of
the mini projector.
Note: Information in this document has been carefully checked for accu-
racy; however, no guarantee is given to the correctness of the contents. The information inthis document is subject to change
without notice.
Features
• 1280x720p output native resolution
• Input resolution up to 1920 x 1080p / 165MHz
• 16:9 output or 4:3 (manually switch) aspect ratio
• Support HDMI 1.3
• Support USB 2.0 for JPEG viewing
• Auto Keystone
• Input I/O: HDMI,D-Sub, Composite, USB, Audio in (Phone jack)
1
mini projector
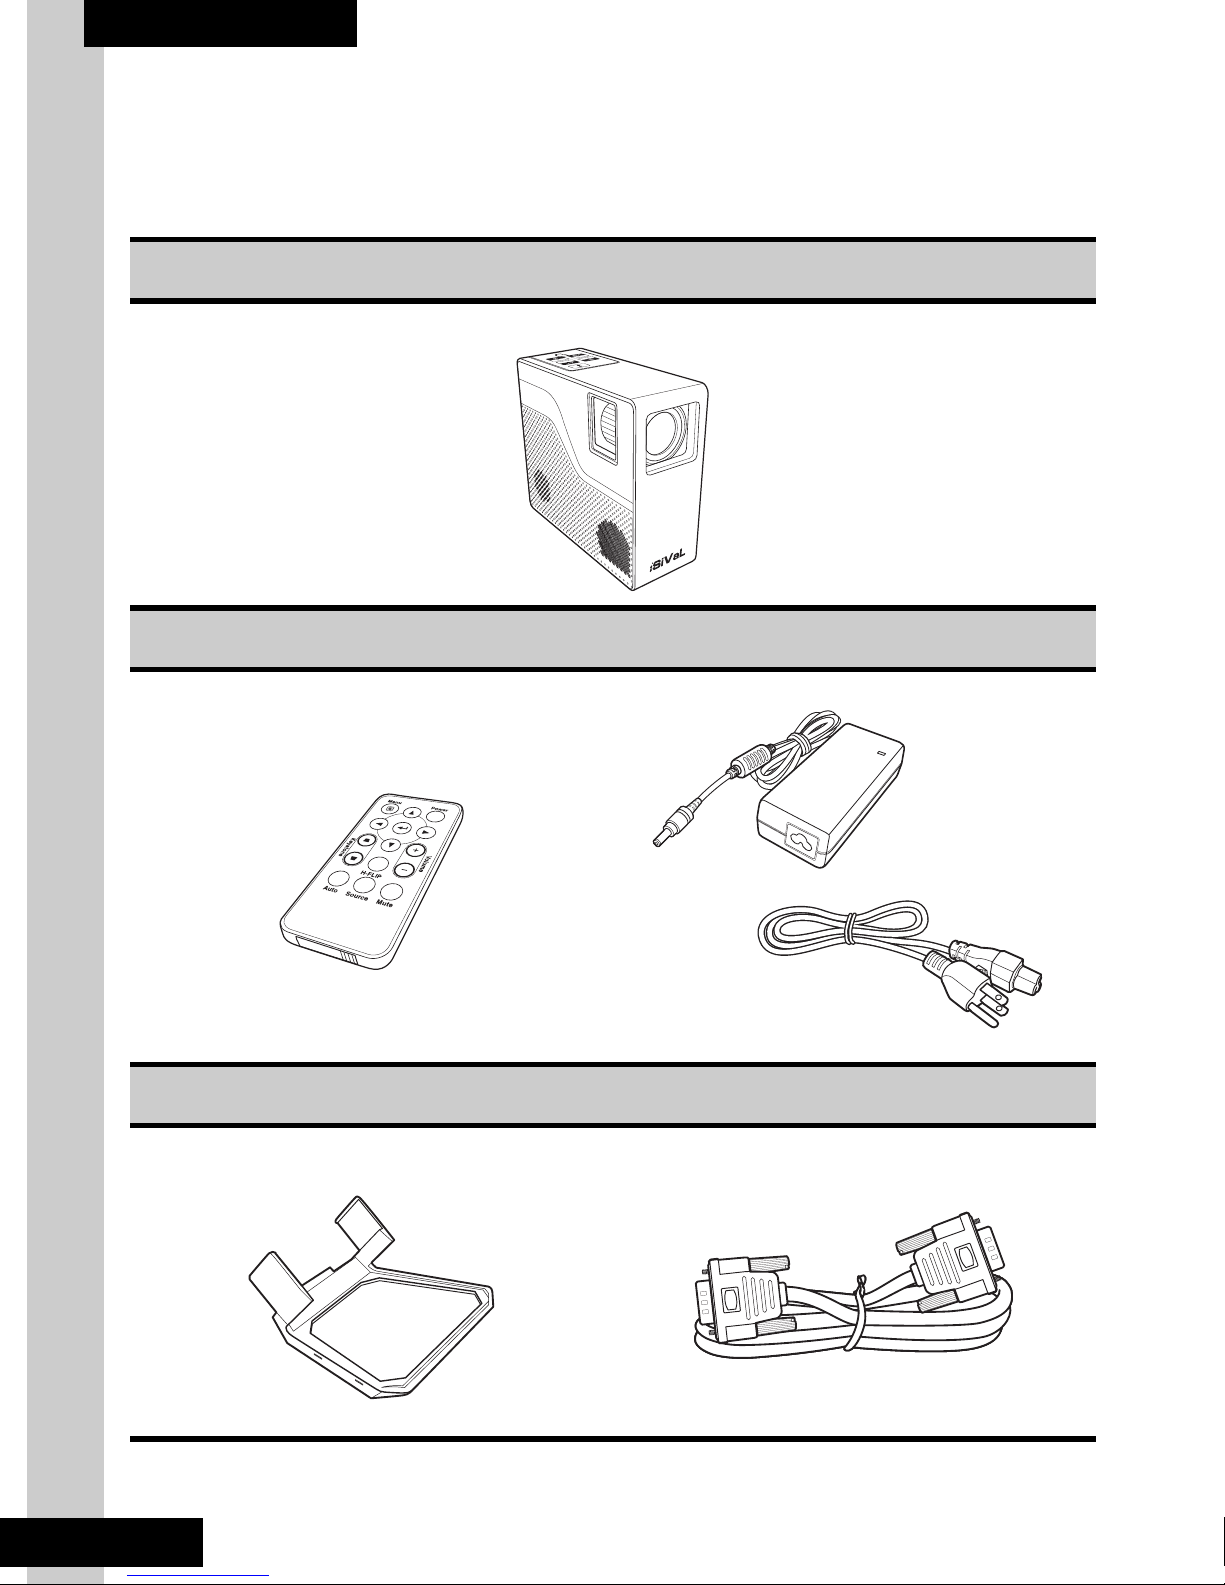
Package contents
Make sure that your package contains the following items. If any of the items is
missing or appears to be damaged, contact your vendor.
mini projector
Remote control Power adapter
Baffle plate VGA cable
2
User Manual
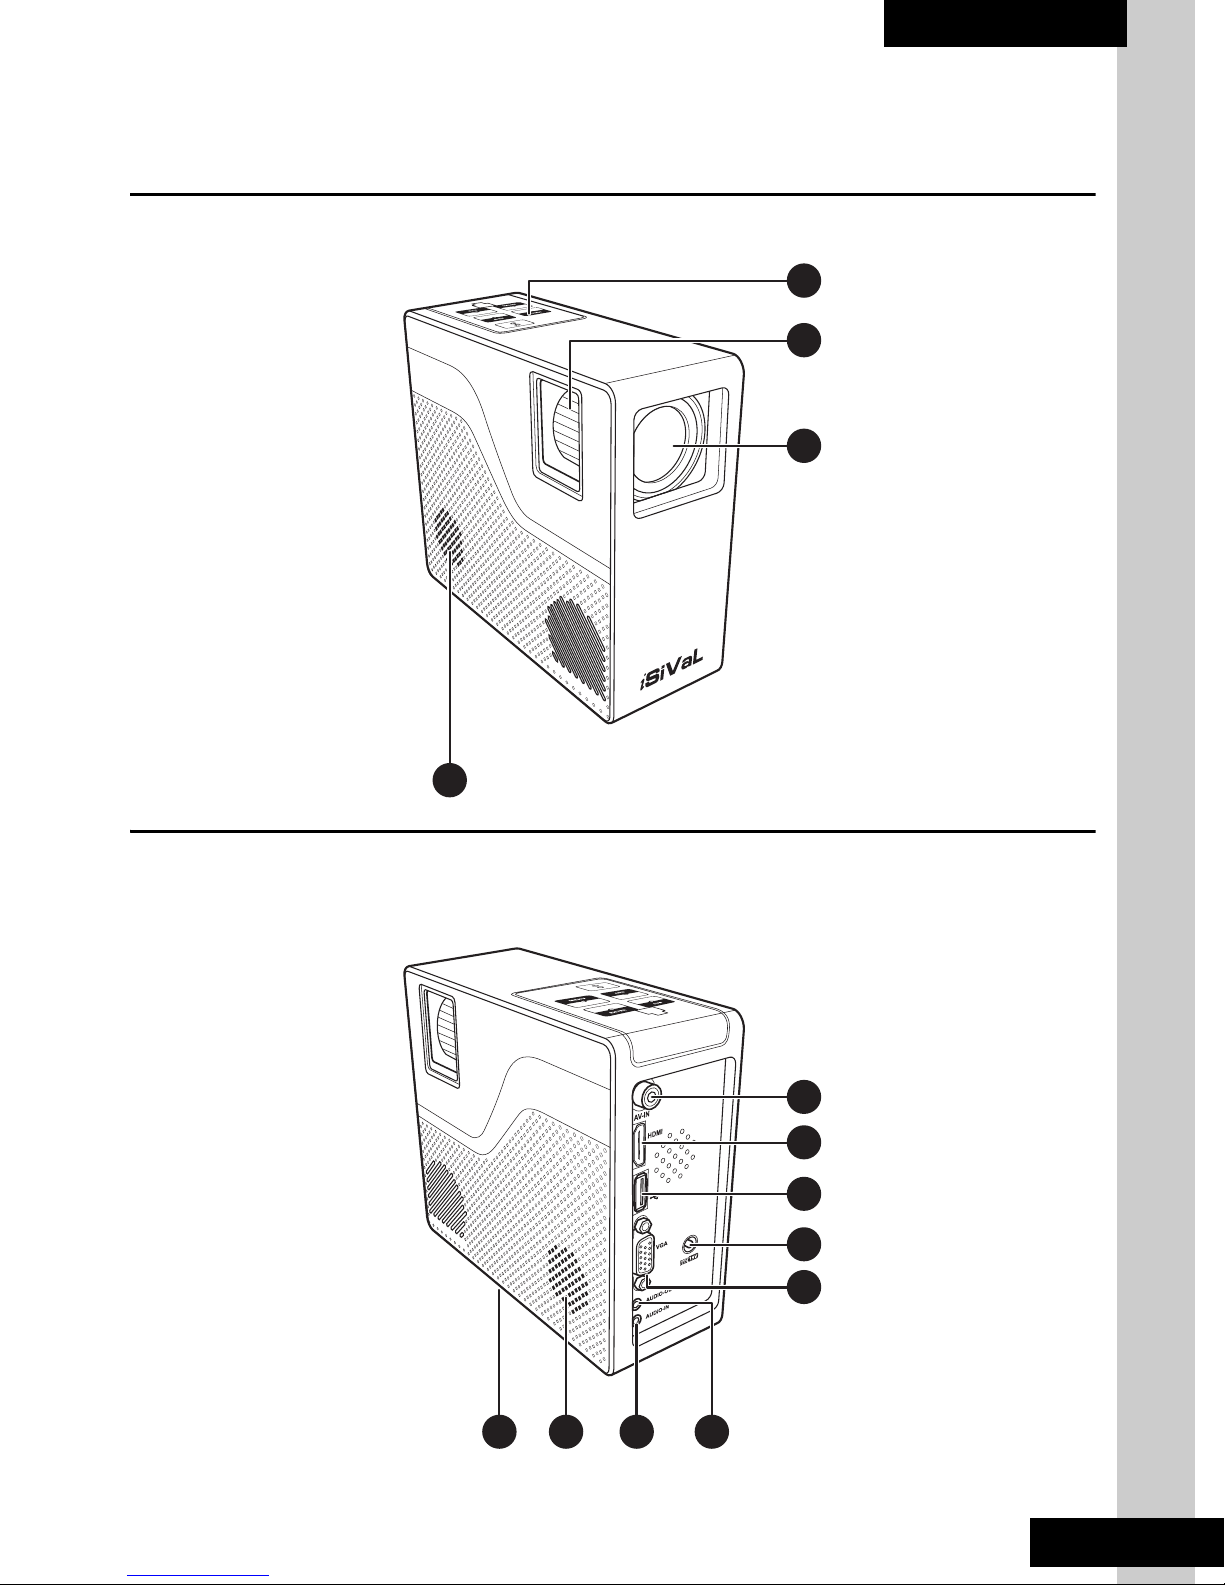
Hardware description
The following sections describe the hardware components of the mini projector.
Front view
1
Rear view
4
2
3
5
6
7
8
9
11412 10
3

mini projector
Name Description
1. Control panel Tap the keys to operate the projector.
2. Focus ring Rotate to sharpen the image.
3. Projection lens Projects the image.
4. Speaker Plays audio.
5. AV-in Connects to AV devices.
6. HDMI Connects to HDMI devices.
7. USB Connects to USB drives for JPEG viewing.
8. DC-in Connects to the AC adapter.
9. VGA Connects to VGA input sources.
10. Audio-out Connects to speakers.
11. Audio-in Connects to audio.
12. Ceiling mounting Hole Use to mount the mini projector on the ceiling.
Control panel
1
6
5
Name Description
ENTER SUB
ADDMENU
2
3
4
1. Power Press to turn power on and off.
2. Add Press to increase the volume
3. Sub Press to decrease the volume
4. IR Remote control receiver
5. Enter Press to confirm selection of menu item.
6 Menu Press to view the OSD menu.
4

Overview of the remote control
Menu Power
10
9
Keystone
Volume
1
2
User Manual
8
H-FLIP
7
Auto
MuteSource
3
4
5
6
Name Description
1. Power Press to turn power on and off.
2. Arrow (S/T/ W / X) buttons Press to move up, down, left, or right through menu
items.
3 Volume Press + to increase volume and - to decrease
volume
4. Help Press to display the help menu.
5. Mute Press to mute the audio.
6. Source Press to select the video sources.
7. Auto Press to automatically optimizes the projected
8. Keystone Press to adjust image distortion caused by tilting
9. Enter Press to confirm selection of menu item.
10 Menu Press to view the OSD menu.
image.
the projector.
5

mini projector
6
 Loading...