

Page 1
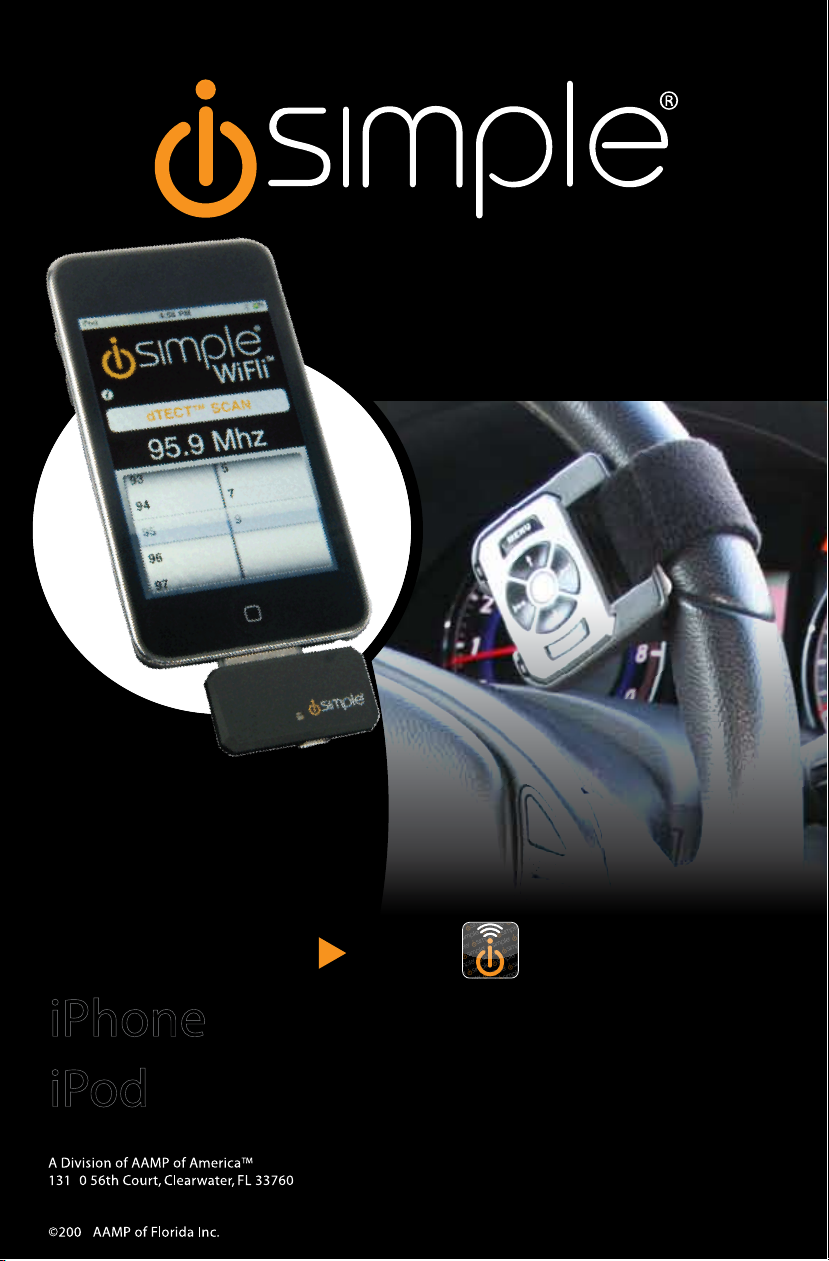
For iPod touch and iPhone
WiFli APP DOWNLOAD
PRO DIGITAL FM TRANSMITTER
FOR YOUR iPhone or iPod
MAKE THE CONNECTION
iPhone
to your
iPod
to your
WiFli
TM
9
9
866-788-4237
iSimple®
support@isimplesolutions.com
IS713
Page 2

Page 3

Table of Contents
Pages
1. Introduction
Compatibility
1
2. Important Safety Notes 1
3. Contents 1
4. Installation 2
A. WiFli™ Remote & Mounting Cradle 2
B. WiFli™ Car Charger 3
C. WiFli™ App (for iPhone & iPod touch only) 3
5. Operation 3
A. Operating from device 3
1. iPhone / iPod touch
2. iPod Models Featuring Click Wheel 4
B. Operating from the WiFli™ Remote 5
1. Basic Mode (non-RDS radios) 5
2. Advance Mode (RDS radios only) 5
3
6. Troubleshooting 6
7. Warranty & Legal Info 7
Page 4
1
1. Introduction
Congratulation on your purchase of an iSimple® WiFli™. The WiFli™ is an innovative wireless docking accessory for the iPod or iPhone that is designed to deliver endless hours of
listening pleasure through any car or home FM radio. To make the most of the innovative
features the WiFli™ offers, please ensure that you read this entire manual.
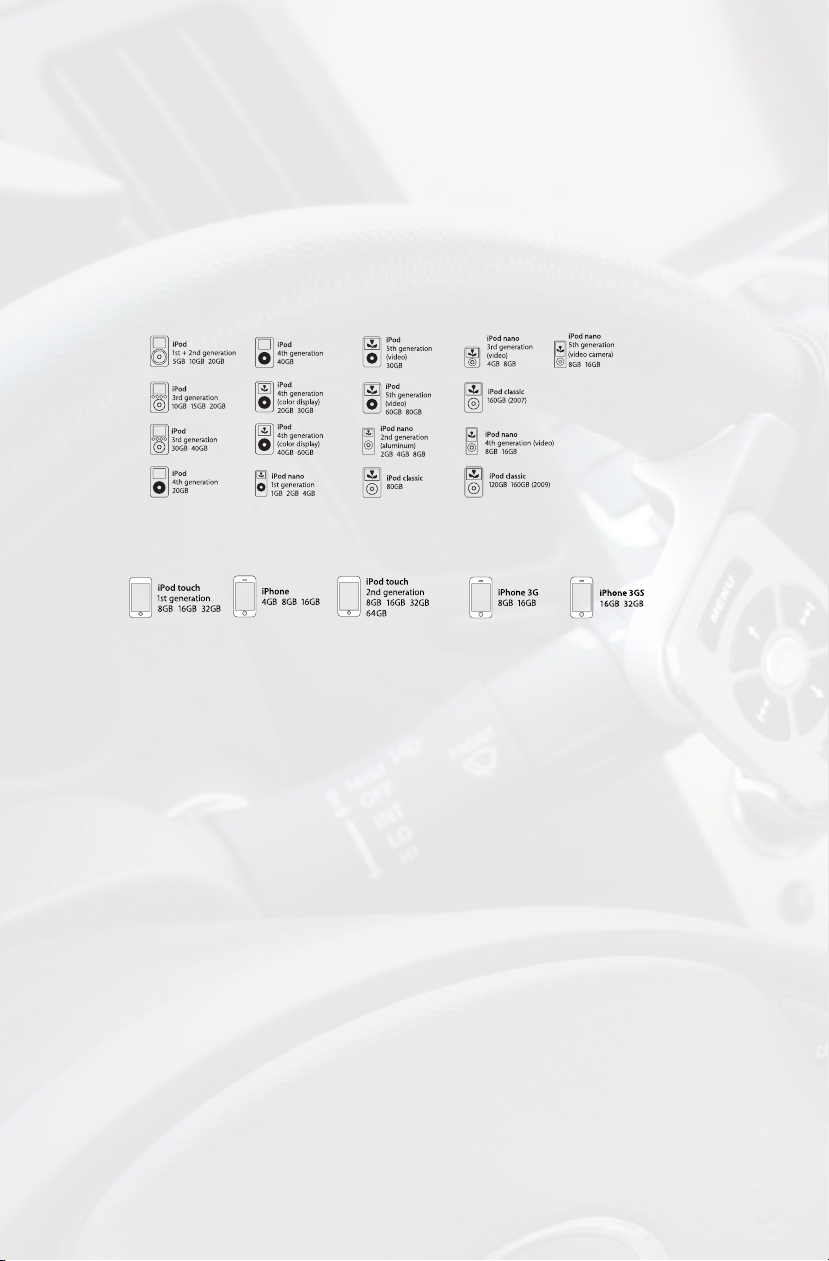
Compatibility:
The iSimple WiFli™ is compatible with the following Apple iPod and iPhone models:
Standard iPod models (requires download of WiFli playlist(P.E.T.S.) see page 4 for details).
The following devices require a special WiFli™ app from the iTunes App store prior to use
(free download):
2. Important Safety Notes Please Read First
Be sure you read and understand the following prior to operating the WiFli™:
• The driver should never manually operate an iPod or iPhone unless the vehicle has come
to a complete stop.
• Although the WiFli™ is designed to make iPod or iPhone operation safer, the driver
should only look at the device or radio briey while driving.
• Do not attempt to download or use the WiFli™ App (iPhone and iPod touch owners only)
while driving.
• Drivers are responsible for complying with all state and local trafc laws regarding the use
of personal electronics while behind the wheel.
• iSimple claims no responsibility for damages, injuries or law violations caused in whole or
part by misuse of the WiFli™ or any attached device.
3. Contents
The WiFli™ comes with the following items:
• The WiFli™ Node (x1) • WiFli™ Remote (x1)
• Mounting Cradle (x1) • Car Charger (1000mA) (x1)
• Battery CR2025 (x1) • Hook and loop tape (x1)
• Alcohol prep. pad (x1) • Owners Manual (x1)
Page 5

2
4. Installation
+
MENU
Left Right
Left Right
MENU
A. WiFli™ Remote and Mounting Cradle
The WiFli™ remote provides access to many of the basic and advanced features of the
WiFli™ explained in Section 5.
Battery installation: Before using the WiFli™ remote,
install the supplied battery (CR2025) as illustrated.
Mounting options:
1-Dashboard: A strip of hook and loop tape has been provided if dash mounting
of the WiFli™ remote is desired. Use the supplied alcohol prep. pad to clean the surface of
the chosen mounting location for the remote. Allow surface to dry thoroughly before applying
the hook and loop tape to ensure best performance.
2-Steering Wheel Mounting:
ly to your steering wheel for safe and convenient access. Using the supplied attaching strap,
tighten the mounting cradle to the steering wheel. The mounting cradle can be installed on
either the left or right side of the steering wheel.
Caution!
The WiFli™ mounting cradle gives you quick access to WiFli™ remote while keeping both
hands on the wheel. It is designed to be attached to the inside of the steering wheel perimeter. Position the cradle in an open space so as not to interfere with the deployment of the
airbag or other steering wheel operations. Improper installation may lead to injury in the
event of airbag deployment.
Removing WiFli™ Remote from the Mounting Cradle:
To remove the WiFli™ remote from the mounting cradle,
push upwards gently on the remote by placing your nger inside the recess on the side of the mounting cradle.
The WiFli™ mounting cradle is designed to t snug-
Page 6

3
B. WiFli™ Car Charger
MENU
Left Right
miniUSB
miniUSB
MENU
WiFli
™
MENU
Left Right
To increase play time of your WiFli™, connect it to your
vehicle’s lighter port using the WiFli™ car charger. When
connected, the WiFli™ car charger also charges the connected iPod or iPhone.
Caution!
The WiFli™ car charger utilizes a mini USB connection to provide battery charging to an iPod
or iPhone docked to the WiFli™. Because the car charger has only been tested for use with
the WiFli™, iSimple
iSimple claims no responsibility for damages resulting from use of the car charger with devices other than the WiFli™.
®
recommends it not be used to charge other portable media devices.
C. WiFli™ App
(iPhone & iPod touch only)
To use the WiFli™ with an iPod touch or iPhone, you will rst need to download and install
the free WiFli™ App from the iTunes App Store.
1. Connect the WiFli™ node to the docking port on your iPod touch or iPhone; a message
should appear indicating that the WiFli™ App is not yet installed.
2. You will then see a massage prompting you to install the WiFli™ app; click “YES”.
3. The device will take you to the WiFli™ app page at the iTunes App Store.
4. Download and install the WiFli™ app for FREE.
NOTE:
An internet connection is required to access the iTunes App Store. Check with your wireless carrier regarding any data usage fees.
No application is required for the iPod classic, iPod nano or other iPod models featuring a click wheel.
5. Operation
A. Operating from Device
1. iPhone / iPod touch
a. Connect the WiFli™ node into the docking port on the bottom of the iPhone / iPod touch
b. Click on the WiFli™ application to run it (this requires the installation of the WiFli™ app –
see section 4 for installation details).
c. Tune your radio to the frequency displayed by the WiFli™ app.
Note:
When running the WiFli™ app you may see a message that reads “Waiting for WiFli™.”
If this occurs, please disconnect, then reconnect the WiFli™ to the device and wait 10
seconds. The message will automatically disappear when the WiFli™ is detected.
Page 7

4
Automatic dTECT scan:
Press dTECT scan button to activate dTECT™ Technology.
When activated, the dTECT™ smart scanning technology will search
the FM band and nd the clearest local frequency for playback of your
iPhone / iPod touch.
Tune radio to displayed frequency.
Manual Tuning:
For best performance, be sure to select a frequency that is not currently receiving a strong
broadcast station and has little or no hiss.
Use the touch screen interface to tune to the desired frequency for playback.
NOTE: Press the
i button to enter the info/settings menu if required.
2. iPod Models Featuring Click Wheel
NOTE:Use of this product on click wheel iPod models requires download of the P.E.T.S.
Playlist from www.isimplesolutions.com/wii/PETS
NOTE: dTECT scan function is not available on radios without RDS when using clickwheel iPods
For iPod models that don’t use apps, we’ve created the Playlist Enabled Tuning System
(PETS). This system uses Playlist style format that allows you to manually choose the perfect
radio channel to play your iPod.
a. Download the P.E.T.S. playlist from www.isimplesolutions.com/wii/PETS
b. Load the P.E.T.S. playlist into your iTunes Music Library.
c. Sync your iPod with iTunes and ensure that the P.E.T.S. playlist is on your iPod.
d. Connect the WiFli node into the docking port on the bottom of the iPod.
e. Using the tuning knob or buttons on your radio, nd a frequency that is not receiving any
kind of broadcast (music or talk show). Try to nd one with little or no hiss (static).
f. Using your click wheel, access your “Playlists”
g. Click on the WiFli “P.E.T.S.” Playlist
h. Inside this playlist there will be many “Channels/Songs” listed. Each with a different
frequency. These are used to select the channel that the WiFli will use to transmit your
iPod music.
i. Select the “Channels/Songs” in the P.E.T.S. playlist that matches the frequency displayed
on your radio. The iPod screen will ash briey while the WiFli changes its broadcasting
frequency. You will see then see the P.E.T.S. playlist again.
j. Now press MENU on the iPod click wheel, to get back to your music.
k.Make your music selection, it will broadcast through your radio.
Page 8

5
B. Operating from the WiFli™ Remote
MENU
Left Right
1. Basic Mode (non-RDS radios)
Note:
Basic mode is intended for use with radios that do not support Radio Data System
(RDS) broadcasting. RDS is a special radio format that embeds small amounts of
digital information in a FM signal, allowing the display information such as the name or
tagline of the station playing, or “now playing” information. RDS capable home or car
stereos can typically be identied by a small “RDS”, “RBDS”, “EON”, “PS” or “RT” on
the radio display window.
Press ►►
Hold ►►
Press
Hold
Press ►
▐
to skip to the next song.
▐
to fast forward.
▐
◄◄ to skip to the previous song.
▐
◄◄ to rewind.
▐ ▐
to play / pause
2. Advanced Mode (RDS radios only)
Note:
Advanced Mode is intended for use with radios that are equipped with stereos that support Radio Data System (RDS) broadcasting. RDS is a special radio format that embeds
small amounts of digital information in a FM signal, allowing the display information such
as the name or tagline of the station playing, or “now playing” information. RDS capable
home or car stereos can typically be identied by a small “RDS”, “RBDS”, “EON”, “PS” or
“RT” on the radio display window.
RDS broadcasting allows the WiFli™ to send additional information to a FM radio. Because
of this, you will be able to see title, artist and album information from the iPod / iPhone
displayed on the radio.
a. Press and hold the MENU button on the WiFli™ remote for 2 seconds.
Note:
The iPod / iPhone will show Accessory Attached on the display.
b. PL: List will appear on the radio display; this indicates you are in Playlist Search mode.
c. Press the ►►
AR: Artist Search mode
AL: Album Search mode
GE: Genre Search mode
TR: Track Search mode
CO: Composer Search mode
d. Press the
Note:
Pressing the
e. Use the ►►
the displayed option.
to select.
▐
▐
or ▐◄◄ on the WiFli™ remote to switch to:
button is like using the center click button on the iPod.
and ▐◄◄ on the remote to change the displayed option, press the to select
Page 9

6
f. Continue using the ►►▐ and ▐◄◄ and until you have selected a song and it is playing.
You should hear this song playing through your radio.
Press the
to go back one step in the browsing menu (this is like pressing MENU on the
iPod).
To begin browsing again, press the
4 times to return to the top of the browse menu.
Complete steps c, d, e, and f to select the desired song.
Press and hold the MENU button on the remote for 2 seconds to leave the browse menu.
Now you can use the ►►
▐
and ▐◄◄ to skip to the next track, or previous track.
If your audio playback is not clear (there is static / hiss) you may use the dTECT™ auto
scan feature to nd a clear signal for use with the WiFli.
Press to activate the dTECT™ technology feature.
Note:
dTECT is a smart FM frequency auto scanning technology developed by iSimple that
makes it easier than ever to nd a clear, clean channel on which to play an iPod or iPhone.
When the dTECT feature is activated, the WiFli™ will automatically locate and lock-on to
the best local FM frequency for iPod or iPhone playback. All you need to do is tune your
radio to the matching frequency.
Issue Resolution
My iPod / iPhone shows “waiting for WiFli™” Disconnect WiFli™ node from iPod / iPhone. Recon-
nect WiFli™ node into the docking port on the iPod
/ iPhone
iPod / iPhone shows “Accessory Connected”
and I can’t manually control my iPod / iPhone
Press the MENU button on the WiFli™ remote for
2 seconds; iPod / iPhone will switch back to Basic
Mode allowing use of the click wheel or touch screen.
No iPod text displayed on my radio. Verify the radio supports RDS; verify that the radio is
tuned to the correct frequency
Lots of static or background noise Run (or re-run) dTECT feature or use manual tuning
to nd a clear frequency
6. Troubleshooting
Page 10

7
7. Warranty
Warranty One Year Limited Warranty
The quality controls used in the manufacture of this product will ensure your satisfaction. This warranty
applies only to the original purchaser of this product from an authorized iSimple
covers any supplied or manufactured parts of this product that, upon inspection by iSimple
®
dealer. This warranty
®
authorized
personnel, is found to have failed in normal use due to defects in material or workmanship. This warranty
does not apply to installation expenses. Attempting to service or modify this unit, operating this unit under
conditions other than the recommended voltage will render this WARRANTY VOID.
Unless otherwise prescribed by law, iSimple
®
shall not be liable for any personal injury, property damage
and or any incidental or consequential damages of any kind (including water damage) resulting from
malfunctions, defects, misuse, improper installation or alteration of this product. All parts of this iSimple
product are guaranteed for a period of 1 year as follows:
®
Within the rst 12 months from date of purchase, subject to the conditions above, iSimple
will repair or
replace the product at our discretion, if it is defective in material or workmanship providing it is returned to
®
an Authorized iSimpleTM dealer, with PROOF OF PURCHASE from an authorized iSimple
dealer.
Warning: This equipment may be reset by unintentional electrostatic discharge during operation. Exposure to direct sunlight or extreme heat may cause damage or malfunction.
FCC
Caution: Changes or modications not expressly approved by the party responsible for compliance could
void the user’s authority to operate the equipment.
FCC Compliance Statement:
1: This device is veried to comply with Part 15 of the FCC Rules. Operation subject to the following two
conditions: (1) this device may not cause harmful interference, and (2) this device must accept any inter-
ference received, including interference that may cause undesired operation.
®
2: This equipment has been tested and found to comply with the limits for a Class B digital device, pursuant to Part 15 of the FCC Rules. These limits are designed to provide reasonable protection against
harmful interference in a residential installation. This equipment generates uses and can radiate radio
frequency energy and, if not installed and used in accordance with the instructions, may cause harmful
interference to radio communications. However, there is no guarantee that interference will not occur in a
particular installation. If this equipment does cause harmful interference to radio or television reception,
which can be determined by turning the equipment off and on, the user is encouraged to try to correct the
interference by one or more of the following measures:
• Reorient or relocate the receiving antenna.
• Increase the separation between the equipment and receiver.
• Connect the equipment into an outlet on a circuit different from that to which the receiver is connected.
• Consult the dealer or an experienced radio/TV technician for help.
“Made for iPod” means that an electronic accessory has been designed to connect specically to iPod and has been certied by the developer to meet Apple performance standards.
Apple is not responsible for the operation of this device or its compliance with safety and regulatory standards.
“Works with iPhone” means that an electronic accessory has been designed to connect specically to iPhone and has been
certied by the developer to meet Apple performance standards.
Apple is not responsible for the operation of this device or its compliance with safety and regulatory standards.
iPod is a trademark of Apple Inc., registered in the U.S. and other countries. iPhone is a trademark of Apple Inc.
Page 11

8
Page 12
www.isimplesolutions.com
For Best Performance Have It
Professionally Installed.
 Loading...